Bed Adhesion
Hi,
I realise this question has been asked a thousand times but non of the answers worked for me.
I'm having real trouble with bed adhesion. My prints start out great most of the time. They seem to stick to the bed great, but after some time they just come loose. Sometimes they stick to the extruder afterwards, sometimes they just get knocked off the bed. So far I have tried: washing soap (Dreft), isopropyl 70 percent, acetone, gluestick (helps but still having problems), hairspray, adjusting my Z-axis both ways, higher bed temperature, brim, making sure my windows are closed so my printer can better keep its heat, slowing it down (which I'd rather not have to do).
Anyone else have some tips? I have the smooth bed surface and the MK3S if that helps.
Thanks in advance!
RE: Bed Adhesion
can you show us a picture of the first layer of a print in progress (nearly complete)
and a picture of the underside of a failed print? Please
I use the "Life Adjust 'Z' My Way" process to adjust the first layer, and I run the heatbed at 65 to 70centigrade.
I wash the build plate rinse well and dry immediately with plain paper towels, keeping my fingers off the build plate surfaces.
Good live Z on a clean build plate usually gives good adhesion even with tiny contact areas
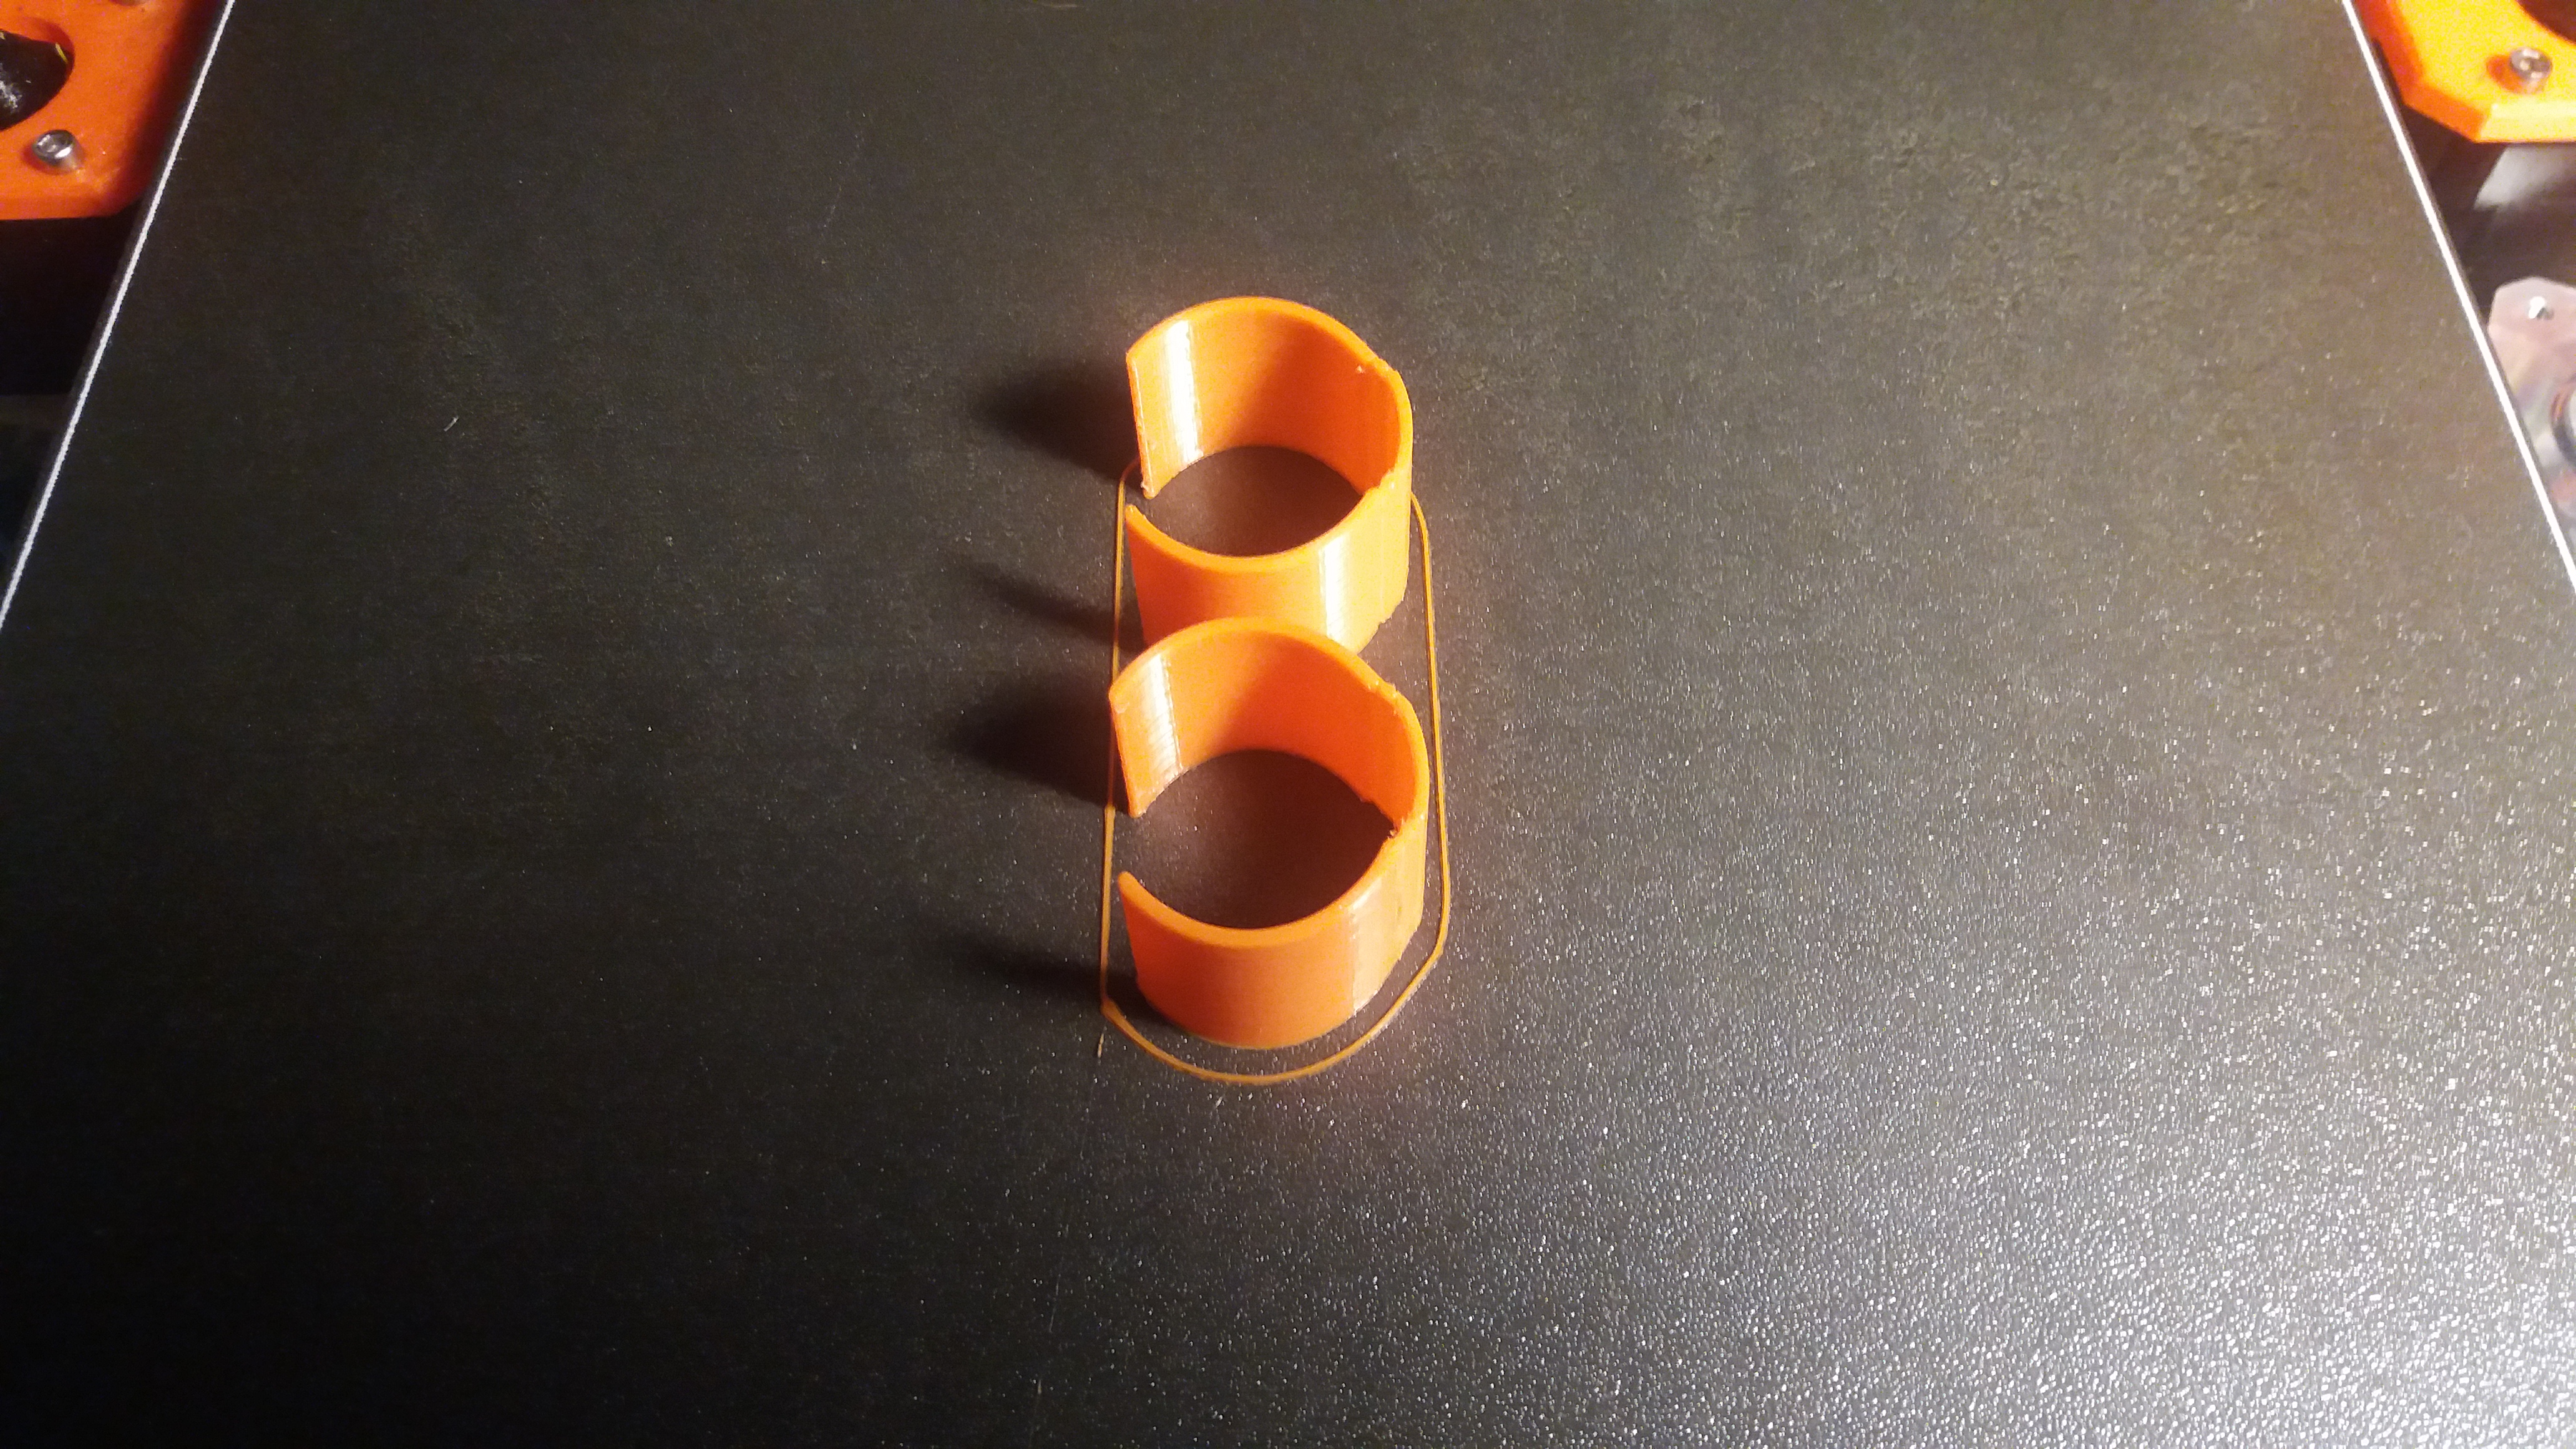
this is PLA on a textured bed, with minute contact area
the part below was printed on a smooth build plate, whilst the actual Z values are unique to my machine with that particular build plate, they differences in values give an idea of the different surface finish and the small values that cause changes in appearance. ideally the first layer should be a single continuous sheet with all filament traces joined together, the underside should be smooth and the top surface should be smooth and even with the slightest sign of the individual filament traces 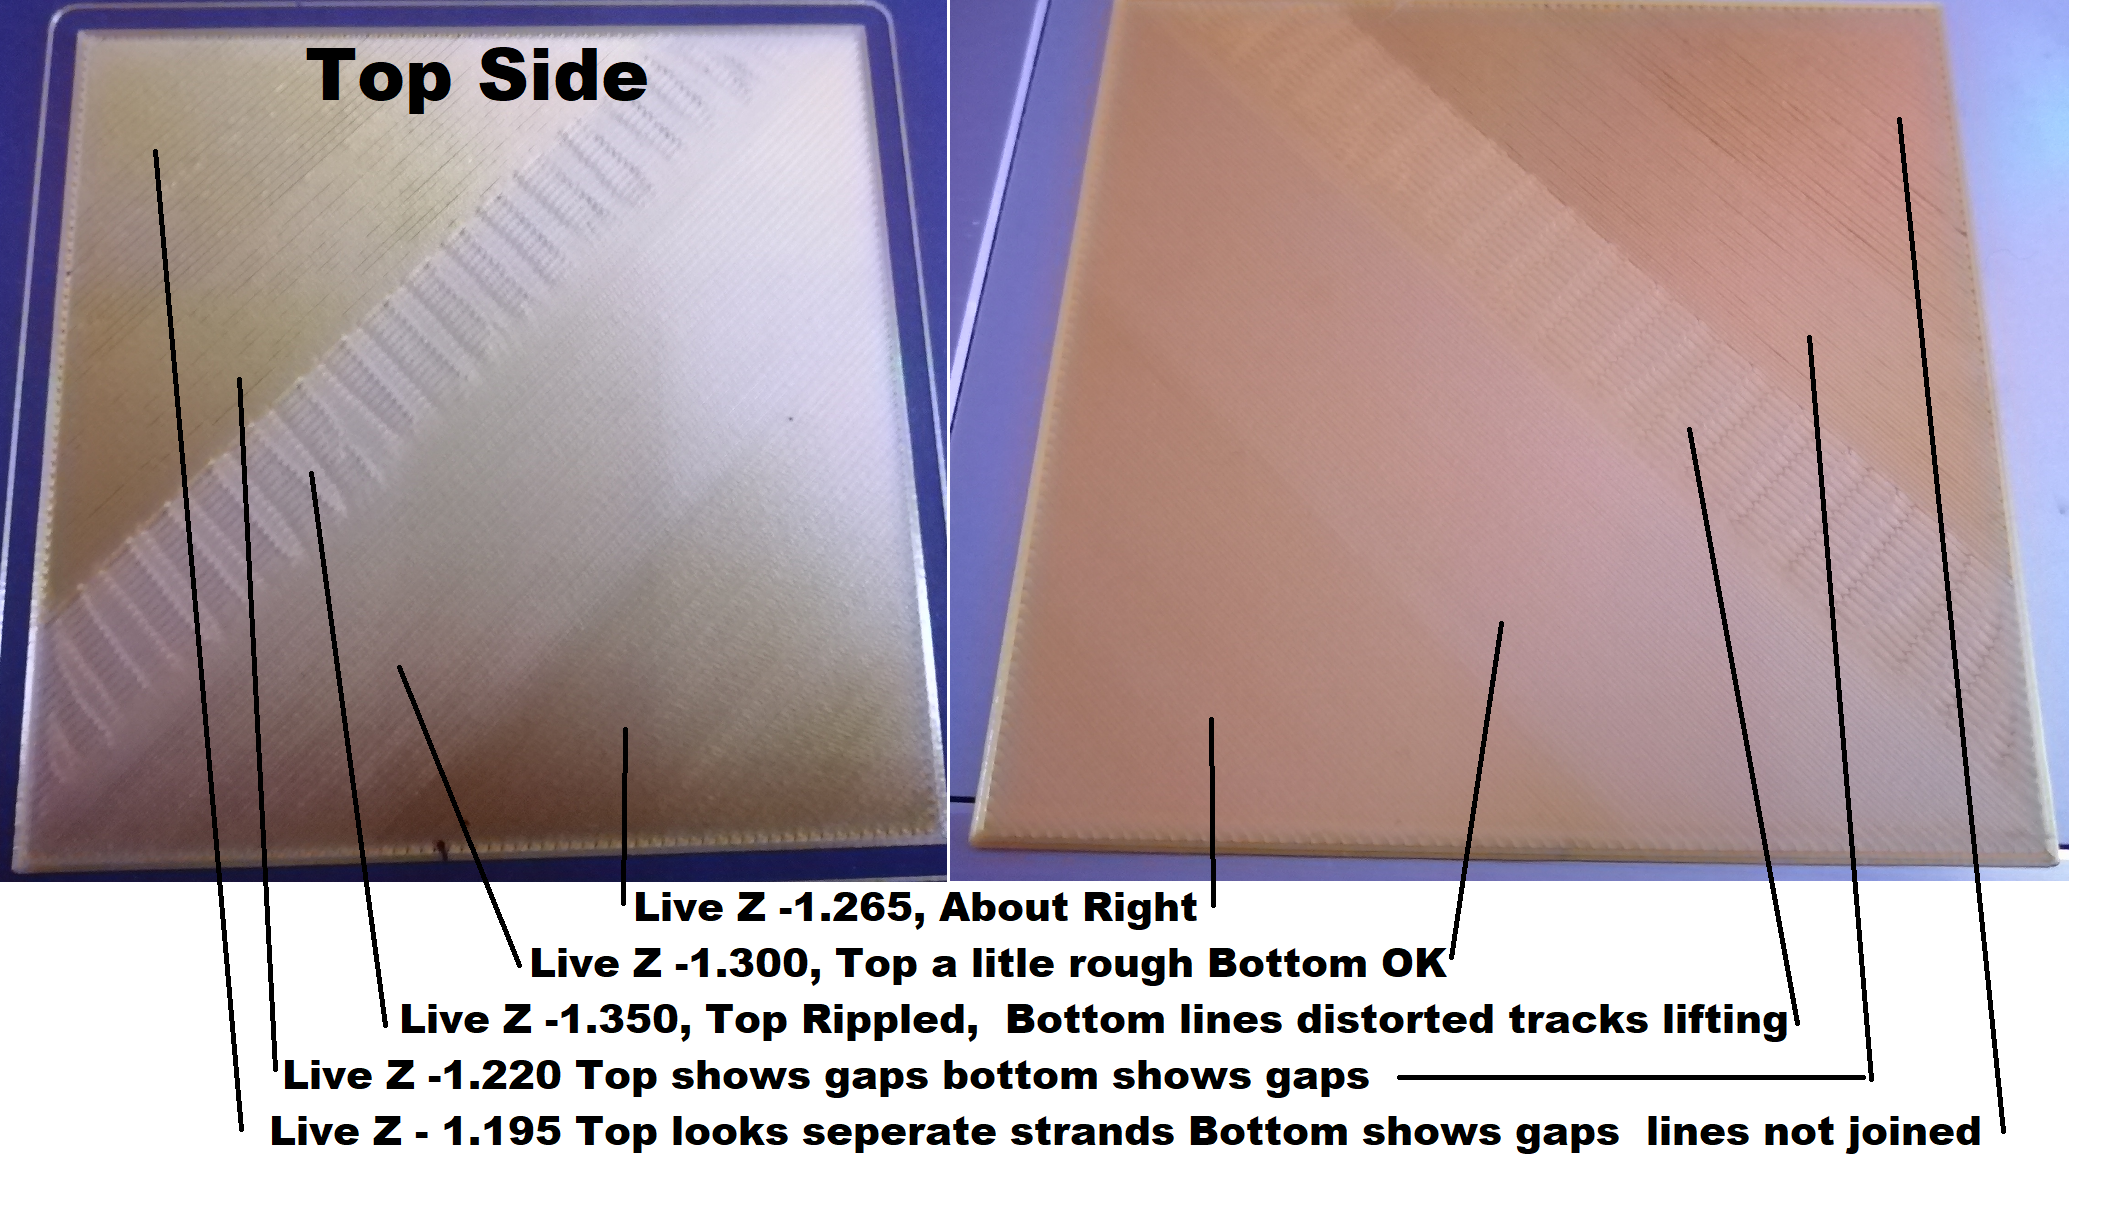
good luck
regards Joan
I try to make safe suggestions,You should understand the context and ensure you are happy that they are safe before attempting to apply my suggestions, what you do, is YOUR responsibility.Location Halifax UK
RE: Bed Adhesion
@joantabb
Hi,
Thank you for the reply.
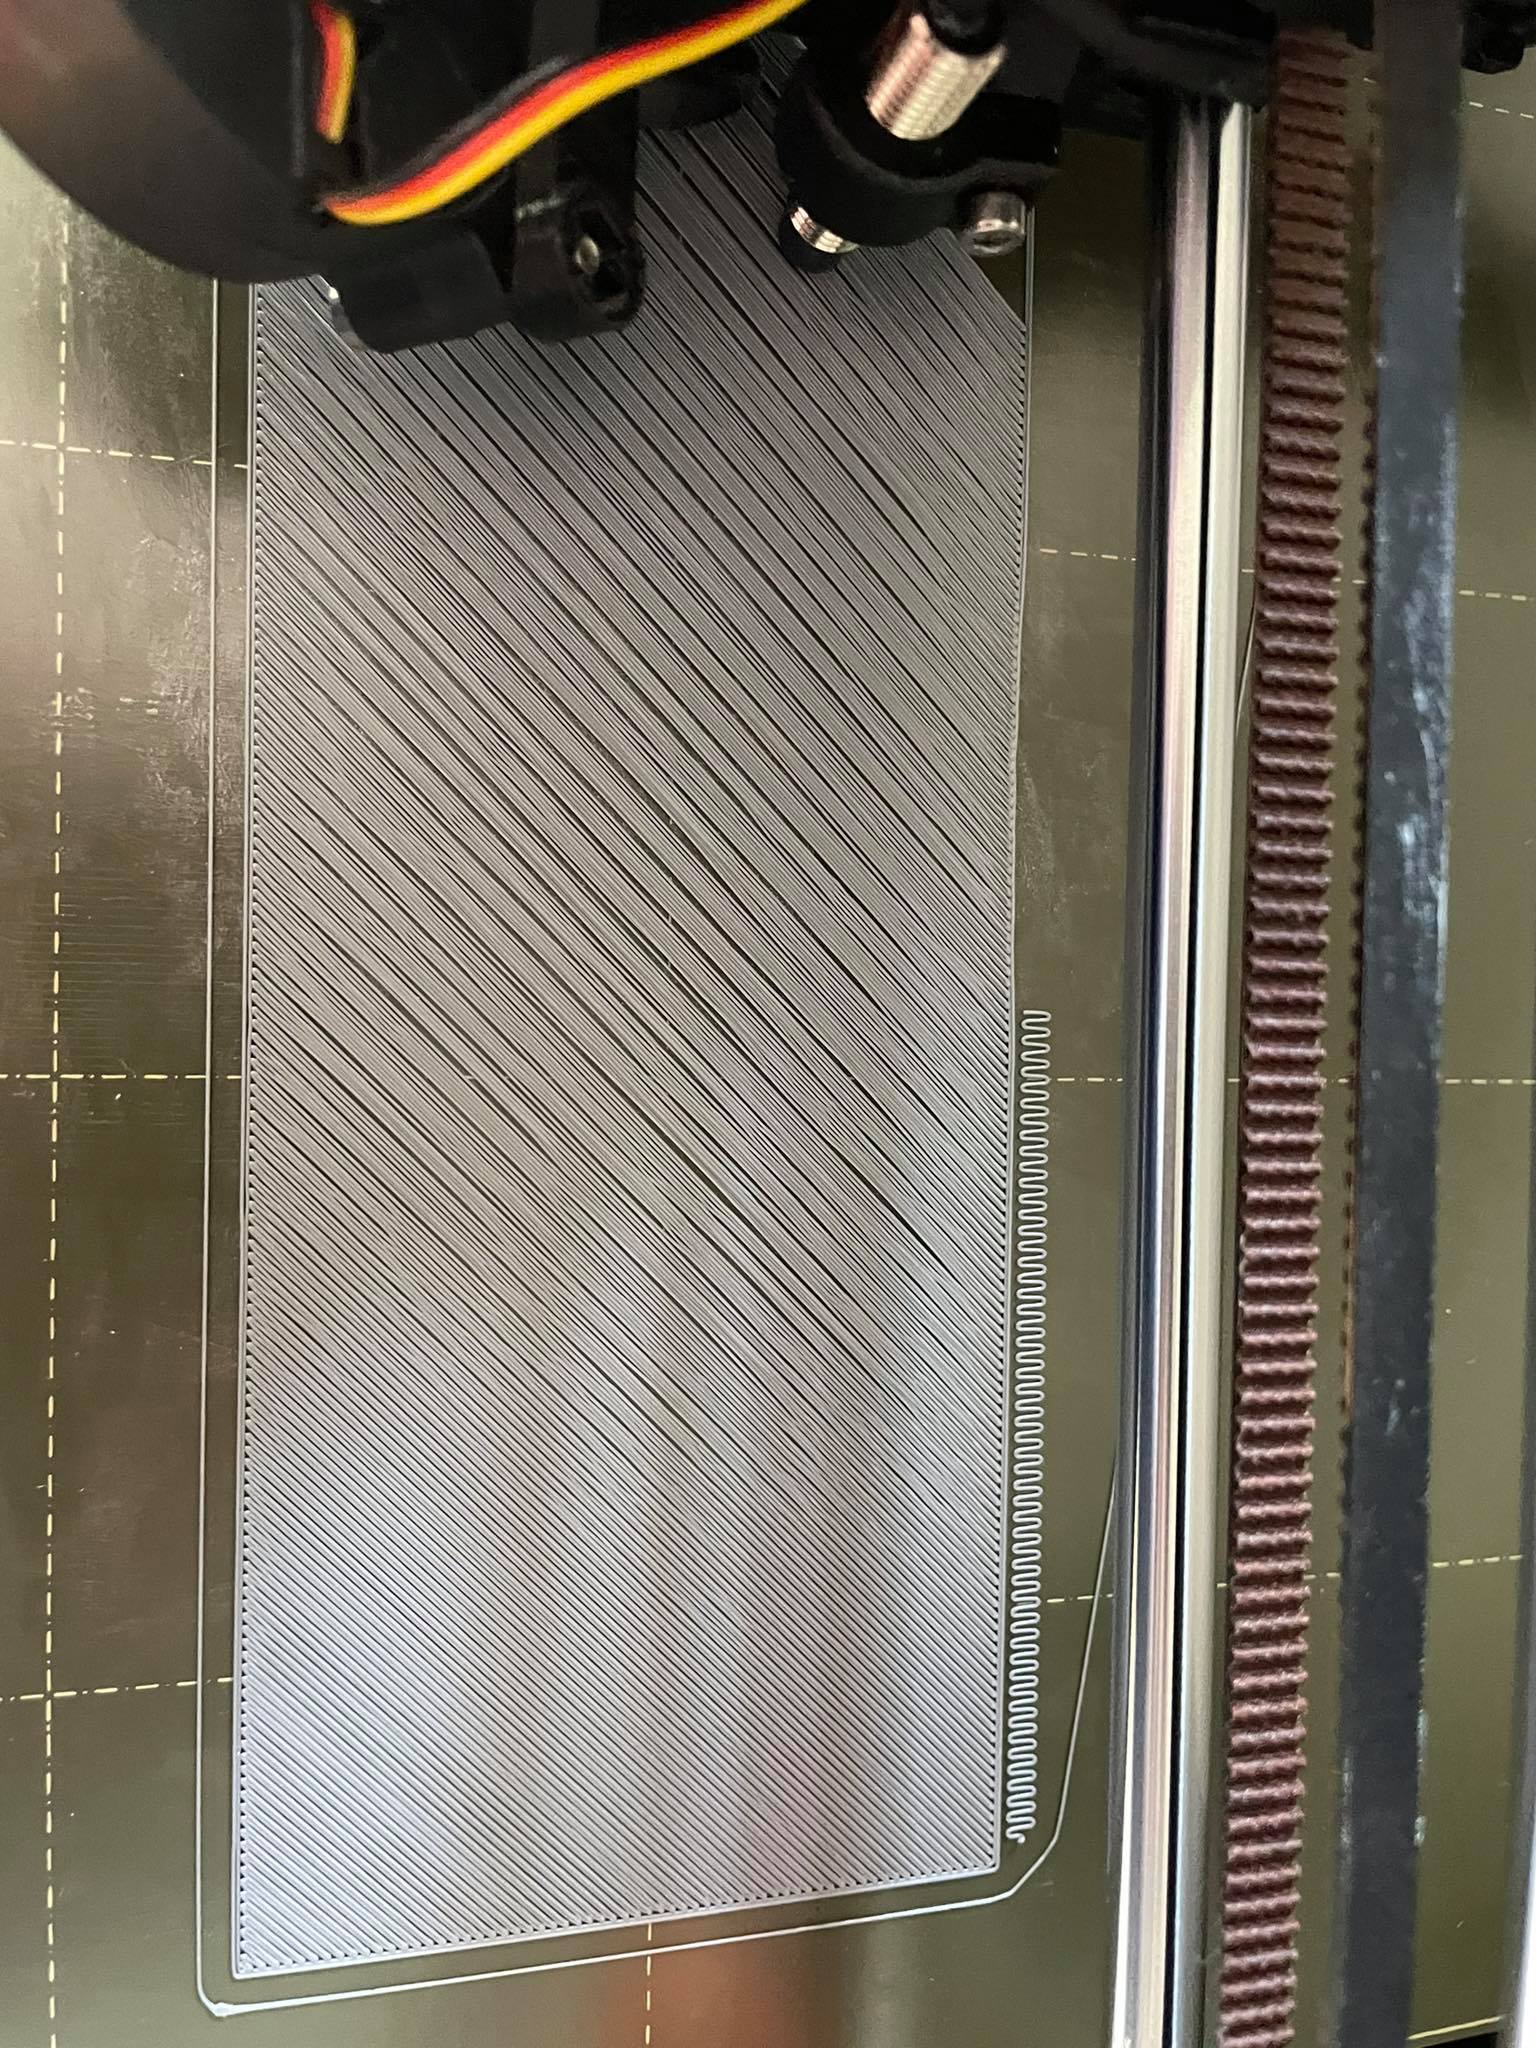
This is a picture of a first layer in progress, the white stuff is residue glue. I've tried without glue and they won't stick at all.

These are pictures of some of my failed prints. The right one started to come loose from the beginning, I added an extra picture of that in progress. I used the PLA that came with the printer.

Best regards,
Arnaud
RE: Bed Adhesion
Different folks, different strokes...
I started in the old days when Prusa used Glass build surfaces and manual bed levelling. and tried many different process to improve bed adhesion.
Most of them seemed to reduce the bottom surface appearance.
since the appearance of PEI build surfaces on the Mk2 and later machines I have stopped using additional surface treatments to help PLA Stick.
I Clean the build plate well with hot water and dish detergent, as previously mentioned.
Looking at your first picture, it looks like your live Z is a little too high.
from what I can see on my small screen, looking at your previous prints they also look to be too high.
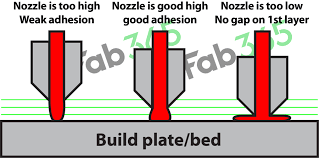
this image may help. when the live Z is correct, the sides of the filament traces squeeze out, and touch or merge with adjacent traces forming a single sheet of plastic. if your live Z is too high like the left hand side of the image above, there is negilgible surface contact, and little adhesion.
if the live Z is too low, like on the right of the image above, there is too much filament squeezed to the sides, and the new filament has to compete with the old filament for space, this causes the filament to buckle up, and cause ripples, again reducing surface contact and adhesion...
any surface contamination also reduces adhesion.
regards Joan
I try to make safe suggestions,You should understand the context and ensure you are happy that they are safe before attempting to apply my suggestions, what you do, is YOUR responsibility.Location Halifax UK
RE: Bed Adhesion
@joantabb
Hi,
Thank you! I think I figured it out. I used the Life Adjust Z method you recommended. I haven't tested it on a real print yet, but it seems to stick to the bed much more and the prints look way better already.

Thank you very much!
Have a good day.
Best regards,
Arnaud
RE: Bed Adhesion
Good luck, Arnaud.
regards Joan
I try to make safe suggestions,You should understand the context and ensure you are happy that they are safe before attempting to apply my suggestions, what you do, is YOUR responsibility.Location Halifax UK
RE: Bed Adhesion
When you do the Life Adjust Z and you pull the sheet up, it should be a solid sheet. If you pull it opposite direction of the strands you should not be able to tear them apart without a lot of force.
If the top side of the square is rough and scratchy, you are probably a little low.