Thermal Runaway and torn out wire
My printer (MK3S+) was having some difficulty with PETG this morning and after finally getting half of a good first layer down I had to leave to go to work.
At lunch I got a feeling I should drop by home. When I checked on the printer it had stopped with a Thermal Runaway error and one of the thermistor wires was loose.
How do I even begin to fix this? Is a whole hotend needed? The wire looks sheared off at the block. 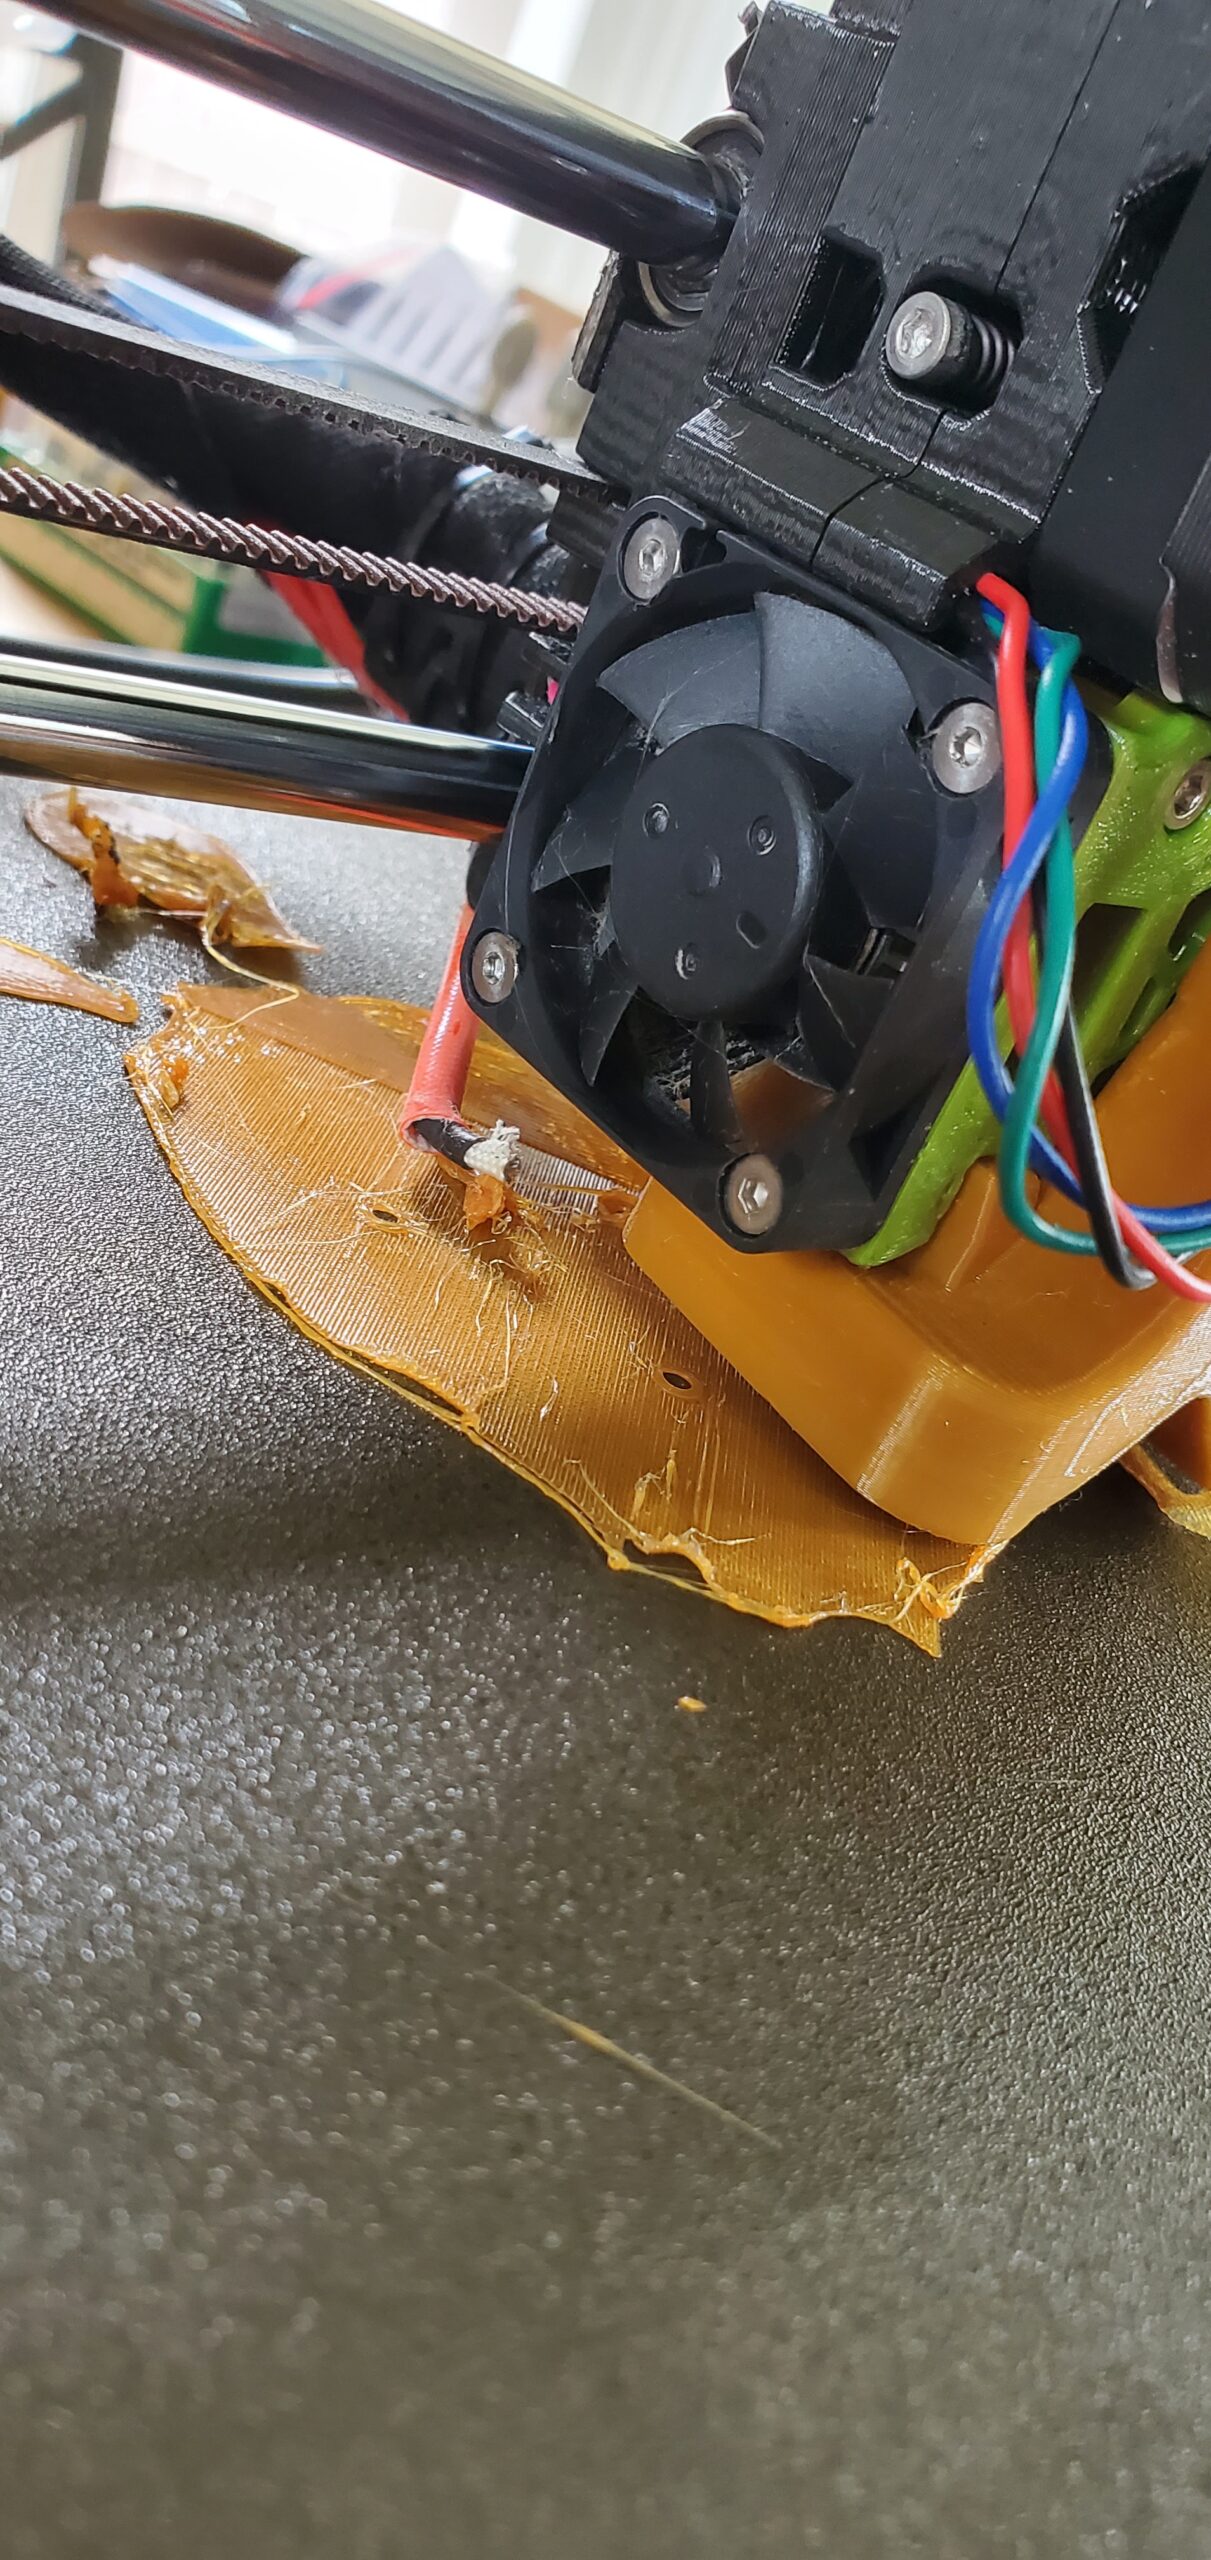


Once they have been used it's almost impossible to reattach the wires as the hotend reaches solder melting temperatures ...
Cheerio,
RE:
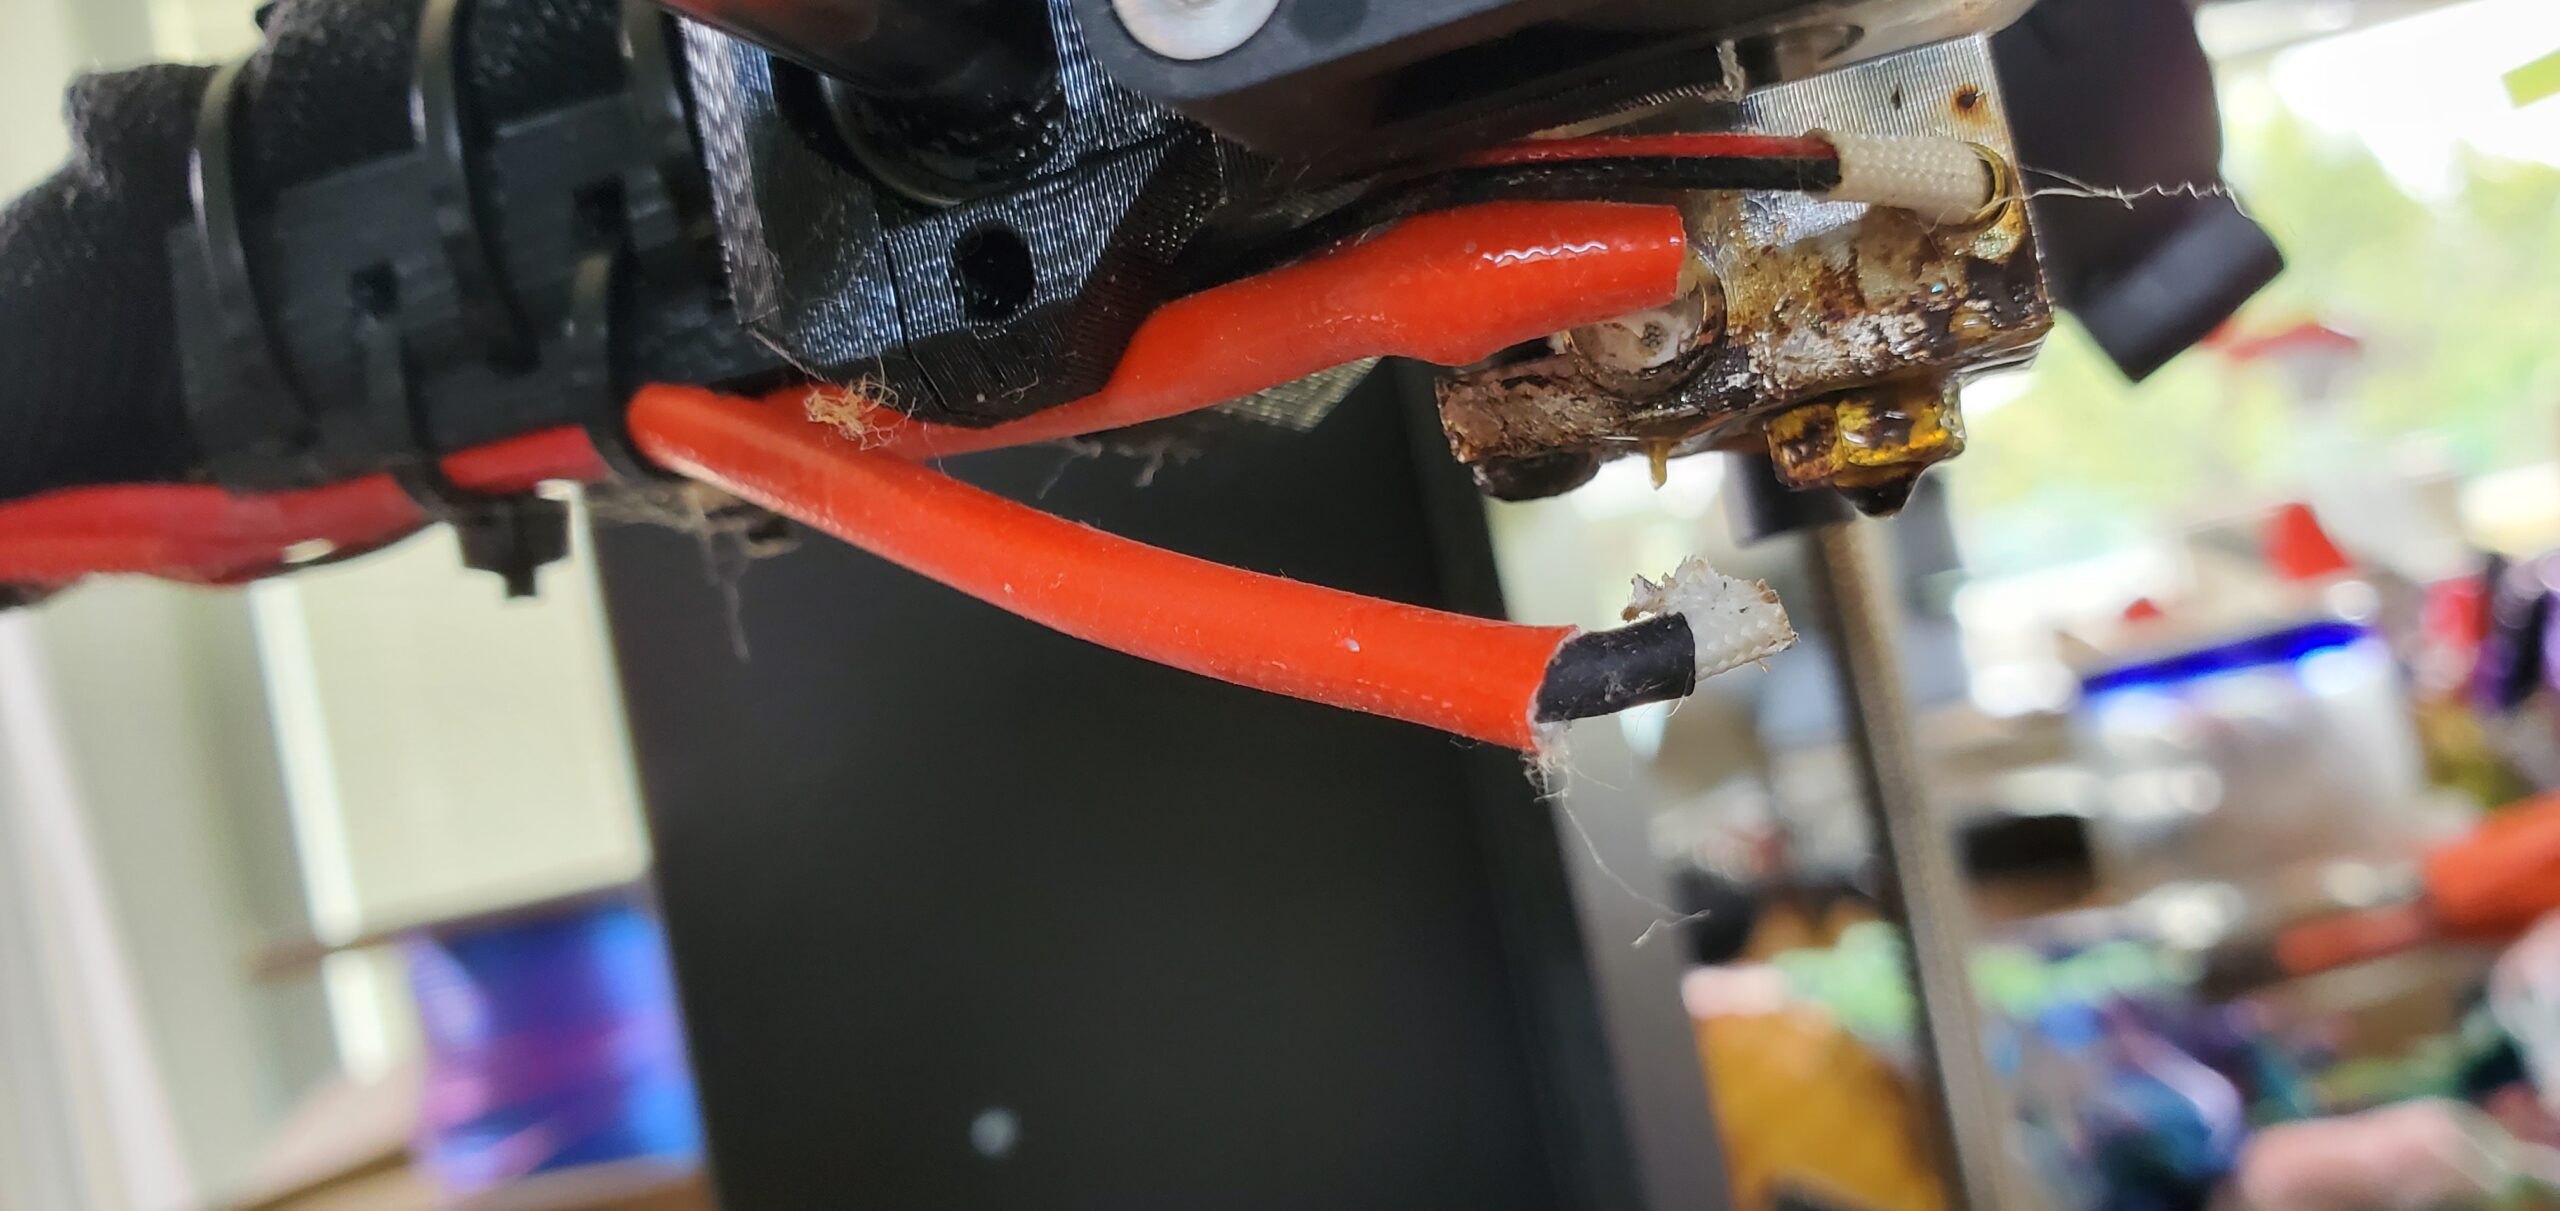
To me, it rather looks like a wire of the heating cartridge, not the thermistor. You need a new heating cartridge. Fortunately, it is quite cheap.
Is it an original Prusa or a clone?
Since your hotend looks somewhat used, it might take some effort to get the old cartridge out of the heater block. Please use good quality hex-keys for the screws. When I changed my heating block, the cartridge stuck like riveted in even though my hotend did not look as used as yours does. I had to break up my heating block in order to get the cartridge out. The thermistor is more fragile, so handle with care. Please consult the (online) manuals from Prusa or E3D on where to apply thermal paste and where not, how to tighten the nozzle etc. Using copper paste for the clamp screws for the heating cartridge and thermistor might help to keep the screws removable.
Therefore, I recommend to get a spare heater block, thermistor and nozzle as well. Those parts are not expensive either. Since the wires are somewhat exposed near the heating block, there is always a potential to break a wire. If you want to avoid longer downtimes before spares arrive, it might make sense to you to have those few cheap but critical parts at hand -- just in case. I ordered mine directly from Prusa.
Don't be afraid to do it yourself. It is not very difficult but please follow the manual and take your time. For me, the most annoying thing was to fiddle the cable through their path through the head and the wire harness.
Btw: I disassembled my hotend, because I swapped the steel heatbreak for a titanium which reduces the tendency for heat creep. Apart from that, I swapped the aluminum heating block for a copper one. Materials I print include PLA, PETG, ASA, Flex and XT-CF20. Since I had to disassemble the extruder anyway, I upgraded it from MK3S to MK3S+ as well.
Have a nice day.
RE: Thermal Runaway and torn out wire
I usually remove and inspect both the heating cartridge and the thermistor when replacing one or the other. If there is damage to either, just replace both. I keep 1-2 on hand because they will break occasionally.
--------------------
Chuck H
3D Printer Review Blog
RE: Thermal Runaway and torn out wire
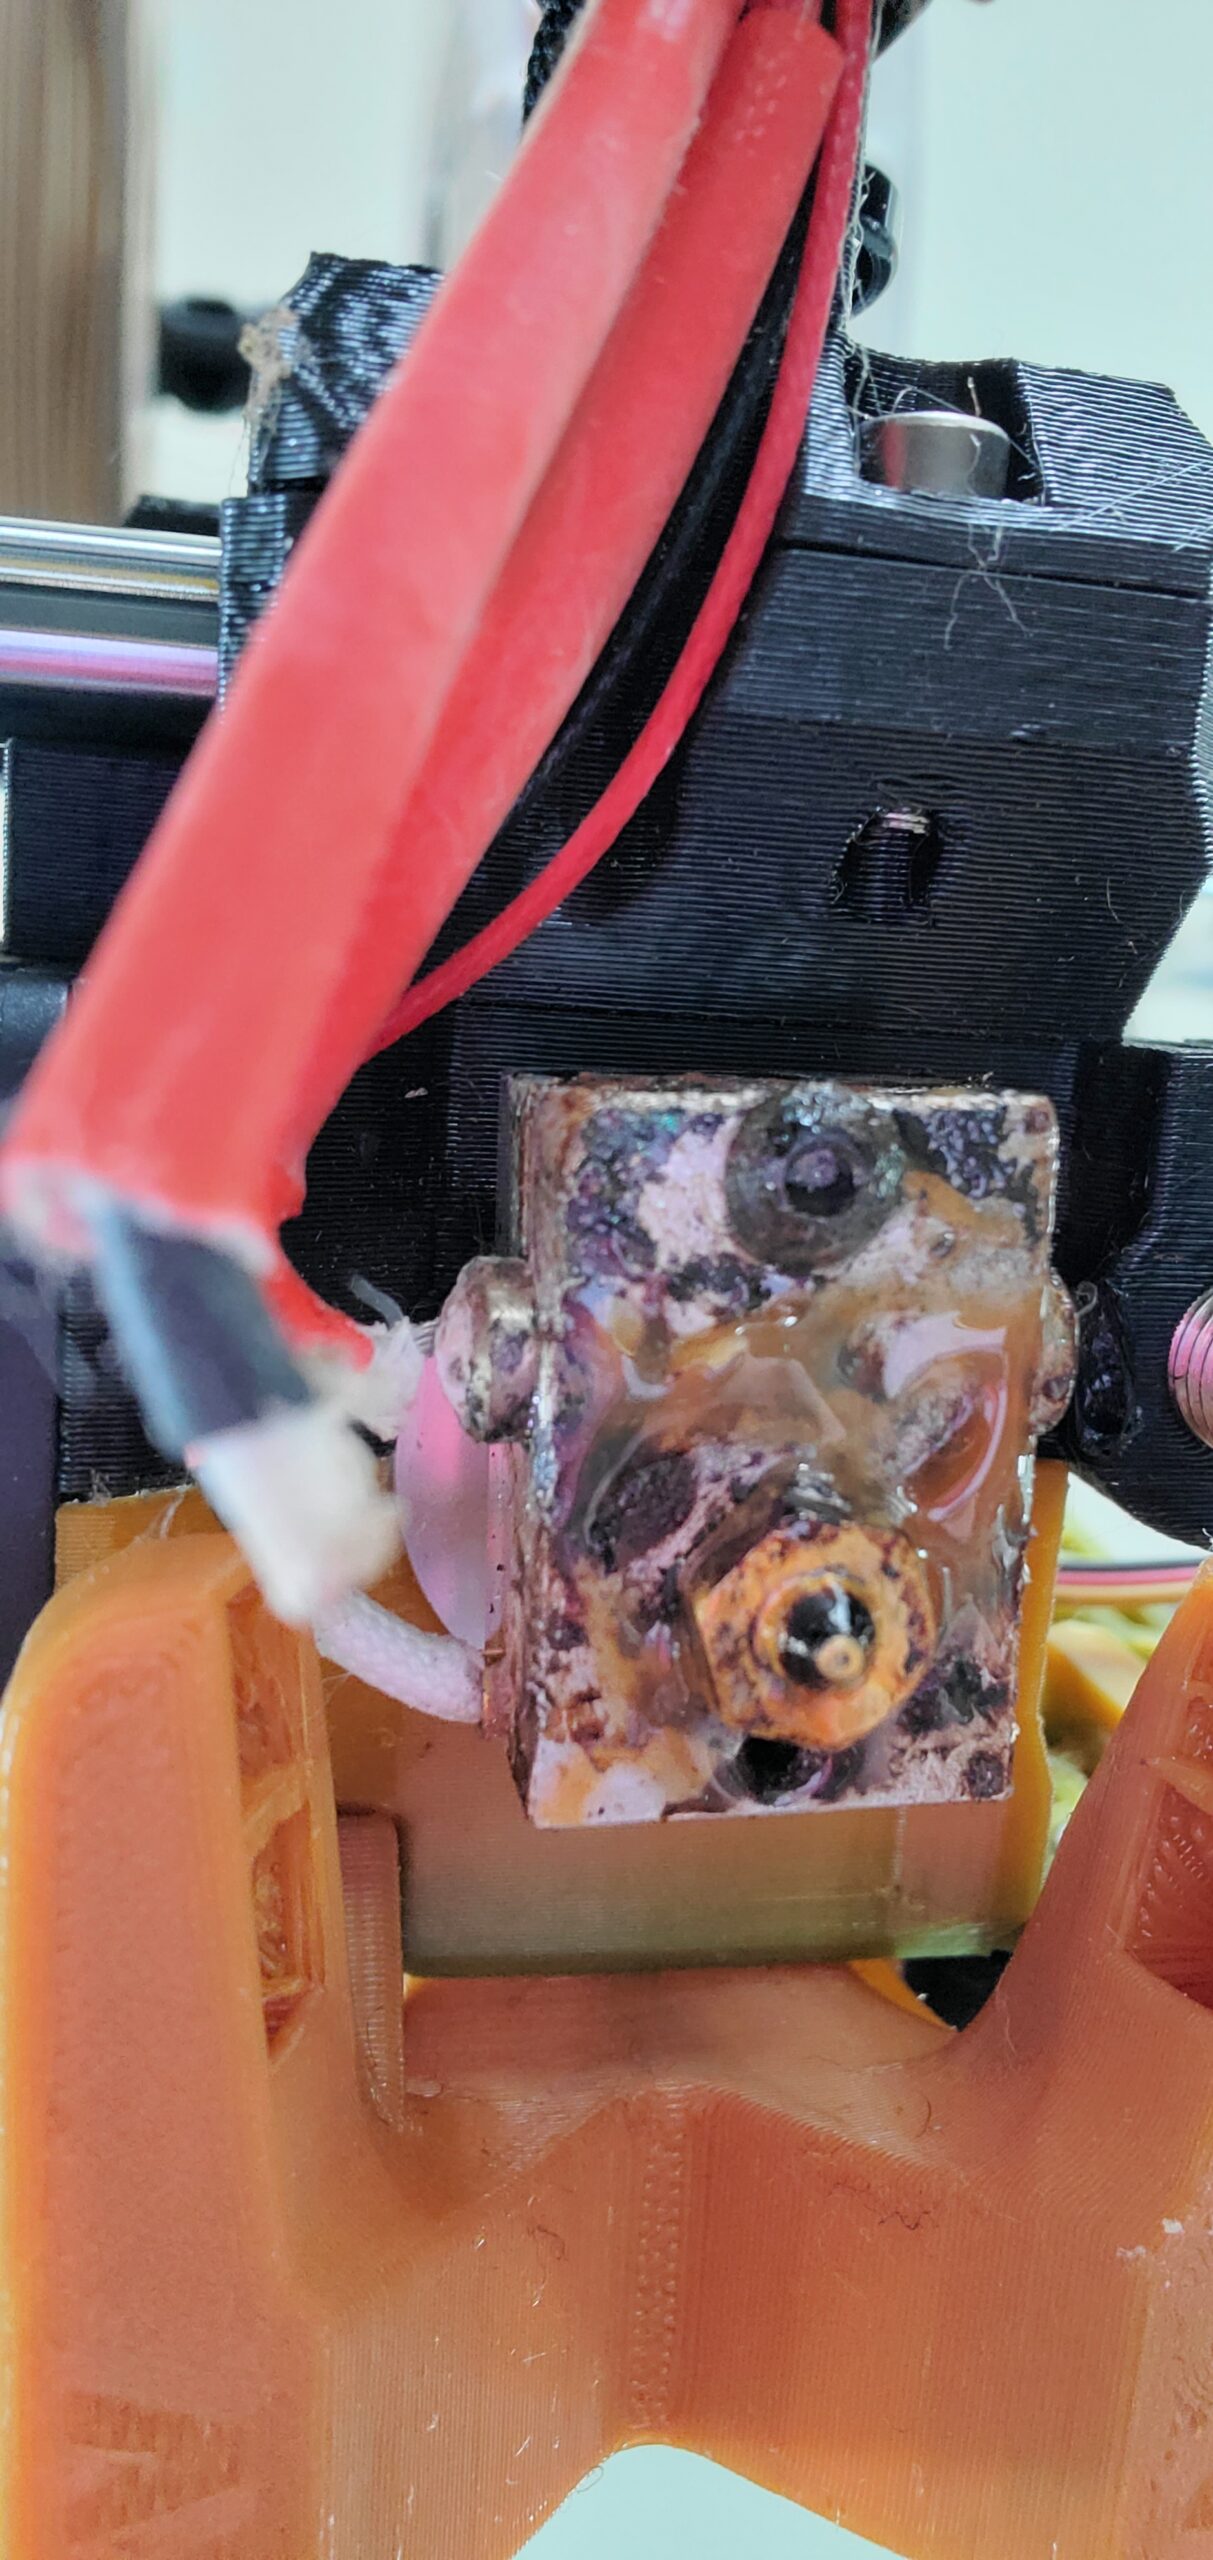
Also that hot end is not assembled correctly. Its no wonder its leaking. The nozzle is screwed up against the heatblock (forth picture down) there should be a slight gap caused by it hitting the heatbreak inside. If the heatbreak was correctly positioned then it would be impossible to screw the nozzle in that far and there would be the gap. As its the seal between the nozzle and the heatbreak that seals and stops plastic leaking then it was only a matter of time.
RE: Thermal Runaway and torn out wire
I agree with @Neophyl. You can find more info in this forum by searching e.g. for "leaking nozzle" or alike.
I think, Karl-Herbert posted here (or in the german section of this forum) a nice cut-away drawing of the E3D. I just can't find it immediately.
...Got it: loose-heater-block-after-changing-nozzles
This ist from E3D: e3d-online V6-Assembly-Guide
RE: Thermal Runaway and torn out wire
Oh my!
Good catch. I looked at the info that @blauzen linked and saw this as I was scratching my head wondering how I messed up the heat break. I was definitely rotating it when I was changing out nozzles, and I know it said there should be a gap between the nozzle and the block but it was loose unless I went further.
Is this going to mean I need a complete hotend assembly? I was mechanically adept enough to follow the manual and build my MK3S+ but clearly I messed something up with installing/using this first one.
RE: Thermal Runaway and torn out wire
Re: Is it an original Prusa or a clone?
It's an original, we bought it direct from Prusa in December and built it in January. But you might be seeing my aftermarket fan duct. I've been having problems printing overhangs and all the self-diagnosing lead me to printing the alternative Delta-V fan duct. I still can't get that stupid articulating slug to print but now at least I can get the big articulating dragons to stop failing most of the time.
RE: Thermal Runaway and torn out wire
You shouldnt need a new assembly if you can clean the one you have up. Remove the nozzle and block completely (which means removing the heater cartridge and thermistor) and clean out all the plastic gunk. As you need to replace the heater cartridge anyway its not that much extra. You want the threads clear so that they easily screw in and out.
Once its clean screw in the nozzle and leave that gap thats usually pictured, you can screw it in all the way and then back it out a couple of turns to get the gap approximately right. Then screw the block and nozzle assembly onto the heatbreak until it stops. Don't torque it, just needs to be touching inside. That will leave your heatbreak further into the block than your last picture shows. It will usually be flush or slightly recessed into the hole and not stick up proud like you currently have it. Adjust the angle so that the block is in the correct orientation, so you might need to turn the whole assembly/heatsink to get it correct.
From there you can reassemble the cartridge and thermistor and do all the usual hot tightening. As you will have adjusted the block/nozzle height position you will also need to go through the pinda height positioning process from the initial build again. Followed by adjusting your new live z position.