Smaller Layer Height Issues
Hello everyone-
I've had my Mk3S (now an MK3S+ with MMU2S) for a couple years now. I haven't used it a ton, but have basic knowledge about print specifics. This time around I'm a little lost on what to adjust, so hopefully someone here can point me in the right direction.
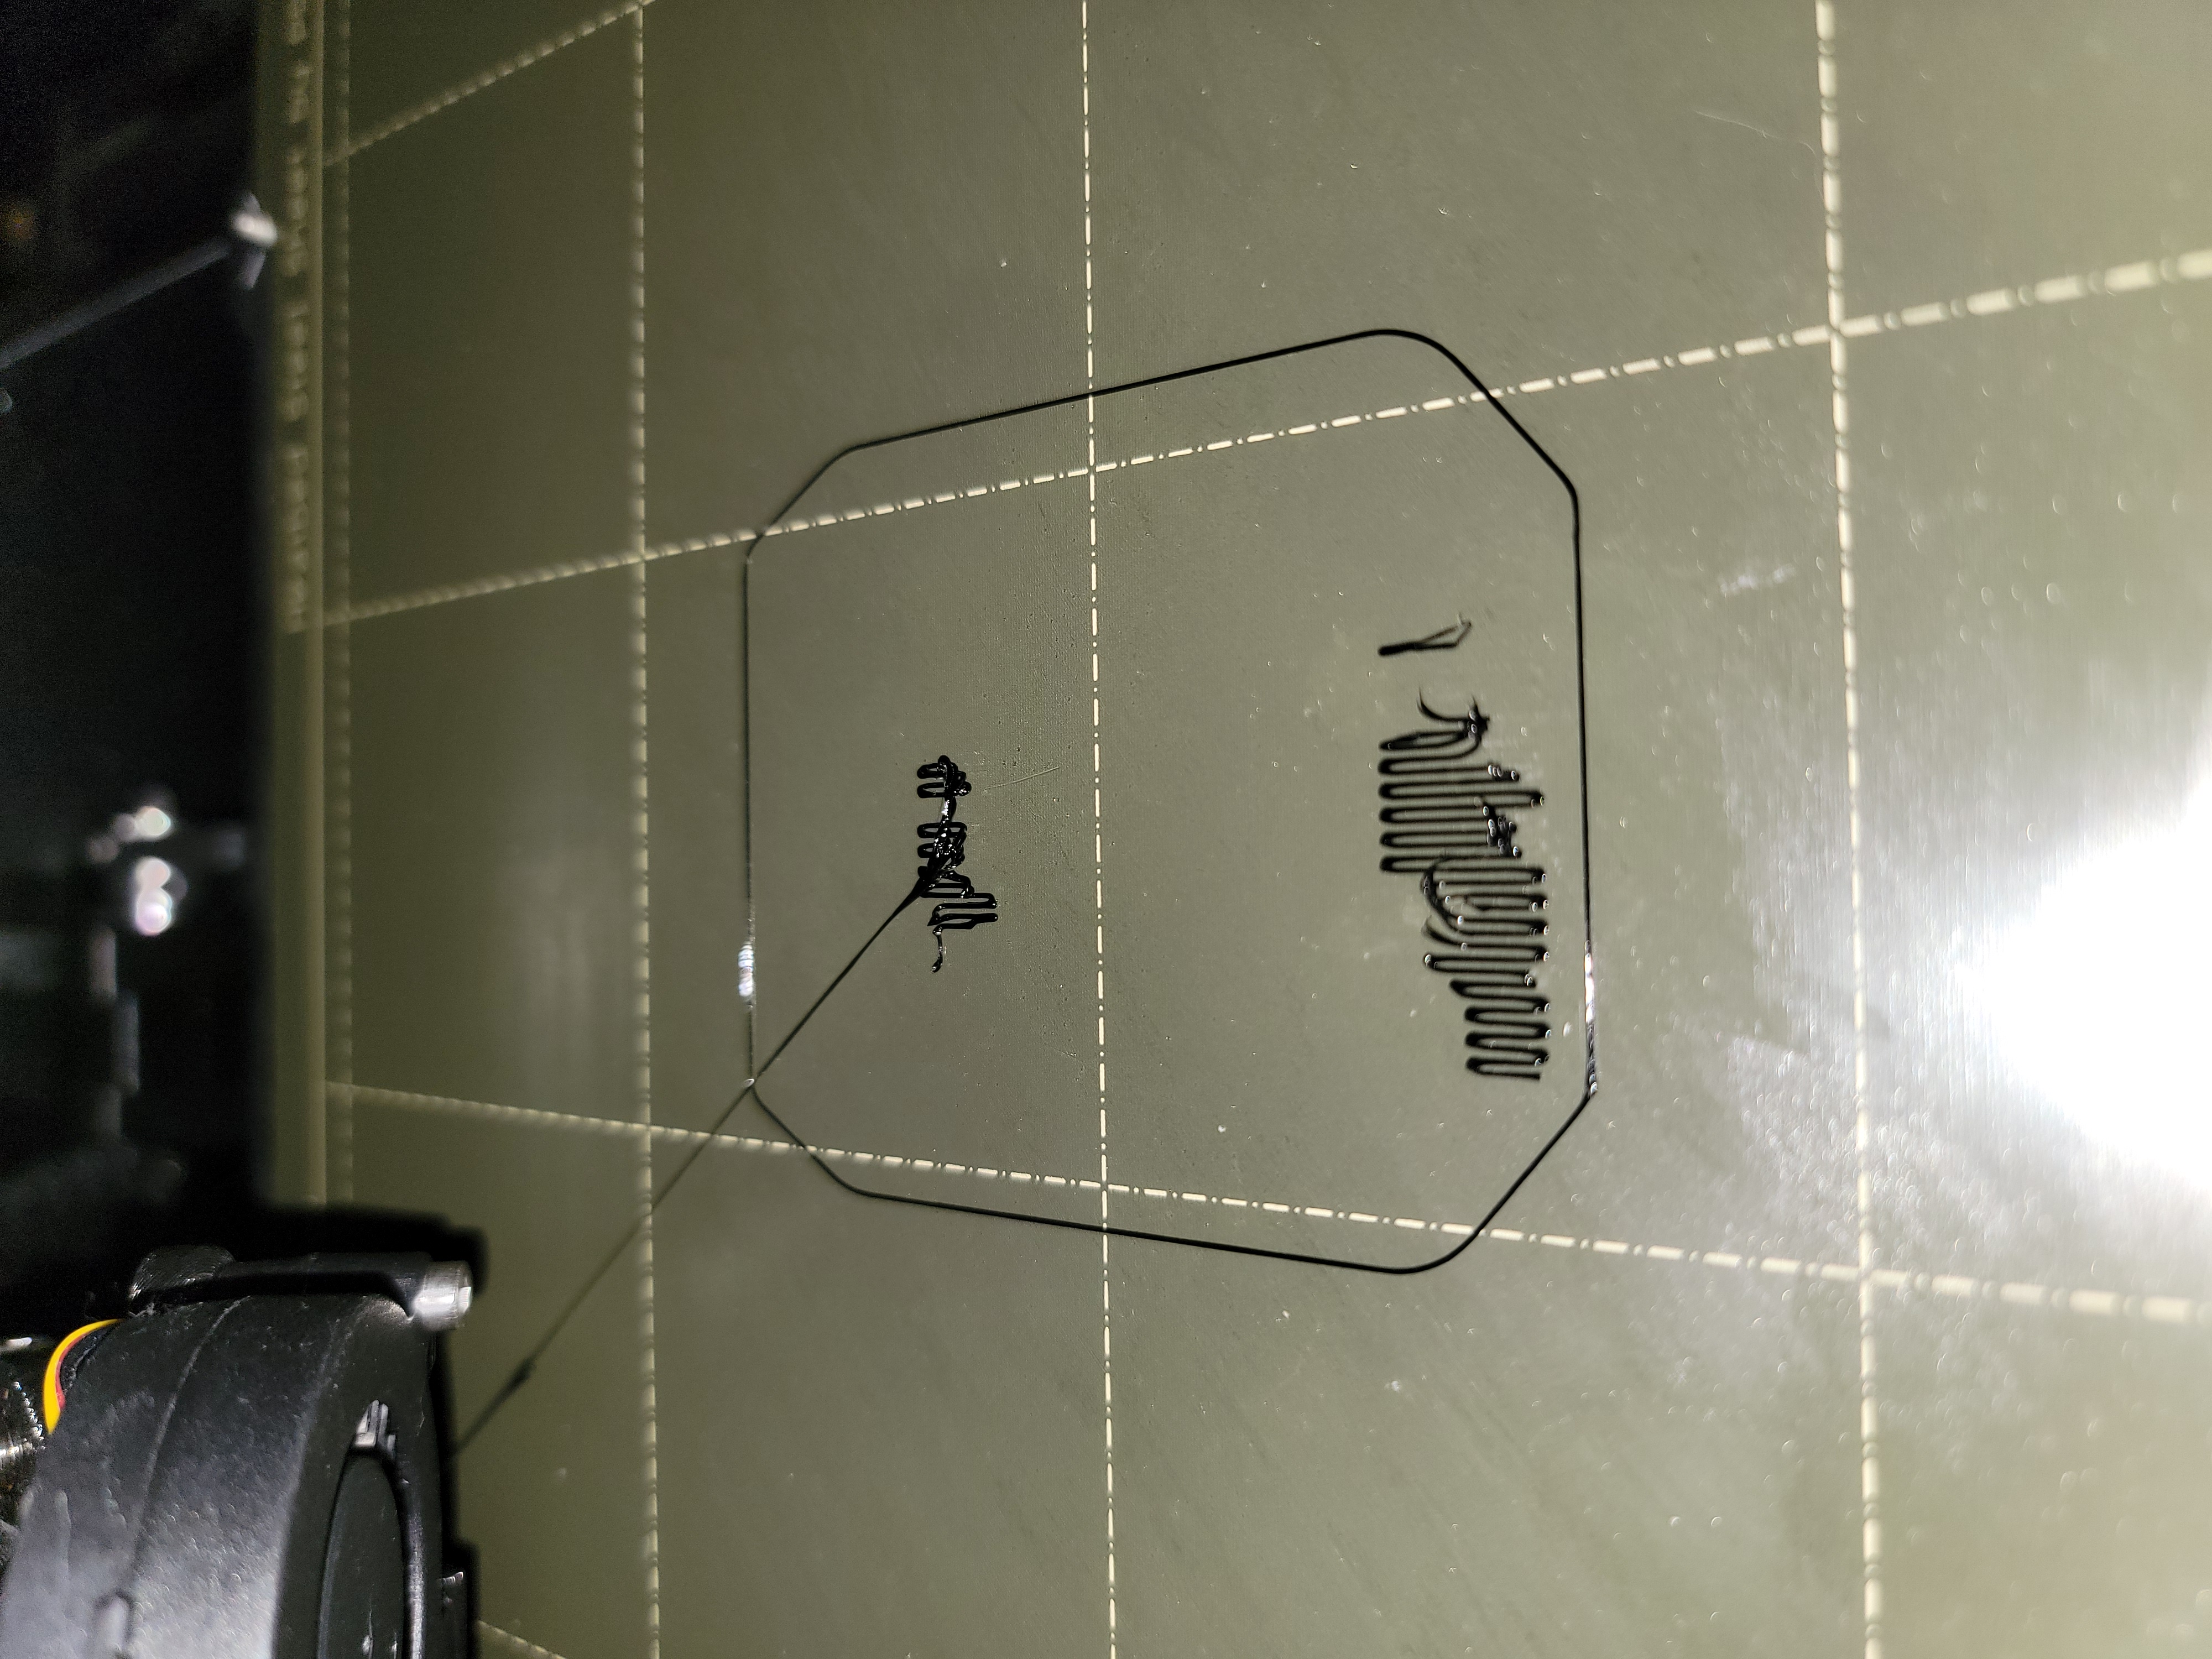
My go-to ol' reliable print settings are the standard 0.15mm profile, with either PLA or PETG, depending. Recently, I've wanted to print a few parts with a smaller layer height to try to get more detail, so I tried the standard 0.07mm profile. But for some reason when I do that, I'm having curling issues on the first layer. It's almost guaranteed to happen if there are supports needed. When its laying down the base support lines and it zig zags, it will pull up the end of each movement. Think of the "U" shape at the ends of the long string of support lines pulling up. I attached an image (albeit poor quality) to show this. This is with PLA at I believe 0.1mm layer height.
My first thought was that the bed was dirty, so I cleaned with dawn, as well as 99% isopropyl alcohol, still no dice. Tried changing materials, still no change. Tried adjusting z offset, still nothing. Tried using purple glue stick, nothing. Tried slowing it down incrementally to ~50%, nothing. Fresh nozzle too. Upon further experimentation, anything below the 0.15mm settings has issues where it pulls up. Maybe the nozzle is yanking the ends up when it changes direction?
This all leads me to believe its a slicer setting, but that's where my knowledge fades out. In the image, the outer brim and the middle of the support material is adhered nicely, I can't pull it up easily. Which leads me to believe its not an adhesion issue. I haven't had to mess with anything like that yet since the quality on the 0.15mm setting is superb. Since its happening on the continuous extrusion, changing the retraction wouldn't do anything. Should I try adjusting something like the extrusion width? Or what other parameters would affect something like this?
The next thing I'm going to try is just setting the first layer to be 0.2mm or something along those lines and see how the successive layers stick to the plastic instead of the bed. Anyone have any input that might help me out?
RE: Smaller Layer Height Issues
If it's curly, lower your Z
RE: Smaller Layer Height Issues
If it's curly, lower your Z
As mentioned in the original post, I have tried that. If it were the z, wouldn't I be having this problem on every setting and not just the <0.15mm settings? After I made the first post I checked and 0.2mm is the first layer height for all of the presets.
RE: Smaller Layer Height Issues
As mentioned in the original post, I have tried that. If it were the z, wouldn't I be having this problem on every setting and not just the <0.15mm settings? After I made the first post I checked and 0.2mm is the first layer height for all of the presets.
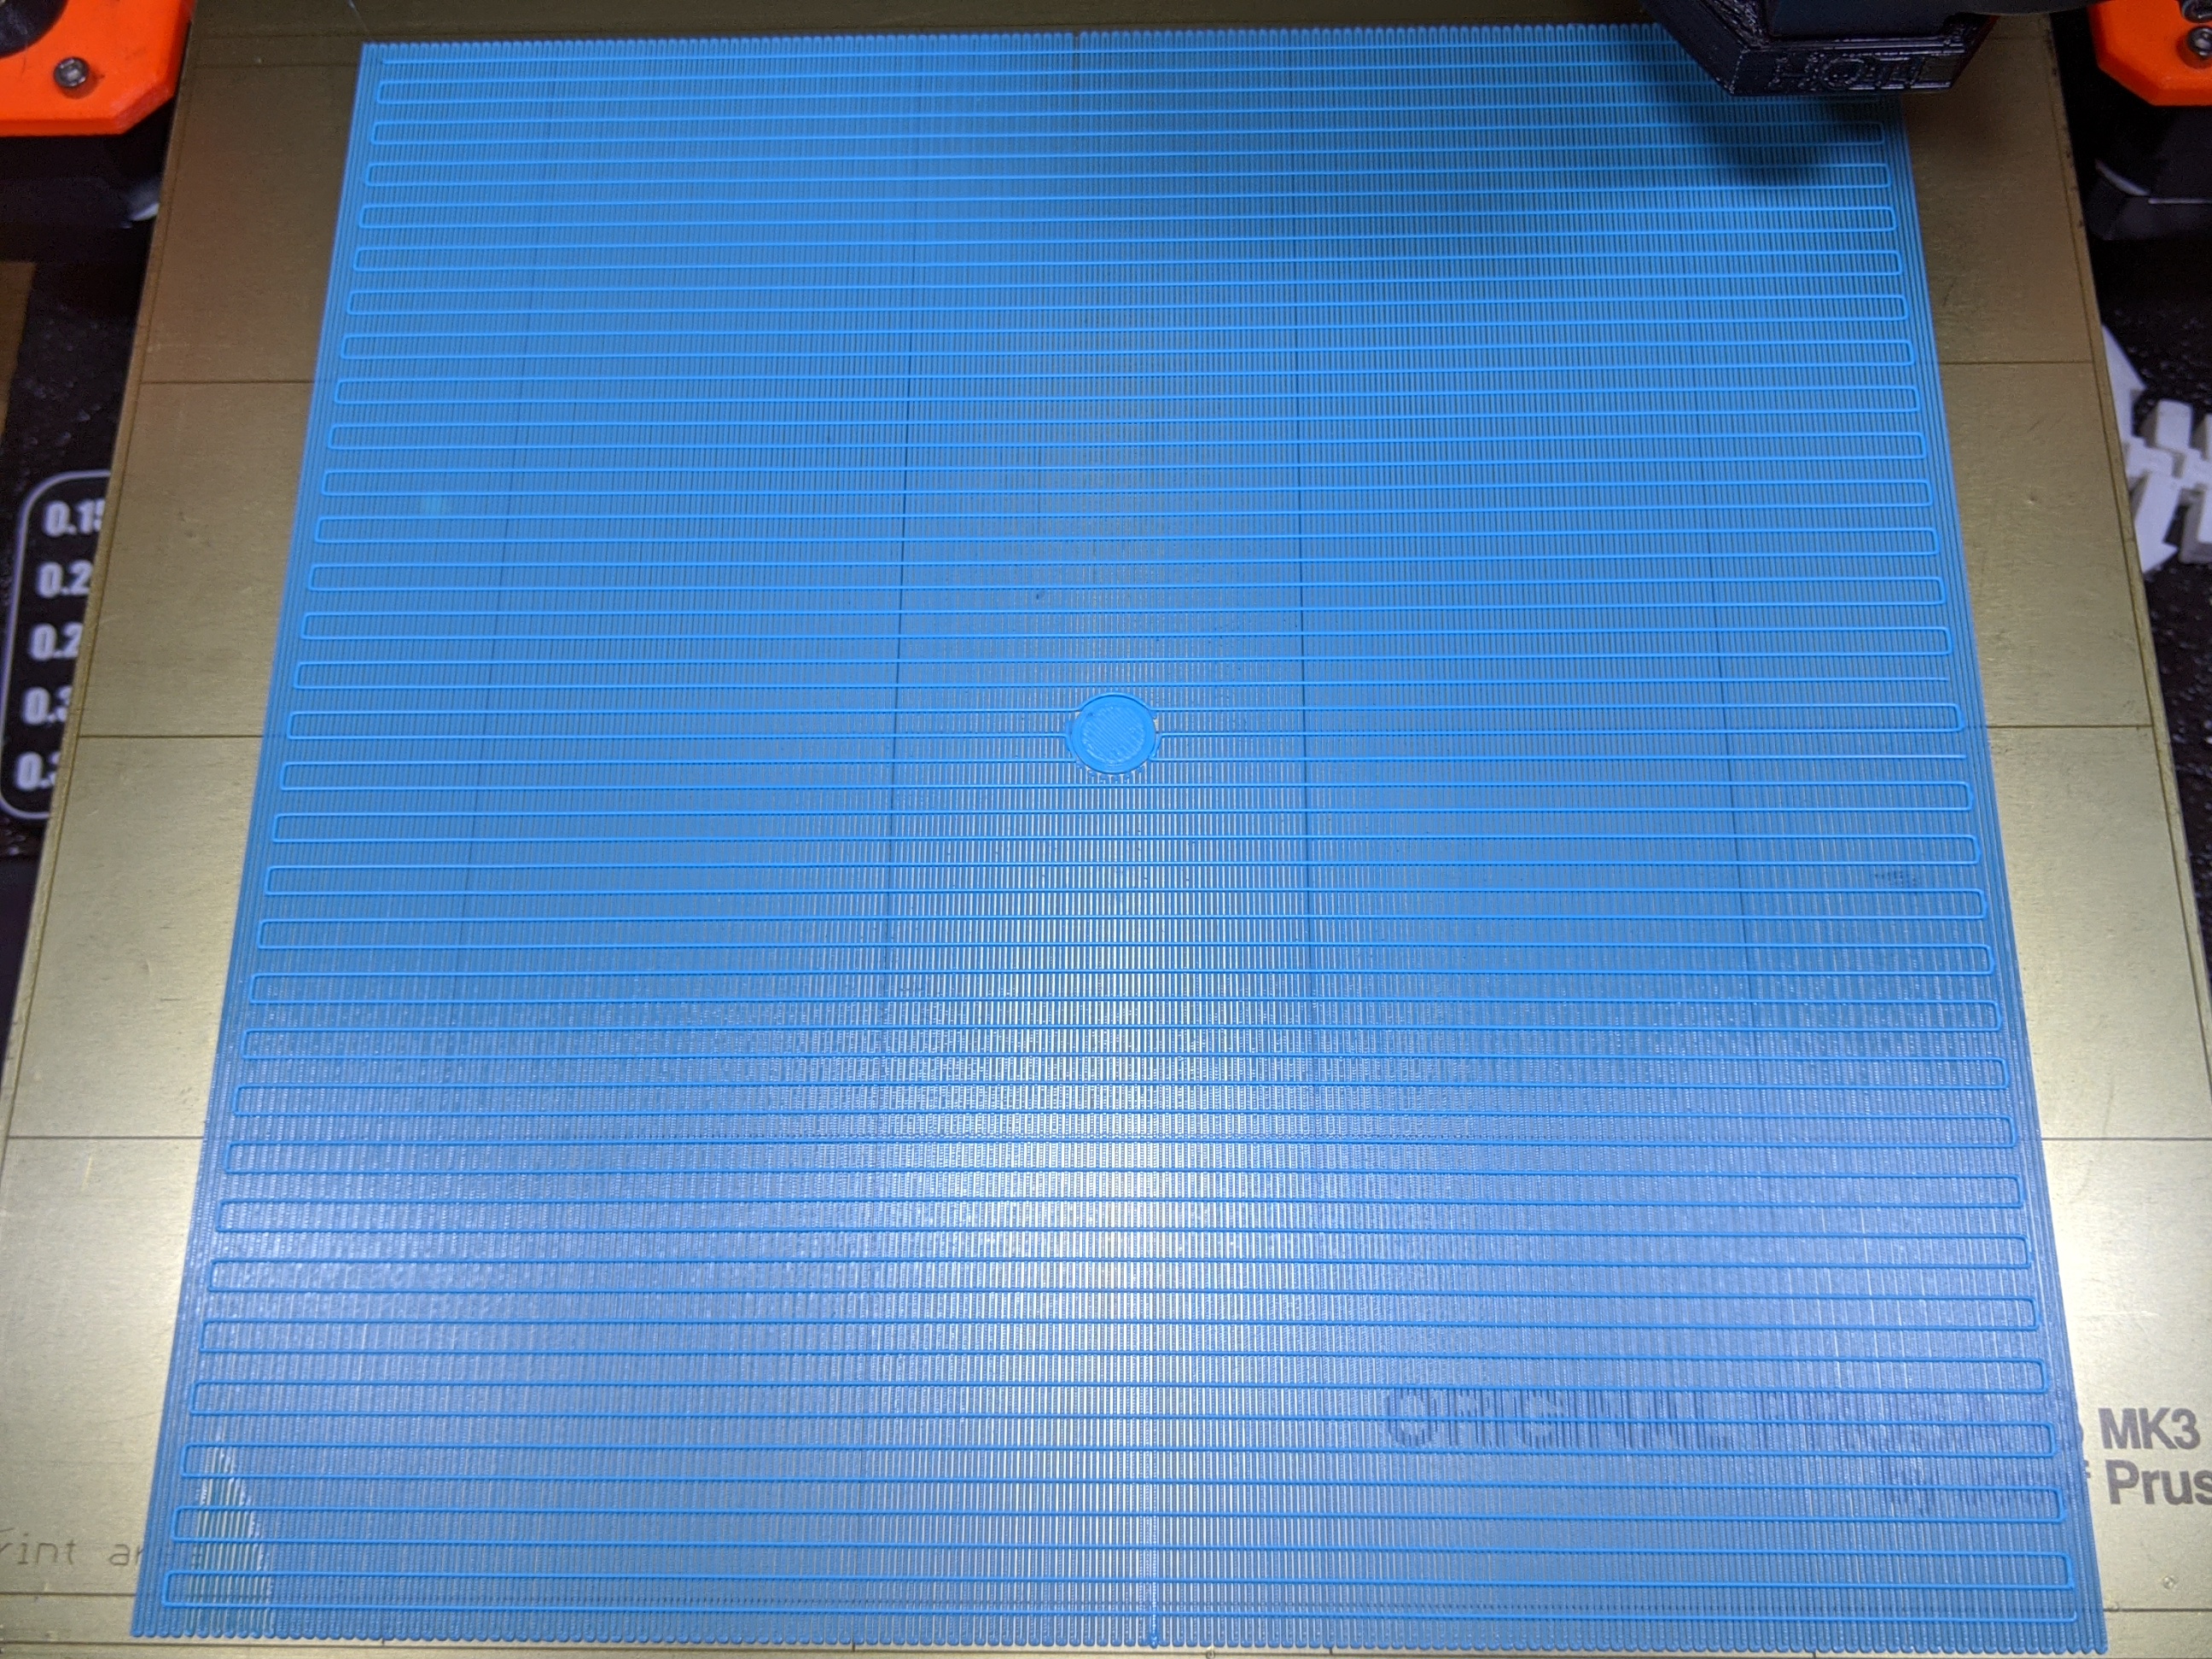
A 0.2mm 1st layer height is intended to allow some correction for minor bed deviations and provide a good foundation for the rest of the print. You can go down to 0.15mm for your 1st layer, but no lower. I don't find that a thinner 1st layer matters much for overall print quality and use 0.2mm for all 1st layers regardless of layer heights used further up.
The PEI print surface can certainly support a complex 1st layer:
Be sure you've fully cleaned the bed and done a good Live-Z adjustment. It sounds like you've done this already, but for completeness, here's an info dump:
-
Part warping or lifting along edges.
-
Bumping or knocking noises as the part moves under the nozzle.
-
Uneven vertical surfaces and bulges caused by print lifting and compression of overlying layers.
-
Spaghetti resulting from parts moving during printing.
-
The dreaded "blob of doom" caused by the part lifting and sticking to the nozzle as it extrudes filament.
-
A dirty PEI print surface. Even if you don't think this is the cause, it's always a good idea to make sure your PEI surface is clean before trying any other fixes. If it's a smooth PEI sheet, take it to the kitchen sink and give it a good dunk with Dawn (original formula, no vinegar or hand softener variants) dishwashing soap or your local equivalent (e.g. Fairy in UK). Use a clean paper towel to clean it off, and another to dry it. Avoid using any sponge or cloth that has been in contact with grease. Above all else, avoid touching the PEI print surface. Once it's good and clean, you should be able to use 91%+ isopropyl alcohol between prints, 100% acetone when that fails , and another dunk when acetone fails. Worst-case, use a 3M 7445 ScotchBrite (1200-1500 grit) pad or equivalent on smooth PEI to give it a very light buff, but only infrequently. If you've got a textured powder-coated PEI print surface, the official instructions are to use 91%+ isopropyl alcohol on it only. Rumors persist that some have had good luck getting started with these sheets by giving them a wipe with 100% acetone and a dunk with Dawn. Either way, there's no real warranty on these sheets. YMMV.
-
If you have not already done so, try using Jeff Jordan's "Life Adjust" procedure for calibrating your Live-Z setting. It is much easier to use and understand than the onboard routine and much easier to make mid-print adjustments accurately with. In general, start high (less negative) and work lower (more negative) in large increments (e.g. 0.1mm) until the filament starts to stick on its own. When you've got your Live-Z setting adjusted properly, you should be able to gently rub the extruded lines on the PEI surface without dislodging them. Then start lowering (more negative) the level until there are no gaps between layers. You should not be able to peel the lines apart after printing, but the top should be regular.
RE: Smaller Layer Height Issues
As mentioned in the original post, I have tried that. If it were the z, wouldn't I be having this problem on every setting and not just the <0.15mm settings? After I made the first post I checked and 0.2mm is the first layer height for all of the presets.
A 0.2mm 1st layer height is intended to allow some correction for minor bed deviations and provide a good foundation for the rest of the print. You can go down to 0.15mm for your 1st layer, but no lower. I don't find that a thinner 1st layer matters much for overall print quality and use 0.2mm for all 1st layers regardless of layer heights used further up.
The PEI print surface can certainly support a complex 1st layer:
Be sure you've fully cleaned the bed and done a good Live-Z adjustment. It sounds like you've done this already, but for completeness, here's an info dump:
Yes, I've cleaned multiple times on separate occasions, as well as adjusted Z both up and down. The borders always print perfectly. If there are no supports, then it will do the outline very nicely. Then, when it reaches the end of a movement on the first layer solid fill and flips 180 degrees to go backwards, that point will curl up.
I've tried printing a part at the 0.1mm presets, with no success. Then immediately afterwards print the same part in the same location at the 0.15mm preset with the same filament, no change to the bed or the Z, and have it print beautifully. And that's why this is stumping me.
RE: Smaller Layer Height Issues
[...] I've tried printing a part at the 0.1mm presets, with no success. Then immediately afterwards print the same part in the same location at the 0.15mm preset with the same filament, no change to the bed or the Z, and have it print beautifully. And that's why this is stumping me.
As you work with lower layer heights, issues like over extrusion become much more critical. A thicker extrusion will tend to adhere to the bed better than a thinner one if there is any drag from the nozzle passing over it. This is really apparent when you try to print supports as there is that very fine 1st layer pattern that highlights any problems.
Other things to try:
- You say you've cleaned multiple times, but have you tried washing the sheet specifically with Dawn (or equiv.) dish soap and nothing else? This is the most effective means of cleaning the bed. Alcohol will only move broken down grease and crud around unless you're soaking in it. I ask because your bed doesn't look all that clean in the pics above. When clean, it tends to have a matte appearance.
- Any buildup on the nozzle can stick to extrusions. Raise the nozzle and give the nozzle and heater block a good clean. I use cardboard strips. A soft brass wire brush can work, but watch out for the delicate wiring. Consider a coated nozzle.
- Go with 0.2mm 1st layer heights. It won't impact overall print quality in any noticeable way.
RE: Smaller Layer Height Issues
You say you've cleaned multiple times, but have you tried washing the sheet specifically with Dawn (or equiv.) dish soap and nothing else? This is the most effective means of cleaning the bed. Alcohol will only move broken down grease and crud around unless you're soaking in it. I ask because your bed doesn't look all that clean in the pics above. When clean, it tends to have a matte appearance.
Indeed I have. I've tried different permutations of cleaning regiments both with Dawn and alcohol (Dawn only, alcohol only, both), taking great care to not touch it or otherwise contaminate the surface post-cleaning. In the picture it may not have been freshly cleaned, but cleaning is the first thing my mind goes to with any adhesion issues so I've cleaned many times. I think with that print I was trying using PETG, so you might be seeing some glue stick on the surface.
Any buildup on the nozzle can stick to extrusions. Raise the nozzle and give the nozzle and heater block a good clean. I use cardboard strips. A soft brass wire brush can work, but watch out for the delicate wiring. Consider a coated nozzle.
Another one of my first thoughts was a nozzle clog, so I cleaned thoroughly and did a few cold pulls, which may have helped slightly, but no significant change. At that particular point in time I hadn't ever changed the nozzle, so I installed a fresh one along with a sock, with no change in print quality.
Go with 0.2mm 1st layer heights. It won't impact overall print quality in any noticeable way.
This I haven't ever changed from 0.2mm for any of my prints.
RE: Smaller Layer Height Issues
@liquidflame
The picture you show has the Z too high, thus the interface that gets laid down to give support a good bond is not sticking. What would happen if you went lower still? Here's an example. For most filaments that I use, my live Z is set to -.520. But I have this one filament that won't stick at that z value. It won't stick until I take it to -.560. When I set it to -.560, it prints great. But if I hadn't recognized that curly means too high, I would have subbornly gone on to try things that waste my time.
RE: Smaller Layer Height Issues
A maybe unsatisfying but pragmatic perspective:
Looks like you're not seeing any curling issues with 0.15mm layer height. So, I'd stay with 0.15mm, or try 0.1mm. Frankly, in my hands I've never seen any appreciable improvements going below 0.1mm layer height with a 0.4 nozzle.
Formerly known on this forum as @fuchsr -- https://foxrun3d.com/
RE: Smaller Layer Height Issues
A maybe unsatisfying but pragmatic perspective:
Looks like you're not seeing any curling issues with 0.15mm layer height. So, I'd stay with 0.15mm, or try 0.1mm. Frankly, in my hands I've never seen any appreciable improvements going below 0.1mm layer height with a 0.4 nozzle.
That may very well be the reality, I just wanted to see if I could squeeze some more detail out of some miniature prints.
@liquidflame
The picture you show has the Z too high, thus the interface that gets laid down to give support a good bond is not sticking. What would happen if you went lower still? Here's an example. For most filaments that I use, my live Z is set to -.520. But I have this one filament that won't stick at that z value. It won't stick until I take it to -.560. When I set it to -.560, it prints great. But if I hadn't recognized that curly means too high, I would have subbornly gone on to try things that waste my time.
When I get home today I'll print a test square or something and lower the Z and report back with a picture. But at the exact same Z offset and the exact same first layer height, why would the 0.1mm setting curl and the 0.15mm setting not curl?
RE: Smaller Layer Height Issues
@liquidflame
Why - because the distance between the head and the top of the extruded layer is now greater (thinner layer is thinner ... so distance from fixed head is greater. It also cools faster because the layer is thinner, so a closer head will help get that temp right at the bed.
Perhaps my understanding of the first layer height is incorrect. So even though the first layer height is set to 0.2mm, the first layer is printed at the current layer height setting? IE if the layer height preset is 0.1mm, and the first layer height is 0.2mm, the printer will print a 0.1mm layer with the nozzle at a distance of 0.2mm from the bed?
I forgot to take pictures, but I cleaned the bed with dawn only, and tried printing a square with overhang at 0.07mm. My normal z offset for 0.15mm layer height PLA is -0.78mm, so that was my starting point. I got better results by the time I had stopped increasing the magnitude, but was at -0.95mm and there was still curling, however its not spreading the filament thin, so I can go more (which I will do tonight). This brings up a second question: how much z offset is too much? Perhaps indicating an adjustment needed at the pinda probe?