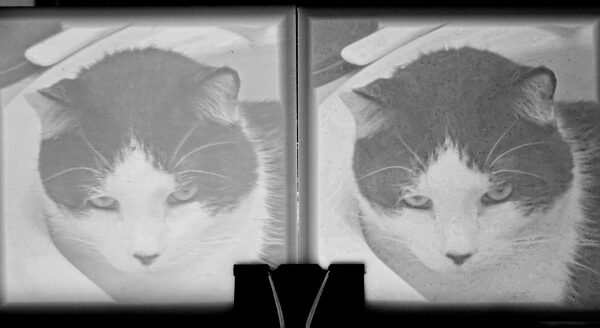
Print Lithophanes at Max Speed (never detach, fine resolution)
I am preparing my decorations for a Christmas party in a few weeks, and I couldn't resist using my 3D printer to make most of the decorations. I wanted to include some lithophanes, and I began printing a 200x200mm x 2.5 litho. It was curved (30 degrees) and I added a 2mm thick base with a 4mm brim. I am using new filament, new out of the package and new to me ("classic white lithophane filament" by American Filament), and I tried to quickly dial in the settings for a good first layer...looked good to me so I went ahead with it. Might have been printing too fast, because after the first hour or two I went to do other things, and came back almost half-way into it. With more than 5 hours remaining, I was very sad to see that one side of the print had begun pulling up off the bed....it wasn't warping, it was just lifting...the print looked fine still (although it was only a matter of time before it was ruined) so I wanted to try saving it instead of restarting it. I wondered if I could "glue it down" by attaching the lifted portion to the brim by using my 3D pen.....so I paused the print, turned my pen on, and then used it like a hot glue gun "filling in the space between the print and the brim/printbed". It not only worked, but the rest of the litho printed very cleanly with no issues. As for the adhesion to the bed, the pen actually only connected the print to the brim, and so it removed just as easily as it would have normally. It was a very thin litho at 2.5mm thickest and .6mm thinnest, and at 200mm tall (8inches is really big, at least that's what she said) and this fix was an incredibly simple, fast, and effective solution! I am absolutely going to do this for ALL of my tall lithophanes from now on. I have since used this to increase the print speed, and had great results. I have had no issues in the past with shorter lithophanes, but this one was taller than anything i've done and thinner, and so I'm almost glad I was put in this position to have tried this. It takes only seconds of time to use a 3D pen to plop around the base of the print onto the brim, and yet it ensures that you can print at max speed and it's not going anywhere.
"When I was a child, I never would have dreamed that the technology and concept of 3D printing would ever exist in our world; the fact that it now does means that we only need to put our dreams into the form of gcode and choose our desired filament for it to become our reality."
RE:
Thank you for sharing your experience. I don't have 3D pen and I never though it could be usable that way. Ok, I don't have bed adhesion problems, but then, I never printed litophane. Now I will consider buying some 3D pen -because one never knows.
[Mini+] [MK3S+BEAR]
@egg
Great tip, Thanks
I will also add one, Blue Tape on the brim can be of assistance in a pinch.
Regards
Swiss_Cheese
The Filament Whisperer
RE: Print Lithophanes at Max Speed (never detach, fine resolution)
I initially bought a pen so that I could fix minor issues/holes/things for parts I intended to sand or surface finish. It ended up being perfect for this, being able to fill and smooth using the same filament as the print. This other usage wasn't even something I had thought about until it just happened, and it turned out even more helpful than the reason I bought the pen in the first place. Lithophanes are absolutely stunning when they come out right, and yet the insane time it takes to print one with good resolution (people often take 12-20 hours on a single one) means that as you get higher on the print, it gets more wobbly EVEN IF it never comes detached.....the ghosting and other effects alone can ruin your print and keep it from being photo-quality. The stability this added to my print while on the bed was incredible, it was just stiff and solid- unmovable. We already have to print these vertically, and along the Y axis (absolutely must or you're asking for a potentially horrible looking image), so without slowing down the print to very very slow speeds (which is already the recommendation by almost everyone) this is changing the entire process for me. I dont slow it down while getting better image quality, and instead of changing my first layer to something extreme or trying to print a super thick raft or using any other means of wasted time and risking elephantitus'ing or warping, simply pausing and passing one layer from brim to bottom edge does more than any of these things could reliably and safely do. I mean, I don't have to change any settings now, or custom g-code, or add a cylindar or rectangle base or change my first layer calibration or flow rate or bed temperature or nozzle temp for first layer or ANYTHING. This is a dream come true, and it seems right now to *only* apply to my printing of lithophanes (i dont have any need for this for any other part that I can think of), and yet lithophanes are relatively easy to "design" but the most frustrating and difficult to print....just google some of the litho's out there, and you'll see why they make some of the most jaw-dropping gifts for so many people. I initially thought the idea "sounded cheesy", just taking an image and trying to 3d print it for a lampshade? Come on, who would actually think that's cool for a gift...but then I looked at what people have done with them, and I was like "um......I could never do that. This is more impressive looking than a print in place universal joint (at least to the person you're giving it to)" It's just stupifying to look at it change from an ugly blob of undefined looking solid white rectangle....into a more realistic and more detailed image than you would get with an actual photo. It's literally 3 dimensional in its physical manifestation, and with the shadows and different angles of viewing, it can be much more detailed looking and mind boggling than a photograph, and with the right lighting and shadows you can even make them slightly holographic (i have done this with 2 so far using blacklights, and i dont think it had anything to do with the blacklights but thats definitely for another time as I don't know what was really at play).
Thank you for sharing your experience. I don't have 3D pen and I never though it could be usable that way. Ok, I don't have bed adhesion problems, but then, I never printed litophane. Now I will consider buying some 3D pen -because one never knows.
RE: Print Lithophanes at Max Speed (never detach, fine resolution)
hm.......I dont think this would really be enough help for some of these lithophanes, but I can see it being more helpful for a regular print. The litho in this example was still sorta "printing ok" when it was lifting, but it wasn't going to be photoquality as several layers weren't perfect as a result and it was only going to get worse until complete failure, but the brim itself was never the issue. The brim stays on the bed just fine, so taping the brim would have no effect. Sometimes the part comes off while leaving the brim behind, even with no elephant foot compensation. You really can't put any pressure on the base of the part trying to stick tape to it or you'll just detach it and push it over, as you really need to attach the part itself to the brim. That's why dropping a dab of molten plastic will work to bond the part down to the brim cause you don't have to make any physical contact or put pressure on it directly. Lithos are very different than normal parts in this manner.
I am interested in knowing more about this blue tape, as I am planning to start printing with petg soon, and I've heard stories of this tape being an essential part of certain filament printing........ and since this litho did have a 2mm thick base, I might have been able to use blue tape to tape the base and brim down before anything happened, and it might have actually held fast. I might even try that, as it would be quicker, easier, and more affordable and convenient for most people. I still think it wouldn't be worth taking the risk of it being a concrete and unmovable connection for extremely long or tall prints, but then again I'll not know this unless I try it!
Thanks for that info
@egg
Great tip, Thanks
I will also add one, Blue Tape on the brim can be of assistance in a pinch.
Regards
Swiss_Cheese
Print em flat - they come out fantastic.
I know that the purists say you should print litho's on end - but I've never seen any explanation. Rotate 90 degrees does a fantastic job - every single pixel gets rotated - not just some. That means you can print them flat side down on the bed with no wobble. I get fantastic lithos - have printed many at .1mm resolution and with massive depth (two of the settings for configuring a litho render). I typically just load the file from lithophanemaker.com into 3D builder, rotate, settle, then save. Then load that flat on the bed file into Prusa Slicer, set it to .1mm resolution (your litho res and slice res should match for best results) and print it. It's not faster - but there is never any wobble (your printer wobbles??? time for maintenance).
RE: Print Lithophanes at Max Speed (never detach, fine resolution)
When I printed my first (and only) lithophane on the I3 about a year ago, I first did it horizontally, flat against the plate. That was the way I had seen it done by others at our local 'makerspace' (using a Taz) so I assumed it was common practice.
Then I read (I think here) that the preferred method is to print them vertically. I reprinted vertically and the difference was obvious. Contrast was better and detail was finer. IIRC I used a brim and some Layerneer (may have used glue stick, not 100% sure) to be sure it would stick solidly to tbe build plate.
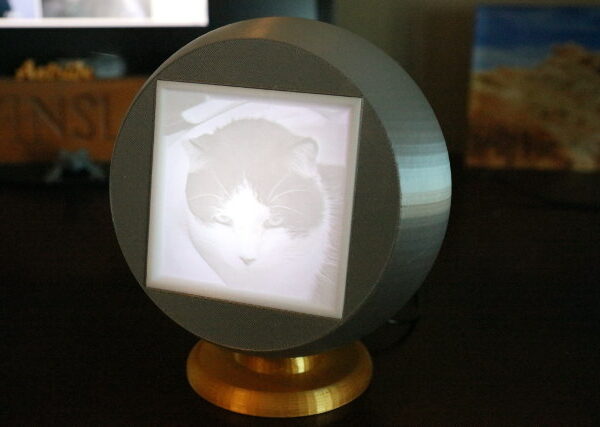
It was a photo of our late cat, and I made a spherical 'frame' with a backlight and made it a gift to my wife, and she shows it off to friends.

