Print Fails in different sections of bed

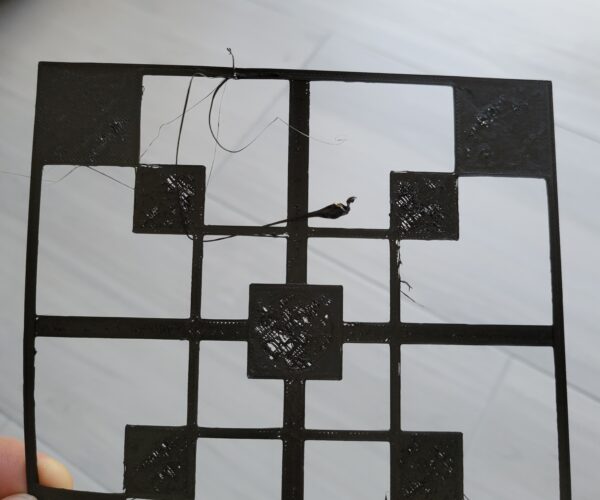
I have been having this alignment problem since upgrade the Prusa Upgrade Extruder MK3S. I have read and tried any all suggested posts. My first layer prints fine, but subsequent layers fail. It seems like the center areas of the print are the issue, in the above photo the lower left corner of the print is fine but the center square is horrible. It seems like the nozzle is picking up filament from the center area and then dragging it all over. I am currently slowing down the print again, so this takes a while. I am printing with PetG on the Powder coated Steel Sheet.
It almost seems like if I avoid printing on certain sections of the heating bed, I can successfully print some parts...of course I would like to use the entire plate but....
Any suggestions appreciated.
Take a straightedge and a torch.
Ley the straightedge on the build plate and shine the light from behind to show any gaps.
Is the bed flat? Is it curved and if so is it a flat valley shape, a low ridge, a rounded hump or a dish?
Was this prebuilt ot a kit?
Cheerio,
RE: Print Fails in different sections of bed
Apart from what Diem said: Have you cleaned the sheet or tried the other side of the it? Since by default prints are put to the middle, residue might have built up there over time, especially in the "valleys" of the textured sheet. Can you try to carefully scrub it with a soft brush and plain dishwater detergent and rinse it with plenty of warm water? I assume, that your first layer squishes the filament not only onto the "peeks" of the texture but also down into the "valleys". Once your prints improve, you can print a single layer large rectangle with a height of 0.2mm. This would give you the full picture of your first layer instead of just the test pattern.
When using a straightedge, usually there will be some gaps. The plate is not 100% even. You can measure them, ideally with a brass (non-magnetic) feeler gauges. But even a piece of paper can give you at least a rough idea whether it might be too much for the meshbed leveling to compensate.
Happy printing.