Re: Full Assembly video's with manual timestamps
No problem but I'm not sure that it is usefull. Each printer has its own sweetspot and even with two of the same printers next to eachother you will have specific tweaks for each of them. How are these settings shared here usally?
Re: Full Assembly video's with manual timestamps
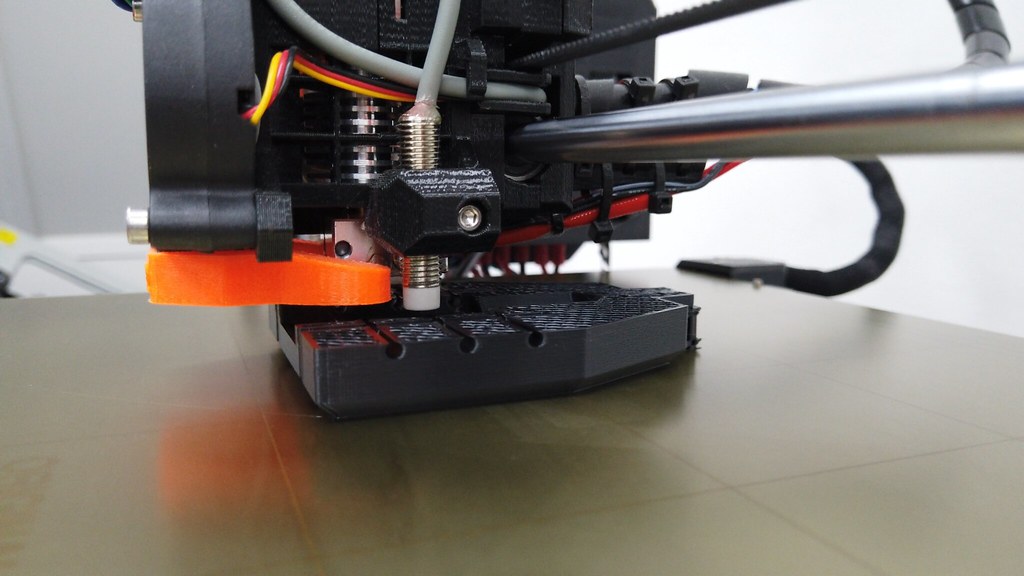
A minor update, after a bit of additional tweaking I managed to get the surfacefinish even better!
- PLA
- 200c nozzle
- 60c bed
- 0.4mm nozzle
- 0.15mm layer
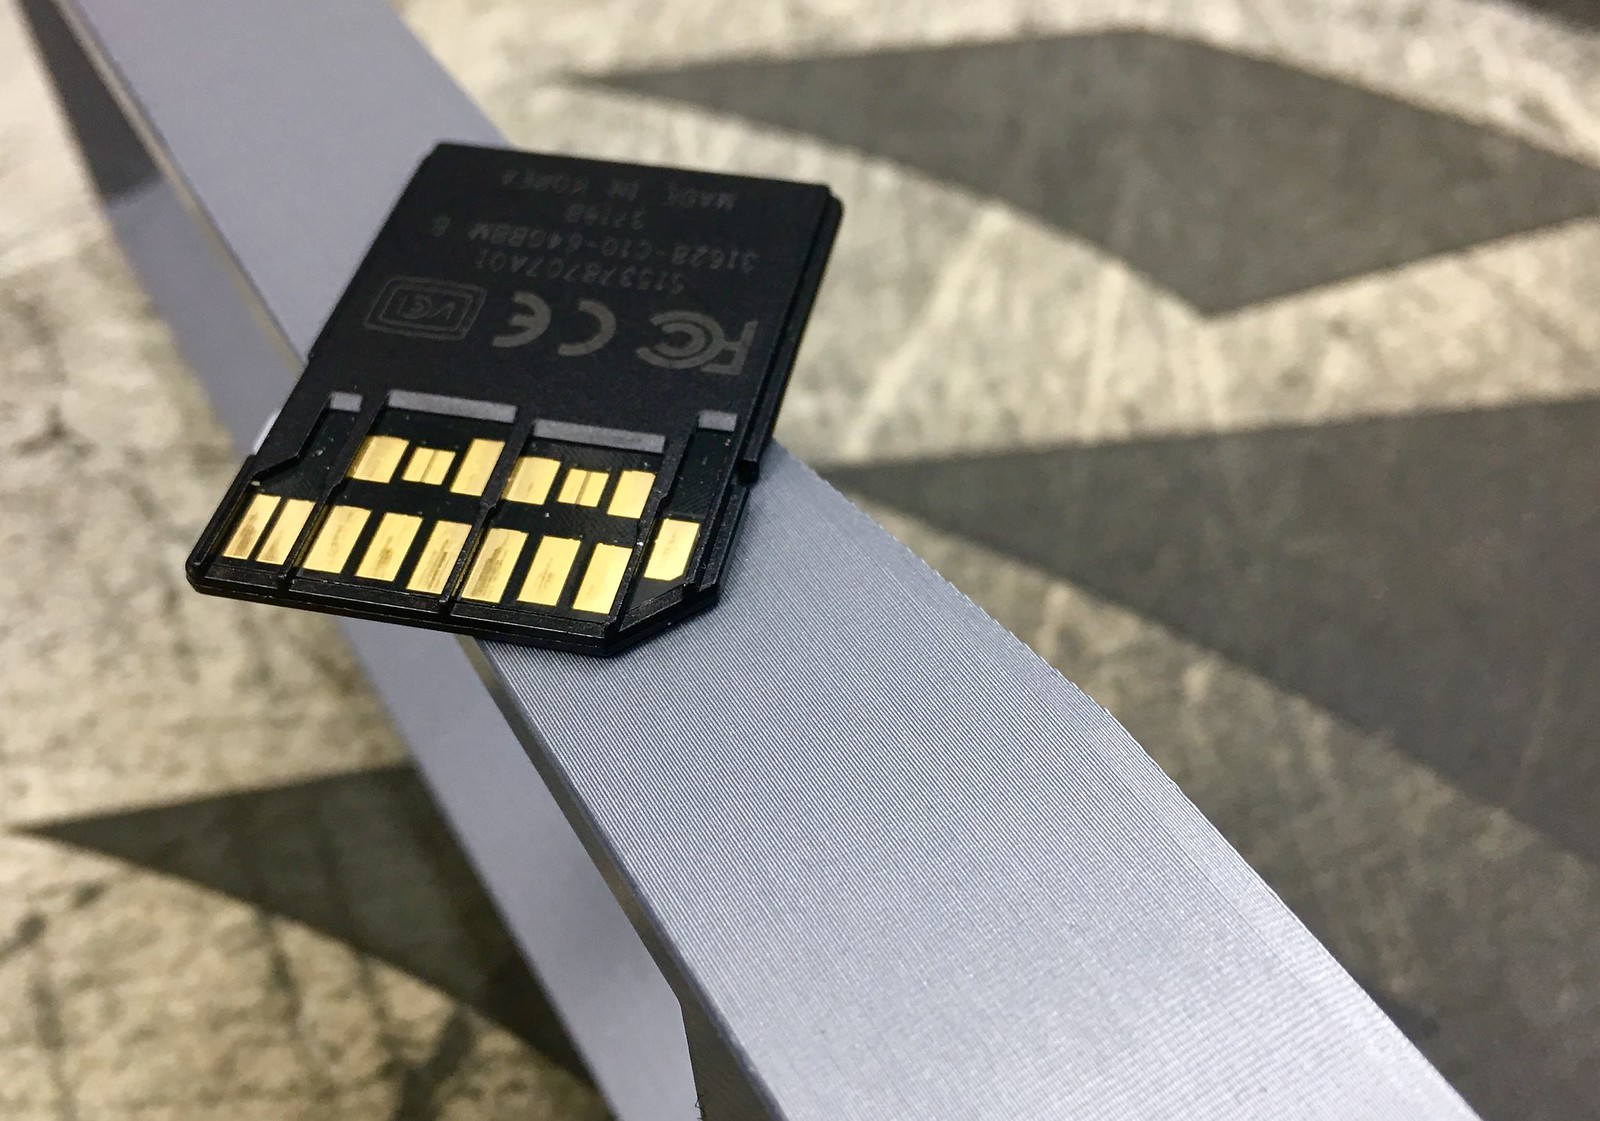
SDcard for scale reference
Re: Full Assembly video's with manual timestamps
Looks great. What kind of tweaking are you doing?
Re: Full Assembly video's with manual timestamps
Most of the final tweaking is done with extrusion multiplier, number of external layers, speeds, extra extrusion after retraction and other ooze control parameters. In most cases in steps of 0.02mm or 1% (as that is the minimum) depending on the parameter.
Things I've noticed that have the biggest impact on the quality:
- Filament spool on the frame (has to come off)
- Speeds (too high by default)
- Extrusion (too high by default)
Re: Full Assembly video's with manual timestamps
Thanks for sharing this info. I already have an external spool holder so will play with the other parameters.
Gaston
Re: Full Assembly video's with manual timestamps
My pleasure!
To be a bit more specific on the settings, these are the ones I used. For anyone that wants to experiment with this, please do understand that these work on my printer with my filament. This does not mean it will work without modifications for you!
;   extruderDiameter,0.4

;   extruderWidth,0.42

;   extrusionMultiplier,0.96
; extruderUseRetract,1
; extruderRetractionDistance,1.2
; extruderExtraRestartDistance,0.1
; extruderRetractionZLift,0.8
; extruderRetractionSpeed,2400
; extruderCoastingDistance,0.05
; extruderWipeDistance,0.3
; layerHeight,0.15
; topSolidLayers,3
; bottomSolidLayers,2
; perimeterOutlines,1
; firstLayerHeightPercentage,105
; firstLayerWidthPercentage,90
; firstLayerUnderspeed,0.55
; skirtOutlines,4
; skirtOffset,0.28
; internalInfillPattern,Triangular
; externalInfillPattern,Rectilinear
; infillPercentage,12
; outlineOverlapPercentage,38
; infillExtrusionWidthPercentage,103
; minInfillLength,5.2
; temperatureName,Primary Extruder,Heated Bed
; temperatureSetpointTemperatures,200,60
; fanLayers,1,3,4
; fanSpeeds,0,40,80
; defaultSpeed,2000
; outlineUnderspeed,0.65
; solidInfillUnderspeed,0.75
; supportUnderspeed,0.8
; rapidXYspeed,4000
; rapidZspeed,1000
; filamentDiameter,1.75
; onlyRetractWhenCrossingOutline,1
; retractBetweenLayers,1
; useRetractionMinTravel,0
; retractionMinTravel,3
; retractWhileWiping,0
; onlyWipeOutlines,1
; avoidCrossingOutline,1
; maxMovementDetourFactor,10
(This is the first part of the gcode generated by S3D. I filtered out all the settings that where not tuned or where turned off)
And on the printer itself, I'm running normal mode. The printer stands on its own rubber feet, on a thick board on a shelf. I've got 3 orings between the board an shelf as an extra layer of isolation. Besides that (like previously mentioned) I do not have the filament spool on the printer itself but on a shelf above the printer.
If you guys are interested, I can make a step by step video on how I approach the tuning of a 3D printer. If you are interested, let me know what kind of video you prefer;
- Step by step Directive
(for example; "Step 1 measure the filament diameter and insert the value in the slicing program" )
- Step by step Instructional
(for example; "step 1, It is important to measure the diameter of your filament because this is the primary value used to determine the required flow of plastic. Each time you switch to another spool it's a good habit to check if this value needs to be adjusted"
Re: Full Assembly video's with manual timestamps
Great videos, I will be referring to them quite often during my build which will be this week. 2 things I noticed, a screwdriver is not a hammer, which was mentioned, but I guess we all do that from time to time. The thing that bugged me the most about every video was the Clock! When did 4 in Roman numerals become IIII instead of IV? 😆
Re: Full Assembly video's with manual timestamps
Thanks for the kind words! I'ts nice to see that my video's can help a lot of people. I may add a notification to the video's soon with a reminder that this is a printer from the first few batches and that if you recieve one today it may have a couple components changed.
On the clock, I know and noticed it as well. There are a couple theories...
Once upon a time, when Roman numerals were used by the actual Roman Empire, the name of the Romans' supreme deity, Jupiter, was spelled as IVPPITER in Latin. Hesitant to put part of the god's name on a sundial or in accounting books, IIII became the preferred representation of four. Of course, IVPPITER wasn't being worshipped much by the time clocks and watches replaced sundials, but clockmakers may have stuck with IIII just for the sake of tradition.
In another blow to the Jupiter theory, subtractive notation—where IV, instead of IIII, represents four—didn't become the standard until well after the fall of the Western Roman Empire (and the numerals we use now are an even more modern set). It's likely, then, that IIII was used on sundials (and everywhere else) simply because that was the proper numeral to use at the time, and not for fear of divine retribution.
Once subtractive notation came onto the scene and a choice was available, to V or not to V became a question every clockmaker had to answer for themselves. Some adopted the newfangled IV because it was the new standard, but others hung on to the traditional IIII.
Source: http://mentalfloss.com/article/24578/why-do-some-clocks-use-roman-numeral-iiii
Re: Full Assembly video's with manual timestamps
Ey guys! So I've got the printer for roughly 11 months now and tought I'd share my experience with the printer. There is quite a lot to talk about and I don't think this is the best place to discuss everything but a short update shouldn't be a problem.
In short: I really really like this printer! It hasn't let me down in the last 11 months. The timer past the 100 days of printing time last week and have yet to fail my first print (fail because of the printer that is, there are a couple in the past year that I used to experiment on and decided to stop the print halfway because I wasn't happy with the finish). It is really nice that I can just count on the printer to make parts and make them to spec and with a nice surface finish!
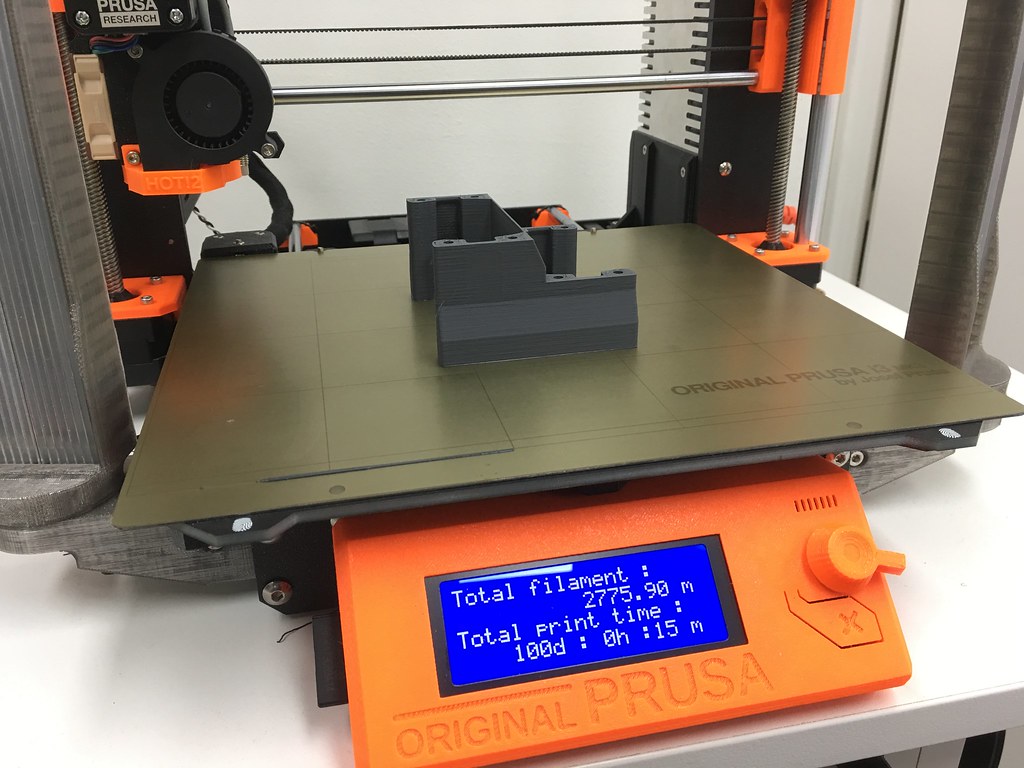
Picture from last week:
This is the nozzle after those 2400 hours of printing:
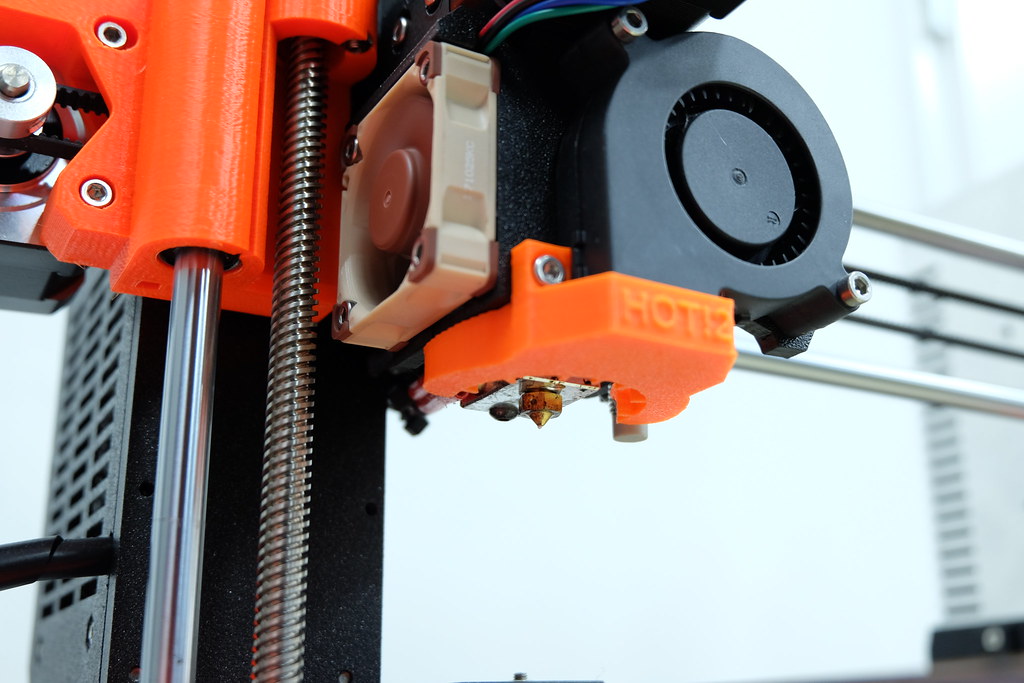
Kept it pretty clean!
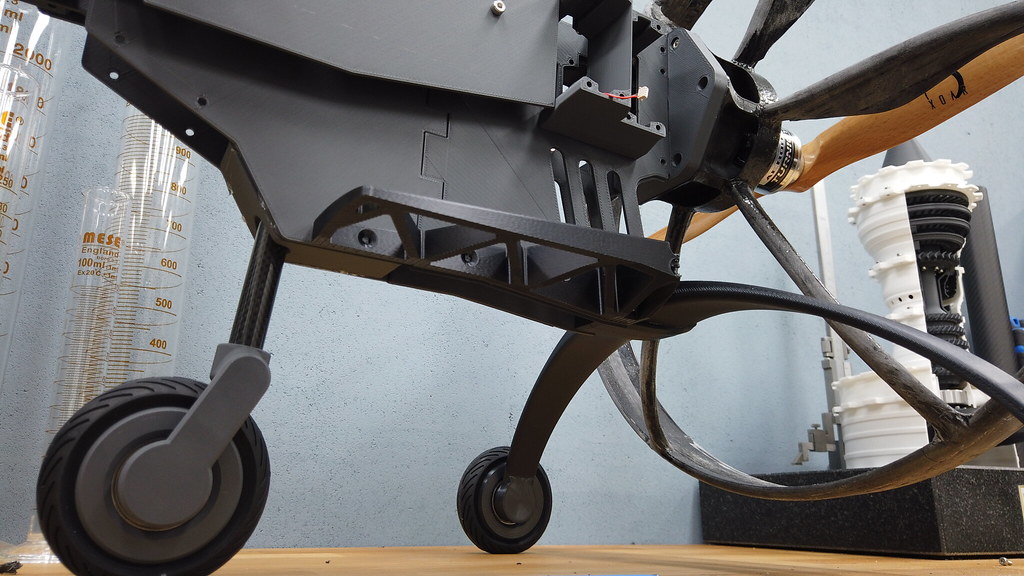
One of the projects:


And another project that is based on printed parts:
A print I made yesterday (rough quick setting)

Conclusion: best purchase for my workshop by far!
Re: Full Assembly video's with manual timestamps
Are you guys interested in a more detailed description or is this enough? And if so, let me know what subjects
Re: Full Assembly video's with manual timestamps
Hi,
First, thank you very much for sharing your videos and tips about the MK3.
I would be interested to know how you adjust the settings. I have also noticed that the spool holder and the initial speed had a negative impact on print quality. But I have never adjust the extrusion multiplier and the number of perimeters.
So if you could inform us, step by step, how you adjust the settings when you receive a new filament, that would be so great and helpful!!
I think you use Simplify3D but the process should not be so different with Slic3r.
I use only PLA in general cause my interest is only in print quality and finishing, I don't really care about time. I have also observed that the best result, on my printer, is on 0,15mm layer heights. In 0,1mm the result is bad, with stringing and others bad visual effects.
Thank you!!
Re: Full Assembly video's with manual timestamps
Sure I can tell more about it, but explaining the entire process of finetuning is a bit too much for a written post. I can make a video about it though.
The main settings I use at the moment are:
0.2mm layer
205C extruder for PLA and 215 for PETG
feed 3000mm/min
Perimeters 60%
Solid infill 60%
First layer 30%
Triangular infill @ +- 20%
Extrusion multiplier 0.96
Width 0.48 (auto)
Retract 1.5mm
Z-lift 0.8mm
Wipe 0.1mm
Only retract when crossing open spaces
Force retract between layers
Only wipe outer perimeter
- I clean the bed before each print (isopropanol and new oval cotton pad each time)
- I always pre-heat the printer and wait for the oozing to stop, take away the extruded plastic with tweezers and after that I start the print itself.
- once every other spool of filament I lightly scrub the bed with a fine scotchbrite pad
Other settings vary quite a bit depending on the model I print.
I am still using the first nozzle, first printbed with the original stickers. The backside of the bed has not yet been used, so in other words, 2500 hours of prints are printed on a single kapton sticker (it is kapton right?)
Re: Full Assembly video's with manual timestamps
Thank you!!
Hum... I can't find these parameters on Slic3r... I guess they come from Simplify3d.
Maybe I should switch to this software to increase my print quality.
But anyway, your help is highly appreciated!
I also have never change the nozzle and the bed. They are still like new!
Re: Full Assembly video's with manual timestamps
Yeah we are really spoiled with these printbeds. I am no longer interested in printers without. Or at least I will check if I can use this bed on that printer.