Z level not consistent across plate
My MK3 does a very good job printing on about 80-90% of the build plate. Very consistent, nice first layers etc. But the last part of the build plate, which happens to be on the extreme right side of the plate, top and bottom, it seems like the distance to the extruder is minutely out of alignment making prints either not stick or surfaces get printed very ugly. As you can see from the picture of a print that's attached.
"First layer calibration" works fine. It covers the part of the plate that works just fine.
Can I manually make small adjustments based on x,y locations? Ie. not just X and not just Y but when X,Y covers a specific area on the plate? Obviously the Z axis needs to be slightly adjusted only when in a few areas on the plate. I'm not sure how to do that.
Re: Z level not consistent across plate
Normal people believe that if it is not broke, do not fix it. Engineers believe that if it is not broke, it does not have enough features yet.
Re: Z level not consistent across plate
https://shop.prusa3d.com/forum/how-do-i-print-this-printing-help--f63/bed-leveling-t26908.html#p124507
So, no options, no capabilities? I'm pretty sure there are options, but that link doesn't outline any. I know how to test the alignment - I'm looking for ways to make adjustments or ensure the calibration makes the proper alignments through-out the whole surface of the bed.
Re: Z level not consistent across plate
Probably not a Z-issue.
This looks more like a problem with bridging in that portion of the print bed. Temperature and airflow conditions DO vary depending on where printing is occurring on the bed. When you get near the edges, or worse near the vertical printer bracket, things get disturbed. Bridging is very sensitive to cooling and ambient temperature changes.
You can prove to yourself by printing four, duplicate,, small objects that include bridging. Position one in each corner of the bed. You'll see that the results differ depending on bed location (even WITH an enclosure).
You're need to experiment with adjusting filament cooling and nozzle temperature to find one that will work with that portion of the print bed as well as the majority of the bed. Slowing down bridge velocity may also help.
Another solution is to rotate or move the print job away from the problem areas.
One other possible thing is that portion of the print warping off the print bed, but you don't mention any warping or lifting of the print.
However, from the shadow at upper left of your picture, I may be seeing some warping. If that is the case, you have an adhesion/warping issue that is making the nozzle collide as the print warps upwards.
BTW, in print settings, drop your "top solid infill" speed to get a better top surface finish.
Re: Z level not consistent across plate
Can you take a picture of the first layer as this will show us what your bed levelling and live-z is like, because if these are not correct, you will very likely get a problem with your finished print.
It may be worth cutting everything above 0.2mm in Slic3r and just print the first layer, then take a picture with it on the bed, peel the first layer off and take a picture with something light behind so that any gaps show (If you have any that is), but I suspect you may have pillowing on the top left as seen in your print.
If your first layer appears good, then bed adhesion most likely suspect.
Looks like PETG, did you put a z offset in?, I find I need 0.025 to get a good first layer with PETG.
Normal people believe that if it is not broke, do not fix it. Engineers believe that if it is not broke, it does not have enough features yet.
Re: Z level not consistent across plate
A bit of an update - I don't think it's a Z-calibration issue anymore. I've printed the same component a few times, and I get slightly different areas of issues. Closer inspection indicates that it's not adhering to the bed in the areas of bad printing - basically there's the shrinking of the print, it lifts slightly from the plate which puts the Z out of whack with the next printing. The very rough surface is because the surface is too close to the print head.
Another observation is the first layer being very smooth and not showing issues with the calibration.
I've measured temperatures of the bed in the past, and there's about 10 degrees differences from the center to the outer edges - at times more in particular during the heating up phase. I'm printing on "Powder Coated PEI" so I'm not so keen on using glue or similar to create adhesion, but I may have to when the surface of the object I'm printing fills most of the plate.
Let me know of the above makes sense or if more information is needed.
Thanks for your replies.
Re: Z level not consistent across plate
With PETG, i#m starting my first layer bed temperature at 90 and extrusion temp 10 deg higher than rest of the layers, then reducing bed to 85 for the rest of the print.
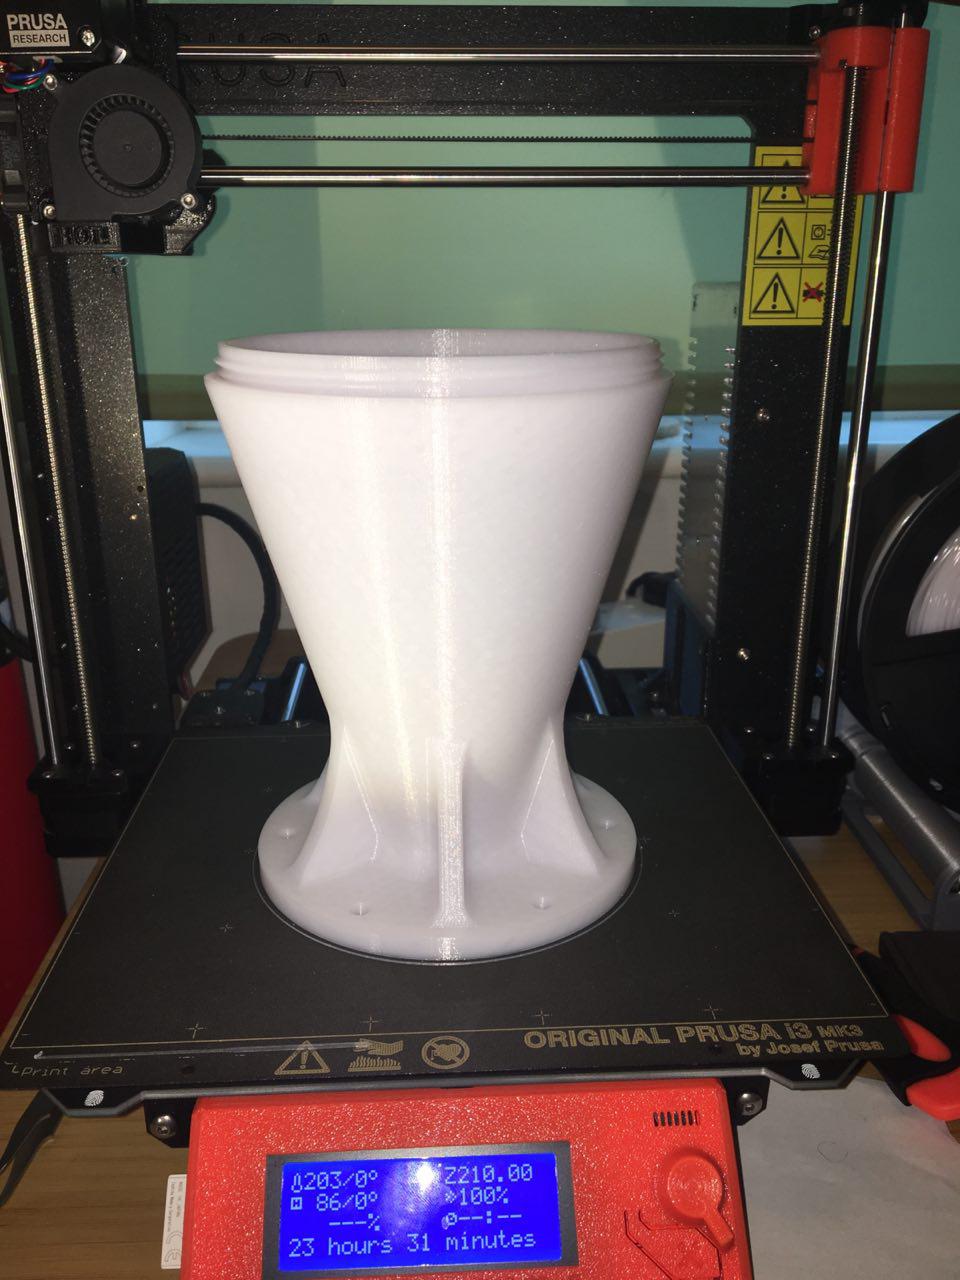
I printed this the other day and had no issues with bed adhesion. Straight onto textured PEI surface printing for 24 Hrs. (OK 23Hrs and 31 mins) 😀
Normal people believe that if it is not broke, do not fix it. Engineers believe that if it is not broke, it does not have enough features yet.
Re: Z level not consistent across plate
Sorry, replying to forums whilst at work is never a good thing, I got those temperatures wrong, it should be 10 deg lower than the rest of the print for the first layer and bed starting at 85 and going up to 90 for the rest of the print, basically the opposite of what I said. 😳
Normal people believe that if it is not broke, do not fix it. Engineers believe that if it is not broke, it does not have enough features yet.