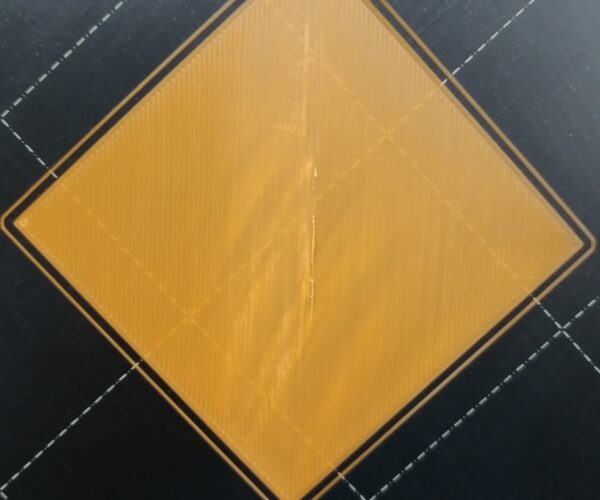
What is this first layer problem?
Hi,
I have about 100 hours of experience with my MK3s, and now I'm suffering from a problem I can't get my hands around. I have fully reset and recalibrated the printer, firmware is curent, standard brass 0,4 nozzle, PrusaSlicer is updated and reset; smooth sheet is absolutely clean, first layer calibration looks good, and yet I get ruined first layers. The orange is Prusament PETG with 245/85 degrees celsius (range per Prusa is 240-260 nozzle temp and 70-90 bed temp), I have similar results with black 3DJake PETG @ 235/85. The orange print got obviously better from left to right (see pic) so this is totally odd. any ideas? Thanks so much!
Chris
I try to give answers to the best of my ability, but I am not a 3D printing pro by any means, and anything you do you do at your own risk. BTW: I have no food for…
RE: What is this first layer problem?
You seem to have a few problems going on. You've got poor adhesion that is causing the 1st layer to stick up and snag the nozzle. This is going to sound like some contradictory advice, so be patient and try these steps...
- Your print surface is definitely contaminated. While PETG is very sticky compared to PLA, you do need to have some adhesion. If you look at the top-right of your print, you can see those raised areas where the PETG is lifting. It is true that you want a release agent for PETG (Windex, finger wipes, glue stick for high temps), but you want those applied to an otherwise-clean PEI surface for evenness. Try cleaning your PEI surface under the kitchen sink with some Dawn (or your local equivalent) dish soap, scrub it with a plain paper towel and try it with another. Avoid touching the PEI print area!
- Your Live-Z is high. The area a middle-right has fine gaps between your 1st layer extrusions. This will reduce 1st layer adhesion. Those should be even. Repeat your Live-Z calibration until those lines clean up. (Do it on a clean bed. Give it a spritz with Windex if using PETG, but PLA is easier for Live-Z calibration until you master it.)
If you have not already done so, try using Jeff Jordan's "Life Adjust" procedure for calibrating your Live-Z setting. It is much easier to use and understand than the on-board routine. It's much easier to make mid-print adjustments accurately with. In general, start high (less negative) and work lower (more negative) in large increments (e.g. 0.1mm) until the filament starts to stick on its own. When you've got your Live-Z setting adjusted properly, you should be able to gently rub the extruded lines on the PEI surface without dislodging them. Then start lowering (more negative) the level until there are no gaps between layers.
- Before printing PETG, clean the PEI print surface (to remove contaminants), then apply a release agent such as Windex (or your local equivalent) or a few light wipes of your fingers. Save the glue stick for exotics like high-temp filaments (e.g. PETG at 270C).
Work through those and you should get a good 1st layer on which to build the rest of your print.
In general, clean the smooth PEI surface with 91%+ alcohol between prints. Acetone very infrequently. Acetone will remove oxidation on an aged sheet, but can cause PEI to become brittle if over-used. Avoid touching the PEI print area at all costs. Follow this regimen and you should get a good clean surface on which to print.
Good luck with it!
and miscellaneous other tech projects
He is intelligent, but not experienced. His pattern indicates two dimensional thinking. -- Spock in Star Trek: The Wrath of Khan Unfortunately,…
RE: What is this first layer problem?
@bobstro
Thank you so very much. I knew about Jeff's alternative adjustment method but never got around to read the whole, extensive thread, which I now did. I knew about cleaning the sheet with Dawn (or Pril over here...), and had used 99,9 isopropanol between prints, but so far I had missed the vigorous scrubbing of the PEI sheet with a paper towel. I took my cordless mini delta-shaped sanding tool, placed a couple of paper towels beneath the sanding paper and went to work - great result.
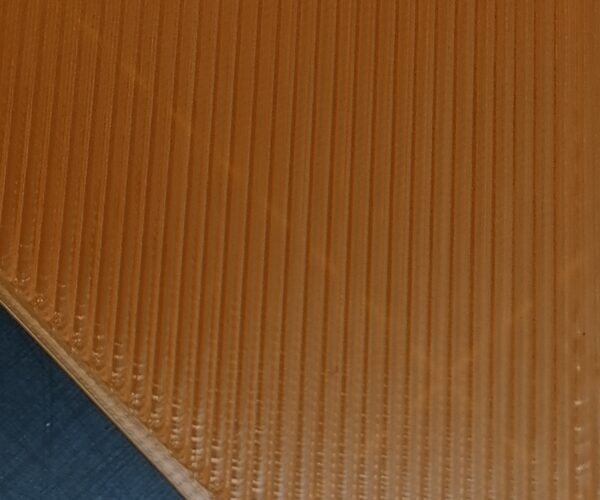
Next I checked the extruder calibration, which was 100steps/100mm perfectly. Then I pulled out some Prusament PLA and went to work with Jeff's standard square V4. I significantly lowered the nozzle and did four or five squares, finding the difference between individual strings and the nozzle digging into the print to be not more than -.300. The attached shows a square close to perfect, with a strip of "too low" near the center. The other shows the details of the level I ended up with as perfect. Adhesion on the sheet is perfect again.
Thanks for your good advice!
Cheers
I try to give answers to the best of my ability, but I am not a 3D printing pro by any means, and anything you do you do at your own risk. BTW: I have no food for…

