Shifted infill (and other)
Hello everyone !
I've just finished building two I3 MK3 (in parallel if it could help to understand the problem) and I started to print with the settings I used on my third I3 MK3 (2018 june batch). The settings are from S3D and it works perfectly well (0.4mm diameter nozzle, 0.48mm extrusion width, 1.00 extrusion multiplier, 0.2mm layer, 12000mm/min (200mm/s) top speed, PLA 215°C, and the rest is basic settings from S3D with prusa I3 MK3).
But with those two printers I have exactly the same problem :
- In the first layer, the infill is not joining the outerline on some points (printing too fast or not enough outline overlap)
- In the other layers, the plastic adhesion is very bad (printing too fast)
So ok, you'll tell me I print too fast... but those 3 printers are supposed to be identical and I can print at top speed with the first one, so why should I print at 80% of top speed with this one ?
For the second problem, I noticed a change in the cooling approach, is it possible that this new approach is not as good as the old one ? But still no idea for the first problem... It looks like there is a shift when applying the infill, that looks crazy to me.
I tests and read several things but I am getting a bit lost with all those info, if you could help that could be perfect ! Thanks a lot
Re: Shifted infill (and other)
I updated the title because I made some other tests.
This time I am printing at max 100mm/s to focus on one problem at a time. You can clearly see the infill which is shifted in relation to the outline.
With 100mm/s max speed, only the second printer has the "shifted infill" problem.
Re: Shifted infill (and other)
Slice the model with Slicer.
See if it's mechanical or software.
Re: Shifted infill (and other)
It is worse... The shifting is more present and other problems
Re: Shifted infill (and other)
It's odd that the problem occurs on the diagonal. It would mean there is a problem on both Y and X axis ?
Re: Shifted infill (and other)
Looks like belt tension issue... or not ? I am totally lost if some experienced guy exists here and could be of help...
Re: Shifted infill (and other)
Different infill percentage can easily be different Layer 1 Calibration. Measure L1 thickness from each printer. If they are not identical, then you can't expect the fill to be the same.
Shifting minute amounts sounds like improper belt tension.
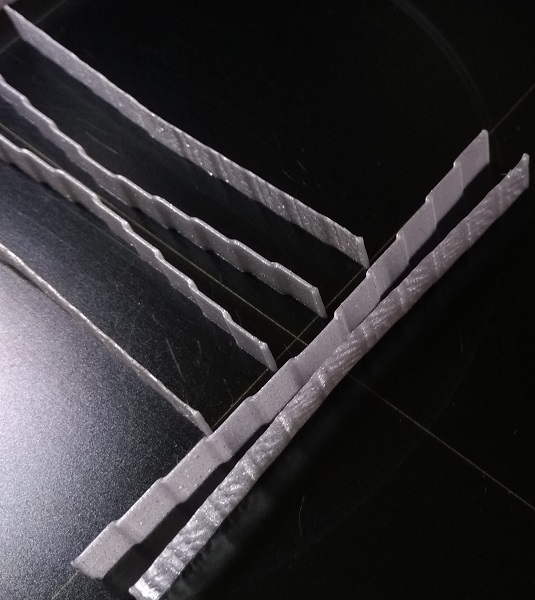
Try printing something like this: look for 0.20 mm radius peaks. Anything greater than 0.2 mm radius or squared off / clipped peaks indicates belt slop.

Re: Shifted infill (and other)
Thanks a lot ! I'll print that and I'll be back tomorrow with results =)
Re: Shifted infill (and other)
Seems ok for me... unfortunately...
Re: Shifted infill (and other)
This isn't a fool proof test, but should show cases of extreme belt looseness.
If you stack the prints, they should all be the same regardless of how they stack (in a perfect world). Just try to keep bed side down as you stack them. And you want to look at the bed side for differences.
But main thing is that the corners are very sharp, no roundness to them, or flatness. The diameter of the nozzle is what you are looking for, just a sharp perfect zig-zag.
Here's another version, you should be able to see steps in all of the parts where the printer changes direction...

Images show a hint of issues on the Y-Axis on my printer ... and a hint of something on the X-Axis. But they seem to be ringing related, belt snap, that sort of thing.
Re: Shifted infill (and other)
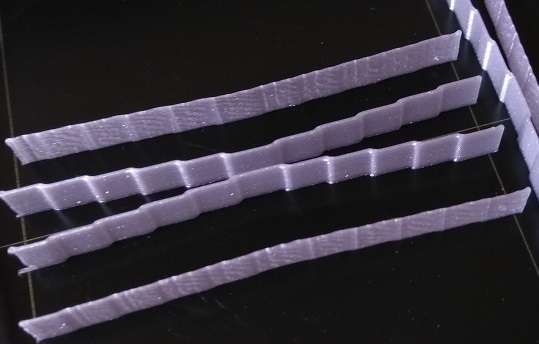
I made your test, I think it printed a little too fast but on the overall it ended up OK (sorry for the bad pic quality, the light is wonderful for working but very bad for taking pictures... I'll change the camera for the other tests).
I also made a test of mine, 5mm width 100mm long and 0.12mm height rectangles in 4 directions. Maybe it could help understanding the problem ?
Thanks a lot for your help Tim !!
Re: Shifted infill (and other)
Part 2
Re: Shifted infill (and other)
I never saw smg like that, it makes no sens...
Re: Shifted infill (and other)
I was so pissed about this problem that I disassembled/re-assembled the whole frame. Now it works but we'll never know why this problem occurred...
Sorry guys... And thanks for the help
Re: Shifted infill (and other)
Well, we know taking it all apart forced you to reconnect all of the cable connectors. You retensioned all the belts. And if you pulled the bearing from the rods you may have unjammed one of them.
Glad you got it working.
Re: Shifted infill (and other)
Yes... and I have done another thing after the mounting to be sure of the equal tension of the belt (see enclosed pic).

I unscrewed the toothed pulley and I made the carriage move all the way. Then I screwed back the pulley.
I think that this + what you said should be enough to cover the whole situation.
Thanks again for the time you took =)