Rough surface on print
Hello everyone,
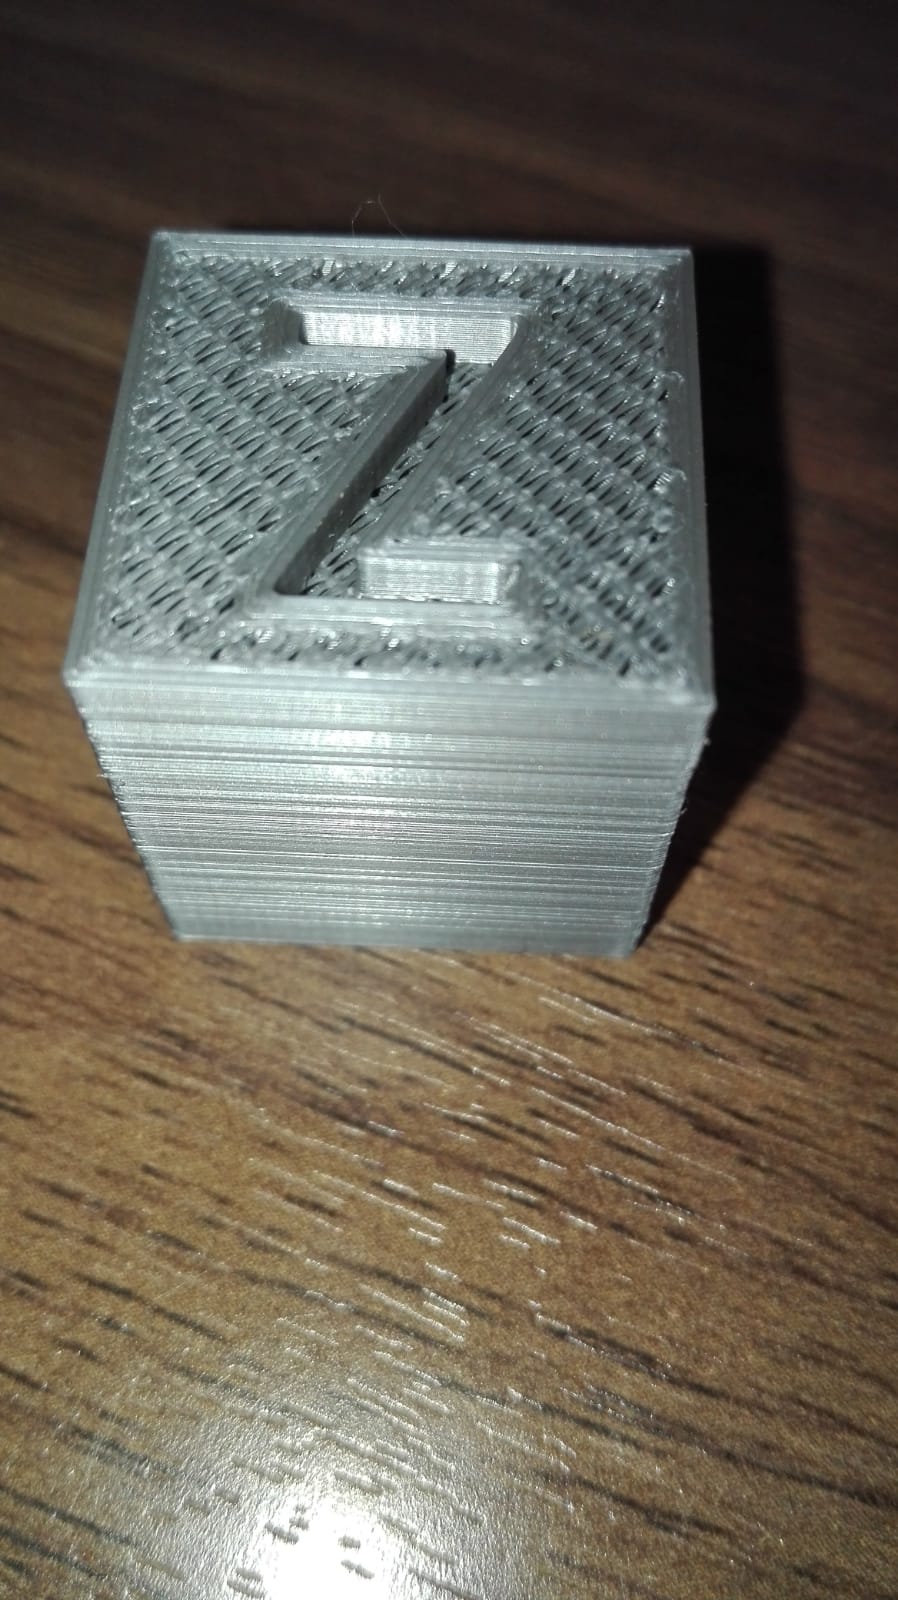
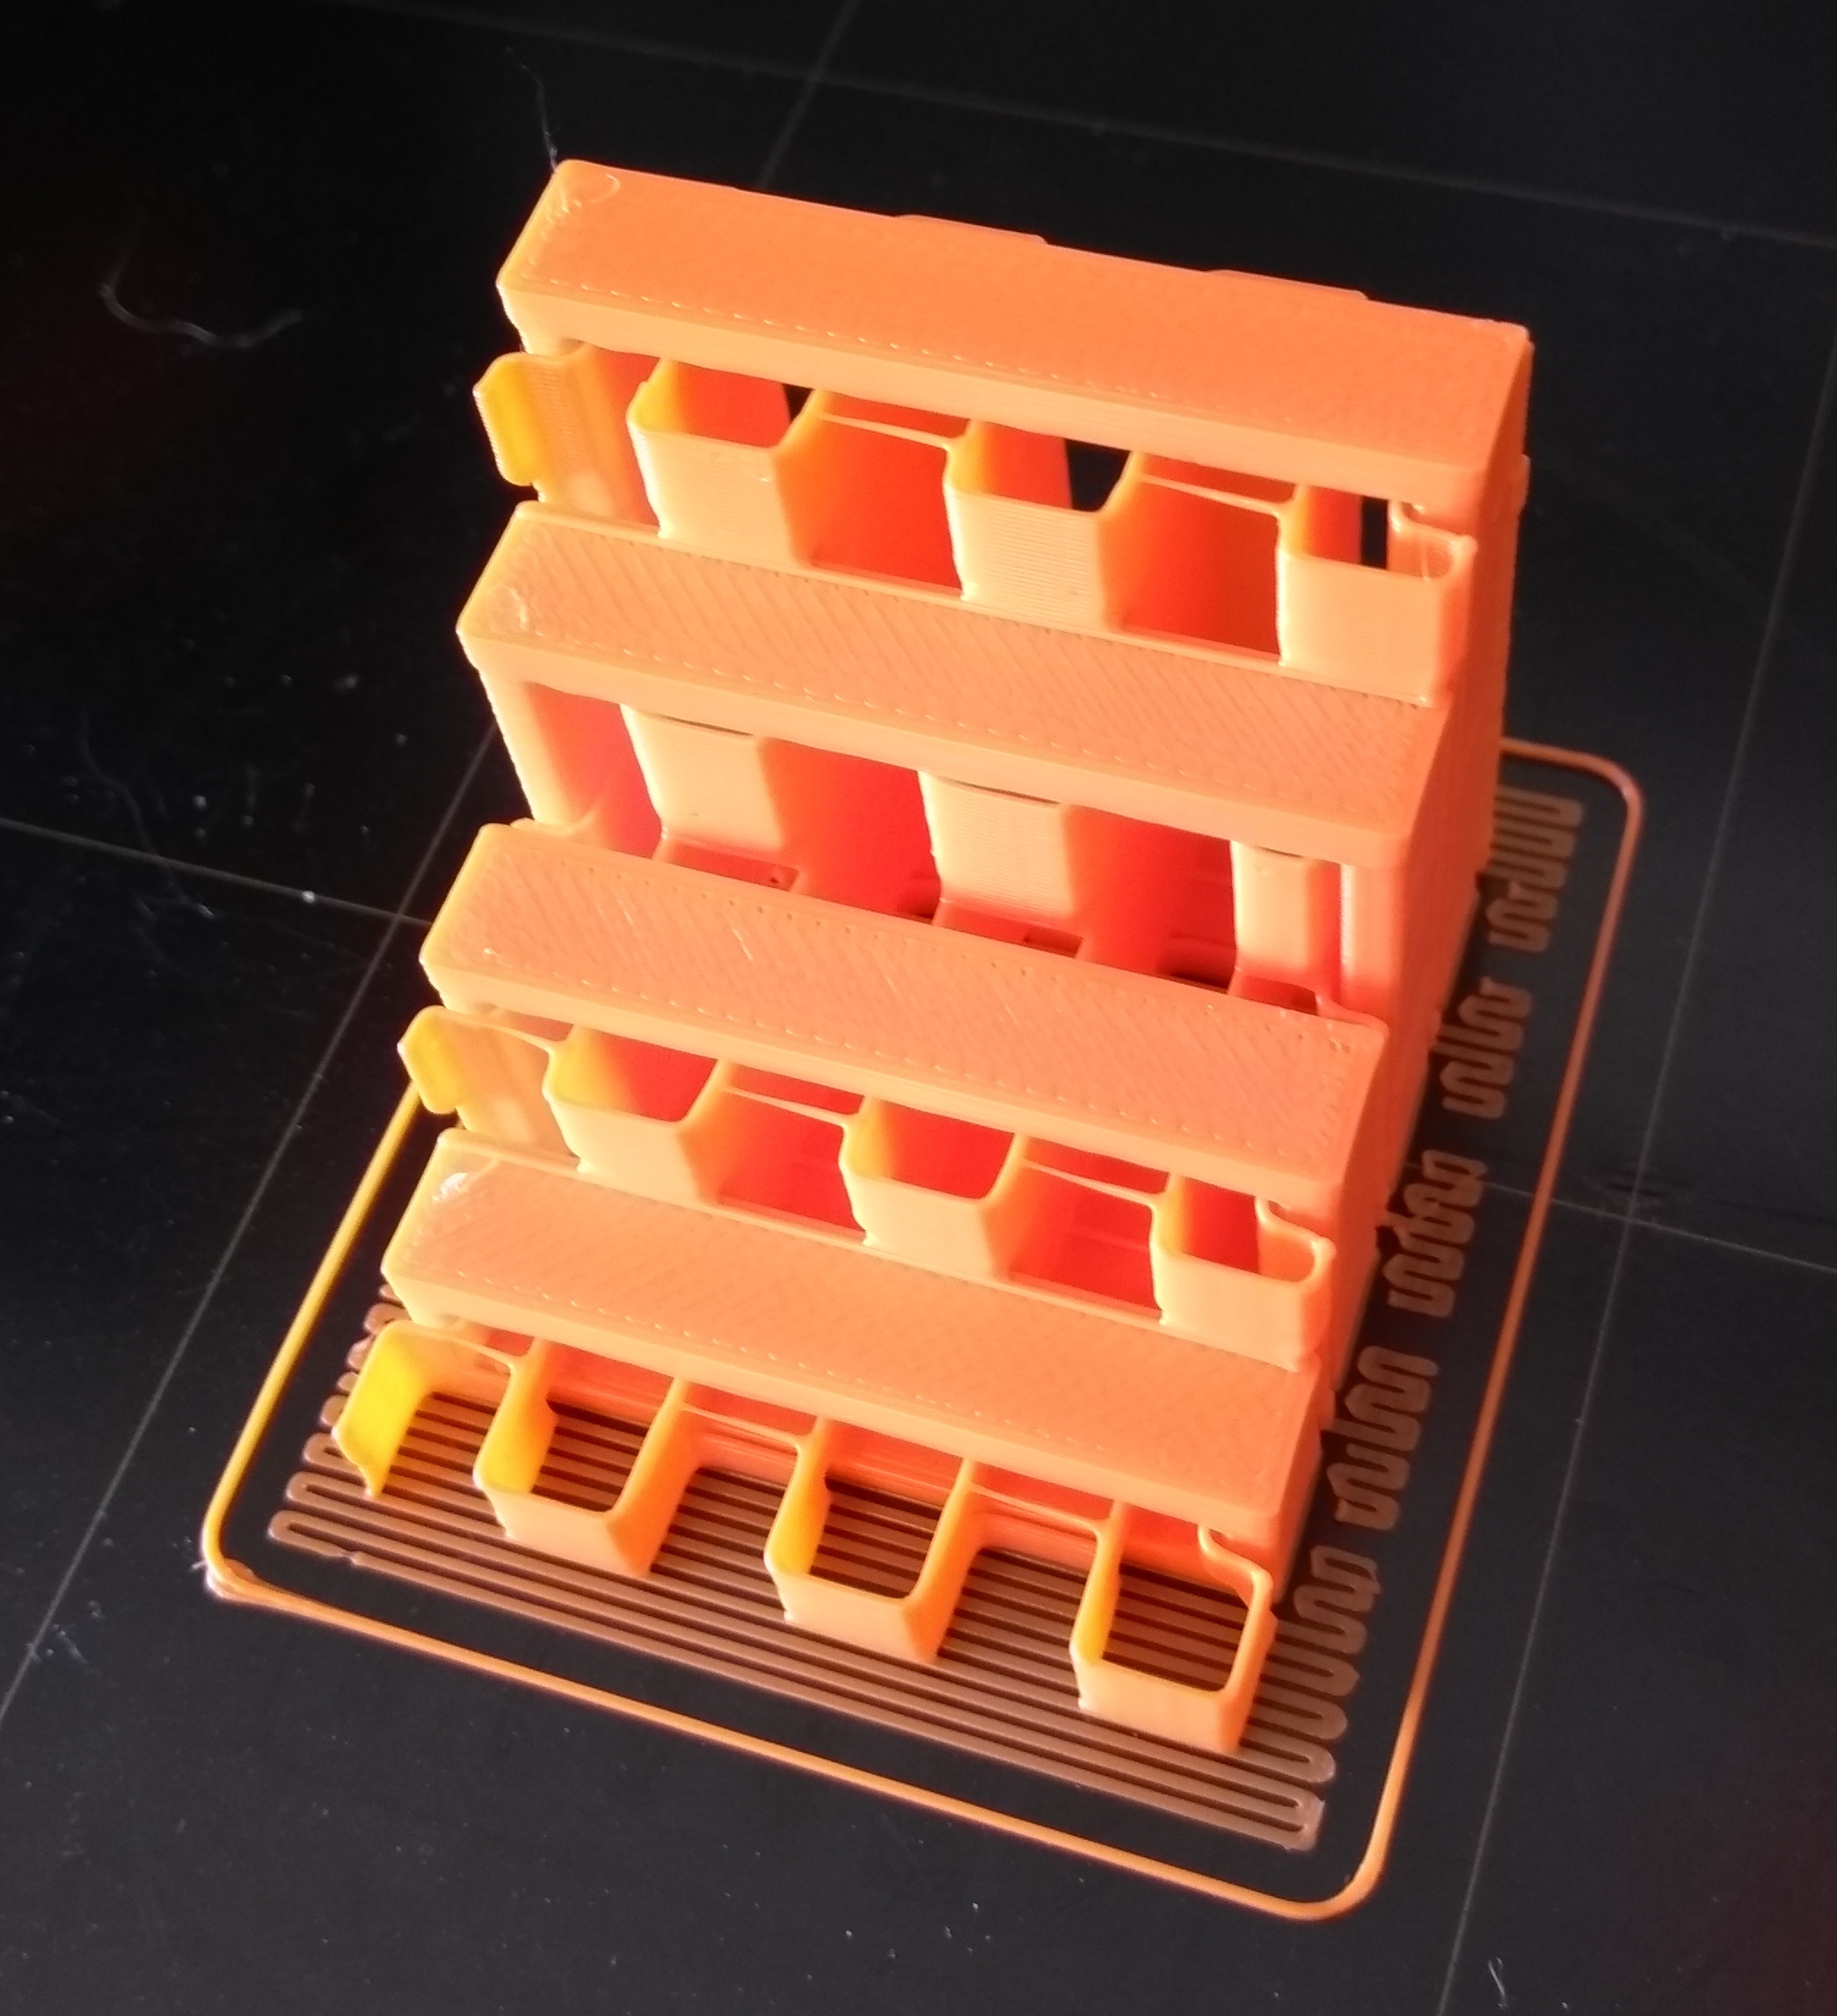
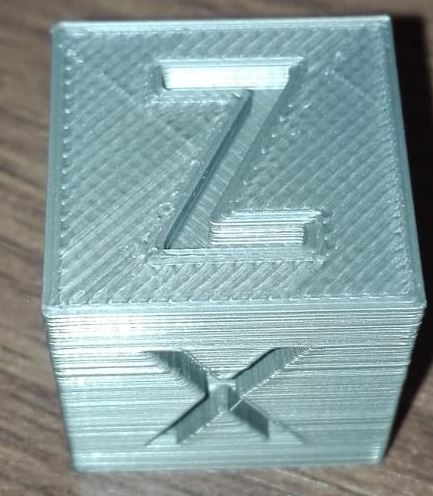
I recently got a MK3S, but my prints have a very rough surface on them. I printed a calibration cube to show the surface.
Does anyone know how to fix this issue?
RE: Rough surface on print
I can make a cube like that too.
It all depends on how you sliced it. So, how did you slice your cube?
RE: Rough surface on print
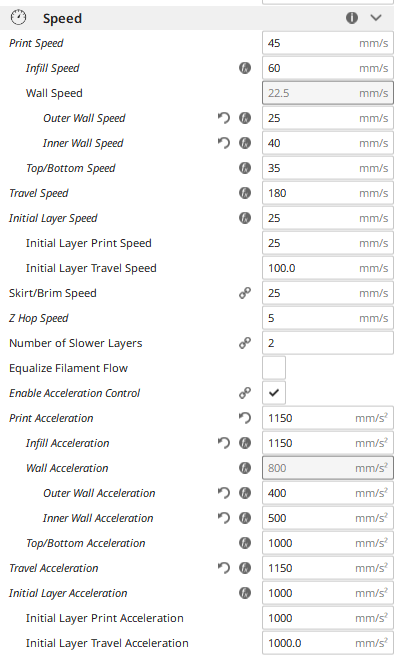
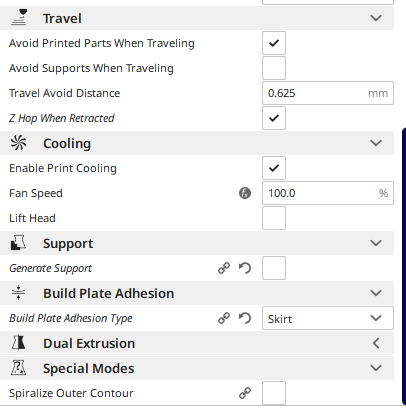
So here are my CURA Slicer settings
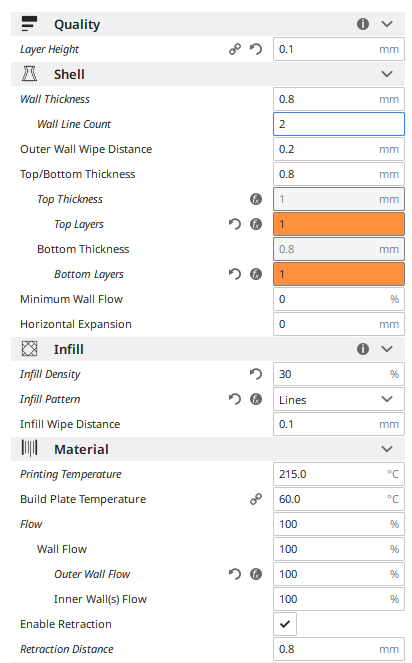
RE: Rough surface on print
Suggest you try slicing in P.Slicer, using default 0.15 settings. Just as a check it is or isn't a slice problem.
ps: you seem to have a misunderstanding of Cura settings, there are a couple of erroneous adjustments you've made.
RE: Rough surface on print
1 top and bottom layer is not enough. You want something close to a 1mm thick top and bottom for good finish. Try 5 each if printing 0.20mm layer heights.
RE: Rough surface on print
Pretty sure the OP thinks he wants 1 layer of 0.8 mm ... Cura is silly that way.
RE: Rough surface on print
After using PrusaSlicer at 0.15mm default settings there seems to be no difference in surface.
As for the 1 top and bottom I was messing around with some settings finding some good ones.
RE: Rough surface on print
What you've done is to tell the slicer you want only ONE top layer. A single top layer of 0.1 mm (layer height) looks exactly like what you are printing.
Top layers build up to make a top shell thickness. If you want 0.8 mm shell thickness, you need 8 top layers.
RE: Rough surface on print
Yeah I saw that after using default settings with PrusaSlicer that, the top was better but, the surface of the print didn't change it still looks the same as before.
RE: Rough surface on print
Why do you want to print a top surface with only one layer?
ps; and no - a default print with Prusa Slicer will NOT result in a cube like the one in the photo you posted.
RE: Rough surface on print
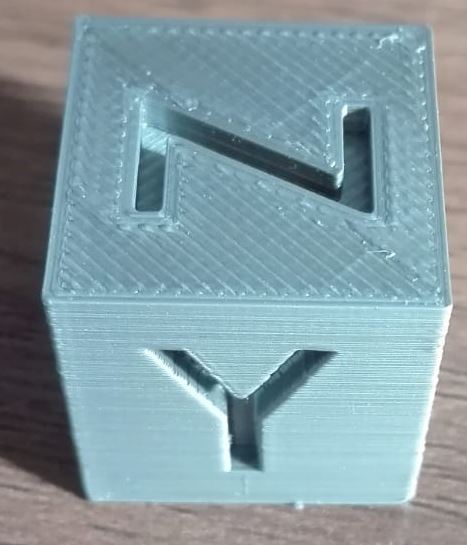
This is what top surfaces look like ...
RE: Rough surface on print
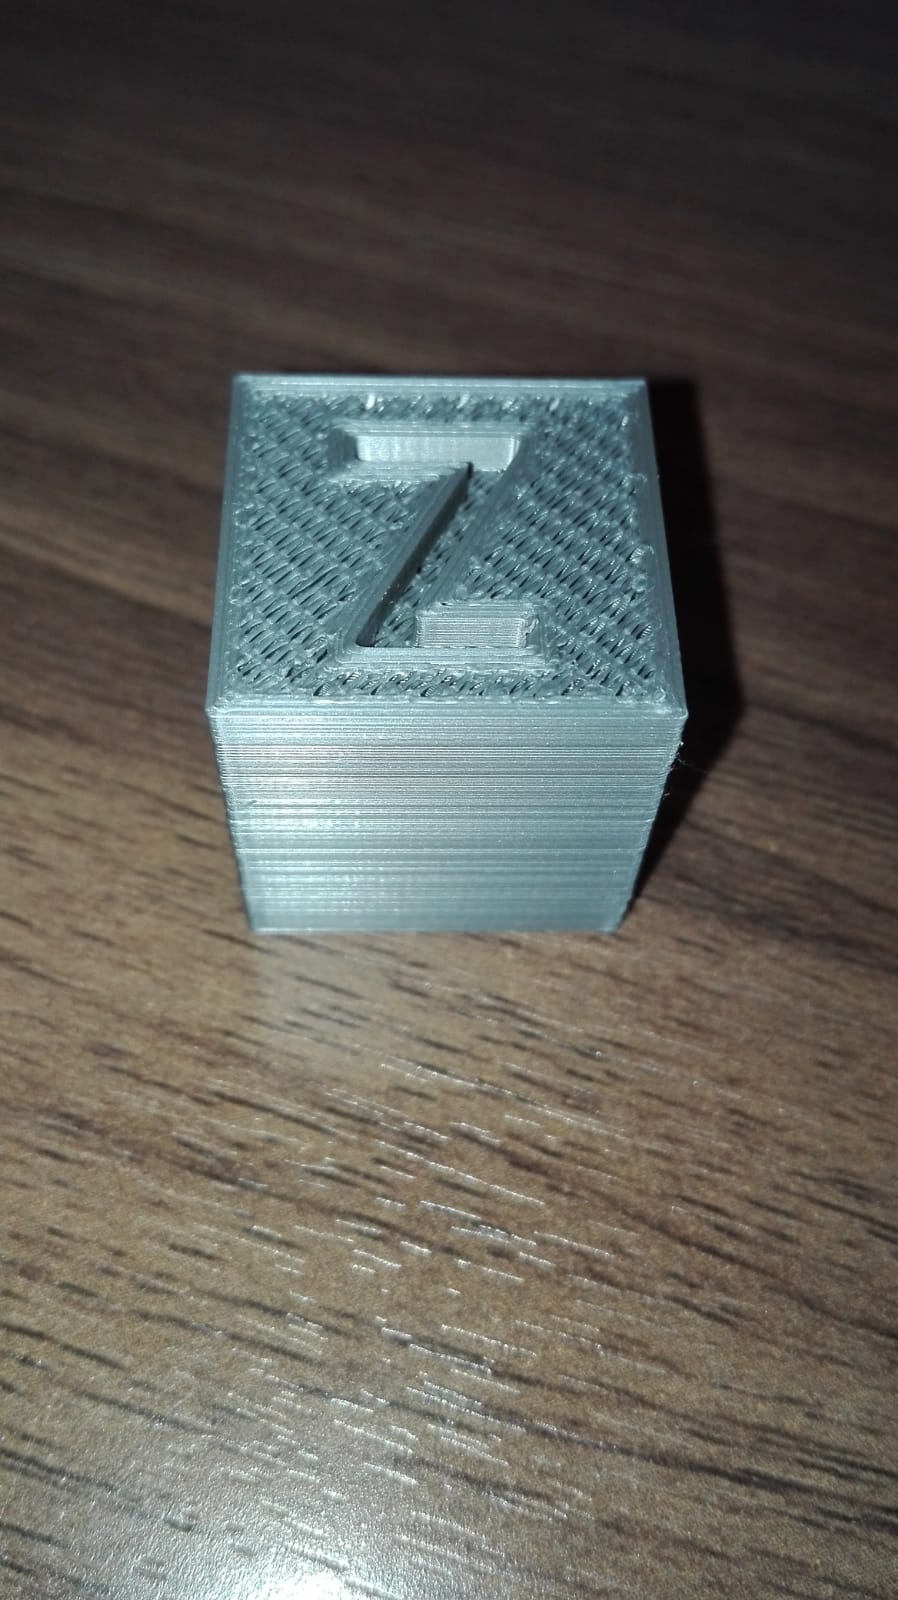
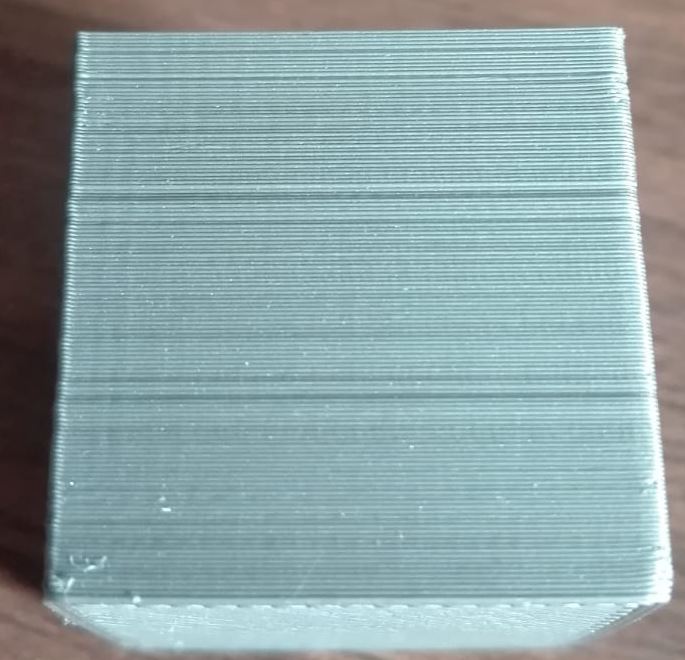
Right, here is the printed cube sliced with PrusaSlicer. There might have been some miscommunication as I wasn't talking about the top of the print but about the lines at the side of the cube. I added a picture at the end, from a side-view of the cube.
RE: Rough surface on print
FDM doesn't create perfection, but in your example it looks like your belts are loose. At 7 ounces of force, the lower belts should deflect 15/64" and 12/64" (X and Y) ... this sets tension to about 6 lbf, about maximum for the motor bearing radial loads. The variation can also be loose set screws on the belt drive gears. They need to be set in order, flat first, then the jam screw. But belts are easiest to adjust.
Ignore the LCD numbers - they show a derivative of motor drive current, and are quite meaningless for belt tension.
RE: Rough surface on print
After tightening the x-axis belt there does not seem to be any improvement in the surface of the print
RE: Rough surface on print
X is rarely the problem, Y is more common due to it's mass. And a simple blind tighten means nothing. Did you set the proper tension?
The primary mechanisms for uneven walls is belt tension and frame rigidity. If the rods are smooth, bearings rolling square, the walls must be smooth. Physics. Other conditions are when a user intentionally reduces extrusion size to below the nozzle diameter; oddities in the motor induction and driver characteristics; and resonances in the frame (that rigidity thing). Search VFA for more info on wall artifacts-- but be aware artifacts the other threads discuss are usually deterministic, the wall noise you are concerned with isn't.
That said, no FDM printer is perfectly smooth. Perhaps you are at your printers physical limits.
ps: Was the X surface facing you when the cube was printed? If so, then the X surface quality is set by the Y accuracy/stability.
RE: Rough surface on print
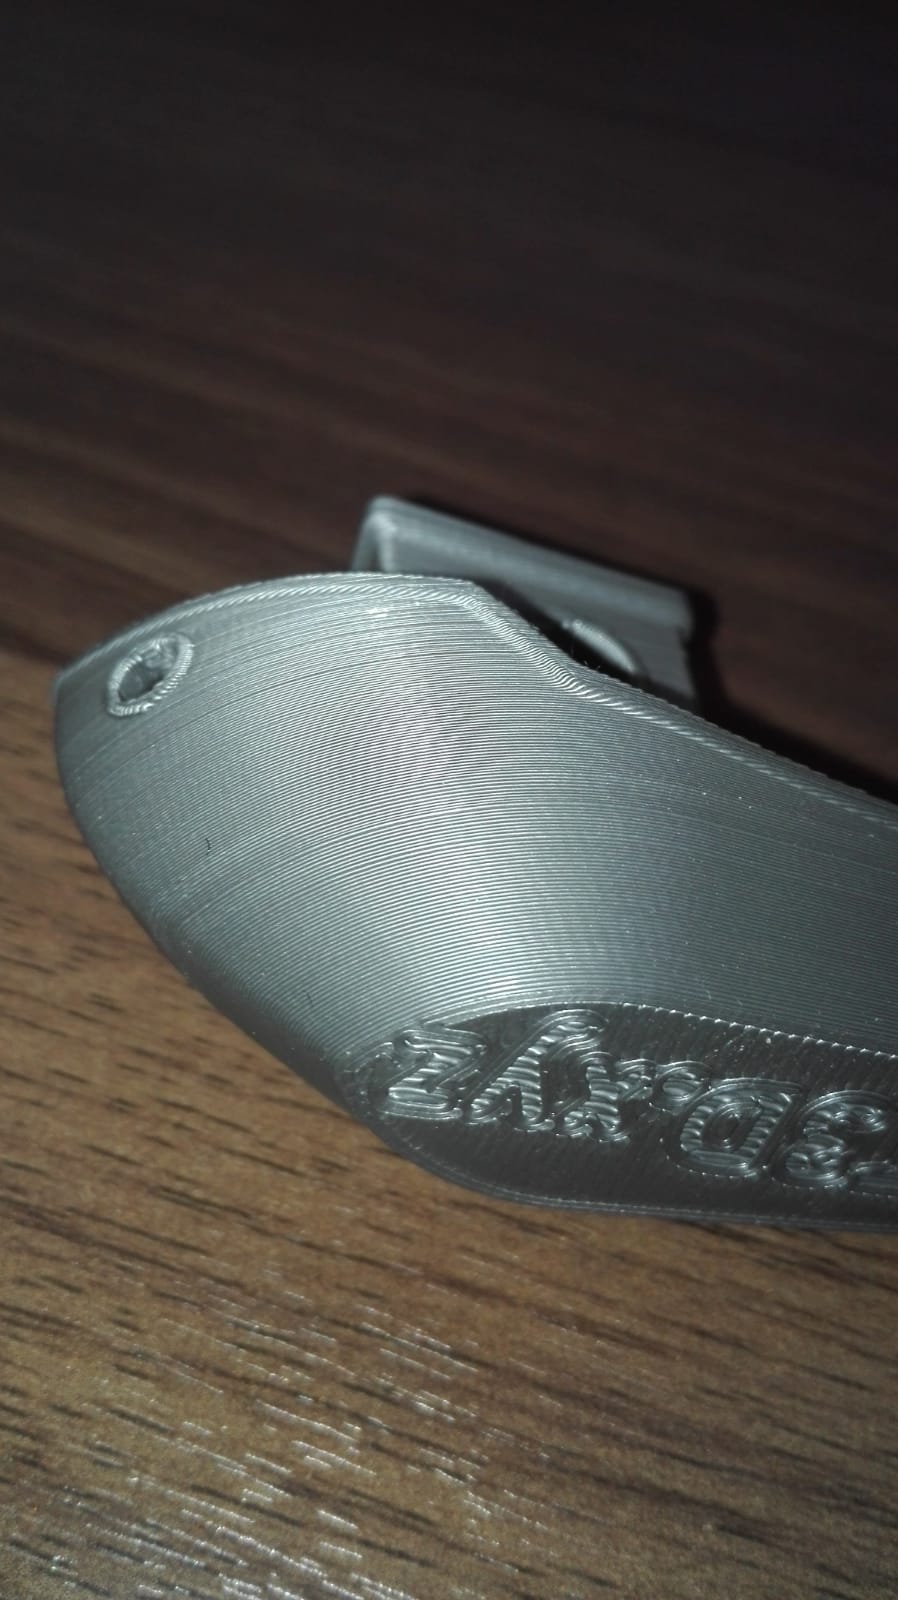
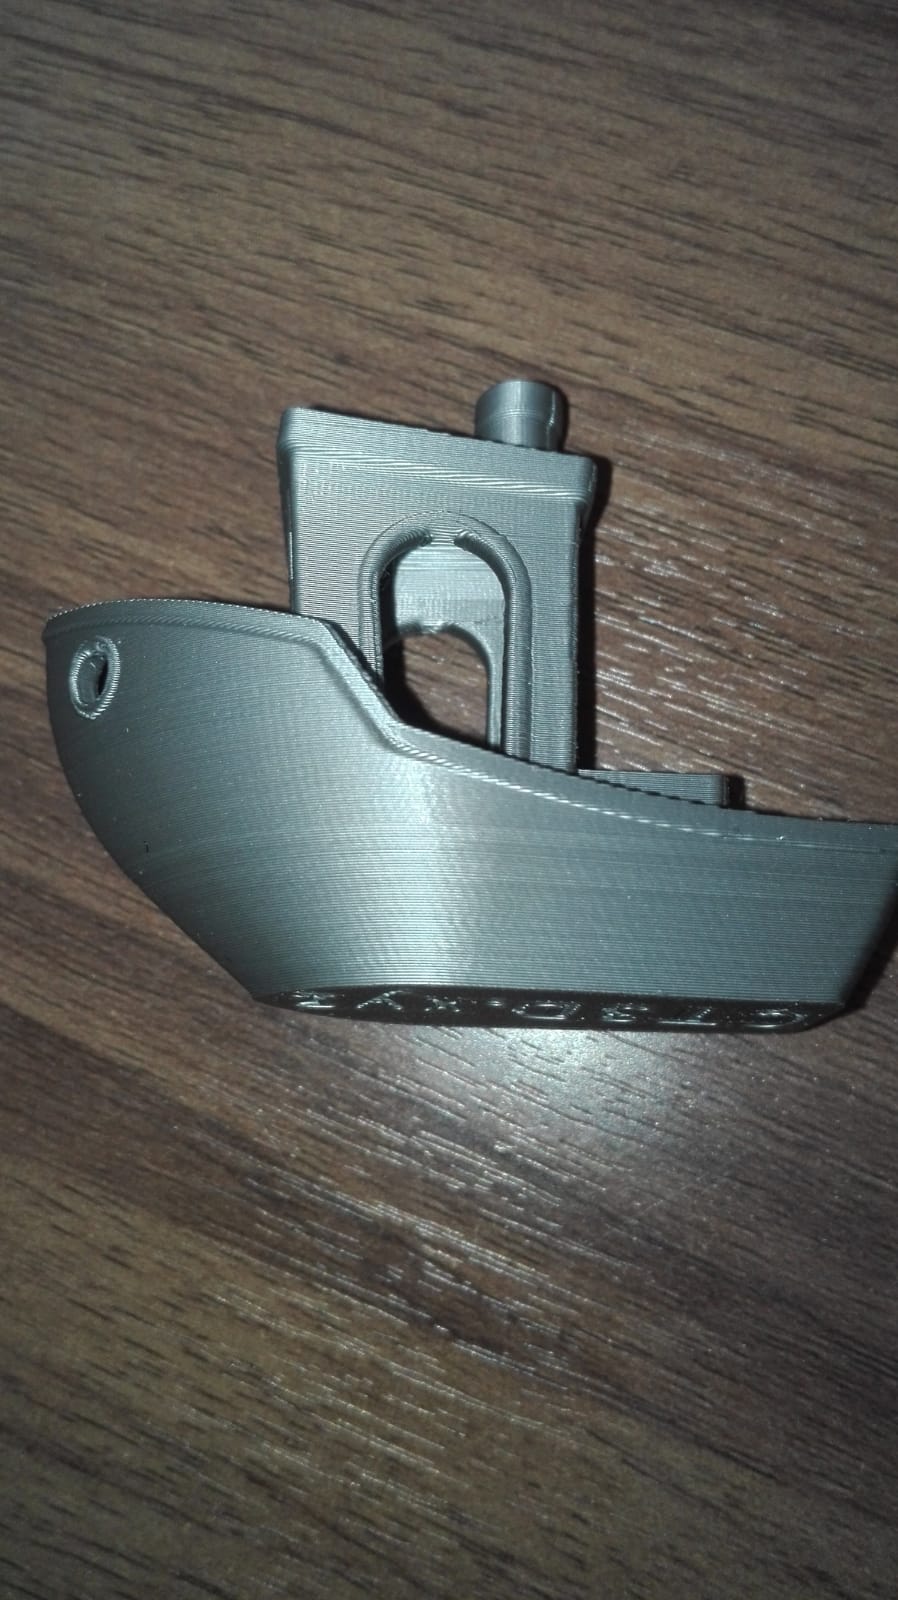
Right, after tightening the y-axis I printed another cube and a benchy and they look better than before.
But, they still have a bit of a rough texture. I will try printing it with lower speed and see if the rough texture will get even more reduced. Perhaps as said before this might be the limit of the printer.

RE: Rough surface on print
Right, I seem to have mostly fixed this issue.
The cause seemed to probably have been that the hotend was too loose in the extruder.
When the printer was printing it would have moved a bit causing it to give this surface.
I fixed it by opening the extruder and putting the hotend in better and when putting it back together i was holding the hotend so it gets in tighter.
After doing this the quality has improved alot.
ps: if the explanation wasn't clear enough by how to fix it just tell me and I will try to explain better.