Replaced heatbed thermistor now having bed adhesion problems.
So last week the cable of my heatbed thermistor failed thus I've had to replace the thermistor, I've removed the heatbed and placed the new thermistor as described here https://help.prusa3d.com/en/guide/how-to-replace-a-heatbed-thermistor-mk3s-mk3s-mk2-5s-mk2s_19272.
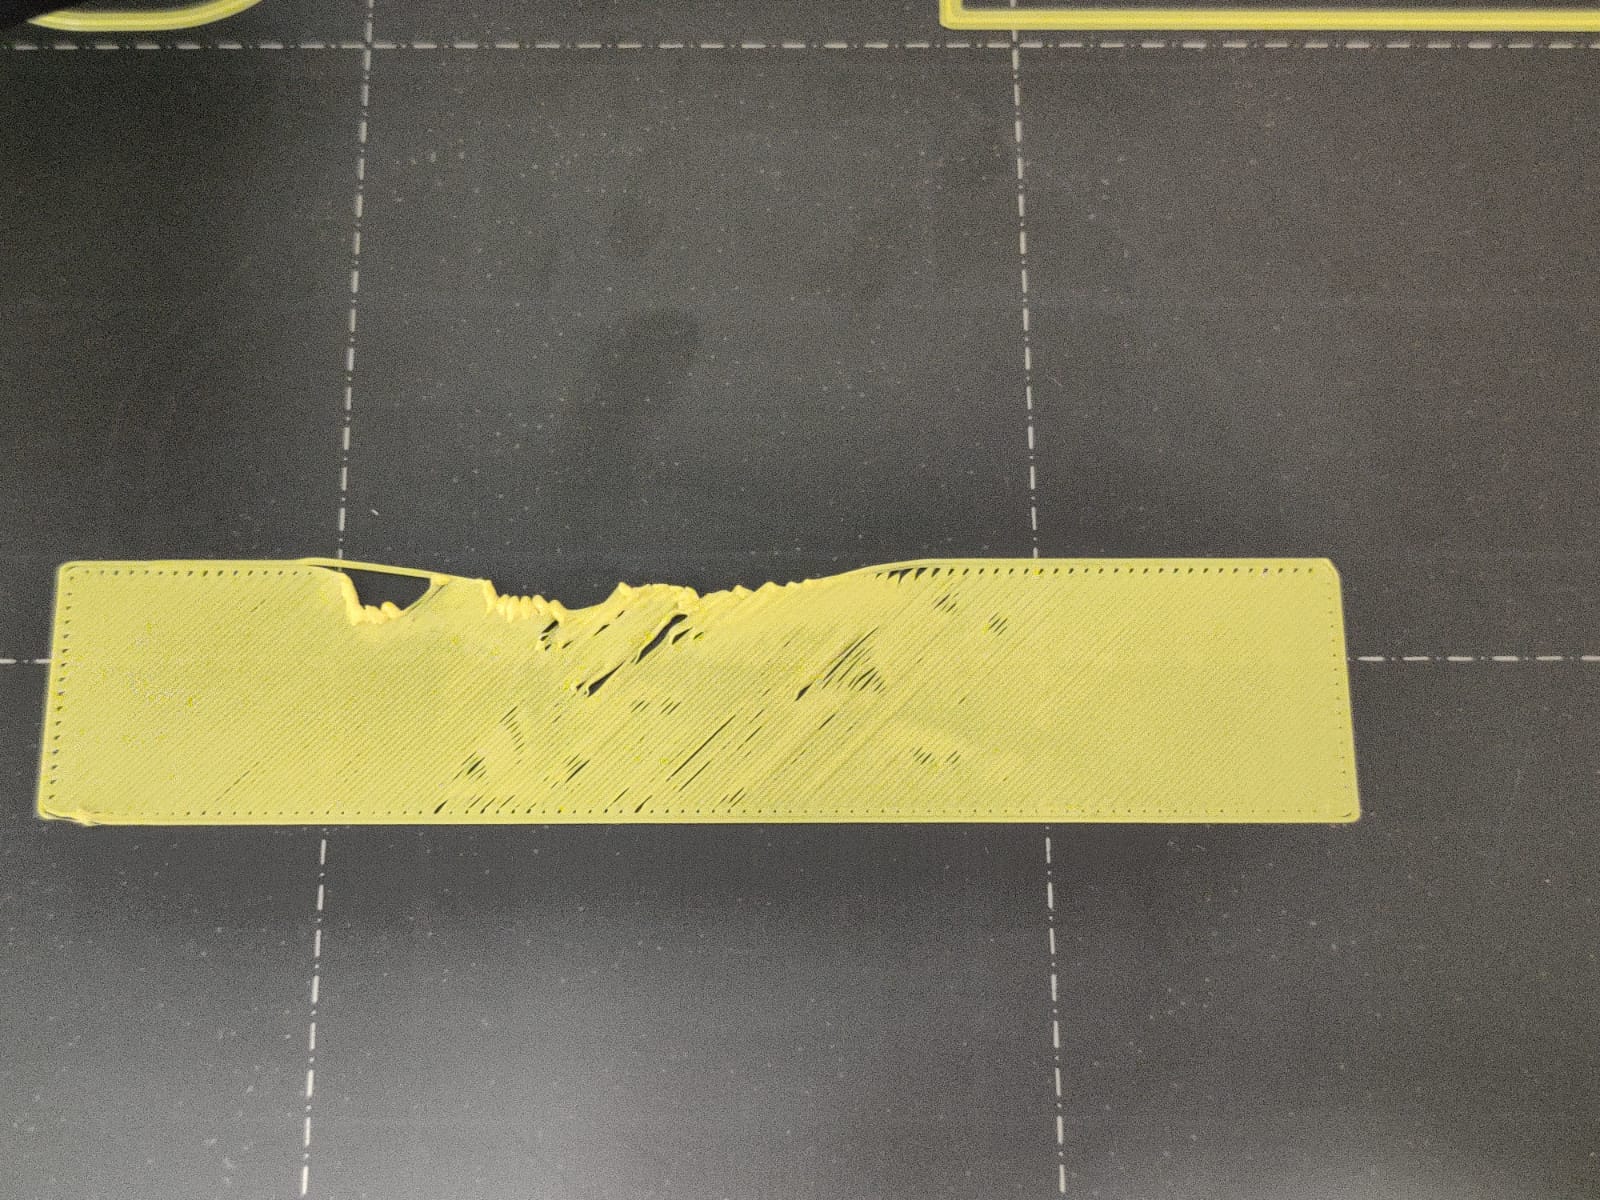
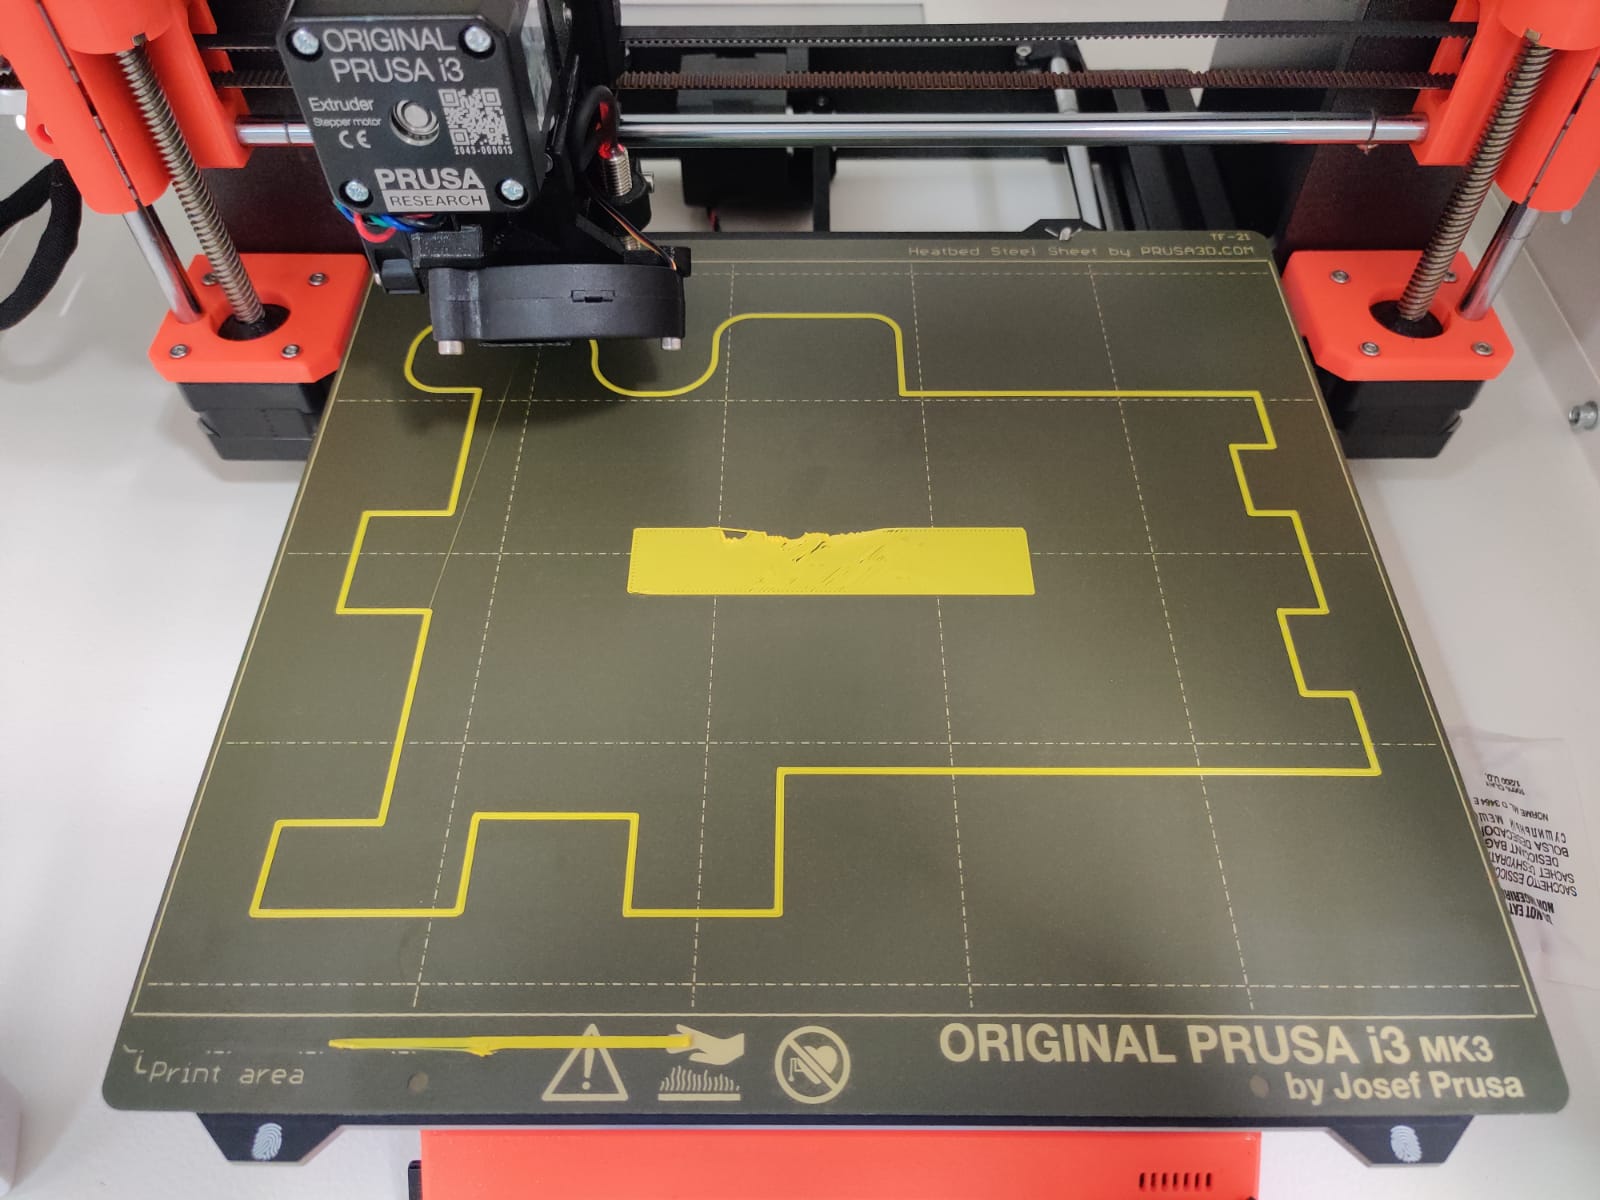
Then I did Z and XYZ calibration and first layer calibration which was going quite well. However when printing the prusa test pattern I get this adhesion problem in the center of my bed, the lines around are sticking fine though.
Anyone with experience who could tell if this is a thermistor, heatbed assembly or a z height issue?
Best Answer by JoanTabb:
Your adhesion issues may be partially due to finger prints on the build surface,
I wash my Build plate, with hot water and dish soap, rinse well with hot water and dry immediately with plain paper towels.
regards Joan

Your adhesion issues may be partially due to finger prints on the build surface,
I wash my Build plate, with hot water and dish soap, rinse well with hot water and dry immediately with plain paper towels.
regards Joan
I try to make safe suggestions,You should understand the context and ensure you are happy that they are safe before attempting to apply my suggestions, what you do, is YOUR responsibility.Location Halifax UK
PID tune for bed
If you replaced the thermistor, it can't hurt to do a PID tune on the bed. I believe you have to do it manually.
dirty bed
That image sure looks like a dirty bed causing poor adhesion.
--------------------
Chuck H
3D Printer Review Blog
Check your z-layer , possible you need to adjust.
To print you need:
1. Clean bed, dish soap with a lot of hot water, and do this a few times. Alcohol does not clean of very good, a few print I use alcohol, and use a lot of alcohol.
2. First layer needs to be 100%, sometimes I am confused, then I start I print a few cubes spread out over the bed, and start printing to high, and lower it a little by little , then you find the good setting again.
Your first layer has holes in it, could be under extruding or to high.
dirty bed
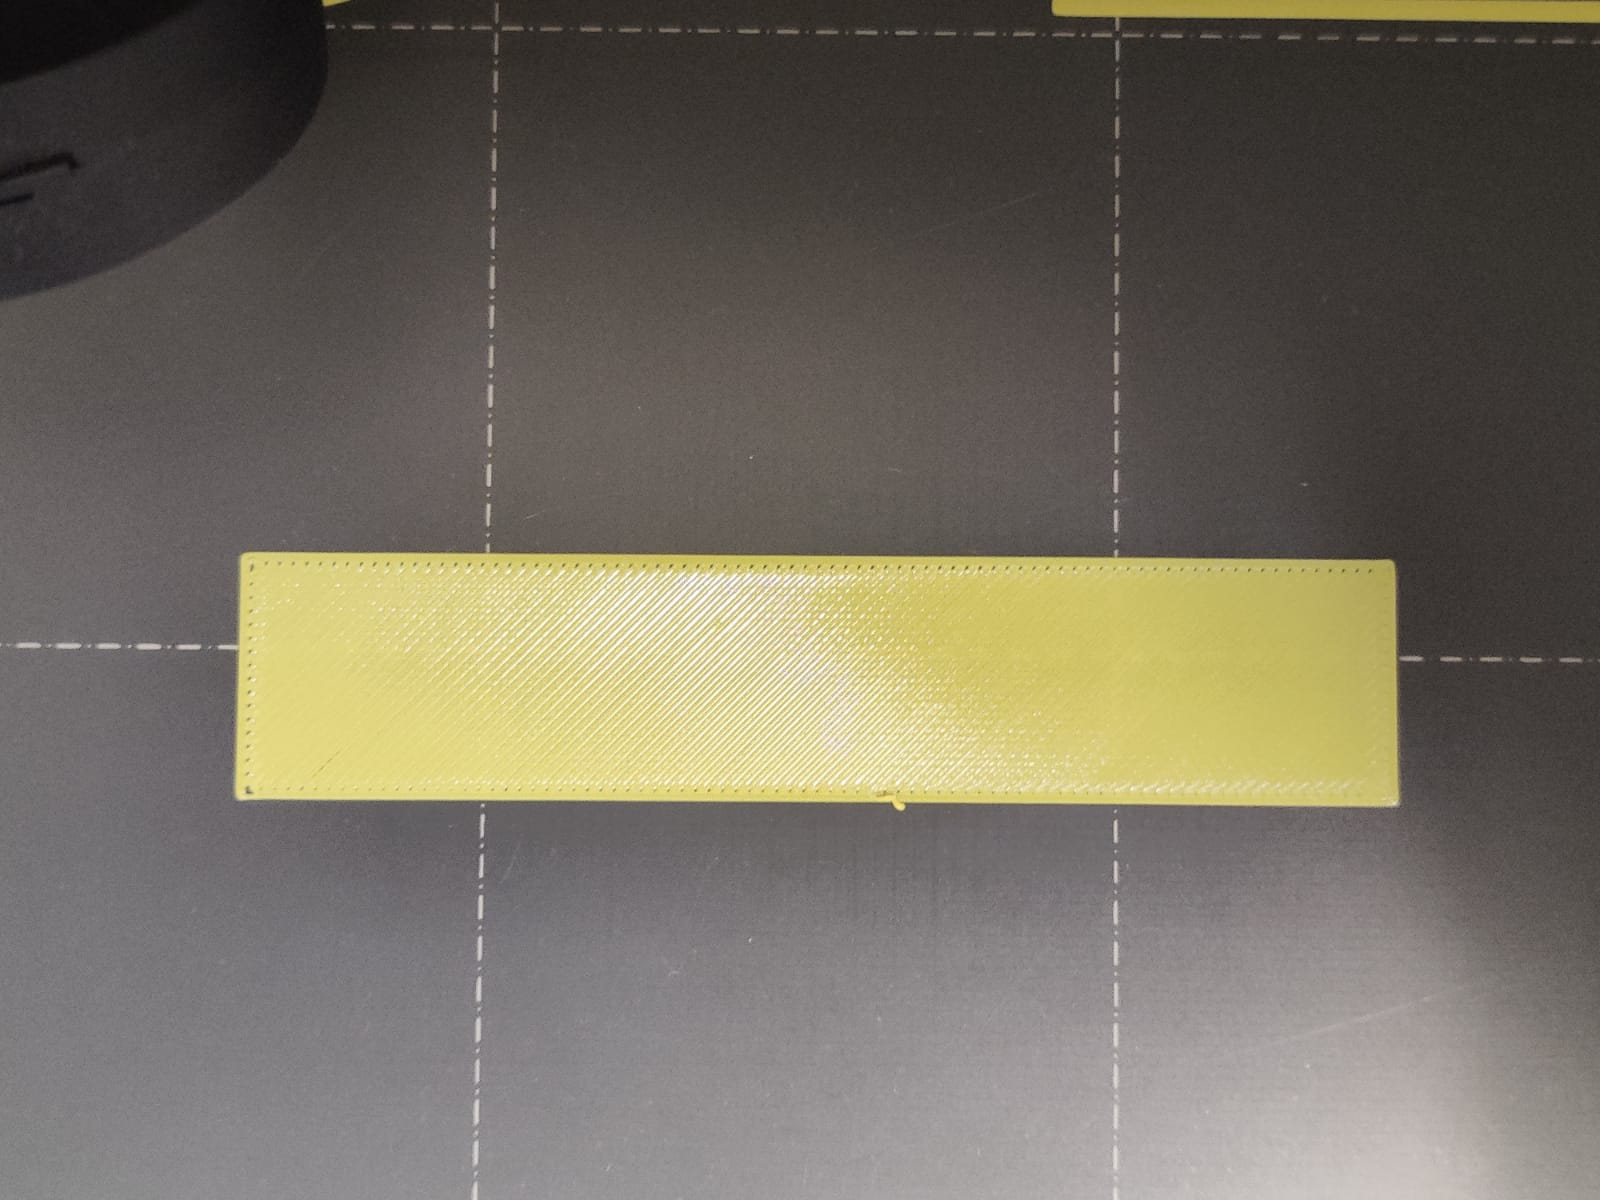
Thank you all for the advice.
I've cleaned my bed with dish soap, alchohol and then acetone and now it seems to be sticking fine.
Still have to tune z height it can be a bit lower I think.
Change hotend
I knwo you found a solution. Just as a point of rreference, any time you monkey with the hotend or nozzle, consider redoing your Z and first layer calibration.
--------------------
Chuck H
3D Printer Review Blog