Print is all over the place - suggestions please
Hi,
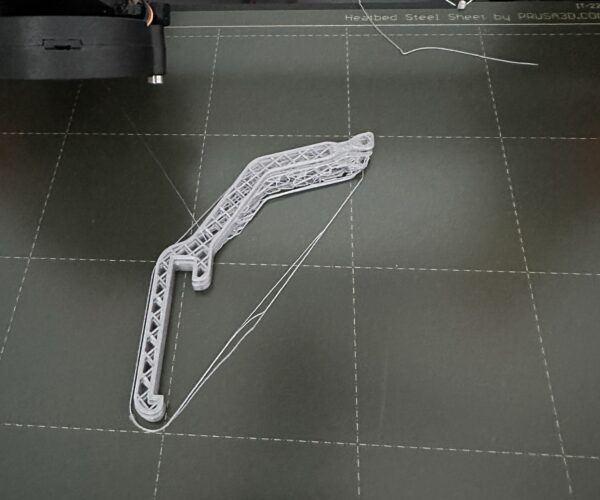
I assembled my MK3S+ and it passed the initial tests after I realised I had installed 623h bearing the wrong way around. I also tensioned the x-belt to what I thought was a reasonable tension based upon the instructions. Something looks like it is slipping based upon the print below:
It looks a bit like there may be some slippage of something in the x-direction, but I am no expert, so I would really appreciate suggestions of possible causes and solutions to try. If anything else also looks awry, please feel free to point it out.
Cheers.
RE:
I take it that the initial self-test was successful?
You can check if your grub screws on the x and y-axis are properly tightened. If they are too loose you can end up with layer shifts. Those layer shifts however effect the whole print, not just one side. The front of your piece looks not shifted by that much while the back is much worse though, across all layers.
What I would check first would be first layer calibration and bed adhesion. Can you do the first layer calibration print and post a picture?
Mk3s MMU2s, Voron 0.1, Voron 2.4
RE: Print is all over the place - suggestions please
I'll give them a check, but I'll run off a print for you to see first.I gave the steel sheet a very good wash with soapy water to remove any grease (I noticed that someone elsewhere on here (who seemed knowledgable) said not to bother with IPA. I'm not sure if I need to use the glue stick provided or not either.
Interestingly, the front isn't really shifted in the x-direction, but latter layers seem to show some shift in the y-direction.
I'll post the photo when done. Thanks for your suggestions. It is appreciated.
RE:
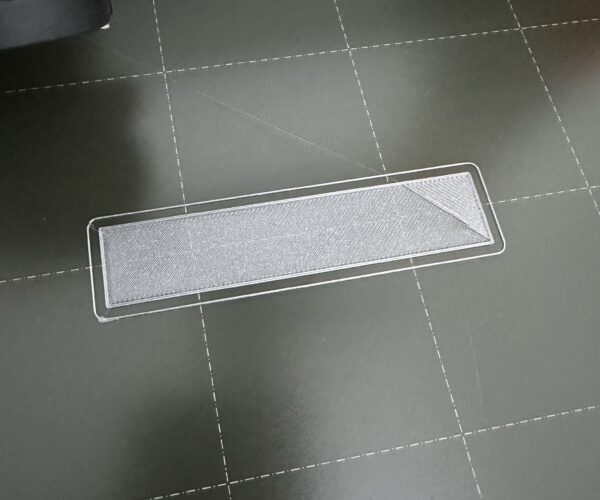
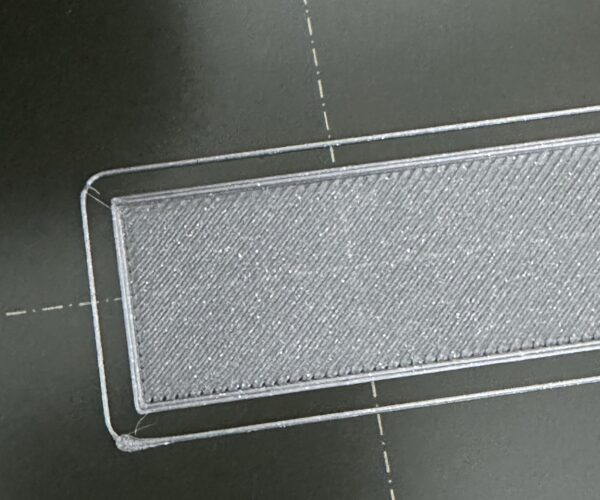
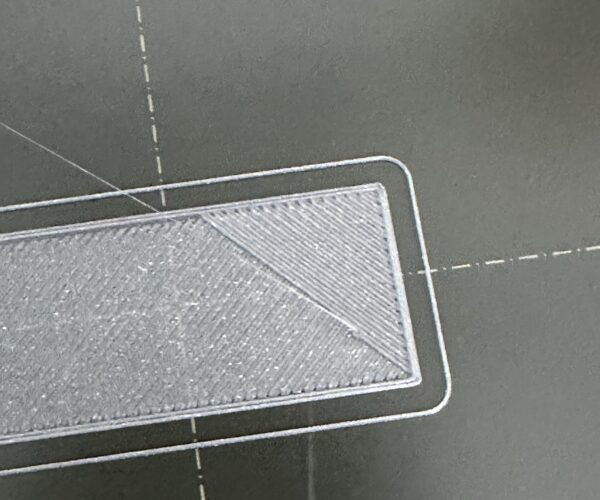
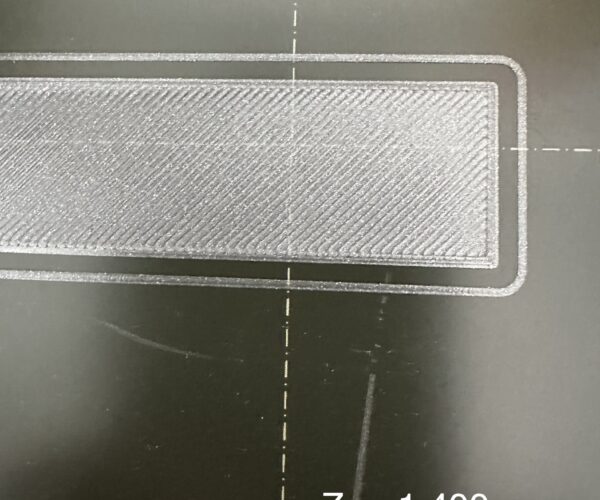
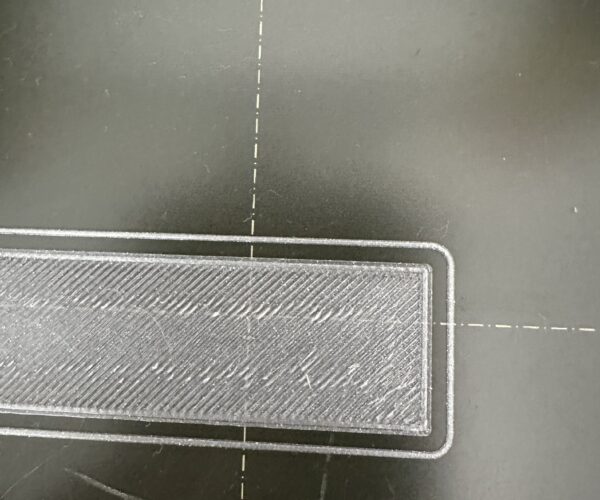
So, here are the photos of the first layer print. It started to embark on a second layer before I could stop it, but I've included close-ups of the first and second layers in case they are helpful in diagnosing the problem. One observation from my end is that the bed moves much more slowly and smoothly for the test as opposed to the actual print where it is moving much faster in all directions. I'm wondering if this is a sign of some kind of slippage, which I think is what you (@thejiral) are suggesting above?
RE: Print is all over the place - suggestions please
No the speed is not a problem. In general with the built in profiles the first layer print speed is set to a low value to aid in making sure the first layer adheres properly. Its why first layer has its own speed setting. It speeds up to normal printing speeds afterwards.
From your picture I would say that you are close but the first layer isn't squished quite enough. You need to make your Live Z value more negative. So if for example it was -1.500 you would make it -1.505. Basically you work it down gradually as its printing the first layer until you get a solid sheet of plastic. If you start getting ripples in it then you have gone slightly too far so you back off a few points. Basically after you remove you you should be able to flex and bend the sheet without the strands separating.
Its why printing a 75mm square or similar is often used as you have more time to adjust things.
You are aiming for a first layer like so, see the infill is barely discernible and looks solid. Bit of texture its picked up from the sheet as its going on 4 years old now 🙂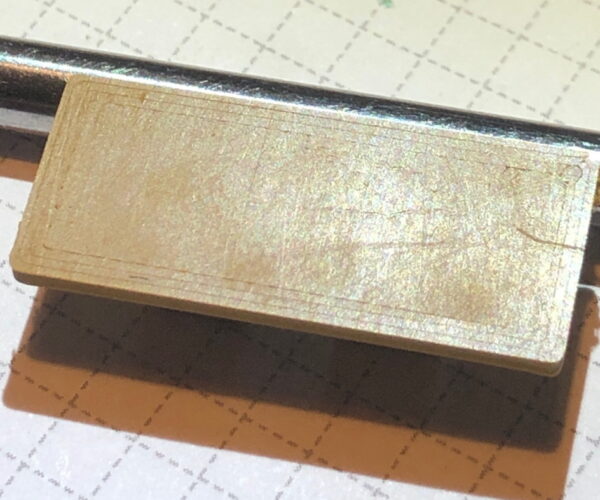
Once you rule out the part shifting due to lack of adhesion you can look at the other mechanical possibilities lkike the grub screws or belt tensions etc.
Your first layer Z calibration could go a fraction lower - go down until it starts to make ripples then back off until it is just smooth.
If your next print fails a picture of the bottom of the failed print would be useful. If it gets to a few centimetres high before failing then include the X and Y sides (or a corner) as well.
I assume this is the PLA supplied with the printer?
Cheerio,
RE: Print is all over the place - suggestions please
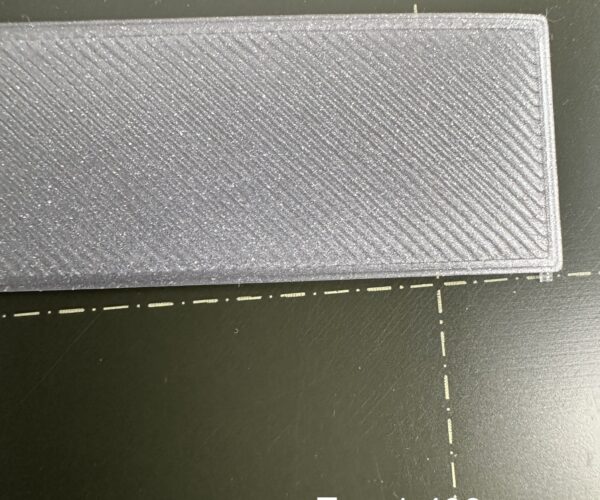
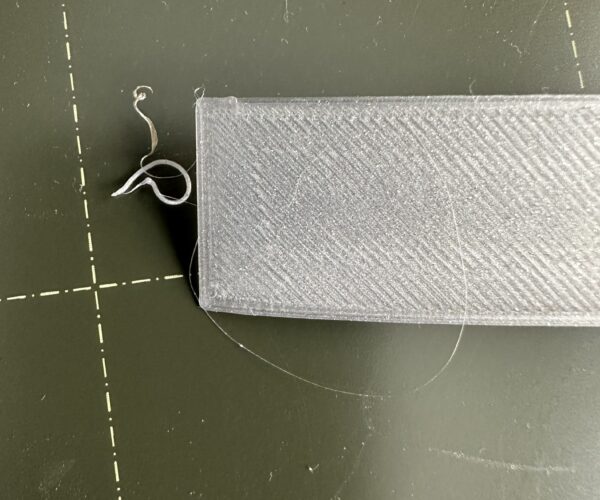
Here is a slight update to see if I'm heading in the right direction. I'm uploading front and back photos and annotating with the Z setting. I checked a few mechanical parts on the printer and adjusted/tightened a couple of parts relating to X and Y: one of the pulleys didn't seem positioned quite right and another I think had come loose and was possibly slipping. I also wasn't sure if the pinter was sitting properly on the unit I had placed it on, because I pulled it away from the wall to prevent the cables bashing into the wall as the bed moved leading possibly to one or both of the vibration dampening feet hanging over the edge partially - probably a schoolboy error! I therefore re-calibrated and then started afresh. I found that as Z decreased, the rougher the print felt under my finger when I ran it across the first layer print. I guess there is probably an acceptable range for what counts as squashing the PLA sufficiently. Adhesion to the metal plate does not seem to be an issue, if anything it's the opposite: the print sticks to it like glue! I am using the PLA supplied with the kit. Anyway, this is what I have produced so far.
The images are annotated with the Z height, but the images seem to be a little clipped as I write this, so just in case, the Z is -1.400 for the first two (front and back), and -1.500 for the second two images (front and back again).
I have experimented with the Z and it seems to either have lines in it, or it seems that the nozzle churns up the hot PLA as it is being deposited and the surface is rough. The backsides of both feel smooth though.
I'm going to try a print again, but in the meantime, please do let me know your thoughts.
RE: Print is all over the place - suggestions please
So, the printer is working away and the result is much much better. One thing I noticed though was that the first layer seemed slightly rough as compared with the first layer tests. From what was written above by @neophyl, I understand that the printer has a dedicated first layer speed. Is this something that the printer enforces automatically irrespective of the gcode for the model being printed, or is it something the writer of the code (I realise much of the generation is probably automated) has to include specifically? I only ask because the deposition of the first layer of my current print seemed a bit on the quick side, but then the object is quite narrow so it may just be my impression of the speed and nothing more.
RE: Print is all over the place - suggestions please
the -1500 is too much as you are getting the nozzle moving the existing filament , the rough 'waves' you can see on the top. The -1400 is closer to ideal but there is a lot of tuning between 1400 and 1500, even 0005 can make a difference and once you get in the right region then 5 to 10 is the sort of increment level you should be making to fine tune it.
Remember also that the pinda probes are temperature dependent devices, so make sure you have everything soak heated throughout to approx the same temp when carrying out these out. Otherwise you will get variations as things heat and cool.
RE: Print is all over the place - suggestions please
Thanks. That adds a level of complexity I wasn't expecting, but then, that's physics for you!! I'll keep tweaking it. I've printed a filament guide that has come out pretty well. I'm now making a lattice boat to see how that comes out. Very wispy at the moment.
You have bracketed the ideal setting but the lower one should work OK if you can put up with an ugly first layer.
Now try the larger print and see if the layer shifts persist.
Cheerio,
RE: Print is all over the place - suggestions please
In PrusaSlicer you can adjust the first layer speed independent of the overall layer speed.
I don’t recall if you need to be in ’expert’ mode to see the settings but switch to that so you can see everything.
Look for the Speed menu under Print Settings and you’ll find lots of different speed settings but a separate box for first layer speed. Reduce your first layer speed to 75% of default speed, run your print and see if the first layer speed is too your liking. Adjust & repeat as needed.
Cheers
