Post Clog Configuration
I'm not sure if this belongs here as I purchased a calibrated printer rather than a kit. Out the factory it printed near perfectly, and it was my hesitation to mess with that which meant I didn't change my nozzle when I should and ended up with a blockage. I've replaced the PTFE tube and re calibrated my XYZ plus done a handful of first layer calibrations. Unfortunately I'm just not getting decent prints out of it post calibration and I'm kicking myself hard.
I'm new to Prusa, but not to 3d printing. I had a Sovol SV01 before the Prusa but wanted something that required less tinkering for good prints. So far this hasn't been how it's panned out!
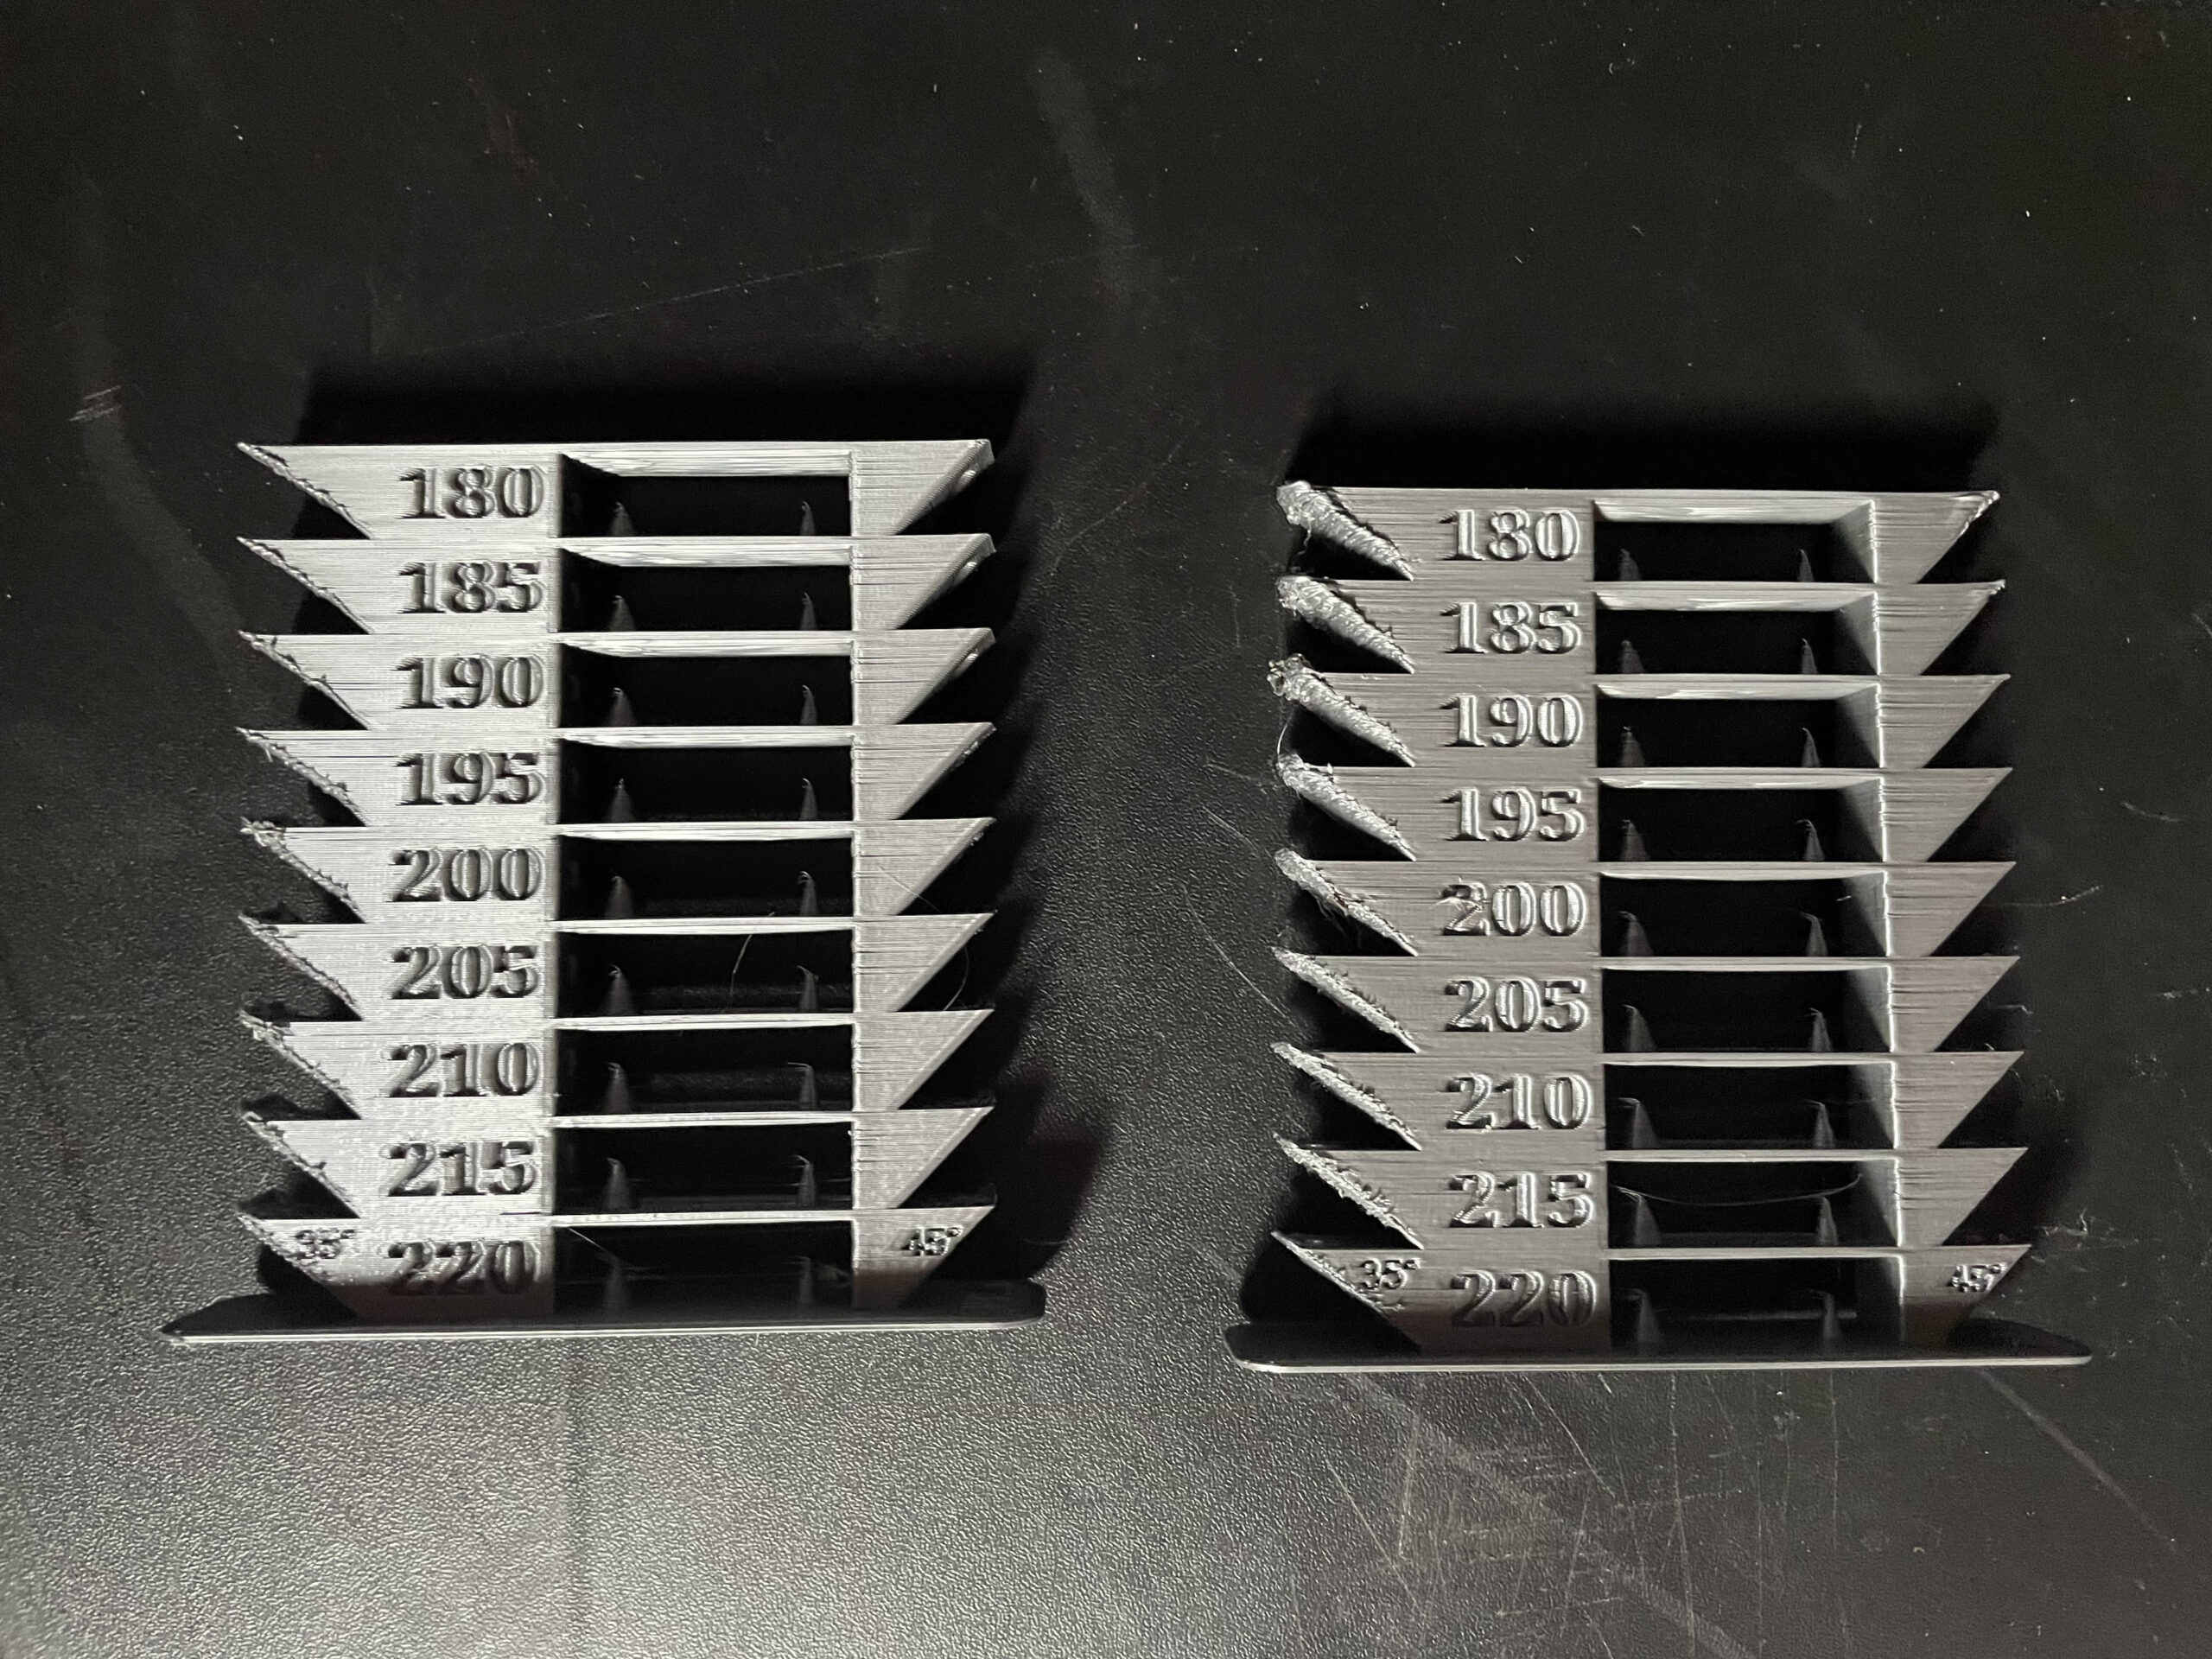
Can anyone help interpret this temp tower (PLA) and help me understand what's going on? Why are the 35deg overhangs such a mess?

RE: Post Clog Configuration
That seems odd. How are the 45 deg overhangs.
Have you tried flipping the print 90* or 180* to see if you get the same effect? Or to see if it changes position? You will only need to print one or two levels to see any changes.
Is this a print you’ve done successfully before?
What layer height are you slicing this at?
RE: Post Clog Configuration
This model is the one from here:
https://www.printables.com/model/39810-improved-all-in-one-temperature-and-bridging-tower/files
I'm printing the sliced gcode rather than slicing it myself. I've successfully printed this before the clog/reconfiguration
Here's a better picture of them. I read a post on here that said that nozzle might not be as tight as it should be so, I heated up the hot end and re-tightened it. Left print is post-tightening. Still got issues with the overhang.
RE: Post Clog Configuration
Here's a different temp-tower in .3mf format for you to manipulate as you need to.
It's uploaded as a .zip file per forum requirements. Simply save it to your system and change the extension to .3mf, then open in PrusaSlicer.
Rather than lock you into predetermined temps, this model allows you to choose a base temp and then adds 10 degrees to the first level and increments by 5 degrees for each level following. You can change the values for the base level and the increment amount by altering the custom gcode in the 'Before Layer Change G-Code' section of the 'Printer Settings' tab. This is not my original model so I can't claim credit, but I also can't recall where I downloaded it from so, kudos to the unknown author.
If you just want to slice with my values, which are Prusament PLA defaults with a 'Base' temp of 225*, you can just slice the file as is.
I would suggest you also try the print after rotating the model 180* on the Z axis to see if the overhang problem follows the direction of the model, which would indicate a mechanical issue.
Let us know how you make out.
Cheers
RE:
@RandyM9 Thanks so much for you response and your Temp Tower. I printed it both Front-Back and Side to Side orientations and had much more success.

Something I am noticing however, is that there's beads of filament left on the print bed and attached to the print. Please see image below. Could this be a sign that the nozzle is still not tight enough?

RE: Post Clog Configuration
Yeah, something is definitely not right with the blobs on the sheet. The temp tower looks a lot better though so you can see the benefits of slicing your own rather than printing gcode you don’t have any control over.
Use the rotary controller & LCD menu to raise the extruder Z height to the top so you can see underneath the hotend. Use a flashlight to see if there’s any filament leaking out around the nozzle or around the heater block from above. You can also take some pics with your phone from different angles to see what you can see.
You can easily remove the fan and cooling shroud to get a better look at what’s going on. This will also give you better access if you find you need to tighten the nozzle a bit more. Here’s a reference link:
https://help.prusa3d.com/article/changing-or-replacing-the-nozzle-mk2-5s-mk3s-mk3s_2069
Pay particular attention to the gap between the nozzle and the heater block. The exact dimension is less important than having some gap as opposed to none. The gap indicates that the nozzle is tight to the heat break, which is the only way to insure it’s tight and properly sealed.
Good luck.
Cheers