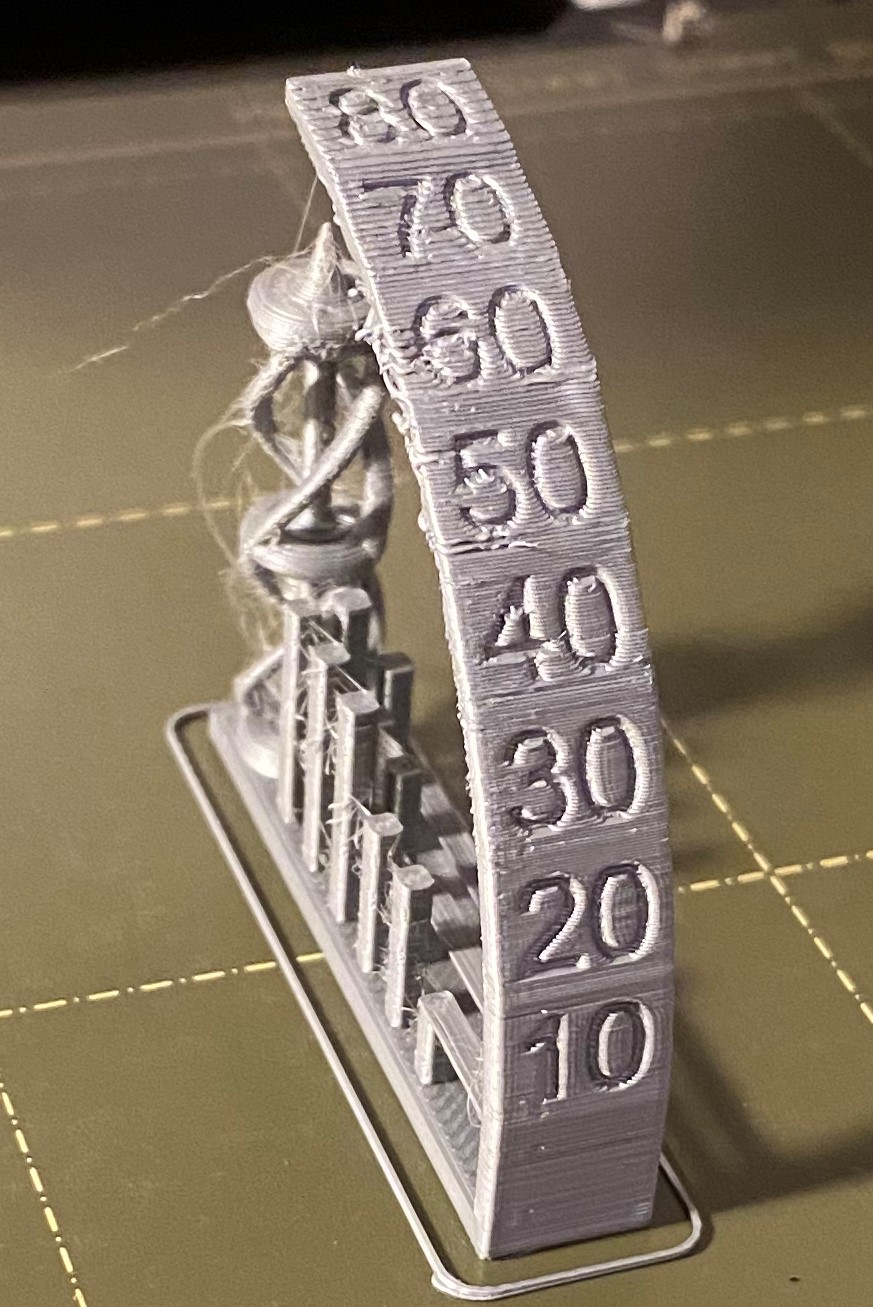
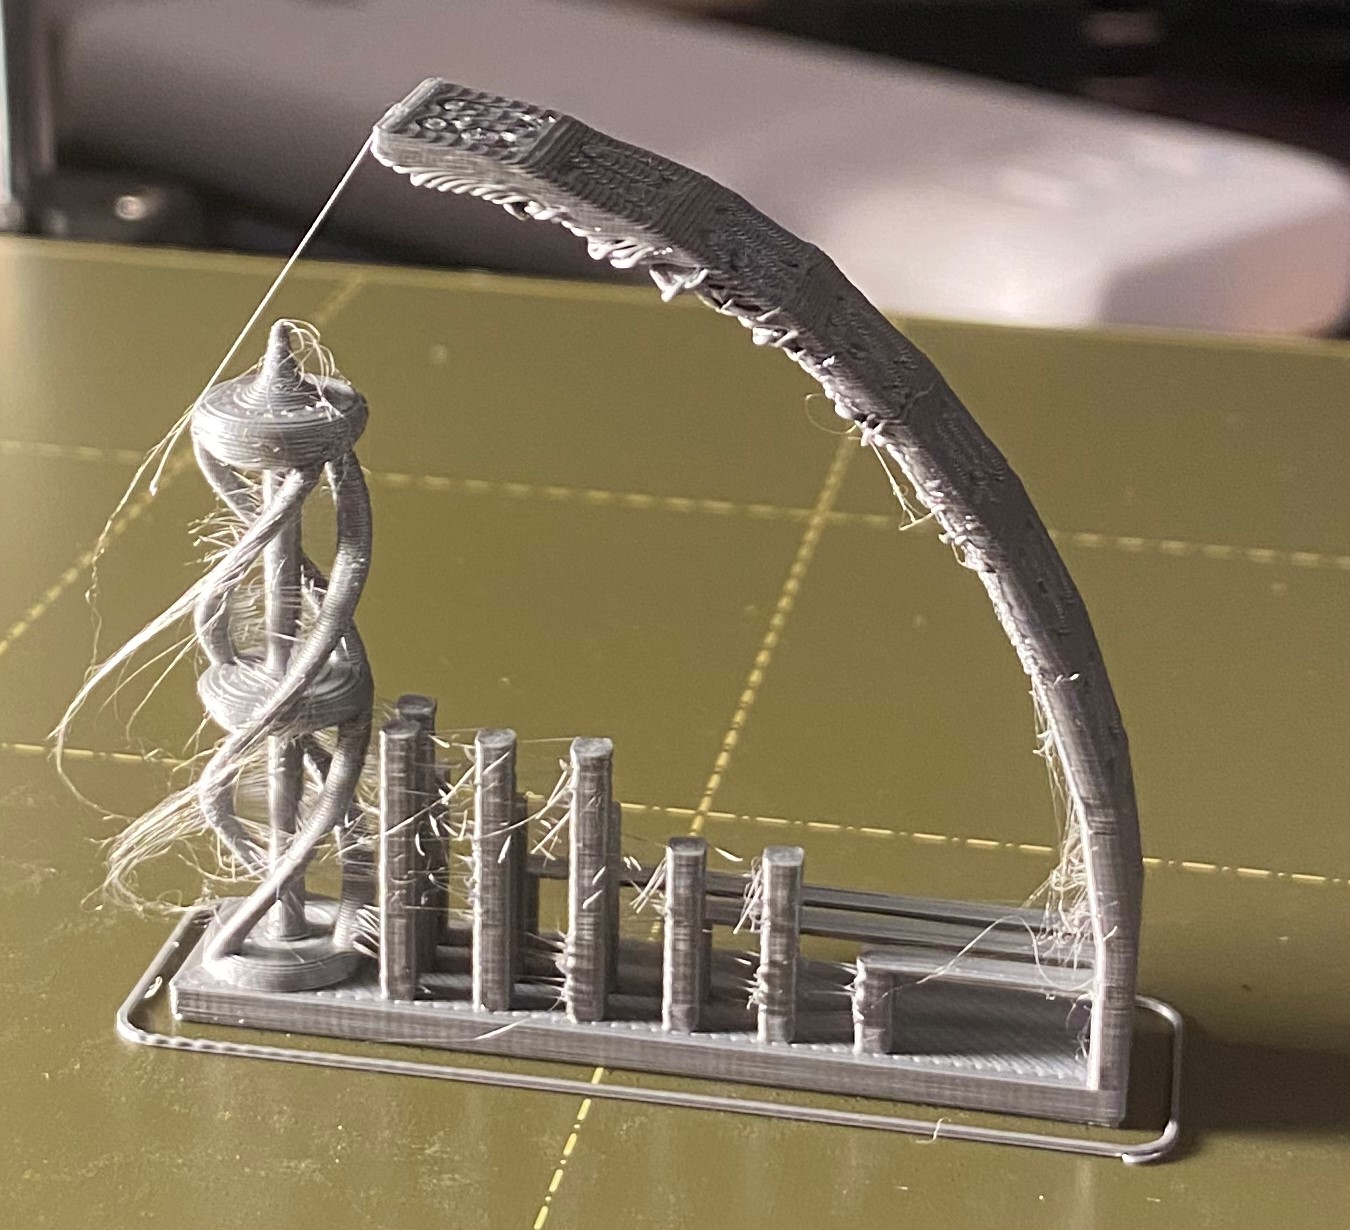
Nozzle hits prints off after about 450mm
Hi everyone!
So I just built my new printer over the weekend and tried a few test prints, flat or small models seem to be turning out fine. However, once I tried to do a few benchmark prints they started to get hit off the bed by the nozzle entirely. I'm not exactly sure what's wrong, I tried recalibrating the XYZ and ended up getting a better result, both in that it now said they were perpendicular (was slightly skewed first time) and that my prints go a bit higher than my first attempt but still fail. I was able to catch this on camera because I started to see my model wobbling and decided to video it just in case. I'm not really sold that this would JUST be that my first layer height might be too high as it doesn't fall off until it is hit with a pretty sizable amount of force, it did clip it a few times before it finally broke off.
You can also see in the pictures that there's a growing amount of errors in the back side of the print as it passes the 40 and 50 degree angle marks, which seemingly multiplied to the final failure.
Video of print breaking off:
PrintSnapsOffShort
other things of note that could be important as I could have missed something being completely new to the 3D Printer space:
- Filament is the silver PLA that came with the printer
- This is on the smooth PEI steel sheet
- Printed with recommended PLA settings at 0.15mm layer height (benchy was purely the benchy gcode that came with the printer)
- I have been cleaning my bed after every print by dabbing a small amount of 91% Isopropyl Alcohol onto a paper towel and wiping it onto the build plate, and waiting a minute for it to dry.
- I took a look at my mesh bed leveling results and they seemed nice from the comparisons I found elsewhere, I can post those numbers later if needed.
-My first issue with calibration was I had to lower the super PINDA as in calibration the paper was being dragged consistently and "about a zip tie in height" was a bit too much.
- Second calibration came back with perpendicular results
- I've also attached my first layer calibration w/z-offset of -1.242mm
- When calibrating the first layer, I'm pretty sure I don't know what I'm looking for. However, I think I was able to judge by the square at the end at least a bit.
- Lower layers seem great! But once it gets to around 3.5 cm things start to fall apart.
Sorry in advance if I'm misusing this forum in some way, I rarely post things in forums and didn't see a rules/ guidelines pin anywhere.
Thanks for any feedback you guys can give me!
Bottom of print: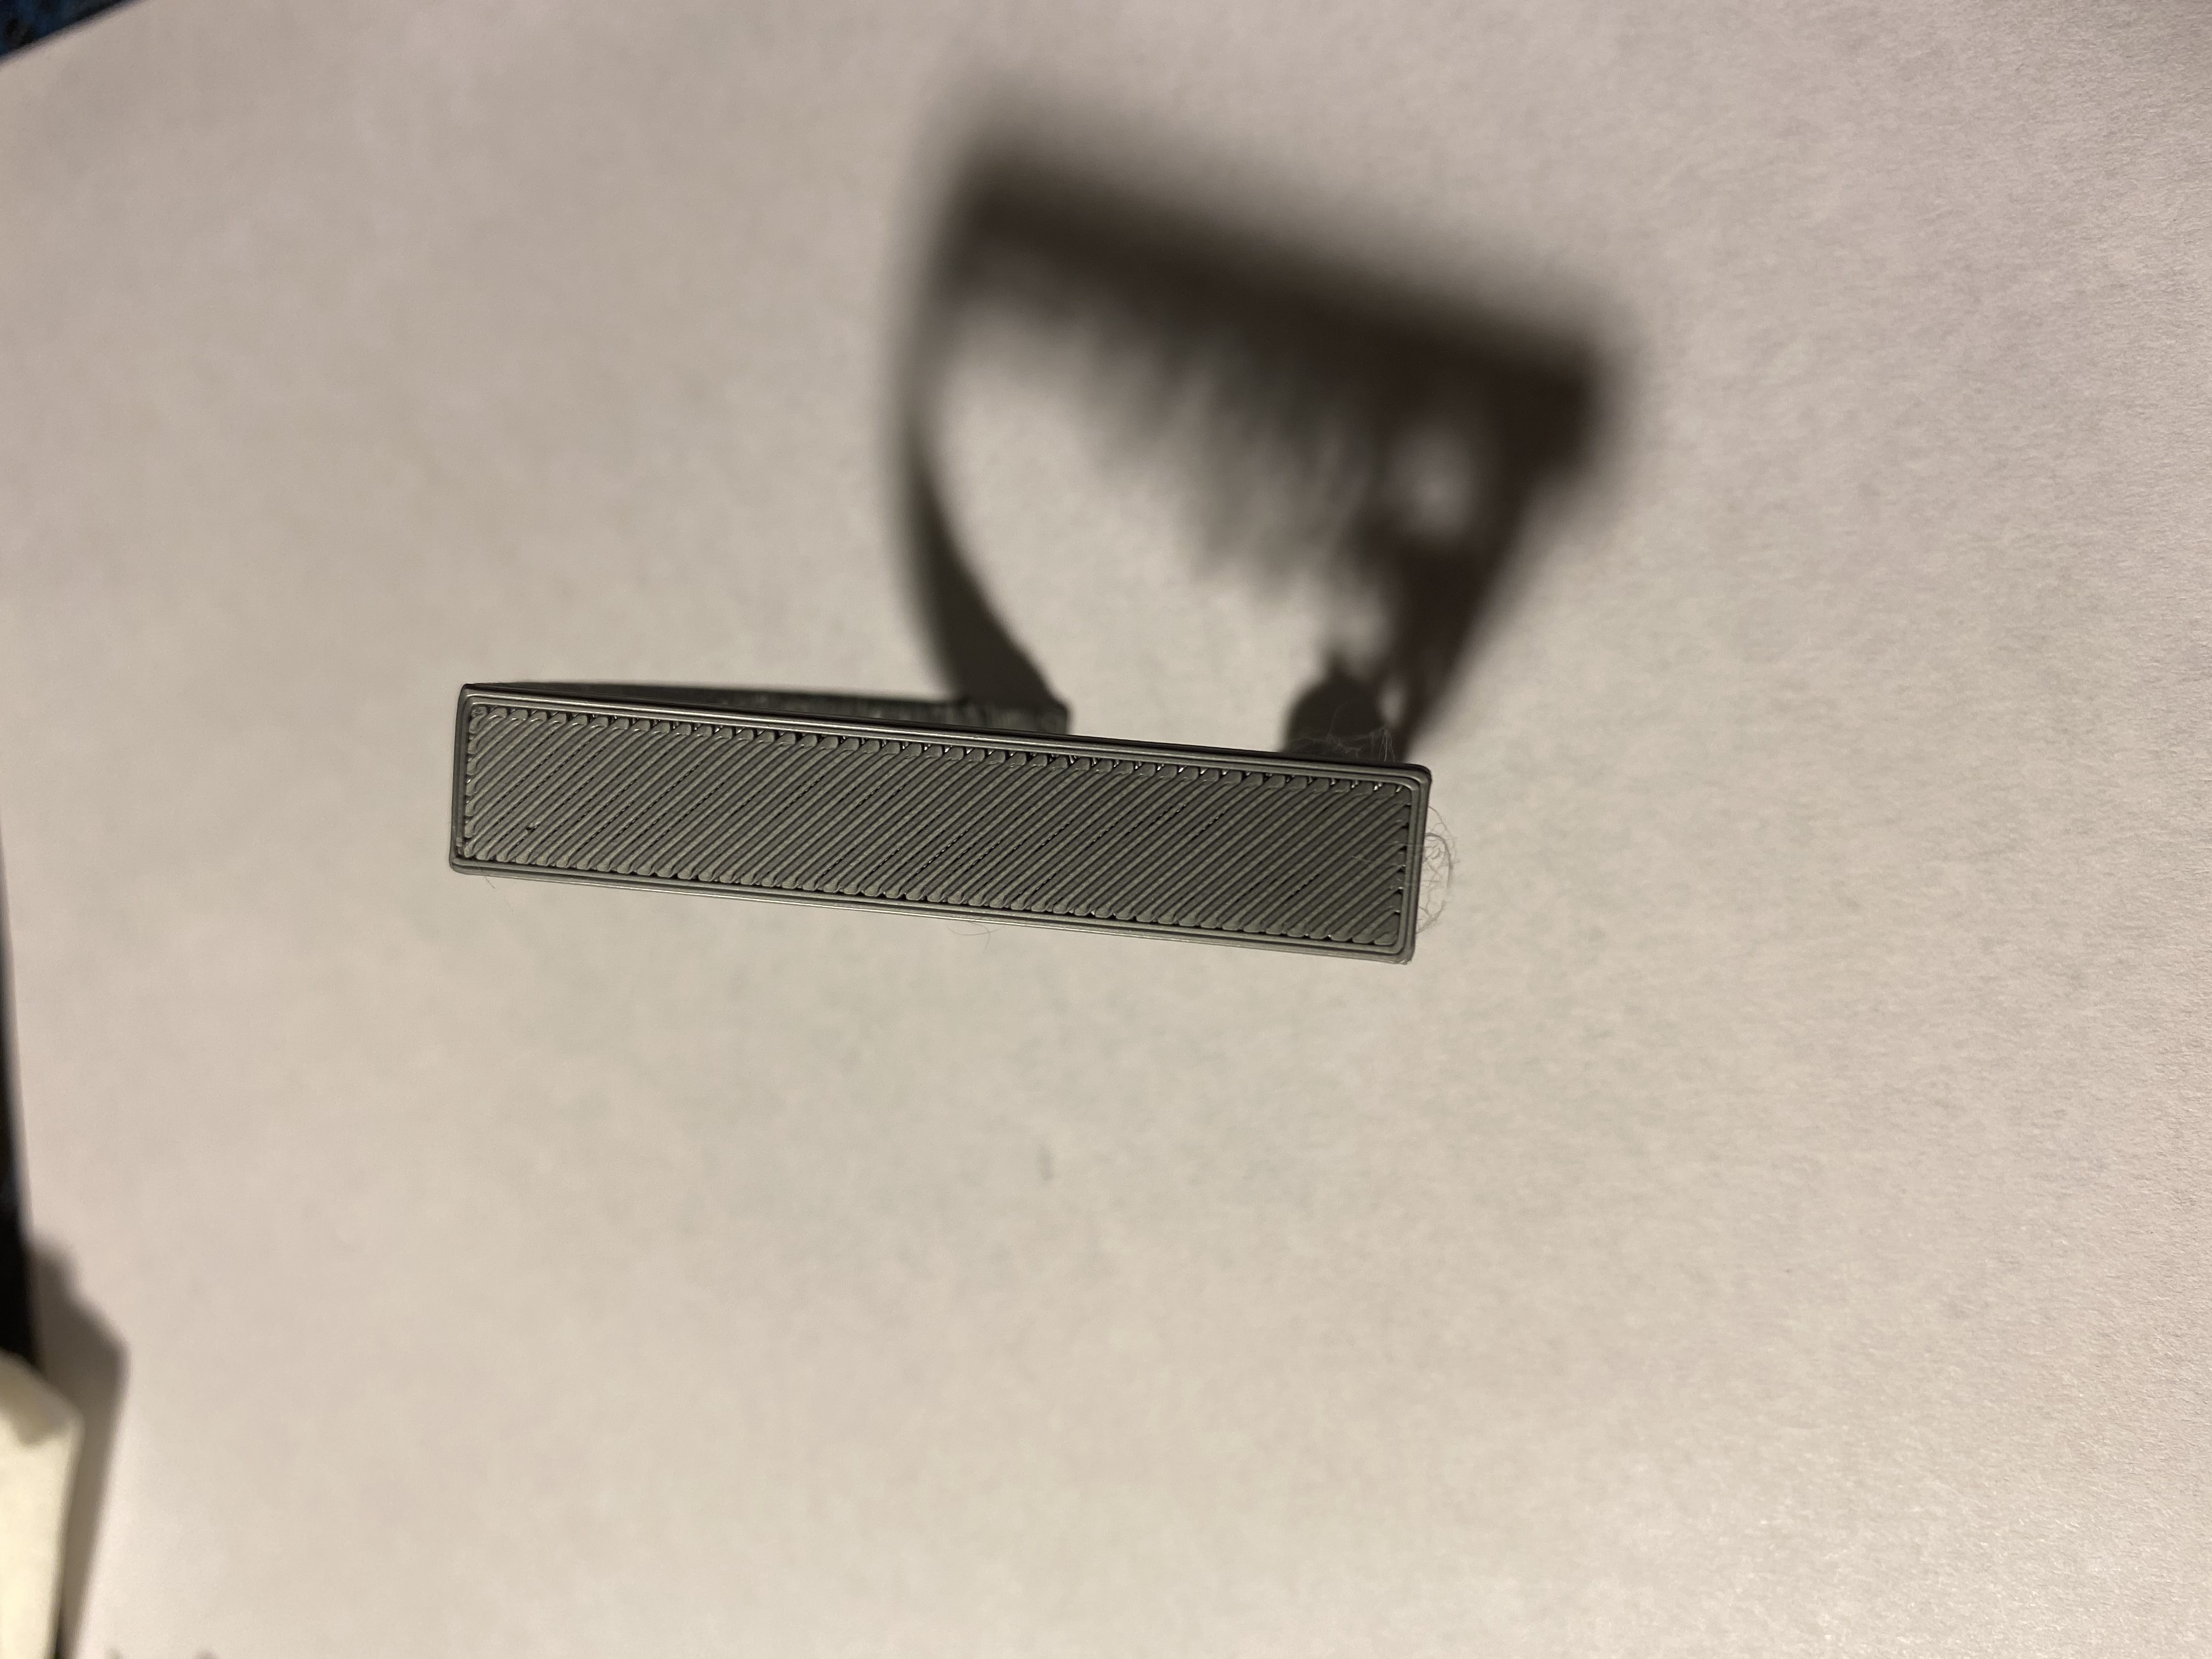
Benchy printed pre second calibration w/ similar results:
Side of test print:
Front of test print:
Back of test print:
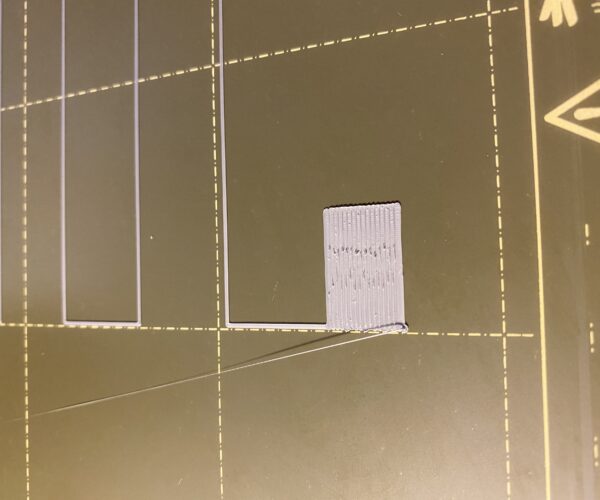
First layer calibration: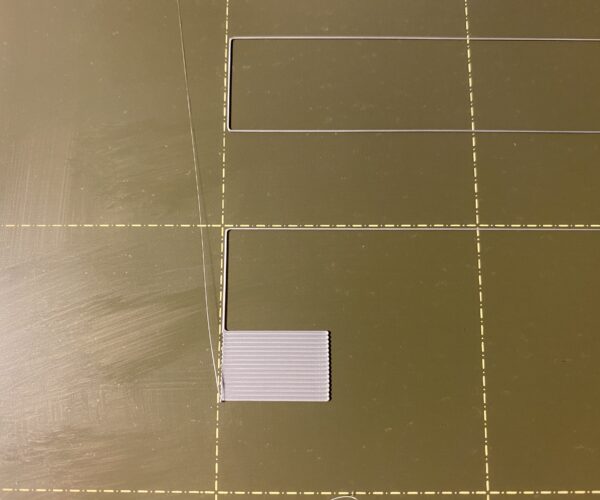
Best Answer by --:
Soap and water are your friend. The print sheet is quite dirty. A bit of dish soap and lots of running hot water at a sink to rinse, and paper towels for scrubbing and drying is the best way to clean the PEI sheet. Dabs of alcohol will only smear oils and greases (including finger prints) -- you need to use a lot to achieve a semi-clean sheet (there will always be a film of oil left over with alcohol - it is what solvents do). Whereas a sink allows soap and gallons of hot water to lift and remove oils - it is what surfactants do.
Once you have adhesion down, then you can work on curl, the plastic curls when printing overhangs because of how the cooling airflow moves around the part. Also, your layer one looks odd. Hard to tell from the photo - but the single lines look too tall - and the flat looks okay. Problem is you need both to look right. Do a search for the thread Life Z by Jeff Jordon - might be a newer version, but this is what I have.
RE: Nozzle hits prints off after about 450mm
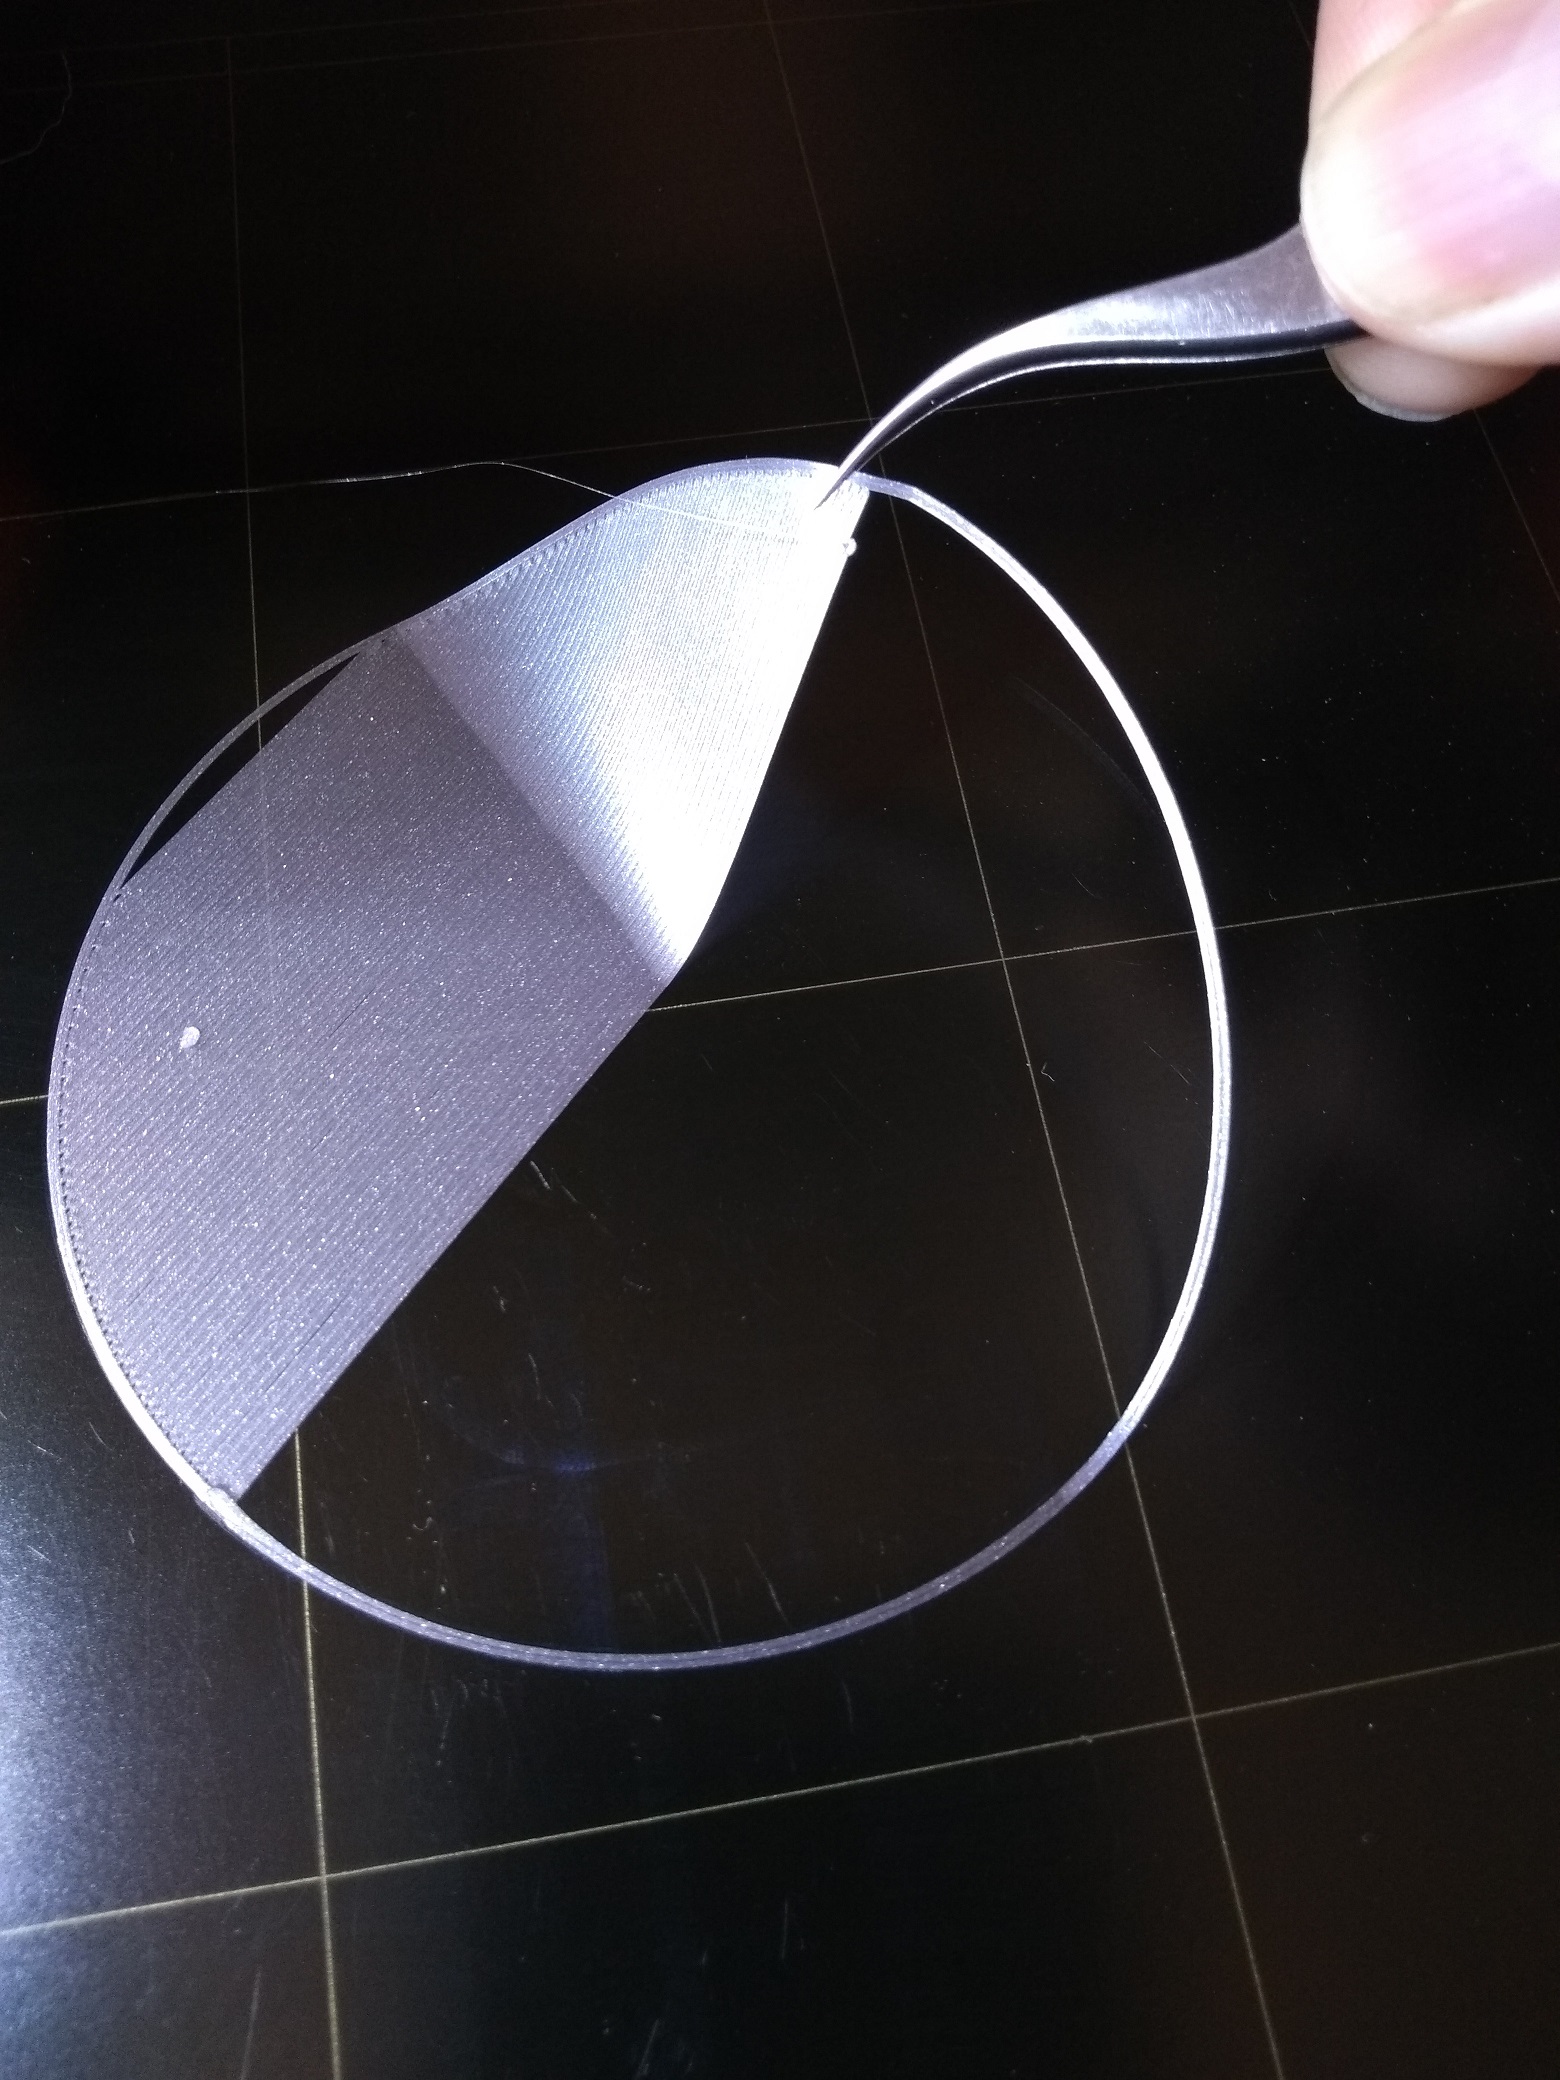
As another helper - here's what I use to cal layer one. I print the circle, and it is large enough that I can make changes during printing and actually see the results. The ideal is no gaps between runs, no stranding, you want a solid piece of plastic. Too low, and you'll begin getting a rough top surface, ridges along the runs.
Make adjustments in 0.025 steps. Then fine tune after that in 0.005 or 0.010 steps. The real trick is to ensure the PINDA temp is stable - and I use custom gcode to ensure a constant starting point. No experience with the "super pinda" - maybe it's better; someone else may be able to comment.
RE: Nozzle hits prints off after about 450mm
Soap and water are your friend. The print sheet is quite dirty. A bit of dish soap and lots of running hot water at a sink to rinse, and paper towels for scrubbing and drying is the best way to clean the PEI sheet. Dabs of alcohol will only smear oils and greases (including finger prints) -- you need to use a lot to achieve a semi-clean sheet (there will always be a film of oil left over with alcohol - it is what solvents do). Whereas a sink allows soap and gallons of hot water to lift and remove oils - it is what surfactants do.
I can try to clean it better, but I can assure you the center where this print was very clean. I may have touched the build plate in that last calibration test, I just wanted to show that quickly as I know I had my suspicions about the first layer being incorrect in some way. It is a brand new sheet, only about 5 prints on it so far and I've been careful not to touch the center particularly. Also as you can see from the video the nozzle gets UNDER the print pretty nicely and takes a bit of force before it rips it off the bed, would have been a problem regardless of if the print stayed on or not. The print bottom doesn't flex off the bed before this happens in any way I could see. While I do understand it could be a factor, I don't see it being the main issue here. I think you mentioning curl might be more appropriate here.
I did see their post about life-adjust-z-my-way and actually used it to see if my smaller square was looking good, you mentioned that the single lines look too tall, but I'm having a lot of trouble gauging that as all the guides are fake cross-sections and it's just too small for me to see with those black and white diagrams. When I go too much tighter onto the bed I start messing with the square and it ends up with some imperfections in the surface.
I am particularly confused because I haven't seen anyone mention this problem with the benchy, while still having nice layers on the more mild bottom slants on the hull. Potentially naive, but it appears to me that this is the same issue (except it didn't have the mounting errors beforehand as seen with the all-in-one test). It's just so confusing that everything up until that point looks great!
RE: Nozzle hits prints off after about 450mm
@tim-2
It also helps to have a good measurement tool. Here's your calibration circle with a micrometer I recently picked up on Amazon on sale.
PS - I found with PETG, the circle is harder to peel off than the standard square where a corner can be grabbed (first layer square).

RE: Nozzle hits prints off after about 450mm
Yea, I have a nice set of analog calipers that I've been using. Might end up picking up one with metric units or just a digital one though as converting units is always a pain XD
RE: Nozzle hits prints off after about 450mm
@milazzone
Haha, same here - lots of imperial unit micrometers and calipers (I'm in US). Seems 3D printing is largely standardized on metric. Was nice to get a really good quality digital micrometer that does both. Cheap digital calipers didn't seem to have the accuracy to measure first layer thickness very well.
RE: Nozzle hits prints off after about 450mm
@milazzone
Clean is very relative. A print sheet can look clean, but have a layer of microscopic oil left behind by the solvent. A micron of oil is just as good at ruining prints as something you can visually see. Here's one of my earlier print failures where it turned out to be oil on the bed. I had just used a puddle of alcohol to clean the sheet, but, it wasn't enough. A soap and water wash fixed my adhesion issues entirely.


ps: A swipe test is always fun -- with a paper towel bit 3"x3" and dab it with alcohol so it is damp, not wet, and swish it across the "clean" bed. If you see colored streaks as the alcohol wets the surface, or any visible streaks remain after the alcohol evaporates, the bed is dirty.
RE: Nozzle hits prints off after about 450mm
Interesting, I don't disagree that it could be at least a part of my problem. I definitely don't have issues like in the picture above. So I'm having trouble thinking adhesion is really my main problem here. Looking again at the full video I took, the wobble in the tower does seem to translate to the base, but only in the last 25 seconds, and by then it was already printing very poorly on the overhang. Even then it was a pretty hard pop as it came off. However, I do see that maybe I initially misunderstood WHY you are so adamant about saying the issue is adhesion. It does appear in the video that it's rocking a bit more than I initially thought in those last 20 seconds.
You mentioned curl on the tower, but would that happen so easily on the pre-sliced g-code benchy directly from prusa? So many people use that as an early test print and I had trouble finding failures in the same way as mine. The first half of the layers of my tests look fantastic (and all the layers in the benchy up until that last layer), just once it gets higher it fails.
Unless there's some way that a dirty bed can cause the print head to collide with the structure only after an hour of printing upwards, I'm having trouble thinking that's my only/main issue, but of course, I'll try cleaning it better when I can give that a shot tonight.
RE: Nozzle hits prints off after about 450mm
Clean the sheet with dishwashing detergent (Dawn/Fairy) and plenty of HOT water, rinse well and dry with a fresh paper towel. Handle by the edges only.
The nozzle clipping the print is often due to poor adhesion, one end lifts off the bed into the path of danger.
Your first layer is not squished enough.
At the end of the calibration you are aiming to print a single layer *sheet*. It should be possible to peel it off in one and fold it without the threads seperating. If it breaks into lines it is too high, not squished enough. If it is a single sheet but with wavy lines or drag marks on it you are too low.
For most people it pays to use 7x7 mesh bed levelling.
Many beginners have problems with the built-in first layer calibration routine. There are alternatives, see this page by a regular poster here:
http://projects.ttlexceeded.com/3dprinting_mk3_live_z_calibration.html
and look at this thread:
https://forum.prusa3d.com/forum/original-prusa-i3-mk3s-mk3-assembly-and-first-prints-troubleshooting/life-adjust-z-my-way/
It's a long thread, read the start then skip to page 39 and follow @joantabb's illustrations.
Cheerio,
RE: Nozzle hits prints off after about 450mm
Alright, I will attempt to work on those two things and get back to you all when I can give that an attempt (hopefully tonight). Having some more tactile ways to check the test layers is nice to know, pictures seem to only take me so far in the understanding of what I'm looking for there.
Thanks for all the help so far guys!
RE: Nozzle hits prints off after about 450mm
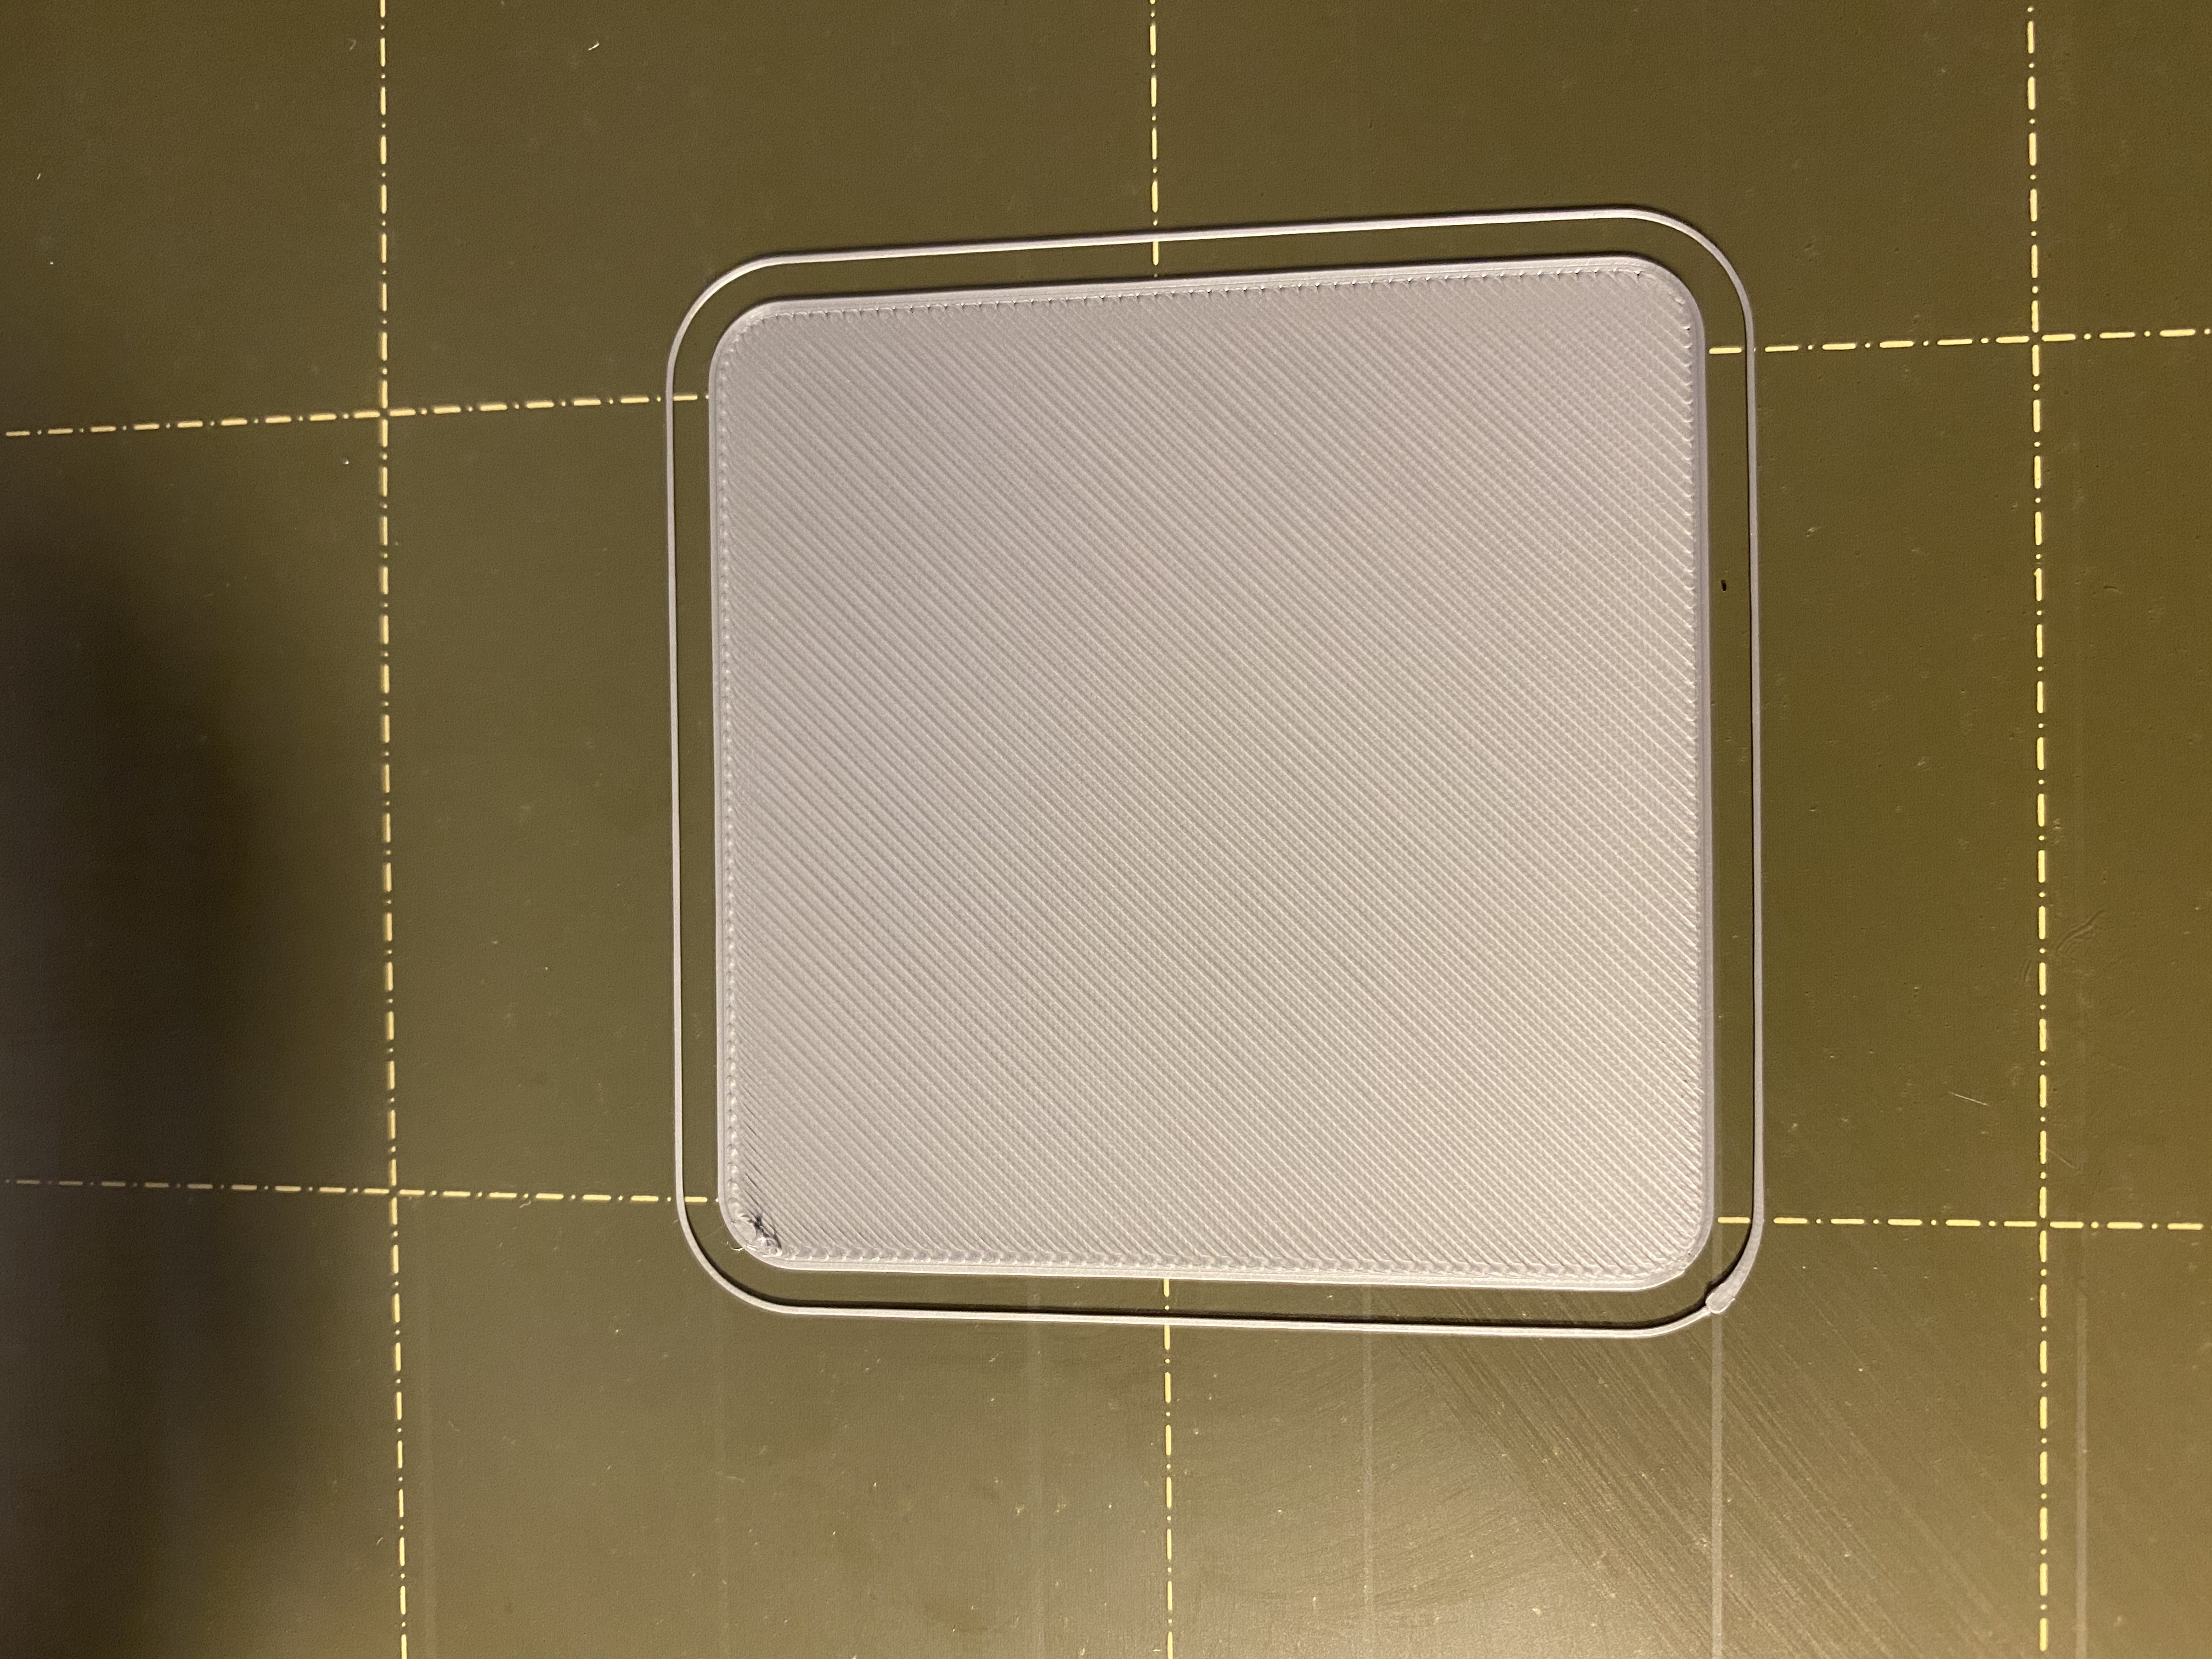
In the middle of printing the all-in-one test again, but figured I'd just post my latest first layer calibration after cleaning my sheet with soap and water. I am a bit worried that I somehow damaged my sheet because it doesn't look much cleaner than before especially considering how clean the other side is since it hasn't been used. Ended up taking my first layer height down a bit more and I believe this test square looks pretty good. I was a bit more unsure with the small square from the first layer calibration itself, but the square doesn't have those extra little strings sticking out of it at all at the same height.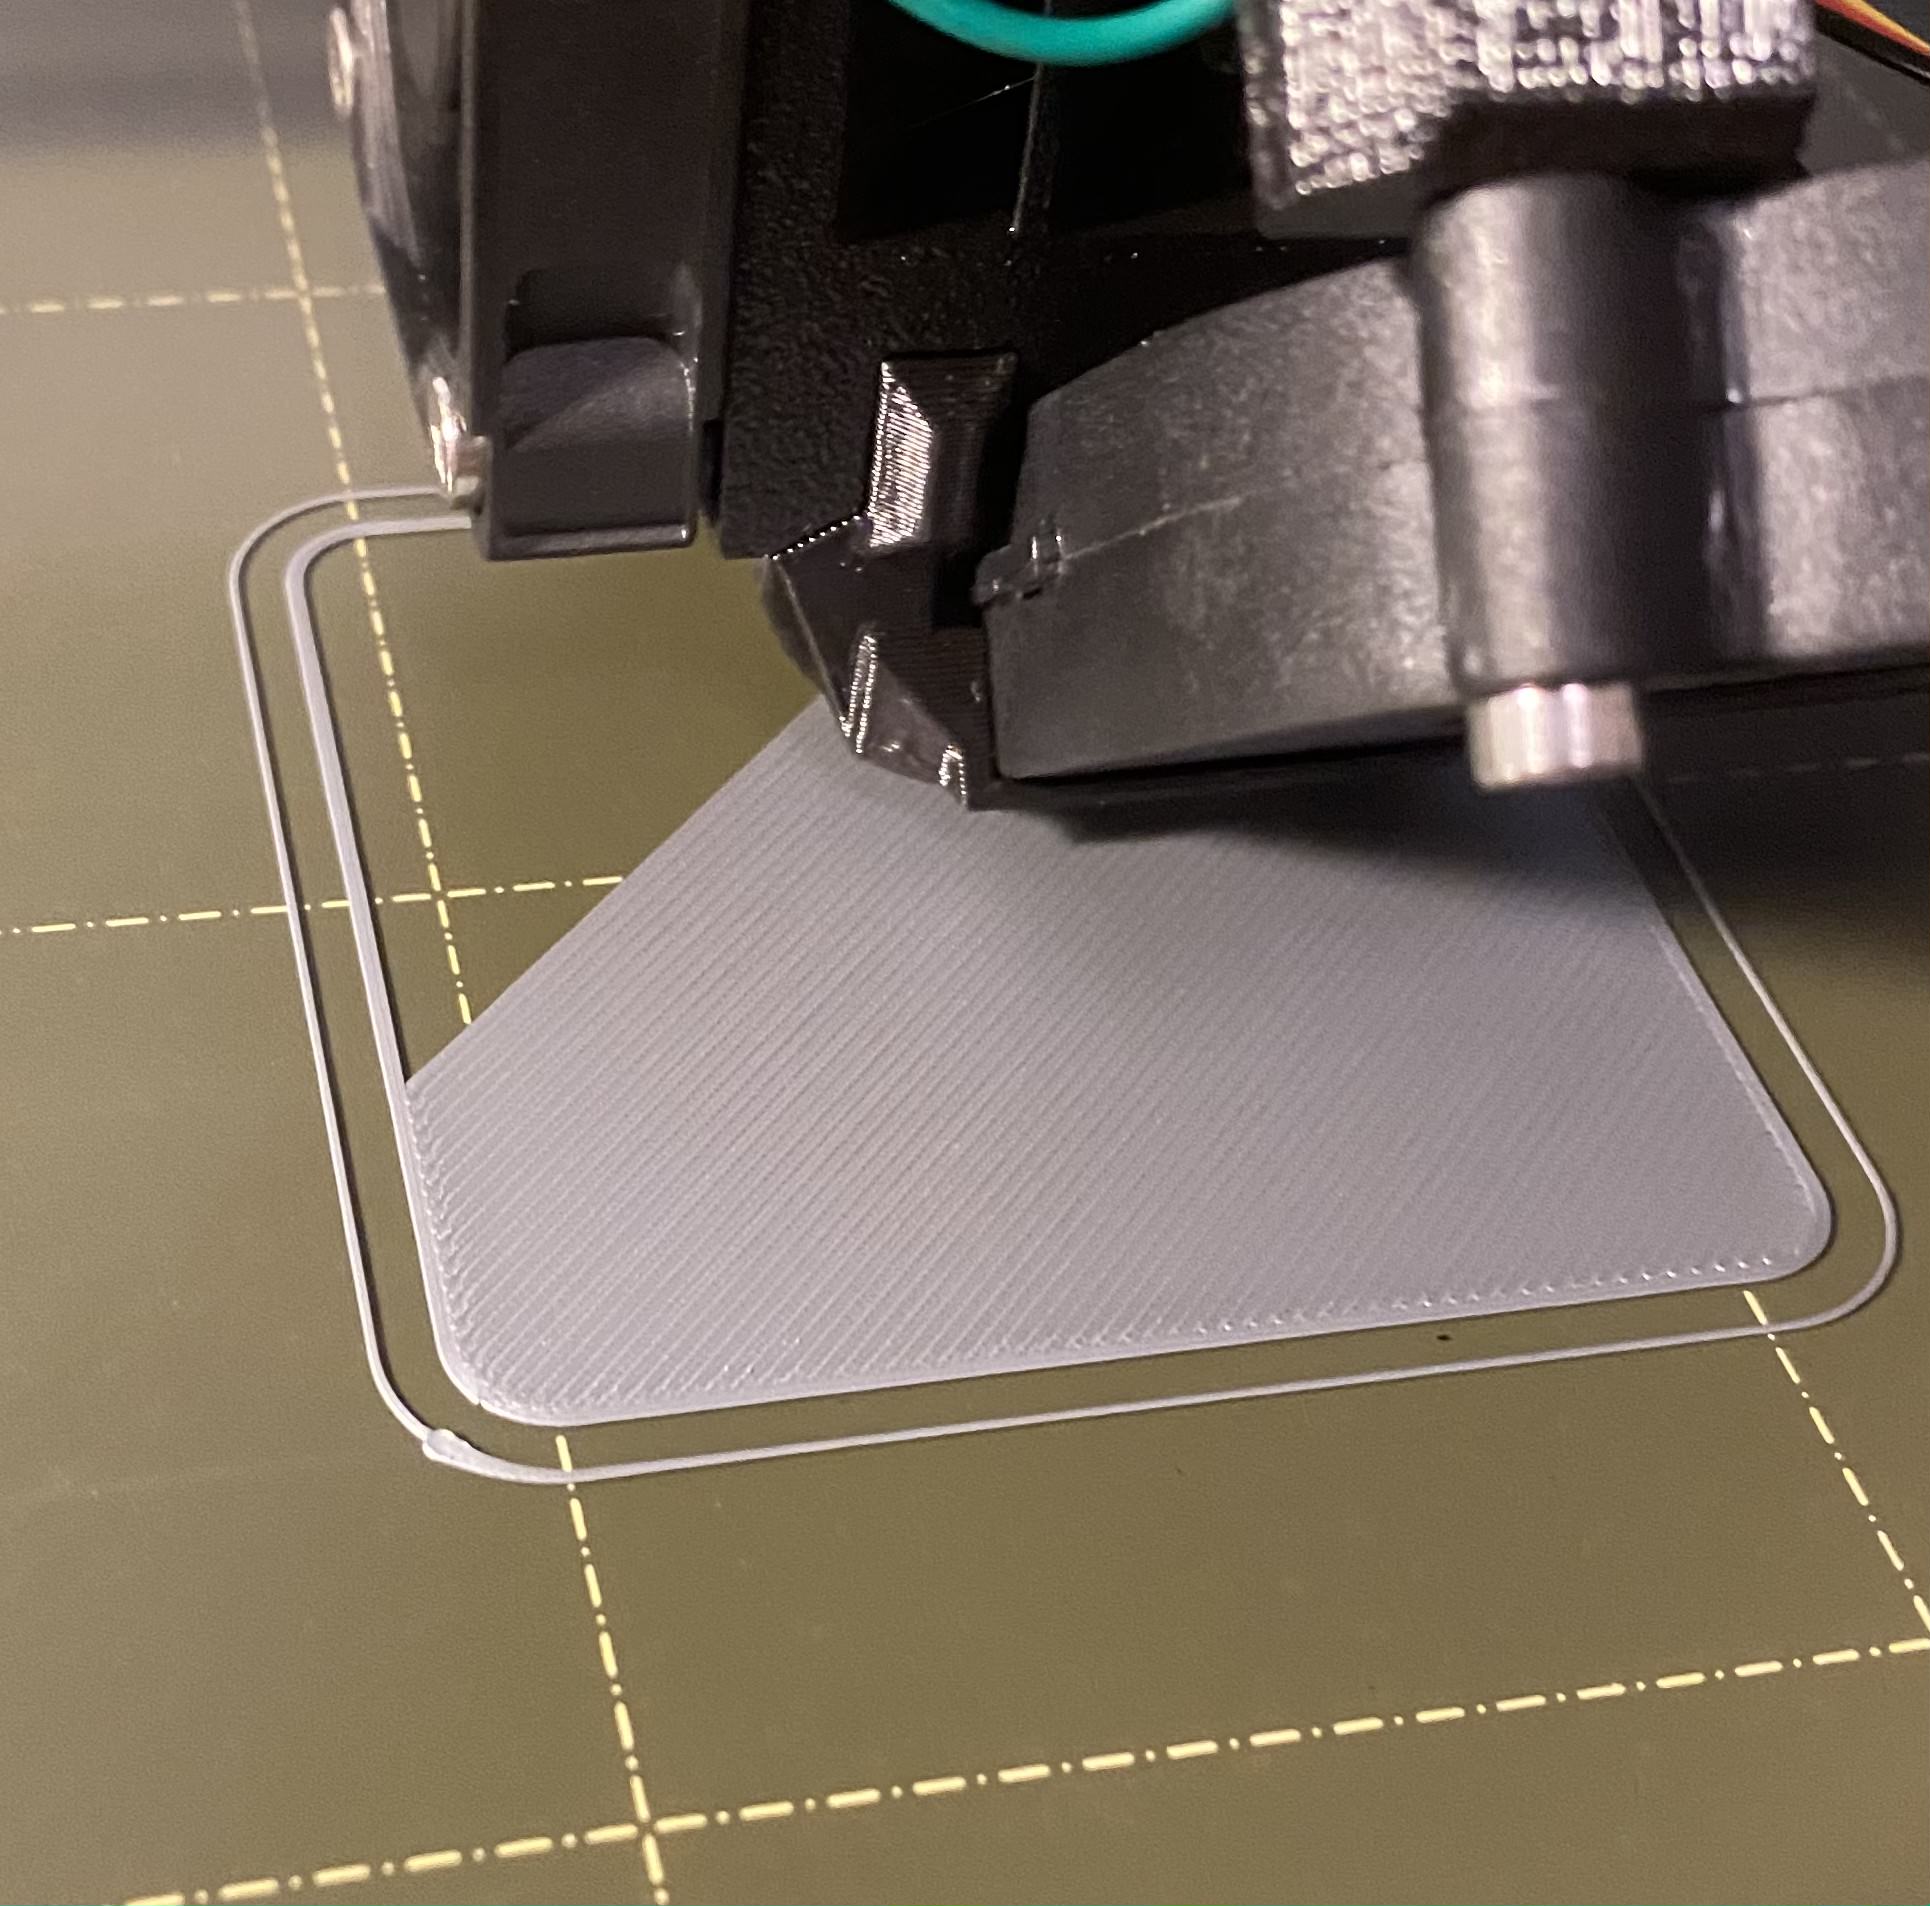
RE: Nozzle hits prints off after about 450mm
In the bottom picture, the built in calibration, you have gone a fraction too low, too squished. Ease back (up) until you *just* lose those waves.
Cheerio,
RE: Nozzle hits prints off after about 450mm
No luck on the test print, it ended up failing earlier than my last print. 🙁
Sure I can raise it back up a bit, however that's about what I did the first time I calibrated. So now I'm back at square 1 and not sure what else to try.
RE: Nozzle hits prints off after about 450mm
Something else I noticed when calibrating earlier today was how hard the filament could get stuck to the bed if I went further down. Like I could actually feel how stuck down it was as I pulled the straight line it almost stretched before it came up . I can see why first layer is so important, but if I'm not meant to go that far down.... I feel quite lost
RE: Nozzle hits prints off after about 450mm
Good news! I have a successful print. As well as new information. I got desperate and decided to just use glue stick on the model. I'm realizing that this All-in-one test isn't super beginner friendly, but I won't be taken in by a 3D model XD (I'll try a benchy again tomorrow, but 2 hours is a bit much for me after work and I'm not comfortable enough to let it run when I sleep just yet). So in doing so I noticed a couple things. I believe my true enemy here is the curling of the layer as it's trying to do an overhang, the layer is slightly curling upwards and THAT is what's catching the nozzle and of course would fall off the bed if not literally glued to it.
I suppose my issue is solved and I'm ok using a glue stick for literal benchmark prints, but now I'm curious about how to fix that in particular. I saw mixed things about "cooling too fast" and "cooling too slow" but I haven't really taken too much time to research it in particular yet...
btw I realized I never mentioned what my test actually was. I've been using *NANO* All In One 3D printer test as it was small and had a lot of nice test structures that I could understand.
My finished print, it's not perfect, but I'll take it when compared to the other prints of the model in photo:
RE: Nozzle hits prints off after about 450mm
Thanks again for everyone's help! Looking forward to making stuff in this community. Glad to finally have a completed benchmark, even if it might be a bit above my skill level.
RE: Nozzle hits prints off after about 450mm
If you had to use a glue stick printing PLA on the smooth PEI sheet - you have a contamination problem you need to solve.
Unfortunately, keeping the bed clean is a hard lesson to learn. Eventually, most figure it out, but there are some that don't and end up using sandpaper to get PLA to stick rather than deal with the real issue.
For what it is worth, I'll repost my full cleaning instructions.
Hot Water wash: often, as needed, and after any of the following
(not recommended for daily use on Powder Coated sheets)
- Handle the bed only by the edges.
- Wash the bed in hot water, use a fresh paper towel as a wash cloth, with a few drops of plain dish soap (Dawn, unscented, no anti-bacterial, etc.).
- Rinse well in hot water - if you have very soft water, rinse a bit longer.
- Dry the bed with a fresh paper towel.
- Handle the bed only by the edges.
- Place bed on printer.
Alcohol wash: rarely as needed
- Gloves recommended.
- Once in a while, an alcohol rinse is helpful to remove PLA printing residue. It does not remove finger oils well.
- Pour a 5 cm puddle of 91%+ alcohol in the middle of the bed, with clean hands use a fresh paper towel to scrub the bed. Wipe up all the alcohol.
- Wash with soap and water to ensure no oils remain.
Acetone wash: infrequent as needed
(Not recommended for USE on Powder Coated sheets, but some find it necessary)
- Pour a 2 cm puddle of acetone on the bed, scrub it around with a fresh paper towel. It will evaporate fast as you clean. This step removes PEI oxides that form over time and with heat, and improves PLA adhesion to a like new state.
- Wash with soap and water to ensure no oils remain.
Streak test: when contamination is suspected
- With a fresh piece of paper towel, and very clean fingers, dampen the towel with 91%+ alcohol, and wipe the bed side to side moving back to front, like you're painting it with alcohol. The alcohol should be thin enough on the towel it quickly evaporates from the bed. If you see any streaks, the bed is dirty and needs a wash.
RE: Nozzle hits prints off after about 450mm
Like I could actually feel how stuck down it was as I pulled the straight line it almost stretched before it came up .
Youre getting closer...
Good news! I have a successful print. As well as new information. I got desperate and decided to just use glue stick
Bad news: You're using glue stick with PLA.
CLEAN THE BED. Clean both sides. Especially clean the edges.
DO NOT TOUCH the clean surface - it's fingerprints you are removing.
Cheerio,
RE: Nozzle hits prints off after about 450mm
Right, as I said in the comment before that I had just cleaned the bed with soap and water before the test and never even touched the bed with my hands. So either I wasn't rough enough with my cleaning, or something else has gone wrong, but at least I know adhesion really was my problem in this case. I was just getting desperate and wanted to try something that I know should work if adhesion was my problem, hence the glue stick.
I am mildly confused though.... you guys are saying my test was already a touch too low as you could see waves in my smaller calibration test... but that was WELL higher than when I actually felt the strength of the adhesion. Maybe it is just my bed not being clean enough because I didn't use a lot of force when cleaning with soap and water. I had mentioned that I could still see some amount of streaks after cleaning when compared to the opposite side of the bed that has yet to be printed on, so that might just be it. So many variables to account for still.