not sticking to bed
I've cleaned the steel bed at least 5 times with Dawn and lots of hot water. I used a sponge and that "stiff scrungy part" to scrub the steel bed. I initially used the IPA that came with the kit to clean the bed (but it evaporated pretty quickly).
Still having problems with my first prints staying on the bed. Here is a video of me trying to print the frog.
Is there anything else I can do? I heard one suggestion of spray glue, but that sounds a little drastic.
https://forum.prusa3d.com/wp-content/uploads/2020/06/frog.mp4
RE: not sticking to bed
Hi,
are you using 7x7 Mesh Bed Levelling? if not, turn it on using the LCD Menu.
Have you done First layer calibration? I find the Prusa First layer Calibration tool difficult to use.
Try https://forum.prusa3d.com/forum/original-prusa-i3-mk3s-mk3-assembly-and-first-prints-troubleshooting/life-adjust-z-my-way/
have you tried re slicing the frog with a hotter bed temperature, say 70C
Can we see the first layer please, it will probably tell us more than the video you showed.
the bottom of the Frog print might be helpful too.
Regards Joan
I try to make safe suggestions,You should understand the context and ensure you are happy that they are safe before attempting to apply my suggestions, what you do, is YOUR responsibility.Location Halifax UK
RE: not sticking to bed
@joantabb
Thanks Joan, you have been so helpful with all my queries!
It is still printing, so I will let it continue till finished, just to see what happens.
I have no idea what "7x7 Mesh Bed Leveling" but will look into it.
I didn't slice the frog, just used what was on the card that came with the kit. But I could certainly re-slice it. In general what does a hotter bed do? I assumed a colder bed would allow the material to cool and stick quicker.
I saw in one of your other helpful posts that you once mentioned changing the bed temperature after the first layer. Is this a way to help getting that first layer established? Then the optimal temp for the remaining layers will be slightly cooler?
Thanks again, all your comments have greatly helped this newbie.
-jim
RE: not sticking to bed
If make the bed hot, and print on it, then let bed cool down, the model will let loose, that is how the sheets work.
Before you start printing, a hotter bed will stick better, a hotter nozzle will stick better, depends on filament(quality, old filament,bad roll).
A new sheet will stick less then a used one.
PLA sticks more difficult on a powder coated sheet.
This how I work on a pei sheet(there are always exceptions):
Most important to 3d printing is:
1. 3d print will never be like start and i have the print, there will always be problems!!!!!!
2. A clean sheet, use dish soap, then you can print on it. A few prints you can use alcohol, then again dish soap, big flat models and models with small footprint on sheet- use glue stick(and not every glue stick is the same, use one that makes a thin layer).
Petg sticks to much on the pei sheet, use window cleaner, this leaves a layer on the bed, so it does not stick to much.
3. To get it stick very good, a 100% first layer is very important, see youtube for movie on this. Every new print watch the first layer, and look if it is 100%, this will also prevent a big ball of filament on your nozzle wenn model let loose during printing.
Extra: (normally not needed).
First layer, print hotter.
First layer slower.
Bed more heat.
Most problems are first layer to get this 100%.
Bad filament is possible, or filament with water inside.
Move extruder to the top and extrude filament, it should go straight down(nozzle blocks), it should be thick enough(nozzle blocks), if explodes during extrusion then it has to much water inside.
RE: not sticking to bed
Big flat models and small footprint, use a big brim attach to model so footprint is bigger so sticking is better.
RE: not sticking to bed
What is considered to be a "big" brim? 1cm?
RE: not sticking to bed
4 or 6 lines, or bigger.
RE: not sticking to bed
I've switched to adding 3M blue tape to my print bed i switch it out after about 20-30 prints. Haven't lost a print to adhesion issues ever since switching. I ran into this lots when i first started. bigger brim might help if you don't want to go down the 3M blue tape solution.
RE: not sticking to bed
@peter-m-3
This series helper me a LOT! For months, i have been unable to get a large to stick. I was able to print only in the center area.
I slowed speed down to 80 and raised bed temp to 75, now printing large parts.
If I can attach an image it will show my results.
This is generic Overture PLA.
you don't know what you don't know, neither do I
RE: not sticking to bed
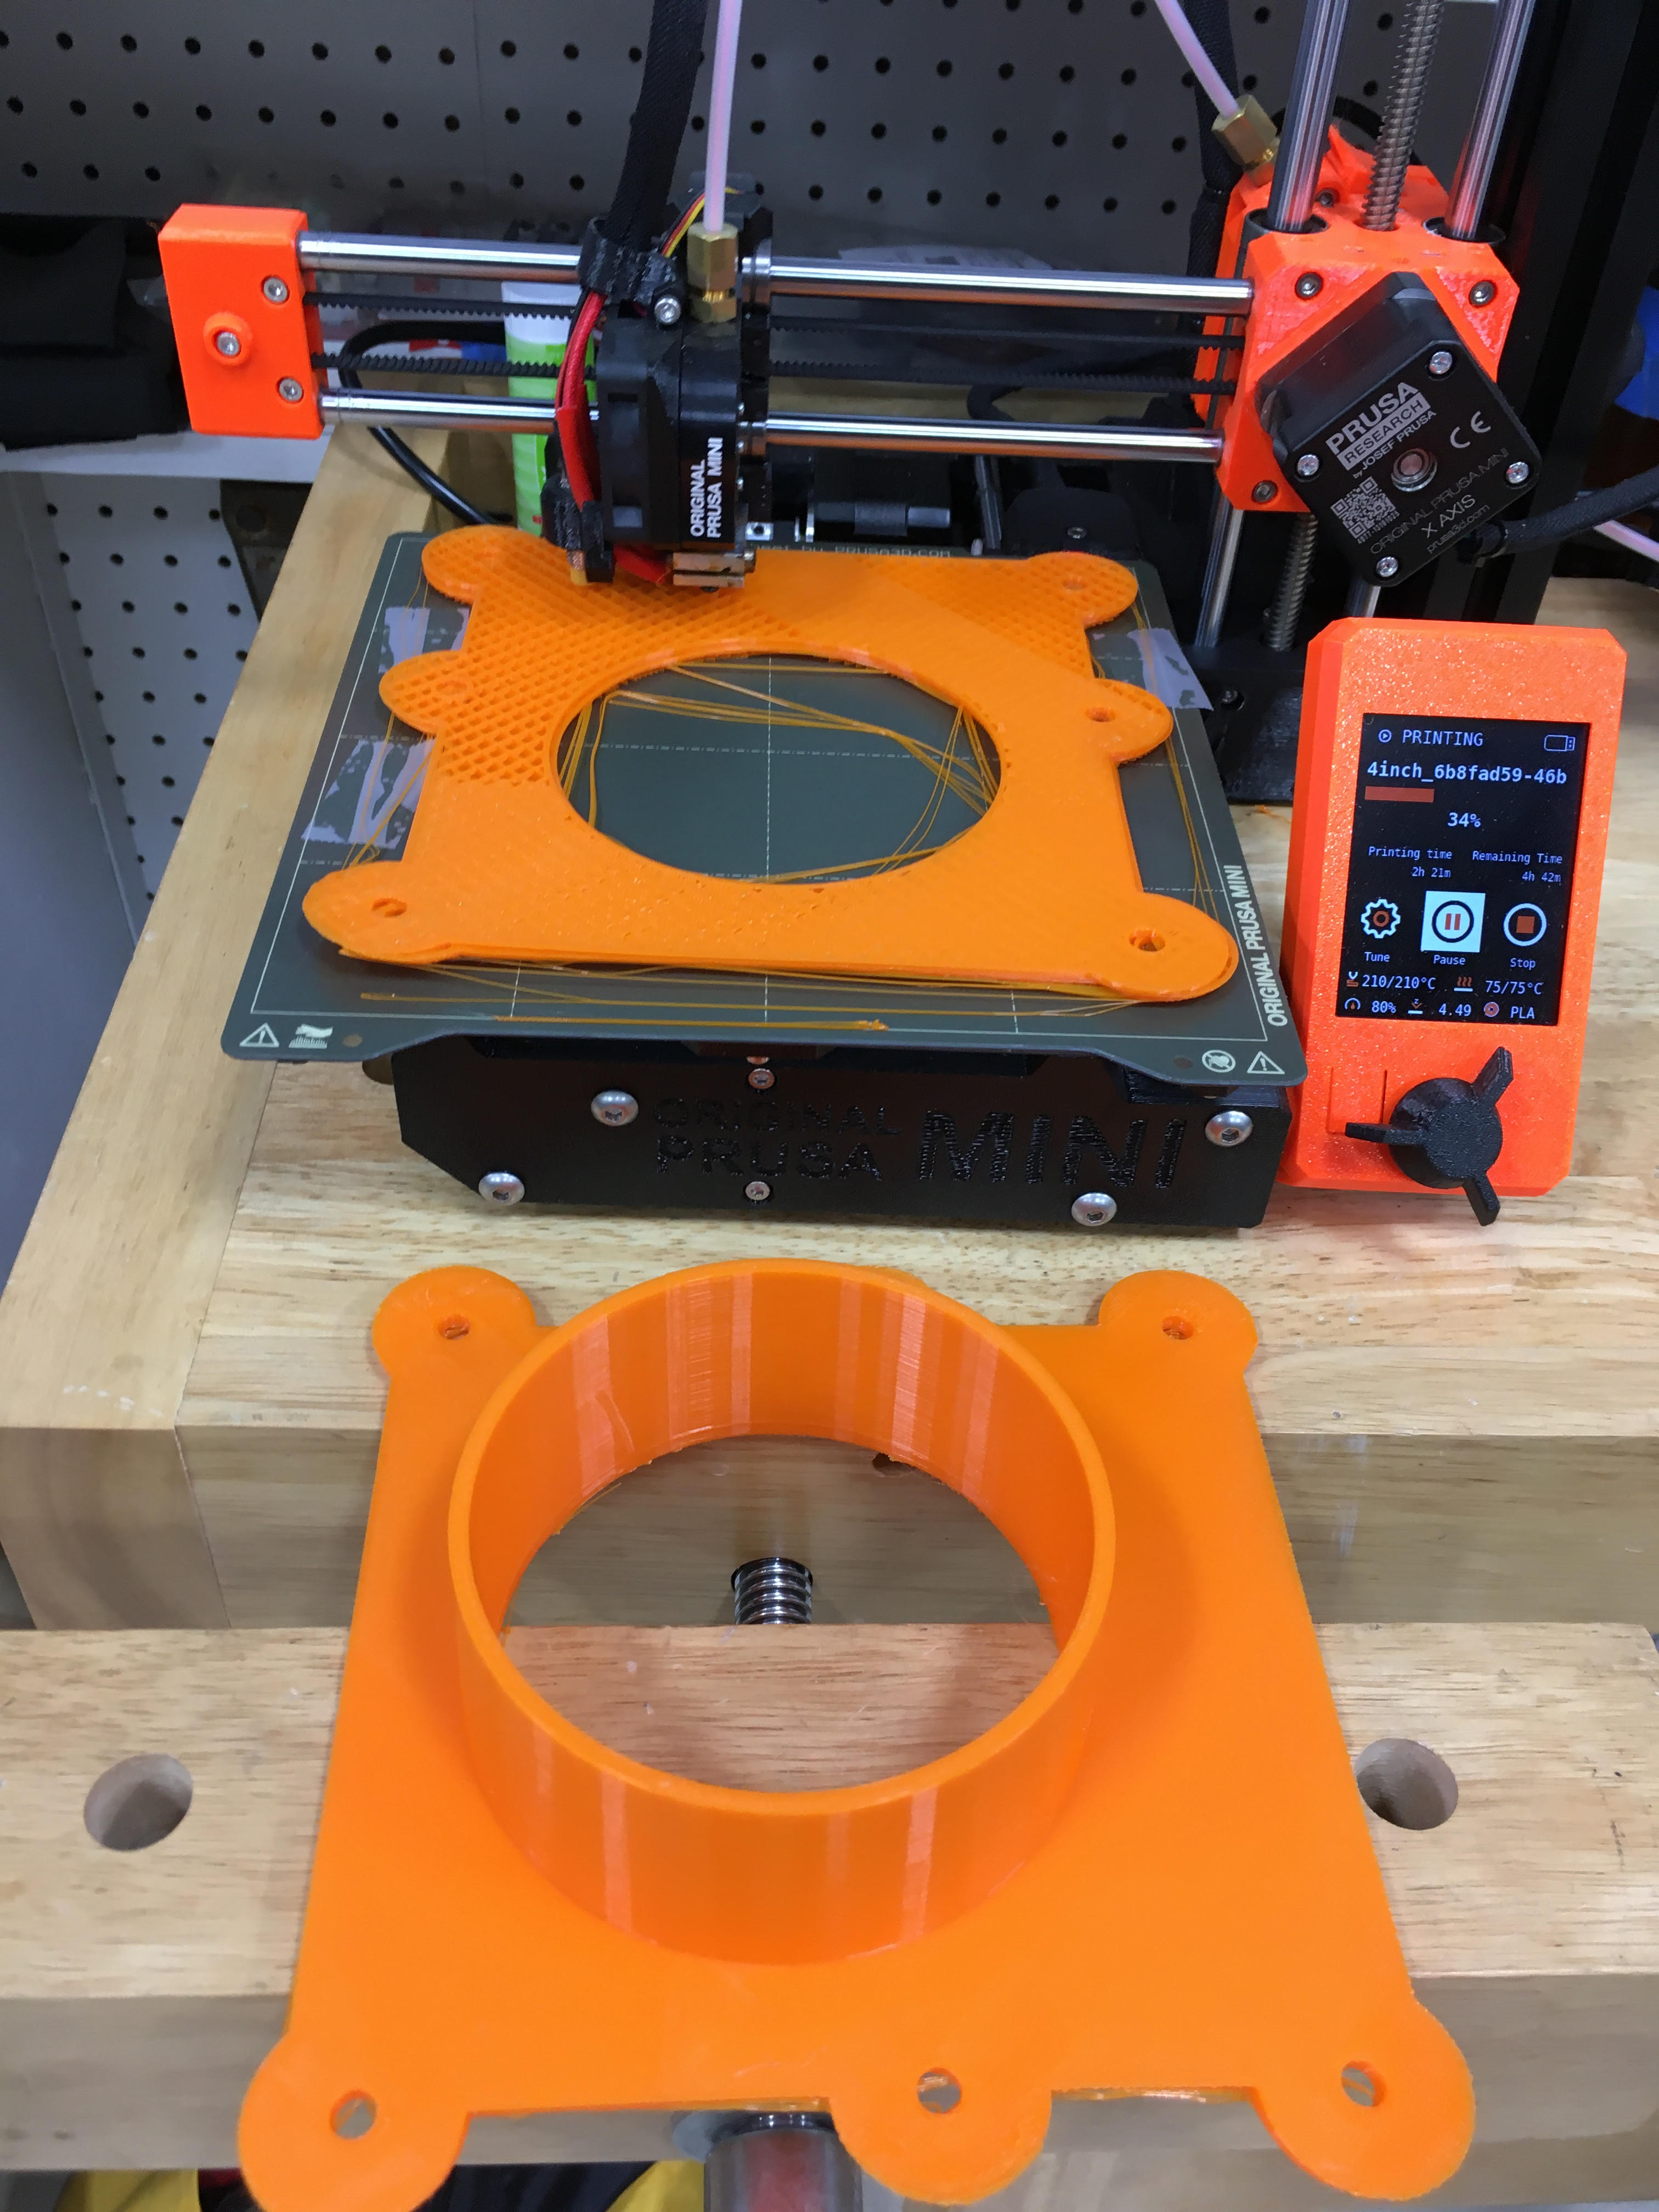 Getting large parts to stick
you don't know what you don't know, neither do I
RE: not sticking to bed
@kyle-a3
Do you still heat the bed with the Blue Tape?
you don't know what you don't know, neither do I
RE: not sticking to bed
Getting large parts to stick
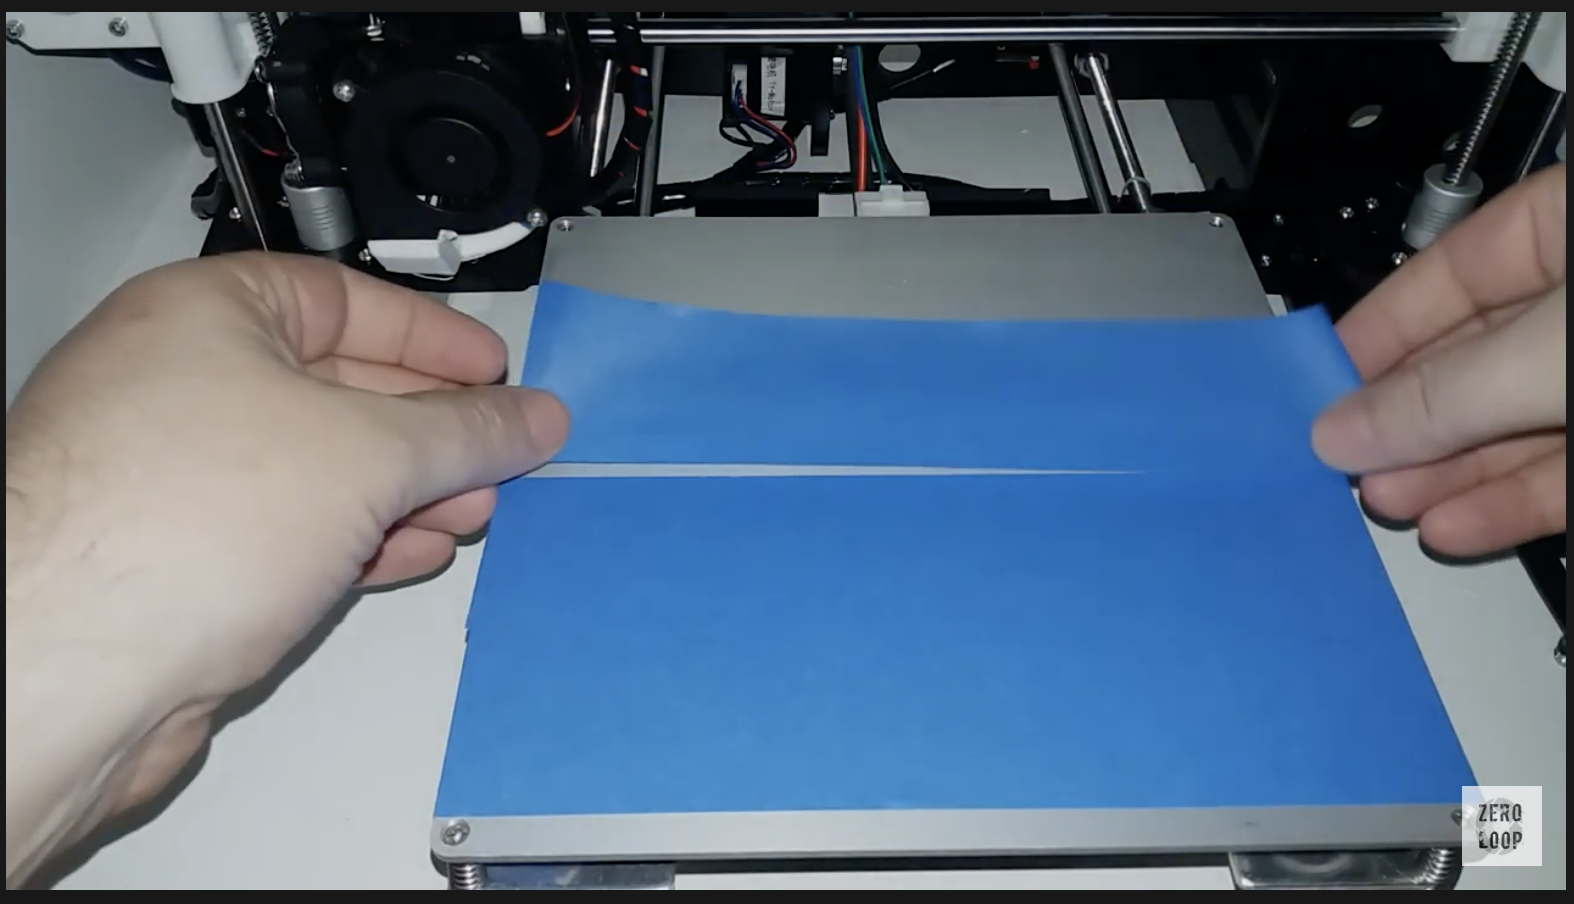
That looks like Scotch/transparent tape. The idea with blue painter's tape is that you lay down a layer for the filament to stick to. Here's a grab from a YouTube video showing it being applied to an older printer.
Looking at those extrusions being pulled across the circular cutout in your print, you've got other problems going on. Try a lower slowing down, increasing temp or reducing cooling, or using lower layer heights for that part of the print.
RE: not sticking to bed
@bobstro
I use the same painter's tape. It works well.
--------------------
Chuck H
3D Printer Review Blog
RE: not sticking to bed
I will try the Blue Tape next, if the higher temps don't help. Thank y'all for your help.
The edges are still curling up on the outside edges. I guess the hot bed is keeping the material flexible enough for it to continue.
I did have one part that got shifted 2mm. I had left it for hour or so, and some how the print completed.
I was able to drill the offset in the bolt holes.
Had another that got knocked off the bed. Found the machine pushing a growing blob of material around the bed and the part on the floor.
you don't know what you don't know, neither do I
RE: not sticking to bed
I you have cleaned the bed with IPA and Soap and water and neither worked. Try adjusting you Z off site value. If that fails, try Layerneer Bed Weld.
--------------------
Chuck H
3D Printer Review Blog
RE: not sticking to bed
I used to have terrible bed sticking issues. No More! I have a "i3 mk3S" that is 4 months old. To fix this for me I first put the steel sheet in the sink and let hot water run over it for 10 minutes each side. This seems to dissolve any residual glue and leave it very clean. Then I dry it with a paper towel and wipe it down with an alcohol swab. Then I put a thin layer of glue stick on the areas that I am going to be printing. Then I do a Z axis calibration starting with "0" and cranking it up until I get the lines to adhere. I have occasional failures which after fixing have caused the Z value to increase as high as 1.50 which is where it is now. My prints are excellent, bed adhesion is excellent. If I miss some perimeter locations with the glue stick then then the edge may warp up and cause the print to fail. I have always made sure that there was adequate flow and if suspicious I will do a cold pull. I only reapply the glue stick if the if the part leaves a white footprint when removed. I wash the Steel plate when the glue accumulates and becomes lumpy. The trick was when Prusa Support said ignore the value of the Z setting and just increase it until the first layer sticks.
RE: not sticking to bed
I have tried my Z height from 0 to -o.130, Maybe I should be raising instead of lowering.
this print failed few mins after this photo.
you don't know what you don't know, neither do I
RE: not sticking to bed
I have tried my Z height from 0 to -o.130, Maybe I should be raising instead of lowering.
this print failed few mins after this photo.
If your Z offset is only -0.130 that seems way too high. The image (especially the perimeter circles) look too high as well. I suggest following the first layer calibration instructions again. As an example, my Z offset for the smooth PEI was -0.920 (it's -1.500 now since I swapped to the SuperPINDA). Somewhere around -0.700 to -0.900 should be around where it is. In a perfect world, it'd be the exact distance the probe is set at, but the MINDA adjustment says it should be between 0.8-1.0mm away from the bed with the nozzle sitting on the bed, thus the Z offset should reflect similar numbers.
EDIT: Also the Z offset cannot be a positive number, that would mean the probe is closer than the nozzle, which would not work at all.
I think I know, I don’t think I know. I don’t think I think I know, I don’t think I think.
RE: not sticking to bed
@skreelink
Ok... the negative Z adjustment move closer to bed; -.5 is lower/closer than -.4 . Have I got that right?
and Thank y’all.
you don't know what you don't know, neither do I