RE:
Hi, I just got my first 3D printer (Prusa Mini Plus) and although calibration seems ok, I'd like the file so that I can check it. I don't see it on the forum though, is it still available at all? I'd really appreciate it!
Thanks
Dave
RE:
The following is a great article on that method: https://projects.ttlexceeded.com/3dprinting_mk3_live_z_calibration.html
And you will gett he files here:
https://www.prusaprinters.org/prints/40729-parametric-bed-level-test-generator
RE: life adjust Z - my way
This is actually the article that got me over the hump on calibration work. And it includes links to STLs for the Mini, too.
The following is a great article on that method: https://projects.ttlexceeded.com/3dprinting_mk3_live_z_calibration.html
And you will gett he files here:
https://www.prusaprinters.org/prints/40729-parametric-bed-level-test-generator
RE: life adjust Z - my way
Thanks very much for the info. I'll take a look! Much appreciated. 🙂
RE: life adjust Z - my way
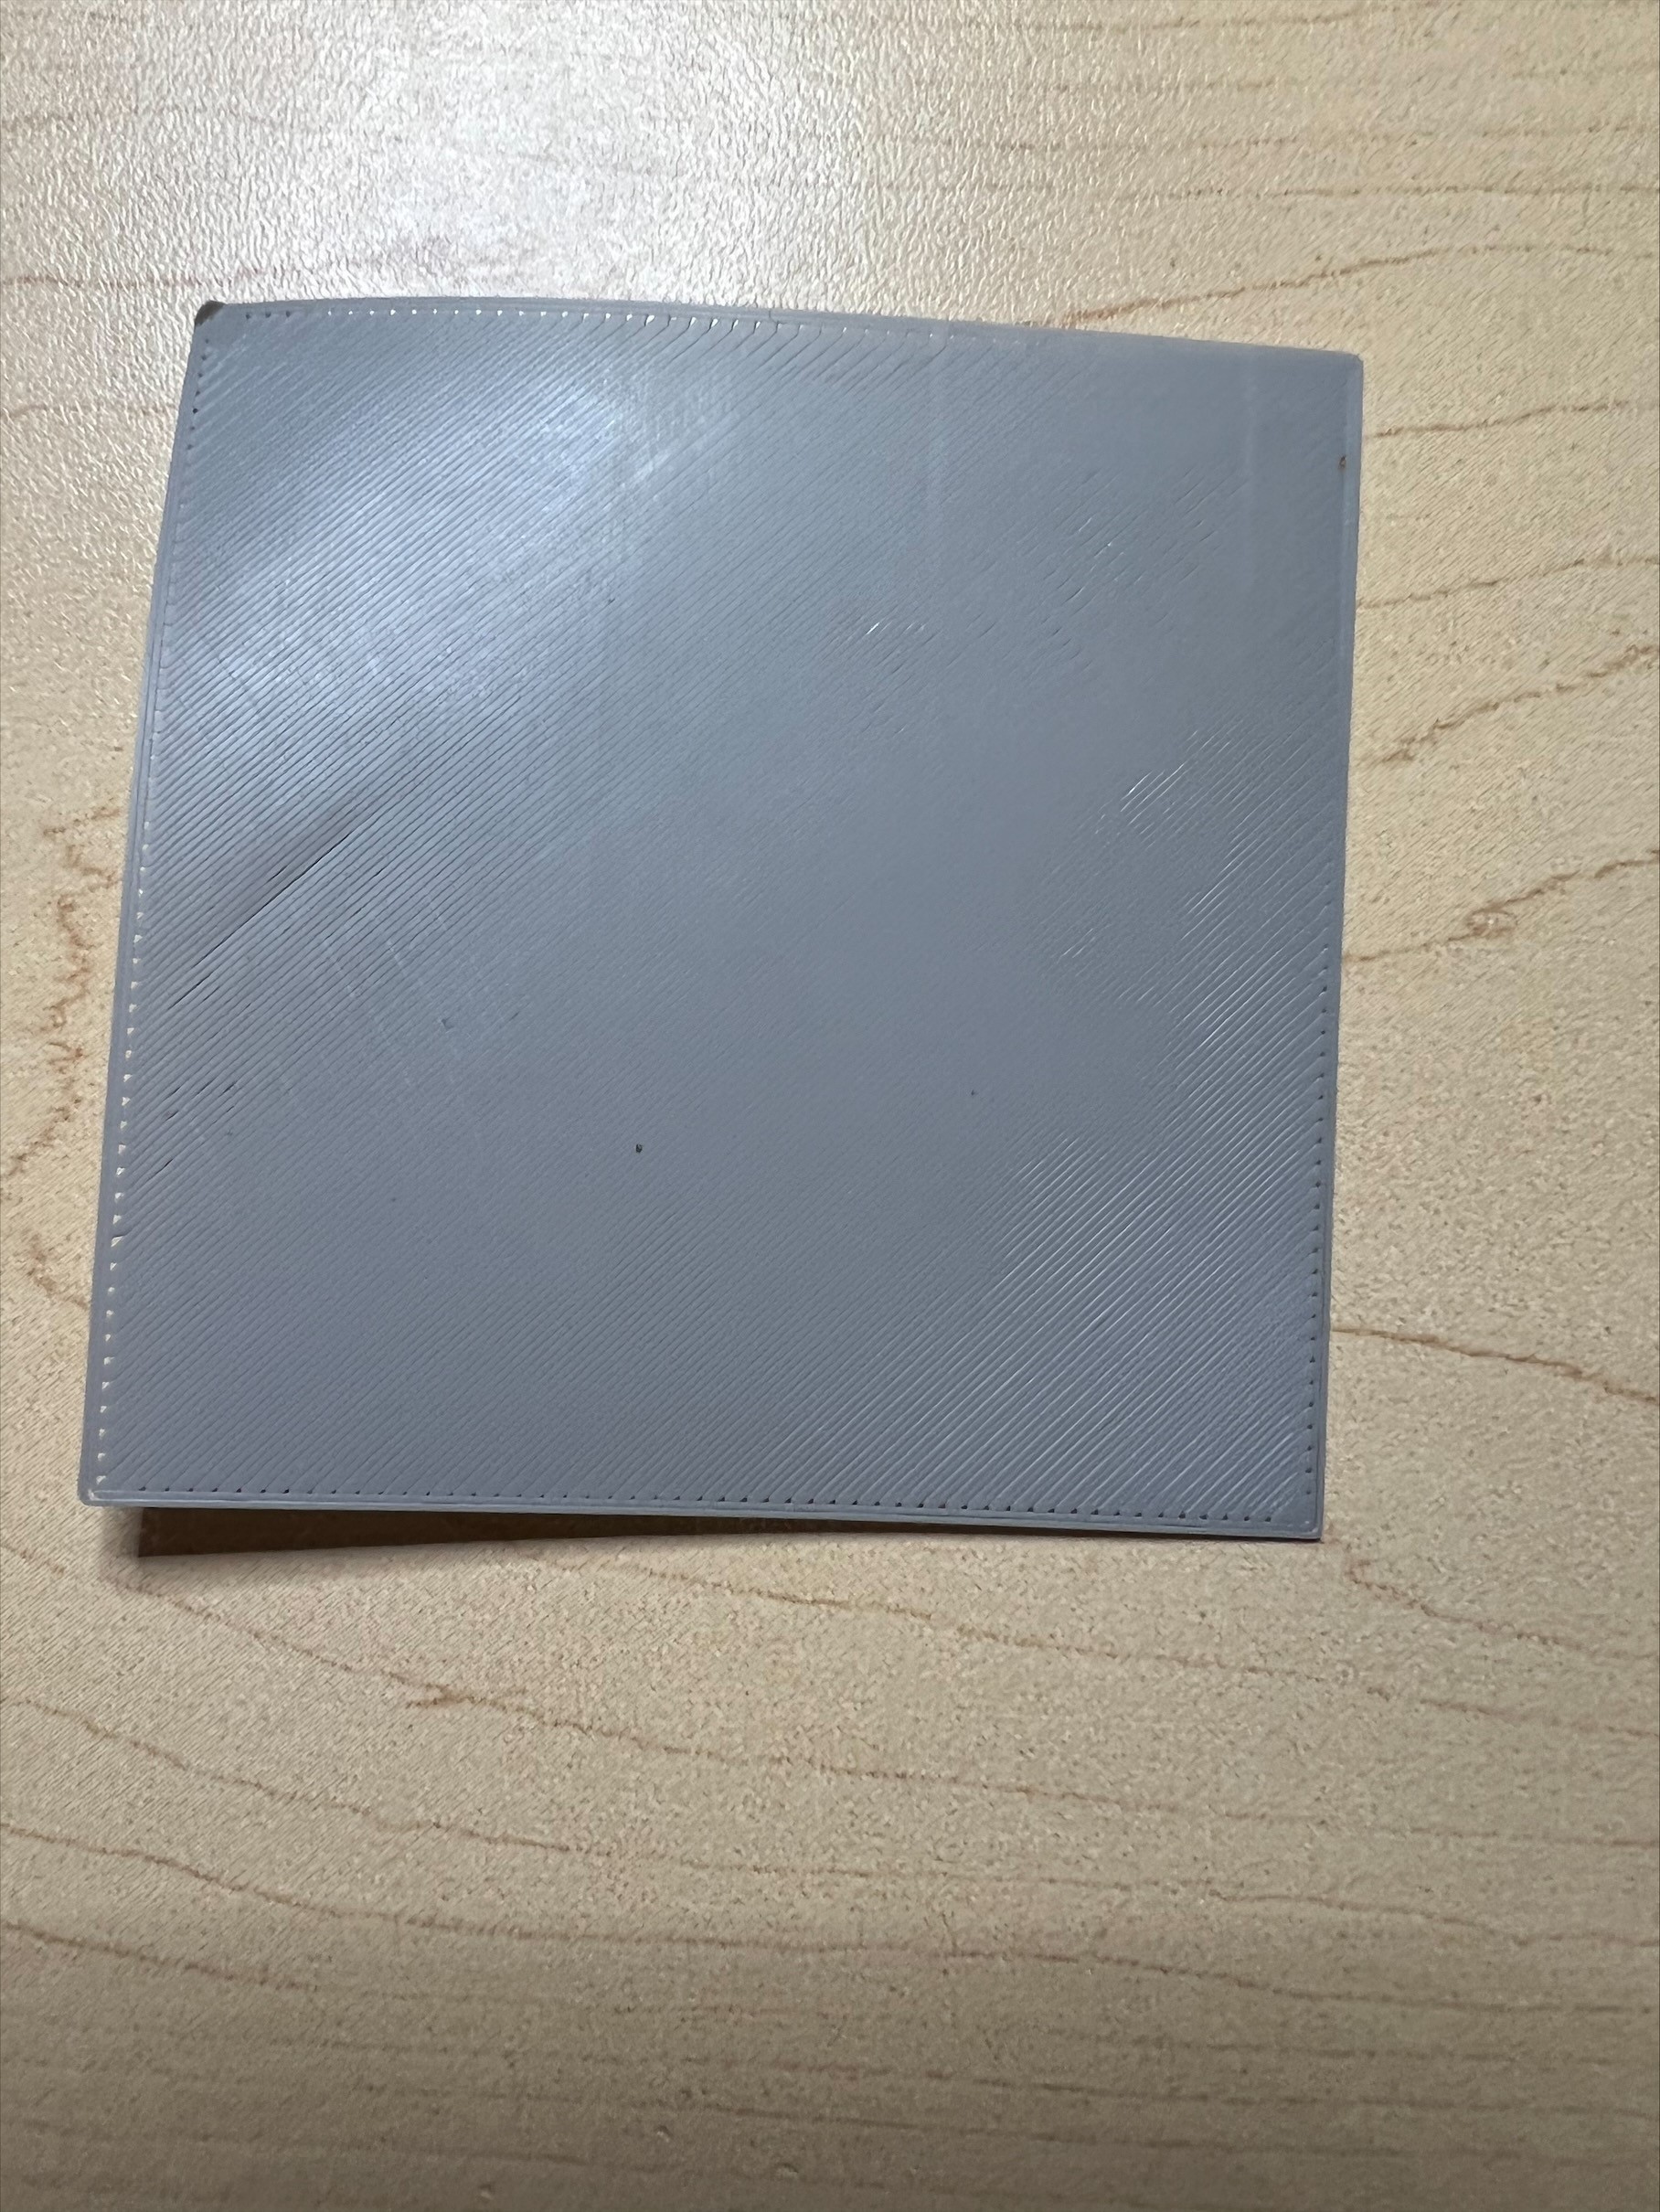
I know the Z - number is arbitrary and differs I'm sure from machine to machine.... I've printed the file numerous times and made
adjustment s to no joy.. What seems to happen... I print what I consider a perfect square...smooth no globs or gouges.... When I try a print
from a regular file/ PLA Filament, it globs/ comes undone and generally is a big fail... Any Clues of what I may be overlooking?
Thanks Guys
RE: life adjust Z - my way
Photos of your square test print (underside is most important) and some of your failed prints would be helpful.
RE: life adjust Z - my way
 Here
Here
Here are a couple of shots... front back of the test print and the failed portion
Thanks for the look See
RE:
You are getting there but your z-offset is still putting your nozzle a little too high. You could try going down by small increments until you are clearly too low and then come back up again.
If you have an MK3S+ be sure to enable the 7x7 mesh leveling from the LCD screen. (The mini does not have this option).
Mk3S+,SL1S
RE: life adjust Z - my way
Thanks much... I'll give this a go.. It prints fine in the middle... but the edges of the print fail... very strange,
I have it set for 7x7 and tried up and low heat.. etc... I"ll keep plugging away.. Let you know how we do... and THANKS for your file
This really helps.
D
Differences between Live-Z and gcode 1st layer heights and gcode flow adjustments will yield different results
[...] I print what I consider a perfect square...smooth no globs or gouges.... When I try a print from a regular file/ PLA Filament, it globs/ comes undone and generally is a big fail... Any Clues of what I may be overlooking?
That's actually good diagnostic detail. This same issue has frustrated me in the past. A couple of things to keep in mind:
- When you use the Live-Z calibration routine, you are establishing the "0" position for the nozzle height above the bed.
- When you move your nozzle to the home position, it is move to XY=0 and Z=0.15mm. The software endstops will prevent you from moving any lower using normal movement commands.
- As you adjust Live-Z, you're adjusting this "lowest" position.
As you've completed your Live-Z adjustments, you're now at this point. Things do change when you start a print.
- The nozzle is moved to the 1st layer height in your slicer settings (usually 0.2mm).
- Flow is adjusted according to your slicer settings.
This has 2 implications:
- Your layer height is different for the first layer of your print versus when setting Live-Z.
- Slicer settings can affect flow and other factors that impact the print.
@sylviatrilling has you on the right path. The only thing I'd add is to be sure that your slicer settings aren't quietly biting you in the backside. In particular, adjustments to the flow rate that are included in the default Prusa start gcode can tweak your filament flow rate without your necessarily being aware of it. On the Mini, there is a line at the bottom of the Prusa start gcode:
M221 S95 ; set flow
This means that, regardless of the settings you've carefully calculated, the flow is automatically being reduced to 95% for every gcode file generated by PrusaSlicer. I know Prusa added similar gcode way back when because Slic3r (on which PrusaSlicer is based) tended to over-extrude on higher (>0.1mm) layer heights. I would suggest commenting out or removing this line from your start gcode and trying again. Then if you still aren't satisfied with your results, play around a bit more with Live-Z.
I've got some notes on this topic here that might be useful.
RE: life adjust Z - my way
Thanks @Bobstro. This explains some things that were puzzling me.
Mk3S+,SL1S
RE: life adjust Z - my way
Thanks Jeff: I was fortunate enough to find this post when I'm still not even in my 10th print. I see how much spagetti drama this has avoided me 😊 😊
RE: life adjust Z - my way
This works so much better than the built in one. I was able to quickly calibrate my new satin sheet using this. I happened to have flex loaded so I figured that might be a problem but not at all. If anything it made it really obvious when I wasn’t in the right region yet… Left was -1.700/-1.675 and impossible to remove from the build plate without every strand separating and coming in around 0.25 as best I could measure. Kind of pretty but not what I need! The next pair of distances were properly bonded and 0.20/0.21 thick. Trying to work out how to better refine the live-z given both of those look great to me.
RE: life adjust Z - my way
this is an old post, but a worthy post.
It was originally started for the Mk2 printers, many years ago
I don't think Jeff Jordan is with us any more, but his post lives on as a legacy!
regards Joan
I try to make safe suggestions,You should understand the context and ensure you are happy that they are safe before attempting to apply my suggestions, what you do, is YOUR responsibility.Location Halifax UK
RE: life adjust Z - my way
This technique is SO MUCH BETTER than the instructions given in the Prusa documentation. I finally got my z value set up and my adhesion is fantastic. The only suggestion I would make is to try to make the pictures that Jeff originally included available -- because they seem like they're gone. However, his description of the look and feel of the print was enough for me to get my adjustment set up.
RE: life adjust Z - my way
this is an old post, but a worthy post.
It was originally started for the Mk2 printers, many years ago
I don't think Jeff Jordan is with us any more, but his post lives on as a legacy!
regards Joan
Thanks for pushing this old thread up into the mind of the newcomers. This has certainly been one of the most important threads ever posted in this forum and I am one of certainly hundreds of those who benefitted from his insights. Too bad if Jeff left the forum, but I´m happy that you´re still around as your tech hints are so valuable, too. Cheers
Chris
I try to give answers to the best of my ability, but I am not a 3D printing pro by any means, and anything you do you do at your own risk. BTW: I have no food for…
RE: life adjust Z - my way
Thanks Chris.
We all have a shelf life...
Not sure what happened to Jeff.
Another Epic poster that I miss is Peter PJR...
Happy printing!
I try to make safe suggestions,You should understand the context and ensure you are happy that they are safe before attempting to apply my suggestions, what you do, is YOUR responsibility.Location Halifax UK
RE: life adjust Z - my way
This has helped me as well.
I used to have excellent print quality but then had a few changes that required me to re-calibrate everything. Probably spent 6+hrs trouble shooting why I couldn't get my parts to stick to the bed when in the past I have done many complicated/ intricate parts.
Two new variables:
1. Using Amazon Translucent PLA
2. Had to rebuild my extruder/ hot end after a HUGE failed print. Just got the thing rebuilt & doing the classic adjustments that I haven't done in a while and having little success.
Unsuccessful troubleshooting:
- Cleaning the print bed.
- 99.9% iso. alc.
- warm soapy wash
- Changing Print temperatures.
a. 215/210. 60/60
b. 210/205. 60/60.
c. 205/195. 55/55 (close)
d. 195/190. 55/55
e. 210/205. 65/65
RE:
This worked for me!
After 6+hrs of troubleshooting.
The First Layer Calibration was giving me different results than the parts I was trying to print.
Seems like a bug in the software of the 1st layer Calibration feature, but maybe I am missing something.
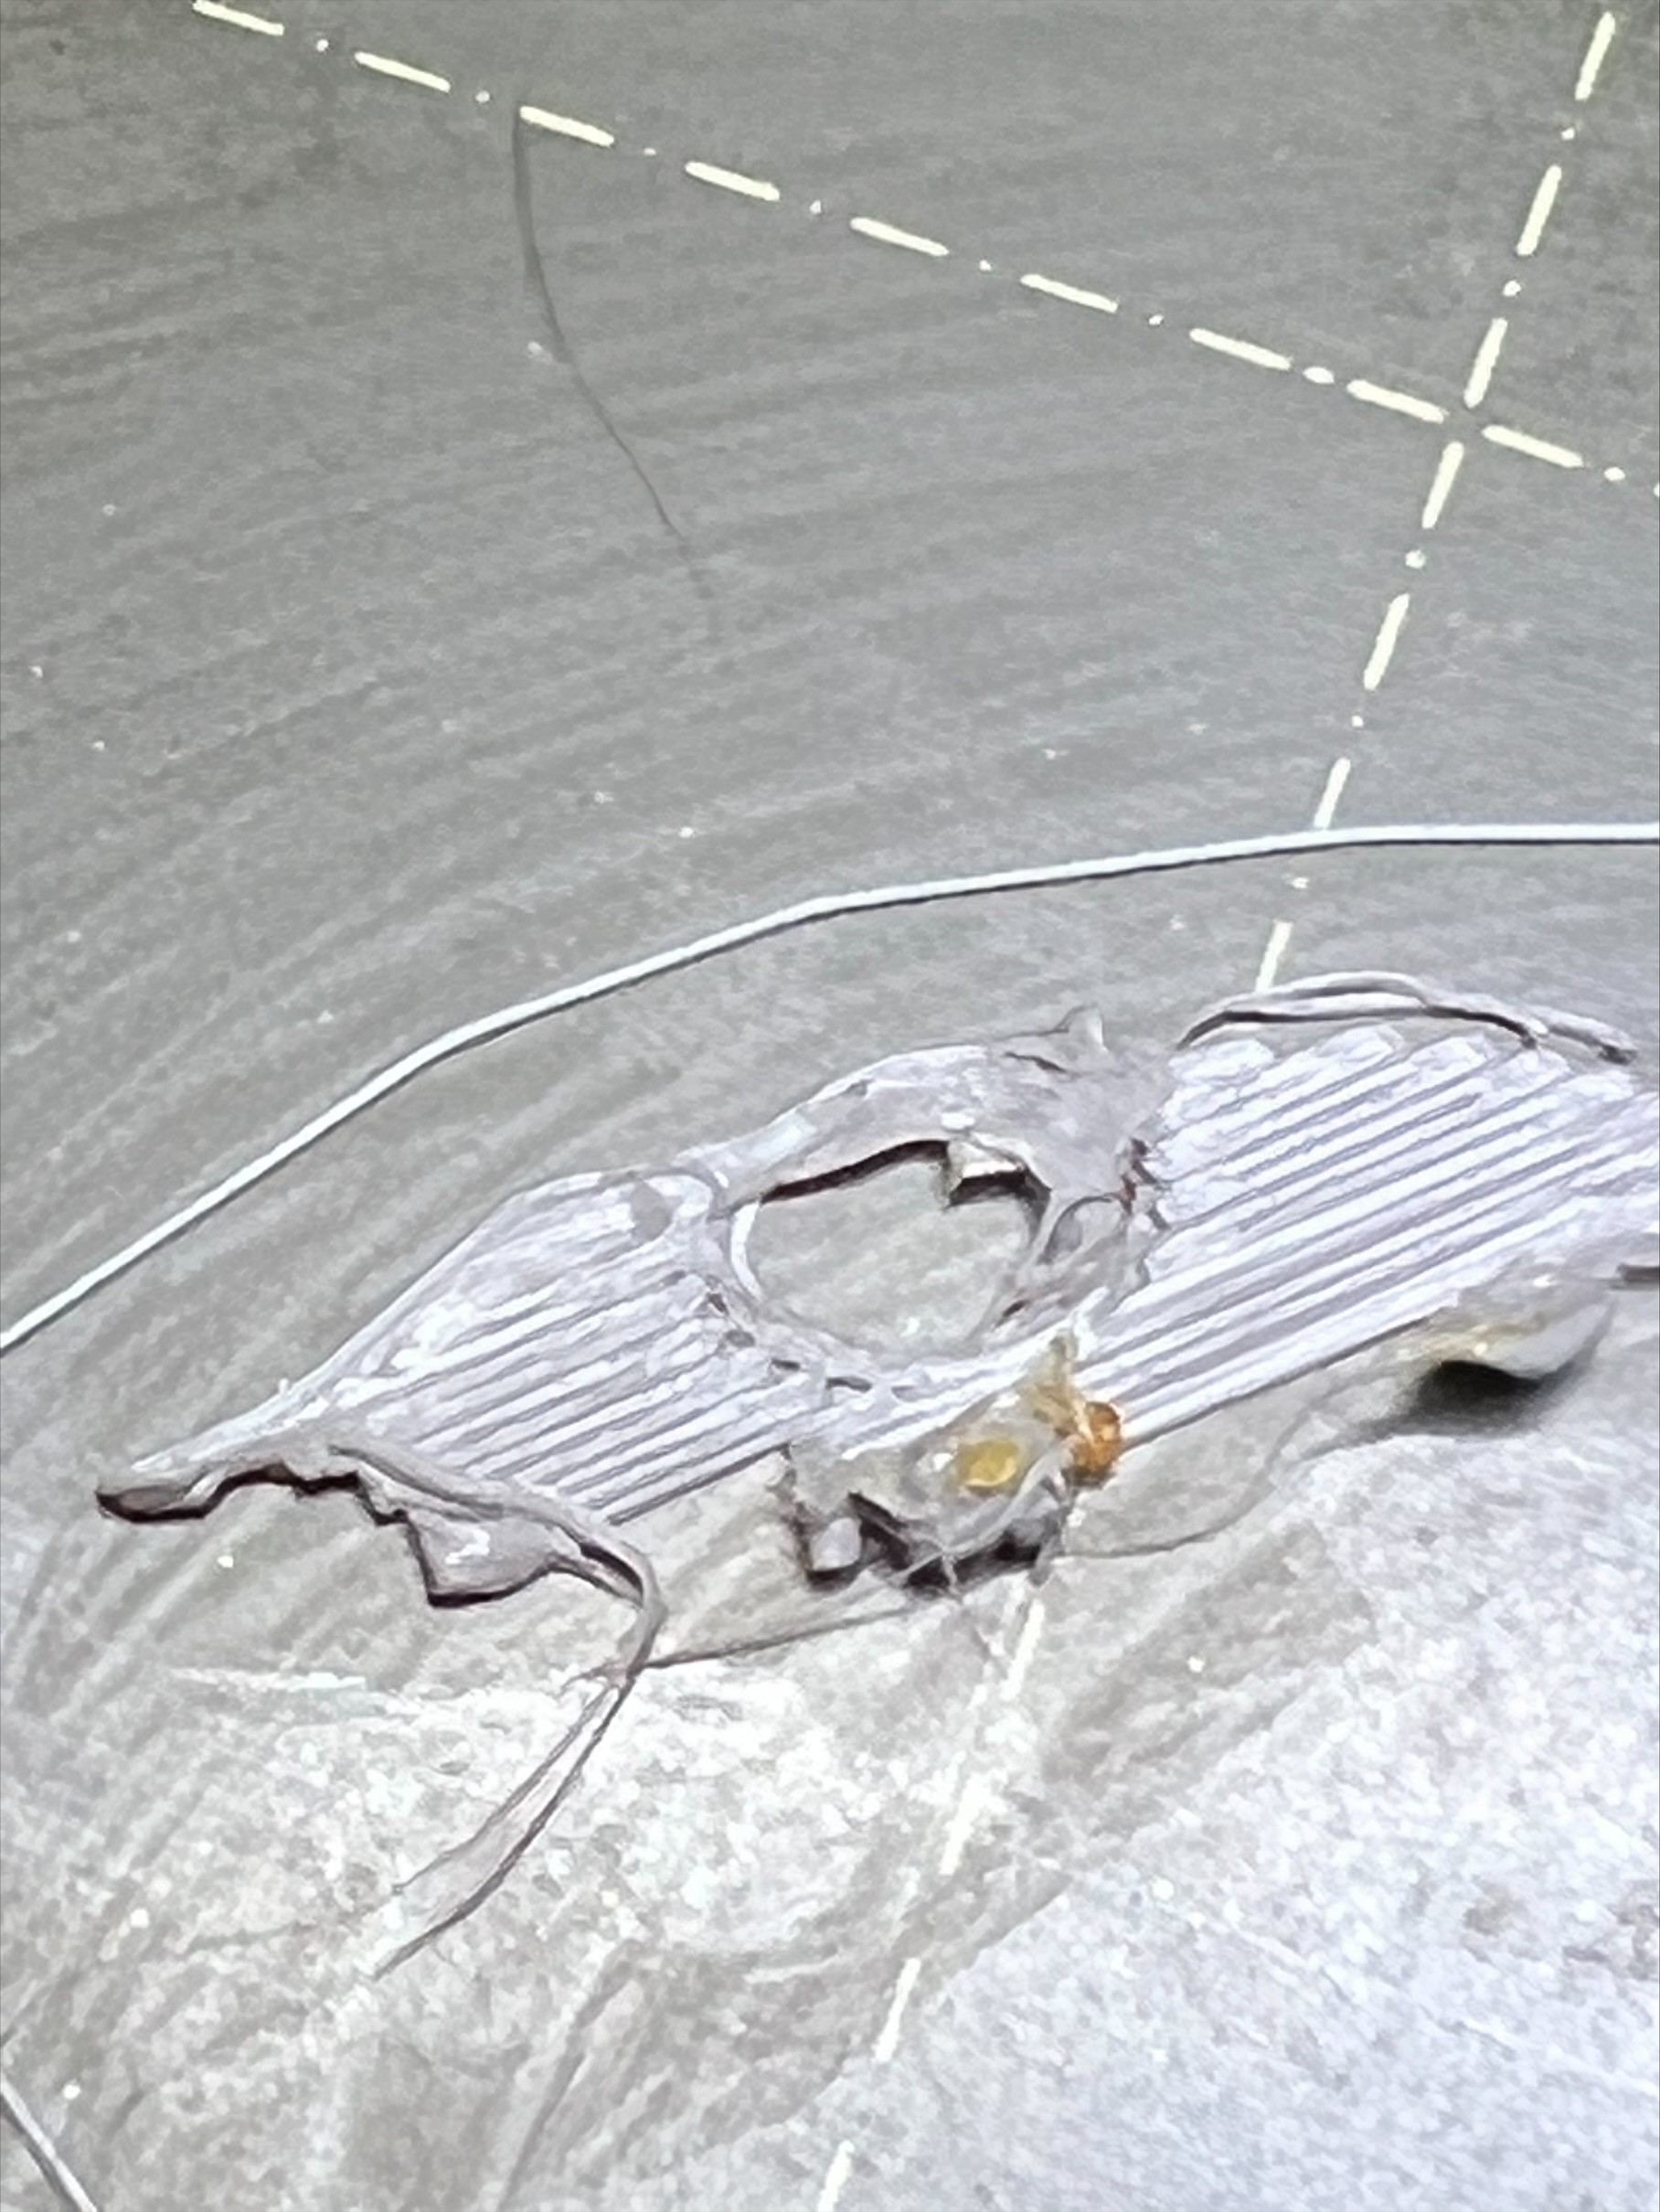
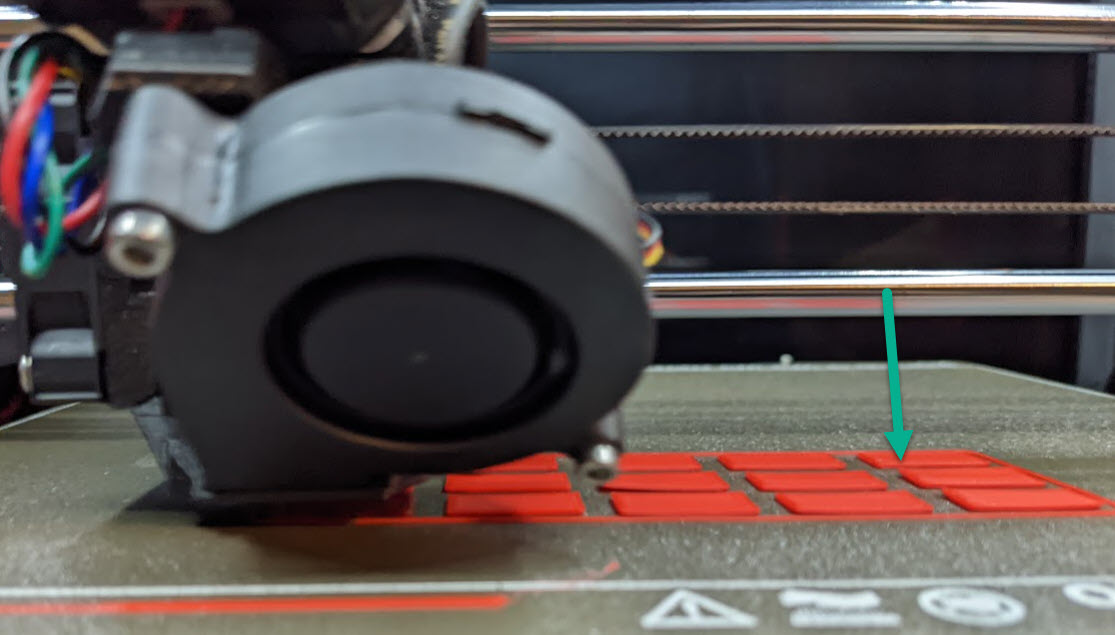
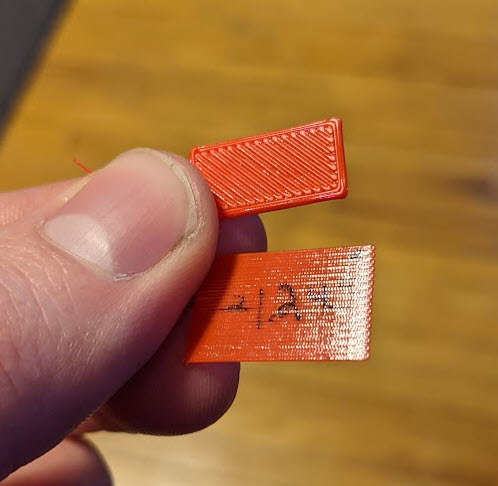
Images:
- Example of print edges warping a little, eventually resulted in many failed print attempts because part would get knocked off bed.
- Side by Side image of Failed print (too tall) vs First Layer Calibration Results (almost too low).both at -1.24
- Using this new Z layer Calibration method height -1.35 (left) vs the First Layer Calibration method height -1.245 (right).
RE: life adjust Z - my way
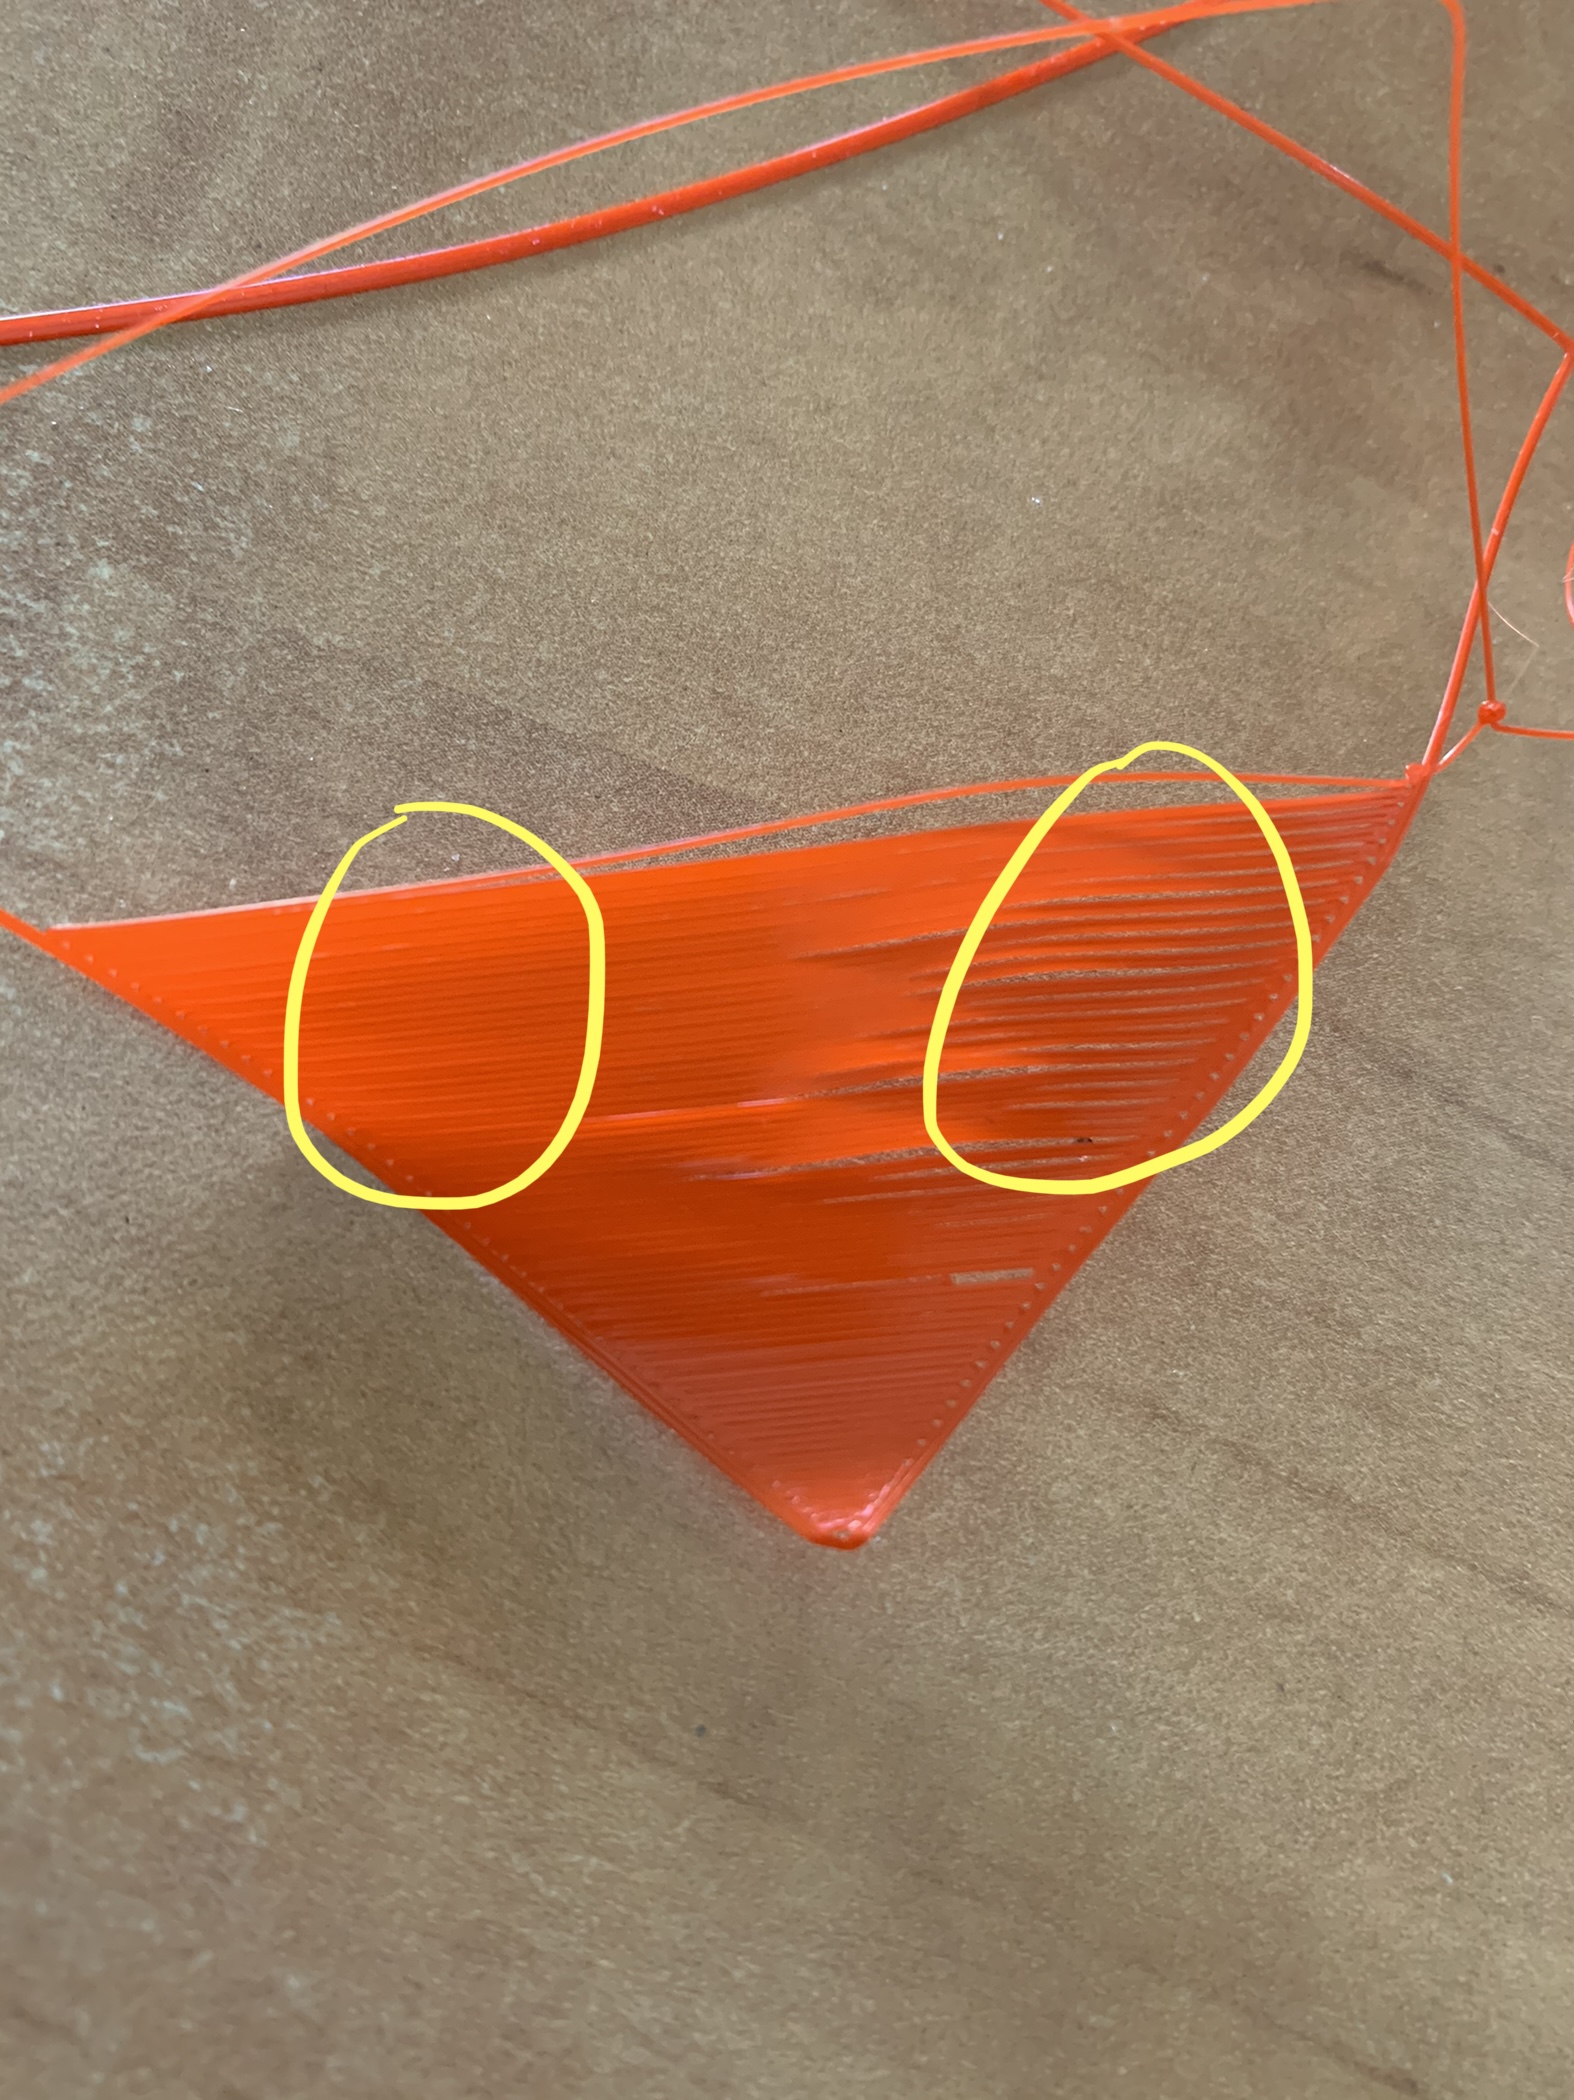
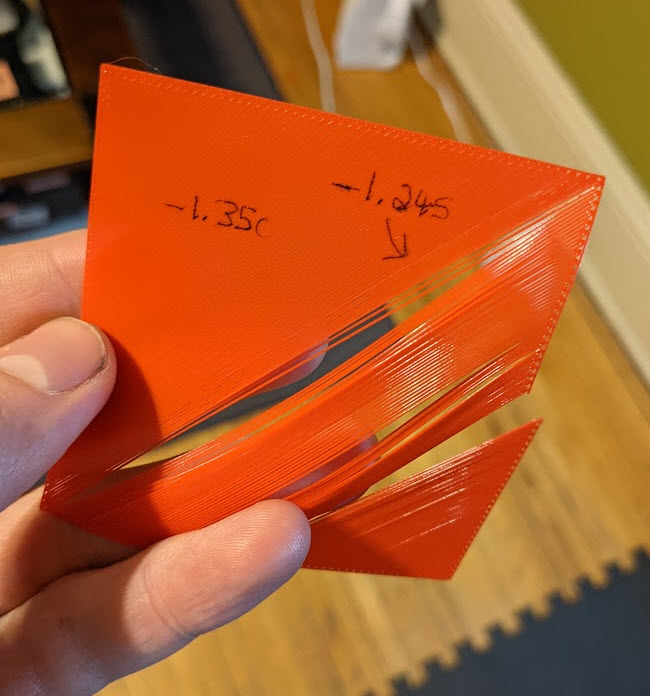
Hi there! owner of a prusa mini + i had some issues and had to fix them.. during this process i adjusted some screws and now i think my mini is not priting as before.. With this great square calibration (half printed on the pic below) and as you can see the left side is printing very good but the right side has some gaps and i wondering now what could be the issue? has anyone across the same problem maybe? axis issue?
thanks to all for your help! much appriciated