Re: life adjust Z - my way
😀 This is soooo much better than trying to see if the one thin line of PLA is too thin or too fat. Thank You!
Re: life adjust Z - my way
...
So I backed up and tried -.910 and -.905; both seemed pretty damn good. But for some reason -.910 was smoothest, so I've stuck with that. But still has a few rough spots.
Does it sound okay?
yes, sounds ok for me.
if you still have a few rough spots, it might be a good idea to check the filament transport mechanism and/or calibrate your extrusion correct.
it's quite important to get a proper and steady extrusion to get perfect prints and surfaces.
a few weeks ago, I had problems getting a perfect surface and it turned out that the hobbed pulley (still got the brass version at my MK2) was worn out.
but some tolerances at the properties of the filament may cause issues as well (diameter, lack of homology at the material composition).
dem inscheniör is' nix zu schwör...
Re: life adjust Z - my way
This helped greatly in getting things printing smoothly.
I however had no idea that the printer could make those noises so GG on giving me a minor heart attack when I had my back turned.
Re: life adjust Z - my way
I got my Prusa MK 3 built and calibrated with no issues and trying to get it tuned now to produce as smooth prints as possible. I grabbed the most recent gcode and ran it through the printer without any z adjustments. Based on the results of the print is adjustment needed here?
Re: life adjust Z - my way
Your Z is not low enough. But worse than that.. you have some very odd pulsing going on there. Is your extruder gear tight on the motor? Are your idler tension screws adjusted correctly? Check for a partial nozzle clog. Something just isn't right there.
Re: life adjust Z - my way
What about it shows that there is pulsing? Just trying to understand what to be looking for. The extruder gear should be tight and the tension on the filament into the extruder seems reasonable from when I fed it in and watching the filament feed in. It definitely could be related to the tension on the x axis. I made a mistake when assembling and put the gear on backwards originally which made the belt fit strange and rub up against the plastic. I didn't run the printer that way but definitely moved it back and forth. It looks like it may have warped the belt somewhat. I also had tension issues with the nylon filament that comes down the cable wrap which was causing the belt to catch. I removed that to make the axis move more smooth. Is that supposed to apply additional tension?
Re: life adjust Z - my way
Used V6.1 for PET, but how should this work. Temperatures seem to be completely of. Set to 170 for the S3D versions
I found out, it are several stages of heating
Re: life adjust Z - my way
So I'm trying this method of z adjust - and the output is amazing, perfectly flat perfect first layer. Great.
I then decided to print a calibration cube, just to see how good it would be. I re-sliced it with PrusaControl, then Slic3r and Simplify3D.
None of the three prints first layer stick at all. Its like the printer needs re-calibrated all over again.
I notice the script moves the extruder up, turns it up to 170 degrees, then does the homing. Do i need to ensure my slicer is doing the same in the script? Is this why the Z Adjust isn't working ?
Re: life adjust Z - my way
Hello,
I'm hoping somebody can tell me what's going on with this print. My measured skew is .05 degrees. Thanks!
Re: life adjust Z - my way
Trigger Warning: There are extremely loud beeps in this gcode in the middle to warn you of change and at the end. D: scared me to death
Re: life adjust Z - my way
Thanks for this excellent calibration procedure. I'm close, but I've got ripples in the center.
In the top photo, I started at -600. Because of the ripples, I thought I was significantly off, so I decreased to -700 at the midpoint. That made it worse, so I dropped back to -620.
In the bottom photo, I started at -620 and decreased to -640 at the midpoint.
The leading and ending corners are smooth as a baby's bottom.
So... what's causing the ripples? How do I troubleshoot this?
I'm a total newb... but miles ahead of where I thought I would be at this point. So that's something.
Re: life adjust Z - my way
your live Z is too big a negative number
Joan
I try to make safe suggestions,You should understand the context and ensure you are happy that they are safe before attempting to apply my suggestions, what you do, is YOUR responsibility.Location Halifax UK
Re: life adjust Z - my way
your live Z is too big a negative number
Joan
When you say "too git a negative", you mean move it more towards 0, right? I.e., try -600, -580, -560...
I'm a total newb... but miles ahead of where I thought I would be at this point. So that's something.
Re: life adjust Z - my way
Hi Brenda,
yes, it looks like the plastic is too squashed, although there is probably not a lot of change required. regards Joan
I try to make safe suggestions,You should understand the context and ensure you are happy that they are safe before attempting to apply my suggestions, what you do, is YOUR responsibility.Location Halifax UK
Re: life adjust Z - my way
First, props...
To Joan for helping me see the error of my ways. I really had to think through what on the surface seemed to be arse-backwards and counter-intuitive. In a nutshell, I'm assuming my slightly too low live Z was thinning the layer so the edge of the previously printed line adjacent to the current one was taking up too much space -- causing the current line buckle. Do I have that right?
To Jeff for creating this awesome means of adjusting the Z. Seriously... the standard way should involve using what's in the manual to just get the test pattern to stick, then using this method to do all the fine tuning.
I was able to print a pretty awesome benchy. We had a storm roll through so I was even able to witness the "continue after power failure".
I think I'm still a little bit low as my square film is a bit thinner than .2 mm so I'll fiddle a bit more... but I think I'm home free.
I'm a total newb... but miles ahead of where I thought I would be at this point. So that's something.
Re: life adjust Z - my way
Hi Brenda,
this is what forum's are for, Information sharing...
Glad to help.
regards Joan
I try to make safe suggestions,You should understand the context and ensure you are happy that they are safe before attempting to apply my suggestions, what you do, is YOUR responsibility.Location Halifax UK
Re: life adjust Z - my way
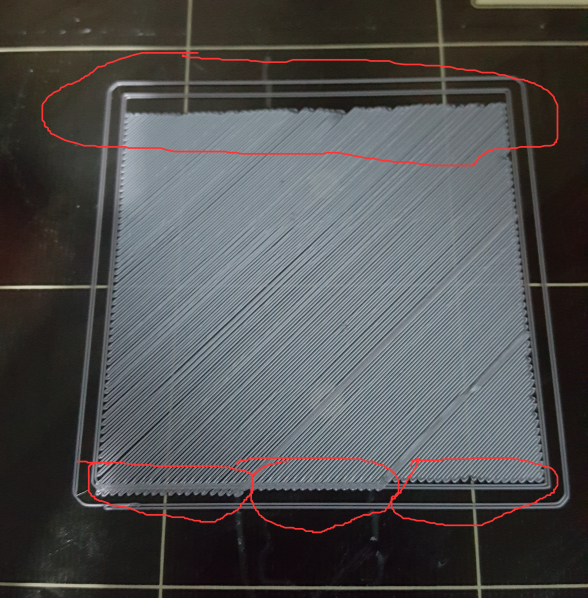
Hello, and thanks for the help this little file has given me. After a rather frustrating time getting my new v3 kit through XYZ calibration, i am having my next challenge to get the adhesion working on the plate.
The default level 1 calibration setting was not producing consistent results, so I was delighted to get a near perfect print from this on attempt 3 or 4.
The filament is still not adhering properly, and not consistently. The outer perimeter is the main culprit and I still cannot get the PRUSA logo to print.
I am using window cleaner to clean the bed at the moment. I did try one application of nail polish remover with acetone, but don't want to repeat that in light of other comments. i have ordered isopropyl alcohol online, which will take a couple more days to arrive. Would you believe the UK chemist shops don't stock this?
A question on the file, it did adhere to the bed the last time, but when I peel it off, the individual lines separate like a sheaf of paper. Is this normal?
Thanks again
Andrew
[attachment=1]DSC_1222[1].jpg[/attachment]
[attachment=1]DSC_1222[1].jpg[/attachment]
Re: life adjust Z - my way
A question on the file, it did adhere to the bed the last time, but when I peel it off, the individual lines separate like a sheaf of paper. Is this normal?
I think your live Z is too high... i.e., you need a bigger negative number.
The reason I think that is if the nozzle isn't squishing the filament down, you end up with individually printed lines instead of a solid surface.
Try decreasing the live Z by -20 at a time. That should also help the print stick.
I'm a total newb... but miles ahead of where I thought I would be at this point. So that's something.
Re: live adjust Z - my way
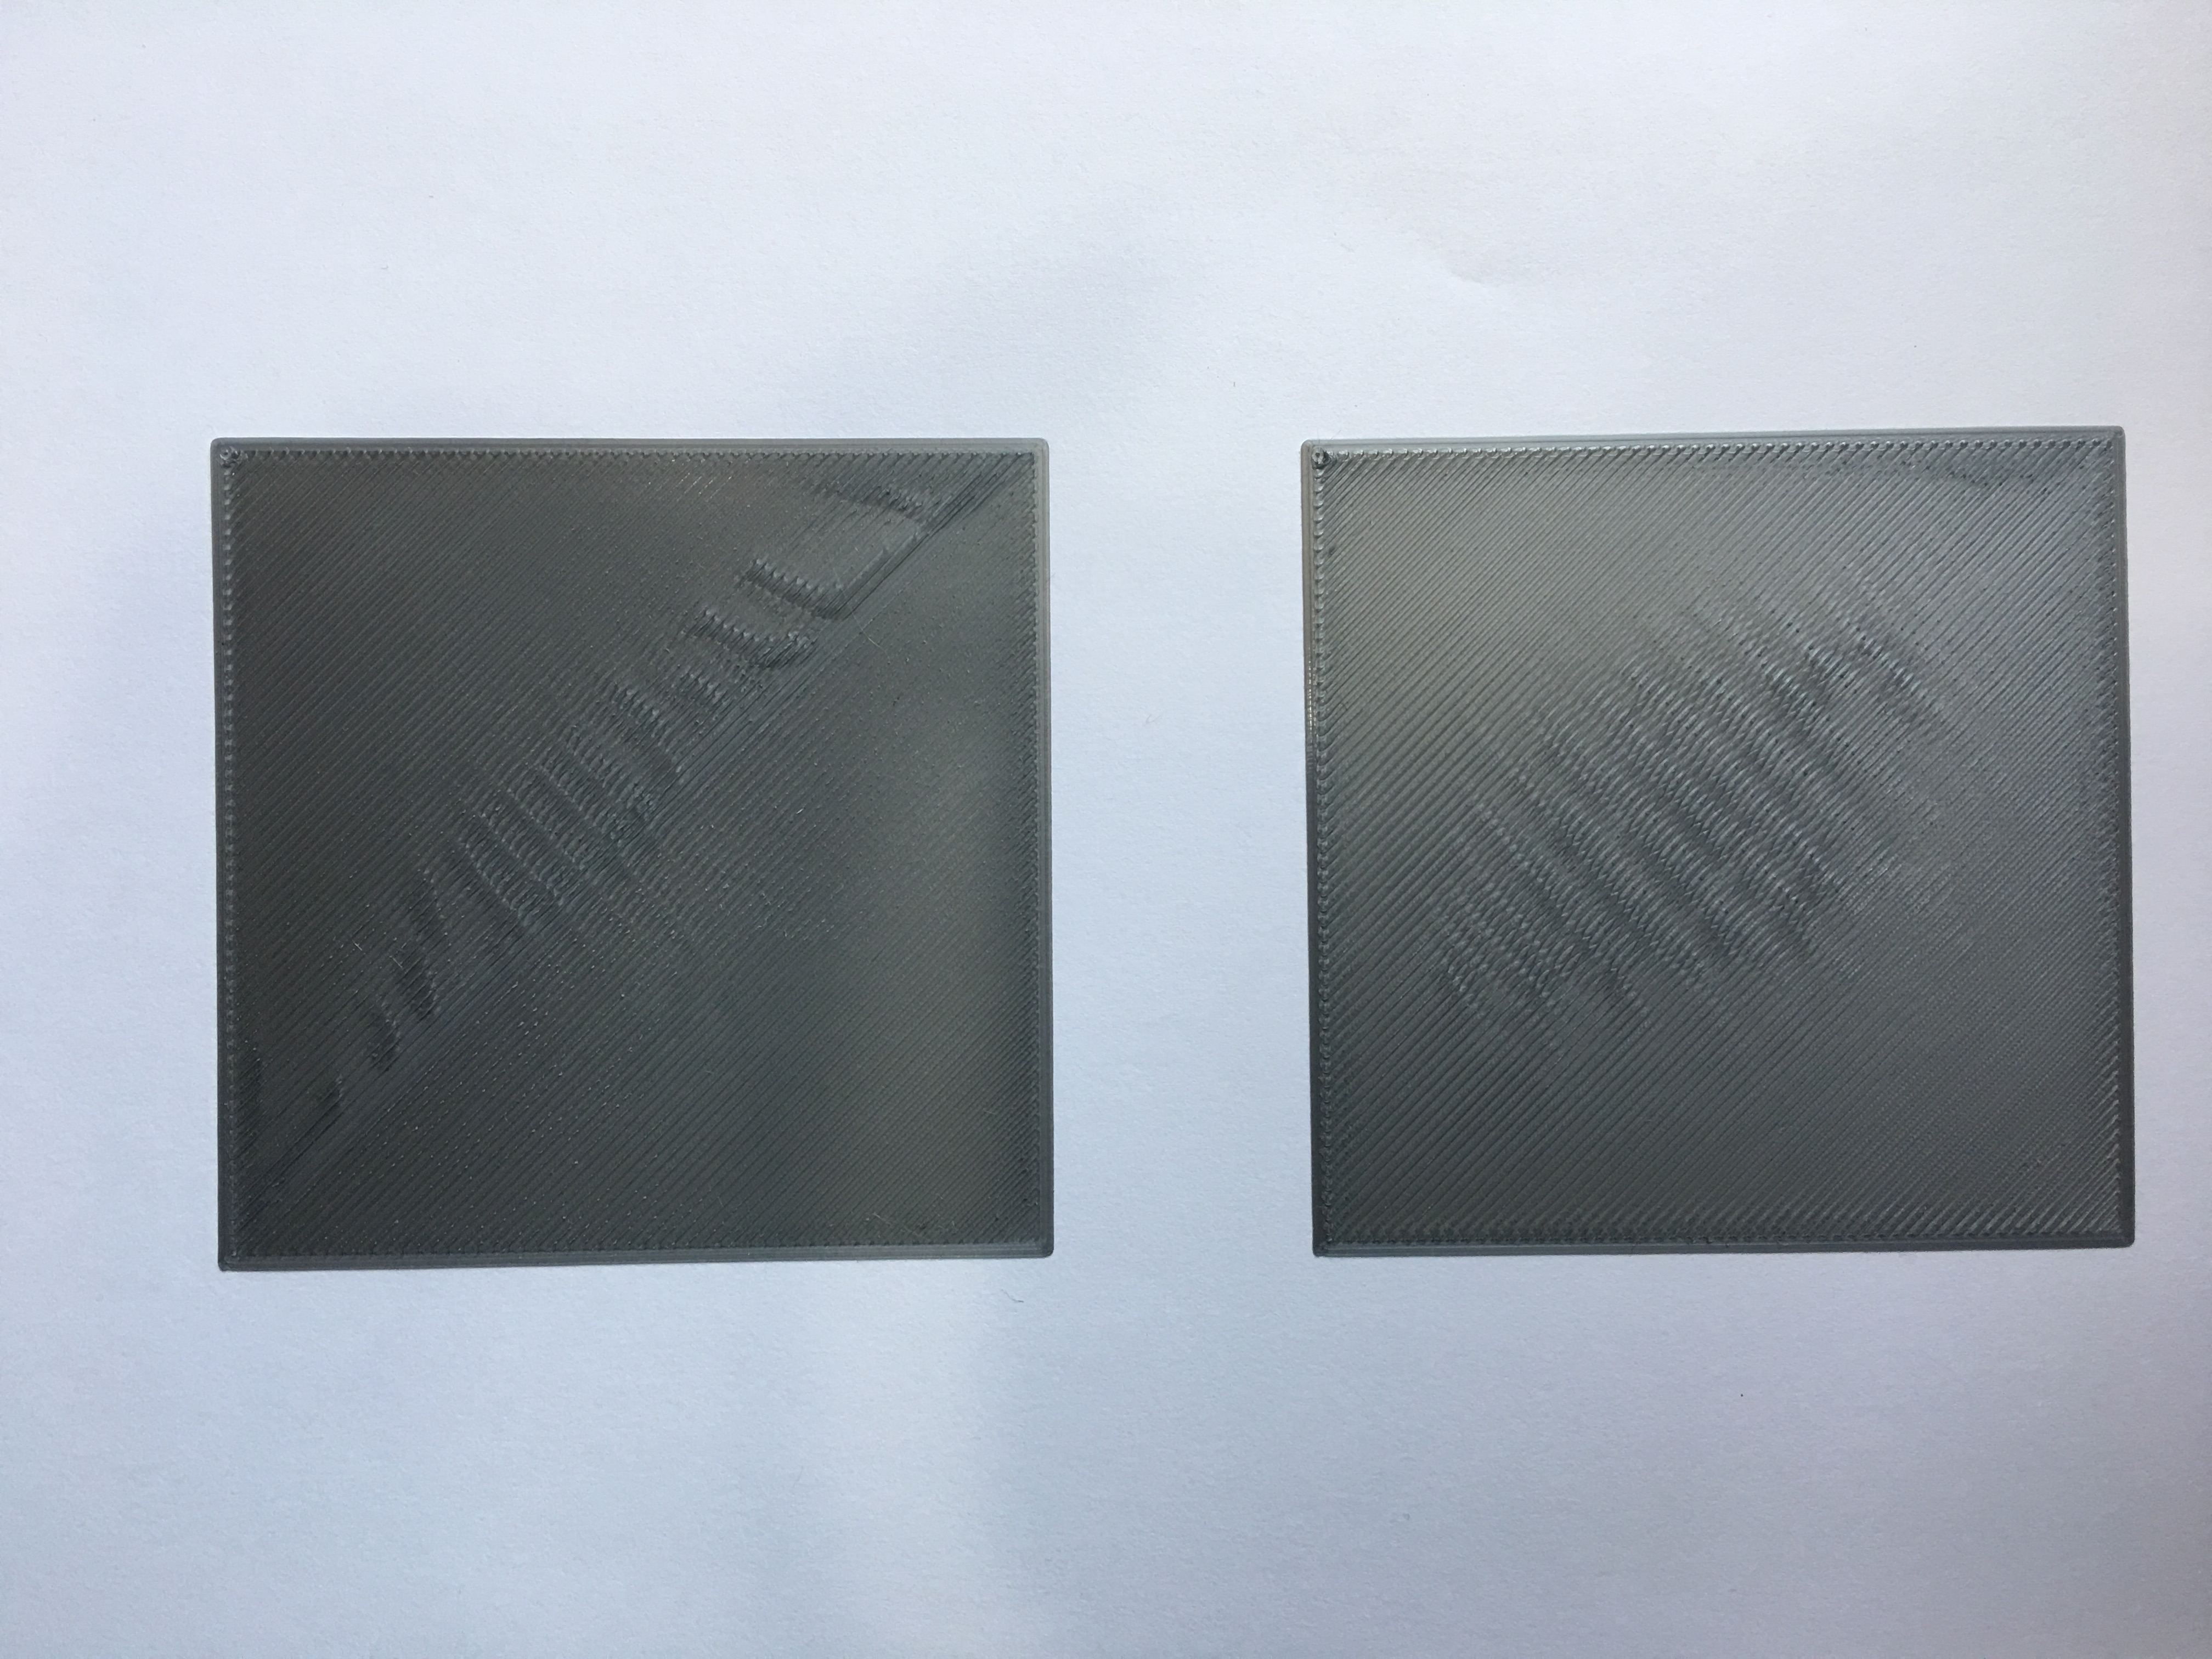
Thank you Brenda, and also those who suggested ways to get the adhesion and clean the plate. I'm beginning to think the plate is like a new frying pan, it takes time to build up the optimum performance. I've ordered both pure isopropyl alcohol and pure acetone now.
Meanwhile I've settled on -525 as a good compromise between adhesion at 500 and a roughish surface at 550. Now for the first tie I've printed a good PRUSA logo. I am happy.
[attachment=0]DSC_1227[1].jpg[/attachment]
Guess the correct one!
Re: life adjust Z - my way
thank you very much for this, it worked great!
One thing though is there anyway to turn down the volume of the beeps? It's quite loud at night and not everybody is happy about it 😉 