Re: life adjust Z - my way
...I have tried several settings: -0.350, -0.375, -0.400, -0.425, -0.450, -0.475, -0.500, -0.25, -0.550 and -0.575.
...What am I doing wrong?
so it seems that you are still not in the zone where you get close to the optimum.
it guess that you still need to lower the value more. values close to -1.000 are sometimes required. remember: it's just a number, neither good nor bad.
dem inscheniör is' nix zu schwör...
Re: life adjust Z - my way
Jeff - Looks like -500 was best on your machine. If the sensor to tip gap is more or less would that change the best live Z value?
Re: life adjust Z - my way
and you are right koder, it does not work with firmware 3.0.12 anymore. github says that there were changes 9 days ago... including: "retrieving settings from eeprom changed to exclude E steps per unit".
💡 curious.
don't know why this has been done.
Researching.
This is probably due to incompatibility with multi-material upgrade. Glitch was introduced in PR#143, and a fix should be delivered with upcoming PR#151.
Re: life adjust Z - my way
Jeff - Looks like -500 was best on your machine. If the sensor to tip gap is more or less would that change the best live Z value?
yes, the optimum value for your machine is mainly determined by two factors: the sensitivity of the probe and the sensor to nozzle-tip gap.
both values are more or less individual.
the sensitivity of the p.i.n.d.a. vary from exemplar to exemplar. and the distance between the tip of the nozzle and the tip of the probe depends on your assembly.
at my printers I've actually -750µm*) (genuine kit) and -310µm (own clone).
*) since the start of this thread, I've changed the nozzle and altered the p.i.n.d.a. height.
dem inscheniör is' nix zu schwör...
Re: life adjust Z - my way
mine is currently set to -780µm for example it just seemed happier around there.
“One does not simply use a picture as signature on Prusa forumsâ€
Re: life adjust Z - my way
...
don't know why this has been done.
Researching.
just took the ConfigurationStore.cpp from 3.0.12-RC2 and recompiled the 3.0.12 with it. works now perfect for me.
dem inscheniör is' nix zu schwör...
Re: life adjust Z - my way
I am the proud owner of the Prusa. Build the kit myself and waiting for the MM. I love reading and learning from this site. It is really great.
Just to be sure: before I do the life adjust Z (many thanks Jeff for your explanations!!), I should do the extruder calibration and determine my extruder multiplier for that roll off filament, then make the gcode with f.i Slic3 PE, so that the gcode includes the extruder multiplier.
Frans Krau
Europe, Holland, Apeldoorn
Re: life adjust Z - my way
I am the proud owner of the Prusa. Build the kit myself and waiting for the MM. I love reading and learning from this site. It is really great.
Just to be sure: before I do the life adjust Z (many thanks Jeff for your explanations!!), I should do the extruder calibration and determine my extruder multiplier for that roll off filament, then make the gcode with f.i Slic3 PE, so that the gcode includes the extruder multiplier.
you can either do the extruder calibration and store the values inside the eeprom (firmware 3.0.10 - 3.0.12-RC2 will allow this) with the M92 / M500 / M501 method, or you can use a multiplier inside the slicer of your choice.
if you do both, you'll overextrude.
I recommend the first method, so that you can directly use the little calibration surface at page#4 of this thread to get perfect results.
it has been sliced with simplify3d at a layer height of 200µm = 0.2mm, an extrusion width of 0.45mm and a multiplier of 1.00.
btw.: the extruder calibration shouldn't rely on the roll of filament (except you're dealing with exotic filaments). it simply corrects the discrepancy between the designed dimensions of the small brass extruder pulley and the real dimensions at the i3 mk2(s).
if you do the Z live adjustment with the method described inside this thread, without previously calibrating your extruder, you'll most likely still find the "optimum" for your printer, but the printed sheet/film then might still show some single strains.
and if you are still waiting for the MM kit: it comes with its own extruder steppers and other pulleys (bondtech steel gears, where the printer needs to be configured to 140 babysteps/mm).
dem inscheniör is' nix zu schwör...
Re: life adjust Z - my way
Thanks for your reply Jeff, as always very thoroughly. So, for the best results first calibrate the extruder and then run the Z adjust.
Frans Krau
Europe, Holland, Apeldoorn
Re: life adjust Z - my way
...I have tried several settings: -0.350, -0.375, -0.400, -0.425, -0.450, -0.475, -0.500, -0.25, -0.550 and -0.575.
...What am I doing wrong?
so it seems that you are still not in the zone where you get close to the optimum.
it guess that you still need to lower the value more. values close to -1.000 are sometimes required. remember: it's just a number, neither good nor bad.
I've tried values around -0.600 using the V2calibration.gcode (to be able to stop quickly in case of crash), but the nozzle virtually stopped depositing filament, because it was near to crash into the bed.
At the end I've chosen a Z value of -0.400 to be used for printing.
I'm using the shipped original Prusa PLA filament. Although the nozzle is very near to the bed, sometimes it seems to deposit the filament a little bit irregularly (looking near at the pictures).
Maybe it's a consequence of a bed crashing, that I got doing the first calibration of the PINDA sensor, or I need to experiment with the sclic3r program slightly changing some settings. But till now I've used only the gcodes delivered on the SD card, that I suppose should be quite optimized.
Re: life adjust Z - my way
...
I've tried values around -0.600 using the V2calibration.gcode (to be able to stop quickly in case of crash), but the nozzle virtually stopped depositing filament, because it was near to crash into the bed.
...
so as -0.600 "strangled" your flow completely, there's no need to go beyond that value.
looks as -0.425 would be the best for your setup.
but the irregular extrusion is still an issue at your site.
I would check the extruder pulley and the spring-tensions first. then I would check the nozzle itself (is it partially blocked, is the hole still a circle ?).
if this doesn't deliver results: what's about the spool-holder and the filament feeding ?
btw.: do you encounter "large" temperature oscillations for the hotend when printing ? I mean: does your temperature "swing" severely around the set value ?
dem inscheniör is' nix zu schwör...
Re: life adjust Z - my way
...
I've tried values around -0.600 using the V2calibration.gcode (to be able to stop quickly in case of crash), but the nozzle virtually stopped depositing filament, because it was near to crash into the bed.
...
so as -0.600 "strangled" your flow completely, there's no need to go beyond that value.
looks as -0.425 would be the best for your setup.
but the irregular extrusion is still an issue at your site.
I would check the extruder pulley and the spring-tensions first. then I would check the nozzle itself (is it partially blocked, is the hole still a circle ?).
if this doesn't deliver results: what's about the spool-holder and the filament feeding ?
btw.: do you encounter "large" temperature oscillations for the hotend when printing ? I mean: does your temperature "swing" severely around the set value ?
Many thanks Jeff !
I'll give a look this evening at the extruder pulley and at the spring-tension; the length of the springs should be set to ca. 13 mm, if I remember well.
Yes, sometimes during printing, the temperature is oscillating, I think about 5 degrees Celsius, but I should give a better look this evening and take note of the temperature variance. What can be the cause of this?
Beside this, for the Z calibration, it's clear that there is no absolute value because it's dependent from the PINDA and nozzle distance from the bed, but what's your experience about the relative value range in which you can find an optimal value ?
If you try every 0.025 mm, can you have a chance to localize the optimal value or you need to try e.g. every 0.010 mm ?
Re: life adjust Z - my way
...
Yes, sometimes during printing, the temperature is oscillating, I think about 5 degrees Celsius, but I should give a better look this evening and take note of the temperature variance. What can be the cause of this?
...
have a look at the pid tuning for the hotend inside this thread.
even so that inside the actual available firmware a pid tuning for the hotend already is implemented, I would recommend the method described at the linked thread, because it simply delivers more accurate results.
...
If you try every 0.025 mm, can you have a chance to localize the optimal value or you need to try e.g. every 0.010 mm ?
...
you should be able to find your "sweet spot" with a step width of 0.025mm between the settings that you try.
then you could slightly optimize it with +/- 10µm steps. changes below this value are only to follow a hyperfine levelling philosophy...
dem inscheniör is' nix zu schwör...
Re: life adjust Z - my way
I have been playing around with the life adjust Z value, and almost got it right. I do notice I need to adjust my bed level as well, so that's the next step.
But I do have a question, to what degree should all the lines be connected to each other? I have a few 1 layer calibration prints (9 squares), they look good, but the lines aren't connected to each other.
I do realize (some of) the lines could have come detached while removing the print from the bed.
I also have a version with a larger negative Z value, all the squares are solid, but the nozzle scrapes the squares when returning to its end position. This sounds like a dilemma. Z value too low (high neg number) the squares are solid, but squished+scraping, Z value not as low, no squishing+no scraping but no solid squares.
Re: life adjust Z - my way
...
But I do have a question, to what degree should all the lines be connected to each other? I have a few 1 layer calibration prints (9 squares), they look good, but the lines aren't connected to each other
...
it depends on how the 9-squares have been sliced and whether your extruder is calibrated or not.
to calibrate the printer properly, they need to be sliced at a layer height of 0.2mm (not 0.15), a default extrusion width of 0.48mm (if you use a 0.4mm nozzle) and an extrusion multiplier of 1.00.
if then the E-steps are calibrated as well, you should get a unique surface, without single strains.
...
I also have a version with a larger negative Z value, all the squares are solid, but the nozzle scrapes the squares when returning to its end position. This sounds like a dilemma...
use a 0.5mm "Lift Z" (slic3r) or "vertical retraction lift" (s3d) and insert a command inside your end script that lifts up the nozzle before homing.
dem inscheniör is' nix zu schwör...
Re: life adjust Z - my way
Thanks, going to check these tips within my slicer.
Btw, I understand I can lift the nozzle after printing, but it should also be able to move without scraping right, otherwise this is a sign that my nozzle is set too low. At least that's how my brain thinks it works.
I printed a 3d benchy, where Z had a larger neg number, all went fine, but at the roof it scraped and pulled the benchy from the plate. So my logic thinks the Z value is too low. (pfff Z value as a neg number, makes writing about large/small values more difficult)
Re: life adjust Z - my way
...
I printed a 3d benchy, where Z had a larger neg number, all went fine, but at the roof it scraped and pulled the benchy from the plate. So my logic thinks the Z value is too low. (pfff Z value as a neg number, makes writing about large/small values more difficult)
no, that's another phenomen and has nothing to do with the Z live adjustment value. the Z live adjustment should only affect the first layer. the height of every other layer on top of the first layer should then be determined by the gcode controled height of the z-axis.
the issue that you've got with the benchy is usually caused by other settings and shouldn't occur when you use the "Lift-Z"/"z-hop"/"vertical retraction lift" option inside your slicer. it's either this issue, or the general problem of upcurling plastics during print, that you can get at unsupported overhangs. this issue is very common at the little treefrog.
recommendation from my site: reduce the overlap between perimeters and infill a little bit and reduce the filament flow in case of bridging to, lets say approximately 95% (in s3d you'll find a "bridging multiplier" at the tab for other settings). and don't use to fine layer heights where they aren't needed.
another tip: use a p.i.n.d.a. probe protector, if you've got an i3 mk2 instad of mk2s.
this little printable plastic part often may successfully avoid that the tip of the probe rips off a print at upcurling edges.
dem inscheniör is' nix zu schwör...
Re: life adjust Z - my way
Thanks JeffJordan, I have learned so much these last few days.
I changed all the slicer settings to you suggestions and calibrated the extruder. This last part is pretty weird (also read that on this forum somewhere). I can extrude 100mm twice and get different values. Sometimes it starts extruding from the nozzle immediately and sometimes a bit later. Any, I got it down now.
I printed a couple more 75x75 squares and manages to get a solid square, no single strands (yeah!). I do notice the right side looks a bit different compared to the left side. This also happens with a 9 square print. This can perhaps be the bed level adjustment. I still have to read some more on that topic, apparently changing the bed level also influences the live Z value. Also when measuring (hoping the caliper is accurate enough) some sides seem thicker. I can even measure one of the squares at different spots and get different readings. closest I get is 0.21mm
About the 3d benchy, its the gcode from prusa, it was already on the SD card. I can assume this has been sliced perfectly 🙂 I have a mk2s btw
Going to read into the 2 suggested links. A lot of info to digest if you're new into 3d printing 🙂
Re: life adjust Z - my way
...
I've tried values around -0.600 using the V2calibration.gcode (to be able to stop quickly in case of crash), but the nozzle virtually stopped depositing filament, because it was near to crash into the bed.
...
so as -0.600 "strangled" your flow completely, there's no need to go beyond that value.
looks as -0.425 would be the best for your setup.
but the irregular extrusion is still an issue at your site.
I would check the extruder pulley and the spring-tensions first. then I would check the nozzle itself (is it partially blocked, is the hole still a circle ?).
if this doesn't deliver results: what's about the spool-holder and the filament feeding ?
btw.: do you encounter "large" temperature oscillations for the hotend when printing ? I mean: does your temperature "swing" severely around the set value ?
Thanks Jeff!
1) The nozzle hole seems to be round
2) I have checked the extruder and slightly changed the spring tension to 14 mm without filament inserted. During the extruding the bearing is turning very regularly.
3) Then I noticed that the Y-carriage belt was loose. This happened probably when I calibrated the Y threaded rods to get the PINDA sensor inside the bed circle.
After tightening the belt and running again Setup calibration and Calibrate XYZ I tried again to adjust the Z distance printing the calibration squares. Now I'm getting a much better result, without the extruding irregularities. Now the Z distance is on another values range.
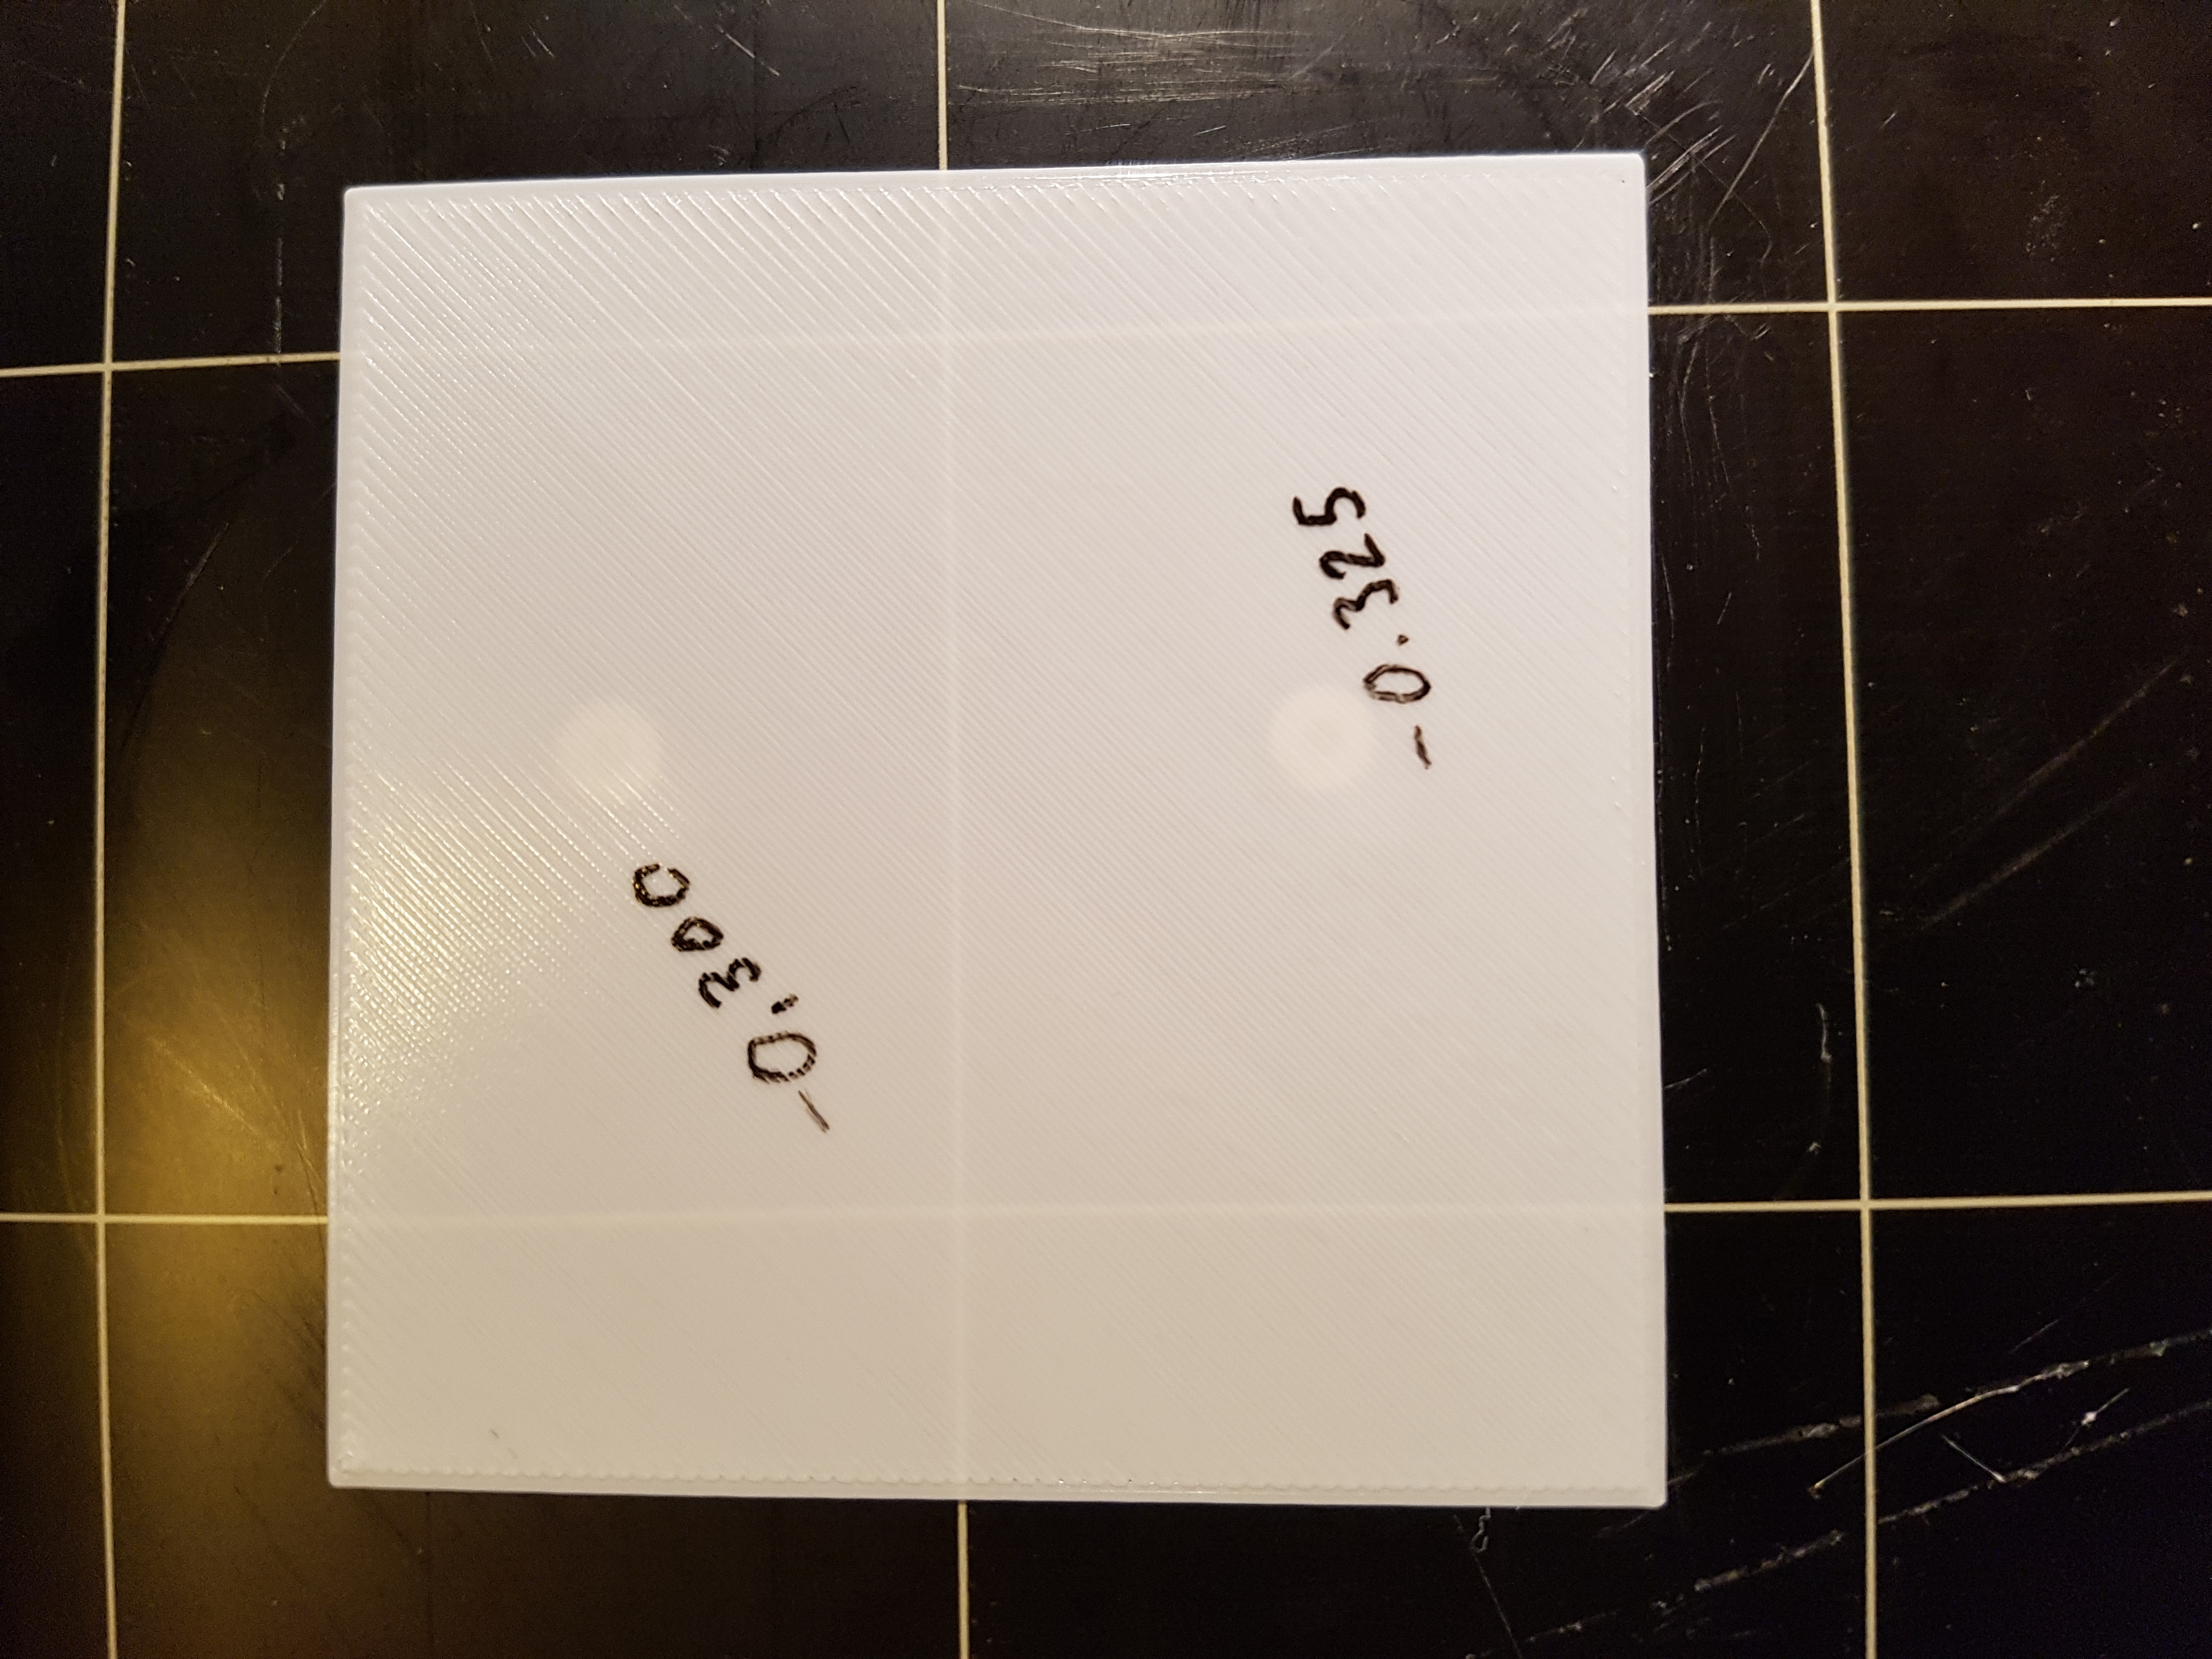
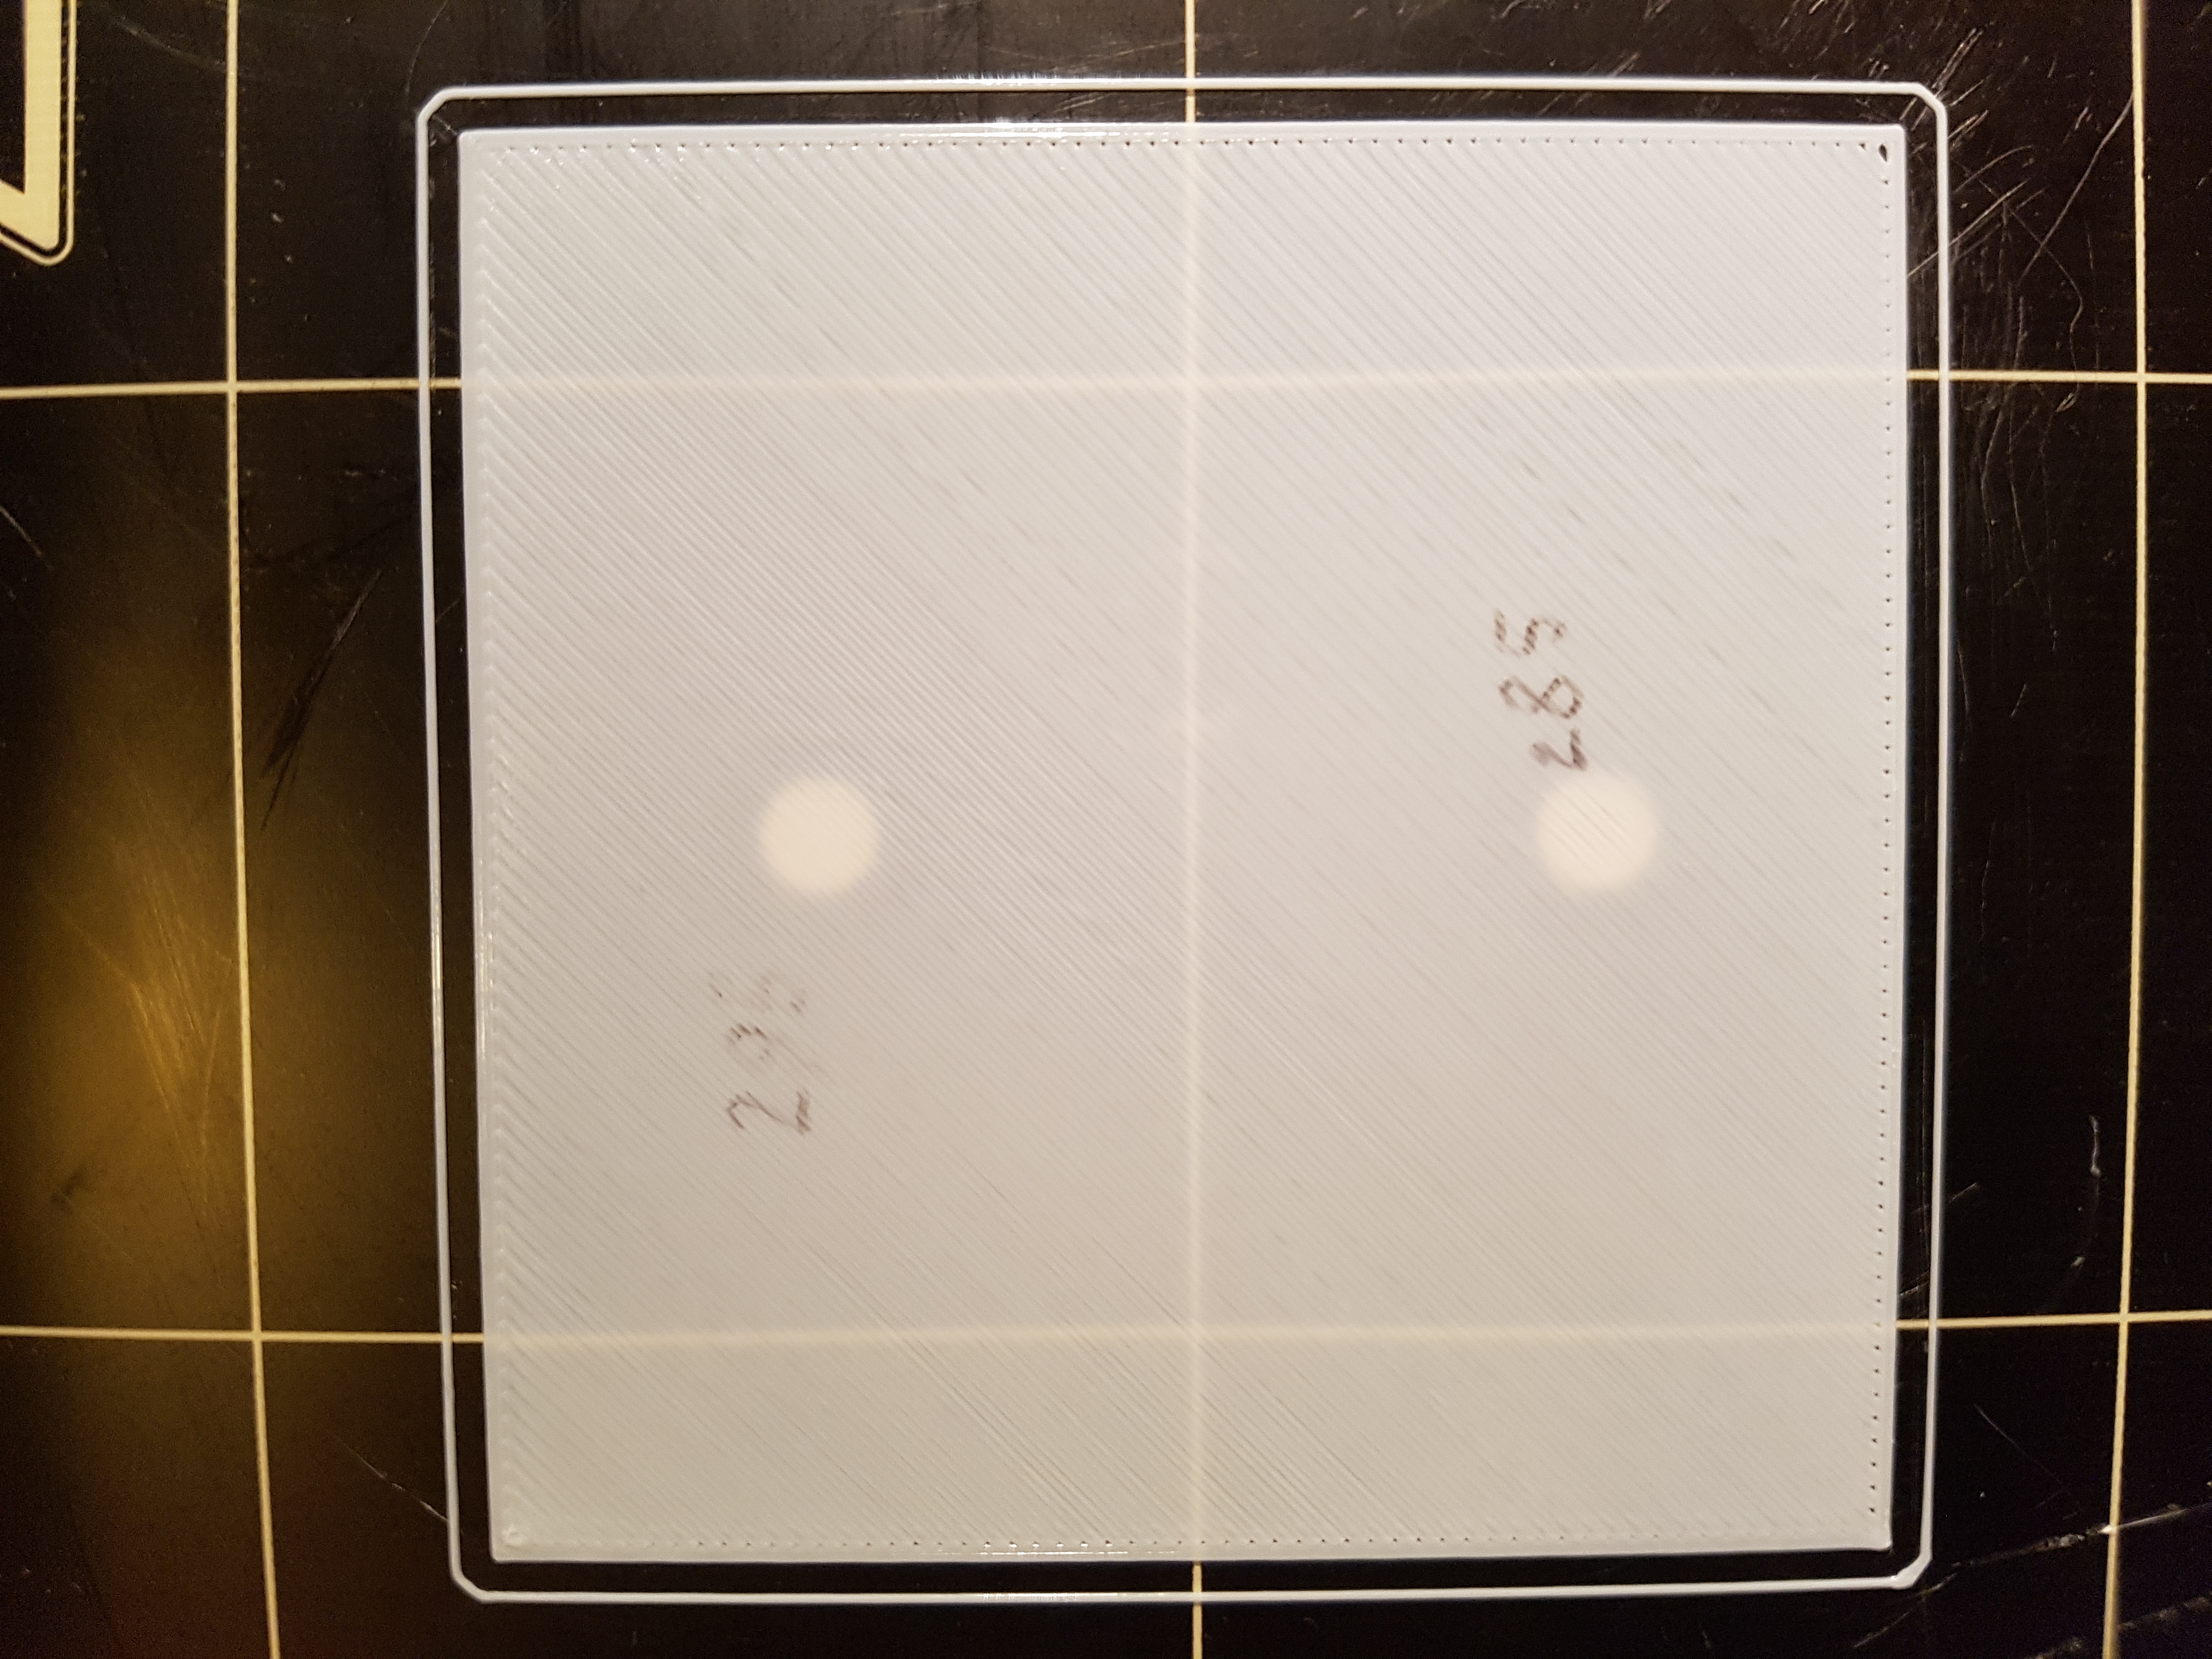
I think -0.300 should be the best value.
4) I've checked also the extruder temperature and it's oscillating a few degrees: e.g. for 215 degrees it's changing between 212 and 219, but very slowly. Although now it seems not to affect the printing quality, I'll try to install Optoprint and calibrate the temperature range with the PID tuning.
Re: life adjust Z - my way
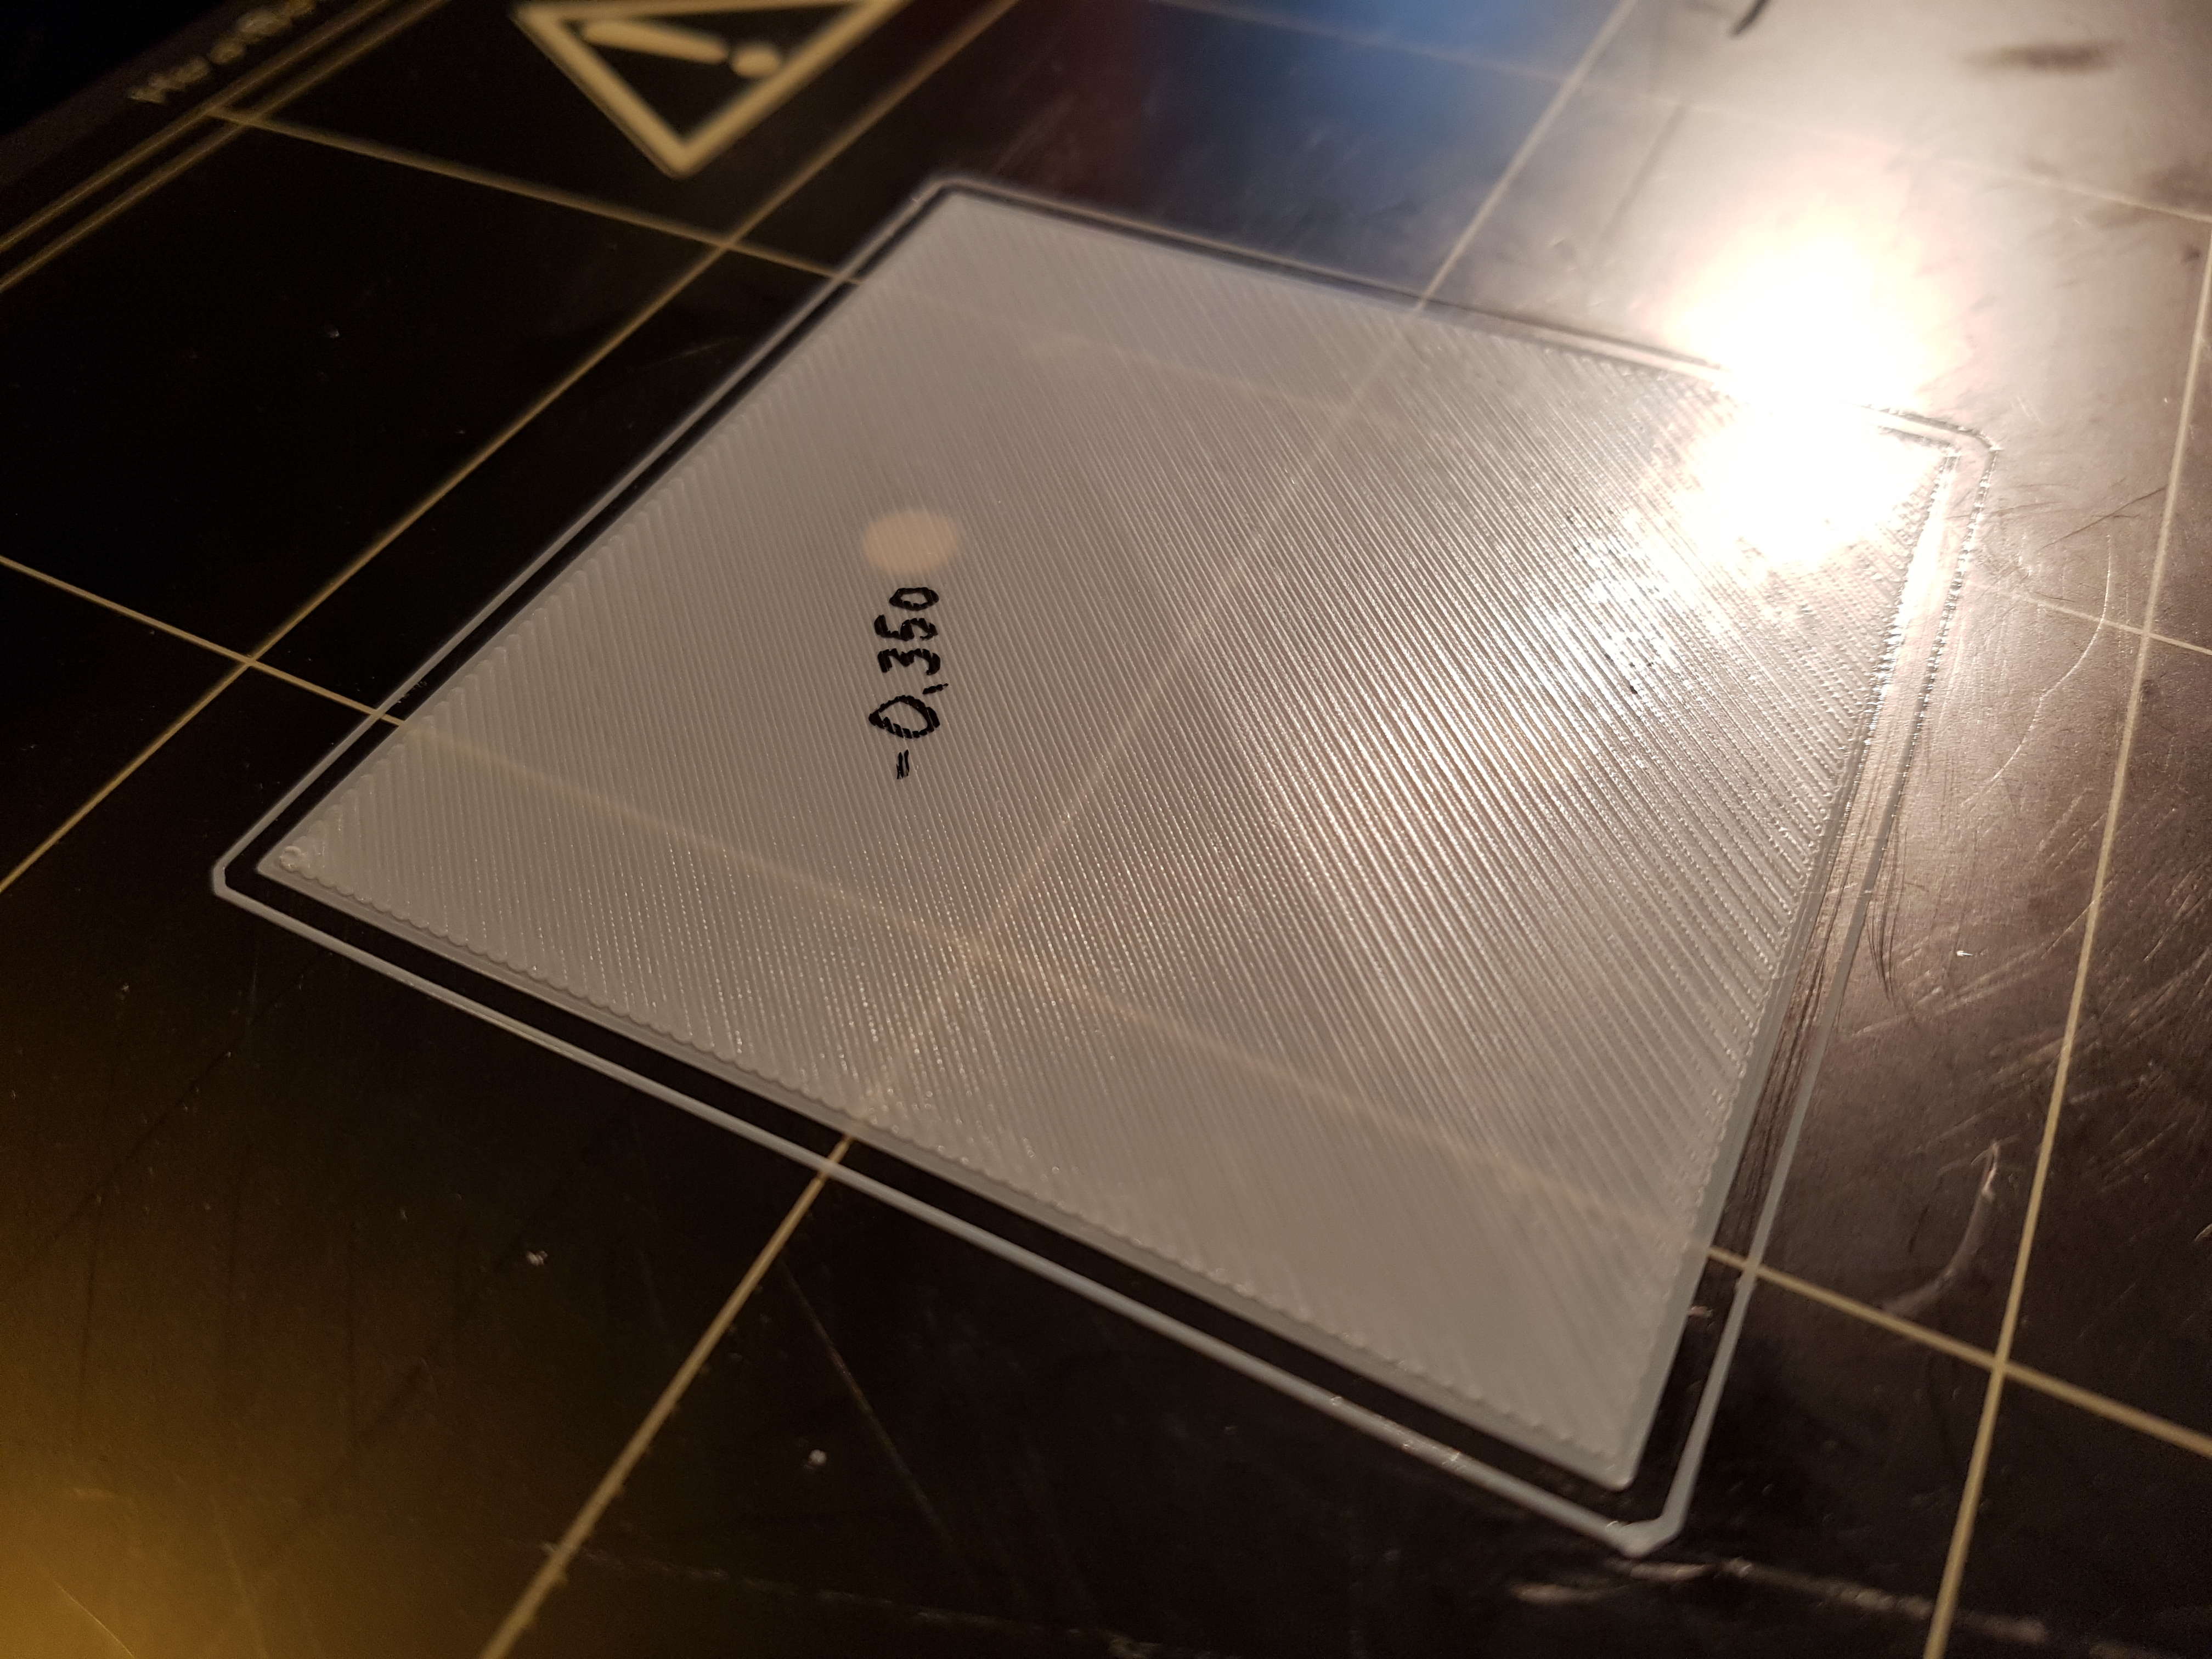
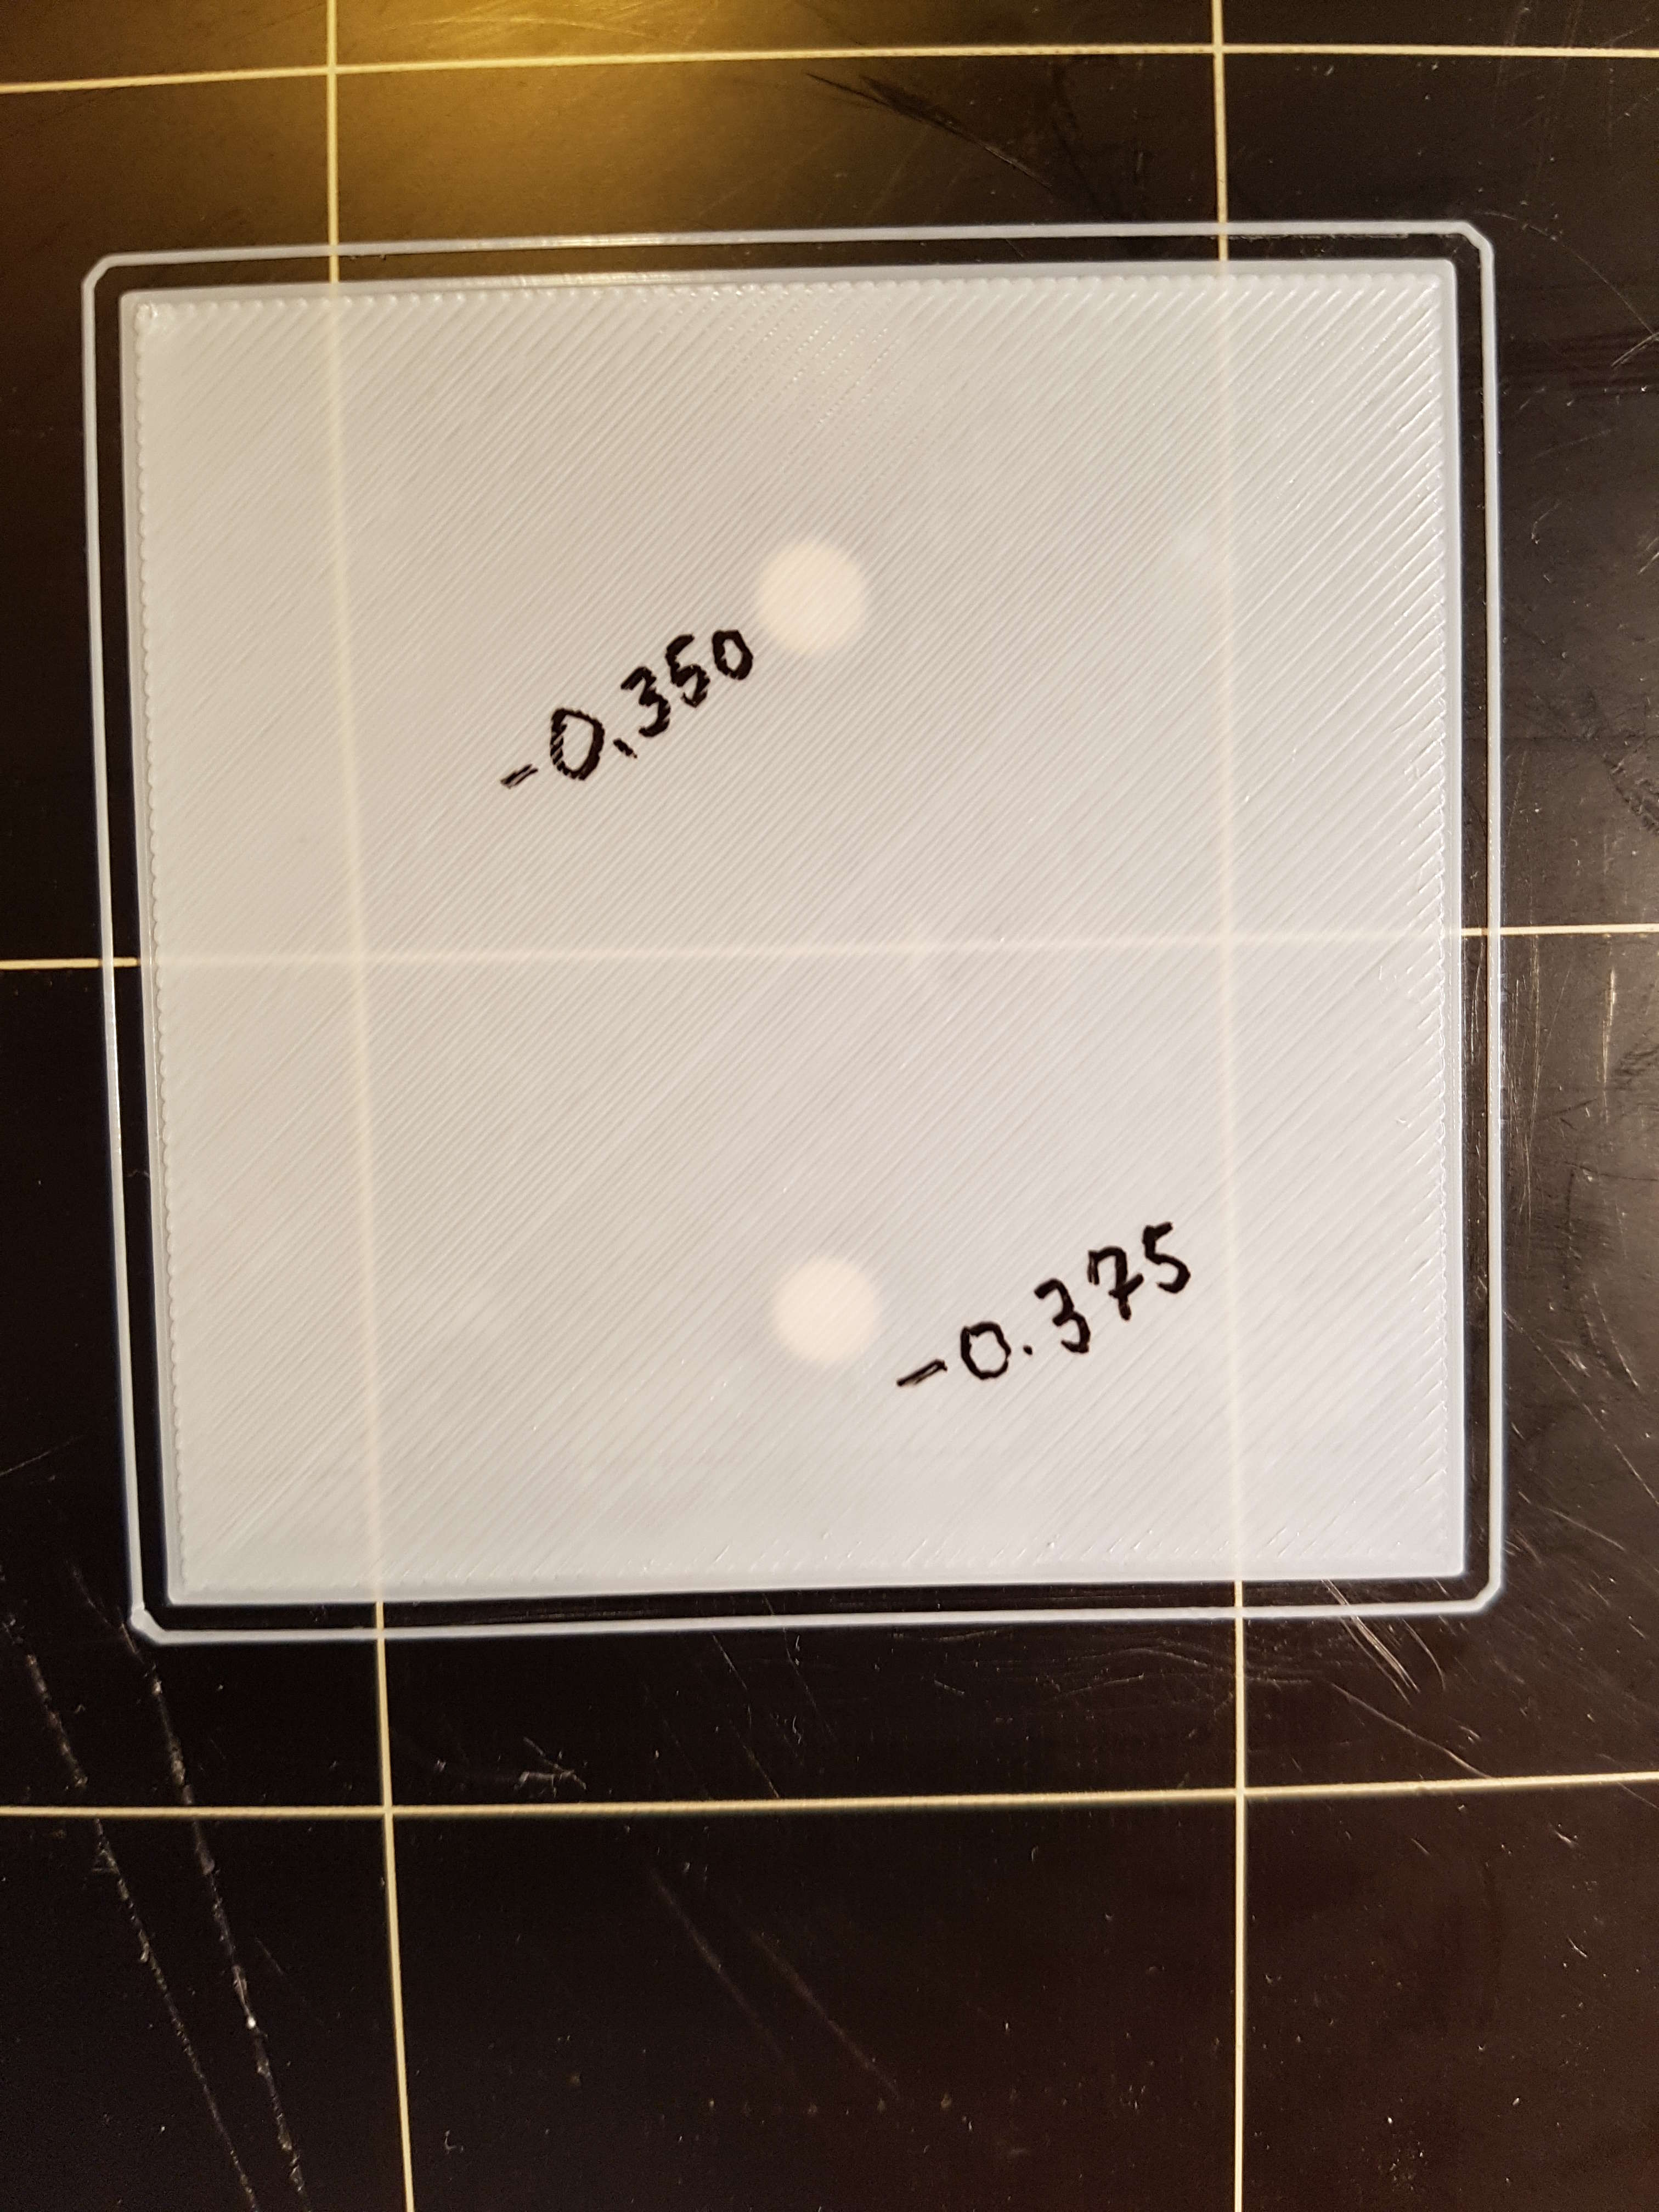
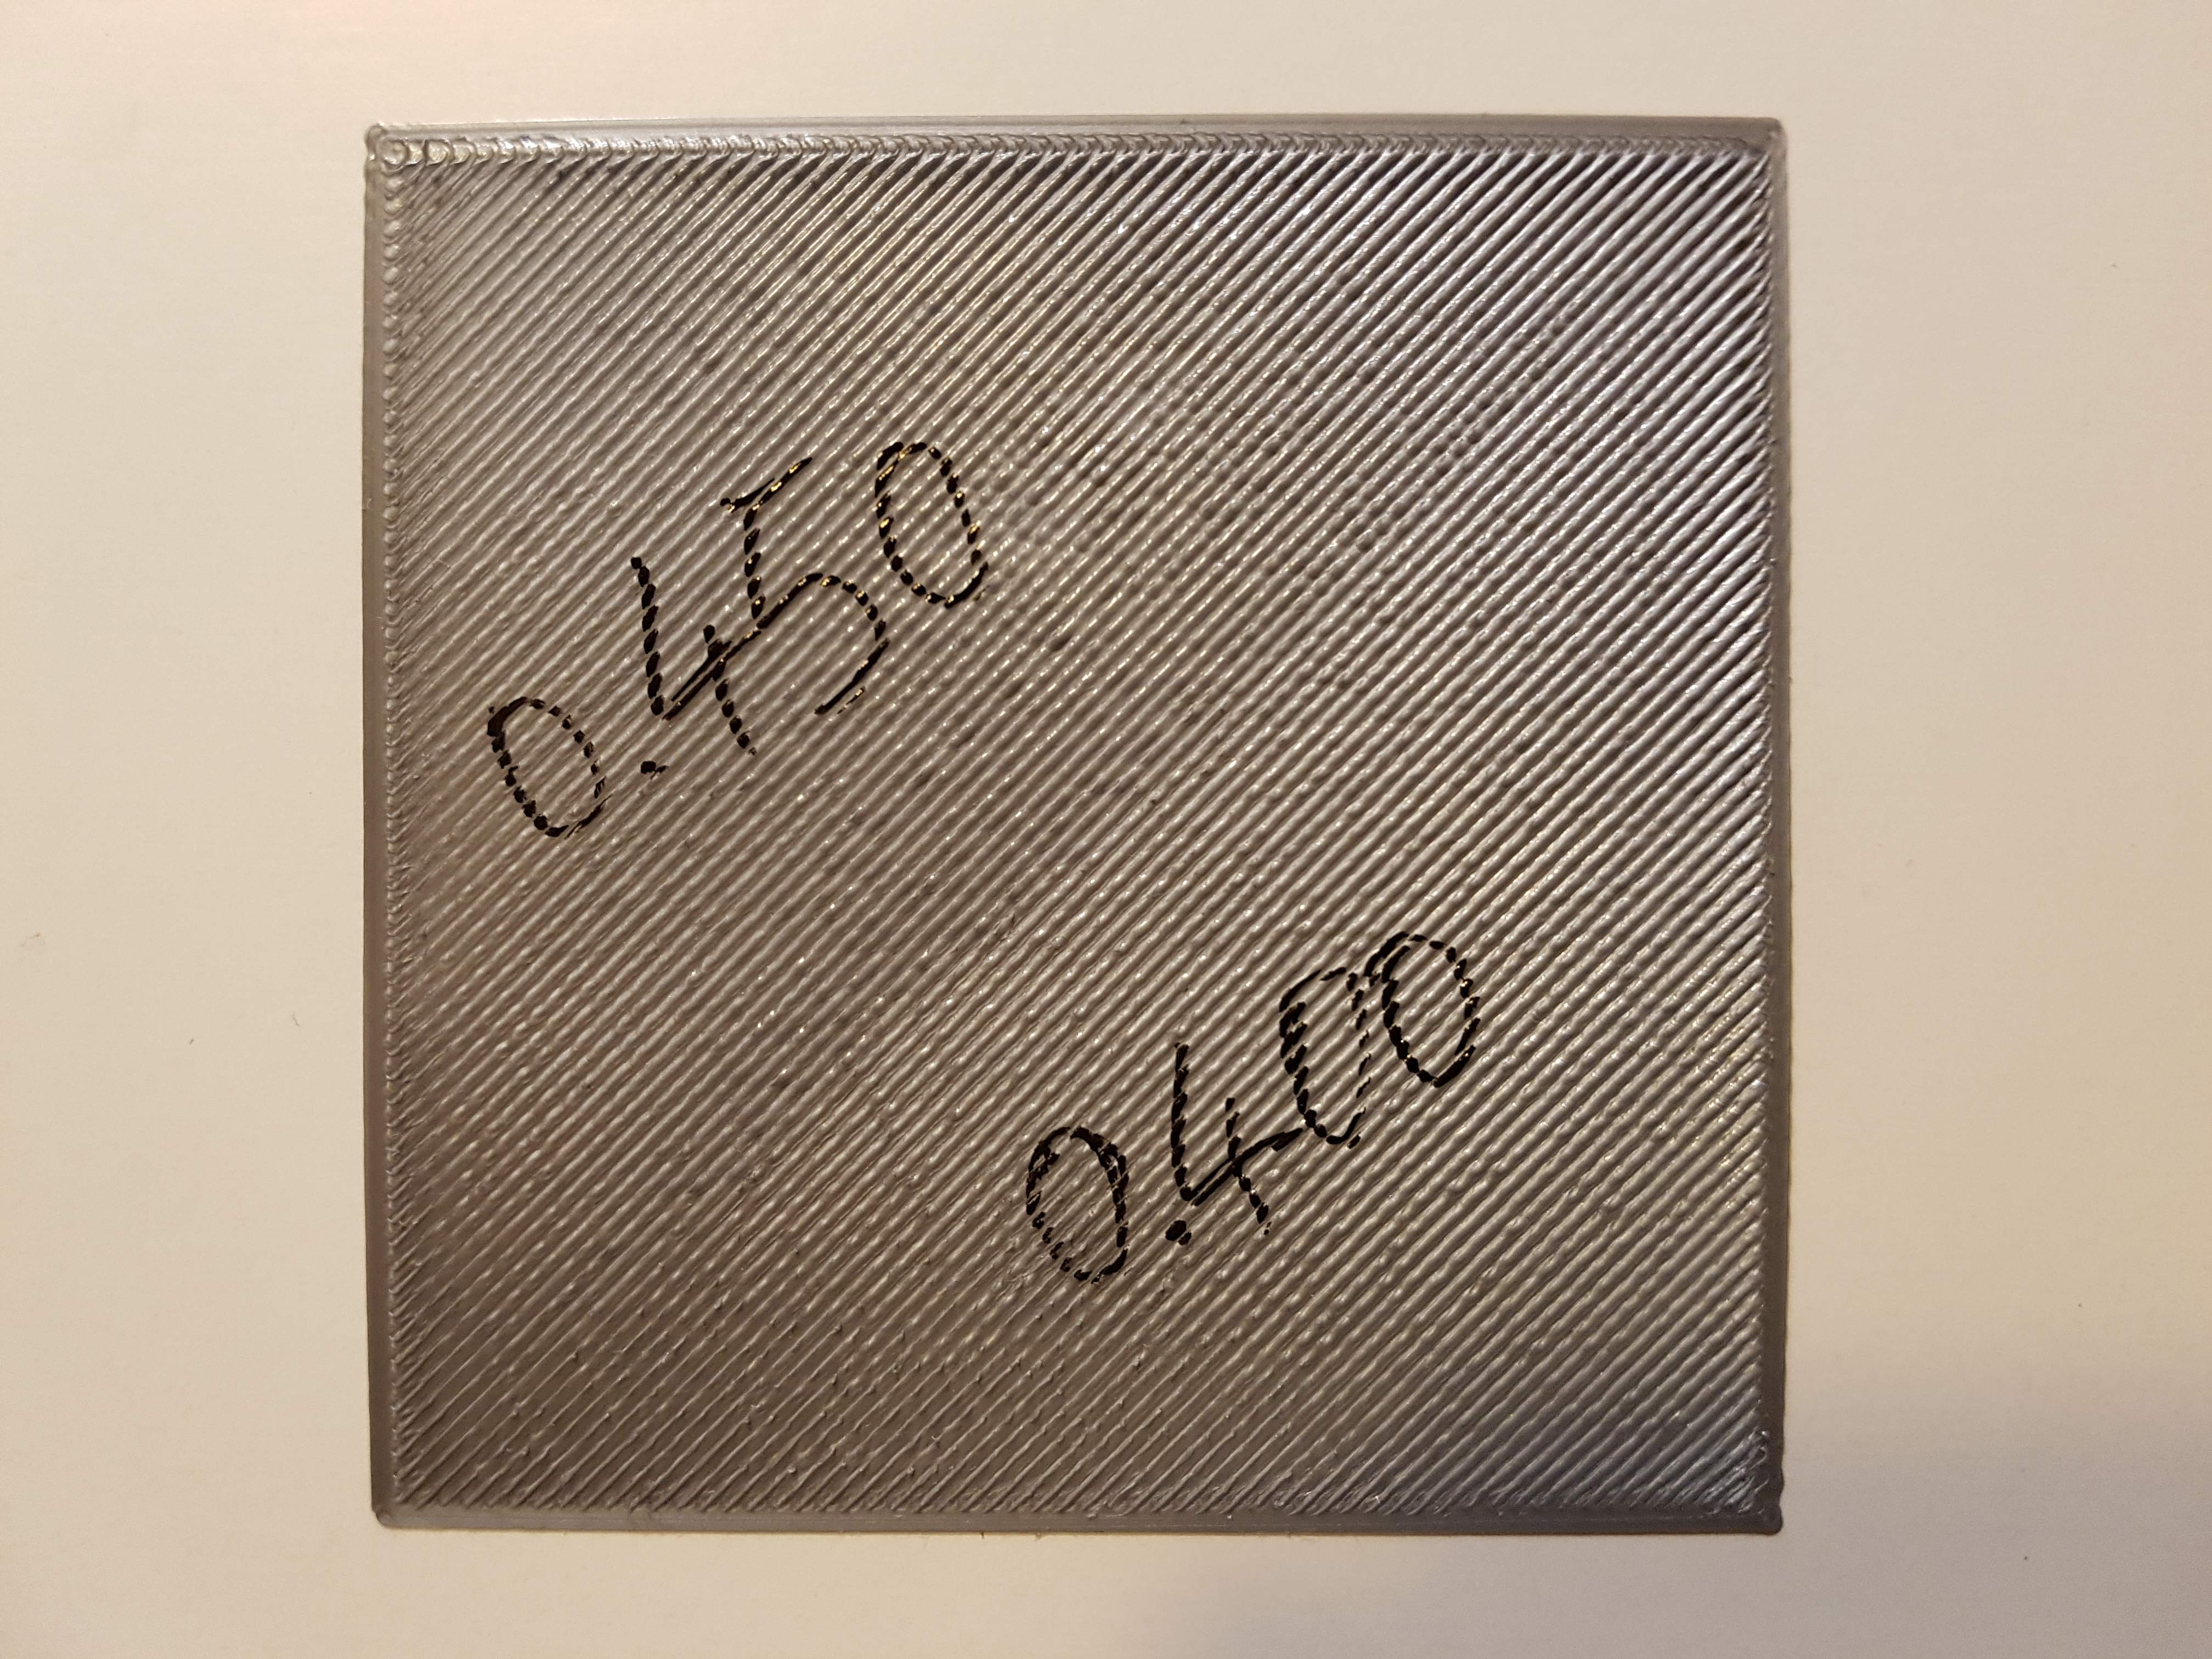
Other two pictures, that were not posted previously. Here you can see the differences better. The -0.350 seams to be very regularly printed.
But I think -0.300 should be the best. See my posting above.