Layers parallel to bed are rough and messy
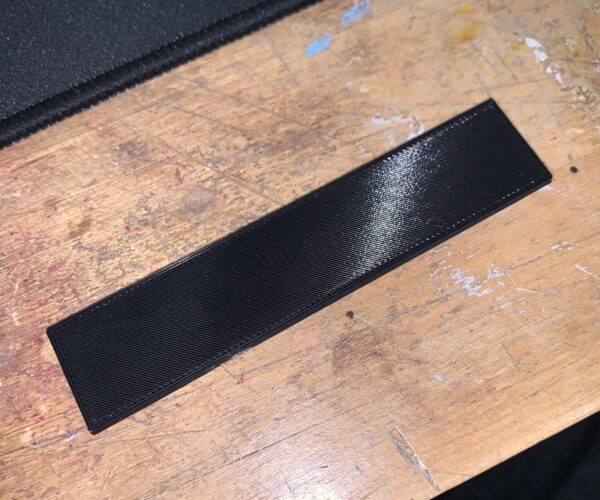
Here is the first layer, it is flat, clean, and even.
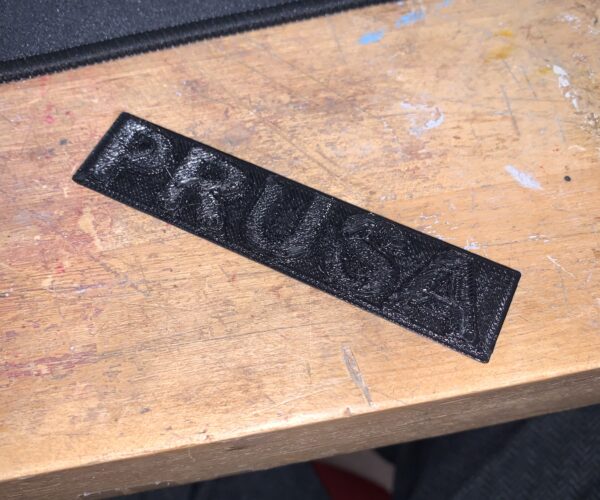
Here is the top layer, it is rough, uneven, messy, has overlapping filament, holes, and is just bad quality.
I am using mesh bed leveling, this is the test print loaded onto the Prusa SD card. I am using PLA+ inland filament from microcenter. Any ideas as to what is causing this? Thanks
RE: Layers parallel to bed are rough and messy
Assuming you are using a PLA test print on the card, the model would have been sliced for 'generic' PLA. You are using PLA+ which in general needs a slightly higher nozzle temperature, but of course it varies by filament manufacturer and their particular recipe for PLA+.
Load the original STL file into PrusaSlicer and try re-slicing it with a 10-15 degrees higher nozzle temperature and see how you get on. Check the manufacturer's website for printing parameters and/or search on here to see if anyone else has experience with this filament.
Cheers,
Tim
RE: Layers parallel to bed are rough and messy
I changed the settings, and to no avail. The exact same print happened. And then, I tried with Prusa Galaxy Black filament, and the same problems arose. So, I can safely say, the filament is not the issue here.
RE: Layers parallel to bed are rough and messy
OK. I had a good look at your first layer picture and while it is a bit hard to tell, it does look as if you can go lower. What is your current Z-offset?
I suggest to do a first layer calibration with the Prusament PLA by printing this one-layer test strip. You are aiming for a smooth top surface with no visible gaps between the extrusion lines. When it comes off the bed you should not be able to easily pull it apart. Also, if you hold it up to a light you will see where there are holes (if any). Adjust your Live-Z until it is the best you can get. Running a fingernail across the surface gives you a pretty comparative feel for relative smoothness between test prints.
Cheers,
Tim
Cheers,
Tim

