How are these first few prints?
Hi, my first 3D printer ever is a new MK3S kit. It's working fairly well, no major hiccups in tests. Got the first layer dialed in with help of some posts here. I have a few examples of what I'm getting that I'd love some help on.
So far I'm using the Made for Prusa PLA Silver that it came with. Default temps (215/210 and 60 H).
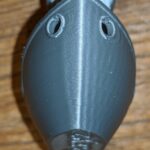
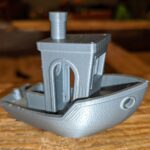
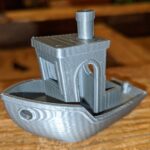
Here's a 3D Benchy from the SD card file. It was oriented with the bow pointing southeast. The starboard side of the hill looks gorgeously smooth. The port side has some waviness. Also, there's a weird split/shift in the roundness of the smokestack.
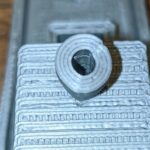
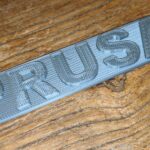
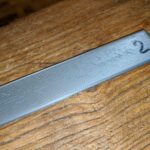
I also tried out the Prusa badge. I think it looks okay? Some gaps on the bottom, but it seems like if I adjust Z height down more I get ridges on from the top side of the first layer. The top layer of the letters look somewhat ripply and the letters aren't quite filled in at spots.
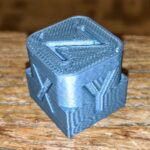
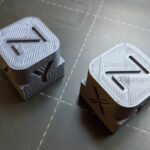
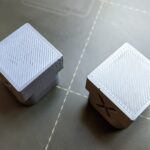
Finally, I pulled down an xyz cube model from here and sliced it myself. 0.20mm quality, 15% in-fill, all pretty standard. It looks fairly okay, but on the Y side (which is the right side as this sits when printing) the wall has waves in it. Again the top layer fill doesn't look awesome.
I've looked at a few things like belt tension (X 256, Y 272), made sure various screws seem tight. Will appreciate any and all suggestions. I'm just learning, so don't really know if this is as good as it gets or if I need to do more to dial this in.
Thanks!
RE: How are these first few prints?
Your Benchy looks pretty good to me. The cube has some ghosting on the Y axis. I can't help you with that, but I can tell you how to get rid of the bottom gaps.
I had the same "issue" with the bottom gaps just a few days ago, once I finished building my MK3S. I solved that by redoing my first layer calibration. Turned out I was only slightly high. Mine sits at -1,050 at the moment. Previously it was -1,020. Since every printer is slightly different, these values don't apply to your machine. But just as a guideline to illustrate that small adjustments can have a big impact.
Second step was to slice the model differently. The gcode models provided on the SD card don't really turn out that well, on the bottom. The test patches however were great.
I assume that the first layer speed was set higher for the default models when they sliced it. Every model I tried from the SD has this issue. The underside just doesn't look "proper", even if your first layer height is properly set. You get those gaps between each line.
For my next tests, I sliced my own models and slowed down the first layer speed to 10 mm/s! Sounds slow, but it makes one heck of a difference! They now turn out perfectly smooth, just like the translucent paper kids use to tinker with. The bottom side is glassy smooth and the top only has a slight hint of ridges. Both sides of the extruded lines are bonding perfectly.
Let me know if that worked.
RE: How are these first few prints?
Hi, velvia, thanks for sharing your thoughts. I've been playing around with some things today, and I think I'm moving in the right direction. Here's what I did, for documentation to help others and in case other folks here have more tips for me... 😀
Z-axis (FLC): I played with this a little more and pushed it a little lower (more negative). It seems to be helping.
First layer speed: 10 mm/s did seem to help some, although I had also adjusted Z-axis. I've now brought it back to 15 and it seems about the same. Bottom layers look more filled.
Filament diameter: I customized my filament diameter. Finally found my calipers and measured thickness mostly in the 1.70 to 1.72 or maybe 73 range. Adjusted Slic3r to 1.72 for this filament.
Temperature: printed a small temp tower and found that this filament quality is a little better closer to 205 than 210 so I adjusted my settings down to around 207 (first layer still at 215).
Y-belt tension: I was sitting there watching the Y belt and I saw that on the back drive gear there would be this bulge that would "pulse" in the belt when it changed direction, probably lifting up ~3mm or maybe more. Even though my tension test reading was in the green at 272, I (carefully) flipped up the device and put more tension on the belt. Now the test reads 286 and the pops are almost completely gone. Maybe I should go a little further. X axis doesn't seem to have any of that kind of play.
Infill: I am toying with infill patterns, wondering if the stroke ends that hit the perimeter wall might be causing some of that "telegraphing" or waviness on the outside walls (especially on the east wall). I changed to a 3D honeycomb infill for now, not sure if that helped. Played with infill at 20% too, again not sure if that is responsible for any changes.
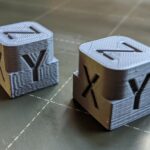
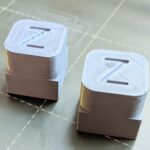
With all that, I present my round two post-tweak xyz cube. In all these photos, before is on the left and after on the right:
- The waves on the east side of the cube are gone.
- The top is filled in more nicely.
- The bottom is great.
- This weird layer shift that happened on the back side (north) right were the curved edges start is also gone now.
All in all, much better! Time to print something for real, I guess. 🙂
If anybody else here has thoughts on what further to play with, please let me know. One question - does your Y belt bulge "wider" (gap gets bigger) near the drive gear on the back when the platform is changing directions? I don't know if I should go tighter there.
RE: How are these first few prints?
The bottom looks much better now. I guess the difference between 10 and 15 mm/s is minimal. Just use what works best for you. I was amazed by the quality at 10, so I just left it there.
The tops look better too, you might want to slow the "Top solid infill" down a bit as well. It does improve quality. For quality prints, I have mine set to 40 mm/s. And the phone holder I printed yesterday has absolutely amazing top layer. It looks just as nice as the bottom layer. I used prusament azur blue, which I think has a slight edge over the default silver PLA included with the printer. Also keep in mind that the type and amount of infill has a big impact on how nice the outer top layer will be. I always use grid with at least 20 % infill. This makes the "bridges" that the nozzle has to gap smaller and thus improves finish quality for the top layer. Then it usually adds a few additional layers to hide the ugly "bridge infill". Just something to keep in mind.
As for the belt, I have mine pretty tight. There is nothing bulging or flexing. I could not find any instructions how tight they should be, so I used my experience from replacing engine belts. I would say they are quite tight. I was worried in the beginning that I might have set them too tight, but it turned out just fine. Its hard to describe how tight is "tight" and what is "loose" since this involves a lot of feeling around until it just "feels" right. I d tighten up the Y belt in your case and see what it does. You might also check that the 3 Y bearings are properly tightened. If they are slopping around, that might create some Y issues as well. The "U" bolts are supposed to be only "slightly" tight as to not deform the bearings. Its a fine balance. You want them tight enough to stay safely in place, but not too tight that they will deform.
RE: How are these first few prints?
I have the same issue with the waviness and it is on the same side. I have not figured the cause yet.
