Hairy frogs...
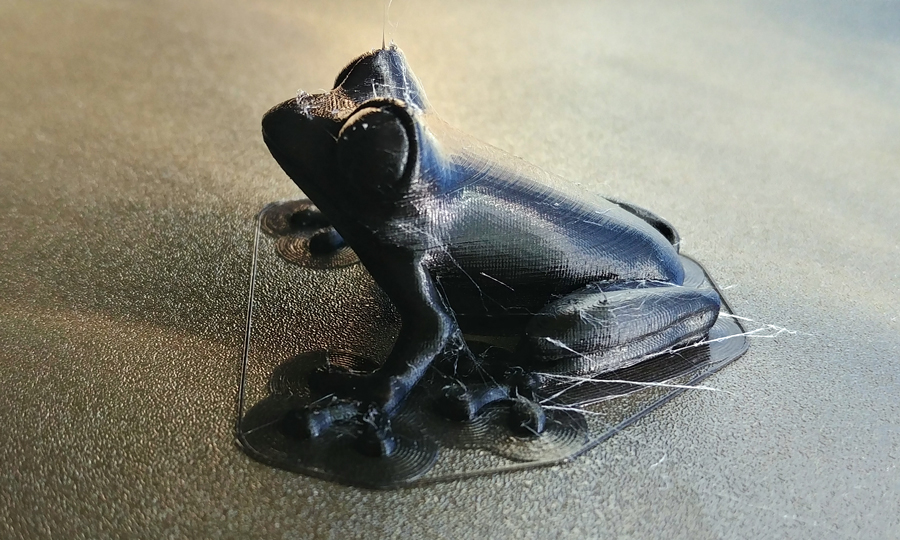
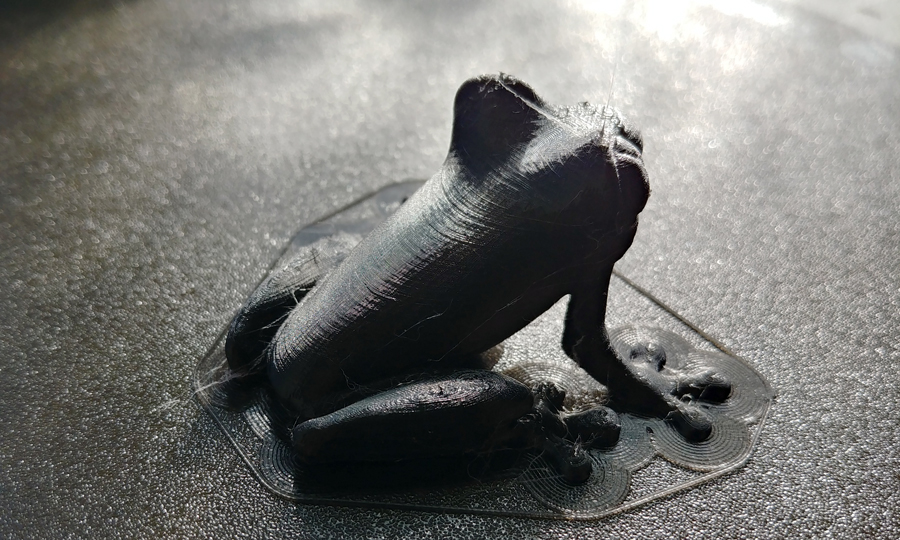
Just wanted to post my first 50um treefrog prints. Overall detail is quite cool but the first attempt is very hairy. For the first I used the default 215°/60° and was able to reduce the hair in the second print by lowering the nozzle temp to 205°. I would like to achieve much cleaner results and will just have to experiment a bit and get familiar with this machine.
I caught this little dude in my house and he was good enough to pose for a reference shot.

First print:


second print / lower nozzle temp


RE: Hairy frogs...
My first print was also a frog (printed yesterday with the silver filament that came with my printer). Using the default settings I got only a few hairs, the biggest one being the final string coming off an eyeball. It looks like lower temperature is working for you. The only explanation I have is that temperature sensors likely have some tolerance (like plus or minus 2% from actual temperature, I'm just guessing), which would mean the ideal 215° temperature could be in a measured range from 210-220 (assuming the sensor is off by 2-3%).
I see some small bumps here and there in your picture too, which suggests to me (I could be wrong, I'm a first-timer too) that extrusion rate is slightly too high for the nozzle movement speed.
MY problem with my frog is that the brim seems pretty well stuck to the frog, and I have no idea how to remove it without damaging the frog. Is it supposed to snap off? How do you get it out from between the toes?
RE: Hairy frogs...
@anachronist
Oh cool! I didn't consider the extruder rate vs speed. I'm running another test right now with a different filament @ 200° (the min is 190° for this one) and have slowed the speed 10%. So far it's looking better but it's only a few layers in.
For trimming, I've been using the little woodworking tools in the image below and they work quite well. The steel is hard but not overly sharp. I found about a dozen of these in a junk shop for two bucks IIRC. I first tried an extra heavy duty Olfa blade but it was too easy to nick the piece, and even cut into it. And slipping is easy so there is potential for deep cuts in your hand.
The brim on my prints is also pretty well stuck and I found by pushing the chisel in and following the grooves between beads it came off cleanly and easily.
jay

RE: Hairy frogs...
If brim is sticking too well, often times Live-Z is set a bit low and the layer is being squished too much. Generally, brim comes off my parts with no effort at all.
RE: Hairy frogs...
If brim is sticking too well, often times Live-Z is set a bit low and the layer is being squished too much. Generally, brim comes off my parts with no effort at all.
You mean the brim just snaps off? You don't have to cut it?
I did that first-layer calibration more times than I can count, spent hours of frustration with PLA refusing to adhere to the powder coat regardless of my 99% isopropyl alcohol, until I found another post here that said to wash the steel sheet thoroughly in soap and water, and that made all the difference. I guess my prior frustration got my brain so obsessed with the non-sticking problem that I thought more first-layer squish was better than less. I set the first layer by running the calibration routine over and over again, decreasing the height about 0.01mm each time, and when the little square test patch started ripping, I backed it off a notch, ending up at -0.880mm. I need to try it in the other direction until it looks too un-squished and then set it in the middle of the range.
@jayryan - please let me know if slowing down the extrusion rate helped. And I'll have to look for a small chisel like you found. Probably one like this.
RE: Hairy frogs...
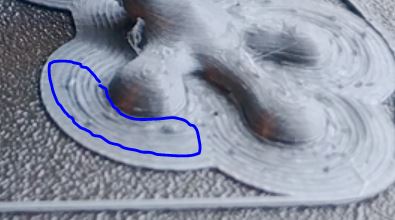
All of the gears were printed with brims due to the height of the knob --- a slight tug and the brims came off; sure they left a small elephant foot, but no trimming needed. Zoom in and you'll see the side showing that had the brim.
But I only use the smooth PEI sheet; the PC sheet present other problems, so your mileage may vary. But even with the PC sheet, brims usually shouldn't be so well attached they must be cut off.

RE: Hairy frogs...
@anachronist Those chisels will do but cheaper are just as good. Here are a couple others as an example - $14.95 12 piece set or $7.95 12 piece set
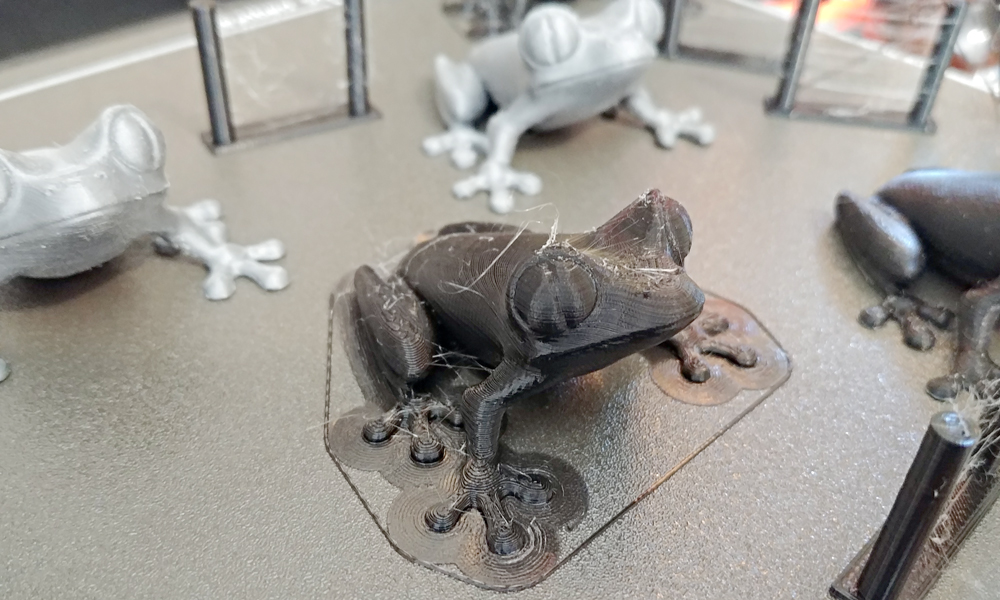
Here are photos from my latest test print. Still a little hairy, more on the bottom than the top because I reduced speed and lowered temp (195° in the end) during the print. Thanks for the speed tip, the surface quality has improved.
@tim-m30 the brims on my prints so far have needed the chisel to remove. I'll raise my Zed adjustment a bit as you suggested.
Thank you both for the help!
jay

RE: Hairy frogs...
It's been a week since my last post to this thread and I thought I would update my progress.
I've learned a lot - printer, materials, temperatures, software, models, gcode, et al - and what I discovered is I have a lot to learn. ;P There are a couple small hardware issues with my printer I thought were contributing to some of my challenges but I think it's pretty well dialed in despite them.
I have had varying results with stringing from thick strings to a few wispy hairs and there are a lot of contributing factors. I've seen prints with much better results than I have achieved and believe now knowledge and experience is why. I'll get there. I have also wanted a hot air blower for some light smd reflow work but it wasn't enough to justify buying yet another tool. Cleaning hairs gives me another 'reason' and I'll be picking it up at the post office in a couple hours. 🙂
I'm done with testing for now and want to start working on the projects I bought the printer for and am quite excited about it all. It's a pretty cool thing to have in my little lab / shop. First thing is a small solder fume extractor I'm working on in OpenSCAD - yeah, I like to jump in.
Here is a photo of the bits and pieces I still have from the tests. There are more but they were launched into the hidden corners of my home after stepping on them. And they will stay there!

RE: Hairy frogs...
@jayryan - the frog and the gear bearing were the first things I printed too.
Nice collection of frogs there. I had a few hairs on mine but not like the pictures you've shown. In response to the brim not being removable from my frog (I eventually did manage to tear it off slowly with pliers) I backed off my Z adjustment and was enjoying easy-to-remove brims until @tim-m30 pointed out in this thread that I went too far. So now I'm back to hard-to-remove brims, but the benefit is that my prints stick better to the print bed.
I've been collecting the scrap PLA in a bag. From all the calibration testing and failed prints, right now I have more scrap than final printed parts. I hope to reverse that situation eventually.
RE: Hairy frogs...
As an fyi, these little globules are symptomatic of filament sputtering - if you are hearing little hisses now and then, more evidence the filament is wet. And wet filament tends to string more than dry filament.
RE: Hairy frogs...
@tim-m30 - I thought those bumps were due to over-extrusion. But moisture makes sense too.
RE: Hairy frogs...
I've been collecting the scrap PLA in a bag. From all the calibration testing and failed prints, right now I have more scrap than final printed parts. I hope to reverse that situation eventually.
We won't talk about how large a box of plastic waste is needed, especially when printing a part that took 6 kilos of PLA. lol.
RE: Hairy frogs...
Thanks for the replies...
@anachronist, I also tried @tim-m30's suggestions for easier to remove brims but then I went back to the lower Z adjust for better adhesion. lol.
@tim-m30, the silver frogs are printed with the Prusa PLA that came with my machine. The bag wasn't sealed so I've suspected moisture could be affecting the prints with it. I also bought some Materio3D PLA and I don't get blobs or bubbles with it. I've found some oven roasting methods to dry it out but will wait until I get some desiccant. It gets pretty humid in the fall / winter where I live so there isn't any point drying it out until I can keep it that way. The blobs could still be from over extrusion but drying the material out won't do any harm.
jay