First layer calibration help for kit build
I finished assembling my mk3s+ a few days ago, and I've been learning the ropes since then. I'm currently having a bit of trouble with first layer Z calibration, and I could use some experienced eyes to check my homework.
Starting with the basics:
- I'm printing Prusa PLA Silver on the textured bed (smooth bed is in the mail, not here yet).
- The XYZ calibration reports perpendicular X/Y. Selftest passes (had to tighten the Y belt a little).
- I switched to 7x7 mesh bed leveling with 5 probes per point.
- I used the builtin first layer calibration to get a decent live-Z at -1.430.
When I printed the Prusa logo, I noticed some quite bad corner lift-off, so I started reading the forum and other guides to figure out how to fix it. The main advice I saw was: don't use the textured bed for PLA, thoroughly clean the bed, and use JeffJordan's calibration squares to check/improve the first layer.
I don't have a smooth bed yet, so I'm doing what I can on the textured one. I washed the bed thoroughly with dish soap, and the Prusa logo came out much better, but still with a small amount of corner lift-off on the bottom-left side.
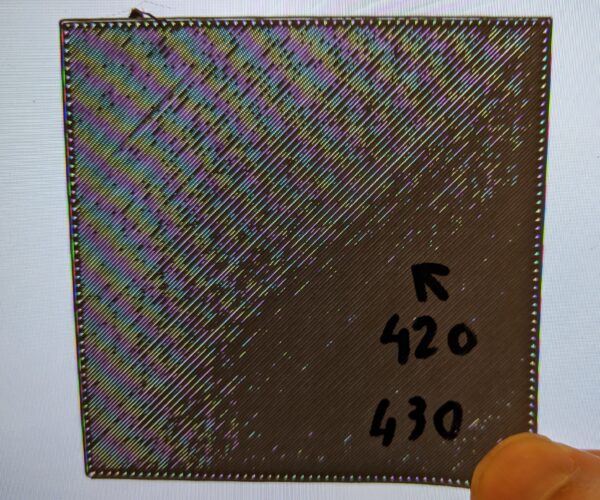
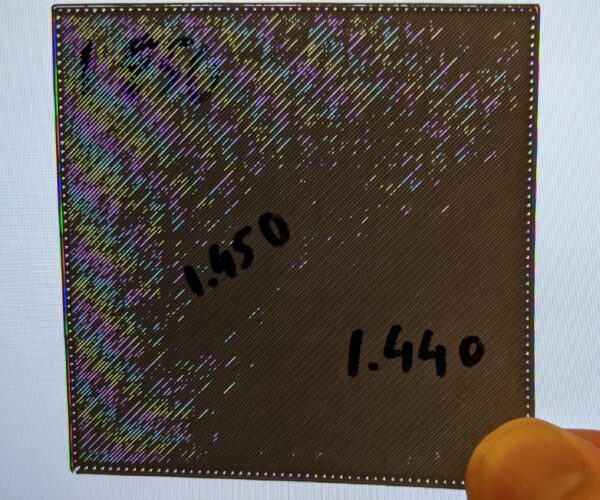
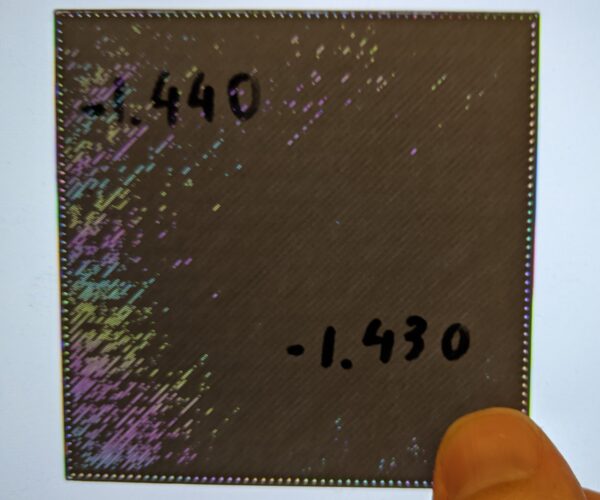
Then I started printing 75x75 calibration squares to check and adjust my live-Z. I cleaned the bed with isopropyl alcohol between prints. The results are:
At -1.420, the segments don't fuse at all, it's like a tiny harp. Everything else fuses at least a bit, with some gaps as you can see. With calipers, the layer thicknesses are:
- -1.420: 0.28mm
- -1.430: 0.23mm
- -1.440: 0.22-0.23mm
- -1.450: 0.24-0.25mm
Based on this, my interpretation is that -1.430 is close to the sweet spot, and I need to maybe search between 430 and 440 for something better. Does that sound right? I'm a little bit confused by the -1.450 result where there are a lot of gaps... Is that a normal effect when the nozzle is too low?
The other thing I noticed is that even with -1.430, the lower-left side of the print seems to fuse less than the rest. This seems to match my experience that the lower-left corner of the Prusa logo print is the remaining "difficult" corner that doesn't adhere well. Any ideas what could be causing this, and what to try next?
Thanks in advance!
- Dave
RE: First layer calibration help for kit build
When I was doing my first layer calibration it looked as if I was low enough at -1.195 as started to close the gaps, however I eventually ended up at -1.230, what I did was tried to pull the lines apart, when I was still too high they pulled apart very easily.
Once I got down to one solid surface was almost impossible to pull apart as formed one surface.
Looks like you were getting the same as me before I lowered a bit further, I was a little cautious about going too low and hitting the bed.
Just go a little bit at a time.
Tank you very much!
RE: First layer calibration help for kit build
doesn't look like you're any where near it yet. I run my z on the smooth sheet at -520 most things now - and I have one filament I take it to -560 to get it to stick well.
RE: First layer calibration help for kit build
Thanks for the advice! I guess I got confused by what looked like the layers closing up enough at -1.430 and -1.440. Continuing down, I got a completely solid surface at -1.480, and at -1.500 my calipers measure 0.20-0.21mm, so I think that's probably about right. And when I got to -1.480 and beyond, the layer also became much harder to detach from the bed at the end of the print, so bed adhesion seems pretty great.
Thanks again!
RE: First layer calibration help for kit build
Final followup, for the archives in case other beginners end up in my situation. I settled on -1.500 and did another print of the Prusa logo. In the first few layers I saw what looked like artifacts from a too-low nozzle, so backed Z off to -1.490. The print came out pretty great, definitely the best I've managed so far.
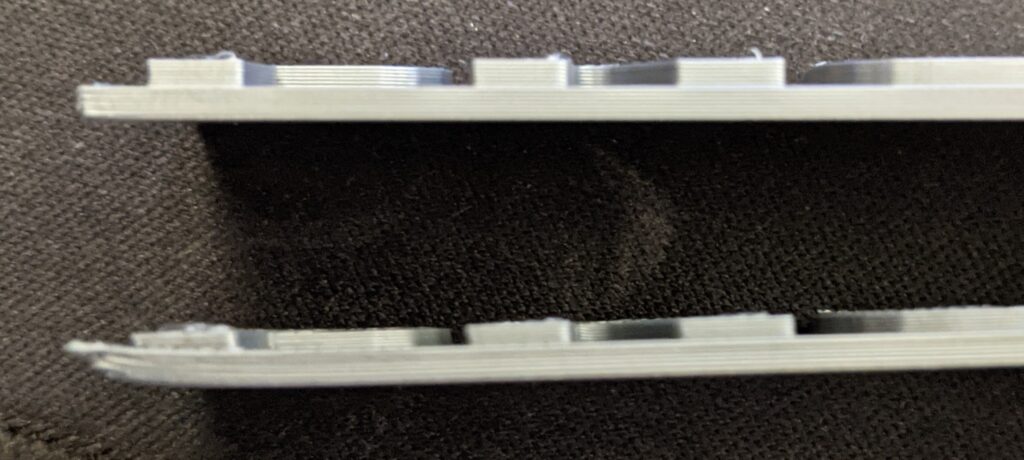
For comparison, here is a shot of the first Prusa logo I printed (bottom), and the one that finished just now. It's a bit hard to see in the photo, but the underside of the bottom one starts curving up between the "P" and the "R". The corner is very visibly completely messed up, and the letter depth is all over the place.
The difference between those two prints were 3 things:
- Wash the removable bed with dish soap, dry, then take care to not touch the print surface.
- After initial wash, wipe the bed down with 99% isopropyl alcohol between each print, to keep the surface as clean as possible.
- ~1.5h working (slowly, first time) through first layer Z calibration using JeffJordan's calibration squares. The first layer of those two prints differ by 0.06mm of nozzle height, so it pays to spend some time on that.


