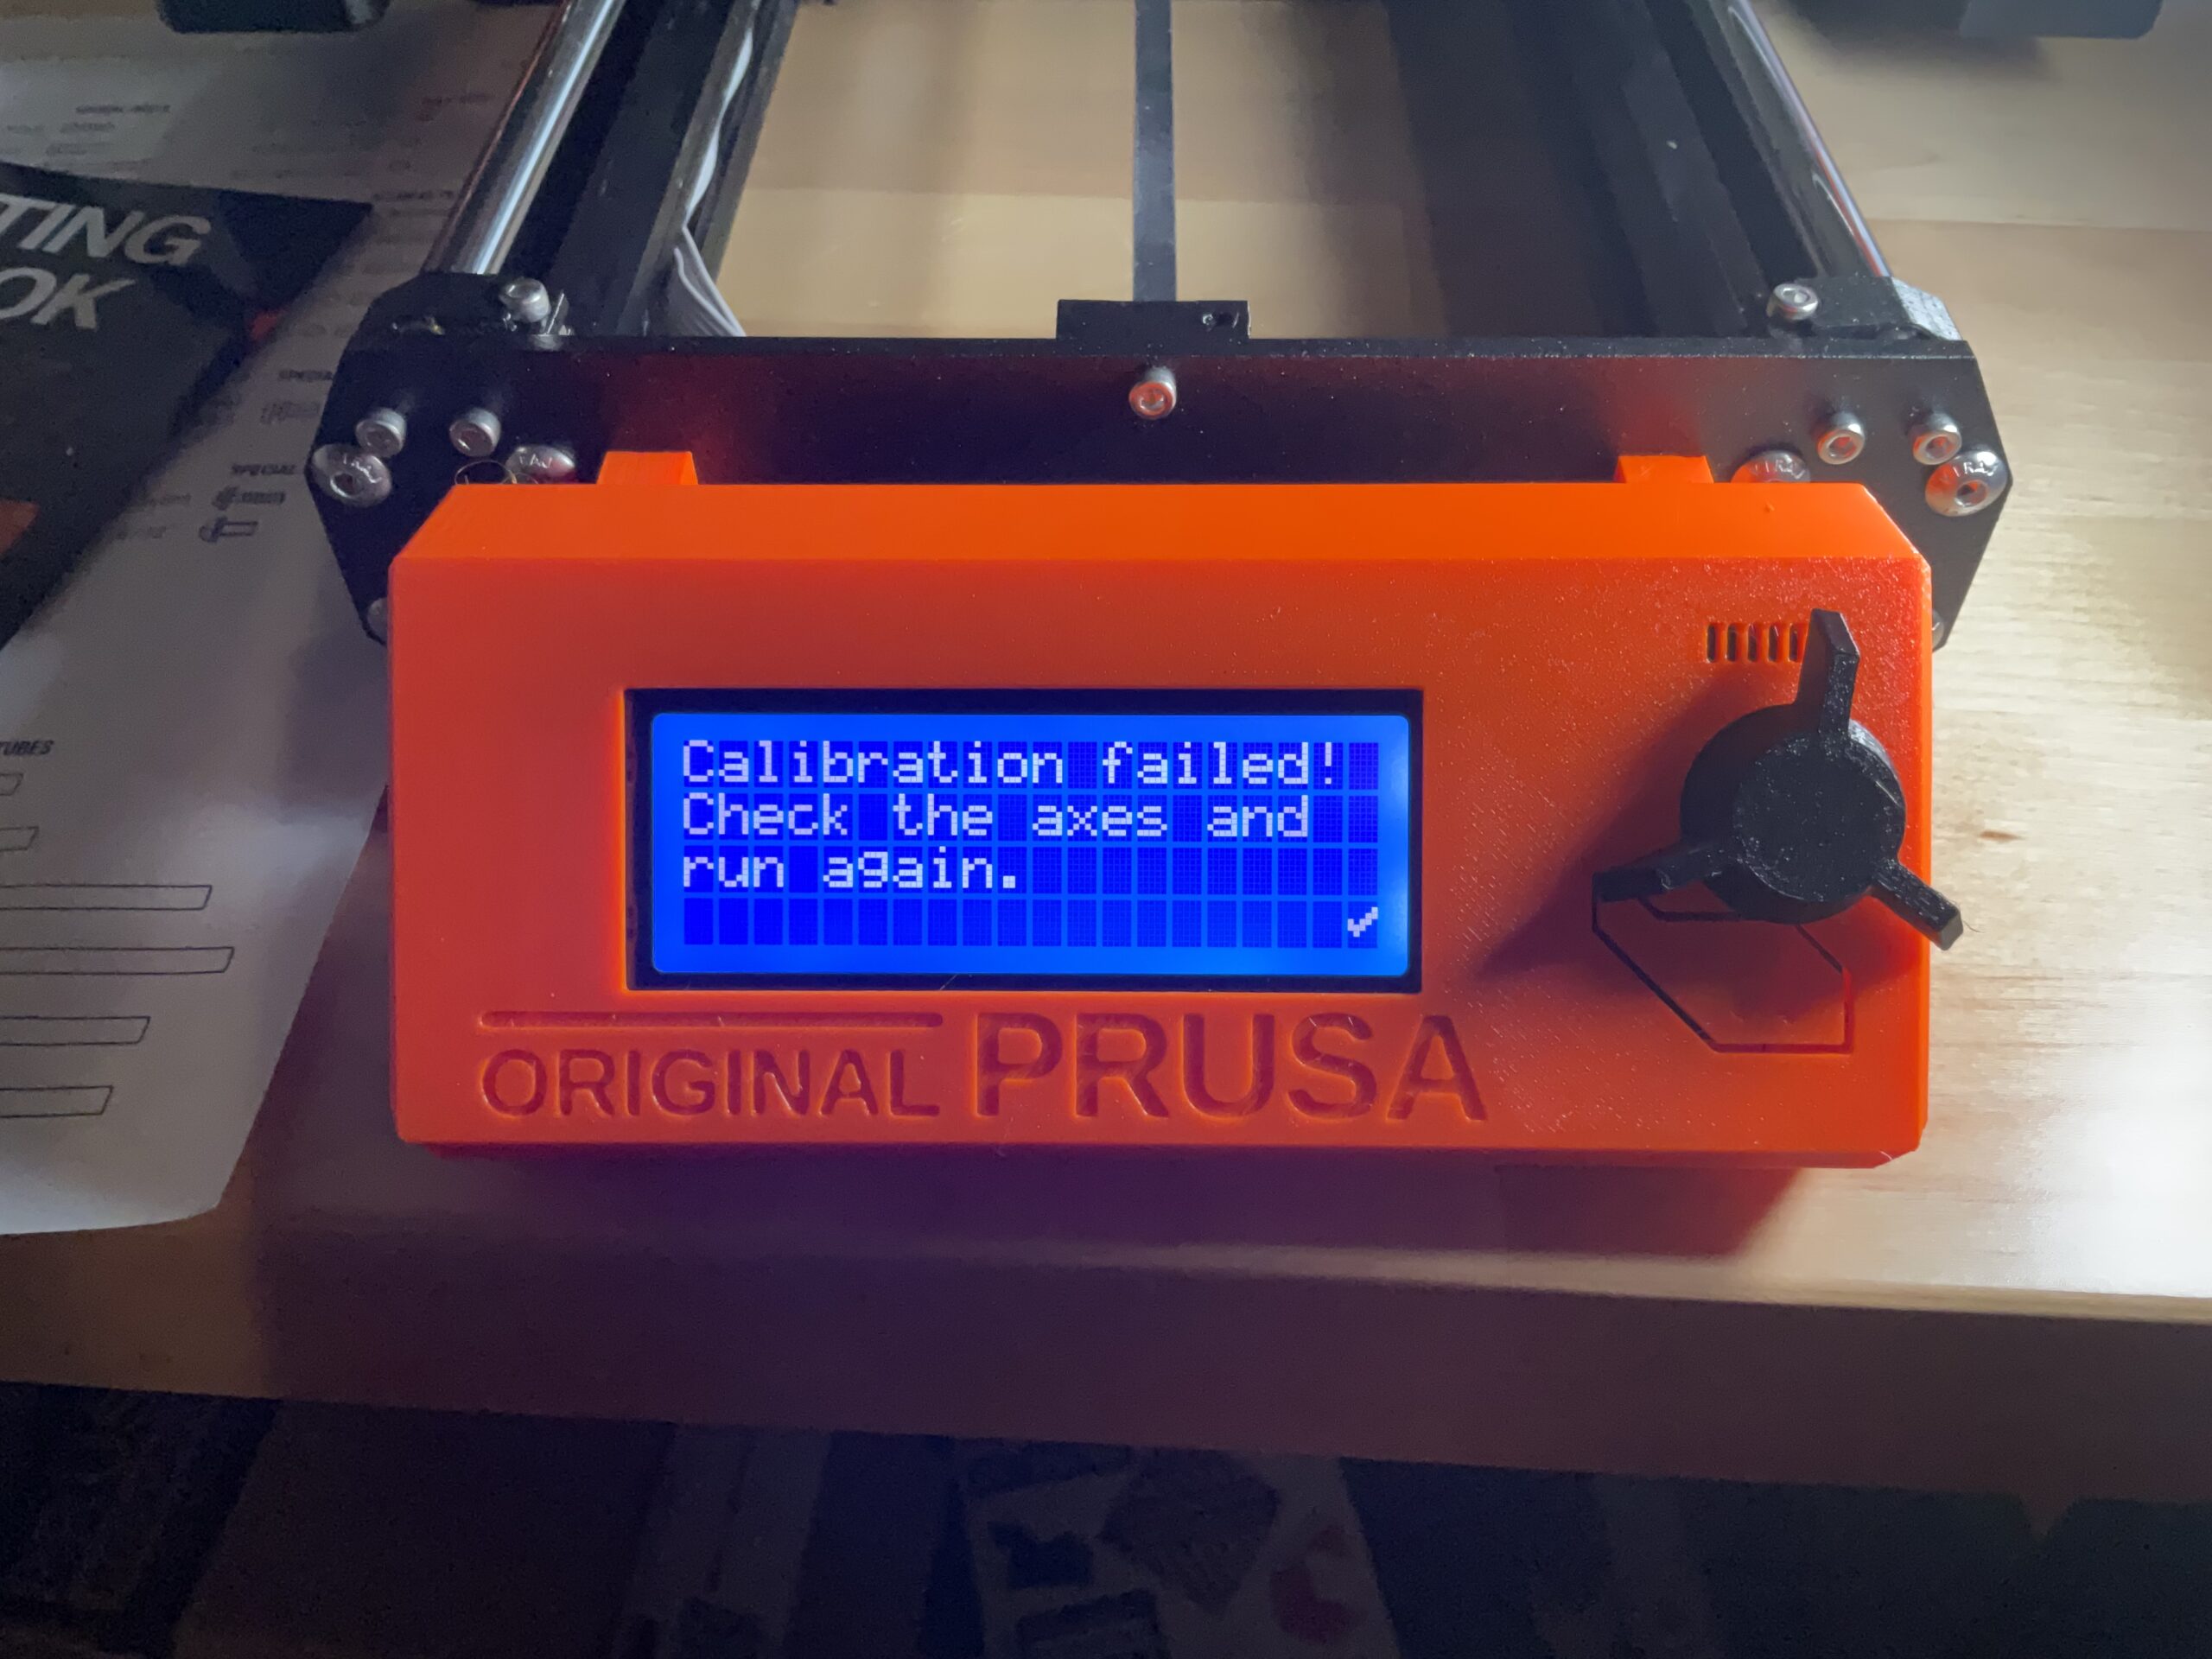
Calibration Failed! Check the axes and run again.
I just got the kit and assembled it slowly and carefully. I got through the setup wizard to the Calibrate step and I am stuck.
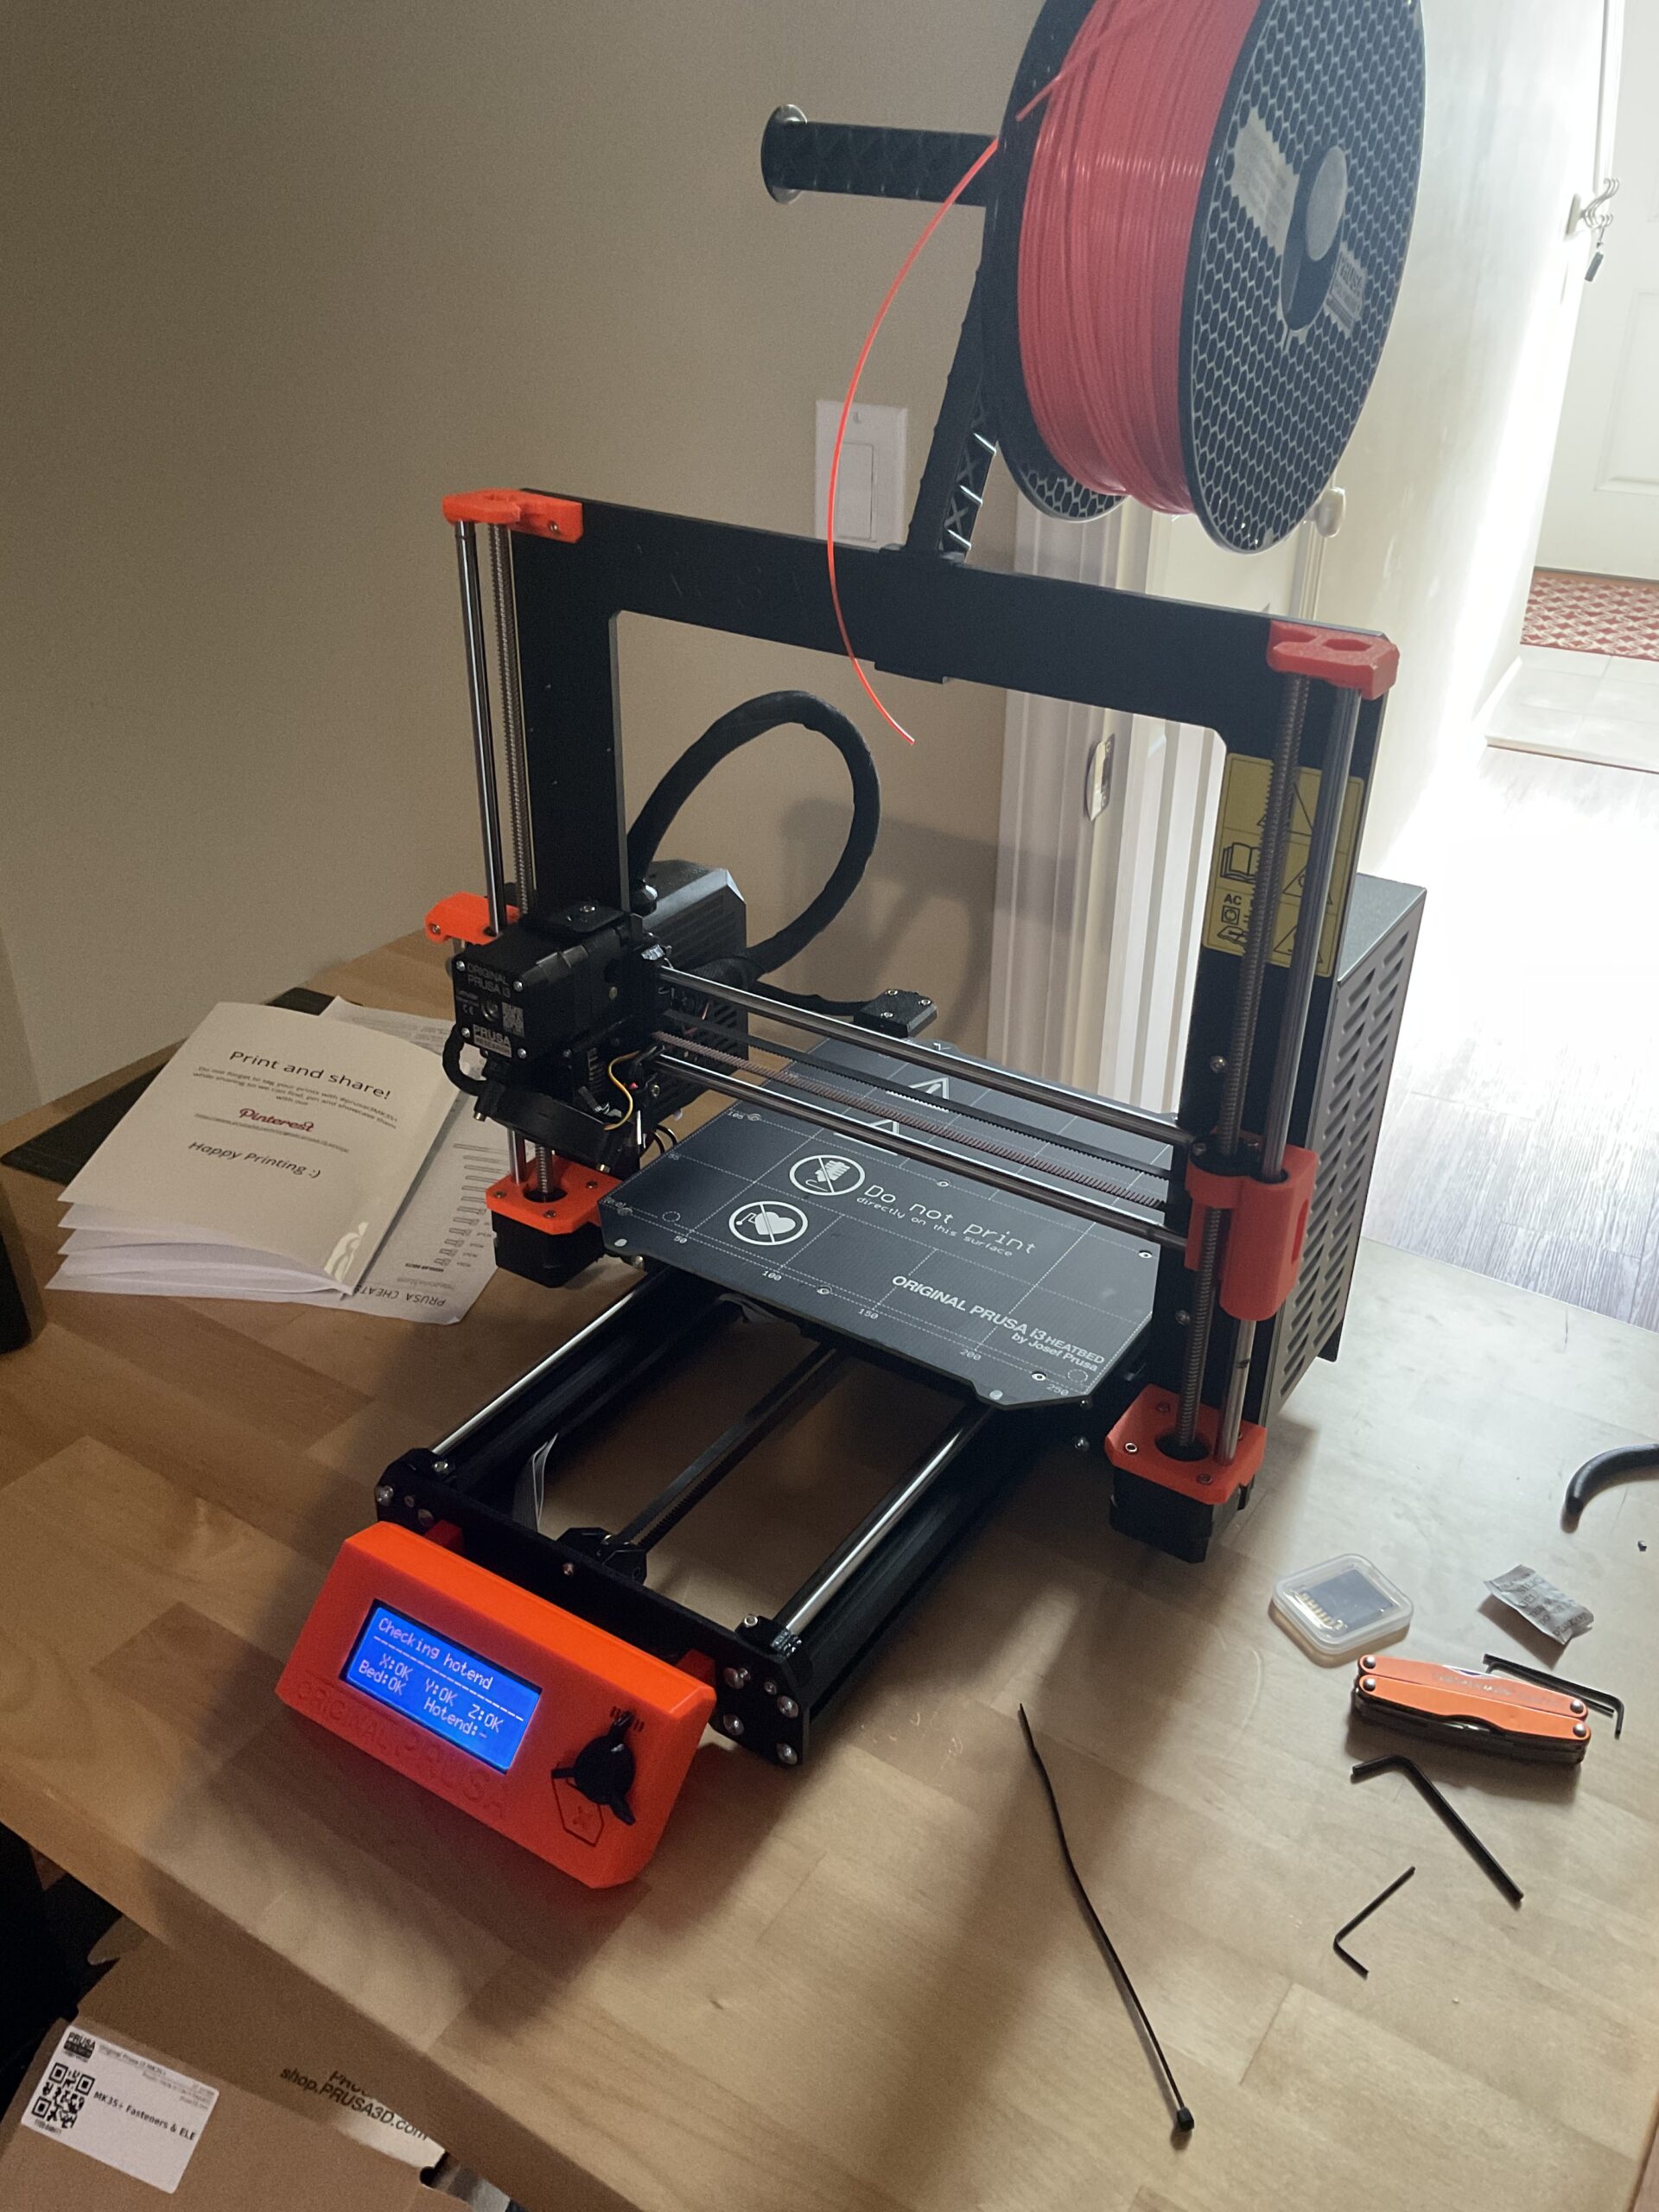
I get the test to start, it homes, then goes all the way up in Z until the rattling of Z all the way up. Then asks to clear the nozzle and put a sheet of paper under the nozzle. It proceeds to lower until “just” touching the paper and errors out, Calibration Failed Check Axes and run again.
I have installed 3.11 firmware. I have done the Super P.I.N.D.A. sensor check and it works. I have no clue what is causing this failure. See photos of where it stops and the error code.
RE: Calibration Failed! Check the axes and run again.
This is Josef's old setup video for the MK3, which I still recommend for the S and S+ versions, because it gives good guidance. For the Super PINDA installation, use the middle part of the zip tie.
Regards
Chris
I try to give answers to the best of my ability, but I am not a 3D printing pro by any means, and anything you do you do at your own risk. BTW: I have no food for…
RE: Calibration Failed! Check the axes and run again.
More photos needed. Check the trapezoidal nuts (z axis assembly) and the z axis top parts.
RE: Calibration Failed! Check the axes and run again.
I had this exact same issue, and honestly I do not know what solved it!
Several reboots and several attempts and I got the same every time.
Flashed the latest firmware - no difference at all.
Raised the Z axis full to the top, and noticed that it would stop around half inch from the top and go no further. I could manually move it up fine though with the printer switched off.
Lowered Z axis half way. The Superpinder was connected as light in the top of it came on when near the bed, although I tested by going to the sensor in the settings and then passing something metal beneath it - the value changes between 0 and 1. All that was ok so ruled out the sensor....
I then tried another calibration with the Z and X axis being in the middle, so the extruder resting in the middle of the printer upon switching on. Suddenly the Z went right to the top - properly to the top this time - and made a noise (it hadn't done this before). It then came down and correctly started the calibration! Completed successfully.
Not sure if this will help you, I think mine was more trial and error! Also make sure your Z axis is completely level before switching the printer on.
RE: Calibration Failed! Check the axes and run again.
Did that again.
RE: Calibration Failed! Check the axes and run again.
I redid the PIDNA sensor setup. I checked I can manually move both bed and extruder with 1 finger and the full range is achieved. I can go beyond the print area in the front side of the build plate, just over the white lines. Photos of the trapezoidal nut at top of the range manually are shown. The self test restarted worked fine, photo shown. The belt on both x and y motor with screw tight on flat of gear is shown.

RE: Calibration Failed! Check the axes and run again.
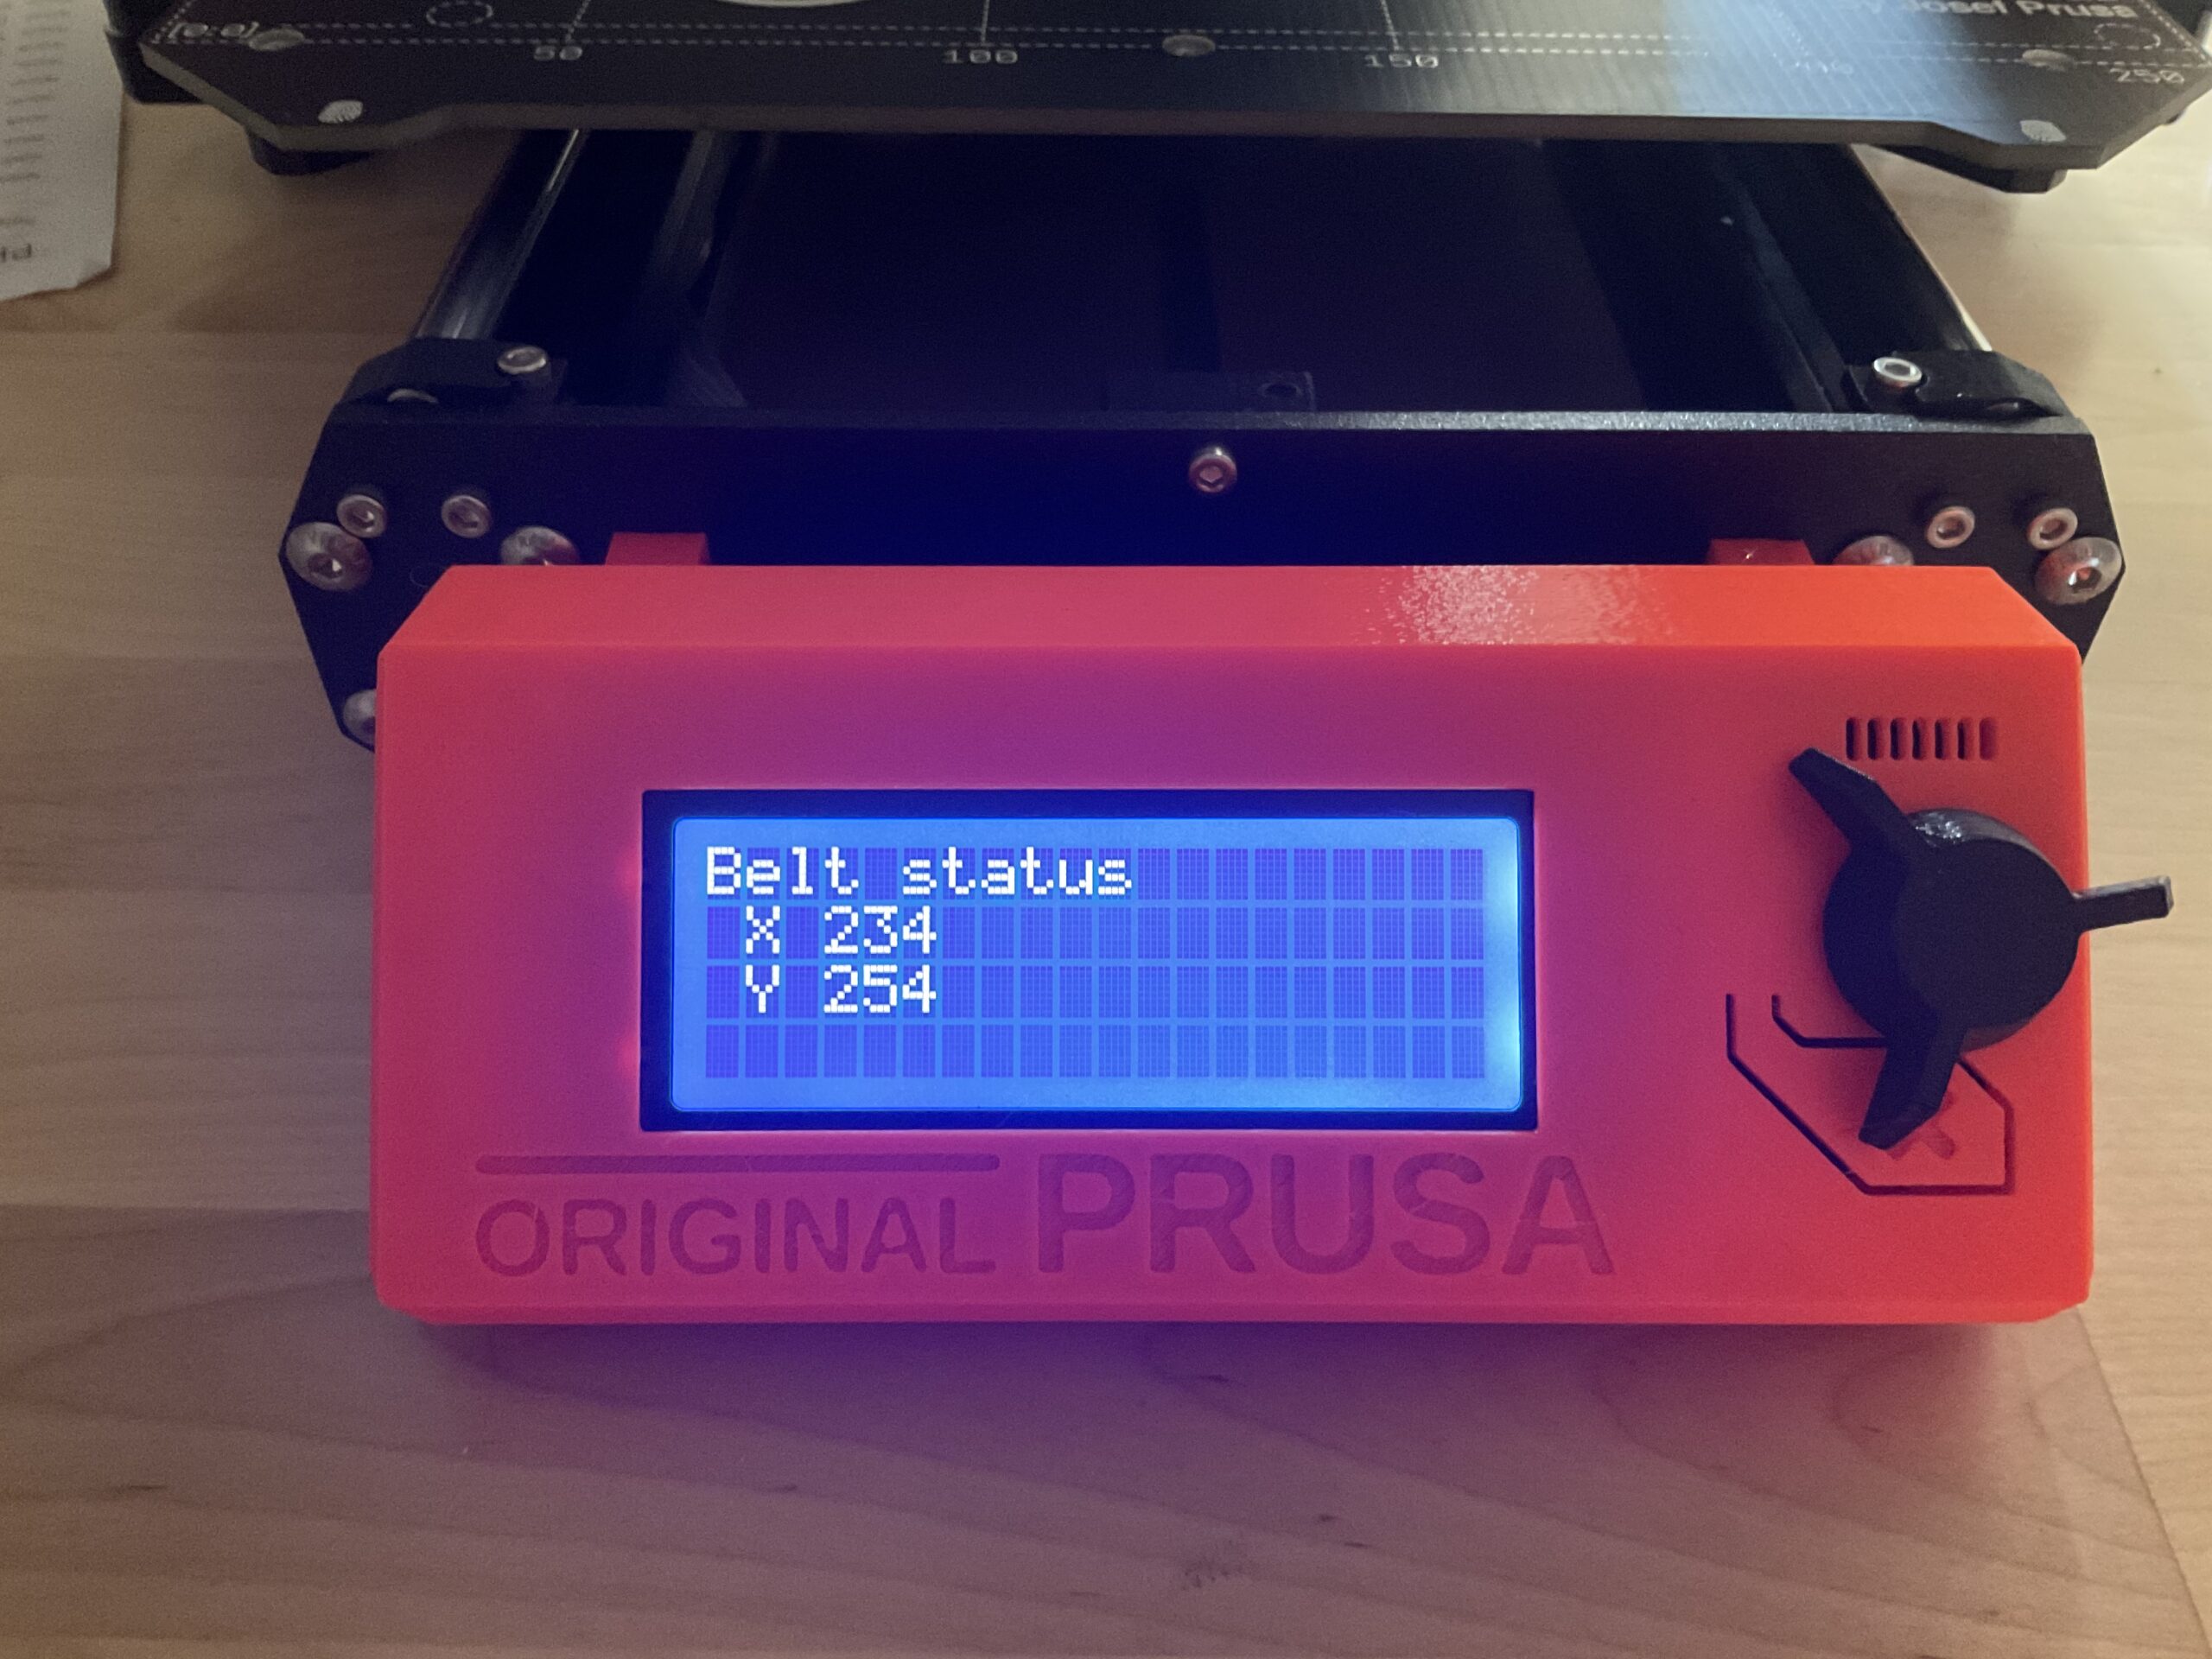
I am really falling into the same boat. I have actually checked everything with a square and a level, nothing is off. I have redone the firmware, no change. I moved the full range of the bed build area several times manually. I checked the belt status and before and after all the manual movements no change in the values. The start just reaches to just above the build plate and stops to say calibration failed. It just won’t touch but it comes soooo close.
RE:
What I´d do:
Check whether the trapezoidal nuts at the *bottom* of the vertical axes are no too tight. The black nuts screwed on the axis, sitting flush on the motor at the bottom end of the axis. See step 3: https://help.prusa3d.com/guide/4-z-axis-assembly_168629
Manually move the extruder to the top of Z and only then start the calibration wizard.
I try to give answers to the best of my ability, but I am not a 3D printing pro by any means, and anything you do you do at your own risk. BTW: I have no food for…
RE: Calibration Failed! Check the axes and run again.
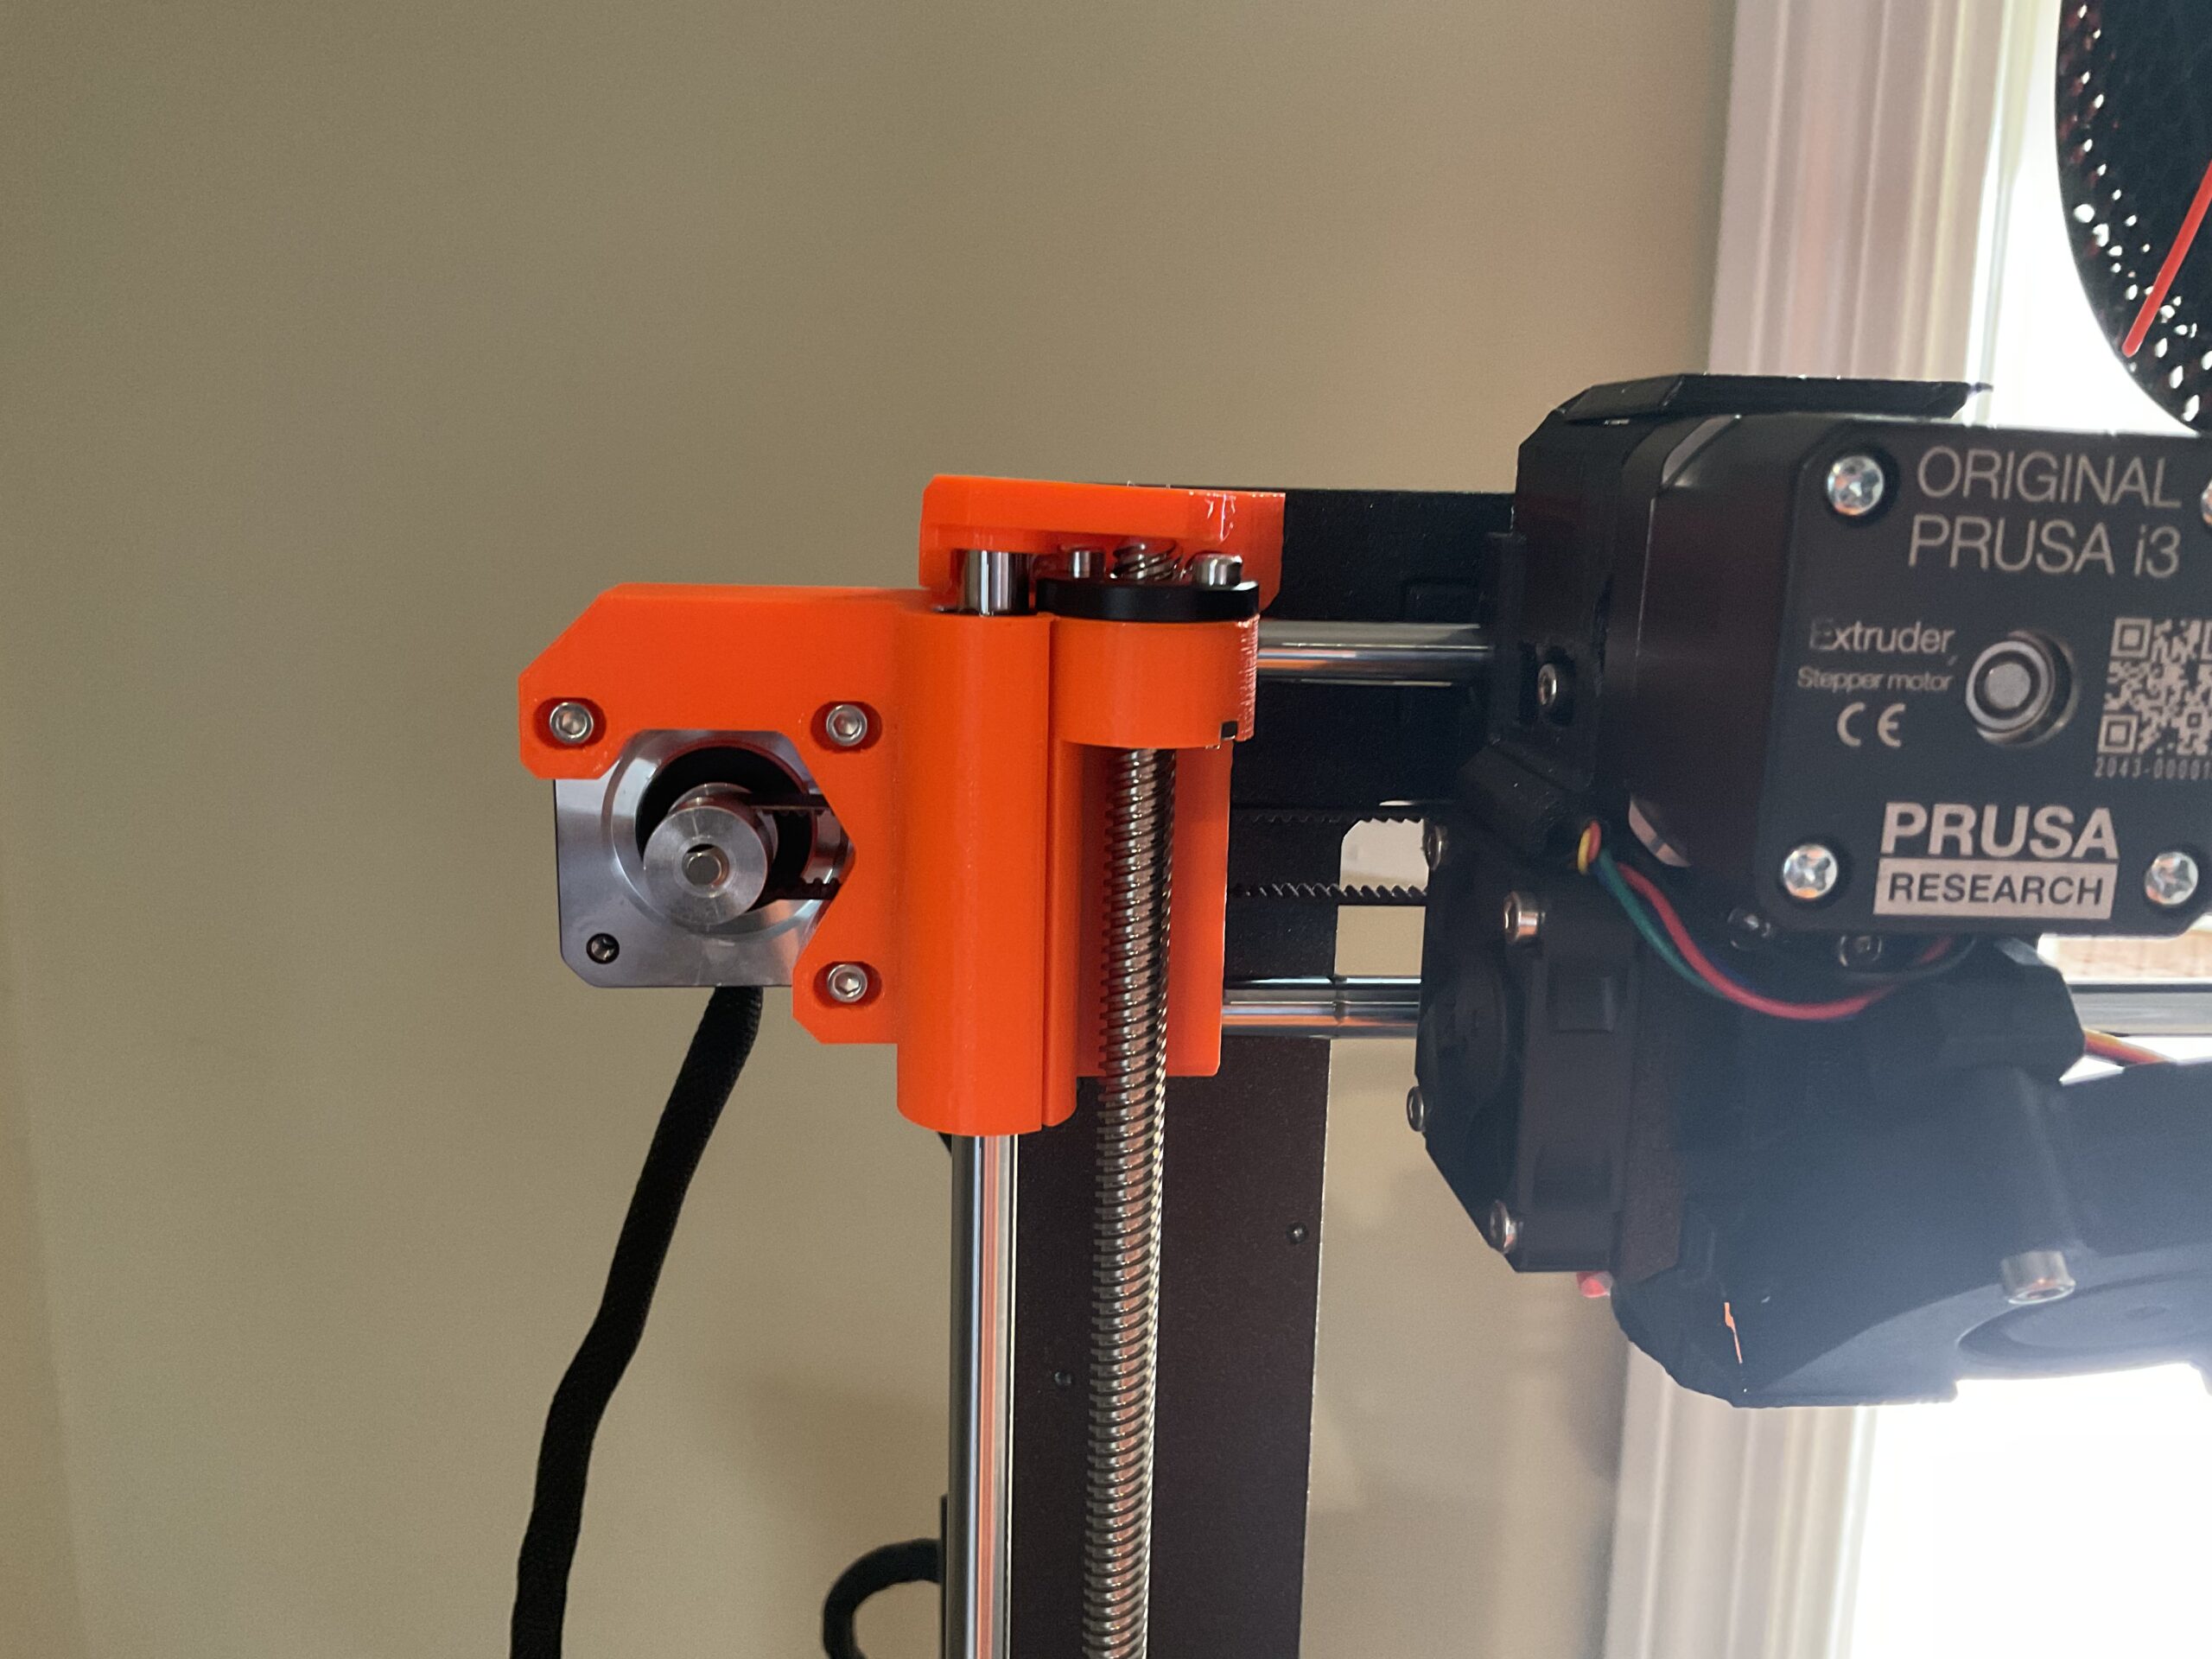
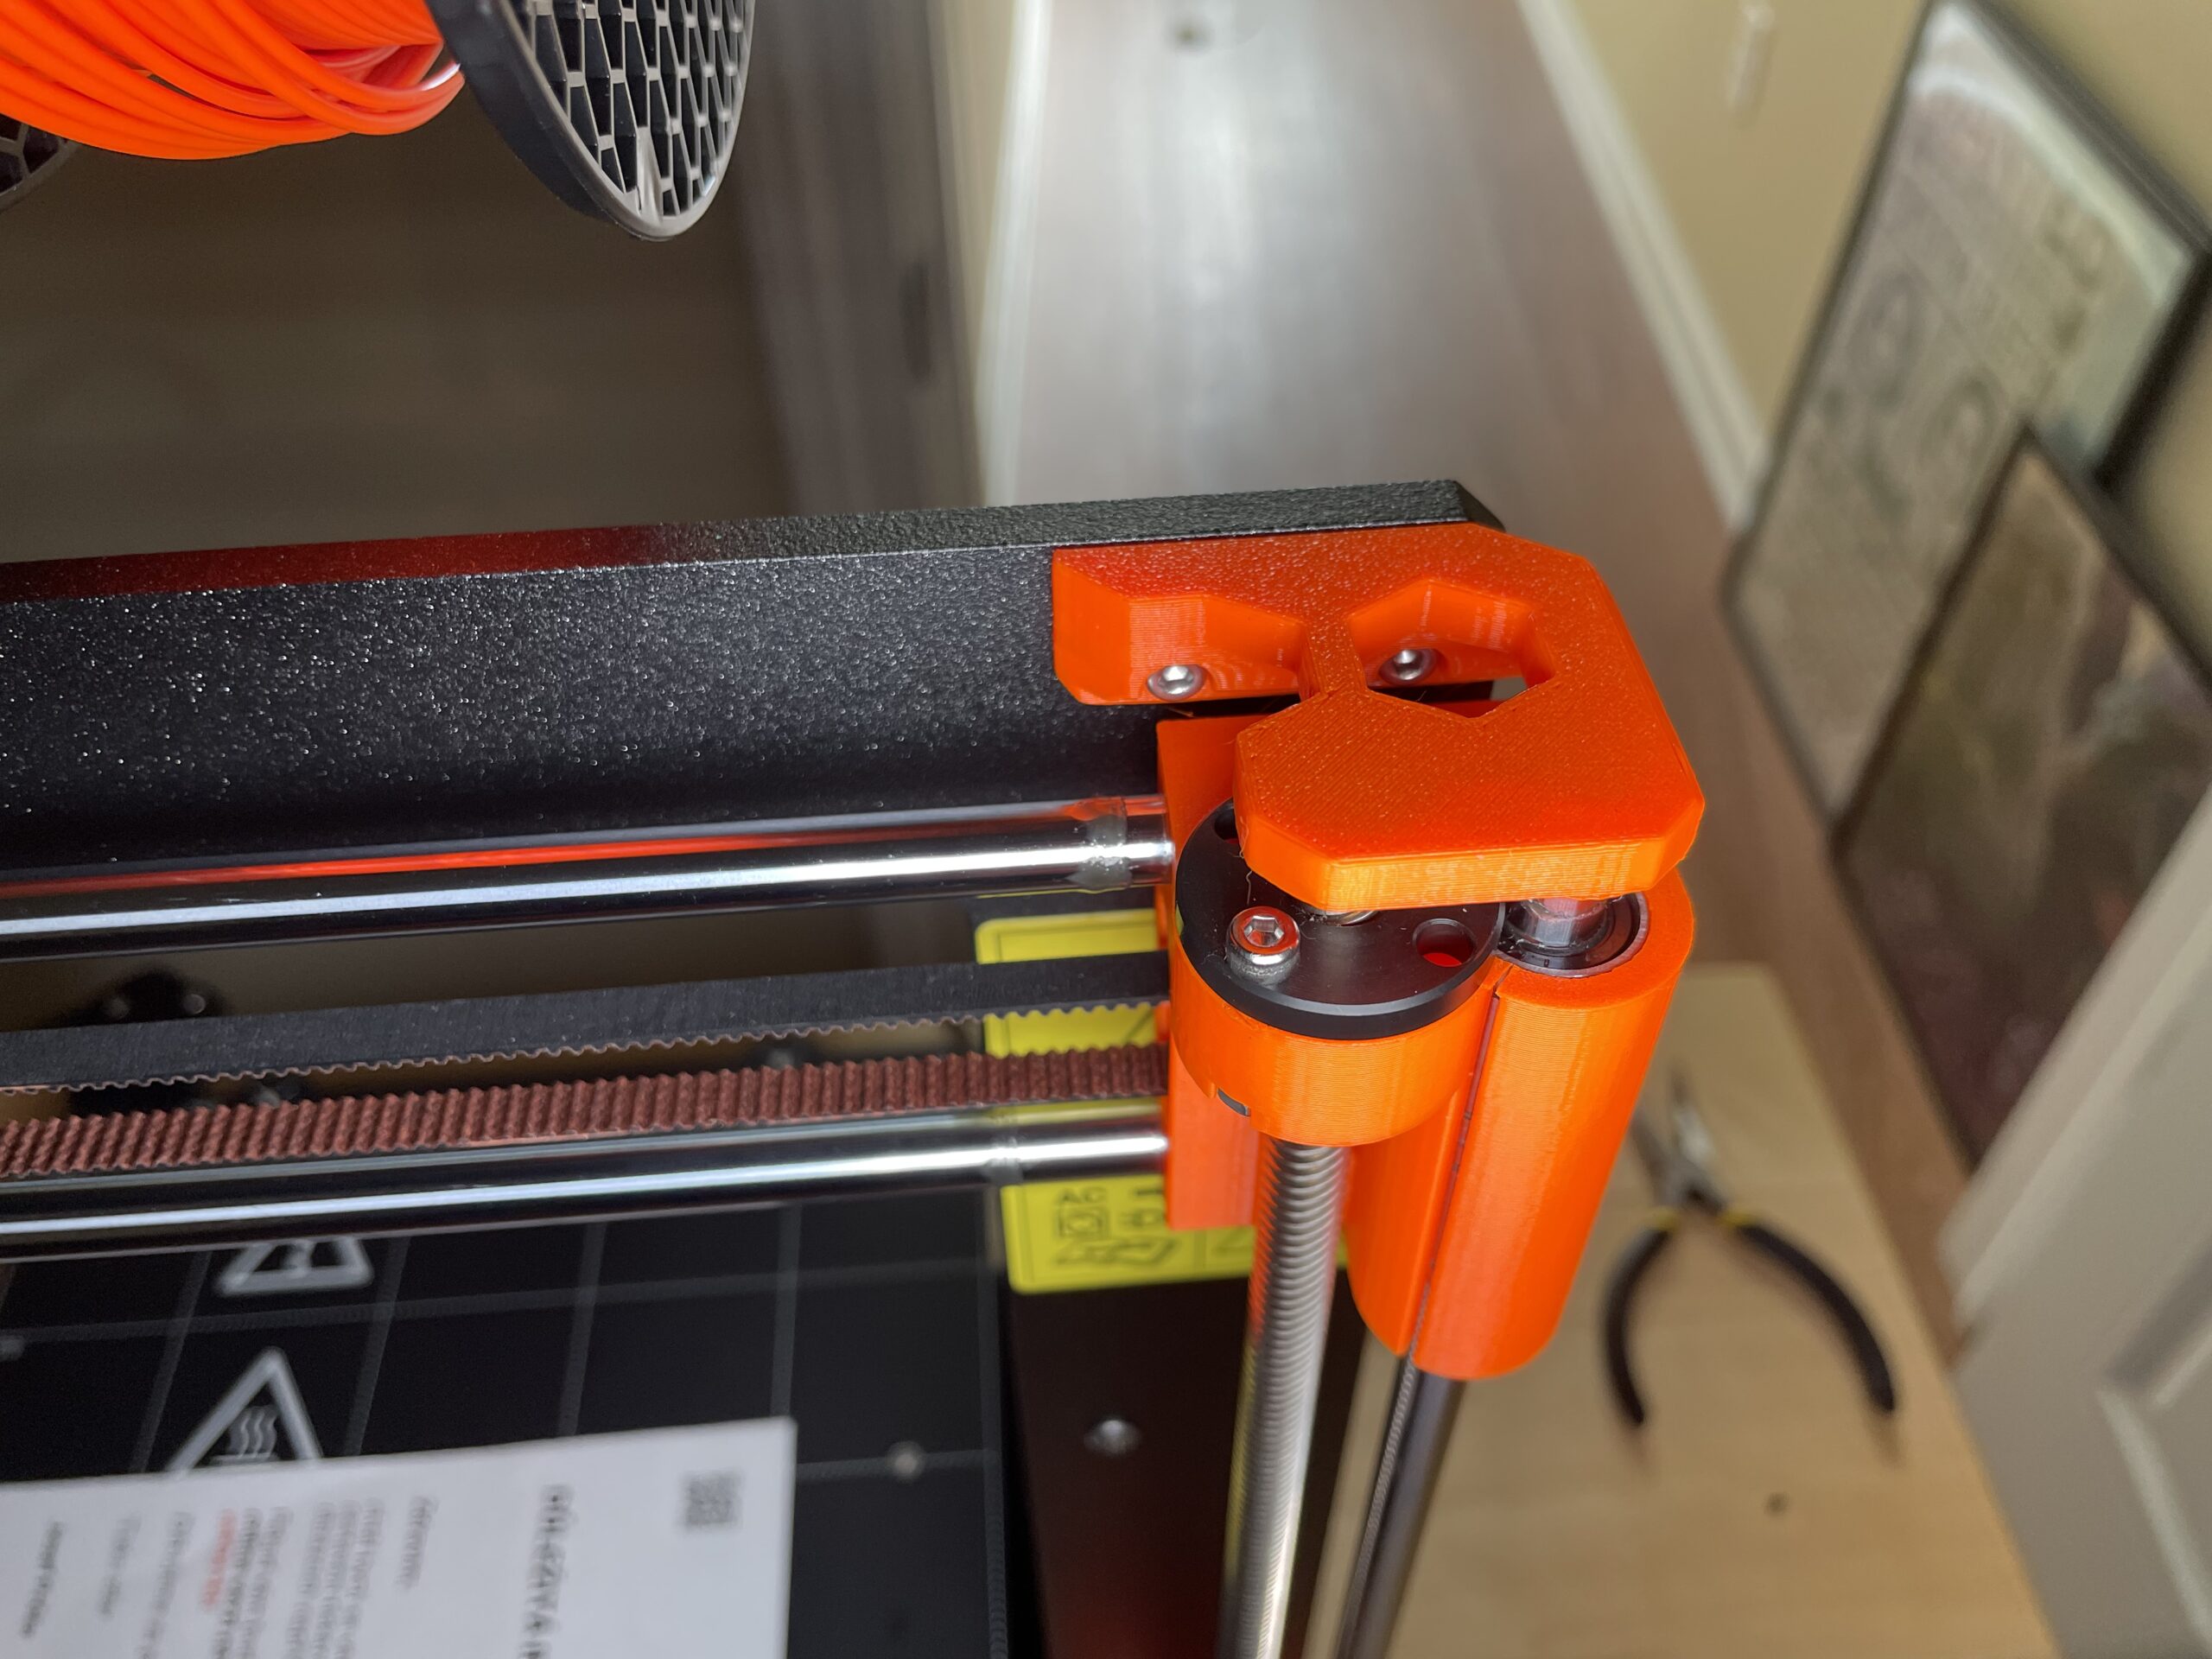
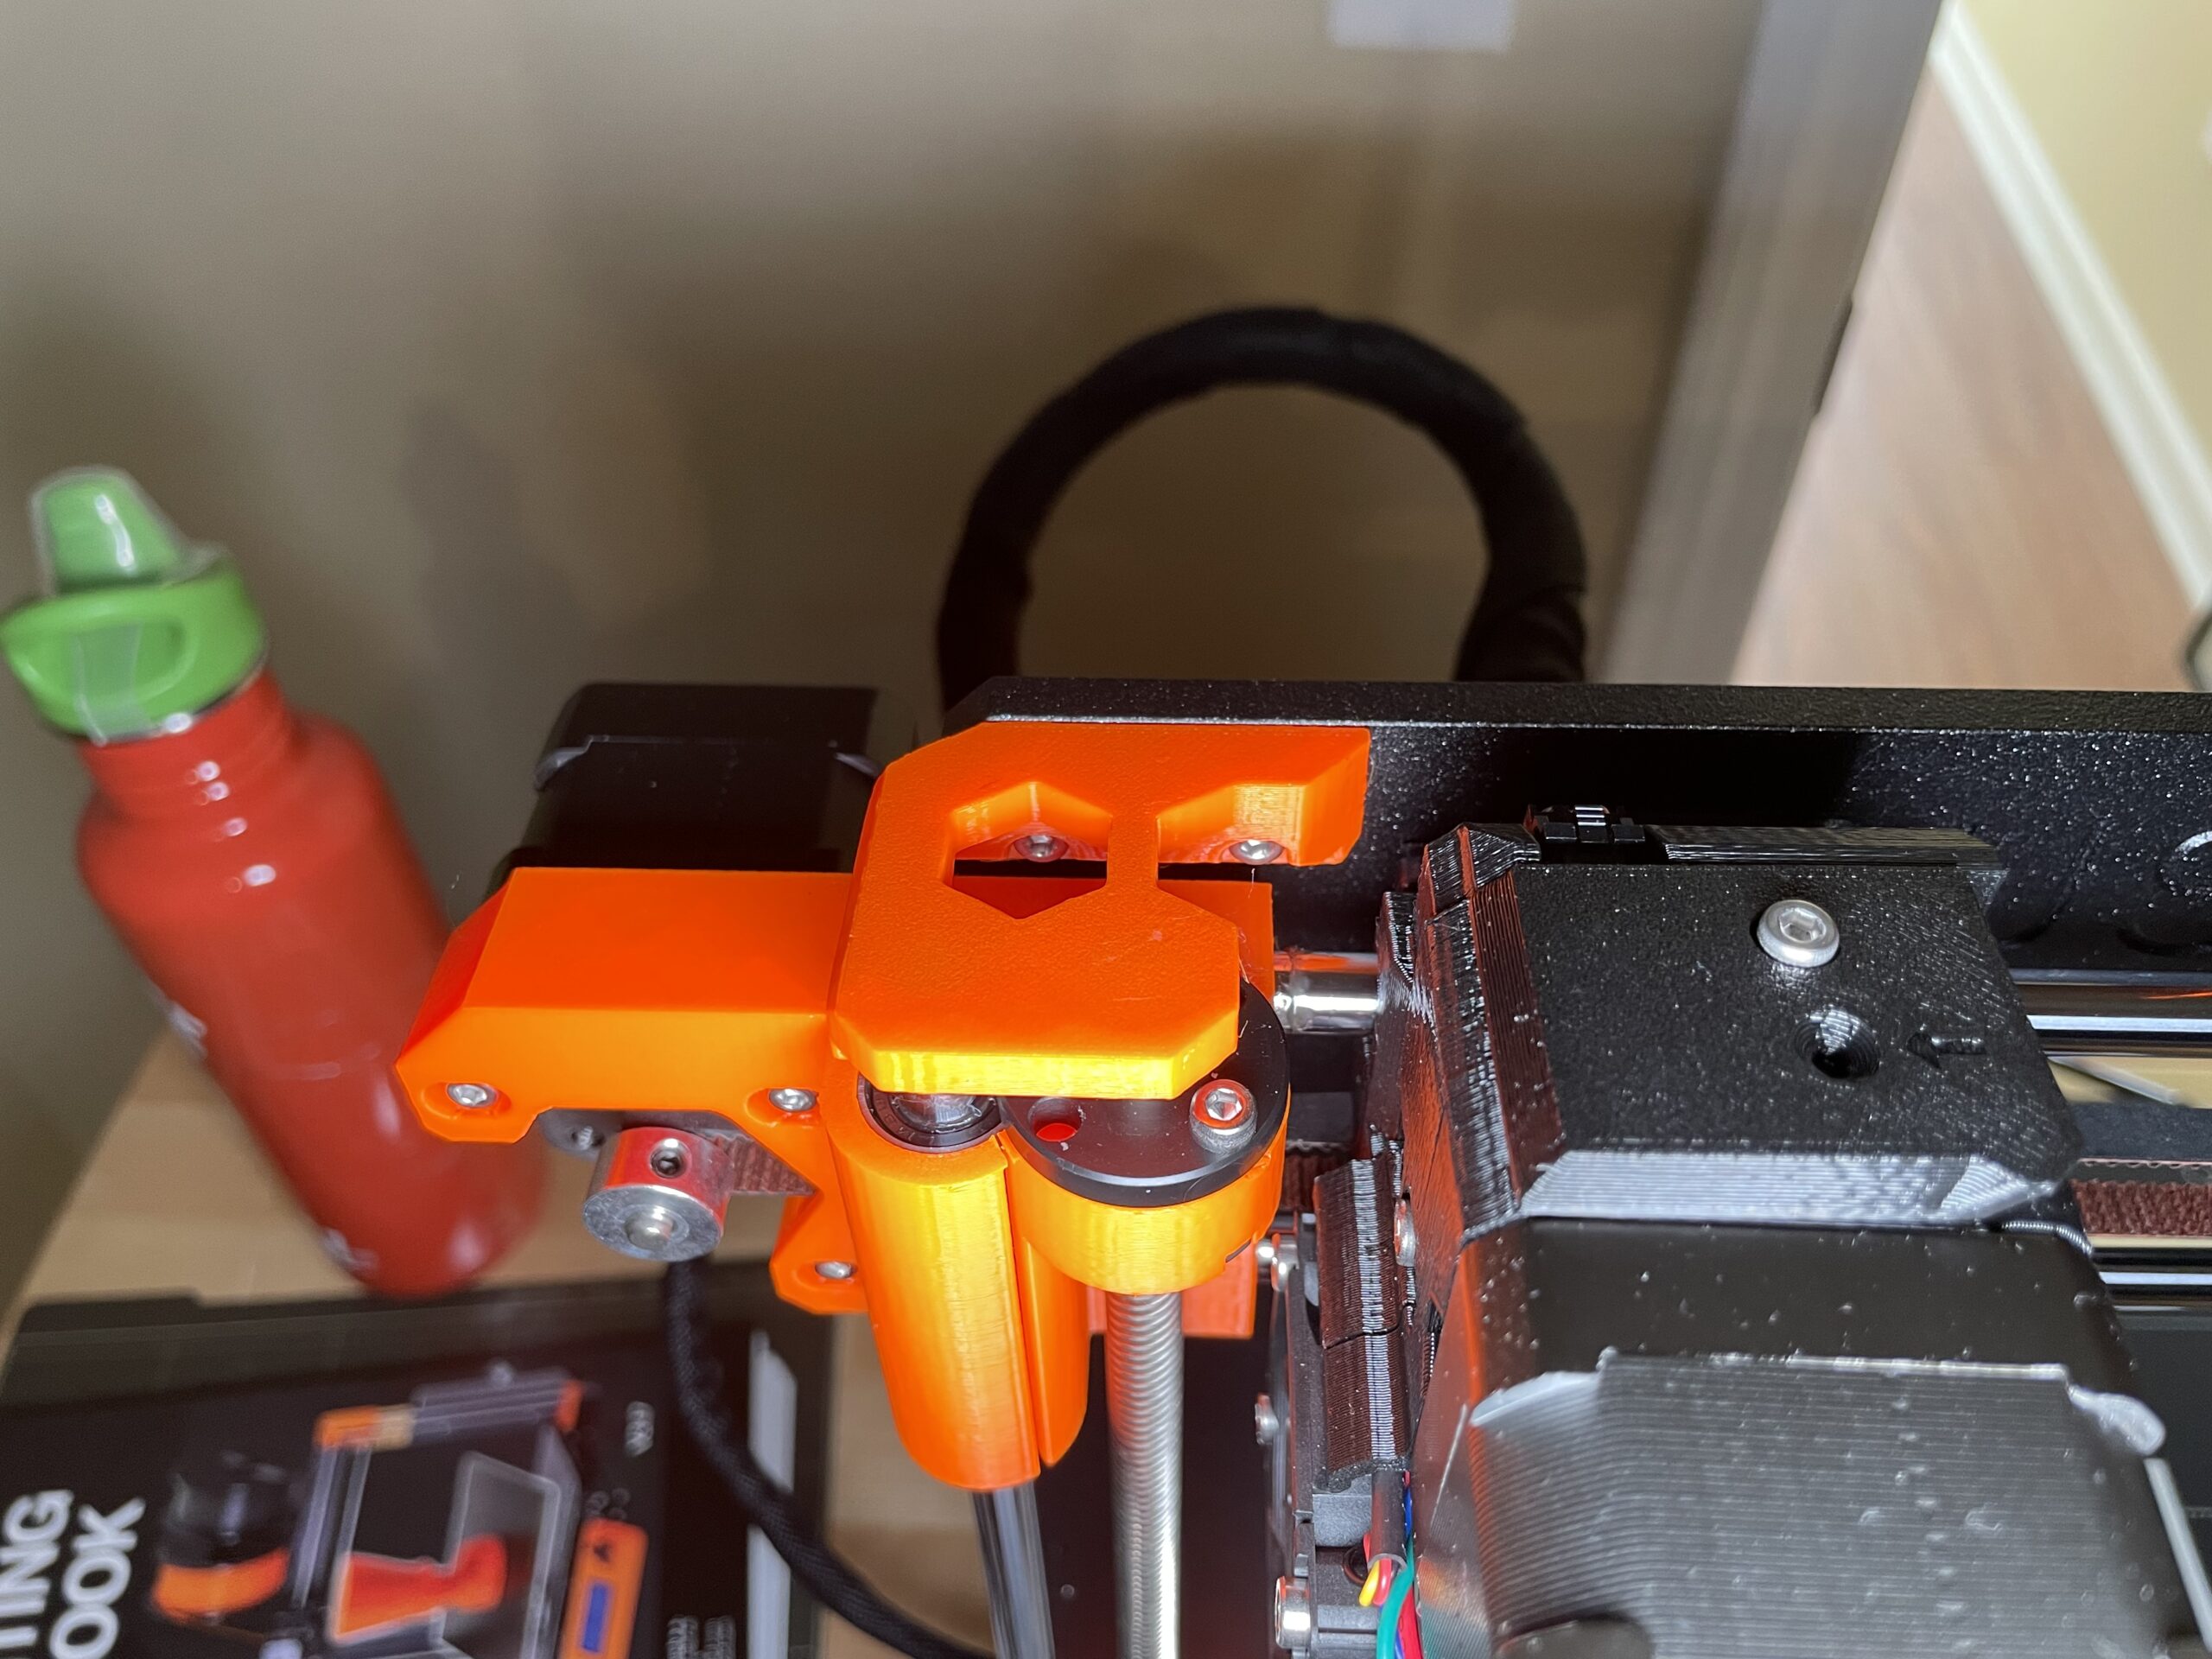
The photo of the left trapezoidal nut is suspicious. The upper top axis part is not even. Check that the axis is fully inserted both in the bottom part and in the top part.
From my understanding the test moves the extruder to the top until it crashes, than it moves it down until the movement is in a defined distance and expects the PINDA to fire. So the reasons to fail can be that the PINDA is defect, no magnet is in the headbed or something with the movement/distance is incorrect.
RE: Calibration Failed! Check the axes and run again.
I redid the PIDNA sensor setup. I checked I can manually move both bed and extruder with 1 finger and the full range is achieved. I can go beyond the print area in the front side of the build plate, just over the white lines. Photos of the trapezoidal nut at top of the range manually are shown. The self test restarted worked fine, photo shown. The belt on both x and y motor with screw tight on flat of gear is shown.
From images 2 and 4 it looks like the Orange Z bracket on the top left is not straight. Make sure the Rod is properly inserted both ends as otherwise your entire Z axis will be out….
RE: Calibration Failed! Check the axes and run again.
Ok still having calibration failed issues.
I have realigned and tightened the top left Z axis end stop.
I have tried starting the calibration from the bottom, the top, the center, and everything in between.
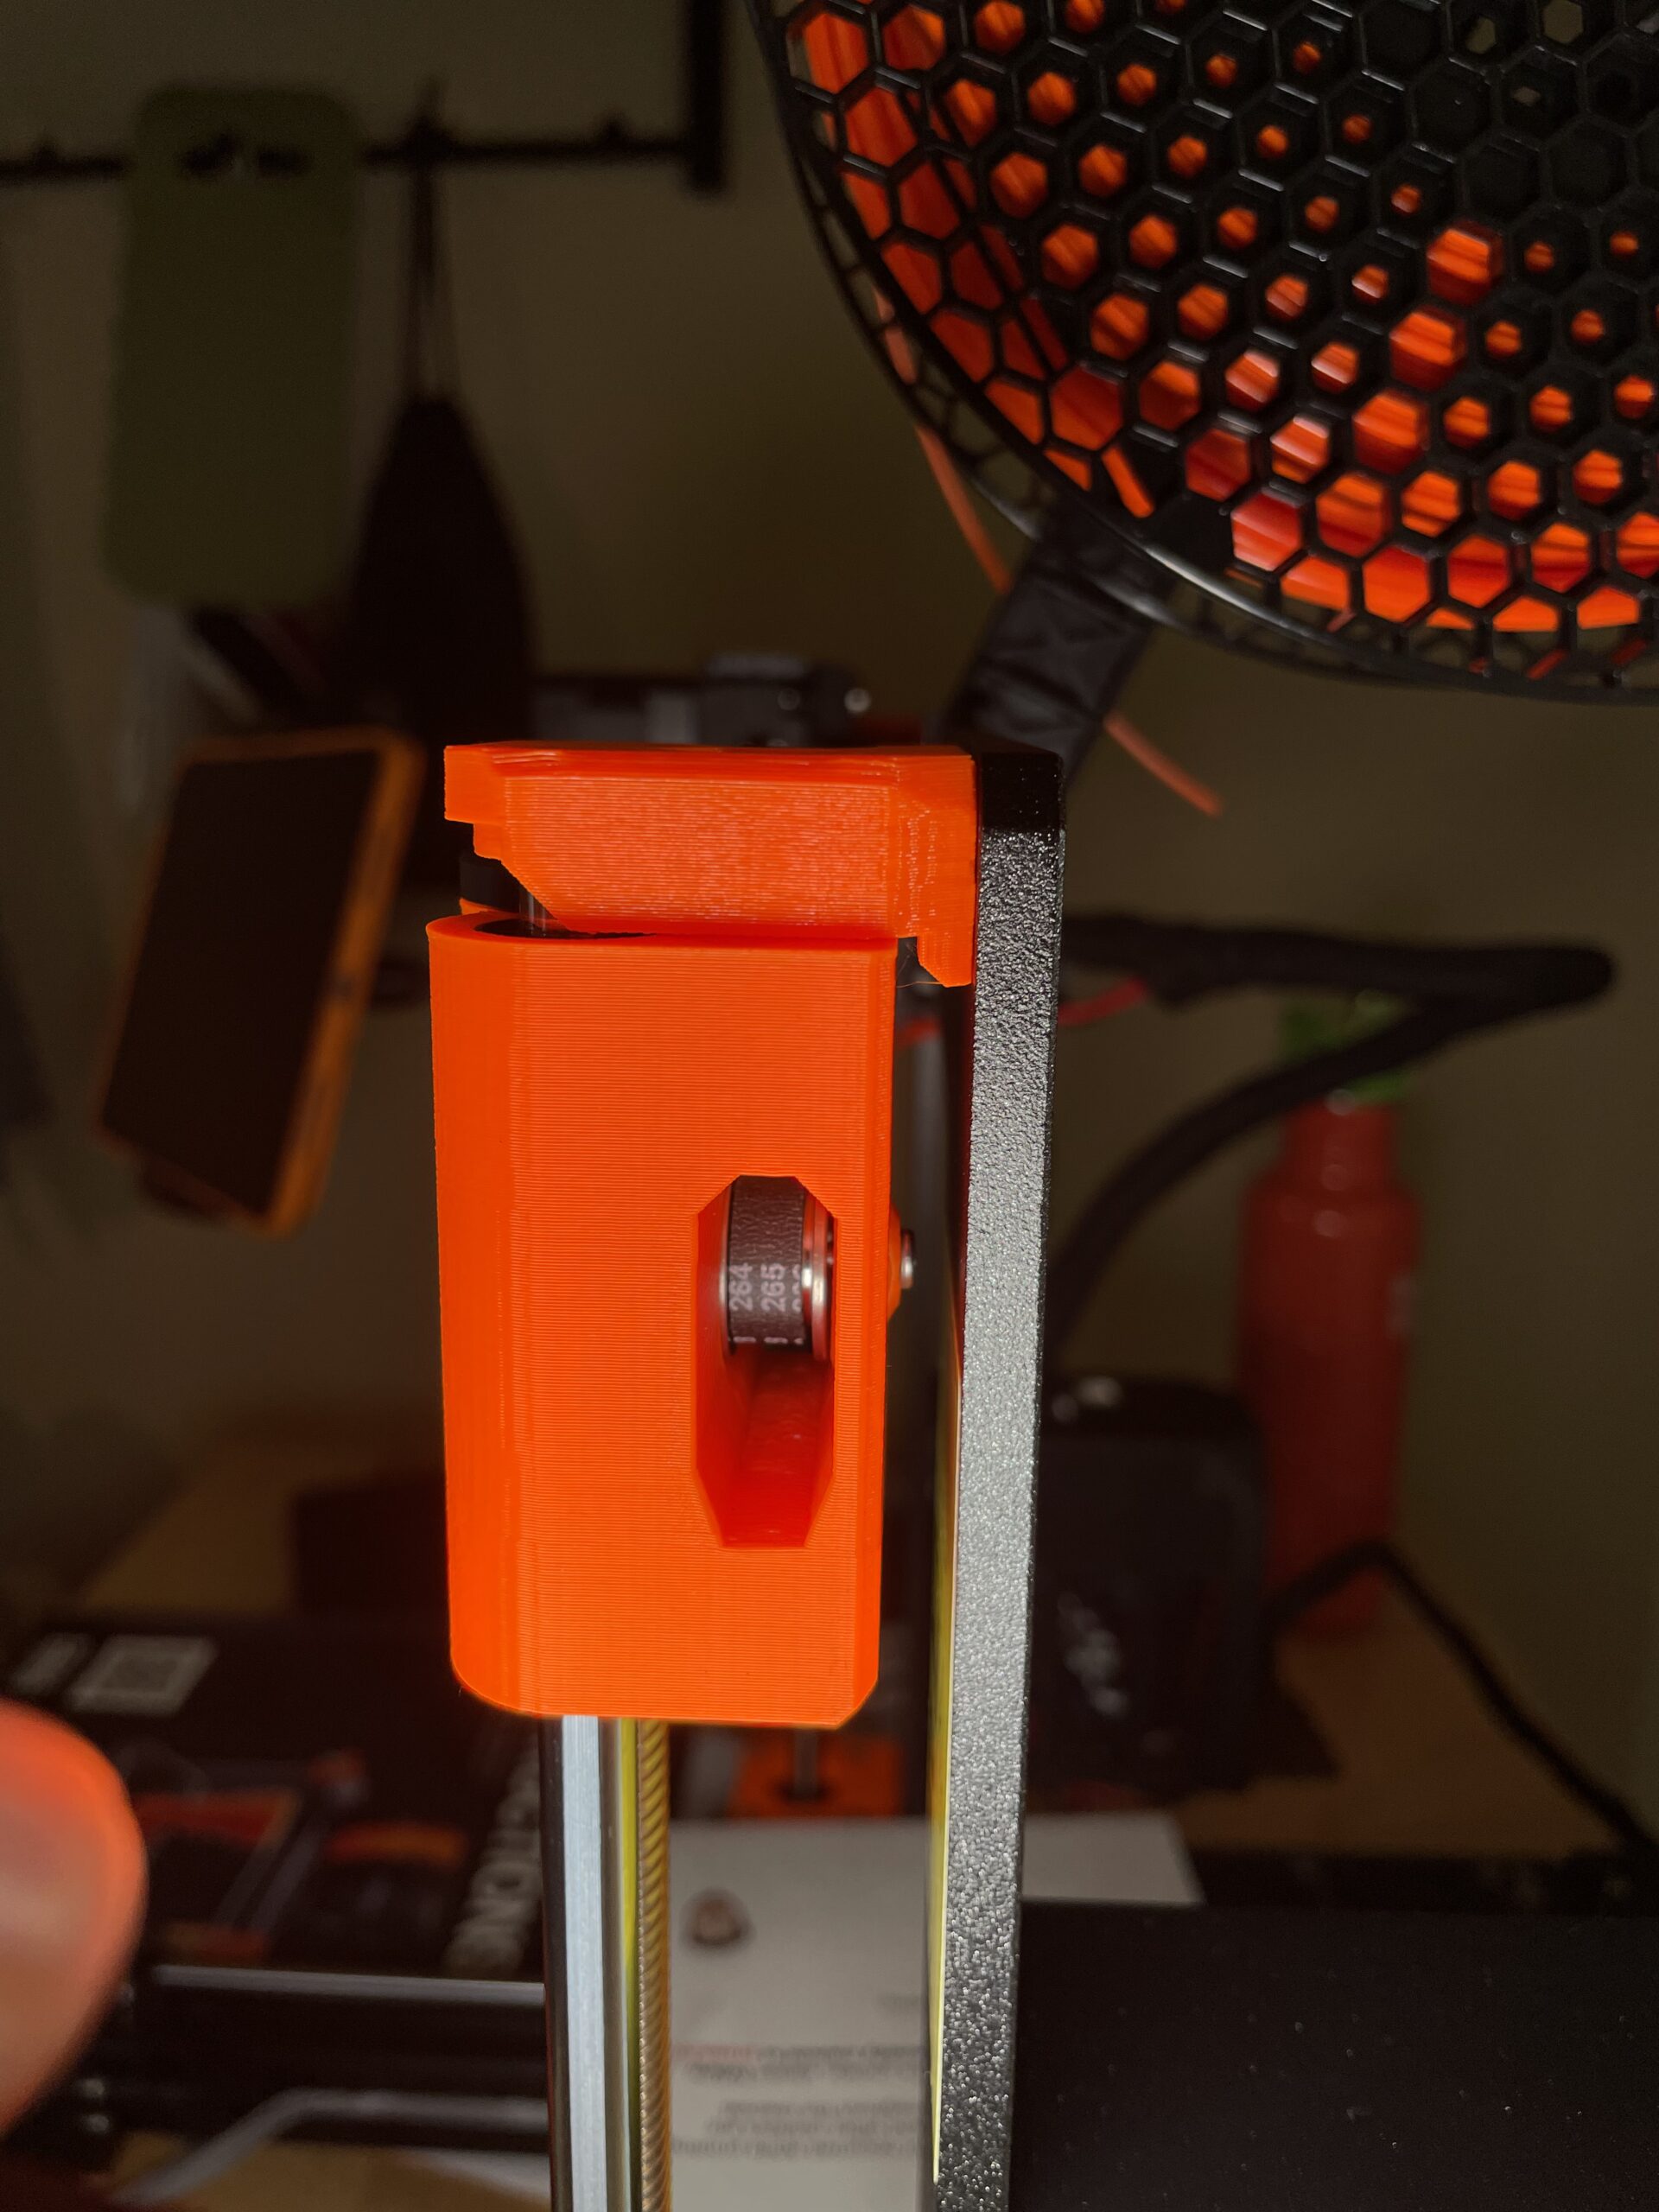
When it fails calibration the nozzle is still just a fraction above the bed and paper. If I hold down the knob and drive the Z axis up, it maxes out at 210 but it is 2.7-3mm from the Z axis end stops. I got calipers out and measure 2.7mm my wife just grabbed a metal ruler and figures it is 3mm. The calibration failed always says it thinks it is at 5mm from the bed. When it fails if I try to drive the motor down I can go from 5mm to 4mm and then the nozzle is just catching the paper. I have photos of manually driving to the Z end stop, and letting the calibration drive to the Z end stop they both look very similar and the plastic is flush with plastic on the x axis housing to end stop. Then I also have some photos of letting the motor drive itself up to 210mm after calibration fails and there is a slight gap as described
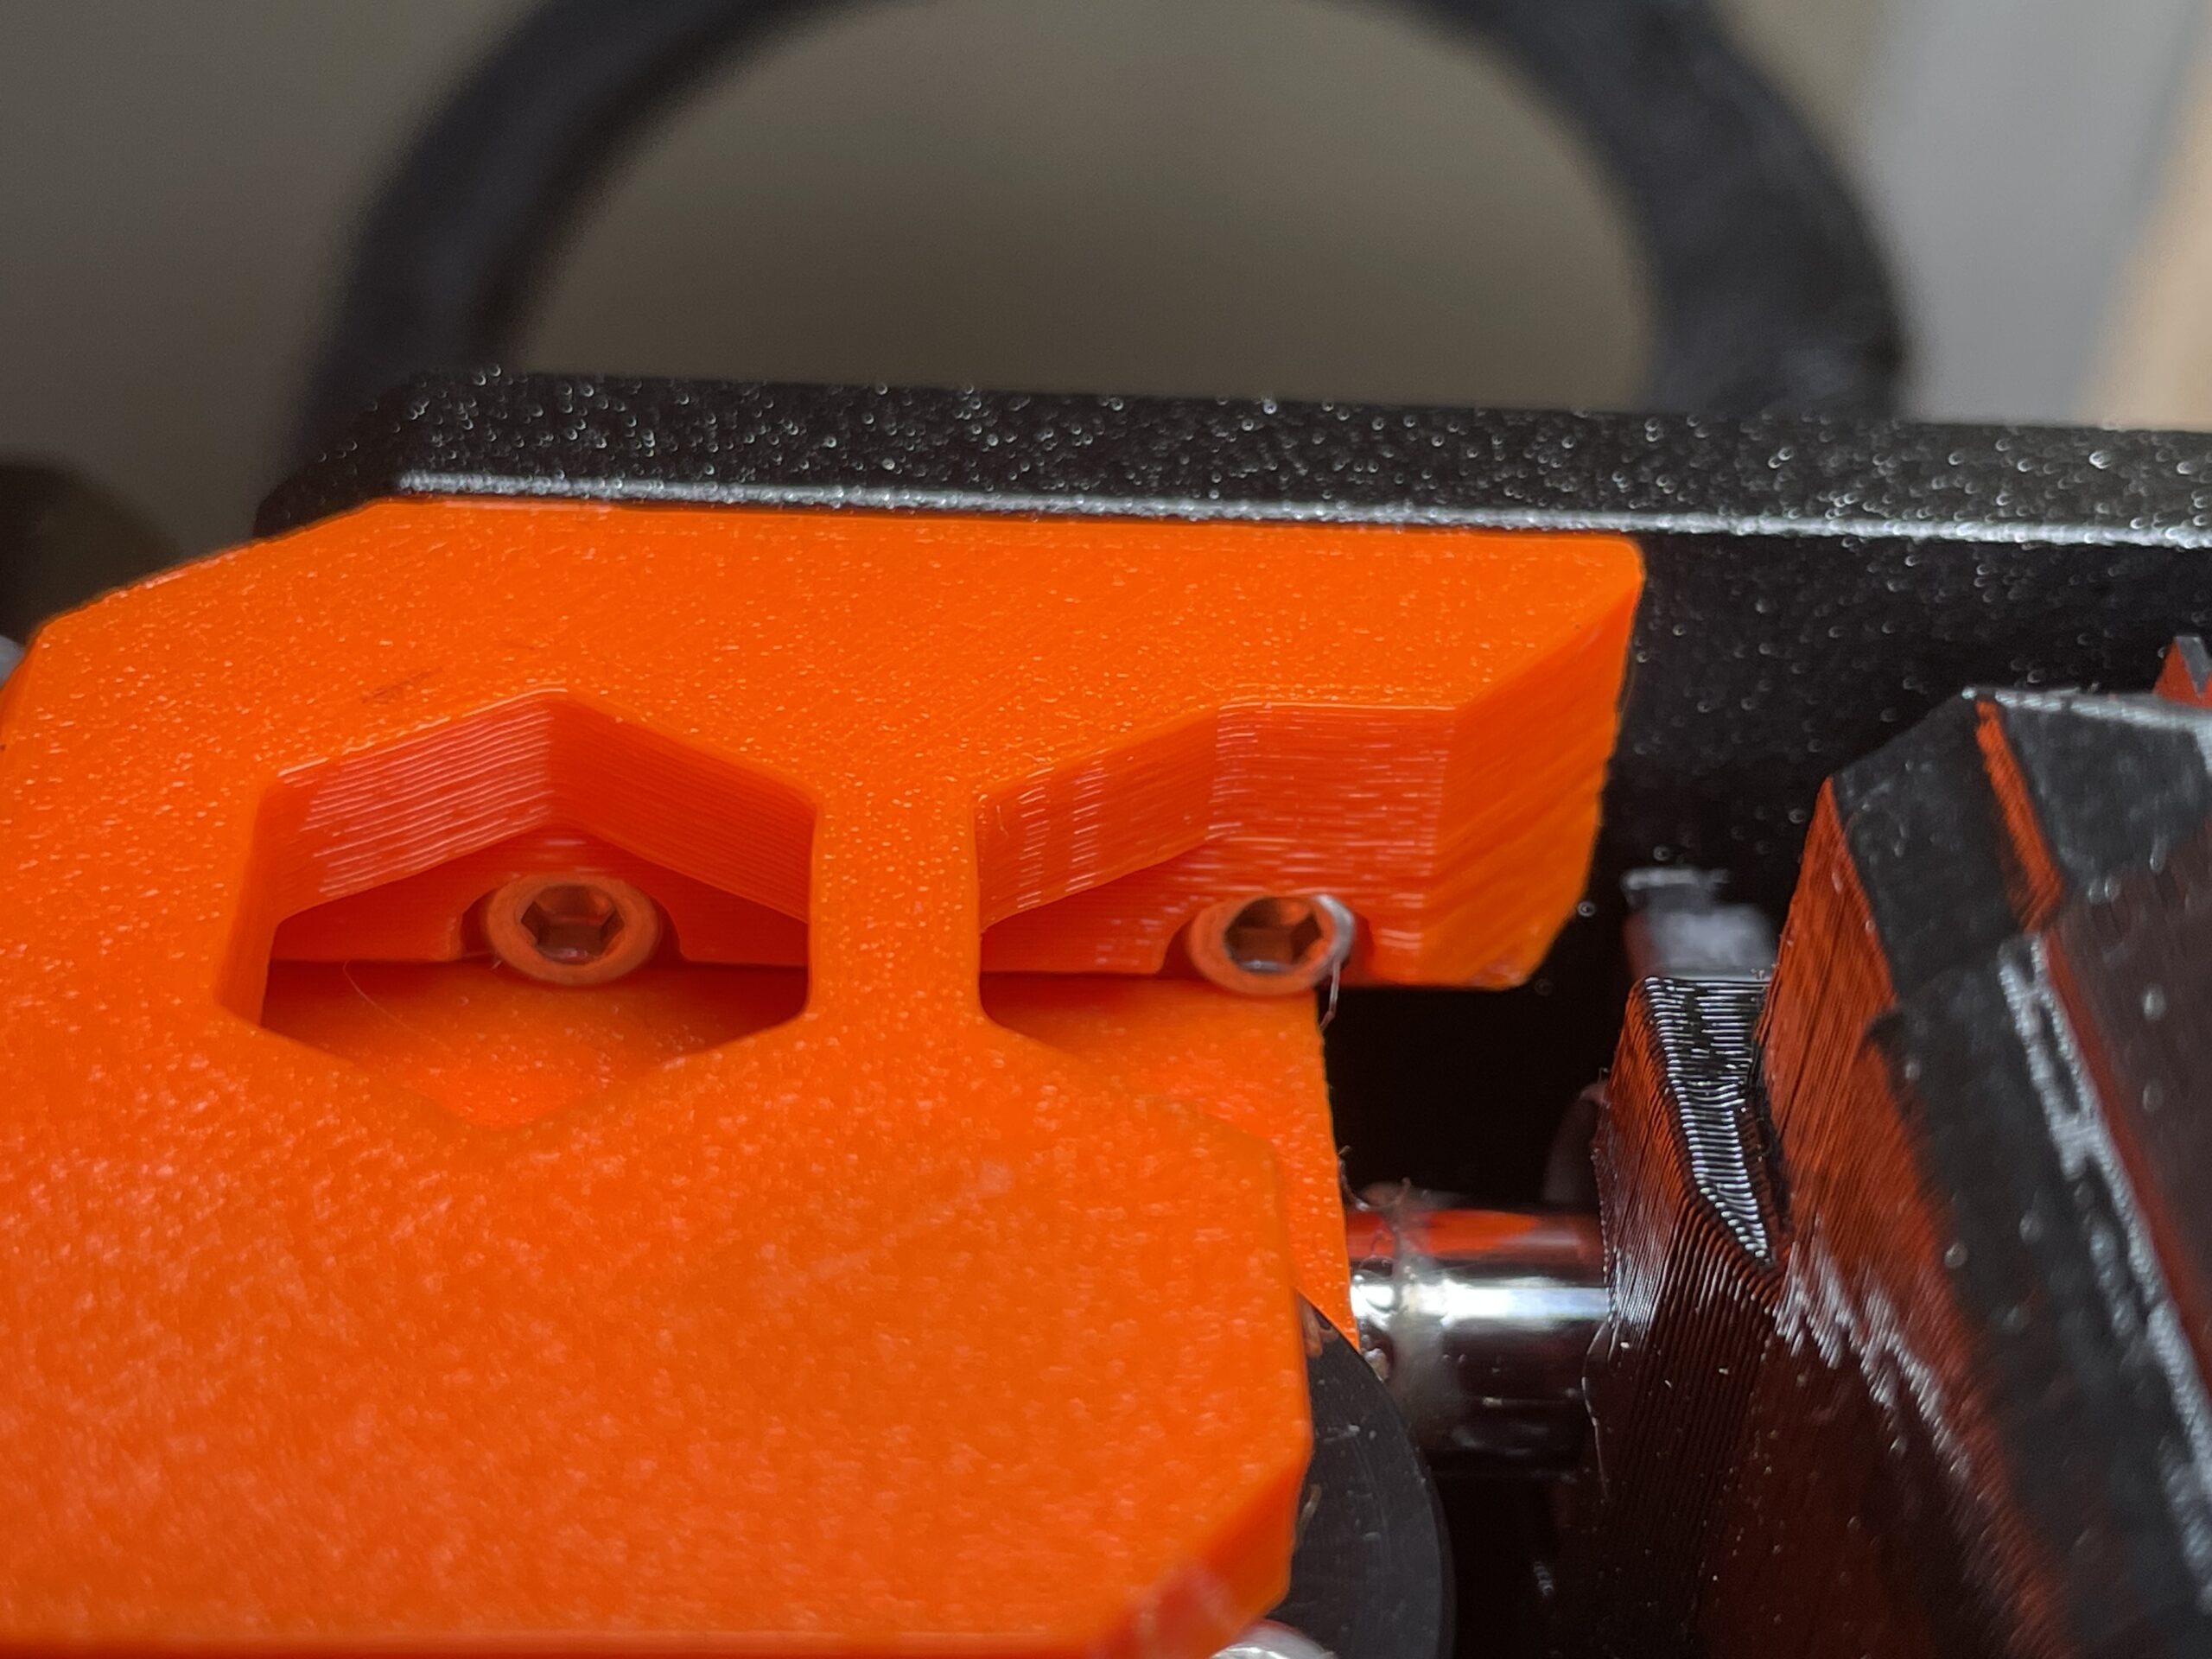
so what now? I have tried the P.I.N.D.A. sensor placement and it looks identical to the photos online. Should I move it further away like higher up so it doesn’t error out as detecting the bed before the full range is achieved? 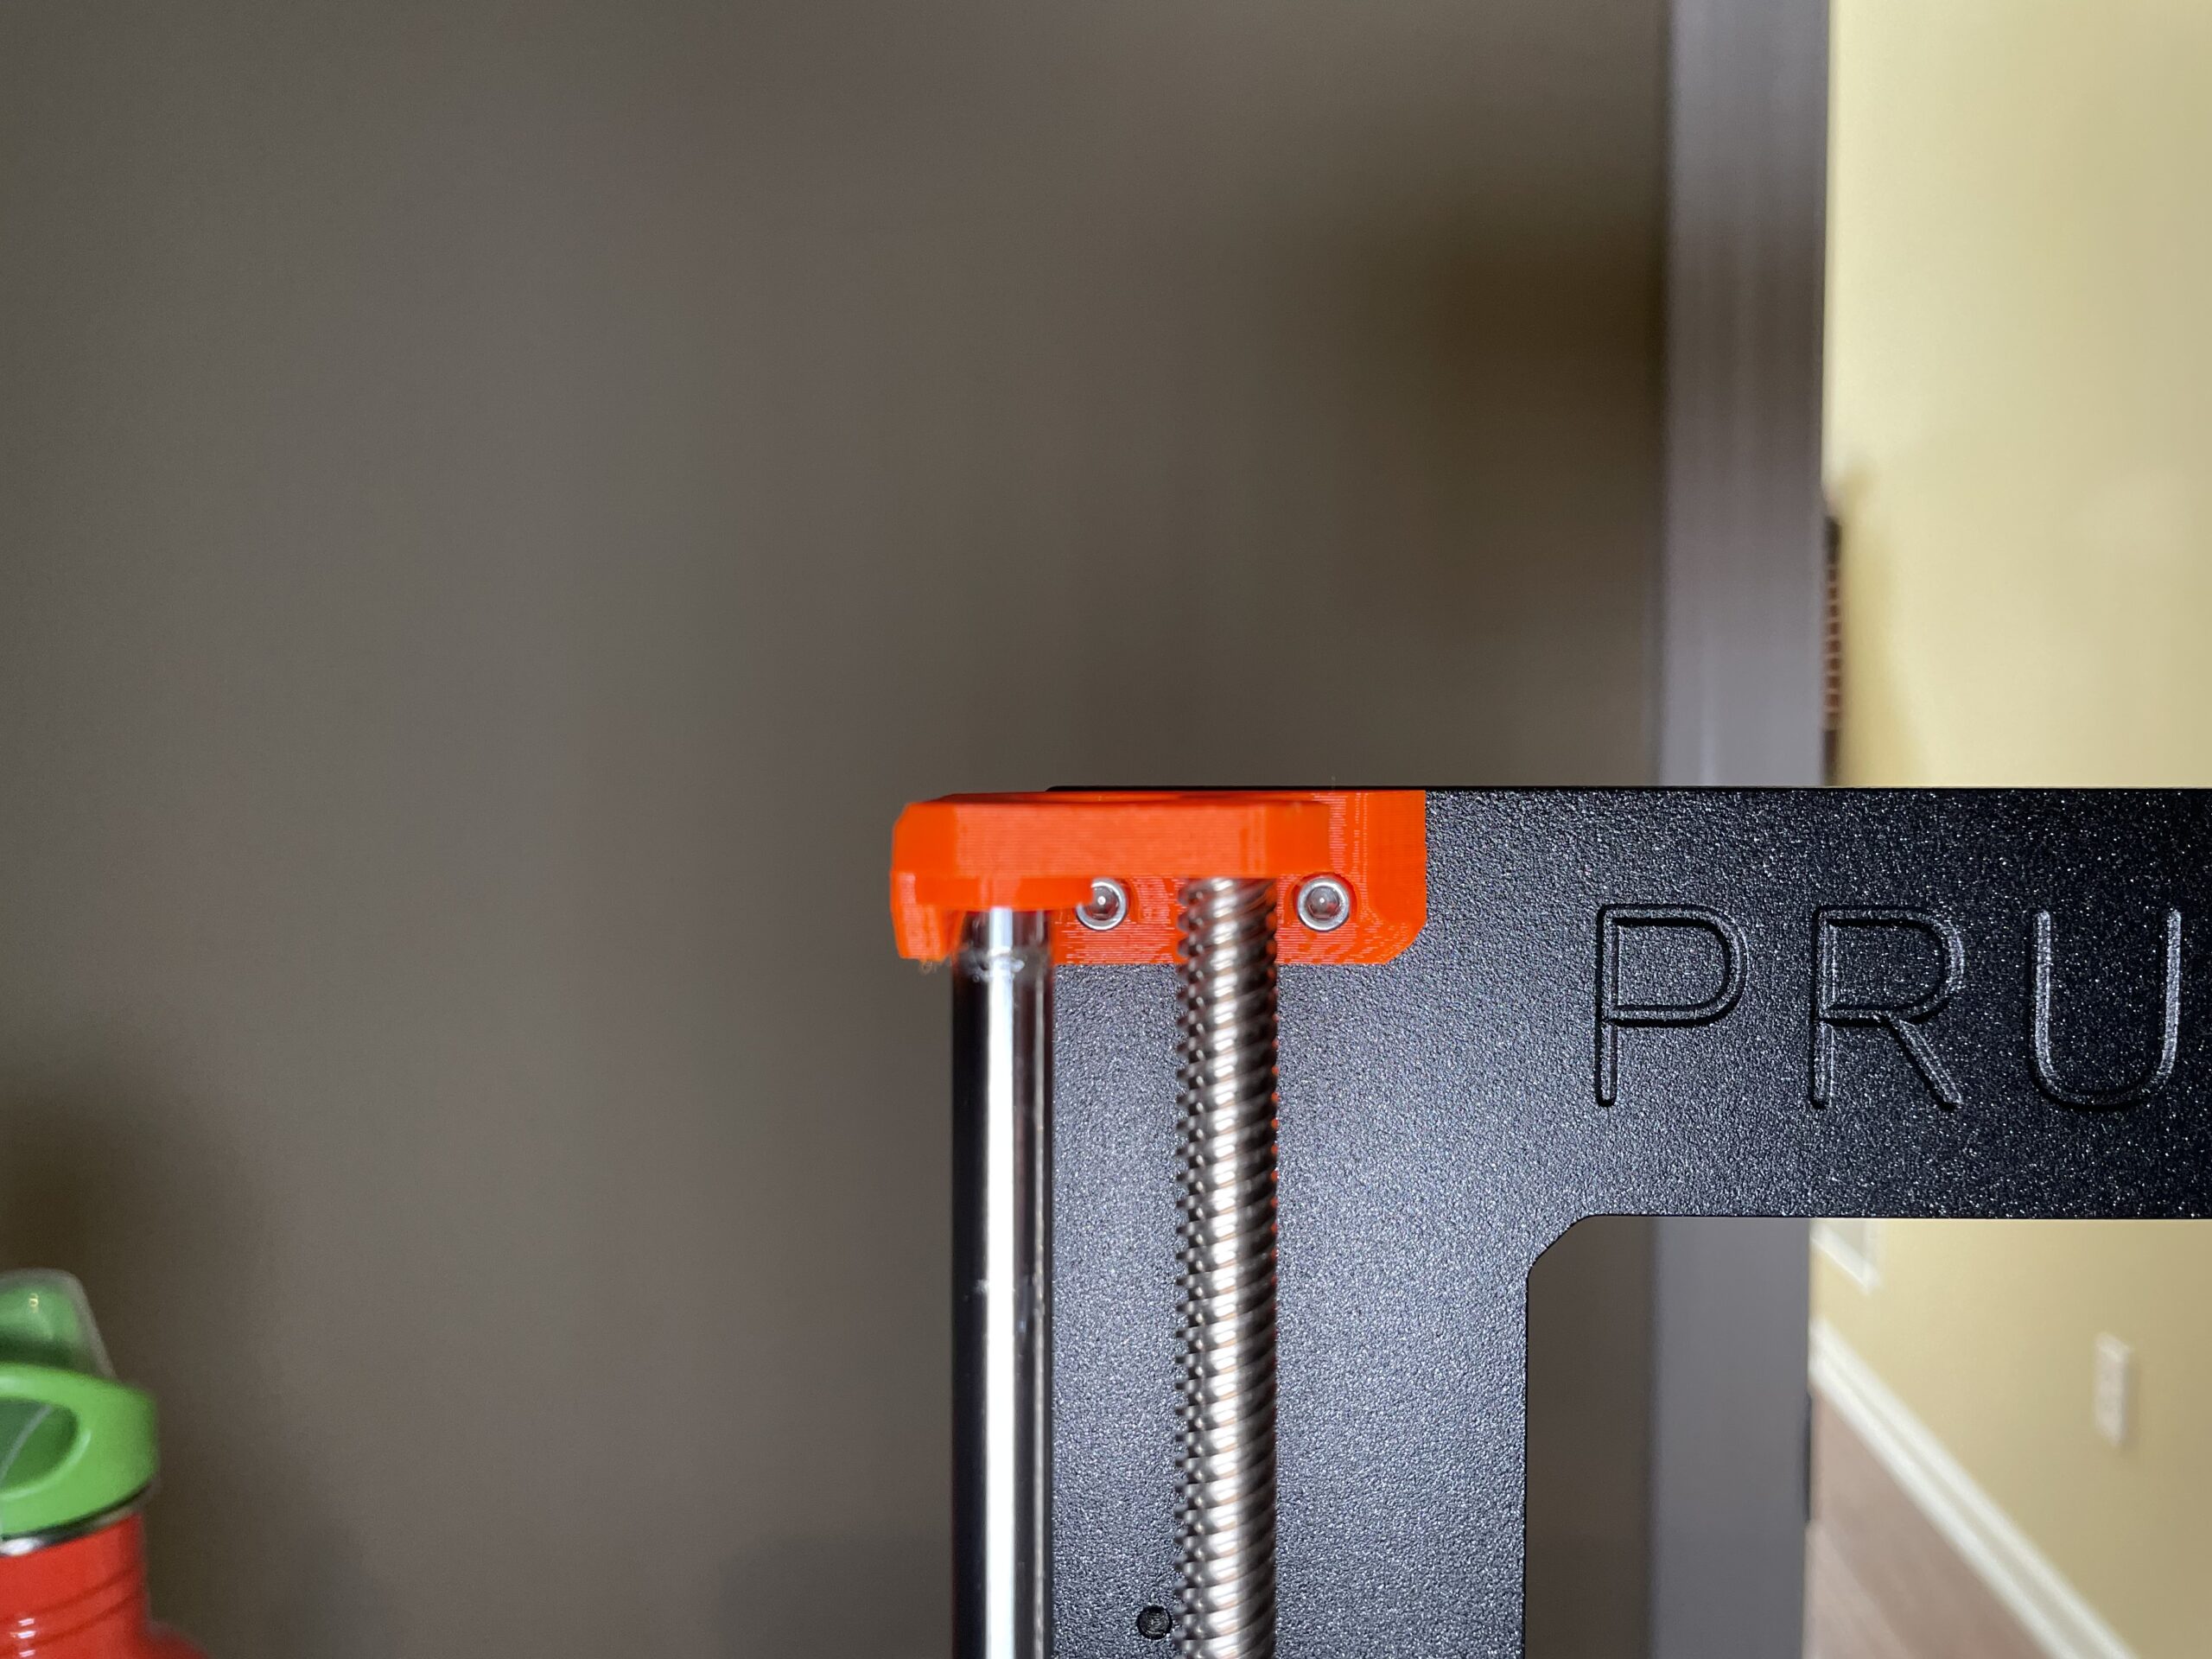 Top left bracket end stop
 Right side bracket at top of range in end stop from the side
 Motor drove to 210mm from SW not manual after calibration failed.
 After calibration fails, SW driven to 210mm leaves a gap.
RE: Calibration Failed! Check the axes and run again.
Try moving the SuperPinda sensor up a mm or two - it looks very level to the nozzle......when the nozzle is down does it light up at the top (although you said you've tested it and it works OK anyways?)
Otherwise, Im all out of ideas, sorry - I have no idea how mine just seemed to fix itself after a little tinkering!
May be an idea to get onto Prusa online chat/support and see what they suggest...?
RE: Calibration Failed! Check the axes and run again.
Z axis end stop at full range left side
Z axis end stop right side at full range

RE: Calibration Failed! Check the axes and run again.
Thanks, I will try moving the P.I.N.D.A. again, I have been tinkering with it up and down over the last two days. I put my bed at the exact same position as the photos and video and I angled the zip tie to match perfectly to set the height. This is super frustrating but also why I got the kit so I know the entire printer inside and out. My day job is to project manage massive robotics testing equipment. So I enjoy the challenge, to a point.
I do have in parallel to this thread a Prusa help via email ongoing. They suggested the drive to the top and redo the calibration and that didn’t work, but that’s where I noticed the gap left at “full range” in the SW. Prusa must use motor shaft turns to determine distance and the P.I.N.D.A. is an extra precaution or backup distance detection. Similar to what another forum post suggested.
I will check the motor nuts now and see if maybe there is something there while I wait another day or two for Prusa to come back after my last email.
RE: Calibration Failed! Check the axes and run again.
Prusa email support can be slow. Try going to your eshop account and click the support chat button in the lower right corner. If you don’t see it, you may have to temporarily disable ad blockers.
Cheers
RE: Calibration Failed! Check the axes and run again.
I checked the end nut on the Z axis motors. They both are flush and allow the shaft to turn. 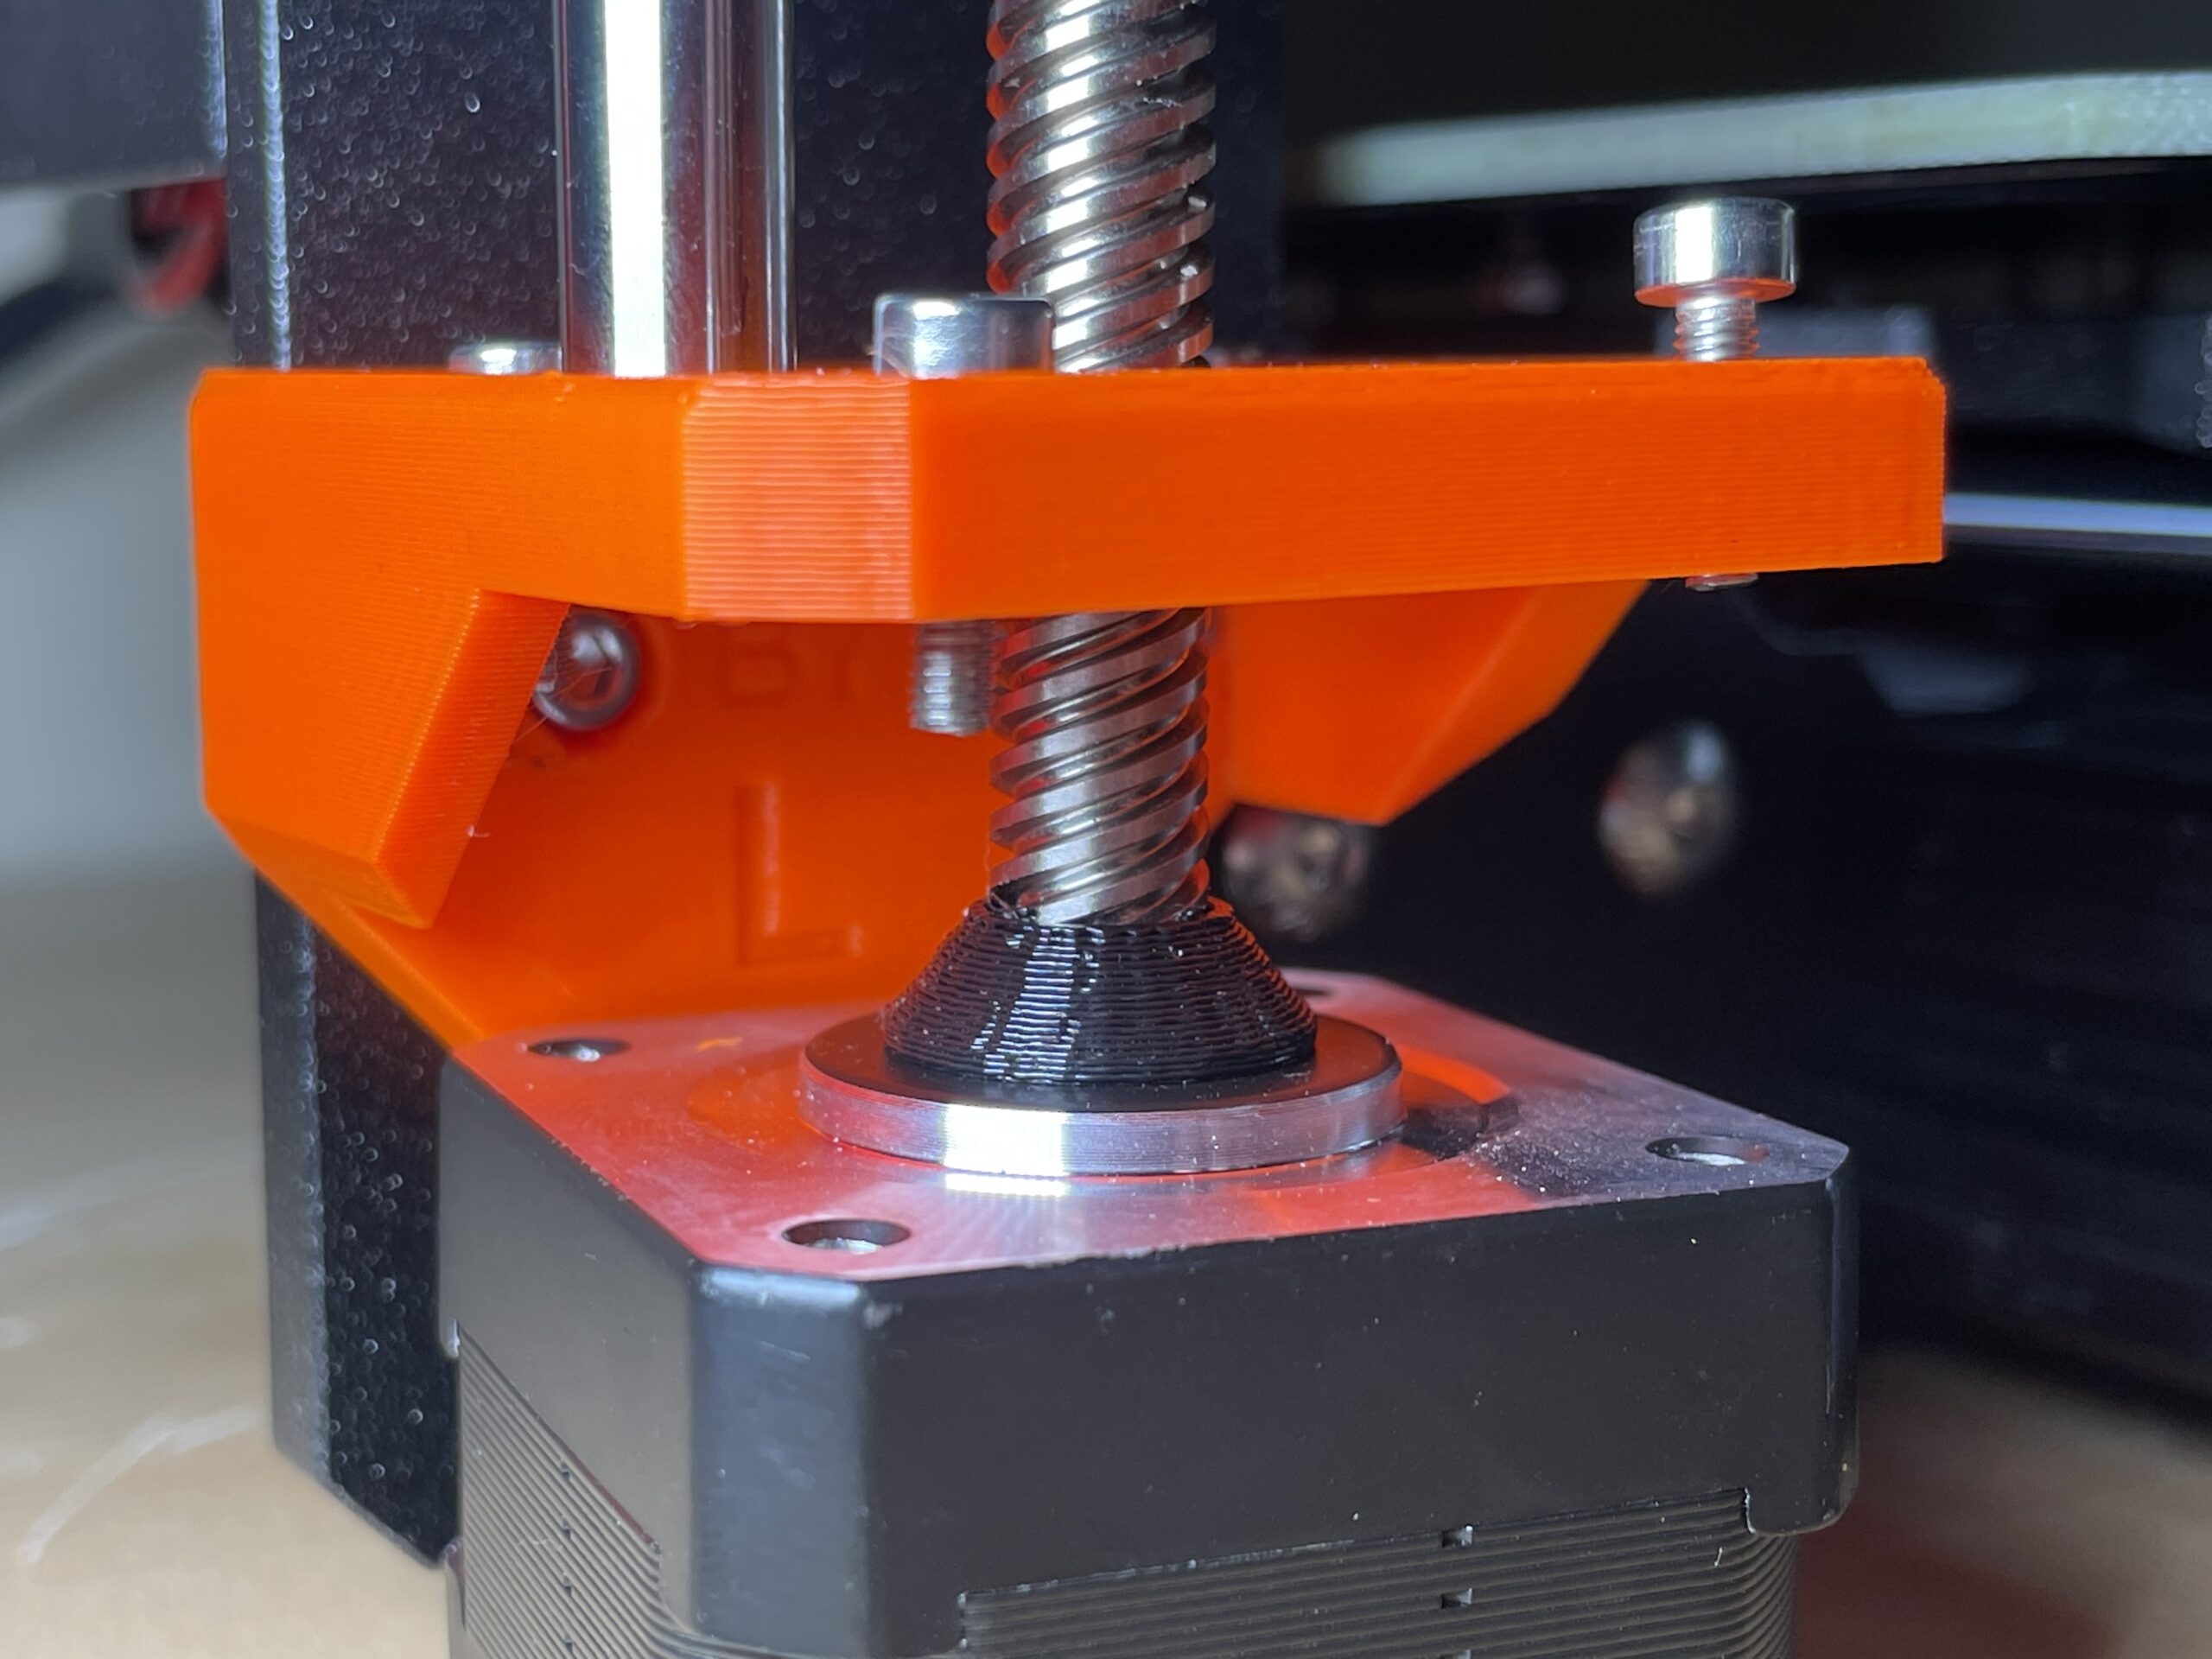 Left side Z end nut check
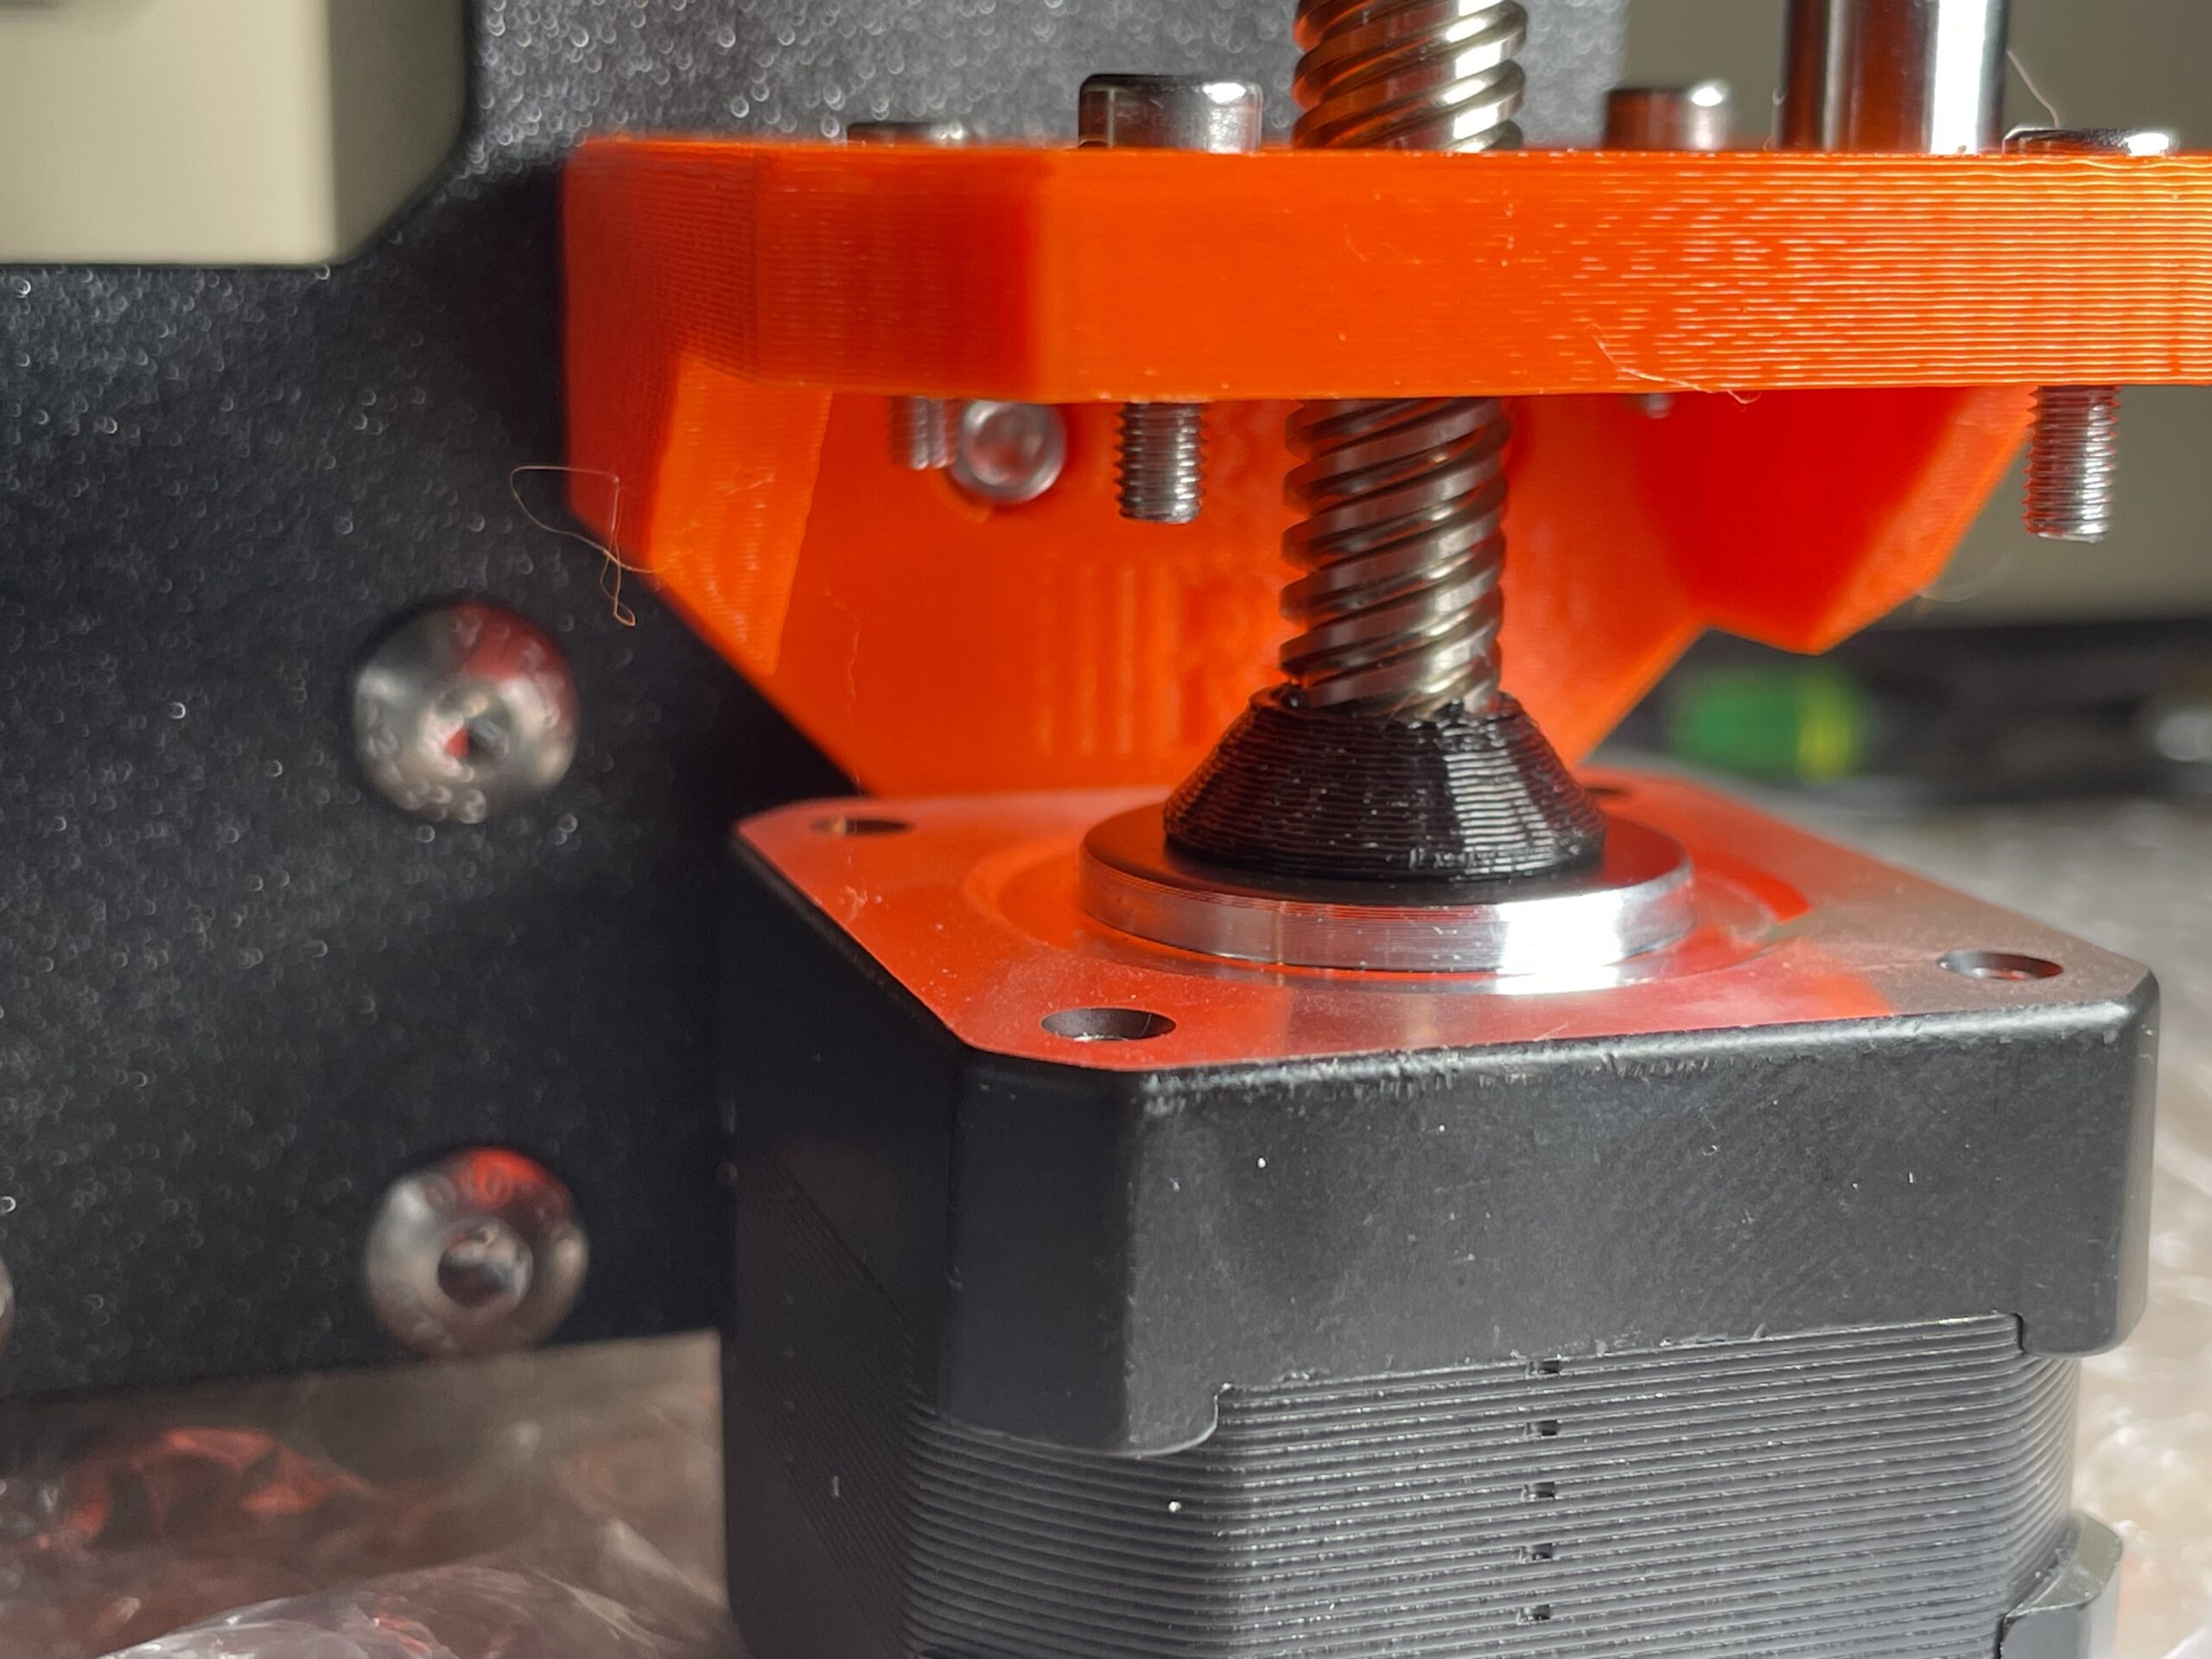 Right side Z end nut check
RE: Calibration Failed! Check the axes and run again.
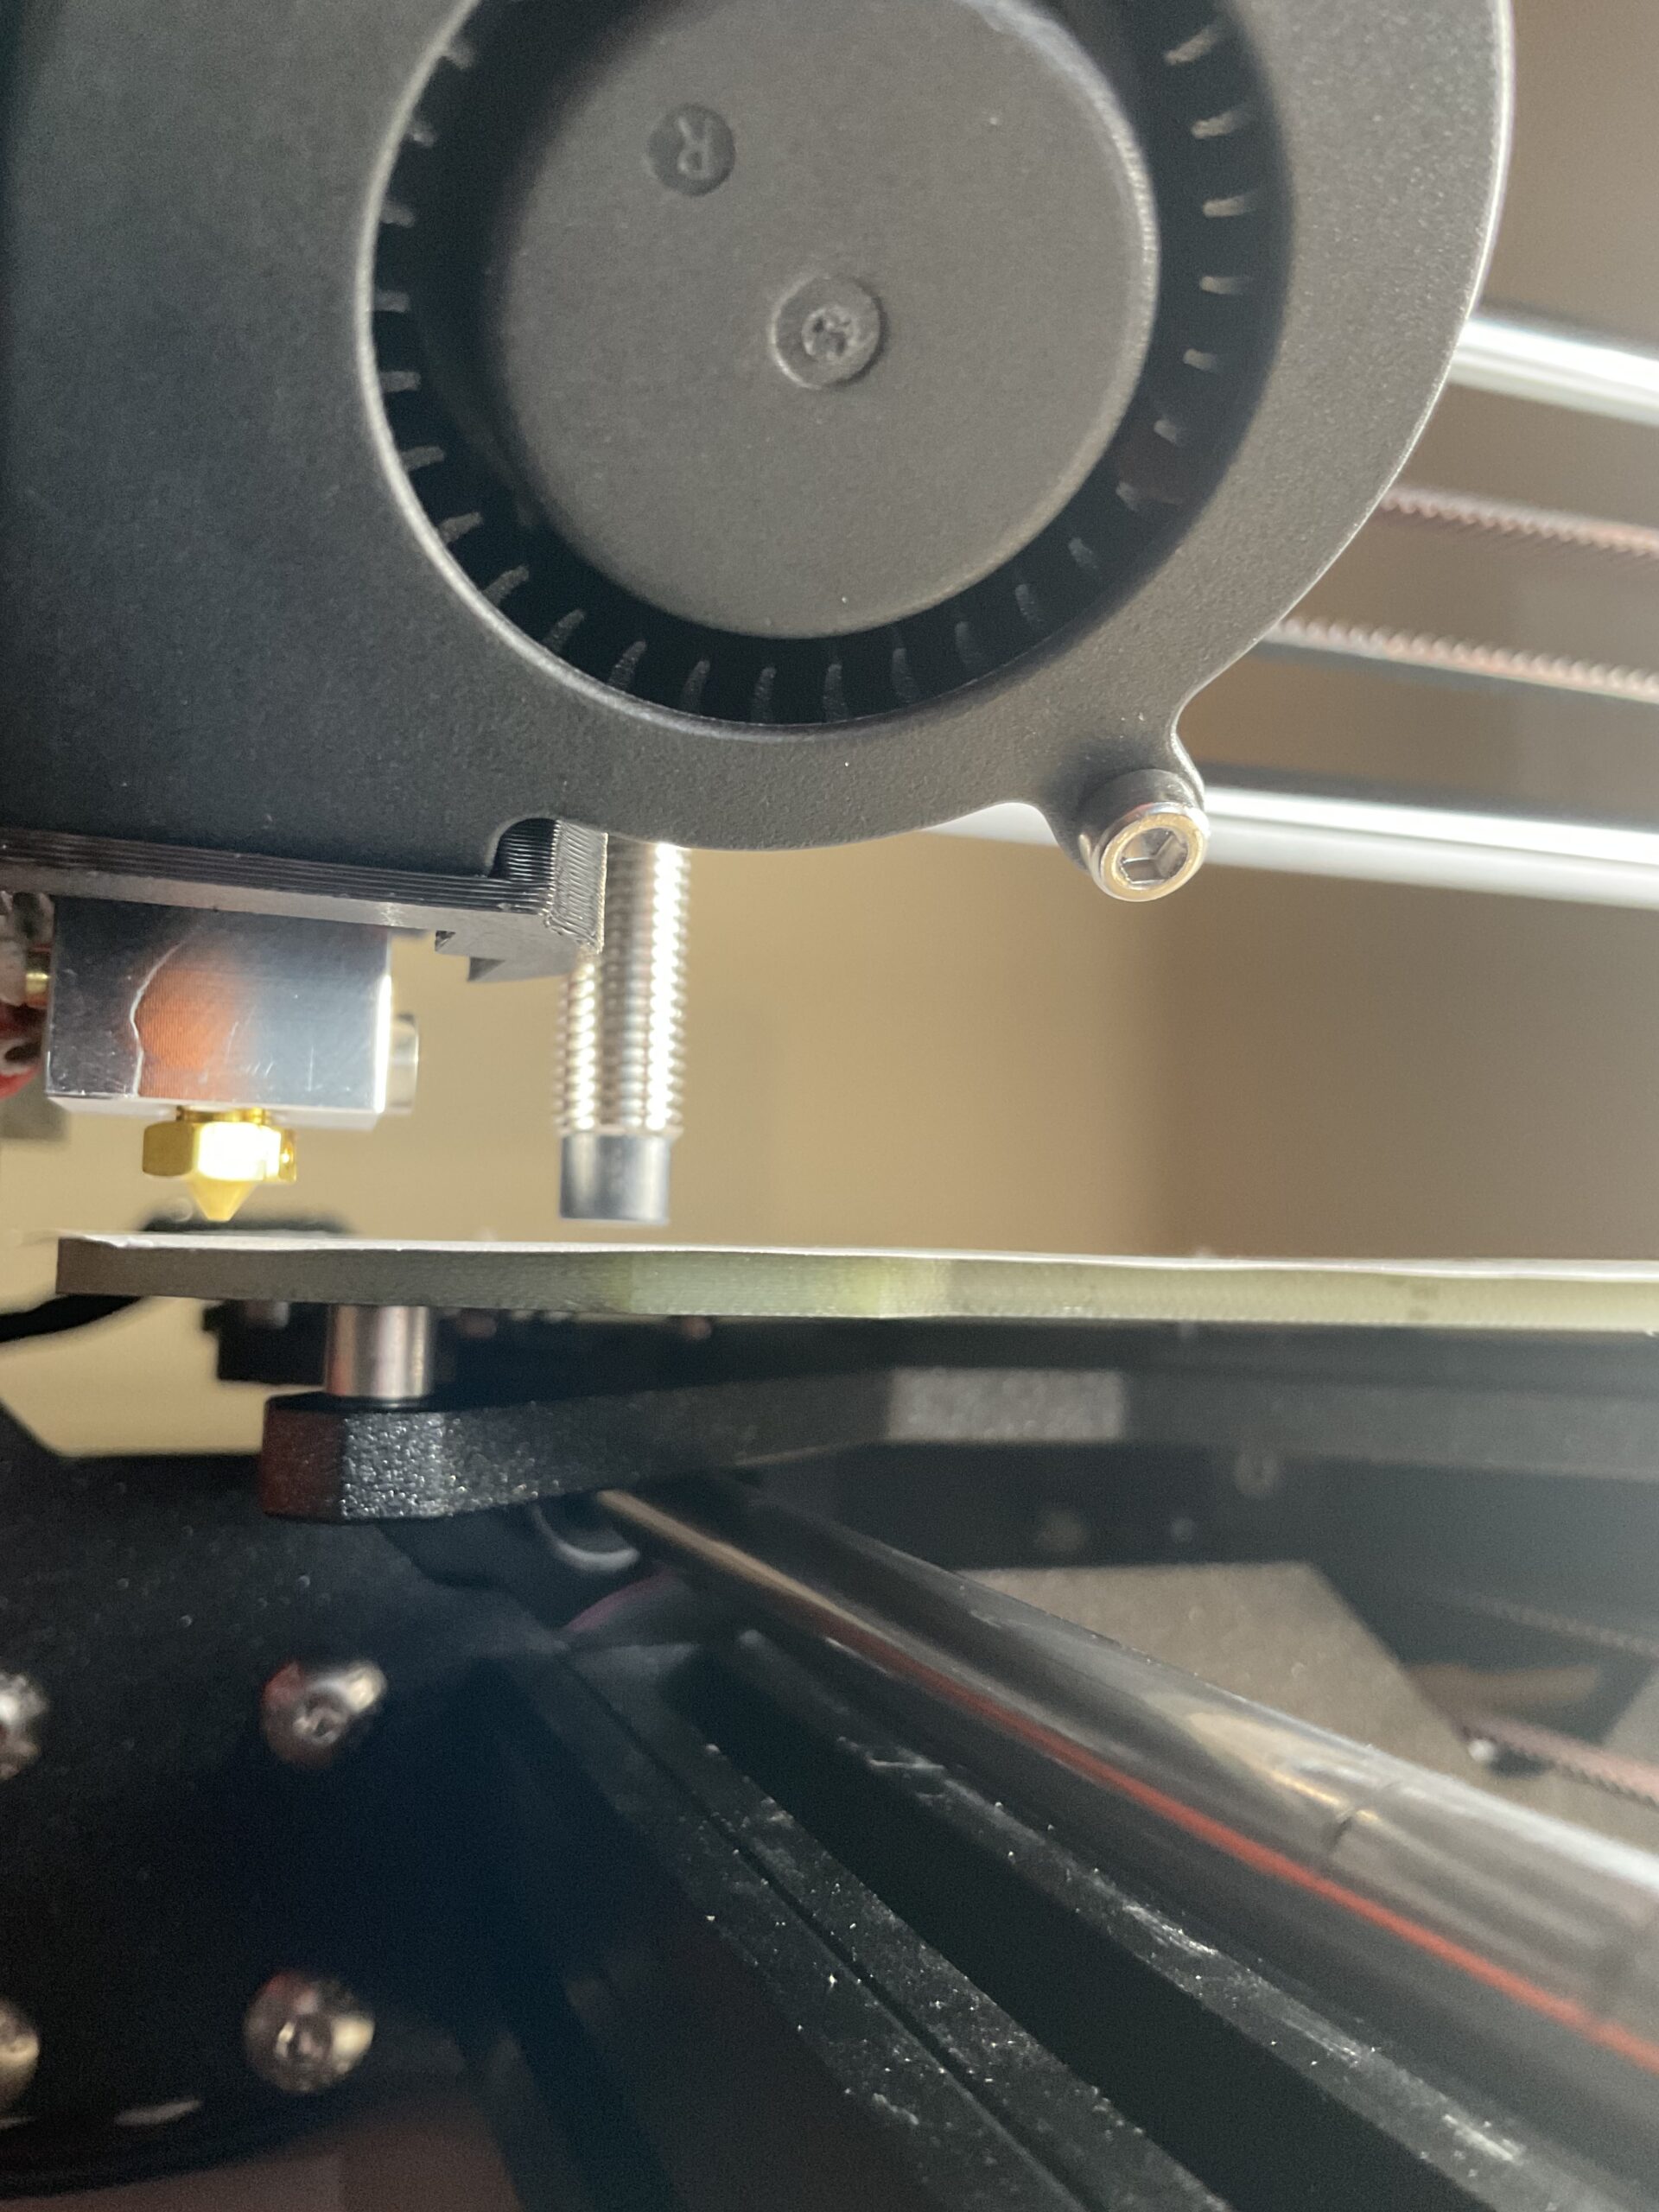
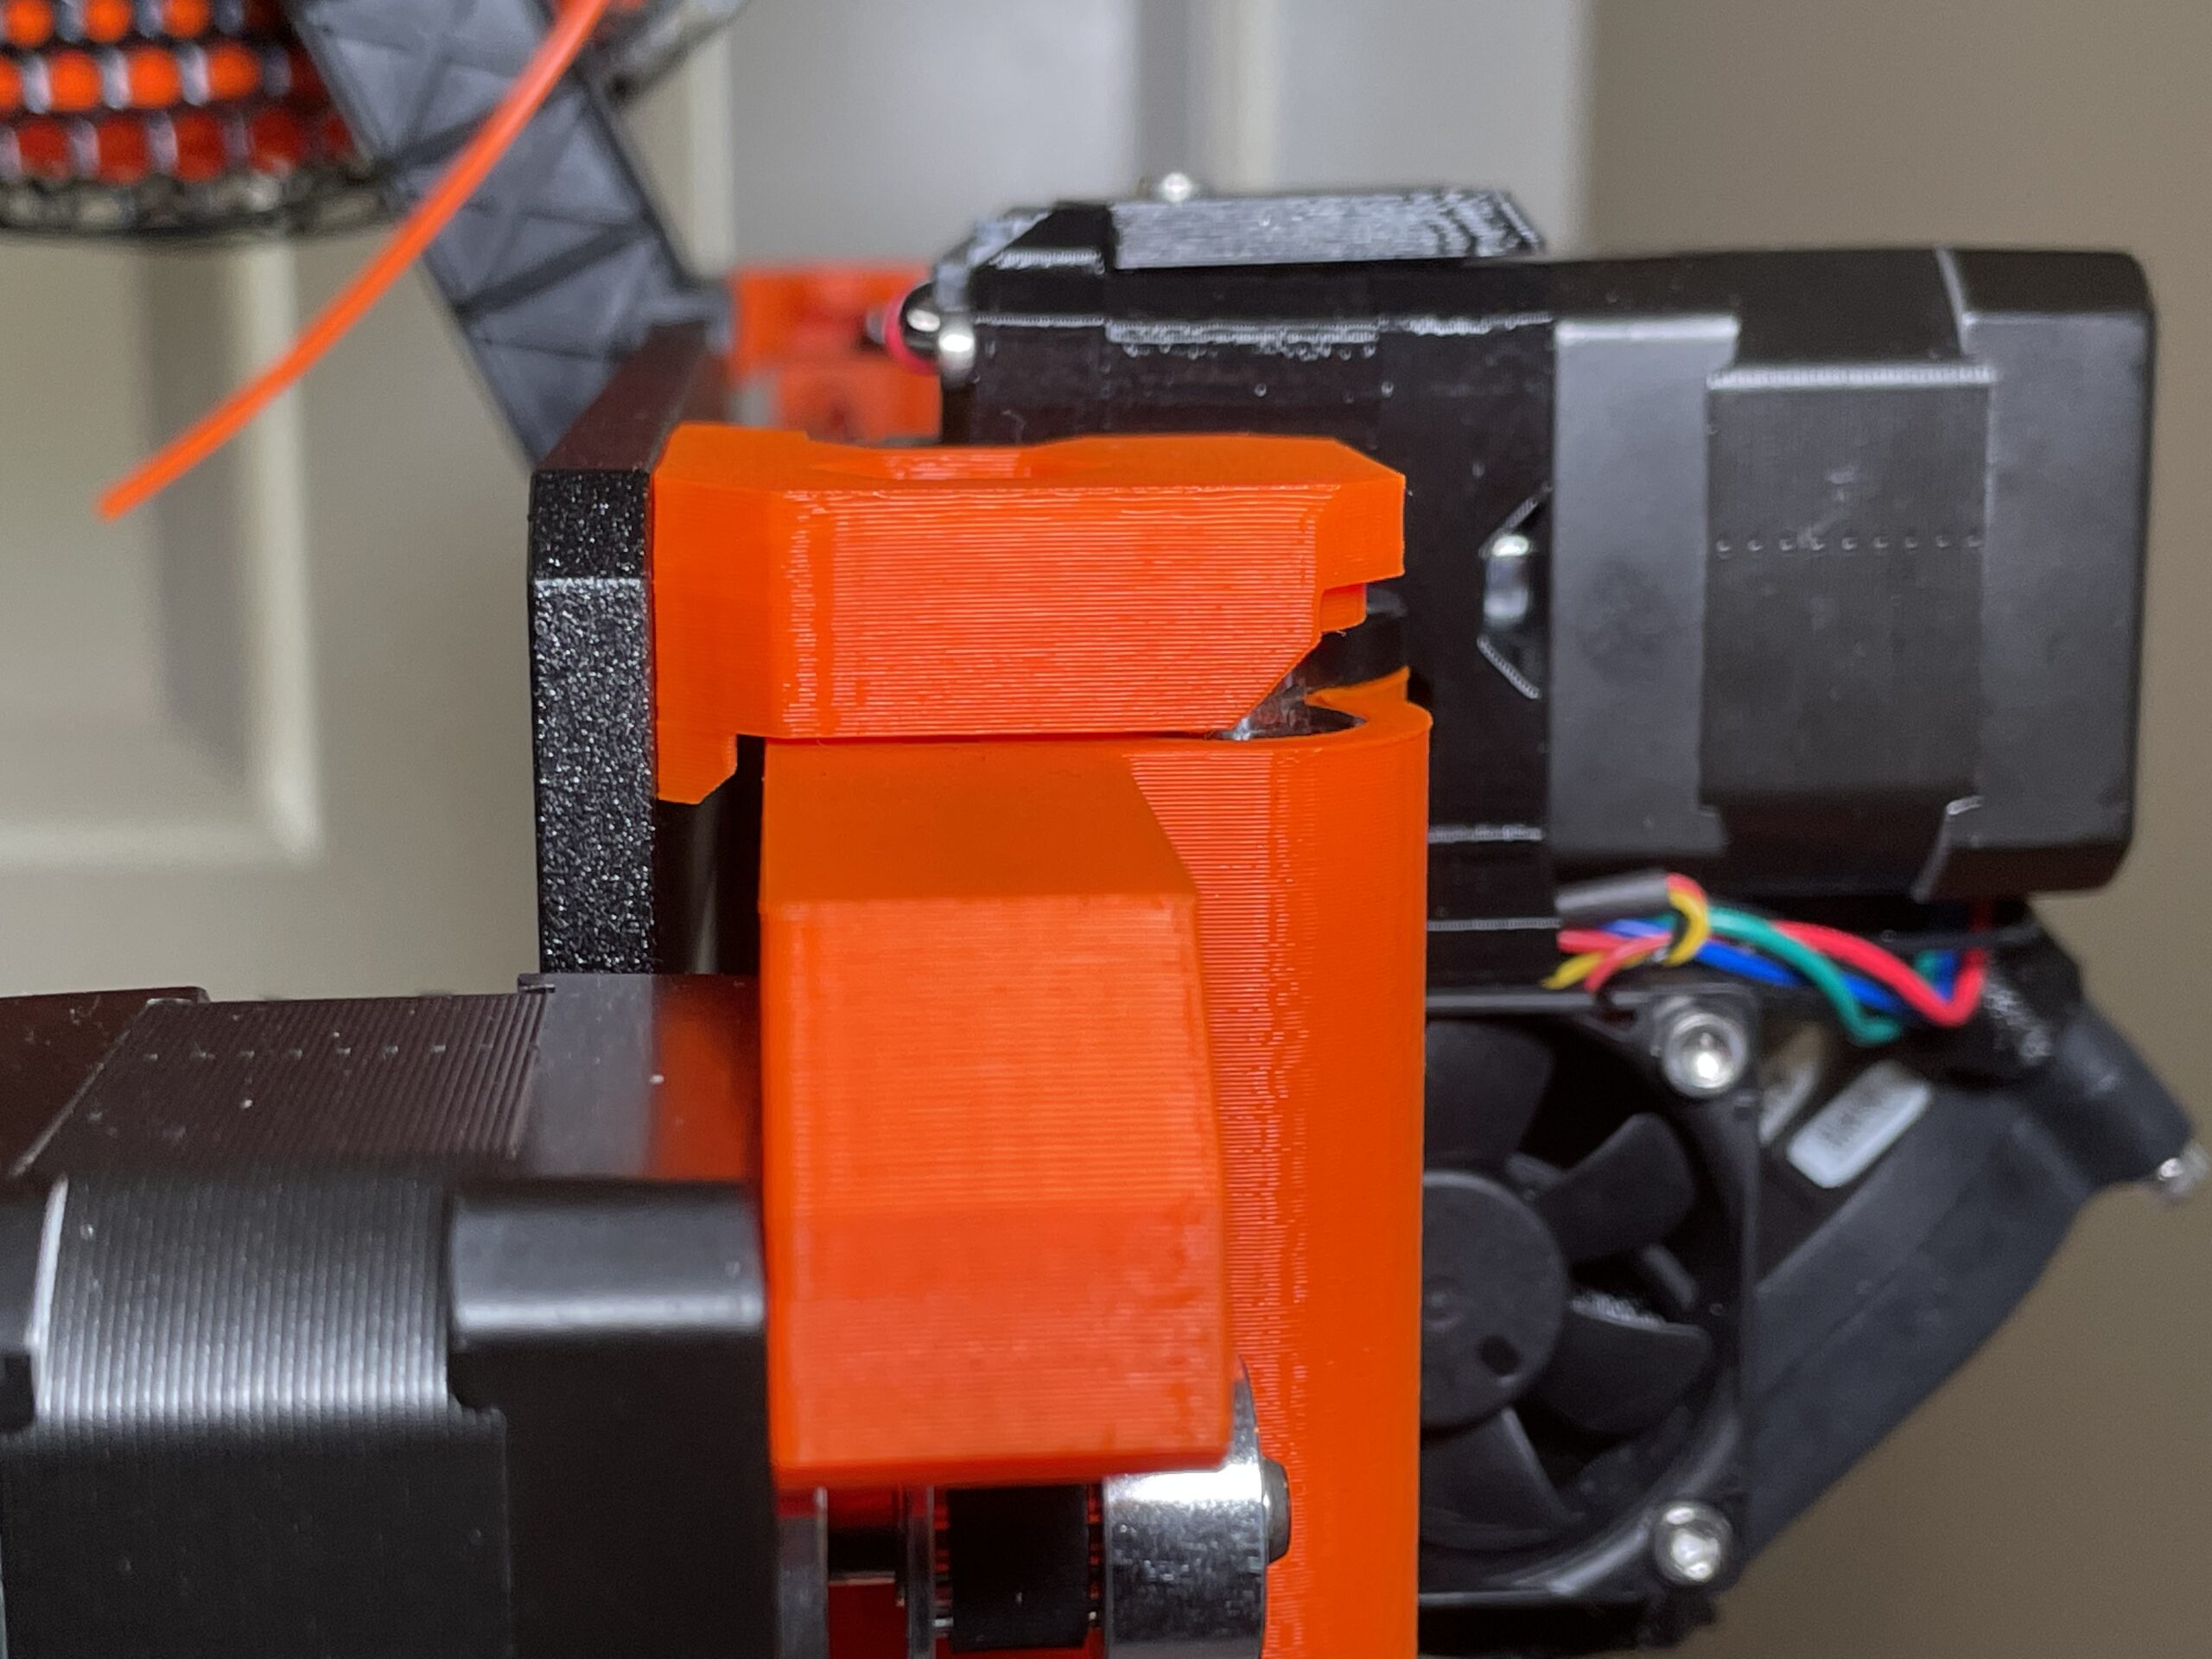
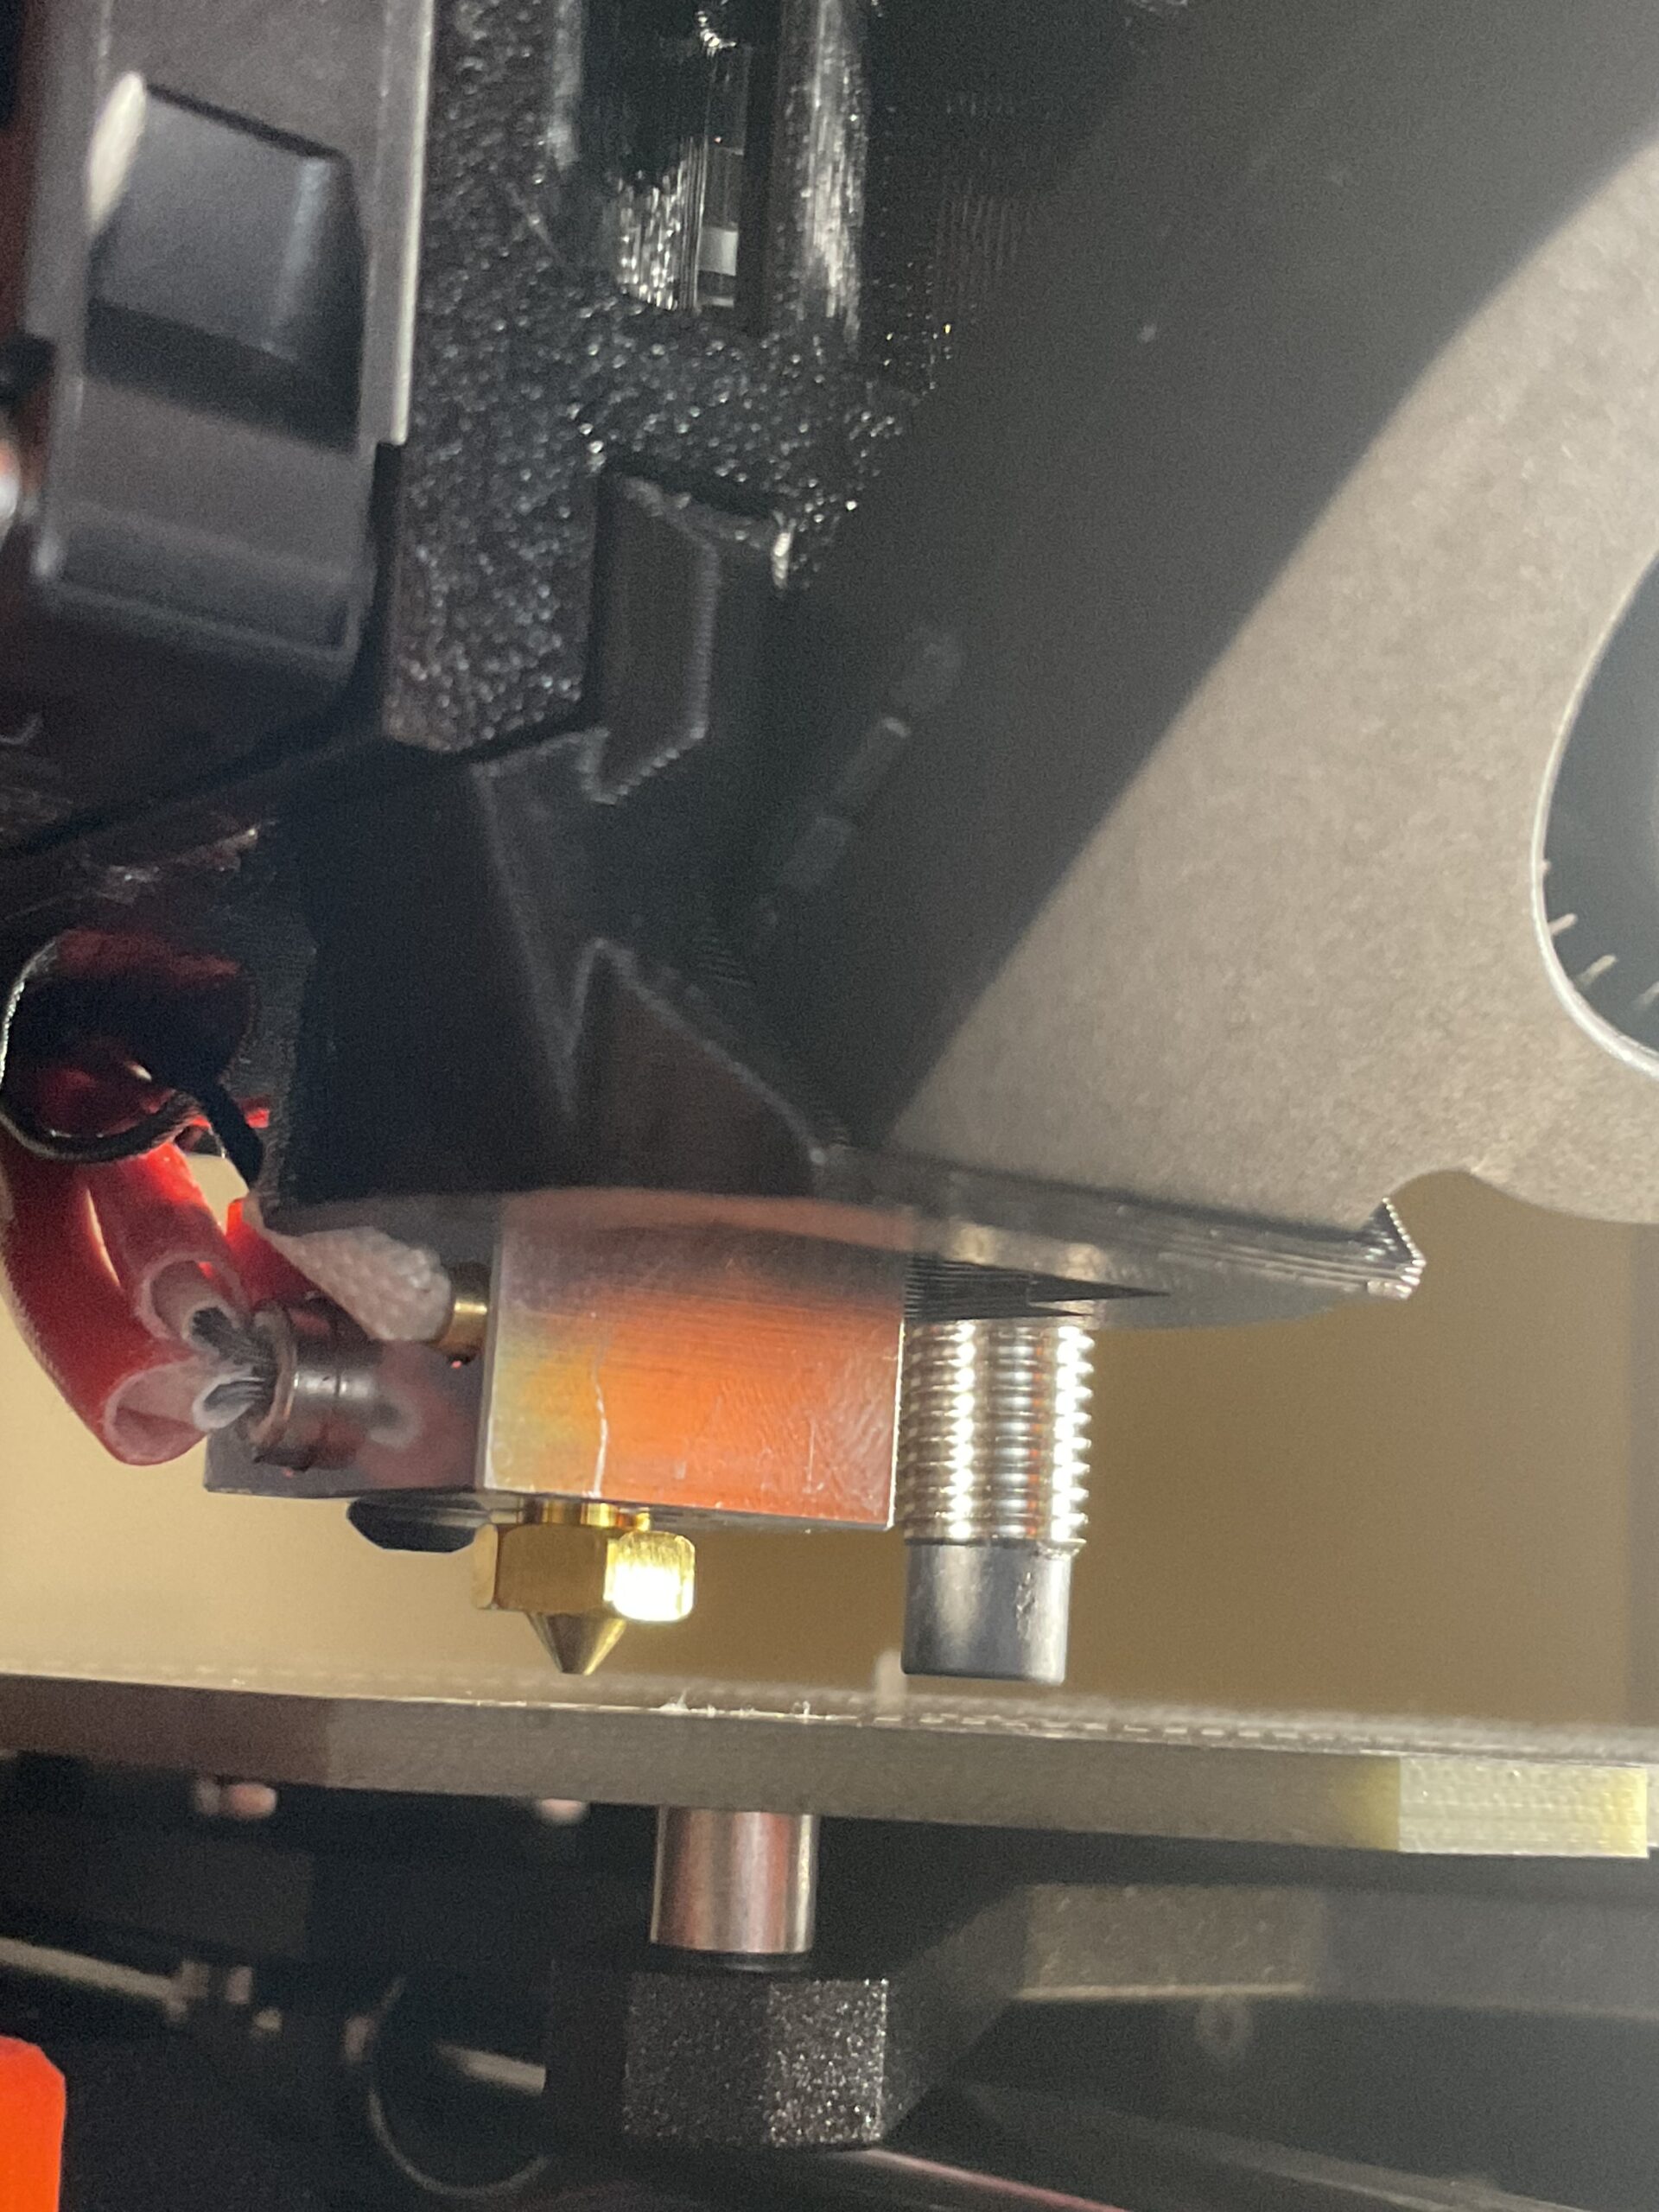
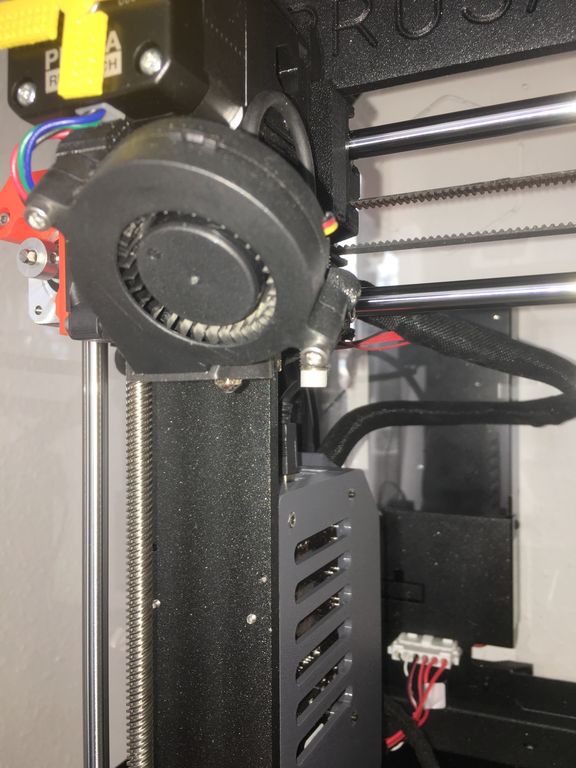
I will be getting into the hot end tomorrow. The Prusa support team thinks I have assembled it wrong, and given everything on the Z axis checked out. This is the next stop. See photo the hot end protrudes too much. If this is the root cause I will post updates with corrected hot end
RE: Calibration Failed! Check the axes and run again.
Ah, yes, that is wrong. The nozzle should be just below the fan shroud.
RE: Calibration Failed! Check the axes and run again.
I will be getting into the hot end tomorrow. The Prusa support team thinks I have assembled it wrong, and given everything on the Z axis checked out. This is the next stop. See photo the hot end protrudes too much. If this is the root cause I will post updates with corrected hot end
They are right, you probably inserted the hot end too low in this step https://help.prusa3d.com/guide/5-e-axis-assembly_169235#170009 .
Normally the fan-shroud is aligned with the heat block at the end of the e-axis-assembly: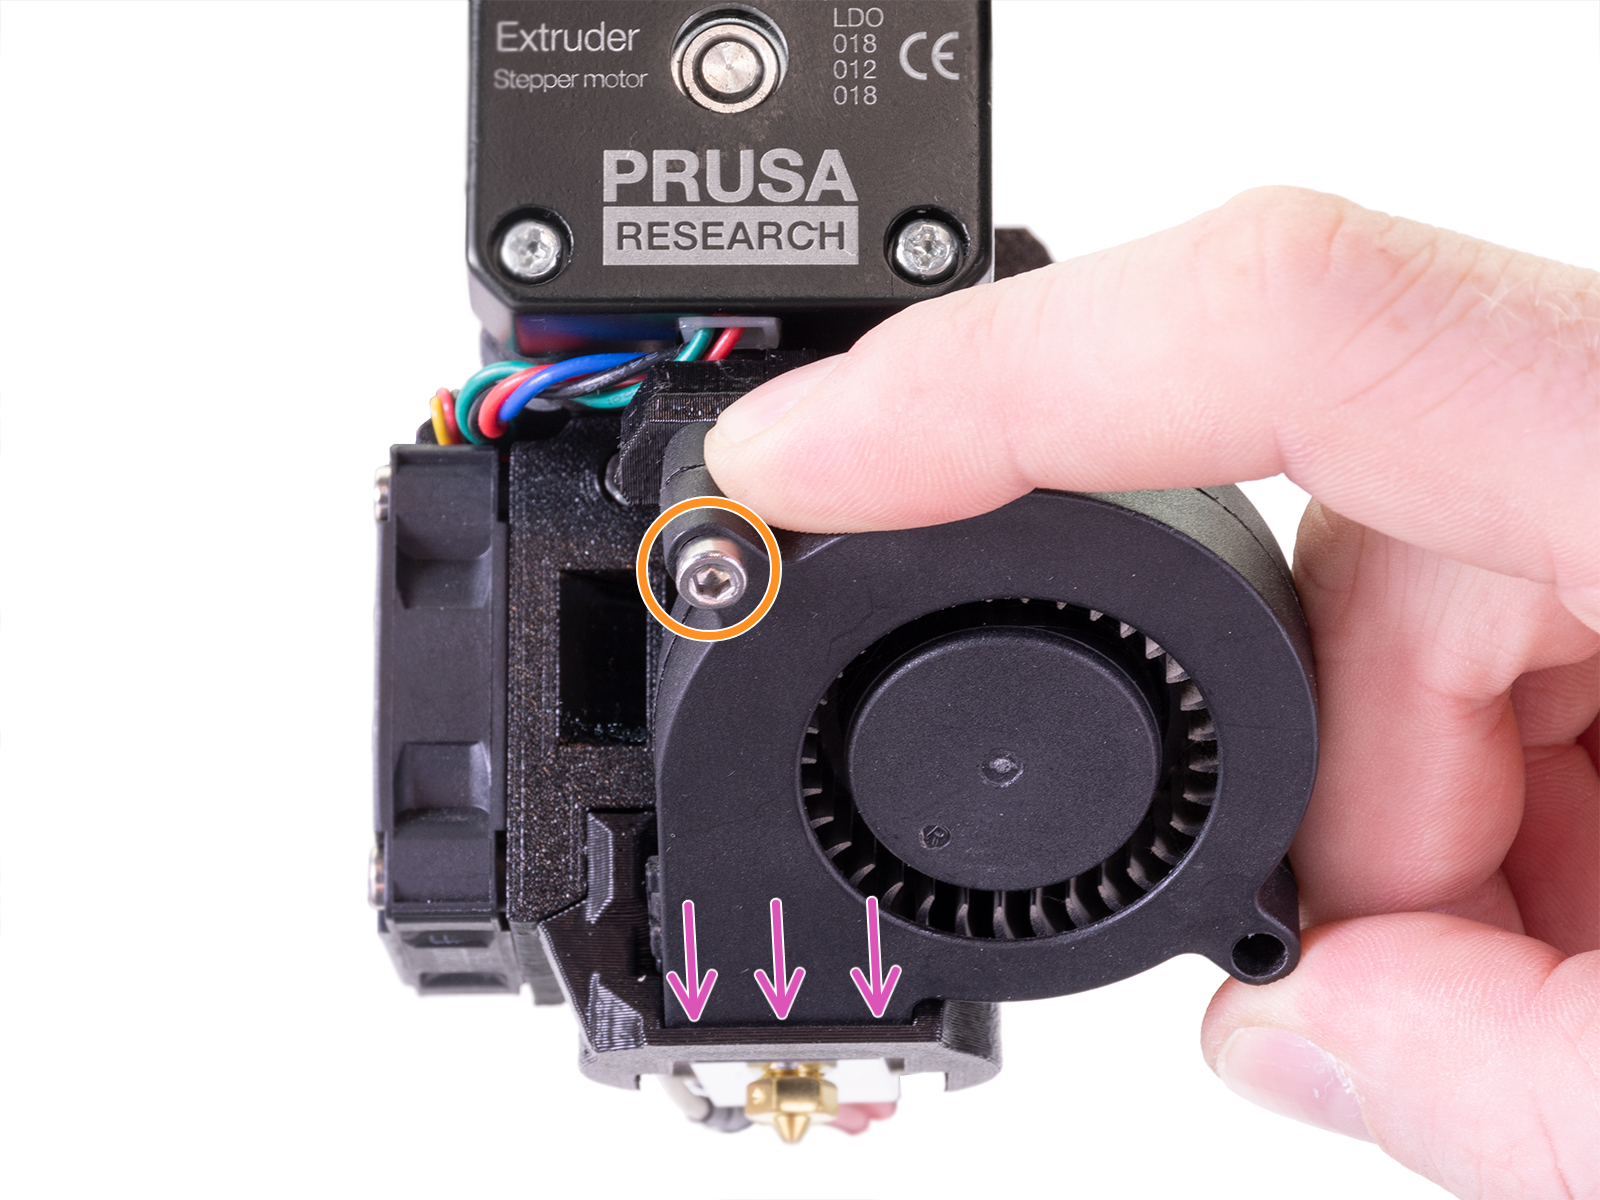
If at first you don't succeed, skydiving is not for you.
Find out why this is pinned in the general section!
RE: Calibration Failed! Check the axes and run again.
PS: if you try to print with this assembly you definitely will get "temperature runaway" errors since you are cooling the heat block instead of the model and most probably you will have extrusion problems because there is a gap in the filament path behind the extruder gears and above the internal PTFE.
If at first you don't succeed, skydiving is not for you.
Find out why this is pinned in the general section!