Badge print sloppy
I tried hard to figure this out on my own and now I've admitted defeat I really need some help!
I calibrated my first layer to make sure all was good.
I ran the badge and this is what I get..
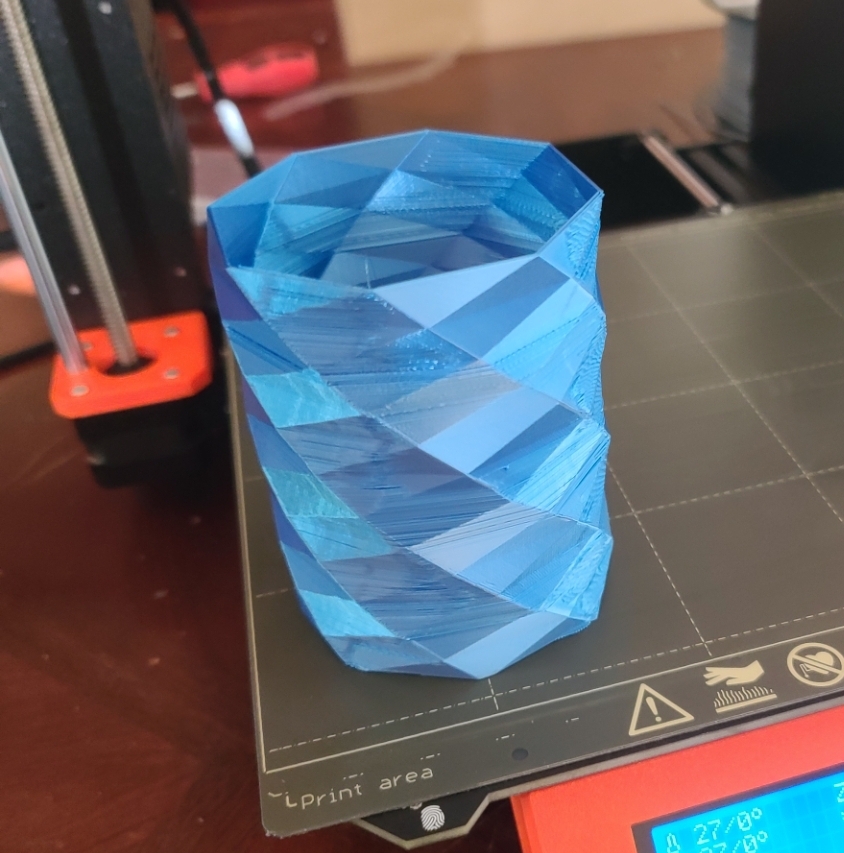
(Also ran a larger print just to get more detail of what is going on I will also add that picture)
Any suggestions on what I am doing wrong??
Thanks in advance! 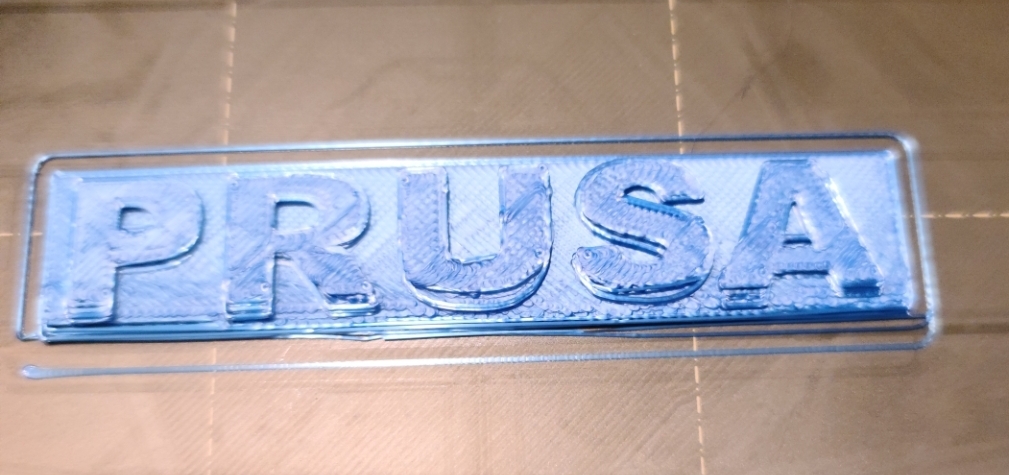
RE: Badge print sloppy
Not sure if this will be helpful... I'm a newbie myself.
I had an almost identical looking logo print. I did two things... first I Realized that the bolt on my Y-Axis Pulley on the front location of the frame was loose.
2nd I needed to adjust my Z axis while doing a live print. Search for that and also search for "Prusa Badge Printing Issues"
Anyways that's coming from a total Prusa newbie.
Best Printing to ya!
RE: Badge print sloppy
Make a good picture of your first layer, it looks to high.
Give all info about settings and filament.
general info:
A new sheet will stick less then a used one.
PLA sticks more difficult on a powder coated sheet. Is still possible settings need to be more preciese.
This how I work on a pei sheet(there are always exceptions):
Most important to 3d printing is:
1. 3d print will never be like start and i have the print, there will always be problems!!!!!!
2. A clean sheet, use dish soap, then you can print on it. A few prints you can use alcohol, then again dish soap,
big flat models and models with small footprint on sheet- use glue stick(and not every glue stick is the same,
use one that makes a thin layer), and big flat models and small footprint, use a big brim attach to model so footprint is bigger.
Petg sticks to much on the pei sheet, use window cleaner, this leaves a layer on the bed, so it does not stick to much.
3. To get it stick very good, a 100% first layer is very important, see youtube for movie on this.
Every new print watch the first layer, and look if it is 100%, this will also prevent a big ball of filament on your nozzle wen model let loose during printing.
Extra: (normally not needed).
First layer, print hotter.
First layer slower.
Bed more heat.
Most problems are first layer to get this 100%, and bed not clean.
Bad filament is possible, or filament with water inside.
Move extruder to the top and extrude filament, it should go straight down(if not, nozzle possible blocked),
it should be thick enough(if not, nozzle possible blocked, or partial blocked), (do a cold pull),
if Bubbling during extrusion then it has to much water inside.
Check after the first layer is ready, then you see if it sticking enough, and not releasing and sticking to the nozzle.
If you see white spots like a bubble on the bed, then filament is releasing from bed.
Also no gabs between lines should be visible.
Use 7x7 calibration for first layer, see settings in the printer.
Search for " 3D printer first layer problem Calibration process" on youtube, movie on first layer calibration, with a good zoom in.
RE: Badge print sloppy
Also check all your hardware, adjust spring on extruder, like in manual, or a little more tension.
Check the whole printer on loose screws, or parts that are loose, I had the whole extruder loose after a long time.
RE: Badge print sloppy
I checked screws, redid both my belts, adjusted sensor, adjusted flow, moved filament location, and watched a hundred YouTube vods. Reran the wizard and finally it is working.
I'm pretty sure the pully on the y-motor shaft wasn't spaced out far enough and caused jerking in the bed.

https://www.instagram.com/p/CDTxdNQgNfd/?igshid=r4gpp4hhrglz
Not sure how to just attach photos?