What changed this print quality?
I have been printing some parts in ABS and I have some issues. The print started to loose quality in certain areas and I cant explain it. Please be aware that I am new to 3D printing and I have a I3 Mk2 that I have borrowed from a friend.
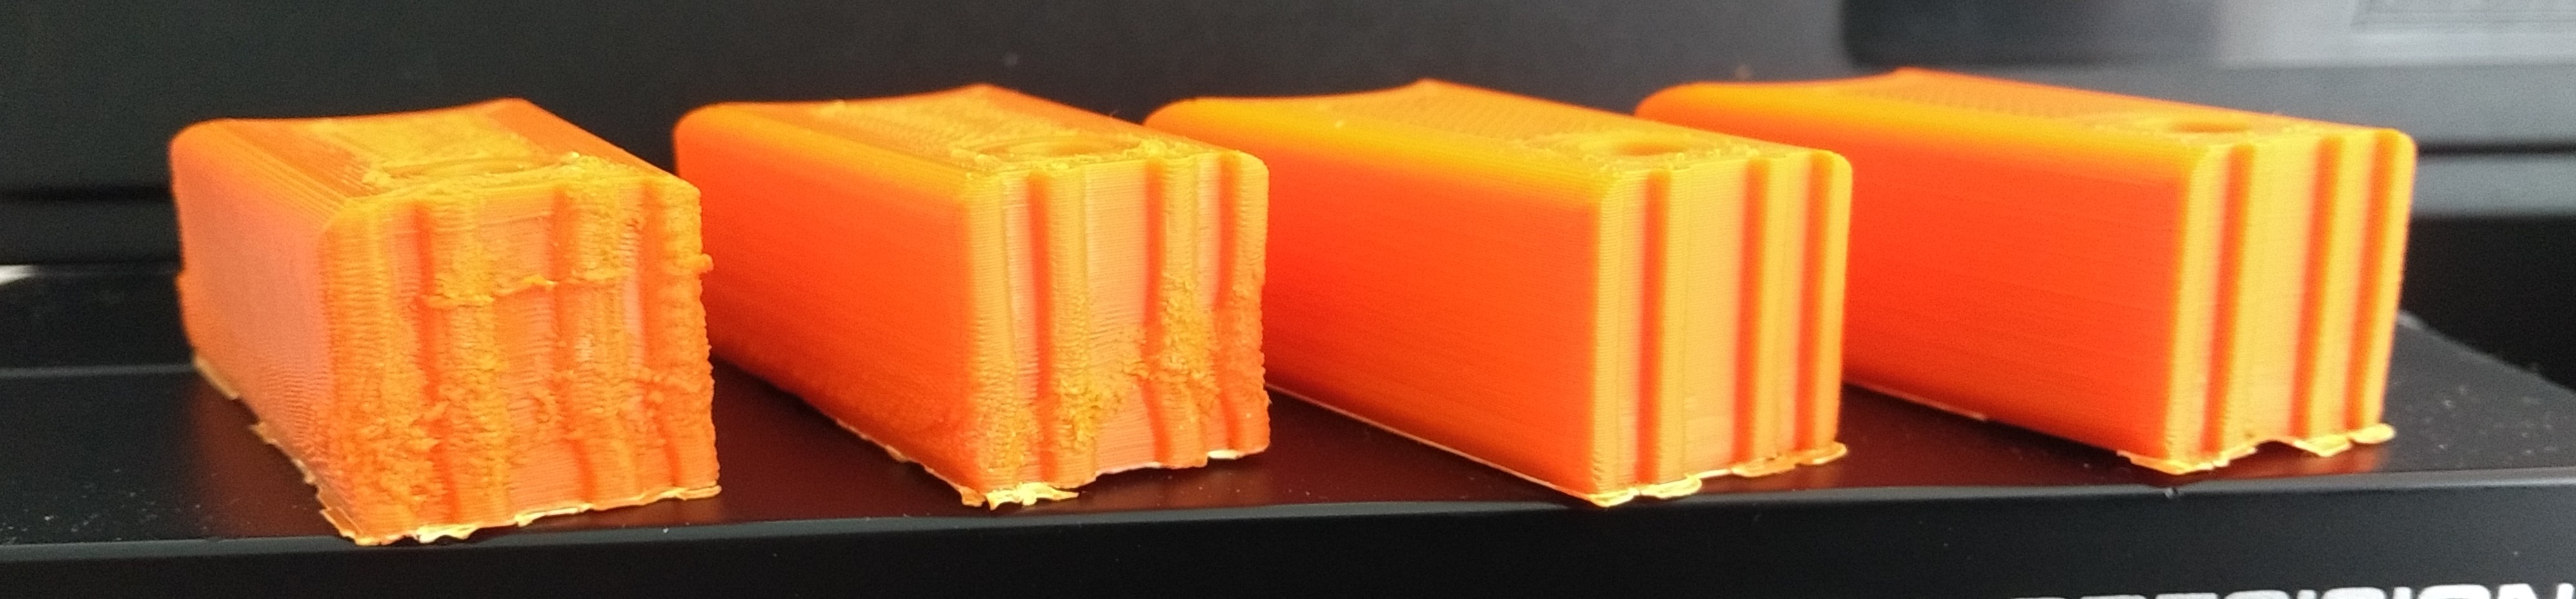
The prints started to loose the smooth surface on the perimeter in certain areas. Other areas of the print seemed ok! Today I printed 4 of the same item. The one on the left of the images I printed first. For the next one (the one next to it) I slowed printing on the external perimeter from 40mm/s to 25mm/sec, and the perimeter from 50 to 45mm/sec. This gave a slightly better quality of finish.
I then read on one of the posts here that someone recommended moving the position of the print on the heat bed to try and alter the quality of an item they were printing. I decided to try this but could not figure out how to do this in Slic3r. To overcome this I put two items on the bed as that meant they could not be in the original position. The result is the two items to the right side, which I printed as a pair on the bed. You can see the improved quality. What is hidden is a hole through the opposite end of the items, about 10mm diameter, that shows the same improvement.
So can anyone explain what is happening that would improve the print.
Also can anyone tell me how to move a single item on the heatbed in Slic3r.
Thanks for your help.
Mick
Re: What changed this print quality?
After you relocated the printer (I assume), did you re-calibrate it?
As for Slic3r yeah, they hide the control in a pretty bizarre place. You are looking for File/Preferences/Auto-centre parts. Why it's there I have no idea. 🙄
Re: What changed this print quality?
My experience is, that much more important than position on the bed is a stable temperature of 35°C (up to 40) around the printer.
Therefore I use printer covered with an enclosure. Best results I get with preheated chamber.
An example of recently printed filament guide on the image:
From left to right
A - preheated chamber, sliced with Slic3r using standard profile for Prusa ABS
B - preheated chamber, sliced with Simplify 3d with profile found on this forum, needs tuning because A is better
C - print started by room temperature 22°C, sliced with Simplify 3d, with observable deformations
With the preheated chamber I reach the same print quality as with PLA. The orange filament is standard ABS.
Re: What changed this print quality?
I think the OP might have some more issues than just the need for an enclosure.
Re: What changed this print quality?
of course there might be thousands of other reasons
I see on Micks pictures that - prints are finished and corners are not bent any significantly up. It means first layer adhesion is not the problem.
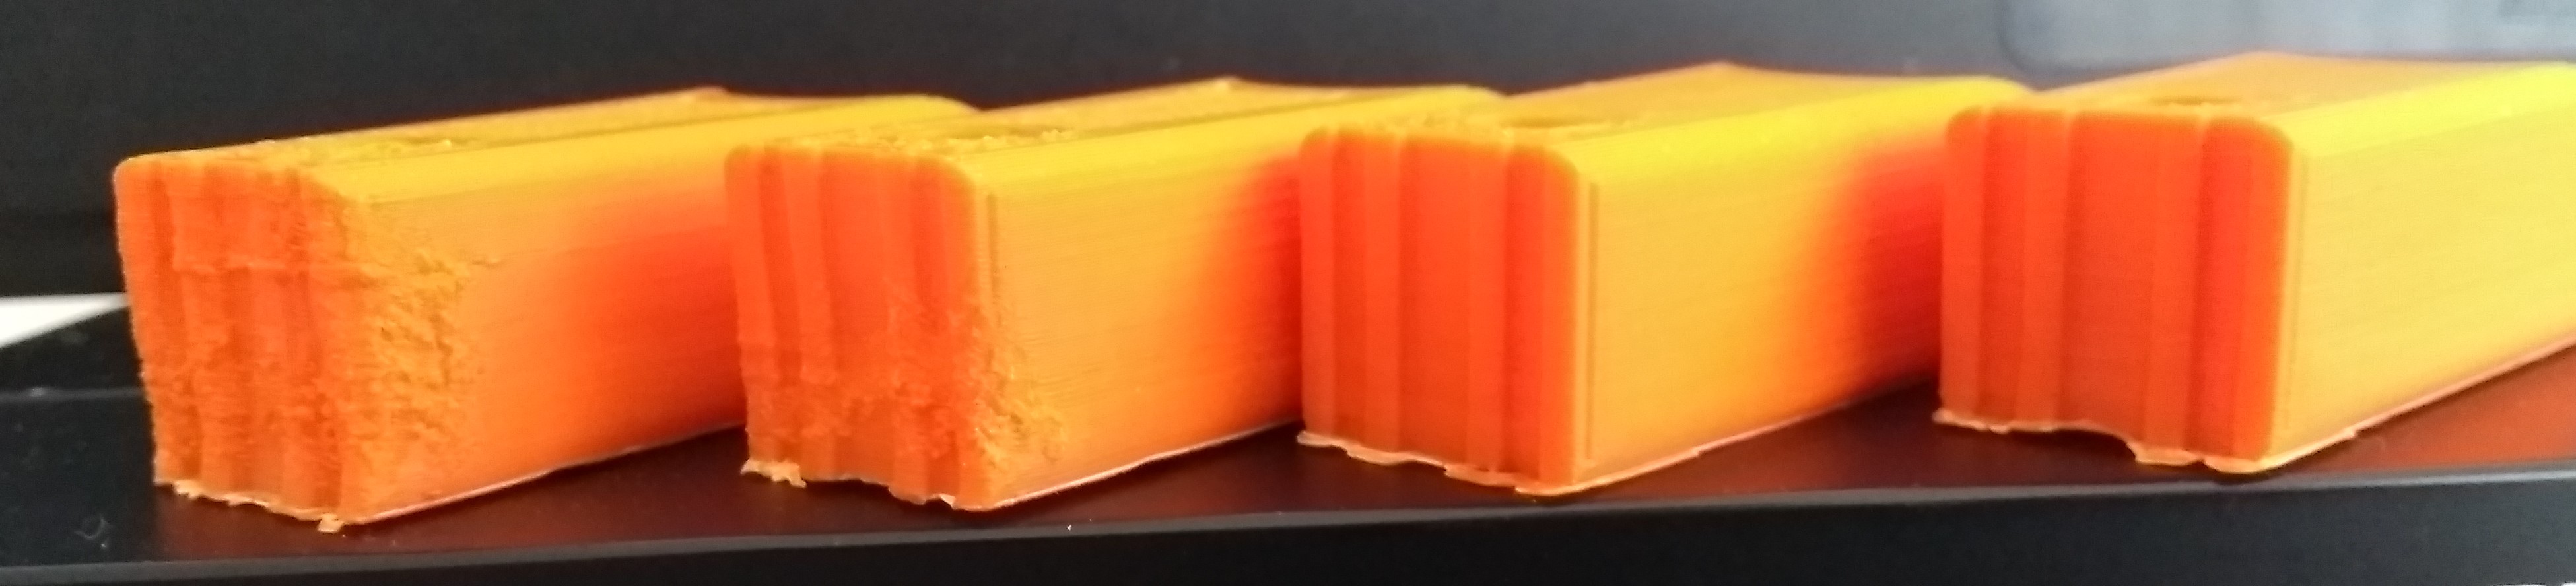
The wrinkles on the perimeter are created if layers bend up and pushing against the nozzle which drives the filament to flow outside perimeter.
This wrinkles are similar to my failed prints - on the picture below.
however one more idea: the ABS filament might be wet. Was it stored in air tight container? If I found it wet, I usually dry it in electric oven for 4 hours at temp around 60°C. I usually get 50 grams down on 1 kg spool.
Re: What changed this print quality?
The issue is that the prints were done on the same machine, same filament, same settings - just a different position.
The prints were well secured to the heat bed.
Unless it is that the filament was the first part of the roll to be used that day?
Strange!
Thanks for the input.
Mick
Re: What changed this print quality?
Actually, when you printed two pieces together on the bed, you automagically extended the time taken for each layer to complete and that allowed each layer to resolidify before the new layer was deposited on top.
Try with your single print at 10 and 20mm/s or set a minimum layer time and let us know how you get on.
Cheers,
Bill
Tagaytay City, Philippines
Founder member of Philippines Prusa Printer Owners FB Group
Sponsor Pillars of God Academy in Bacoor