Success with printing ABS
Hello,
I am creating this post in an attempt to share my success when printing with ABS on PEI with the Prusa i3 MK2s. The PEI sheet took some time for me to get the print settings dialed in and may vary for other users which is why my main focus is to share my experience with printing ABS and steps I took to combat the typical "warping" and "corner lifting" that occurs. When initially trying out ABS I had trouble getting it to stick just like a majority of people that attempt to print ABS for the first time. My main issue was more due to curling that would occur primarily around sharp corners or peninsula areas of a print. I first tried Prusa's slic3r settings as default and of coarse smashed the first layer adjusting the live z height. This allowed me to print ABS parts but the final product still had warping and large imperfections due to the warping. After several attempts with different bed and nozzle temps as well as trying the glue stick/ abs juice methods I still had issues.
ABS was kicking my ass at this point so it required more than just trying one thing over the other. It required getting several aspects of the printers environment under control. First of all I had to deal with the ambient temperature being cold (running A/C) and not allowing the bed to maintain a high enough desired temp. The solution I took to solve this was making sure the bed had sufficient voltage and current to maintain the temps. Upon inspection of the voltage while preheating both the hotend and bed I was startled to discover the voltage under 11.5v. By simply adjusting the pot on the inside of the PSU I was able to increase the supply voltage to the RAMBO mini so that under full load the bed was still being supplied greater than 12 volts. A quarter clockwise turn of the pot provided an additional volt which left my bed at 12.5 volts while under full load with the hotend. I can now maintain 120 on the bed with absolute ease.
My next problem was cold drafts of air causing inconsistent layer shrinking which obviously lead to problems with curling and warping. A trip to the hardware store and about $20 later I had a sheet of thin (dry erase) board cut to 24 inch squares that easily created an enclosure around my printer. Once I solved the drafts from hitting the print I noticed an absolute night and day difference of curling no longer occurring.
My last issue was making sure the PEI is absolutely clean. There is NOTHING BETTER than just plain PEI that is wiped clean with 90-100% IPA. PEI as a bed material works wonders when properly treated prior to printing. I take a cloth and wipe down the bed right before heating with 91% IPA and noticed that prints (other than ABS as well) stick like hell. At first I was printing at the suggested 100 temp for the bed and still had slight curling on the very tips of corners. By turning the temp to 110 I noticed that smaller parts adhered much better however larger parts still curled. By printing at 120 on the bed I practically can lift the printer by the part when they are finished.
With all that said I believe the best combination to achieve success with ABS is the following in summary:
* Make sure the heat bed has sufficient voltage while heating both hot end and bed
* Increase the ambient temperature (if possible)
* Prevent air drafts from hitting the print
* Higher temp on bed for larger ABS prints
* No part cooling fan at all!!!
* Clean with IPA the PEI before every print (the slightest touch of your hand on the bed can transfer grease that will work against you)
* Print slow, printing faster will cause layers to not cool enough
Print Settings:
First Layer - Nozzle-255 Bed-120
Remaining print - Nozzle-245 Bed-115
I am currently reprinting all the parts for the MK2S in Nuclear Green ABS and now have achieved "Prusa Research quality prints" 
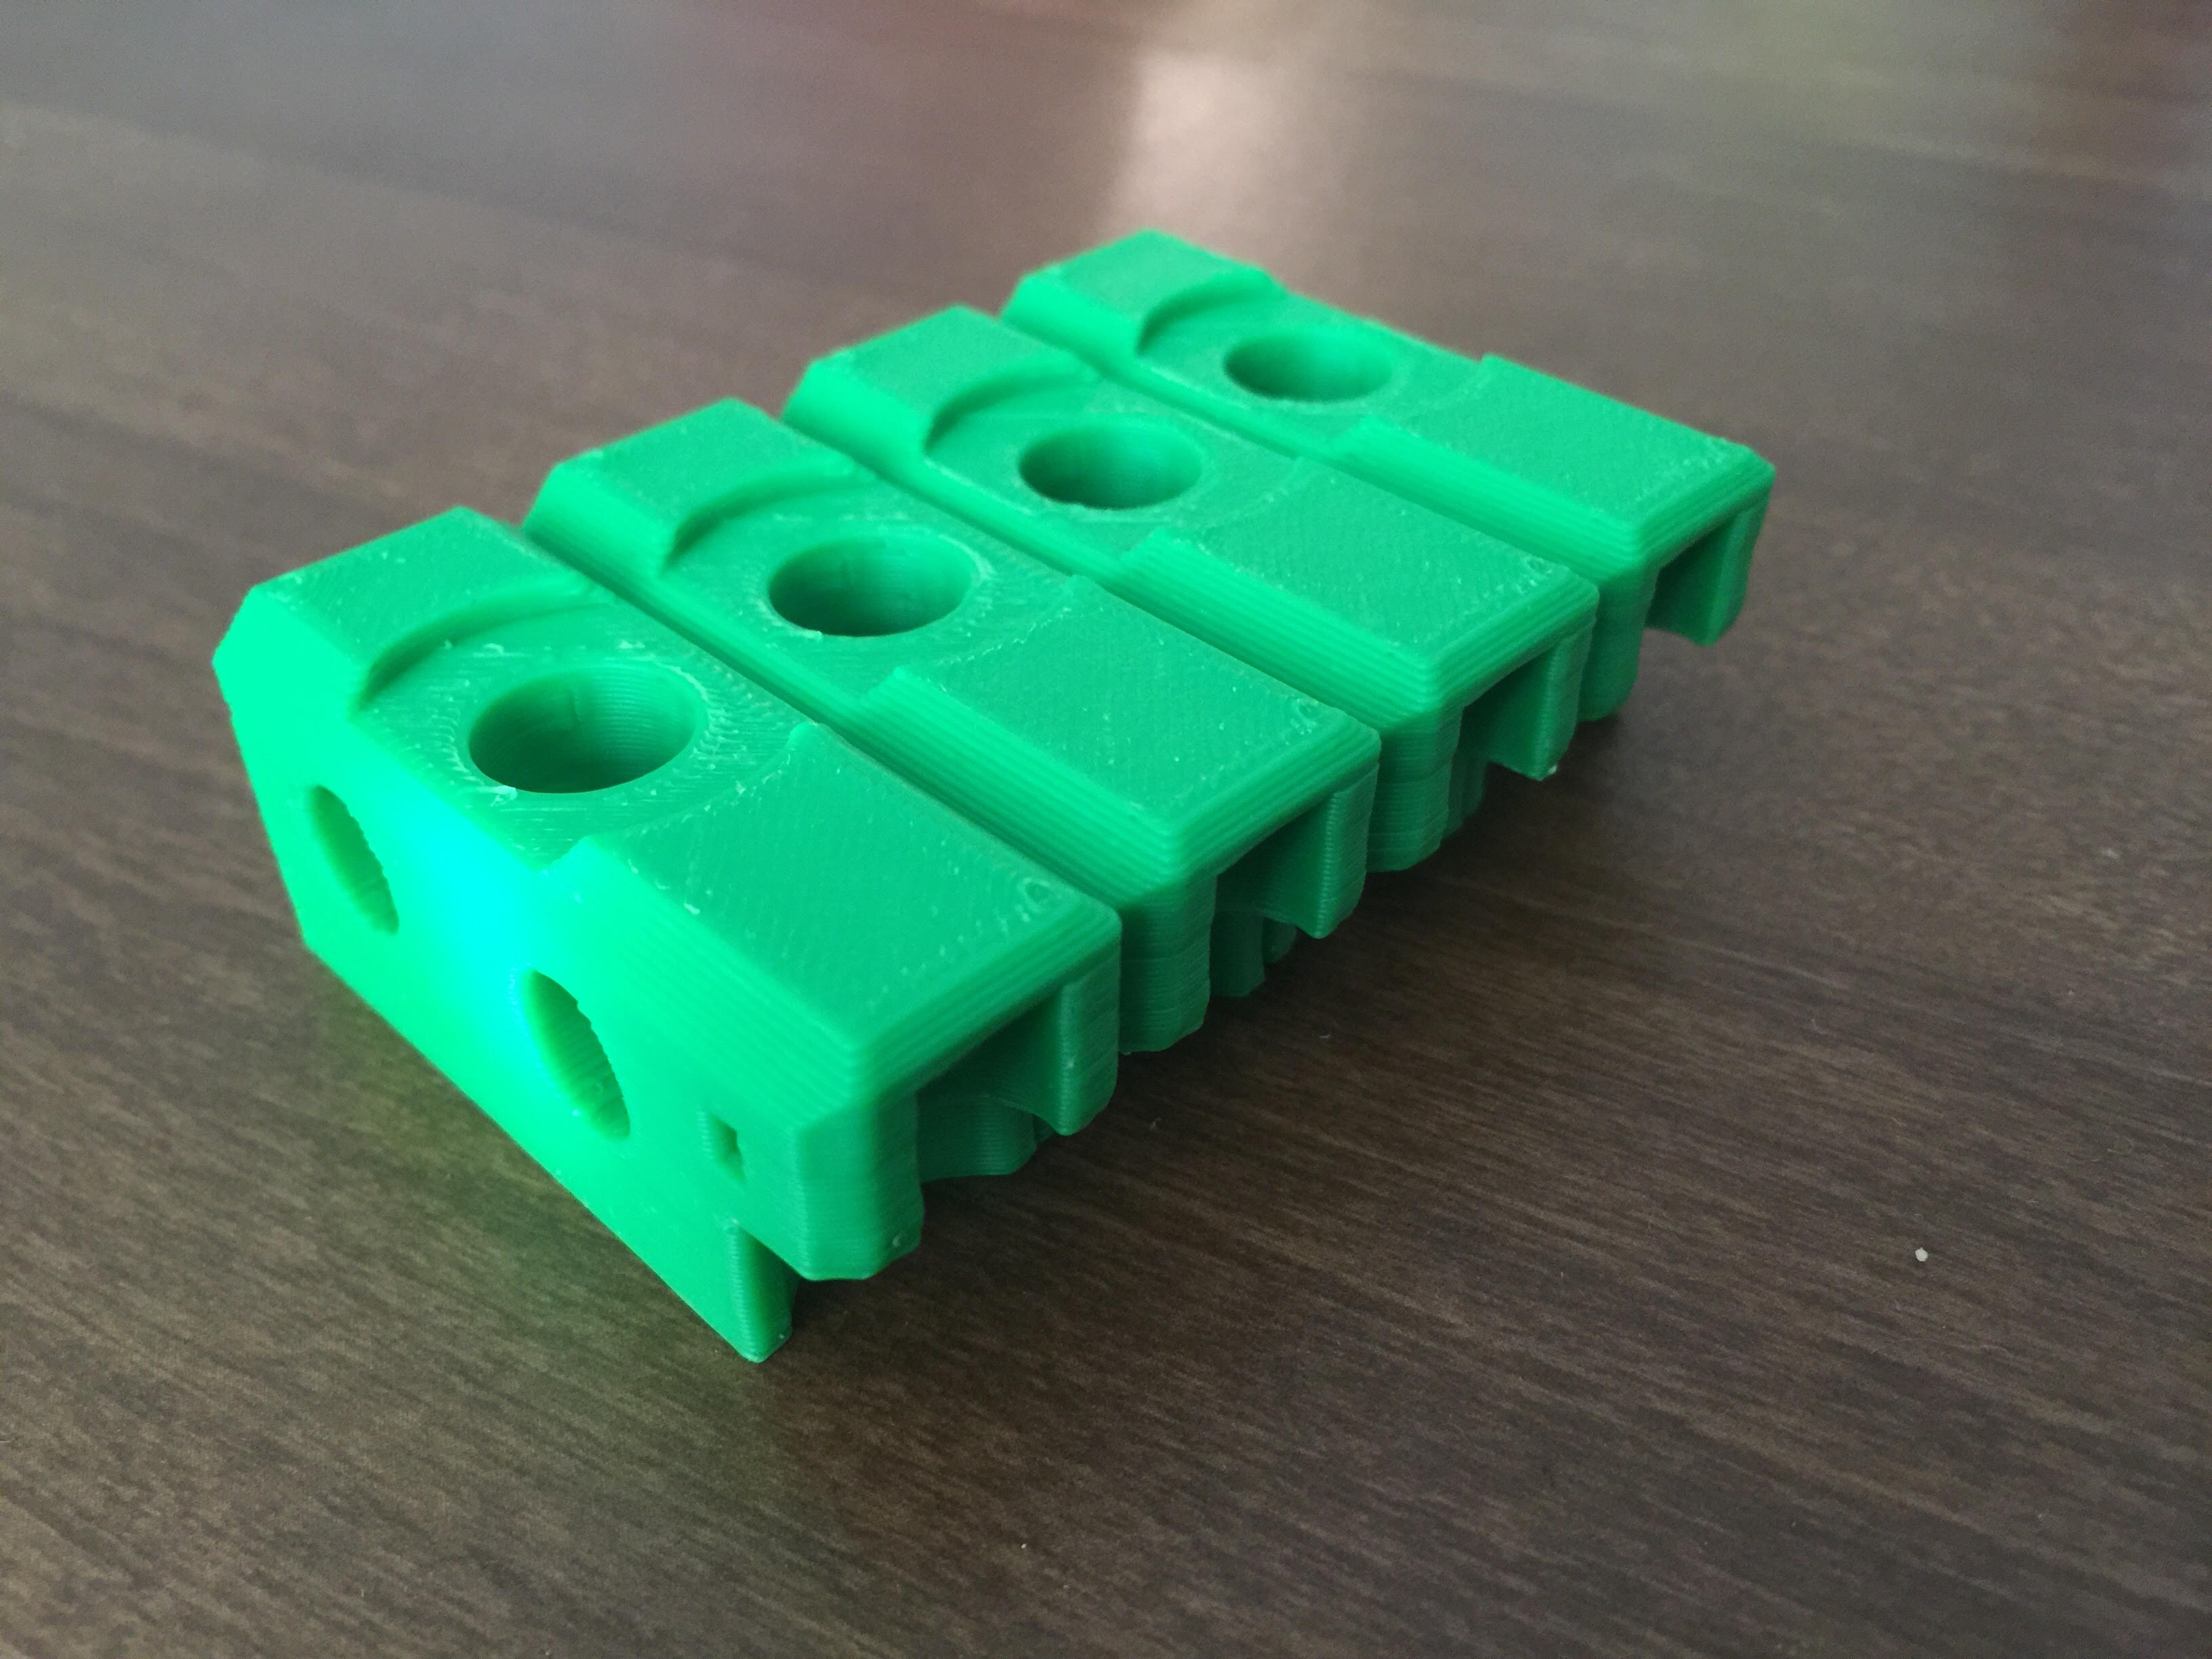
The following are all the extruder assembly parts:

Philip G.
Original Prusa i3 MK2S
Turnigy Fabrikator Mini
Re: Success with printing ABS
As someone wanting to print ABS once my kit comes, I really appreciate this! I ordered black parts because I really hate orange, but I'd love to print them in yellow someday!
Re: Success with printing ABS
Thanks for the info!! Could you post some detail pics of your enclosure? I am currently in need of a cost effective box myself and Im sure others would appreciate it as well!
Re: Success with printing ABS
The hottest my bed would heat to is 113.
Got any pictures of where I should adjust the PSU?
Re: Success with printing ABS
Hi Philip,
thank you a lot for sharing. Very interesting read!
According to Prusa the Heatbed should not be run over 110ºC - above this point the glue holding the PEI is supposed to become soft. Did you notice such a thing?
I would like to see how the bigger parts came out.
BTW: There is an "official" G code from Prusa to print some extruder parts in ABS for the MK2S upgrade. They use mouse ears (see my post here: http://shop.prusa3d.com/forum/print-tips-slic3r-settings-kisslicer-model-repair--f12/which-settings-for-abs-spare-parts-i3-mk2--t2500-s10.html#p34958 ).
BR, Hendrik
Re: Success with printing ABS
Thanks for the info!! Could you post some detail pics of your enclosure? I am currently in need of a cost effective box myself and Im sure others would appreciate it as well!
Sure! I made a post here:
http://shop.prusa3d.com/forum/original-prusa-i3-mk2-f23/advice-needed-my-thoughts-on-printer-enclosures-t4962.html#p36078
Got any pictures of where I should adjust the PSU?
No, but the steps are easy:
* Unplug from main power (duh...)
* Flip the power switch on to drain all the capacitors then back to off
* Cut any zip ties near the 2 output cables to free them up
* Loosen both mounting screws to the frame and the two screws on the Y-Connector (black part)
* Loosen the allen screws going around the top of the black PSU cover (MAKE SURE IT IS DISCONNECTED)
* Towards the bottom look around for an opening and inside you will see a very small white pot that you can adjust with a flathead
My tip is to check your voltage before making this change as it may not be necessary. You DO NOT want to exceed 13 volts.
According to Prusa the Heatbed should not be run over 110ºC - above this point the glue holding the PEI is supposed to become soft. Did you notice such a thing?
Nothing changed as far as appearance and usage of the PEI after several multi hour prints at a solid 115 and first layer going down at 120. Now after some additional experimenting with the enclosure I am noticing less temps needed to keep the parts stuck. I now print with these settings:
First Layer Nozzle - 255 | Bed - 100
Rest Nozzle - 245 | Bed - 100
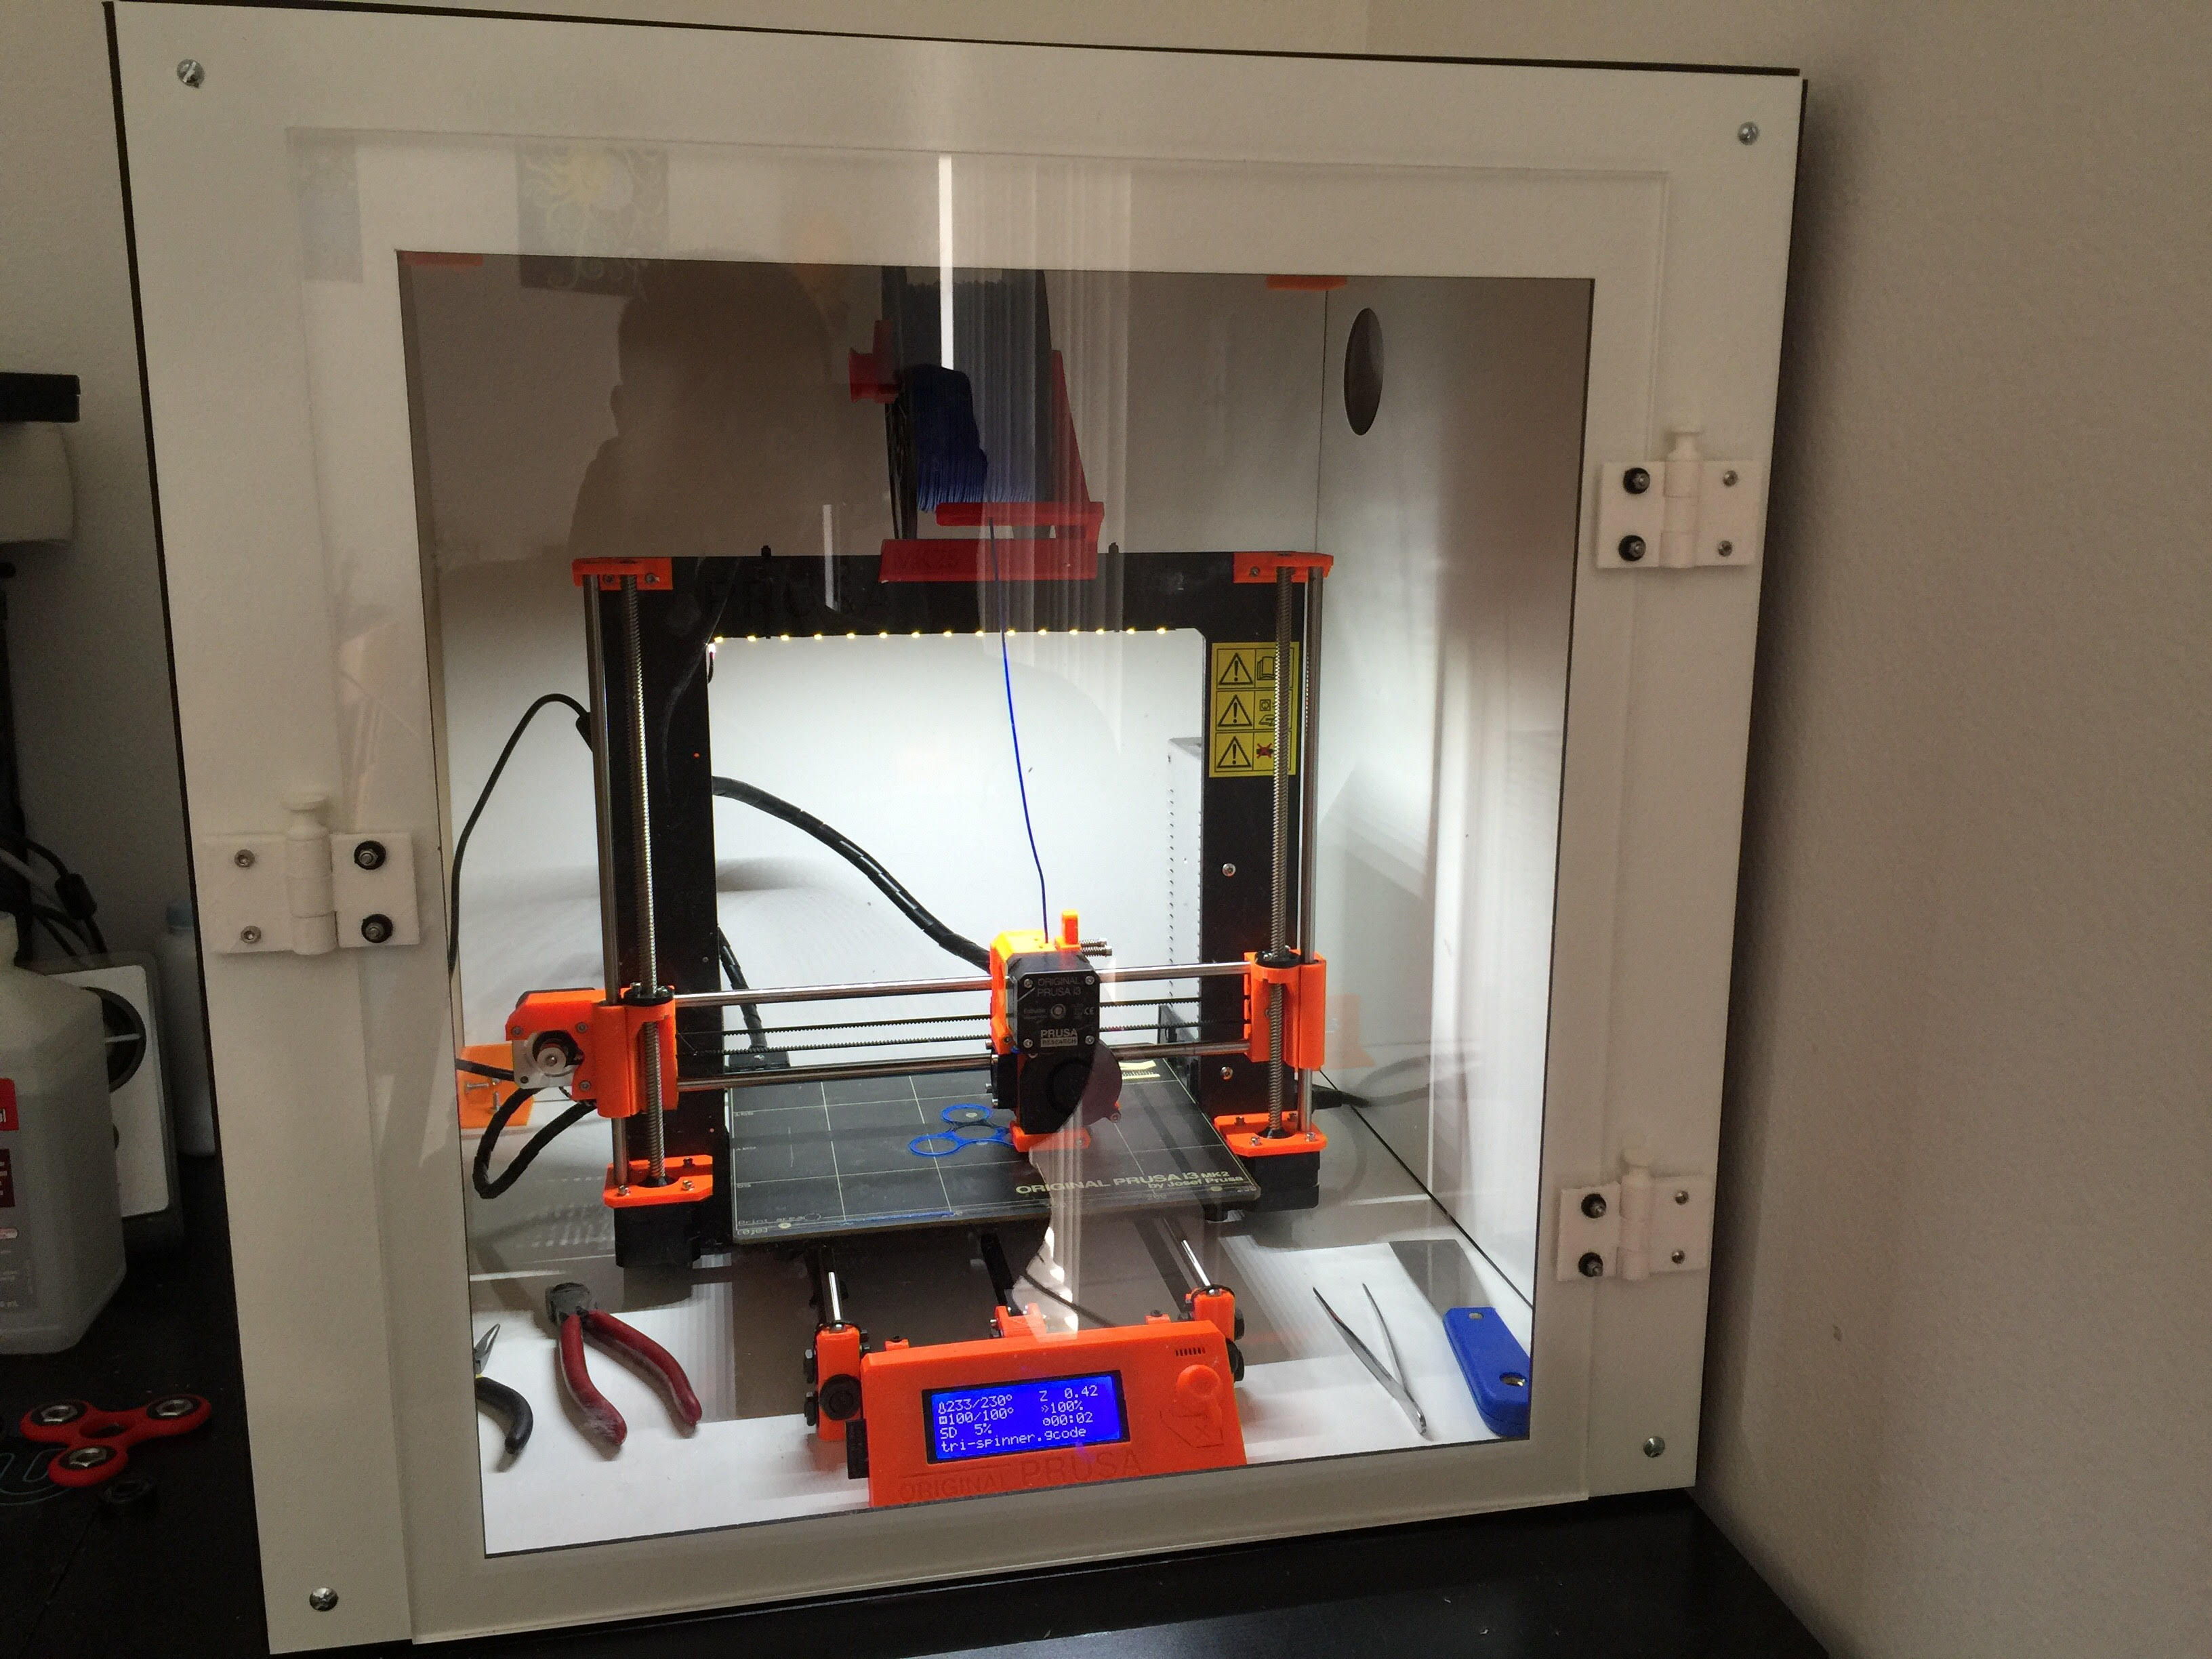
and last here is my enclosure... additional details on it made on the aforementioned link above


Philip G.
Original Prusa i3 MK2S
Turnigy Fabrikator Mini
Re: Success with printing ABS
Nice!! 2 questions:
1. how did you seal it?
2. is that a plexi panel in the front?
Re: Success with printing ABS
Nice!! 2 questions:
1. how did you seal it?
2. is that a plexi panel in the front?
1) Its not sealed yet, its a work in progress. What I have noticed however is just by stopping draft air and bringing the ambient temp up with the enclosure it definitely improved my ABS print quality.
2) Now it has one
Used the following printed latch/hinge, they work absolutely perfectly.
https://www.thingiverse.com/thing:2359570
I can use one as a latch and the other two as a hinge door or just remove the whole thing if I am printing PLA or TPU
NOTE: Yes I was printing spinners, got a couple to print on my queue... 😕
Philip G.
Original Prusa i3 MK2S
Turnigy Fabrikator Mini
Re: Success with printing ABS
That looks really nice. Do you have any concerns about the controller board, LCD, or PS, getting too warm in there? I just know that often electronics and excess heat don't mix, but maybe these are designed to take it. Or maybe I'm just thinking the ambient temp is getting hotter in there then it actually is.
ABS Problems
I am new to ABS, and am using 3D Solutech Natural Clear 1.75mm ABS 3D Printer Filament. My prints all come out the same. the bottom 1/4 of the print is off and takes an hour glass shape, while the top 3/4 is how it should print. This picture is a 40mm test cube. the top is accurate as hell and the bottom is all funky. I am slicing it with Simplify3d.
BED: 100c with ABS Juice
Nozzle: 225c with E3d sock
No Fan set
Rectilinear infill and exterior pattern
10 lines of brim
Printer semi-enclosed with cardboard.
PLEASE HELP ME EXPLAIN WHY ALL MY PRINTS COME OUT LIKE THIS WITH ABS.
Re: ABS Problems
I am new to ABS, and am using 3D Solutech Natural Clear 1.75mm ABS 3D Printer Filament. My prints all come out the same. the bottom 1/4 of the print is off and takes an hour glass shape, while the top 3/4 is how it should print. This picture is a 40mm test cube. the top is accurate as hell and the bottom is all funky. I am slicing it with Simplify3d.
BED: 100c with ABS Juice
Nozzle: 225c with E3d sock
No Fan set
Rectilinear infill and exterior pattern
10 lines of brim
Printer semi-enclosed with cardboard.
PLEASE HELP ME EXPLAIN WHY ALL MY PRINTS COME OUT LIKE THIS WITH ABS.
I have same problem with my parts. Have you found a solution yet?
Re: Success with printing ABS
I've read a lot about people ABS not sticking to the PEI
But I have the opposite problem. It welds so well to the PEI that is a problem to remove it. Sometimes even damaging the print or the PEI sheet. I started printing very far from the bed so it doesn't stick so well. Sometimes I use Windex to clean if I need even less adhesion if the parts have a lot of surface area touching the bed
I was kinda experiencing the same problem here, in the beginning I also couldn't get ABS to stick but then I noticed that if I upper the bed 0.3 to the nozzle closer than pla it does stick very well.
Then I had the problem that it did stick to well, so well that I kinda had to force it to much and was scared to misallign the bed by doing so. After a lot of troubleshooting and a few weeks later I replaced my PEI sheet and the problem was solved. My guess is that it was due to much texture on the pei sheet. (from scraping to much on it)
Re: Success with printing ABS
It almost sounds like if one lives in a state with a hotter than average climate an enclosure may not be needed; at least until winter rolls around. I've read and heard that printing ABS can be a stinky affair so I'd most likely be letting the printer run out in the back of the shop.
Six months out of the year it can get anywhere from 80 to 114 degrees outside. The high end of those temperature ranges is hotter than the build plate is supposed to get via the electrical current; isn't it? This could mean that I might be living in a place that's more conducive to printing with ABS.
I have yet to order my printer as of right now so in the mean time I'm doing my research for when I finally do take delivery of it. I need to be able to start printing as soon as I can with a minimal learning curve. This is how I did it before purchasing my CNC mill, Lathe, CAD software, CAM software and most of the other technical stuff I've had to learn over the years.
I'm self-taught on all those things so it creates a situation where the teacher is just as ignorant as the student. I can't begin to tell you how helpful it really is to find posts like this one from a guy who's been there and done that. It goes a long way toward taming that learning curve for me.
I'm hoping to have as much success with my ABS prints as you've achieved with yours.
Tim M.
Re: Success with printing ABS
Hi Tim,
You're getting your temperature units muddled. Your summer temps are 80-114°F. The heatbed is either 55°C for PLA or 100°C for ABS.
I don't do Fahrenheit, but I do know that 100°C is 212°F for some reason. 🙂
It's midwinter here in Australia and I can ABS in a spare bedroom with no enclosure. That room is downstairs by the garage and is about 16°C because I don't put the heating on down there. Except for really big items I have no problems really. Watch the bed temperature, if it starts dropping over time then that caused some warping I was seeing where the part peels up from the bed.
Thanks
Carl