Step by step assembly video for MK2?
Hello dear Prusa friends,
I could not resist and purchased the MK2 upgrade kit and this although my ABS printing experience was a huge fail with the MK1.
My MK1 came pre-assembled so I'm super nervous about doing the upgrade myself.
I'm asking because the guide at http://prusa3d.dozuki.com/c/Original_Prusa_i3_Plus_1.75_mm_to_MK2_upgrade is a joke in my eyes.
For example step 2 from http://prusa3d.dozuki.com/Guide/0.+Printer+disassembly/130 says the following.
"Using the supplied tools, disassemble the Heatbed and PSU."
And how *exactly* is that done? Which screws or zip ties do I have to remove and how?
Please bear with a noob here but I want to do the upgrade without destroying my printer 😀
Kind regards
b0rski
Re: Step by step assembly video for MK2?
Sorry Borsay. You have to pretty much trash your printer. To completensure the upgrade.
As far as I recall you have to retain some of the existing bolts as you dismember the pringer.
Every plastic part except the plastic safety cover on the powersupply. Needs to be changed..
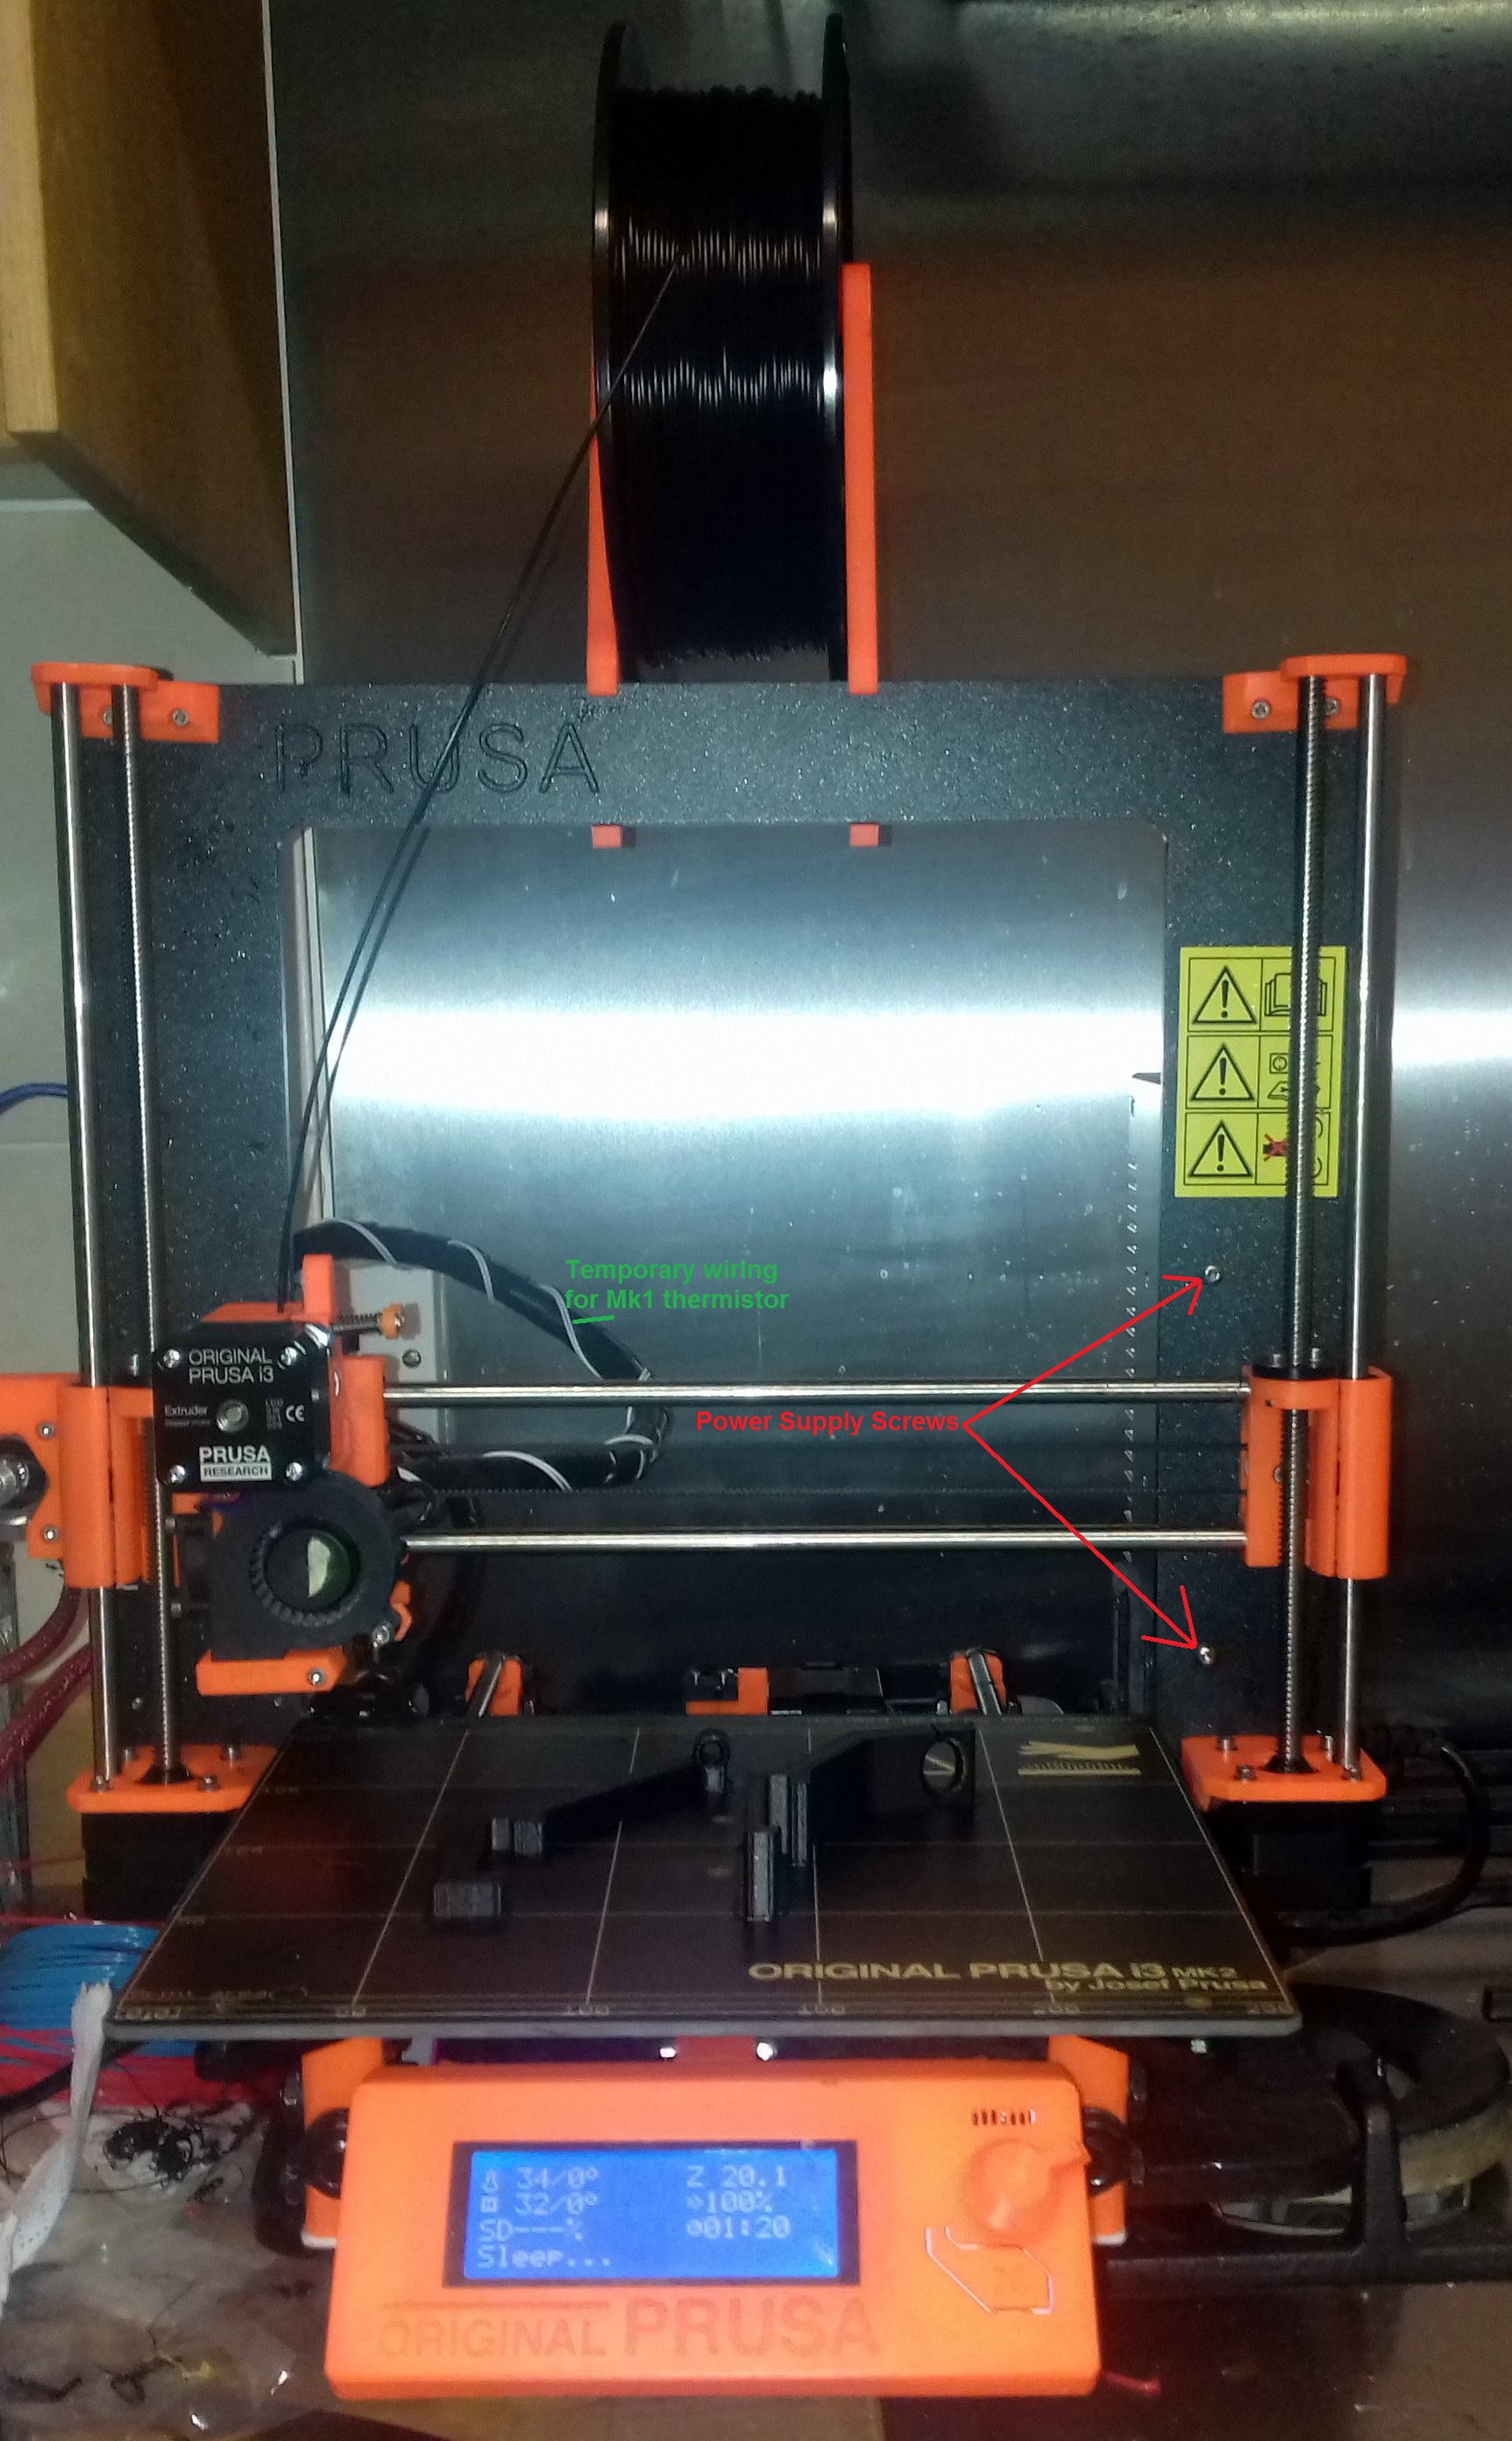
The powers up ply is held in 0lace by twour screws through the aluminium frame on the right hand side.
The heat bed cables should be released from the plastic wrapping. Then the heat bed cable and thermistor cabless can deliver released dromantic the processor board. Once the cable ties are cut. The heat bed should release fromy the machine best wished, Joan
I try to make safe suggestions,You should understand the context and ensure you are happy that they are safe before attempting to apply my suggestions, what you do, is YOUR responsibility.Location Halifax UK
Re: Step by step assembly video for MK2?
Who is Borsay?
What does completensure mean?
What's a pringer?
What do you mean by "The powers up ply is held in 0lace by twour screws"?
Admit it, you have been drinking before posting 😀
No, seriously. I don't mean to troll. I need a better user guide.
Sorry Borsay. You have to pretty much trash your printer. To completensure the upgrade.
As far as I recall you have to retain some of the existing bolts as you dismember the pringer.
Every plastic part except the plastic safety cover on the powersupply. Needs to be changed..
The powers up ply is held in 0lace by twour screws through the aluminium frame on the right hand side.
The heat bed cables should be released from the plastic wrapping. Then the heat bed cable and thermistor cabless can deliver released dromantic the processor board. Once the cable ties are cut. The heat bed should release fromy the machine best wished, Joan
Kind regards
b0rski
Re: Step by step assembly video for MK2?
Sorry, I was trying to write on a tiny Phone screen, battling with Autocorrect and Dyslexia,
No alcohol has passed my lips for a long time...
Honnest!
I will have another go...
Sorry b0rski. You have to pretty much trash your printer. To complete the upgrade.
As far as I recall you have to retain some of the existing Socket screws as you dismantle the Mk1 printer. you don't need to retain the washers.
Every plastic part (except the plastic safety cover on the power-supply). Needs to be changed for the new parts.. Oh, you can re use the Spool Holders as well 😆
The powersupply is held in place by two screws through the aluminium frame on the right hand side.
in the picture of my Mk1 - Mk2 upgrade printer, the red arrows show the power-supply screws...
The heat bed cables should be released from the plastic wrapping.
Then the heat bed cable and thermistor cabless can be released from the processor board.
Once the cable ties are cut. The heat bed should lift out from the Printer Y carriage.
the adjuster screws are only using the holes in the Y carriage, as guides, they are not screwed in place.
If you go to the Prusa Mk1 1.75mm construction manuals, and work backwards through them, you will be pretty much guided through the disassembly..
best wishes, Joan
I try to make safe suggestions,You should understand the context and ensure you are happy that they are safe before attempting to apply my suggestions, what you do, is YOUR responsibility.Location Halifax UK
