Replacing Hotend full kit on mk2
Due to a nozzle that snapped off due to my own incompetence I ended up ordering the full kit hotend so I have one less thing to screw up:
http://e3d-online.com/E3D-v6/Full-Kit/V6-hotend-Fully-Assembled-1.75mm-and-3mm
The closest instructions I see are for replacing the ptfe tube on the mk1:
http://manual.prusa3d.com/Guide/How+to+replace+PTFE+tube/82
Are those the instructions I should follow for replacing the hotend on the mk2? Can I replace the hotend while leaving the extruder body on the x-carriage? Is it necessary to remove the extruder body or can that be left on? Will the cables match the existing ones so I can just swap them out as well? Any gotchas I should look out for?
Although I did build the kit I feel pretty clueless about what to do. Hopefully when the hotend arrives tomorrow it'll make more sense.
Re: Replacing Hotend full kit on mk2
Hi
You could also order the kit and build it together ist quite easy.
Yes you can leave the extruder body on the carriage. Just unscre the part fan. then then cover - and pull it gently out from the top. Its eally easy.
Then loosen all the cables and zipties and replace the whole hotend.
See the manual for building the extruder to disassemble it.
Manuel
Re: Replacing Hotend full kit on mk2
Just unscre the part fan. then then cover - and pull it gently out from the top.
The cables must be released before attempting to remove the old extruder.
You could also save having to re-wire everything on the printer by re-using the heater and thermistor (assuming you already have the cartridge-type thermistor).
Peter
Please note: I do not have any affiliation with Prusa Research. Any advices given are offered in good faith. It is your responsibility to ensure that by following my advice you do not suffer or cause injury, damage…
Re: Replacing Hotend full kit on mk2
Just unscre the part fan. then then cover - and pull it gently out from the top.
The cables must be released before attempting to remove the old extruder.
You could also save having to re-wire everything on the printer by re-using the heater and thermistor (assuming you already have the cartridge-type thermistor).
Peter
I have one of the first mk2s so cartridge type will be different. I guess I need to unwrap the black coil to reinsert the new thermistor cable. In which case I need to remover the extruder motor I imagine. Thanks.
Re: Replacing Hotend full kit on mk2
No you don't need to remove the extruder motor.
Remove cable ties and wrapper for the extruder cable bundle. Remove fan and front cover. You should then be able to pull the hot end forward, wriggle it about a tad with a bit of downward pressure, it will release.
Replace the hot end into the housing in the same manner, route the cables, swap over the heater cable RAMBo plugs, re-wrap the cable bundle and cable tie as necessary.
Run a self-test to ensure all is OK.
Peter
Please note: I do not have any affiliation with Prusa Research. Any advices given are offered in good faith. It is your responsibility to ensure that by following my advice you do not suffer or cause injury, damage…
Re: Replacing Hotend full kit on mk2
No you don't need to remove the extruder motor.
Remove cable ties and wrapper for the extruder cable bundle. Remove fan and front cover. You should then be able to pull the hot end forward, wriggle it about a tad with a bit of downward pressure, it will release.
Replace the hot end into the housing in the same manner, route the cables, swap over the heater cable RAMBo plugs, re-wrap the cable bundle and cable tie as necessary.
Run a self-test to ensure all is OK.
Peter
Ok, great, thanks!
Re: Replacing Hotend full kit on mk2
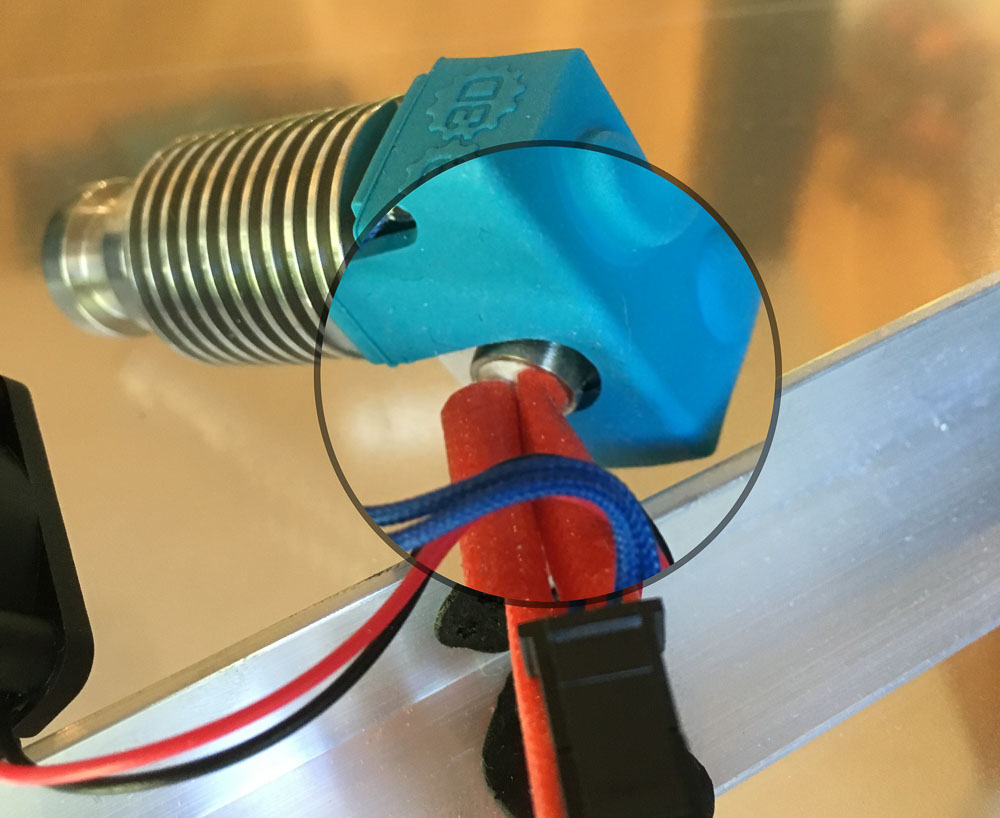
That's not the extruder cable; that's the heater cartridge...
You can simply swap over the cartridges (held in place with 1 screw on the underside) or swap over the cables, which you will have to do with the thermistor.
Peter
Please note: I do not have any affiliation with Prusa Research. Any advices given are offered in good faith. It is your responsibility to ensure that by following my advice you do not suffer or cause injury, damage…
Re: Replacing Hotend full kit on mk2
That's not the extruder cable; that's the heater cartridge...
You can simply swap over the cartridges (held in place with 1 screw on the underside) or swap over the cables, which you will have to do with the thermistor.
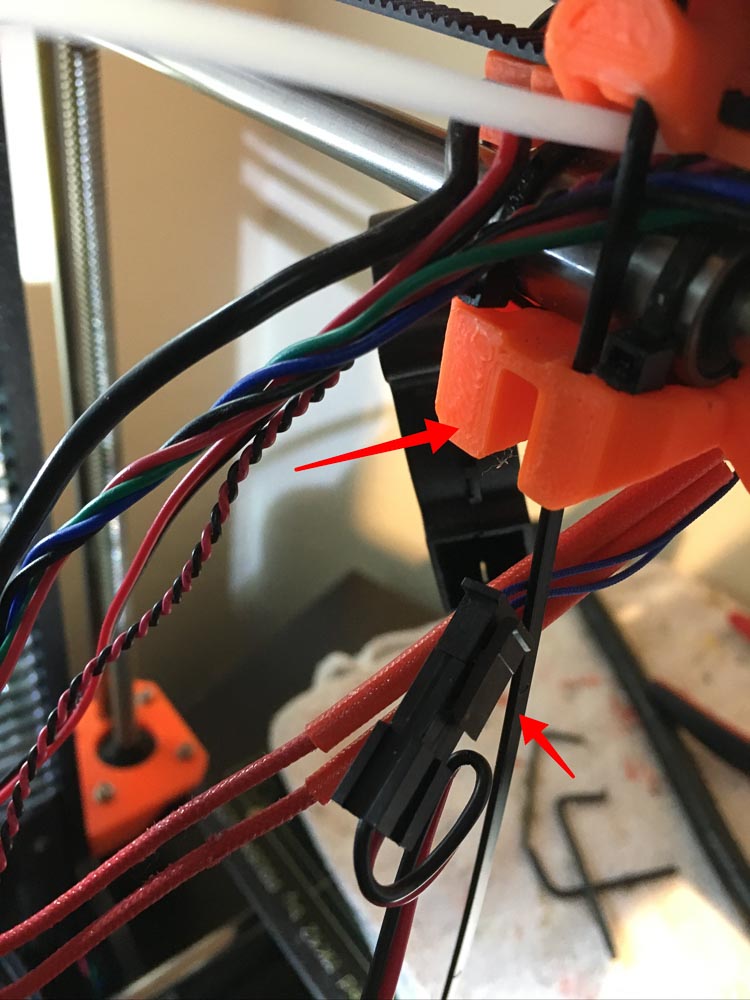
I see, so I unscrewed the cartridge in order to reuse the old heater cartridge cable. I'm using the new thermistor however, the cable comes with a connector now as explained in step 31/32 of the extruder mnual:
http://manual.prusa3d.com/Guide/5.+Extruder+Assembly/114
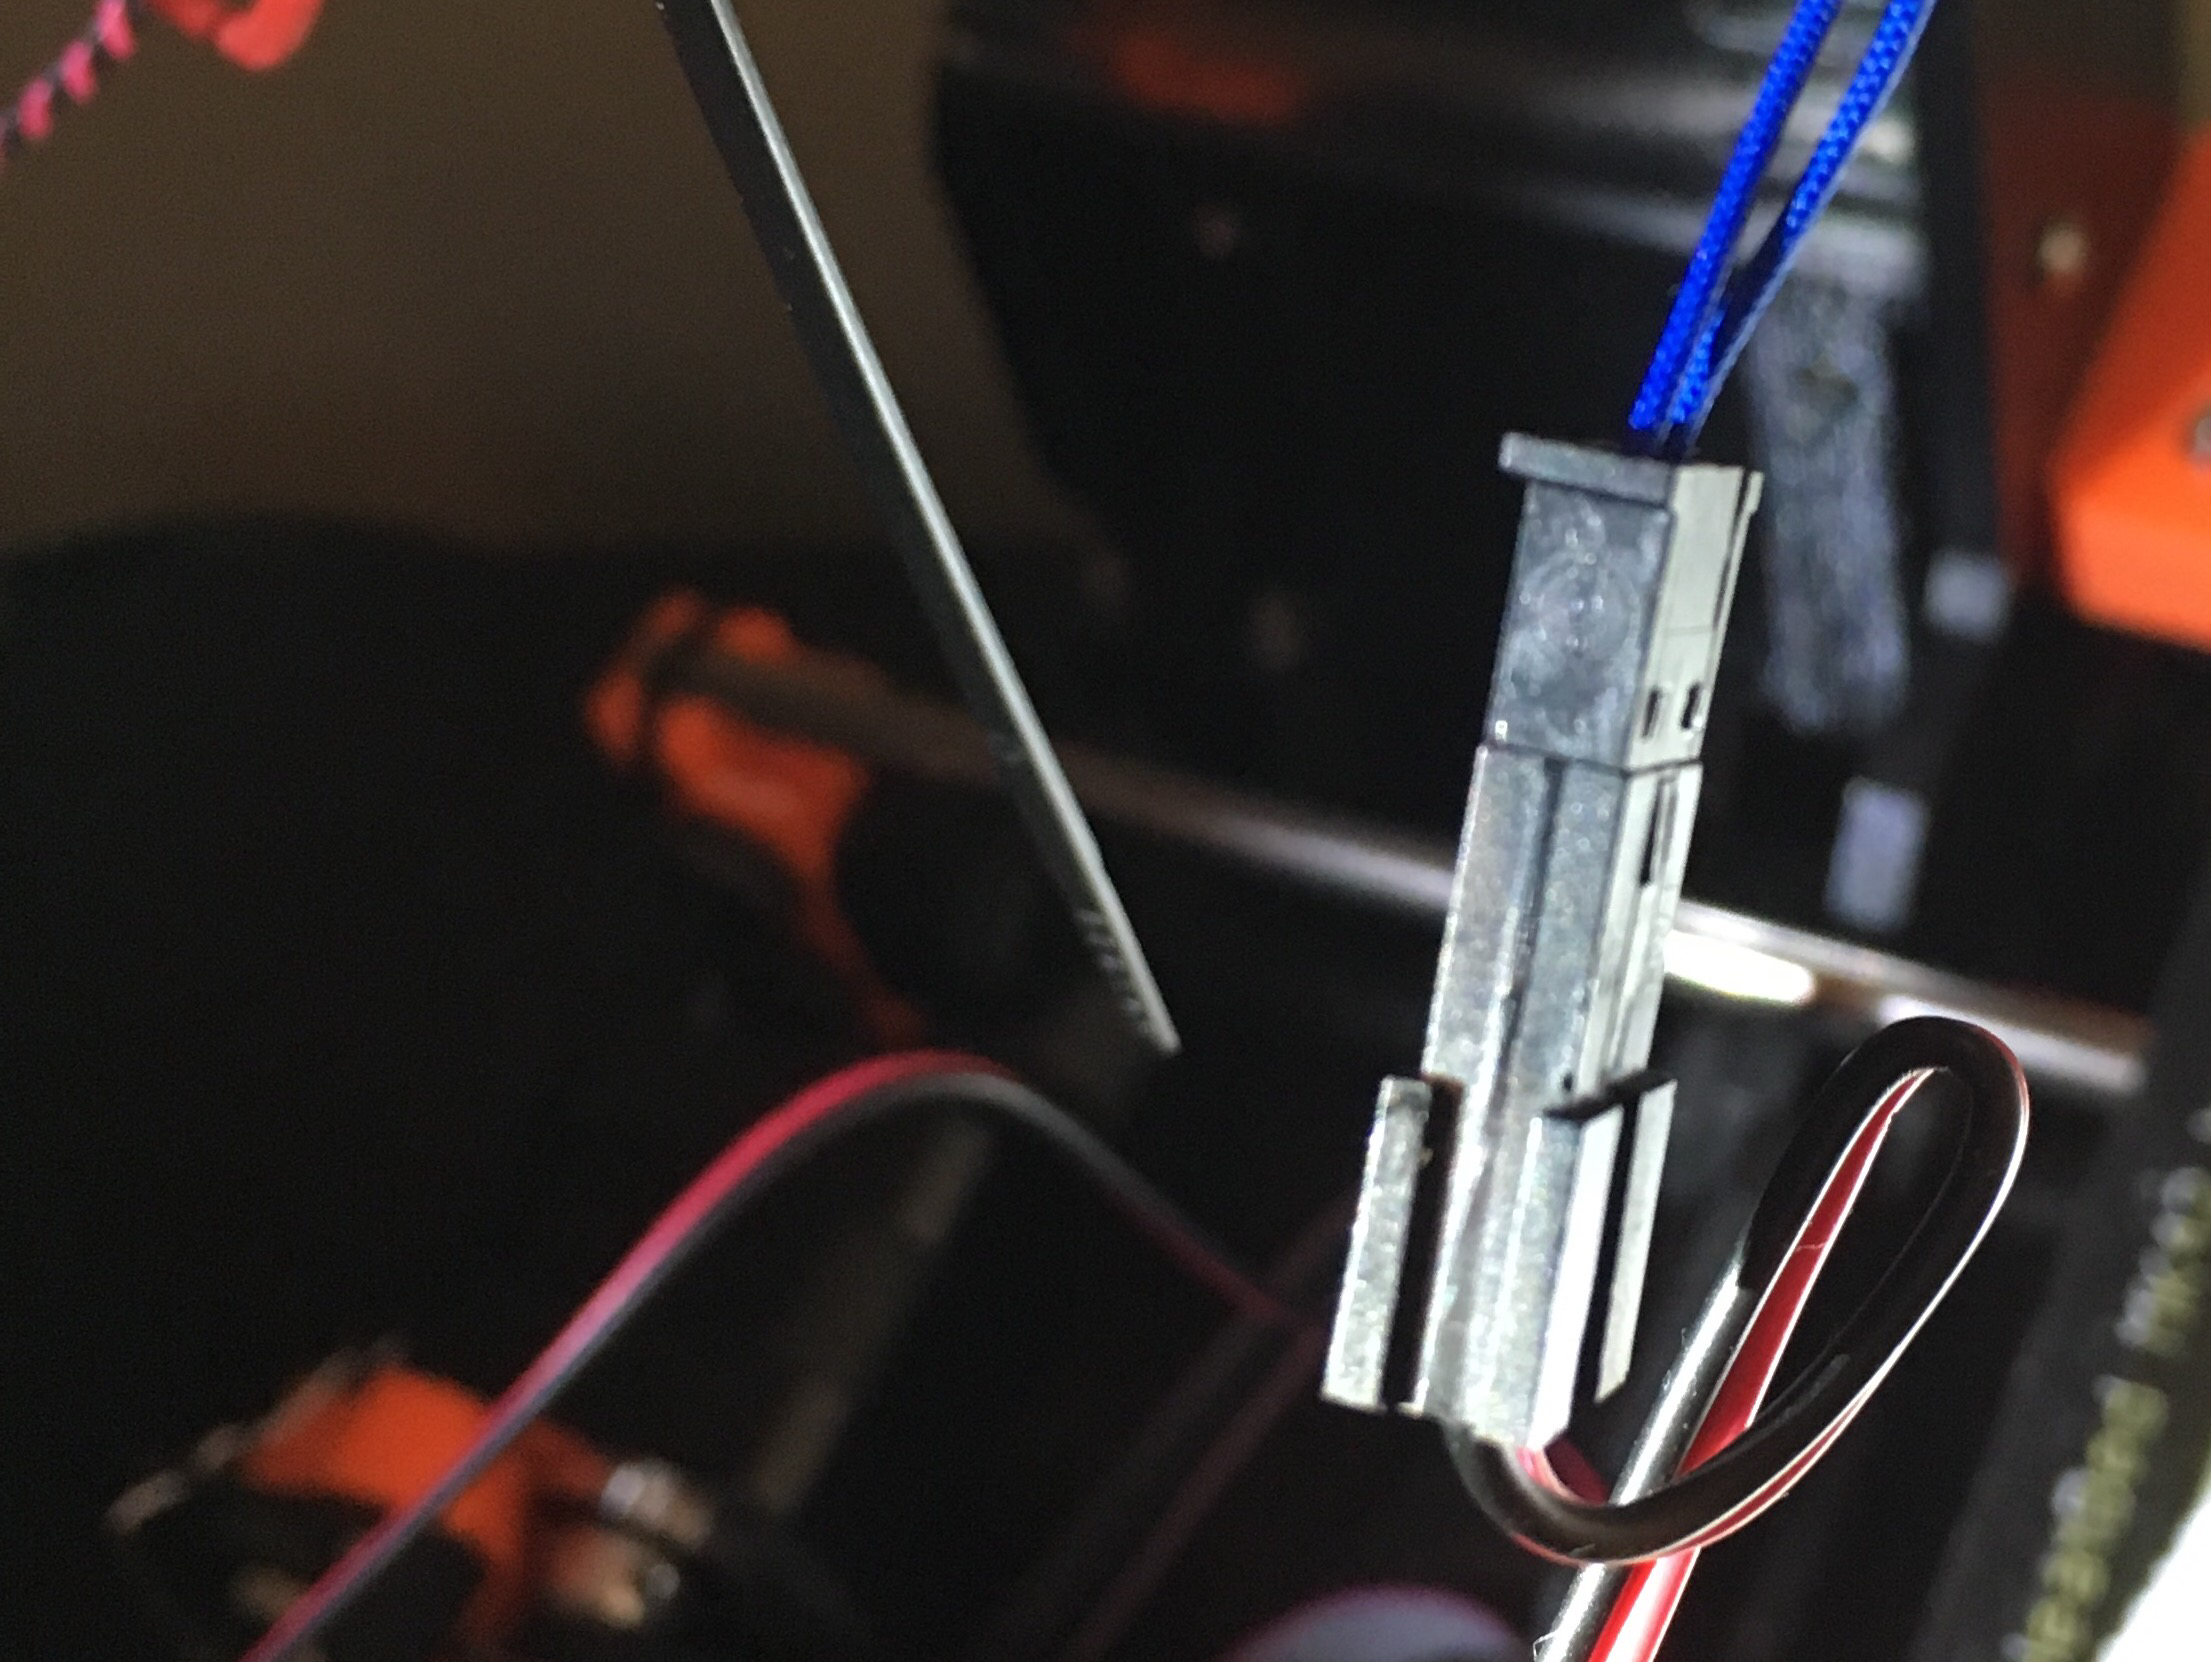
The photos in the assembly guide don't show the other side of the connector but it seems like the bulging part that locks the connector is cut in order it for it to fit. Otherwise I don't see anyway it can fit. There is simply not enough space. Do you think I should cut the connector lock piece so it fits? Or are there other options?
I'm suffering from the same dilemma you are. I just recently upgraded via the Block and Sock kit from E3D and for me, it was a bit of a struggle to get that connector to not drag across my prints. I'm planning on redesigning the X-Carriage to better handle the connector and have it be tucked away in a kind of "snap together" fashion. I don't want to cut the tab off because of what the comments stated about the connection getting loose. The plan for my design will also allow for some sort of plunger to push against the tab so that if you wanted; you could release the connection without removing the whole connector from the X-Carriage.
and an 8 inch (200mm) or greater caliper is recommended.
Re: Replacing Hotend full kit on mk2
Interesting. What if I cut the tab and use loctite threadlocker like for the pinda probe so it would be stuck together but could be removed with force?
That's not the extruder cable; that's the heater cartridge...
You can simply swap over the cartridges (held in place with 1 screw on the underside) or swap over the cables, which you will have to do with the thermistor.
I see, so I unscrewed the cartridge in order to reuse the old heater cartridge cable. I'm using the new thermistor however, the cable comes with a connector now as explained in step 31/32 of the extruder mnual:
http://manual.prusa3d.com/Guide/5.+Extruder+Assembly/114
The photos in the assembly guide don't show the other side of the connector but it seems like the bulging part that locks the connector is cut in order it for it to fit. Otherwise I don't see anyway it can fit. There is simply not enough space. Do you think I should cut the connector lock piece so it fits? Or are there other options?
I'm suffering from the same dilemma you are. I just recently upgraded via the Block and Sock kit from E3D and for me, it was a bit of a struggle to get that connector to not drag across my prints. I'm planning on redesigning the X-Carriage to better handle the connector and have it be tucked away in a kind of "snap together" fashion. I don't want to cut the tab off because of what the comments stated about the connection getting loose. The plan for my design will also allow for some sort of plunger to push against the tab so that if you wanted; you could release the connection without removing the whole connector from the X-Carriage.
Re: Replacing Hotend full kit on mk2
Interesting. What if I cut the tab and use loctite threadlocker like for the pinda probe so it would be stuck together but could be removed with force?
I read somewhere that Loctite is not recommended to be used with plastics.
and an 8 inch (200mm) or greater caliper is recommended.
Re: Replacing Hotend full kit on mk2
Interesting. What if I cut the tab and use loctite threadlocker like for the pinda probe so it would be stuck together but could be removed with force?
I read somewhere that Loctite is not recommended to be used with plastics.
Well, I did it, I cut off the tab cleanly, added a tiny dab of superglue to the top edge. I wonder if it'll work out... thanks.
Re: Replacing Hotend full kit on mk2
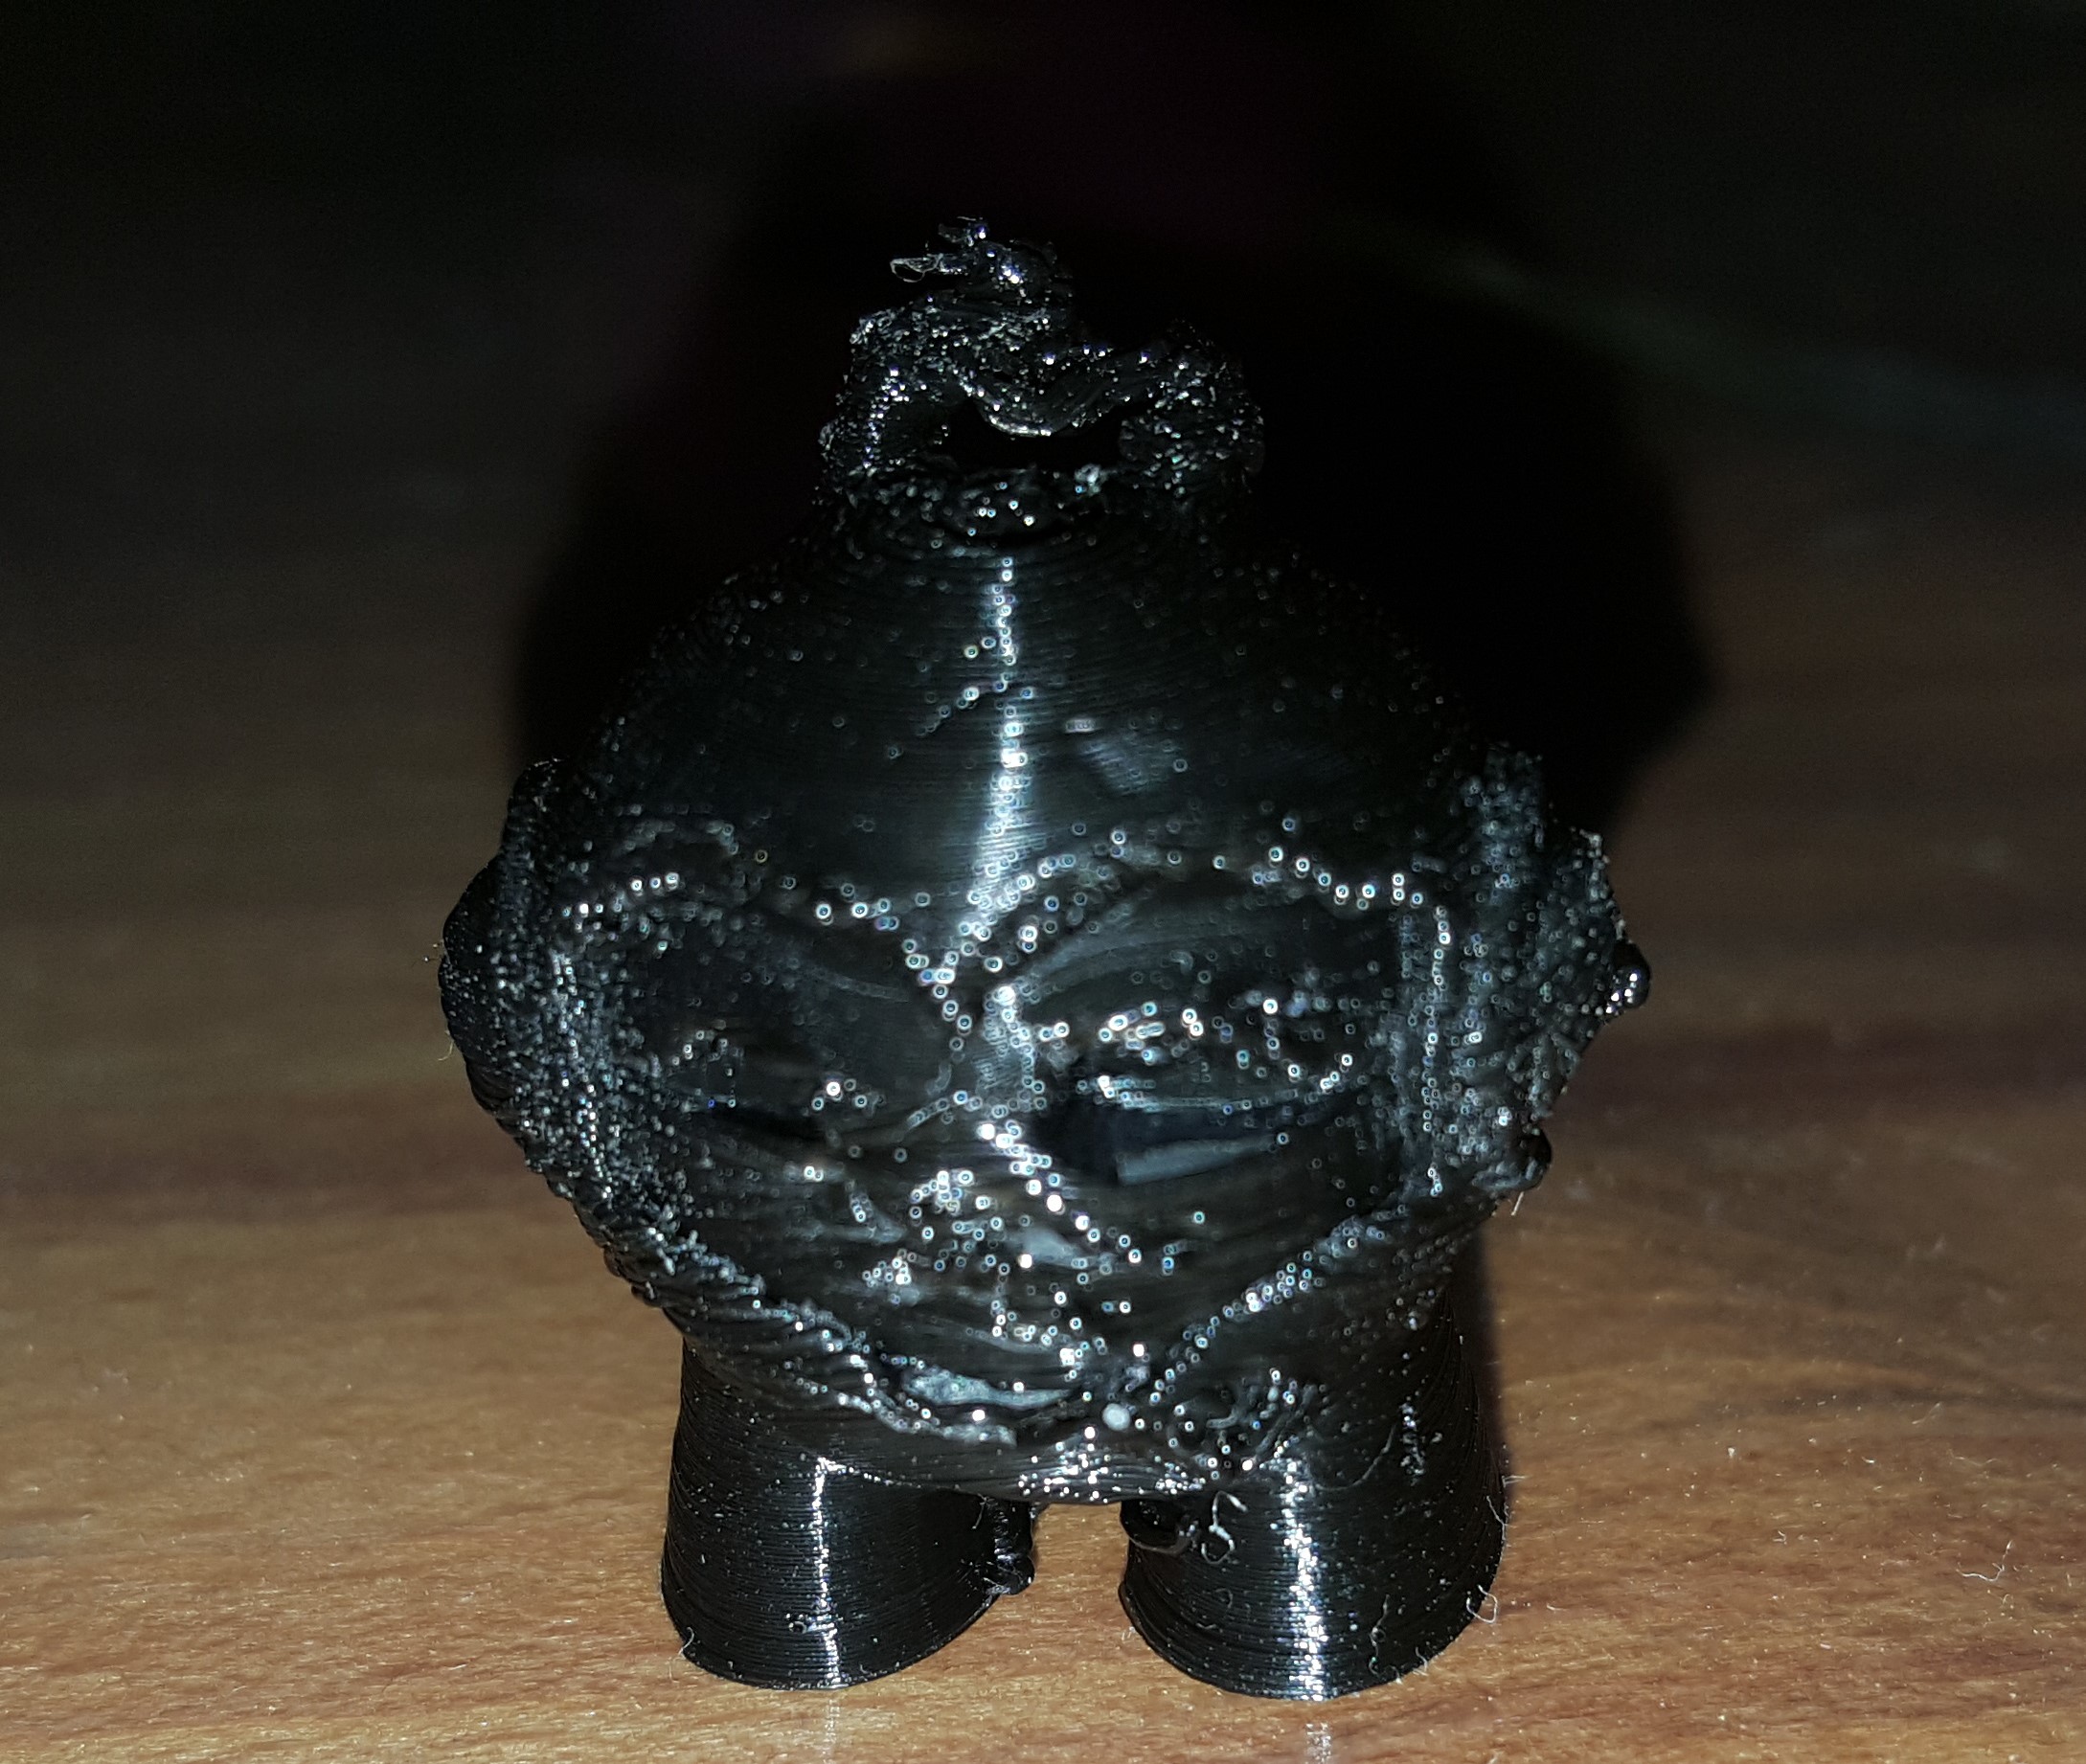
It turned out great so far. I can't believe how degraded my .4 brass nozzle was even though I exclusively use PLA filament. The difference is shocking that to me I thought maybe a .25 nozzle was being used but really the old nozzle got degraded to something like a .8 nozzle I guess. I have no idea why. But next time I'm switching to a hardened nozzle.
Re: Replacing Hotend full kit on mk2
Hardened nozzle can have completely different heat characteristics, so you do switch, you may need to change a few settings.
Peter
Please note: I do not have any affiliation with Prusa Research. Any advices given are offered in good faith. It is your responsibility to ensure that by following my advice you do not suffer or cause injury, damage…
Re: Replacing Hotend full kit on mk2
Hardened nozzle can have completely different heat characteristics, so you do switch, you may need to change a few settings.
Peter
Good to know, I guess if it's not one thing it's another. Thanks!
Re: Replacing Hotend full kit on mk2
It turned out great so far. I can't believe how degraded my .4 brass nozzle was even though I exclusively use PLA filament. The difference is shocking that to me I thought maybe a .25 nozzle was being used but really the old nozzle got degraded to something like a .8 nozzle I guess. I have no idea why. But next time I'm switching to a hardened nozzle.
I personally am going to be getting a tungsten nozzle. It's hard and conducts heat well. Currently only 3 days left on the campaign.
and an 8 inch (200mm) or greater caliper is recommended.
Re: Replacing Hotend full kit on mk2
I personally am going to be getting a tungsten nozzle. It's hard and conducts heat well. Currently only 3 days left on the campaign.
Don't know that I would be willing to wait 3 months for a $25 part.


