Small raised text won't slice in Slic3r
I've modeled a fun business card for a colleague who is leaving. The raised text won't slice properly in Slic3r, at 0.20 mm layers, MMU. I have the "Detect thin walls" option checked (I had problems with raised text before and had to check that option to make it work) but it is slicing with holes in the text. See the attached screenshots of the sliced file and the 3D model. The card is standard business card size (2x3.5").
I modeled in Fusion 360, exported each file as an *.stl and then had to scale up by 2540% in Slic3r to get it the right size.
Any help is appreciated!! I only have a few more days to get this done before he leaves. Thanks!
Re: Small raised text won't slice in Slic3r
Hi Elizabeth,
use bold text, slic3r won't respond to artifacts that are too small...
also thin, raised text, gets knocked off easily.
regards Joan
I try to make safe suggestions,You should understand the context and ensure you are happy that they are safe before attempting to apply my suggestions, what you do, is YOUR responsibility.Location Halifax UK
Re: Small raised text won't slice in Slic3r
another option, is to model the text as a separate entity,
set up slic3r with 2 extruders, and tool change gcode of M600
then use the text as a modifier for the card, define the background as extruder1 and the text as extruder 2 and begin printing
might be something like this
I try to make safe suggestions,You should understand the context and ensure you are happy that they are safe before attempting to apply my suggestions, what you do, is YOUR responsibility.Location Halifax UK
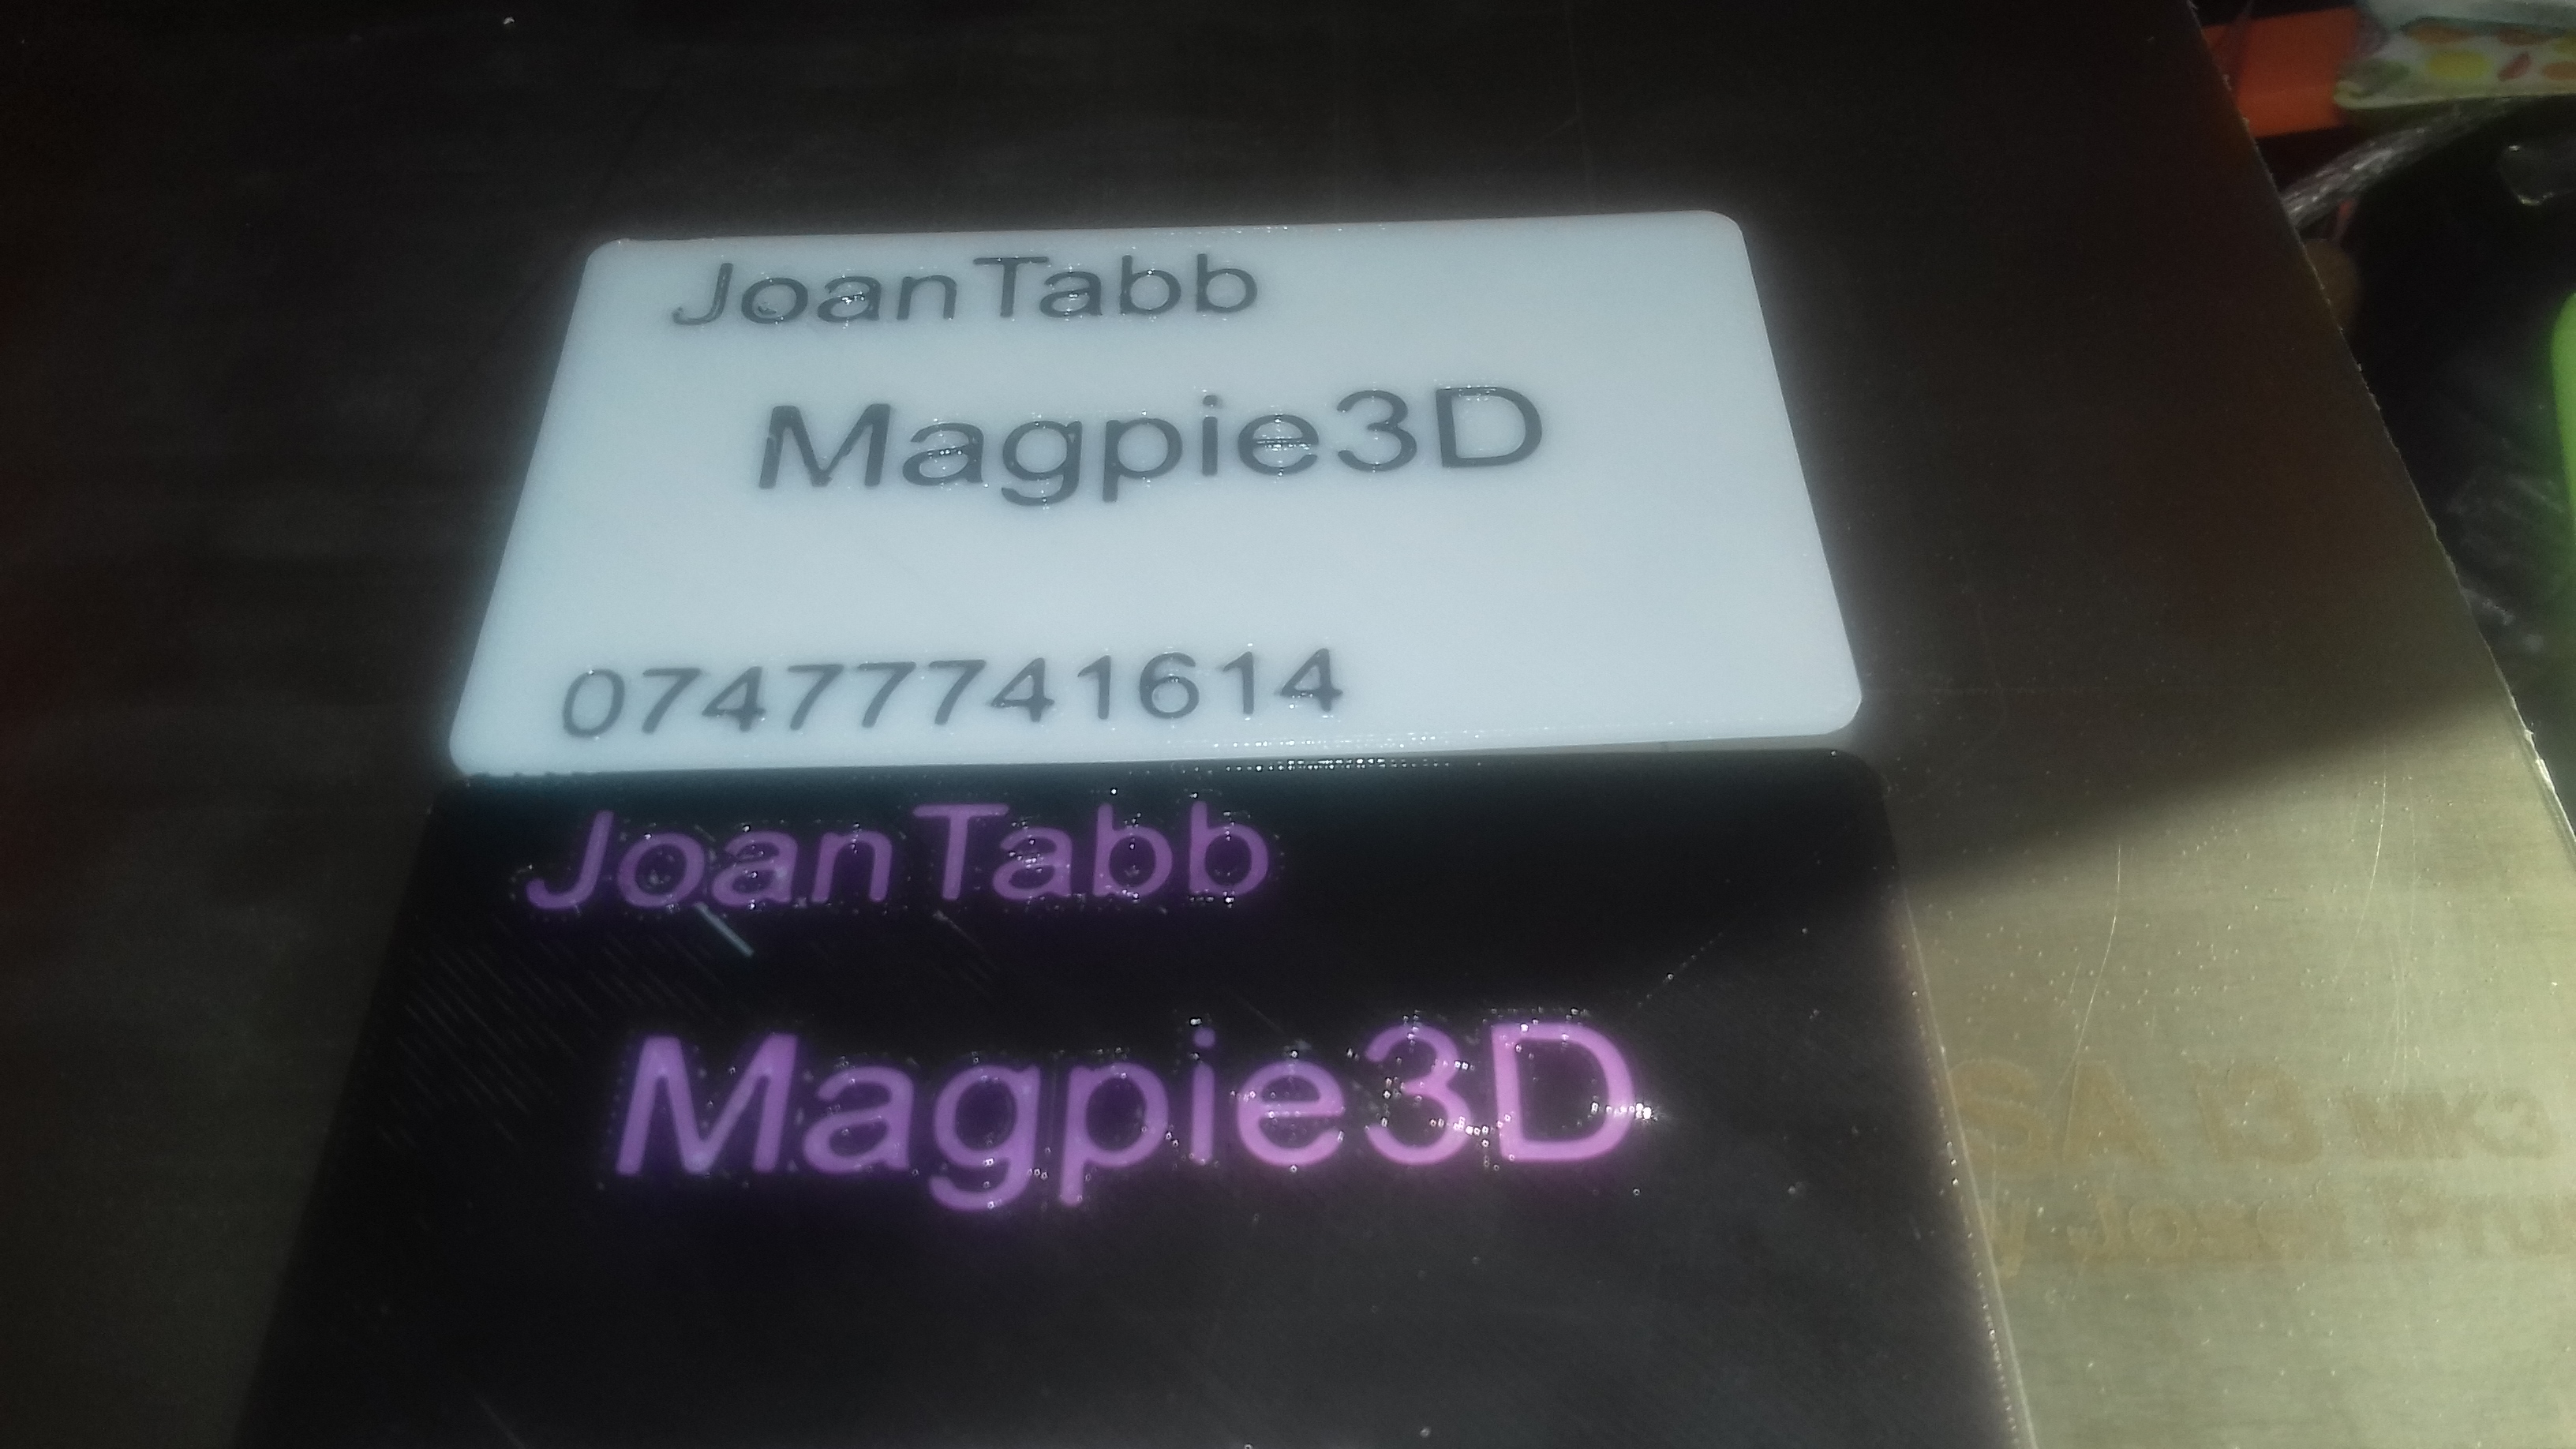
Re: Small raised text won't slice in Slic3r
You have the MMU, so you can embed the text into the "card". To get a clean finish, you need at least 3 layers of text and preferably 5 at 0.2mm layer height.
You can also get a really nice flat finish (if your PEI is in good order) by printing it upside down (with the text on the PEI). Doing that also reduces filament waste.
If you do want raised text, then you will have to print with text on the top and again, embedding the text into the "card" and raising it 2 or 3 layers above the card surface will ensure nothing gets "knocked off", but it will still look and feel raised.
You need to check what extrusion width your perimeters are set at an then ensure that your letter lines are at least twice that (at least 0.8mm, more likely 0.9mm). If your letter line width is not quite right, then you may get small gaps between perimeters or they will not print nicely.
This is one reason I use KISS; you set the line width (for me, 0.4mm) and it's the same for everything so it's easy to calculate. Any gaps will usually be filled with crown paths (if your line width is 1mm, you get the two perimeters at 0.4 and a crown path in the middle of 0.2mm).
Peter
Please note: I do not have any affiliation with Prusa Research. Any advices given are offered in good faith. It is your responsibility to ensure that by following my advice you do not suffer or cause injury, damage…