Re: Hyperfine bed leveling?
Ok, I'm a bit confused now.
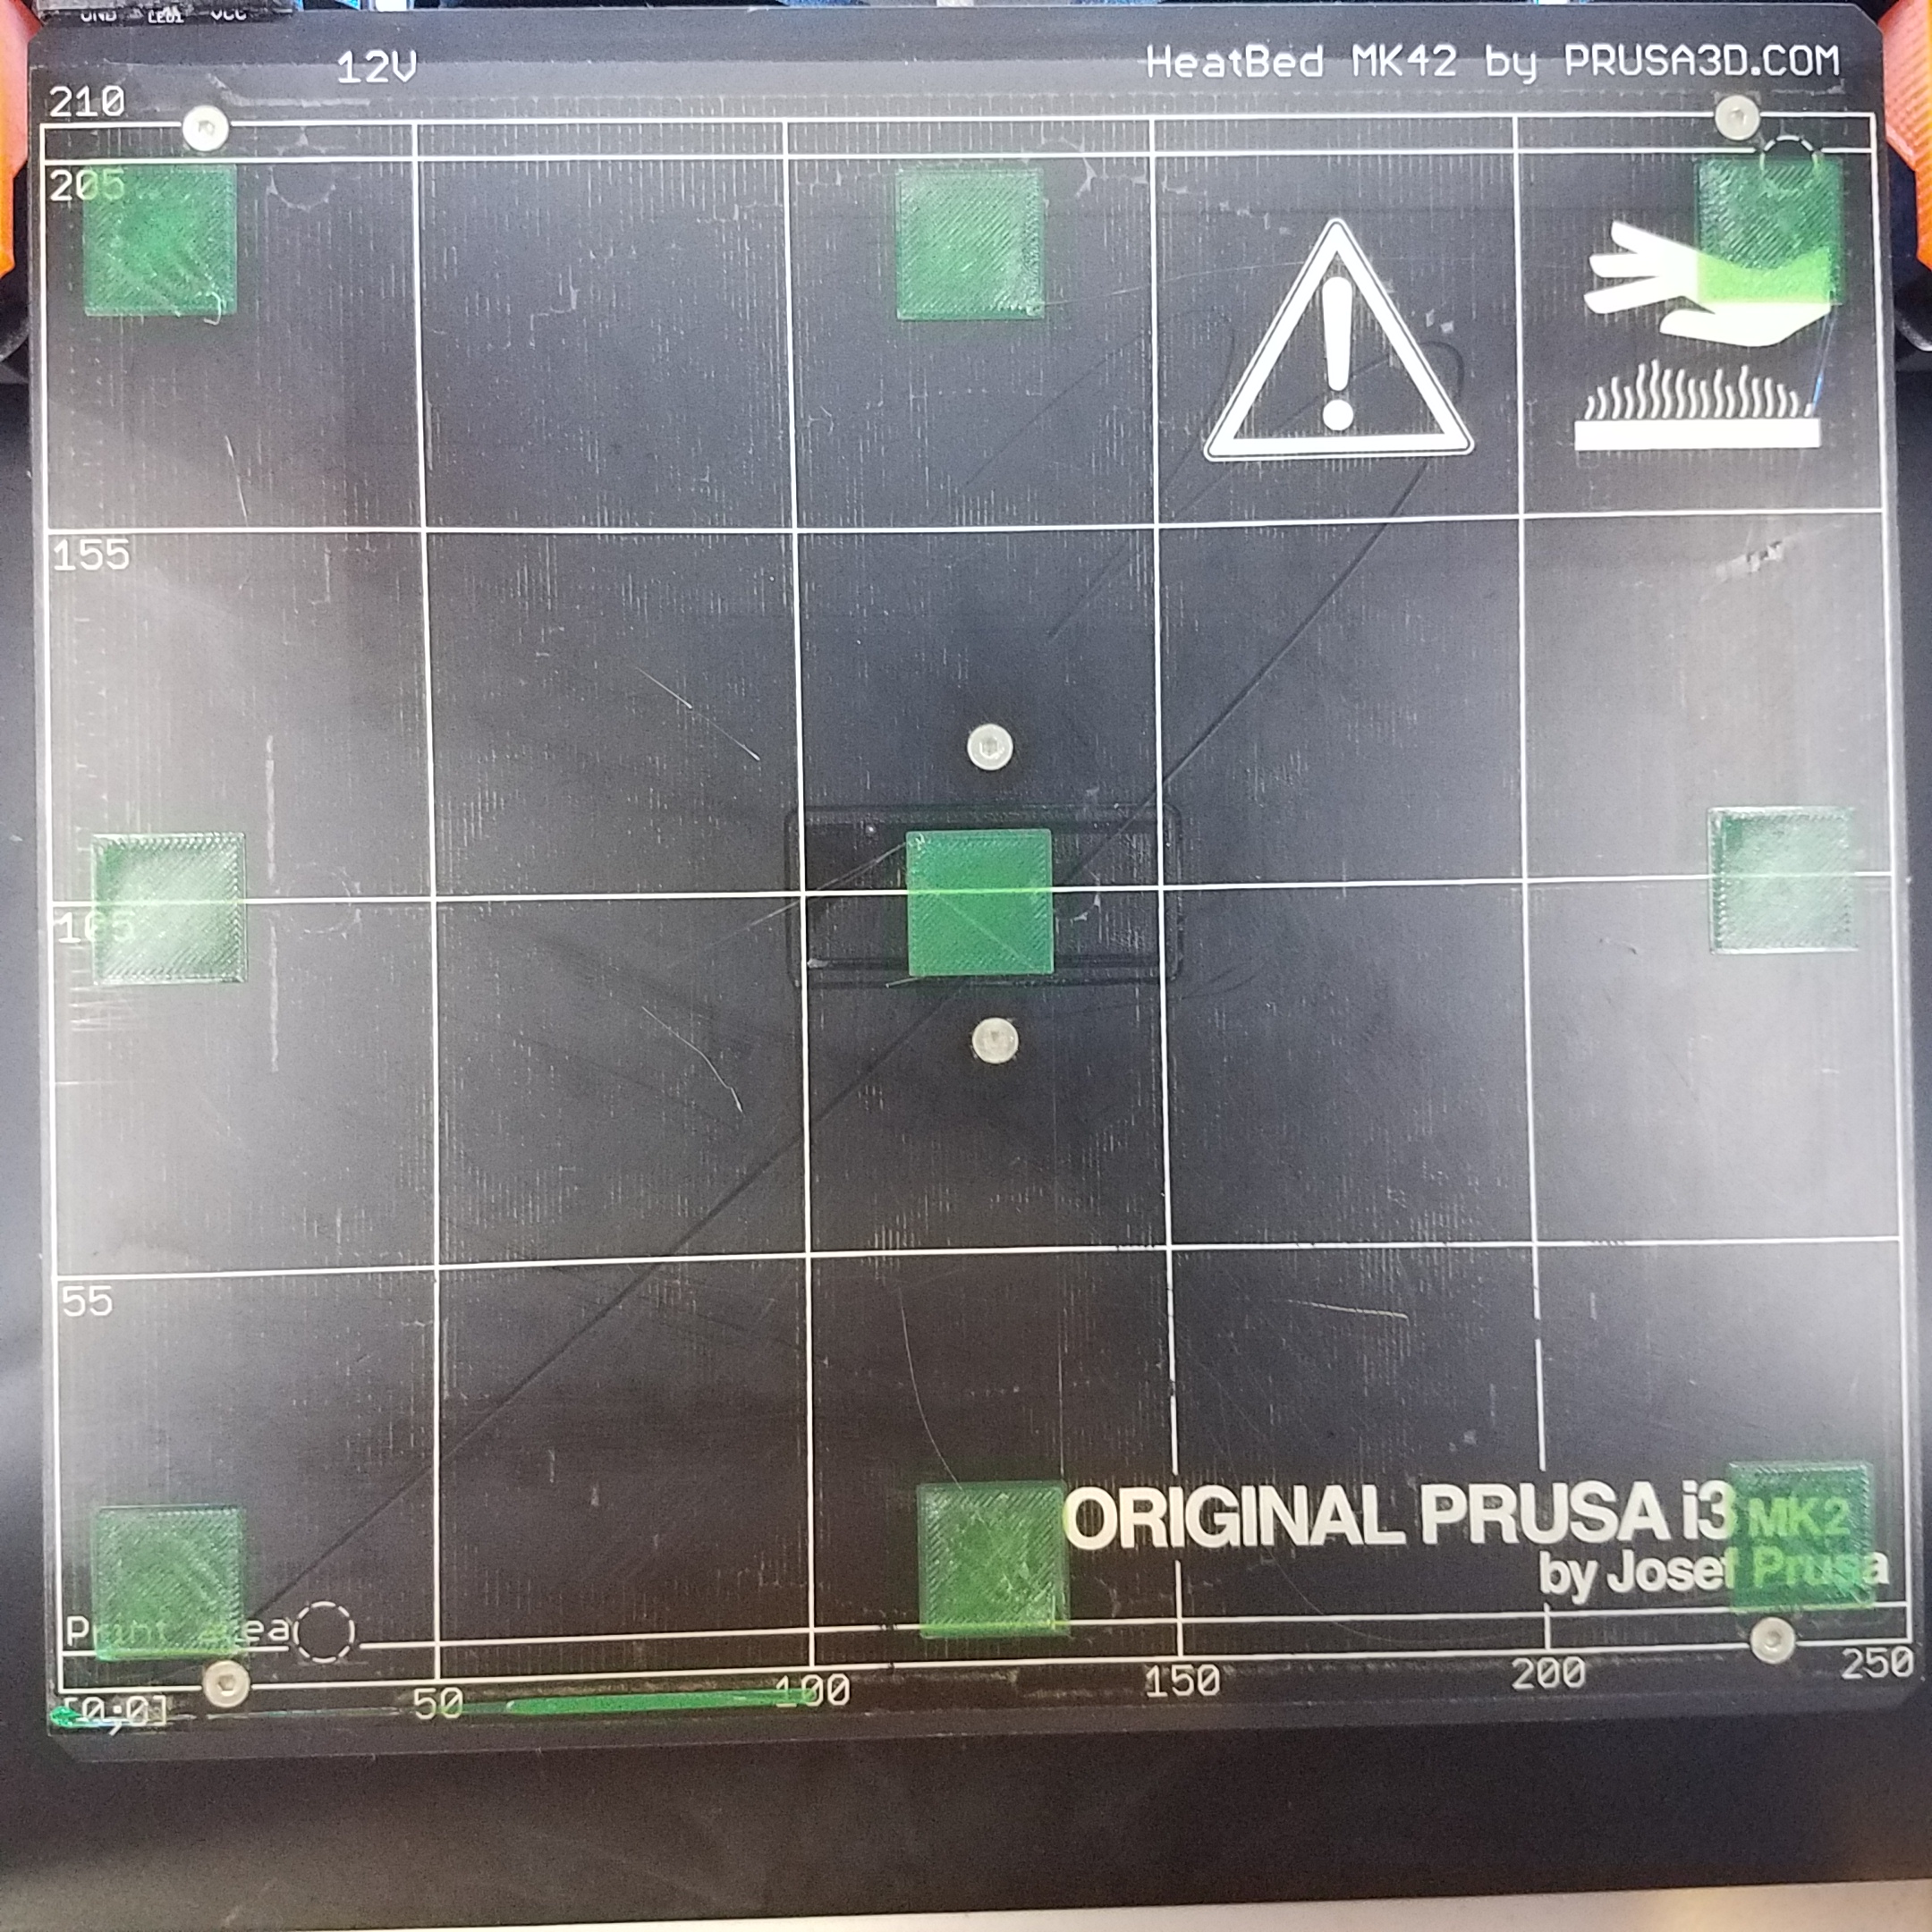
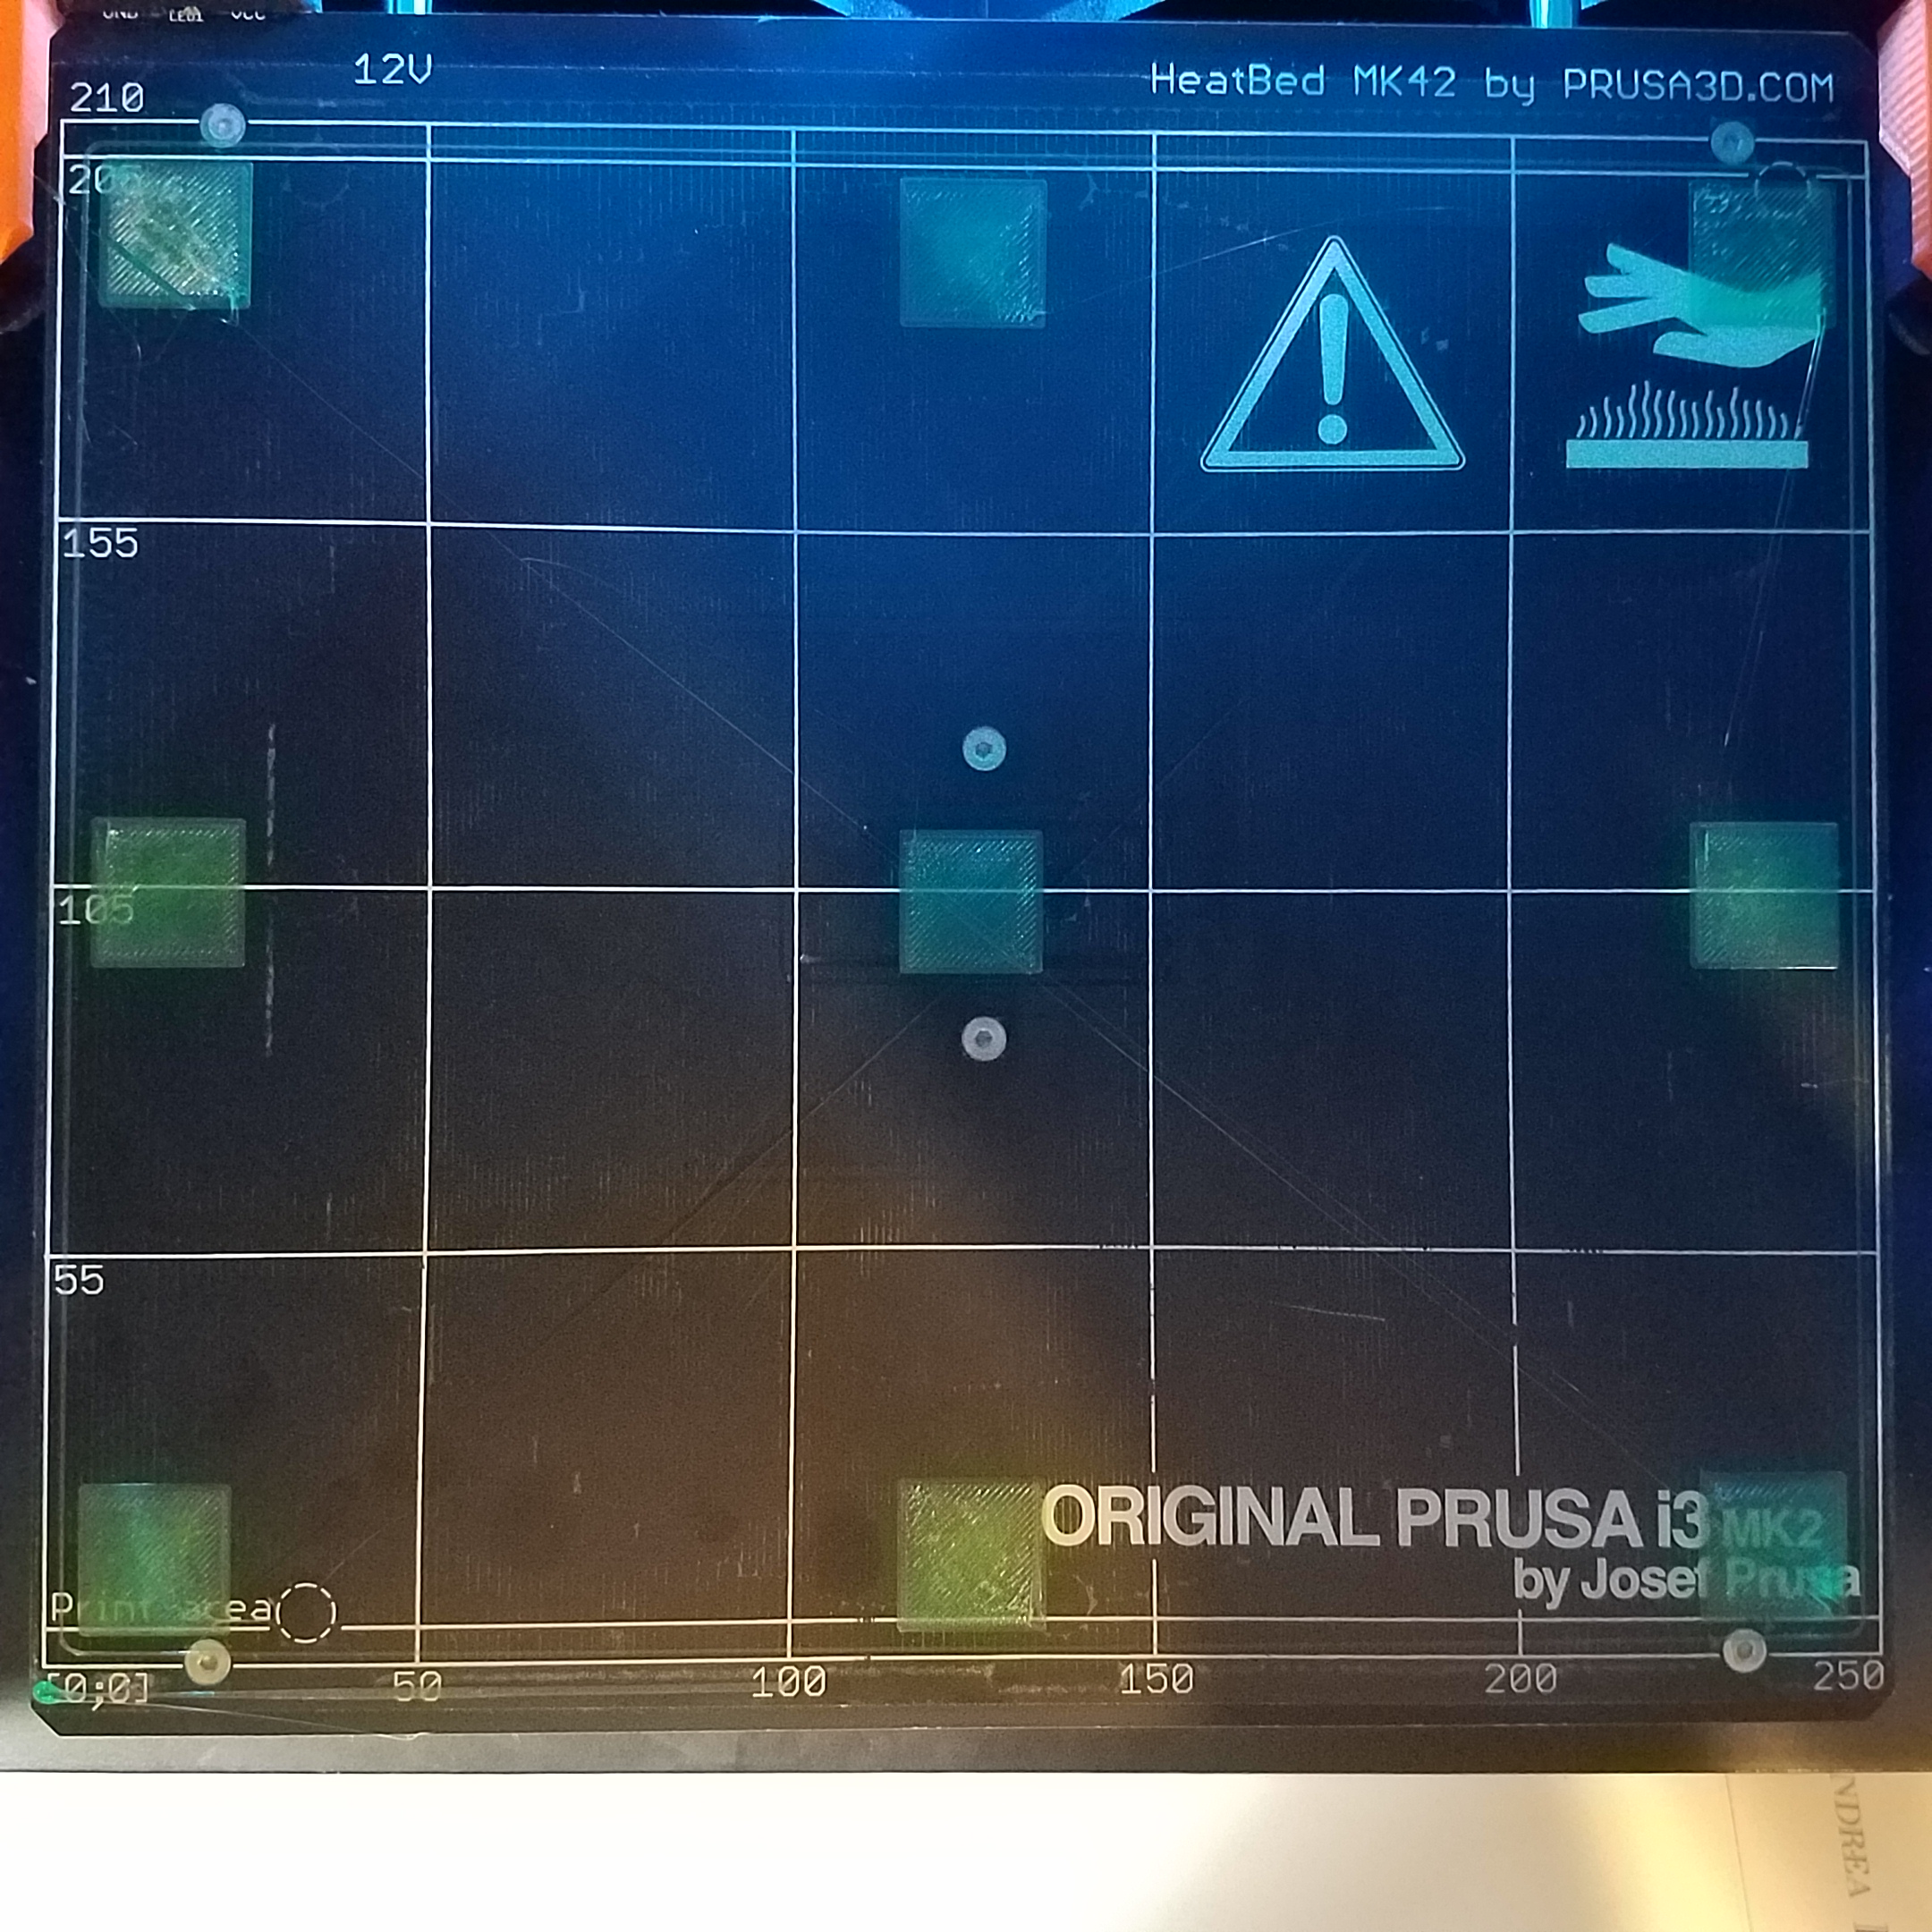
I printed out a 9-square test to check each of the areas on the bed (after resetting all values for bed leveling to get a baseline to work from), and was getting the same awful results:
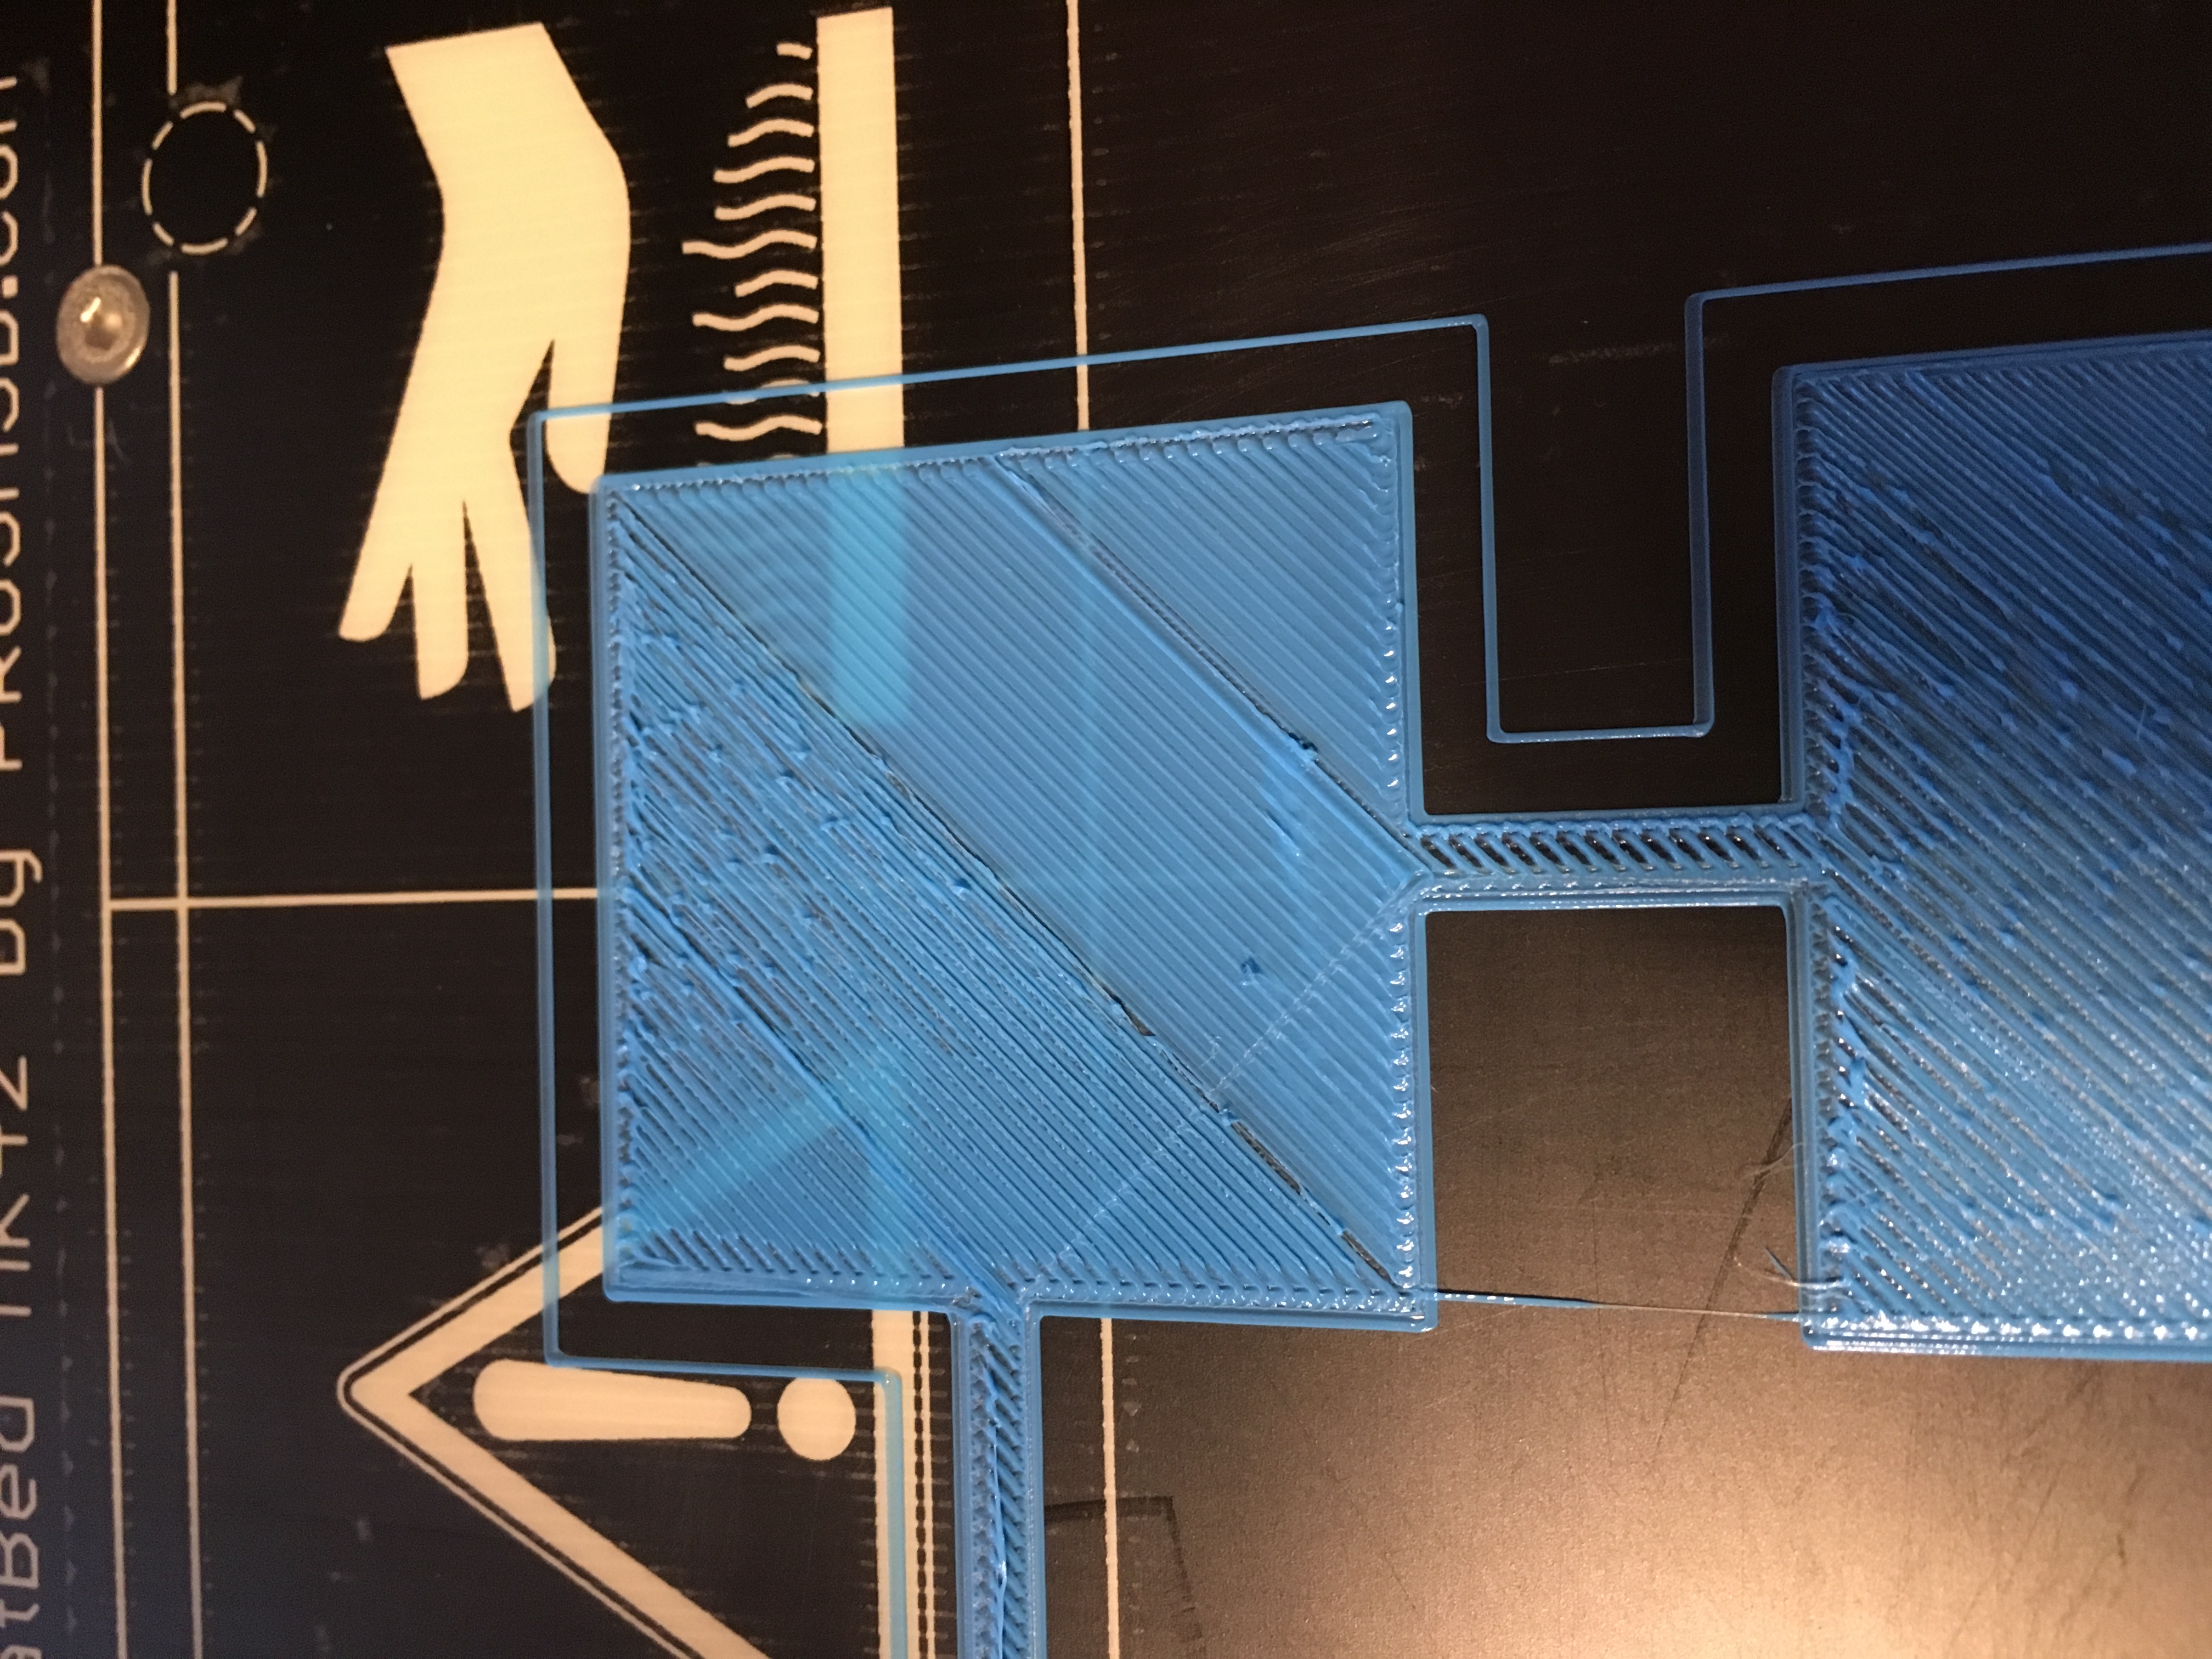
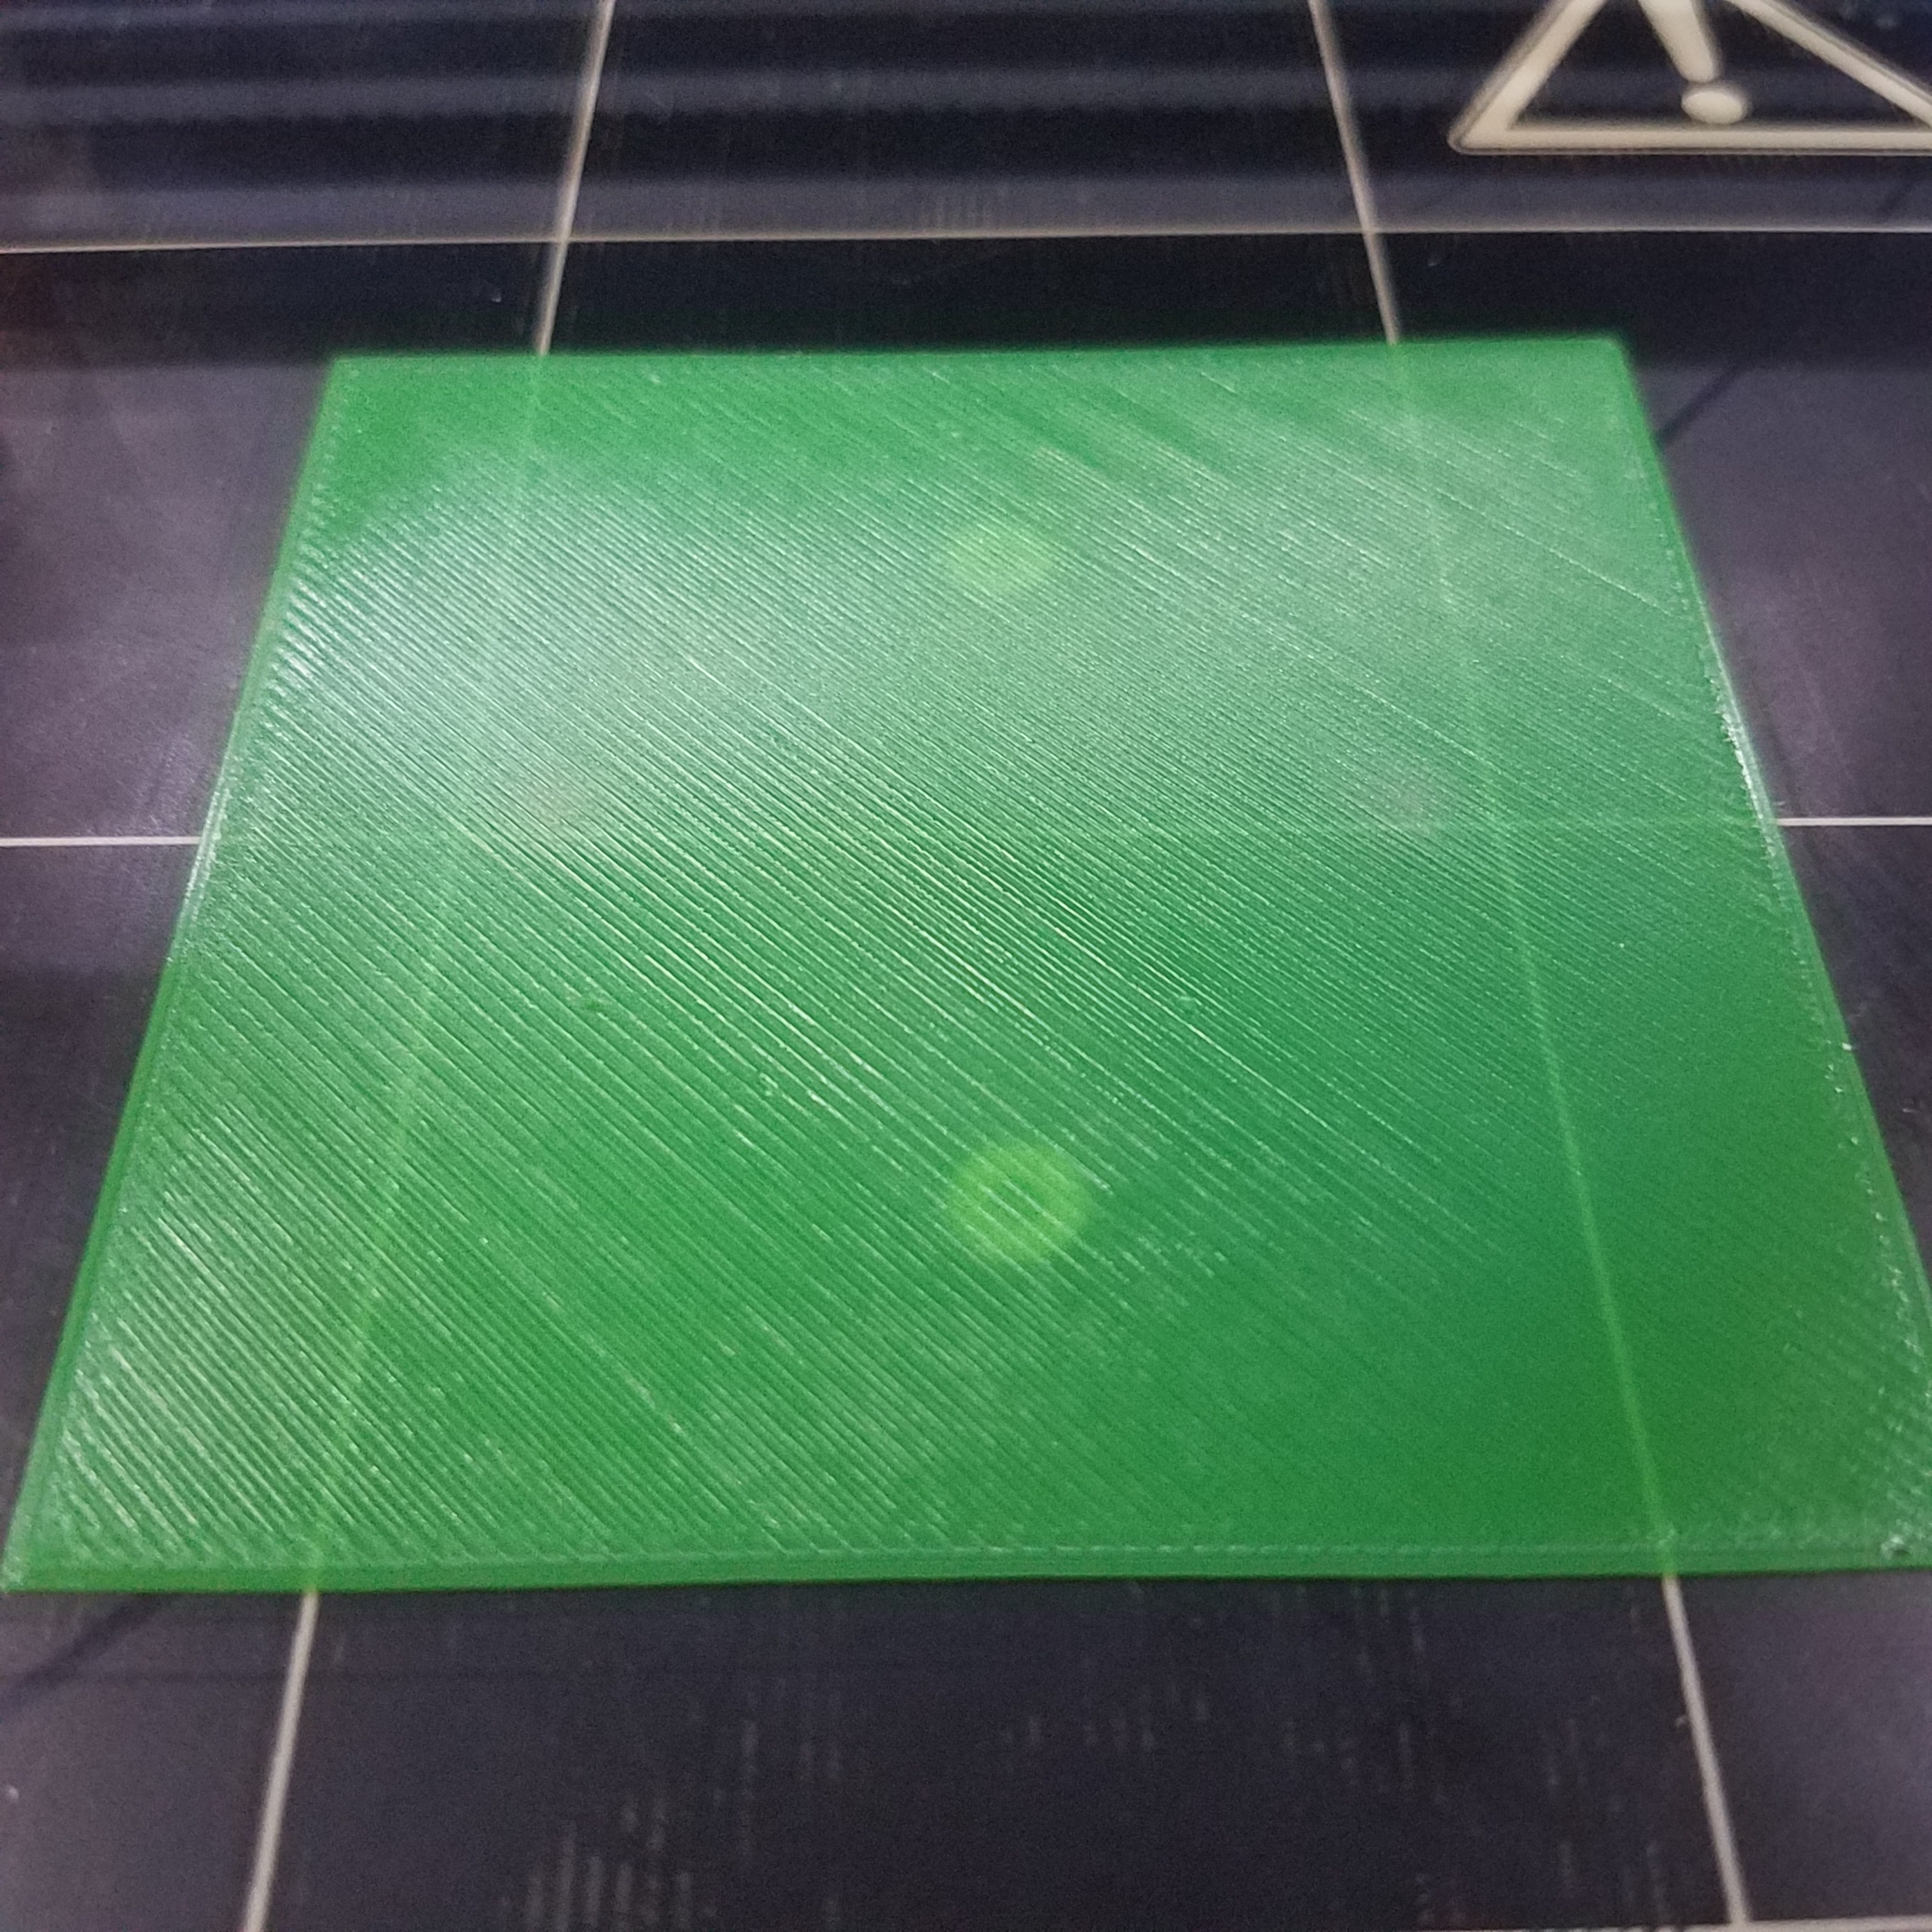
After looking at this (back right corner), I realized that the middle of the square seemed to print ok. So I'm thinking, if the bed was physically off, the deformity should be even across the square, or at least go from good to bad - not a strip of good in between bad. I started thinking perhaps software, so I resliced the object in S3D, and got this which was better overall:
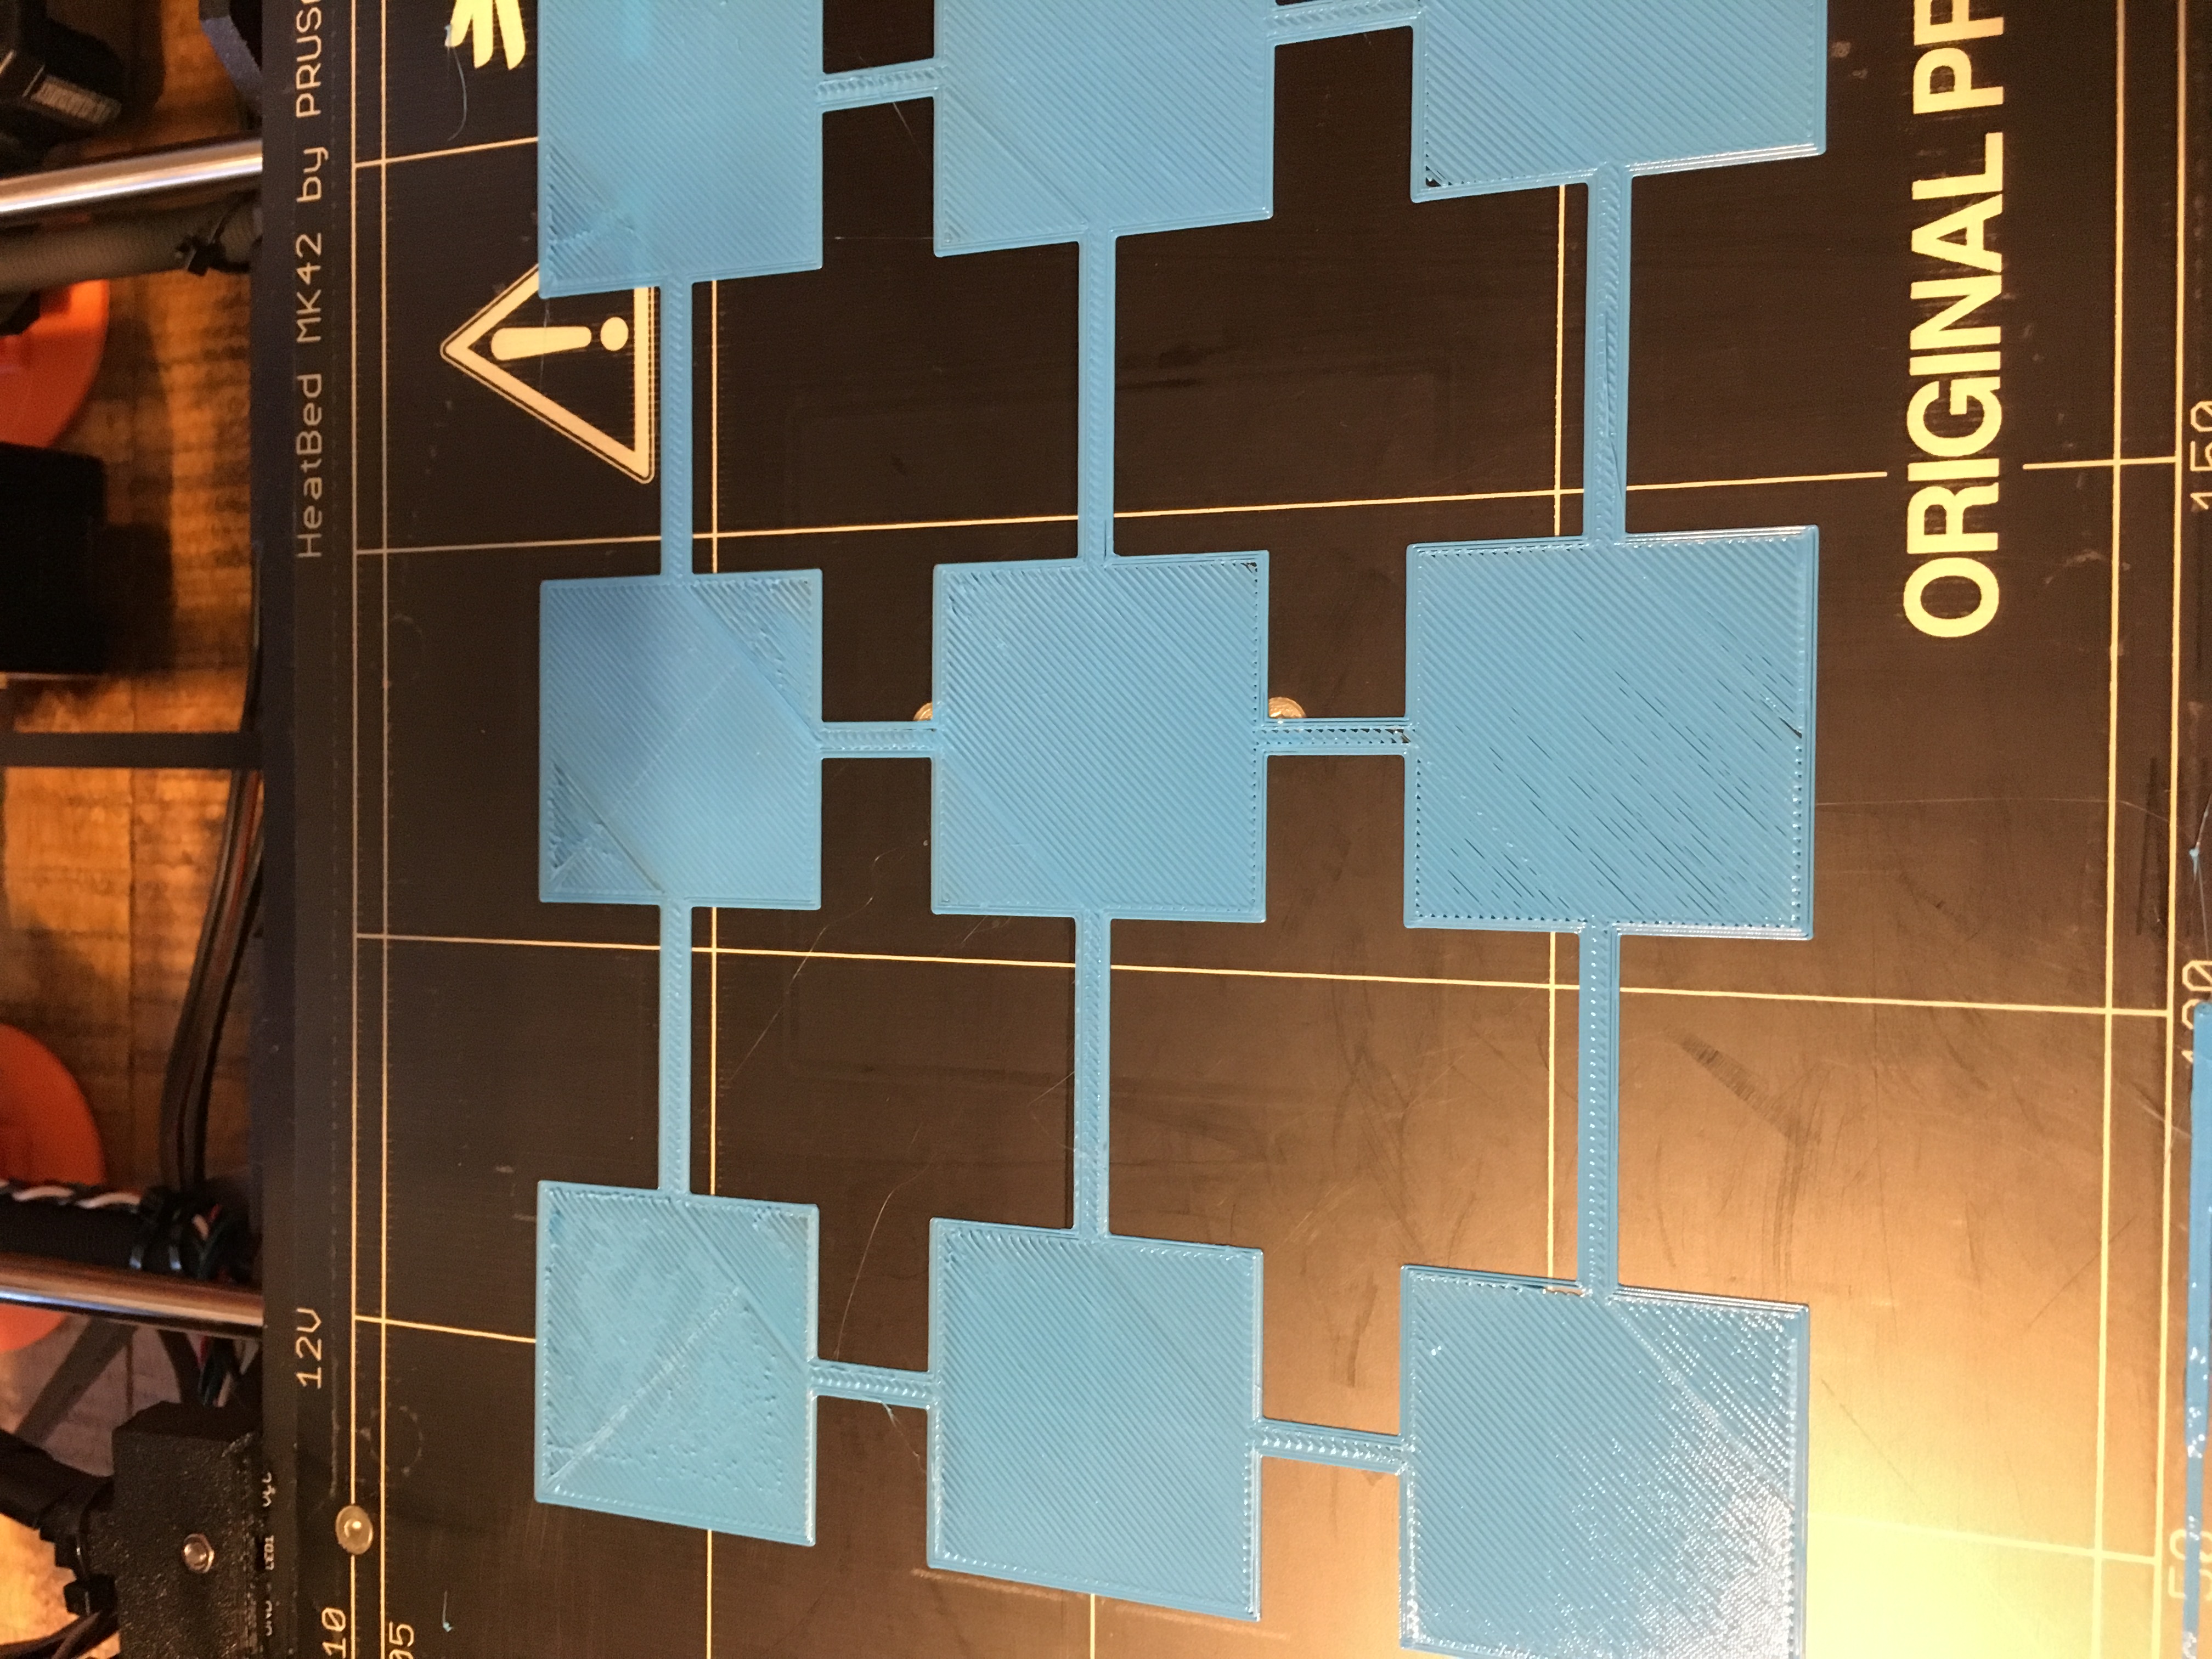
But still getting odd behavior (at least it seems that way to me) - this is the back middle square with the same sort of good result in the middle, bad on the outsides:
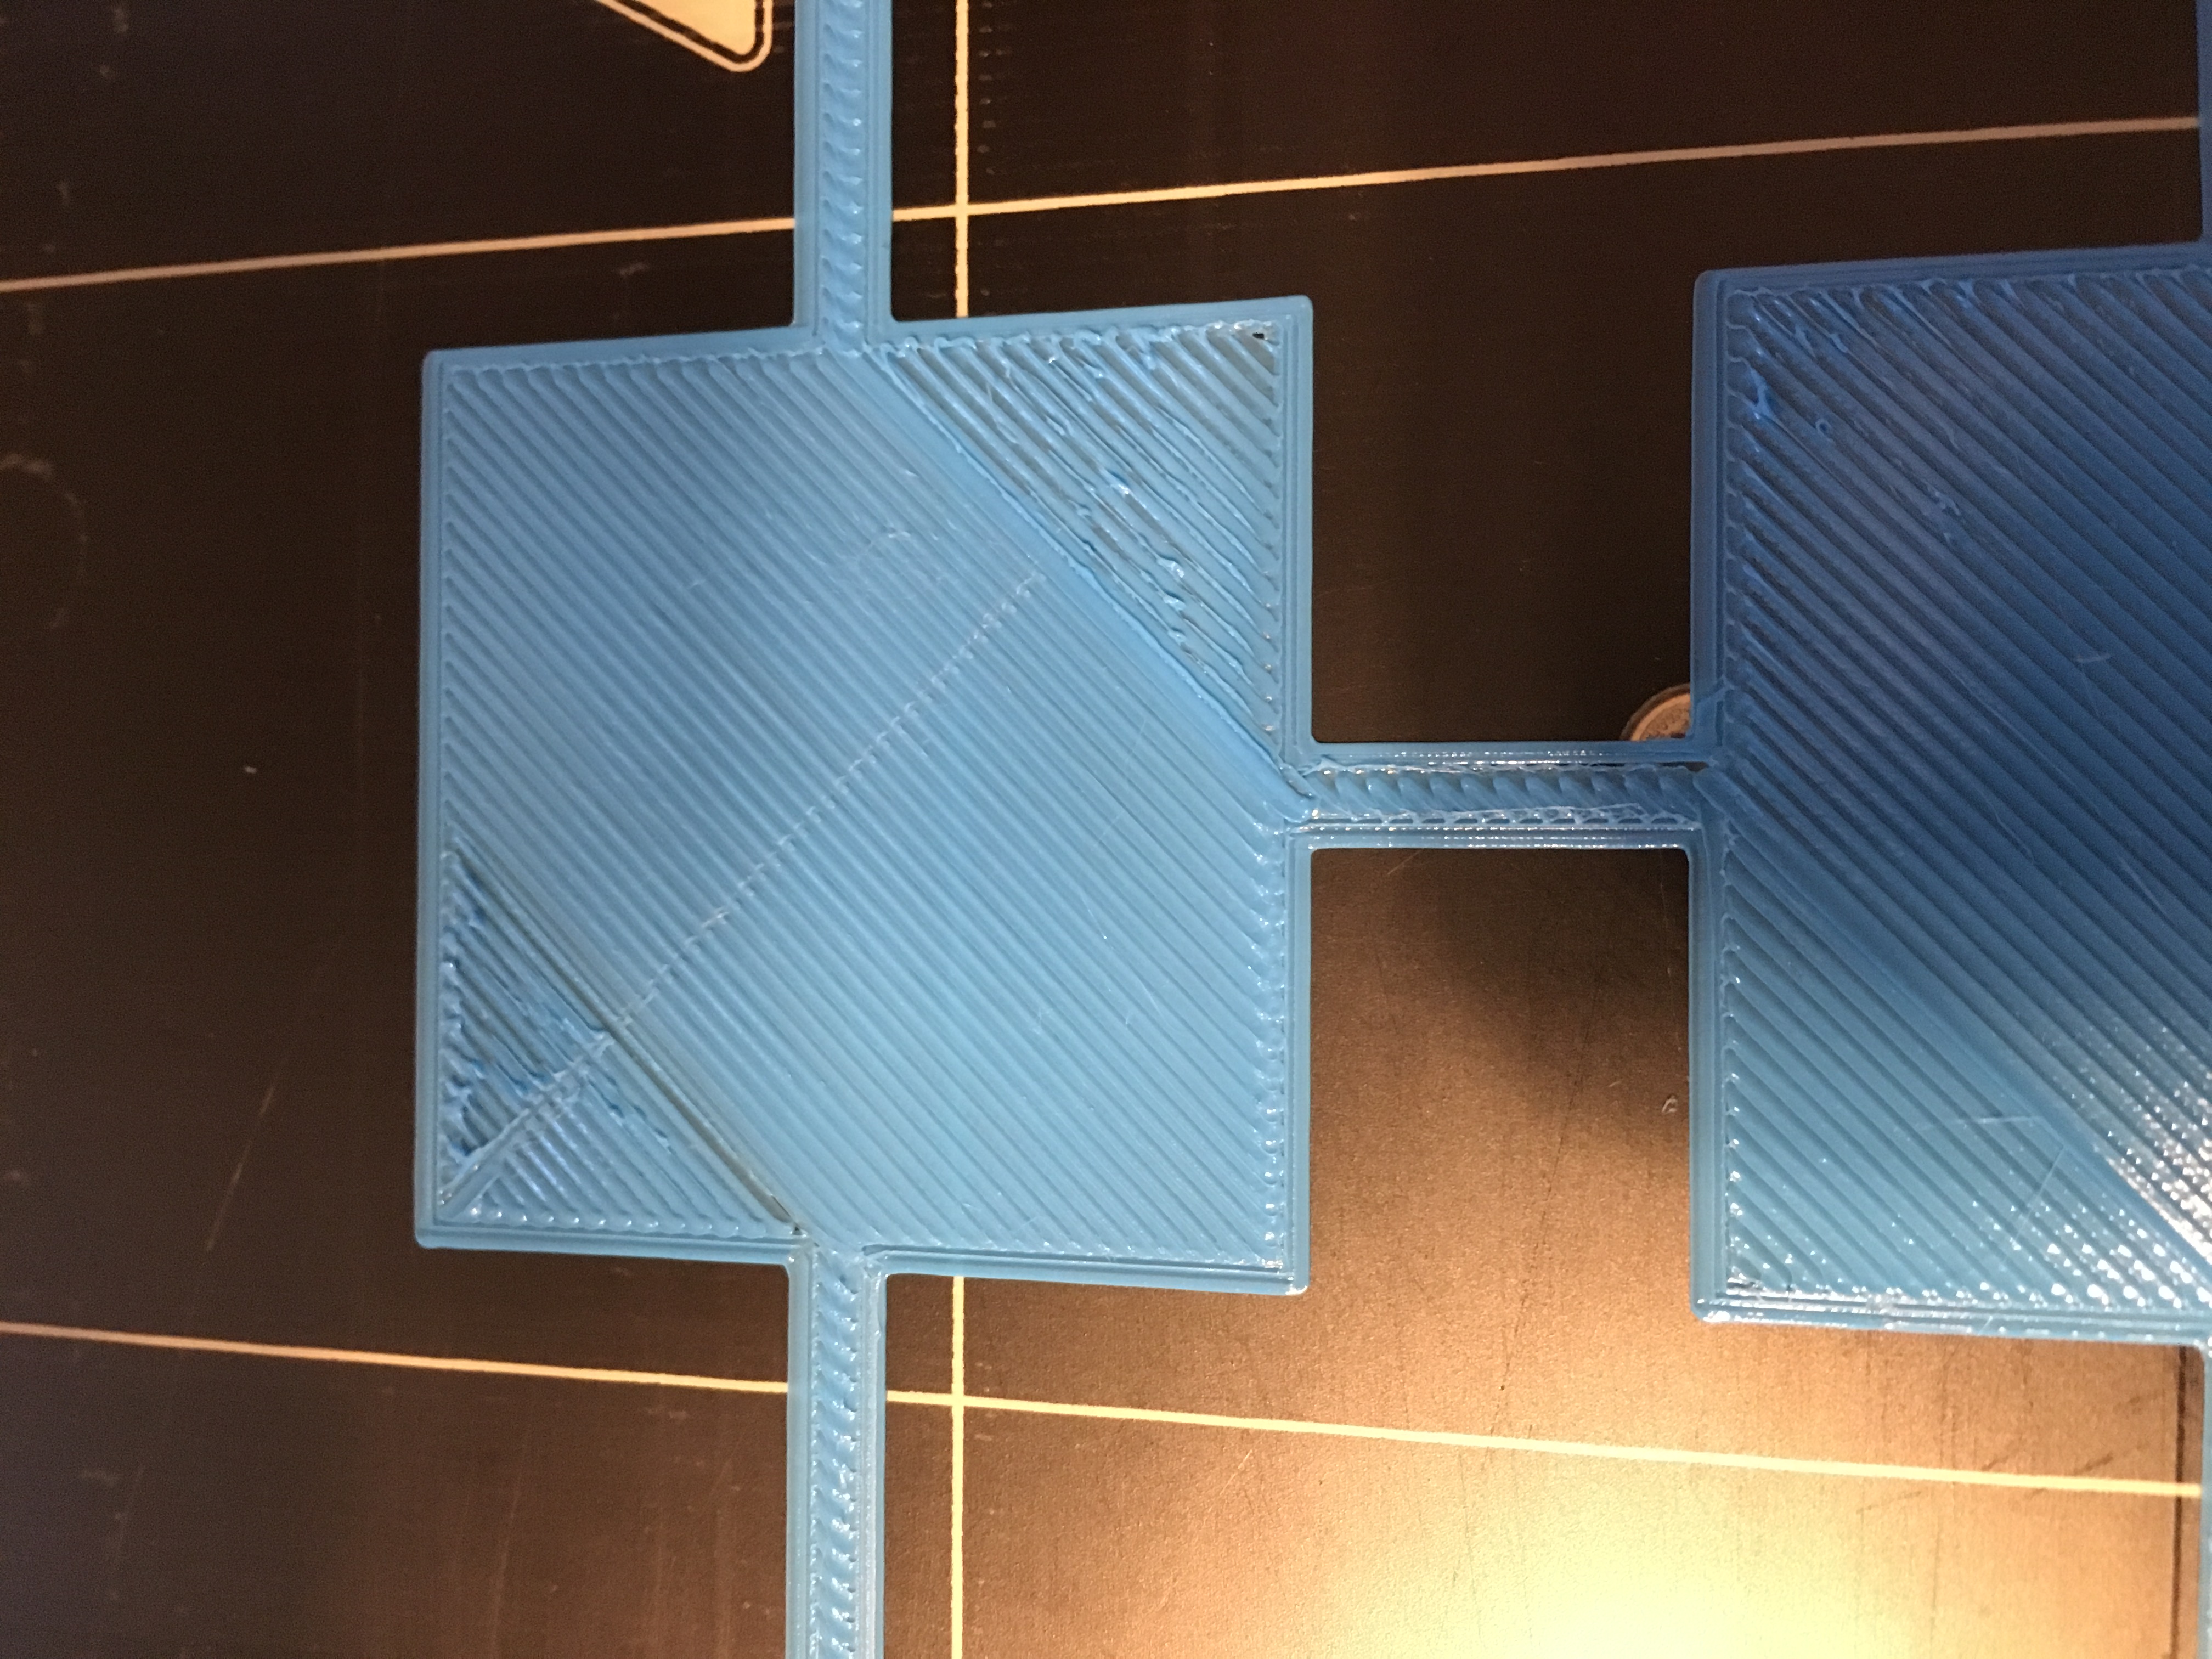
I know that back middle square (where it is good in the middle and bad on the outsides) was done in two different passes - but this is leading me to believe it's not a hardware issue if it can print well on one pass, and then the next pass or passes are bad.
Anyone have any ideas on that??
Re: Hyperfine bed leveling?
I tested my theory about printing one direction vs the other.
When printing from back to front (on the back middle) it prints nearly perfect, not quite though, still some little problems:
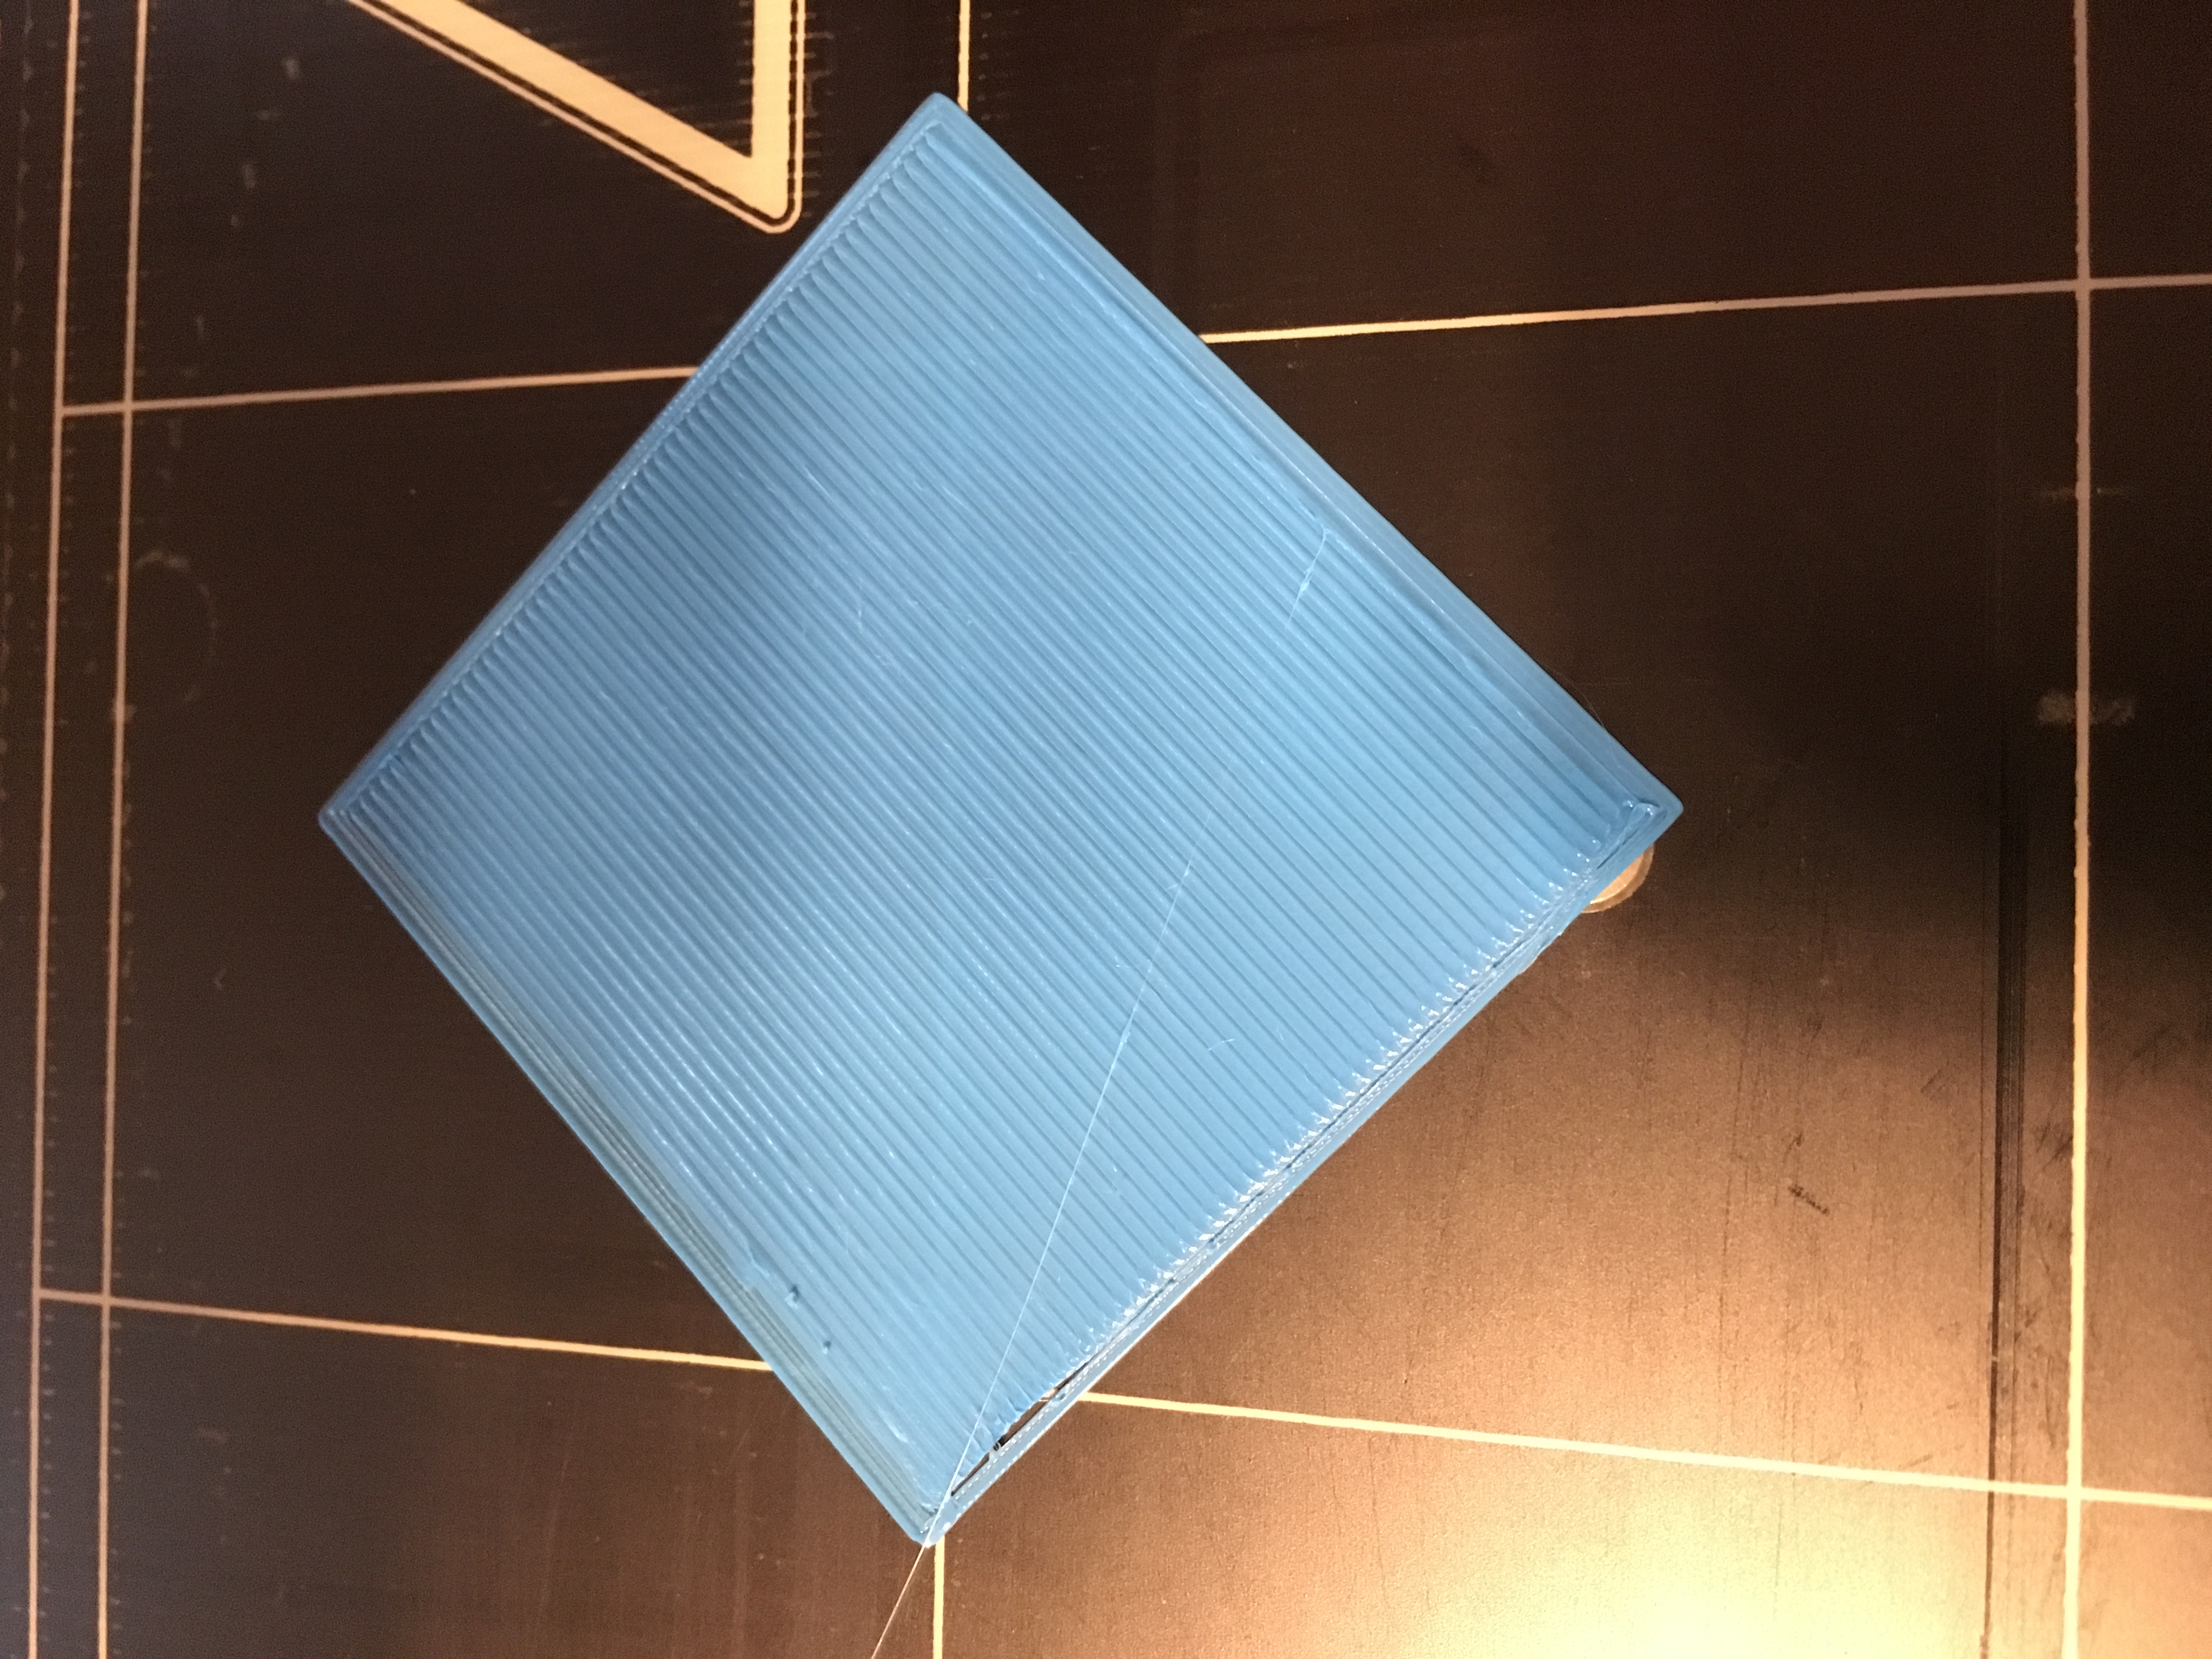
And when it prints from front to back, it's all rough and funky (as previously posted).
Does that seem like hardware or software? It seems to me like it would be software, but I'm not certain - perhaps something to with the direction the bed is moving? Bad bearings maybe, causing the bed to move up or down depending on the direction it's travelling?
Re: Hyperfine bed leveling?
I tested my theory about printing one direction vs the other.
When printing from back to front (on the back middle) it prints nearly perfect, not quite though, still some little problems:
2017-08-22 18.55.49.jpg
And when it prints from front to back, it's all rough and funky (as previously posted).
Does that seem like hardware or software? It seems to me like it would be software, but I'm not certain - perhaps something to with the direction the bed is moving? Bad bearings maybe, causing the bed to move up or down depending on the direction it's travelling?
Well...
I feel like a noob, but I learned something - this is what a damaged nozzle can do (previous posts):
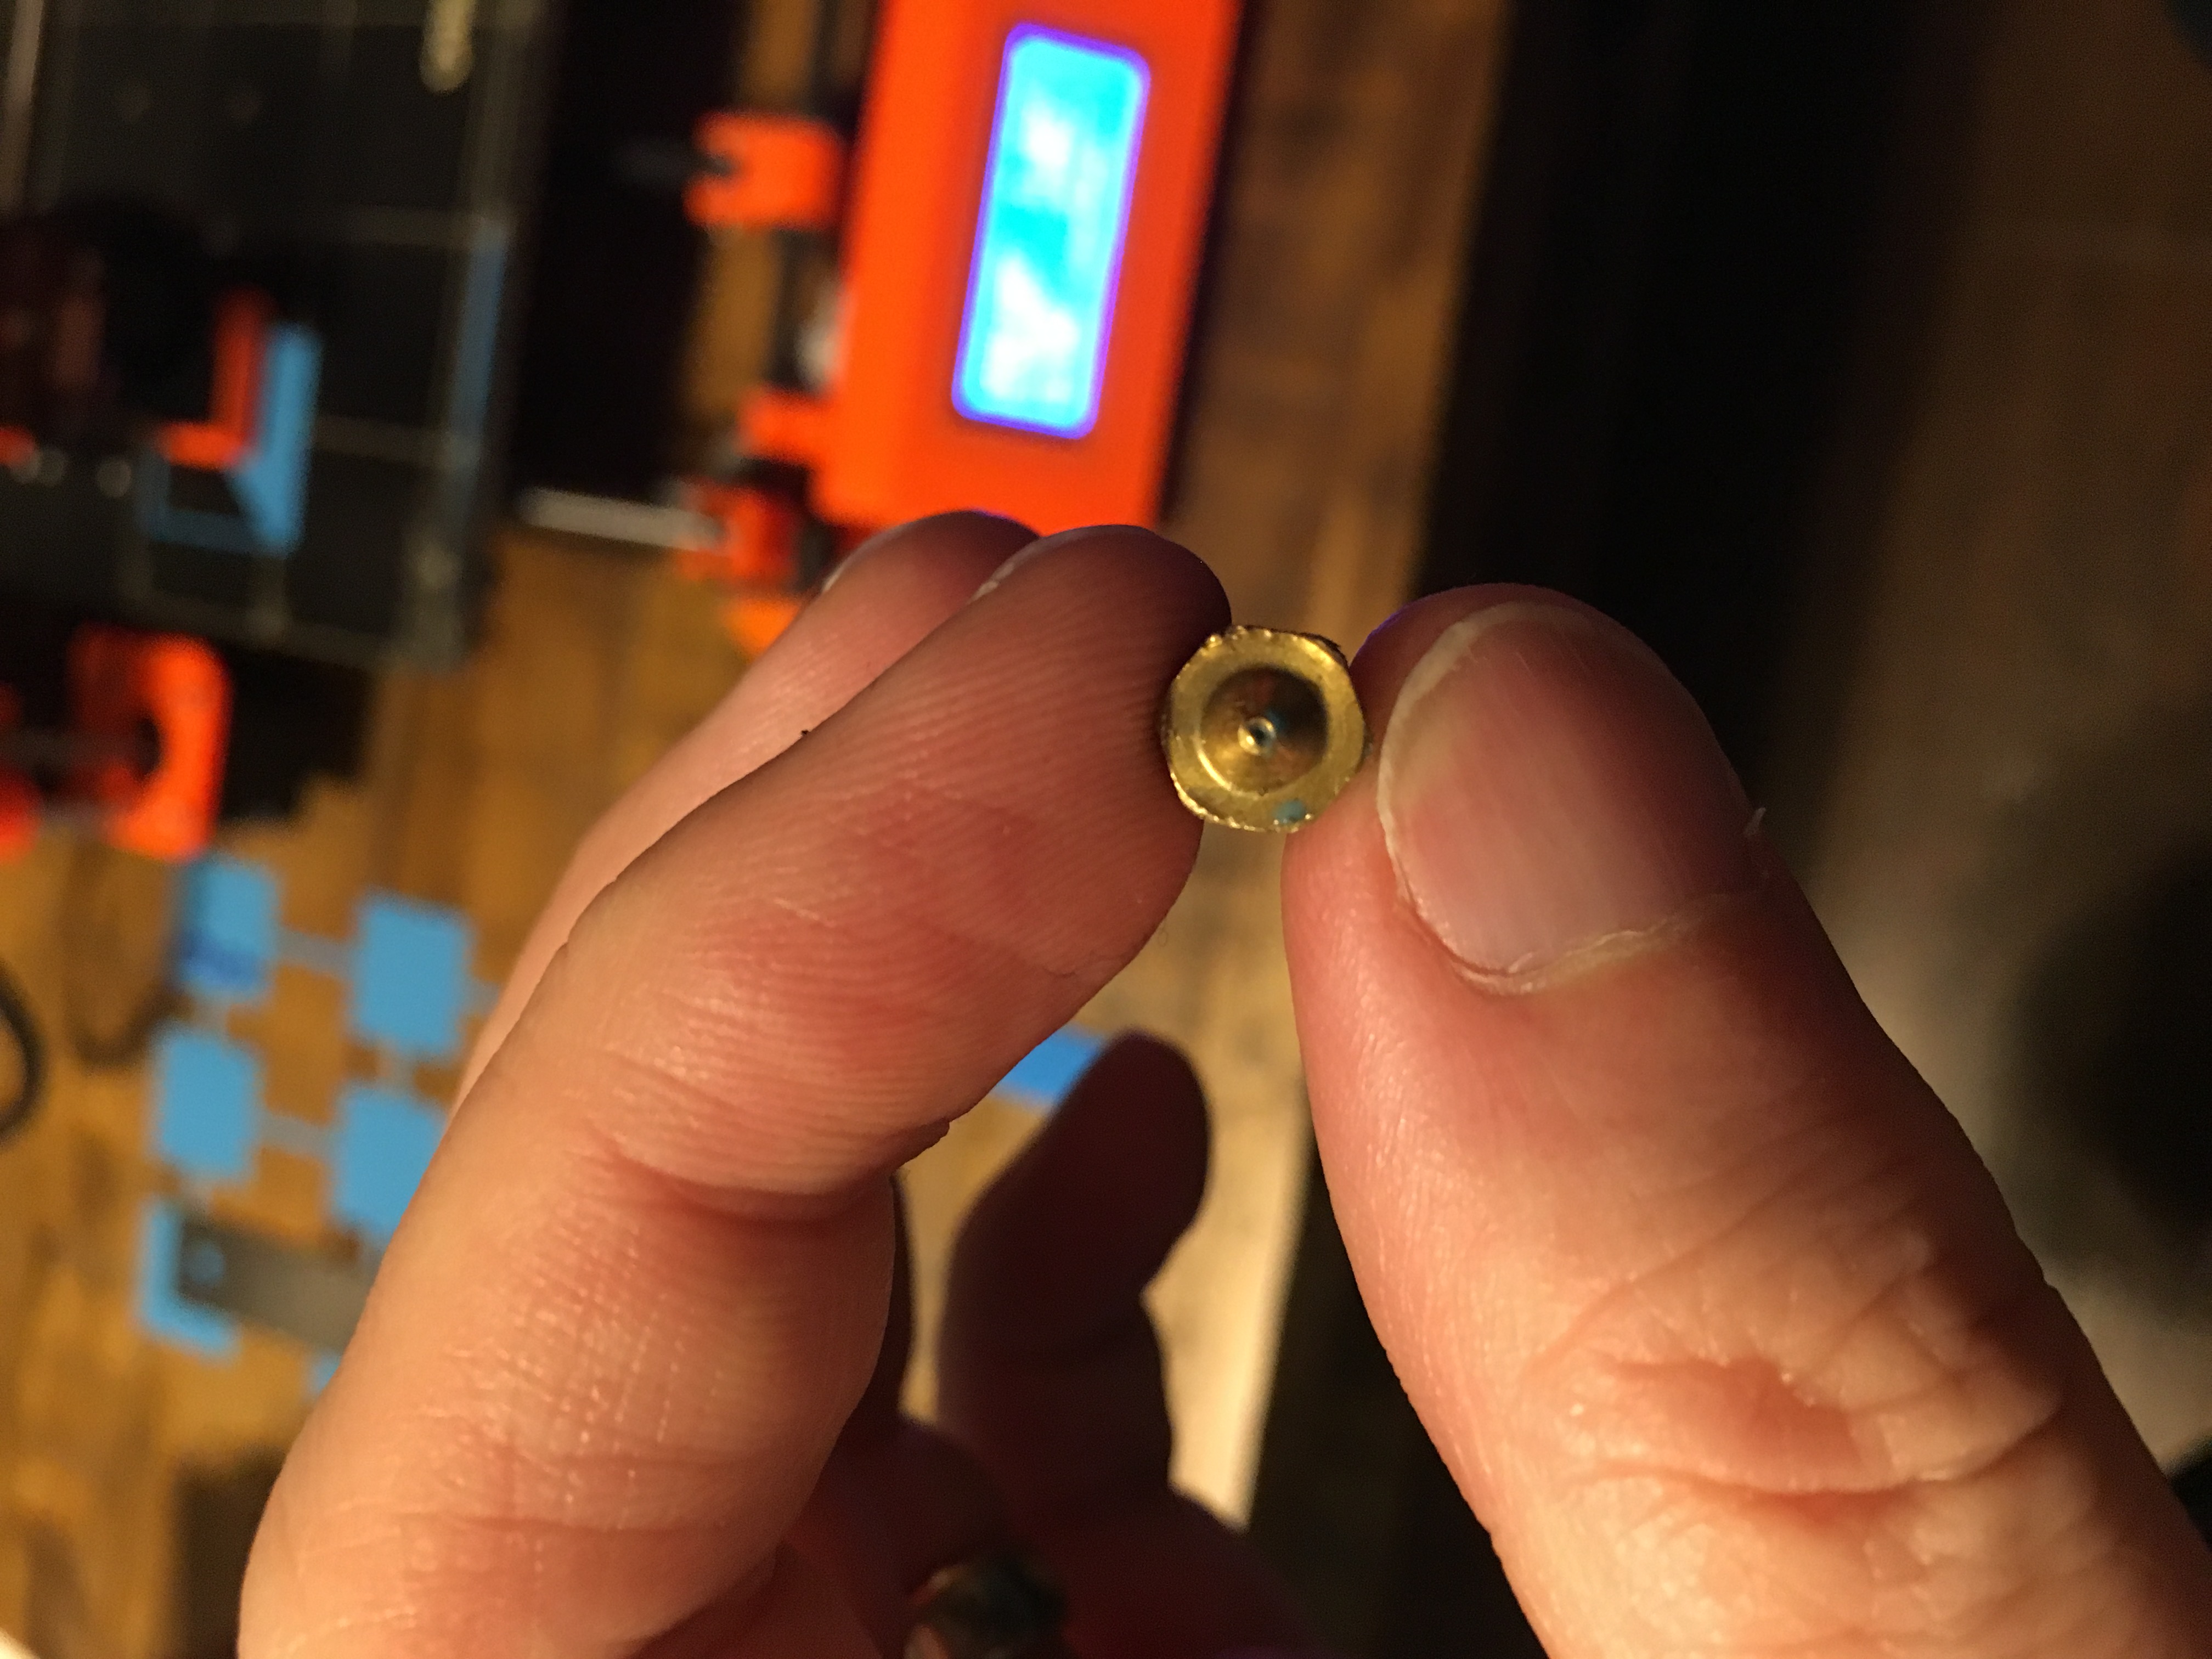
It appears that the way the nozzle was damaged, it worked when the bed was moving in one direction, but not the other. Strange... but it all makes sense now.
And I now have wonderfully tweakable bed calibration settings to really dial it all in. I hope Prusa adds this functionality to their firmware.
Thanks Peter, Jeff, and Jordan for all your help!
Re: Hyperfine bed leveling?
I have read through this thread several times and would love to do this to my printer, but I don't want to mess anything up. If someone has the time could they write up a basic instruction manual on how to do this properly?
Thanks!
Re: Hyperfine bed leveling?
I have read through this thread several times and would love to do this to my printer, but I don't want to mess anything up. If someone has the time could they write up a basic instruction manual on how to do this properly?
Thanks!
1. PM Jeff to get the compiled firmware
2. Upload the firmware to the printer
3. Print the 9 calibration squares
4. Use Live Z adjust to get the centre square correct and add the parameters for the 8 edge squares.
Peter
Please note: I do not have any affiliation with Prusa Research. Any advices given are offered in good faith. It is your responsibility to ensure that by following my advice you do not suffer or cause injury, damage…
Re: Hyperfine bed leveling?
Hi Jeff, i would like to try your firmware 😀
I still need a few posts to pm
Re: Hyperfine bed leveling?
Hey guys/Jeff,
I've been trying to get my bed level for quite some time now, and have been having similar issues as posted by others. No matter what I do, the bed is higher in the back, lower in the front, and I have made sure everything is on a flat surface, everything should be fine. I would love to get my hands on that firmware and try out this improved bed levelling. Jeff, if you could send that my way, I would be extremely appreciative!
Original Prusa i3 MK2S
Re: Hyperfine bed leveling?
Just found this thread and glad to see I'm not the only one with the problem. JeffJordan, I'll send you a PM as soon as I make 3 posts. 🙂
Re: Hyperfine bed leveling?
Mega top this bed levelling process 🙂
I would be interested in getting the LCD update as well.
How do you normally do the firmware update? Via the "Prusa Firmware updater" or through the Arduino IDE?
I am going to PM JeffJordan in the next few hours...
Thanks again for your work.
Re: Hyperfine bed leveling?
Hi,
This is very interesting! and I can see my bed would benefit from it.
Cheers 🙂
Re: Hyperfine bed leveling?
Holy smokes this looks like something I want to get involved with. I have had great challenges using bed level correction. As soon as I have enough posts I will be messaging Jeff to kindly ask for the FW with 8 point Hyper BL correction.
Thanks PJR and Jeff!
Re: Hyperfine bed leveling?
OK So I got the goods thanks to Jeff! (Thanks Jeff and PJR for being awesome).
Here is my story:
I have learned grave lessons in my adventures in printing. You will see this from the battle scars on my PEI sheet. Please dont judge me too much, I can say that this is my second sheet. The reason that ive had soooo many issues with BL in the past was that im very impatient. I like to print, peel it off and queue another one. This seemed to work ok in the beginning but I feel that over time the pinda became more and more susceptible to heat variables. Morel of this part of the story is that I only start a print when the bed and head are 29C! This seems to give me fairly reliable resuts so im sticking with it. Along with this I have implemented some tricks from the forums to raise the pinda while heating bed, only heat to 170 to avoid the gloopy spots, reverse the heater block fan to pull air past the pinda to the HB instead of blow air from the HB on the pinda. Final nail in the coffin is that I run the cooler fan at 100% while heating bed and mesh bed leveling.
G28 W ; home all without mesh bed level

G0 Z60 ; get head above bed to keep it cool

M106 S255 ; Turn on fan

M140 S[first_layer_bed_temperature] ; set bed temp

M104 S170

M190 S[first_layer_bed_temperature] ; wait for bed temp

M104 S170

G28 W ; home all without mesh bed leveing

G80 A20 B20 C20 D0 E25 F5 G25 H0 ; mesh bed leveling + Hyper BL Correction

M106 S0 ; Turn off fan

M104 S[first_layer_temperature] ; set extruder temp

M109 S[first_layer_temperature] ; wait for extruder temp

G87 ;

G1 Y-3.0 F1000.0 ; go outside print area

G92 E0 ; reset extrusion distance

G1 X60.0 E9.0 F1000.0 ; intro line

G1 X100.0 E12.5 F1000.0 ; intro line
On to the business at hand:
Center BL is not too shabby off the bat. This was with 0 Live Z due to painstaking adjustment to get 0. Maybe I was bored or something who knows....
To be continued...
https://drive.google.com/open?id=0Bytp0ZX4wB6HeXFqWEd3TnFwM1FmU0puWFJaYi1RWl9UTkdj
Re: Hyperfine bed leveling?
Continuation...
I decided to drop the pinda so I could dial some Live Z in to have some room to play with with the Center calibration. By the looks of the previous first layer (the slight waves in sections), we can see that its a bit tight to the bed and could due with being raised a bit. Just for the record, I would definitely print like that. That is a pretty good first layer in my eyes.
Here is what I dialed in after dropping the pinda and running a few first layers to dial in -190um:
Now that I have a pretty good first layer (in my humble opinion),I moved on to cal squares. Again take it easy on me over the bed, ive had my challenges that have resulted in 50% rebuilds and many late nights in my dungeon. This is what I ended up with:
Personally I think this BL gets the job done and think I would get a solid first layer for any print spanning my bed. However, this thread is about the pursuit of PERFECTION. So I started to dial in the 8 point variables!
Here is A20 B20 C20 D0 E25 F5 G25 H0:
Center looks ok I think that we can take this a bit further on front and back. Keep in mind there is some funky glare making the squares look worse than they really are. I have a lot of LED light in my Lack Enclosure. My next post will by my tuned bed!
Hyperfine bed leveling? -> dial it in 🙂
hi guys,
as promised, I'll provide you a set of *.gcodes to dial in the hyperfine bed levelling efficiently.

and here's the how to:
first, if you've got my compilation, reset the eight bed level correction values to 0. if you just implemented Peter's amendment into your firmware, you don't need to ;), but resetting the standard bed level correction should be done as well.
then find your optimal live z-adjustment level for the center (as good as it gets).
you can do this with the meanwhile well known calibration surface v4.
from here on, I assume that you are familiar in finding the right value (not stringy, not to dim/rough, best would be a closed sheet with 0.20mm thickness (+/- 0.01mm)), if not, read the whole thread about it.
once you've found your center live z level, write this value down !
for example -0.735.
💡
clean the heatbed thoroughly with 99% ipa (maybe with some acetone if you've got to much fingerprints on it).
do a "calibrate z".
print the hyperfine_#_center.gcode. it'll do a meshbed levelling and draws you a 40mm circle in the middle of the heatbed as reference.
thickness should be pristine, because you've printed it with the value you've determined for your setup.
after that it parks the extruder 10cm above the heatbed but doesn't cool down the hotend or the heatbed !
now remove the purge line from the heatbed.
the printer now waits for printing one of the calibration squares for each of the remaining 8 calibration points.
all the steppers remain powered on, so there should be no requirement for a new meshbed calibration.... just print the small calibration squares for each corner/edge.
let's say we choose the front left calibration point to start with. so we have to proceed with hyperfine_a.gcode as hyperfine_?.gcode in the following description:
🙄 (x) start the hyperfine_?.gcode.
maybe you've to remove some oozed filament from the nozzle with your tweezers.
take in mind: this gcode doesn't do any mesbhed levelling and should start quite fast, because bed and hotend remain heated up.
after the square is printed, remove both, the purge line and the square (cooling spray might make it easy).
*) try not to move the heatbed while removing the printed square !
check the printed square wheter it's ok, to stringy or to rough. a digital micrometer might help you as well.
if it's to stringy, lower the live z-adjustment by 20 micrometers (would be -0.755 mm in my example).
if it's to rough, add 0.020mm to the live z-adjustment level (would be -0.715 mm in my example).
if it's ok, note down the found z-adjustment level for this point and proceed with the next calibration square.
if not, go to 🙄 (x) and repeat with this calibration square.
➡ hints:
(1) *) if you've accidentially moved the heatbed while removing one of the printed calibration squares, go to the "settings" menu, "move axis" and move the y-axis to it's minimum value (-2.0) before you proceed printing the next calibration square.
(2) don't move the extruder (x-axis) or the z-axis manually during the process, otherwise you'll have to start all over again.
(3) if you want, you can go for a finer adjustment than +/- 20µm
after you've dialed in and written down all the 8 edge & corner calibration values, you'll have to do some easy maths.
but first: reset your live z adjustment level to the one that you've found for the center (in my example -0.735) !
here the values for my heatbed and assembly:
center  = -0.735mm

hyper_a = -0.755mm

hyper_b = -0.735mm

hyper_c = -0.735mm

hyper_d = -0.765mm

hyper_e = -0.715mm

hyper_f = -0.715mm

hyper_g = -0.715mm

hyper_h = -0.725mm
this would lead you to the following bed level correction values:
FrontLeft [um]:-20

FrontCentr[um]:  0

FrontRight[um]:  0

MidRight  [um]:-30

RearRight [um]: 20

RearCentr [um]: 20

RearLeft  [um]: 20

MidLeft   [um]: 10
now use these values either for setting the eight correction values through the menu (which stores them inside the eeprom) or for using them with PJR's extended G80 command (remember to use lower case characters) at your slicer.
if you want, you can now clean up the heatbed (remove everything) and print the whole bunch of calibration squares and the center circle at once, just to check if everything is as desired.
😮 attention: make sure that your printer cools down now (-> preheat -> cooldown), because I've disabled cooling down nozzle and bed for proceeding as quick as possible with the procedure.
dem inscheniör is' nix zu schwör...
Re: Hyperfine bed leveling?
Thanks jeffjordan, appreciate your work. Unfortunately I think I need to space my bed up as im max out -99 on my left side.
Could you post your start gcode sequence? it appears your warm up to 170 then bed then home and then the print temperature. I'd like to implement this as it minimises oozing during the heating sequence.
Thanks.
Re: Hyperfine bed leveling?
...
Could you post your start gcode sequence? it appears your warm up to 170 then bed then home and then the print temperature. I'd like to implement this as it minimises oozing during the heating sequence.
...
this has already been discussed/mentioned at several threads here at the forum.
have a look at this thread, that thread.... or (with a text editor) inside the gcode: hyperfine_#_center.gcode
if you need a correction value between +/- 100 ... 199 µm, you can still use the G80 command, instead of the altered bed correction menu entries.
dem inscheniör is' nix zu schwör...
Re: Hyperfine bed leveling?
will the G80 command override all of the set numbers in the LCD?
Re: Hyperfine bed leveling?
will the G80 command override all of the set numbers in the LCD?
for the actual printing process:
yes, it'll override all set numbers for the points you'll parse a new value with the G80 command, but only until a new G80 will be used or the printer will be reset.
so if you look at my example/settings above and use:
G80 d-45
it'll take all the bed correction values from the menu, except the one for MidRight ( -> calibration point "d"), where the printer uses now -45µm instead of -30µm.
over all:
the G80 command does not change the bed correction values shown at the LCD and stored inside the eeprom.
so you can't "edit" them using the G80 command, neither by accident nor by purpose. the values could only be overwritten or cleared through the sub-menu for the bed correction values.
dem inscheniör is' nix zu schwör...
Re: Hyperfine bed leveling?
I was wondering if it would be too much of a hassle to upload your calibration method squares and circle (all) as an .stl so I can slice and print it without the calibration procedures.
Thanks.
Re: Hyperfine bed leveling?
Hi Jeff,
Looking for your firmware but i cant PM you of course...need 3 posts