RE:
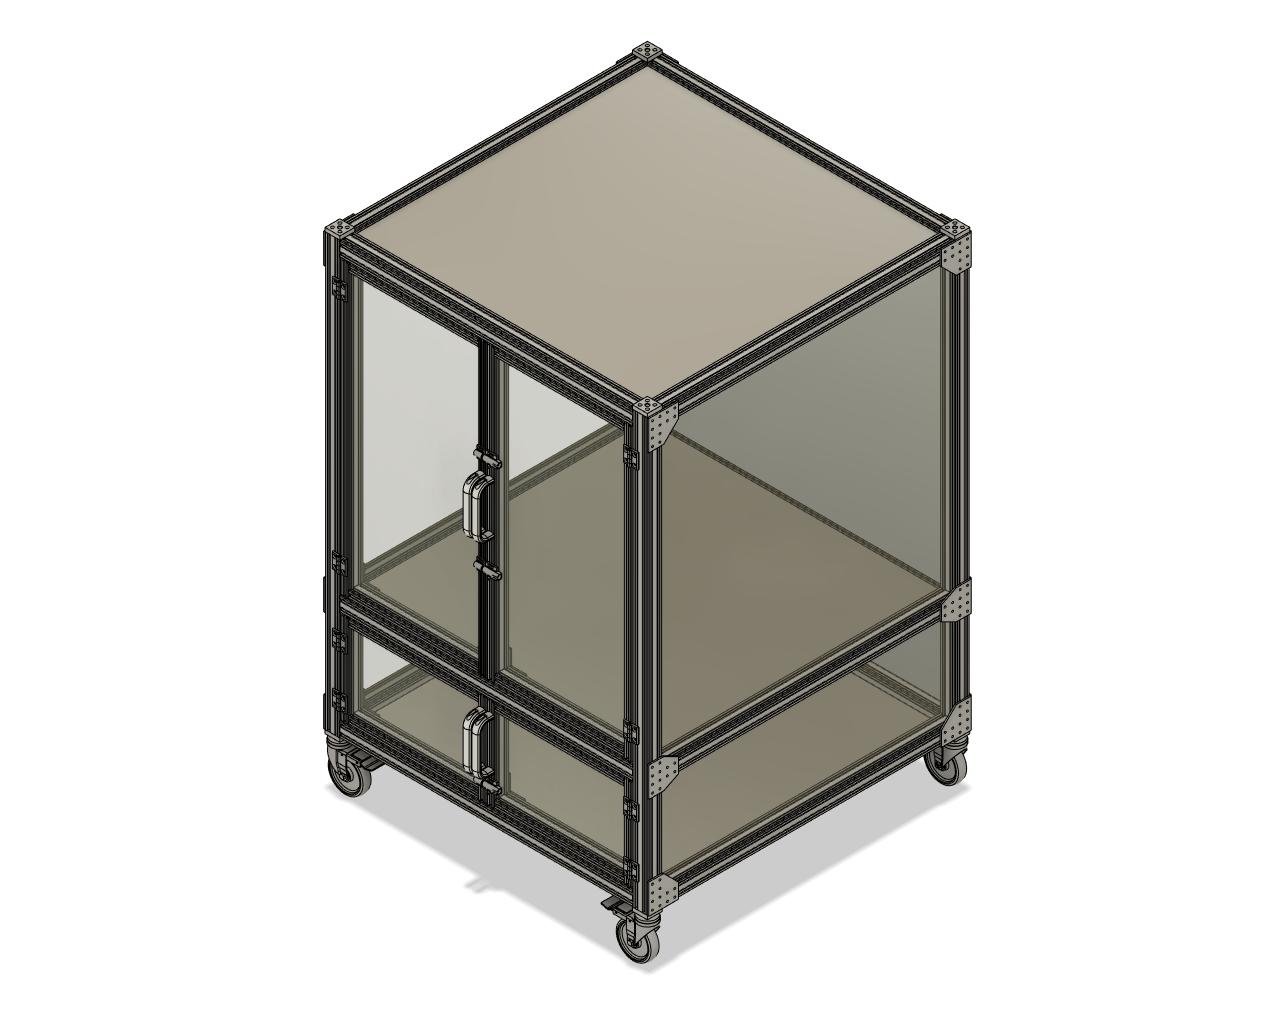
I designed an enclosure with 8020 extrusions, plexiglass sides and front (double layer with an air gap), and aluminum sheet top, back, and bottoms (also double layer with an air gap between. This air gap will be filled with 1" fiberglass insulation). I have all the parts in my garage and am going to try and get it put together in the next week or two.
RE: Where are you putting yours?
I tried to an image of my setup but option avaible challenge and I could not work out which paper clip looking icon would work. I tried both but no go. Any instructional feedback would be apprecisted
RE: Where are you putting yours?
Use the ADD MEDIA button to add an image to your text.
RE: Where are you putting yours?
RE: Where are you putting yours?
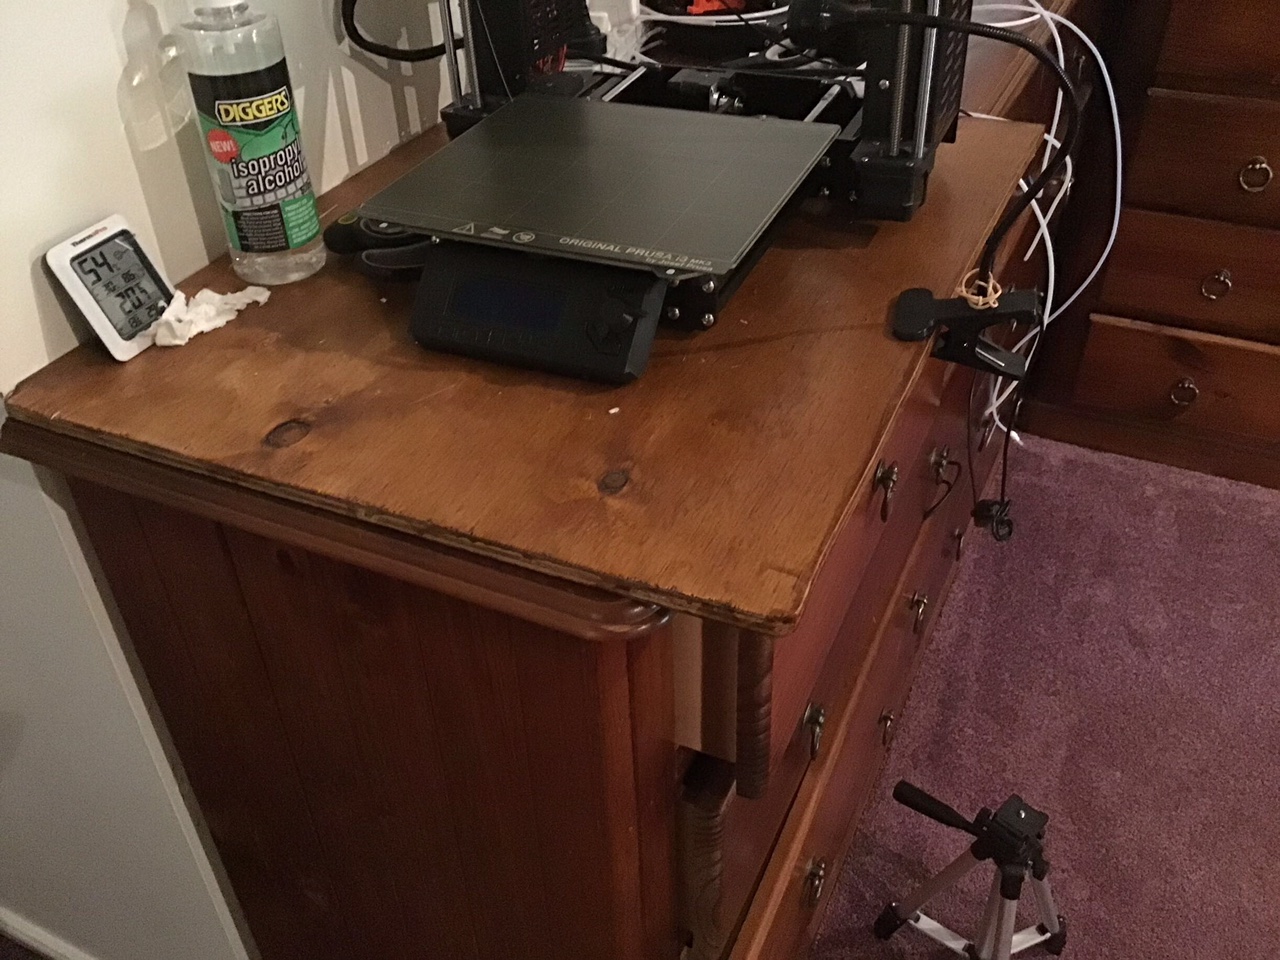
Here I try again. I reduced the pixel size to below 2500 and all good this time. This image is of my bedroom setup on top of my chest of drawers, all ready and waiting for my XL to arrive.
RE: Where are you putting yours?
Very nice.
I have build this. Top XL - Bottom Mk4+Enclosure. The rolls can be lifted, so it is stable and moveable.
--------------------
Chuck H
3D Printer Review Blog
RE: Where are you putting yours?
Thanks, the plan is to have the XL on top and the mk4 in enclosure below

RE: Where are you putting yours?
I realized recently... Be sure that vibrations from one printer can not be felt by the other. My XL repeatedly failed bed leveling because it's on the same table as an Input Shaping enabled MK4 while it was printing. And the MK4 is on 2 concrete pavers with vibration dampeners underneath them. It still shook the table enough to foil the load cell on the XL. (I assume the opposite would also be true for starting a MK4 print while the XL is printing something that causes lots of shaking). I guess i need something softer underneath the pavers to see if that can absorb some more table-shake.
RE:
In my garage 😊 10mm steelplate on top and 40 x 80 x 5 mm square iron as legs. 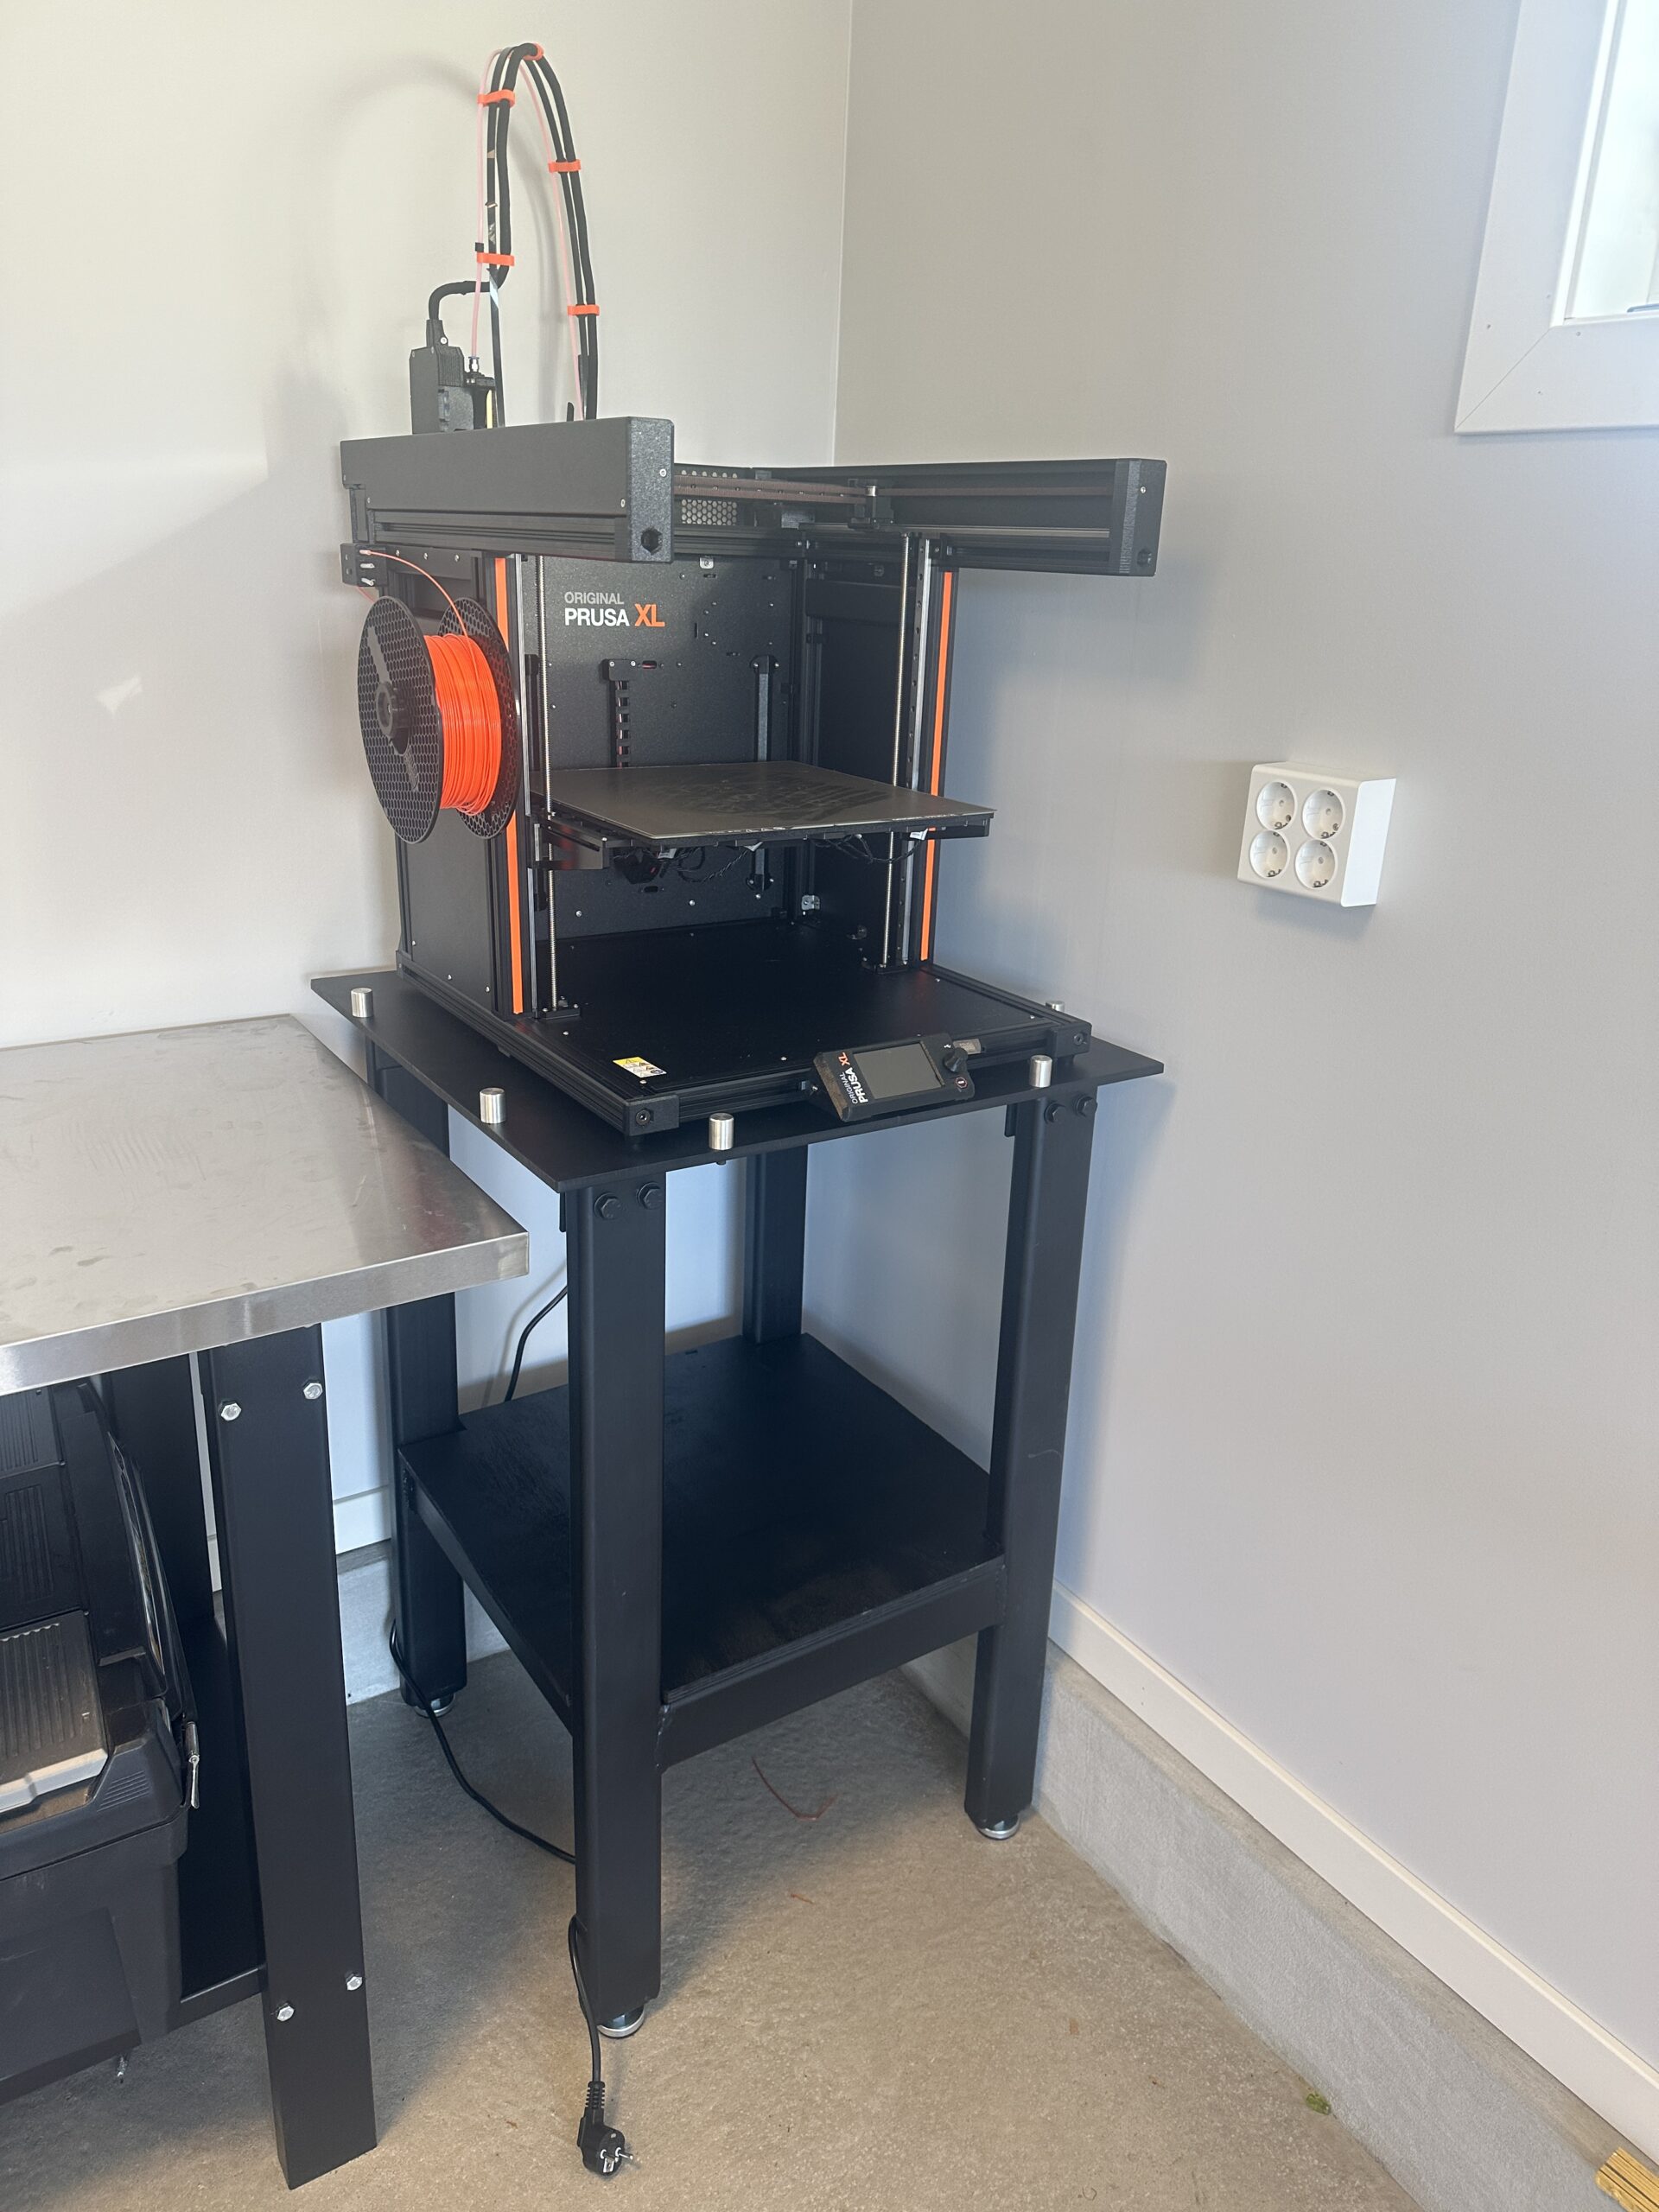
RE:
Mine is on one of my work benches in the office with my CNC and 2 computers. It's a tight space but working out good so far presently printing the parts for a prototype enclosure.

Its on a base I made with leveling feet.
RE: Where are you putting yours?

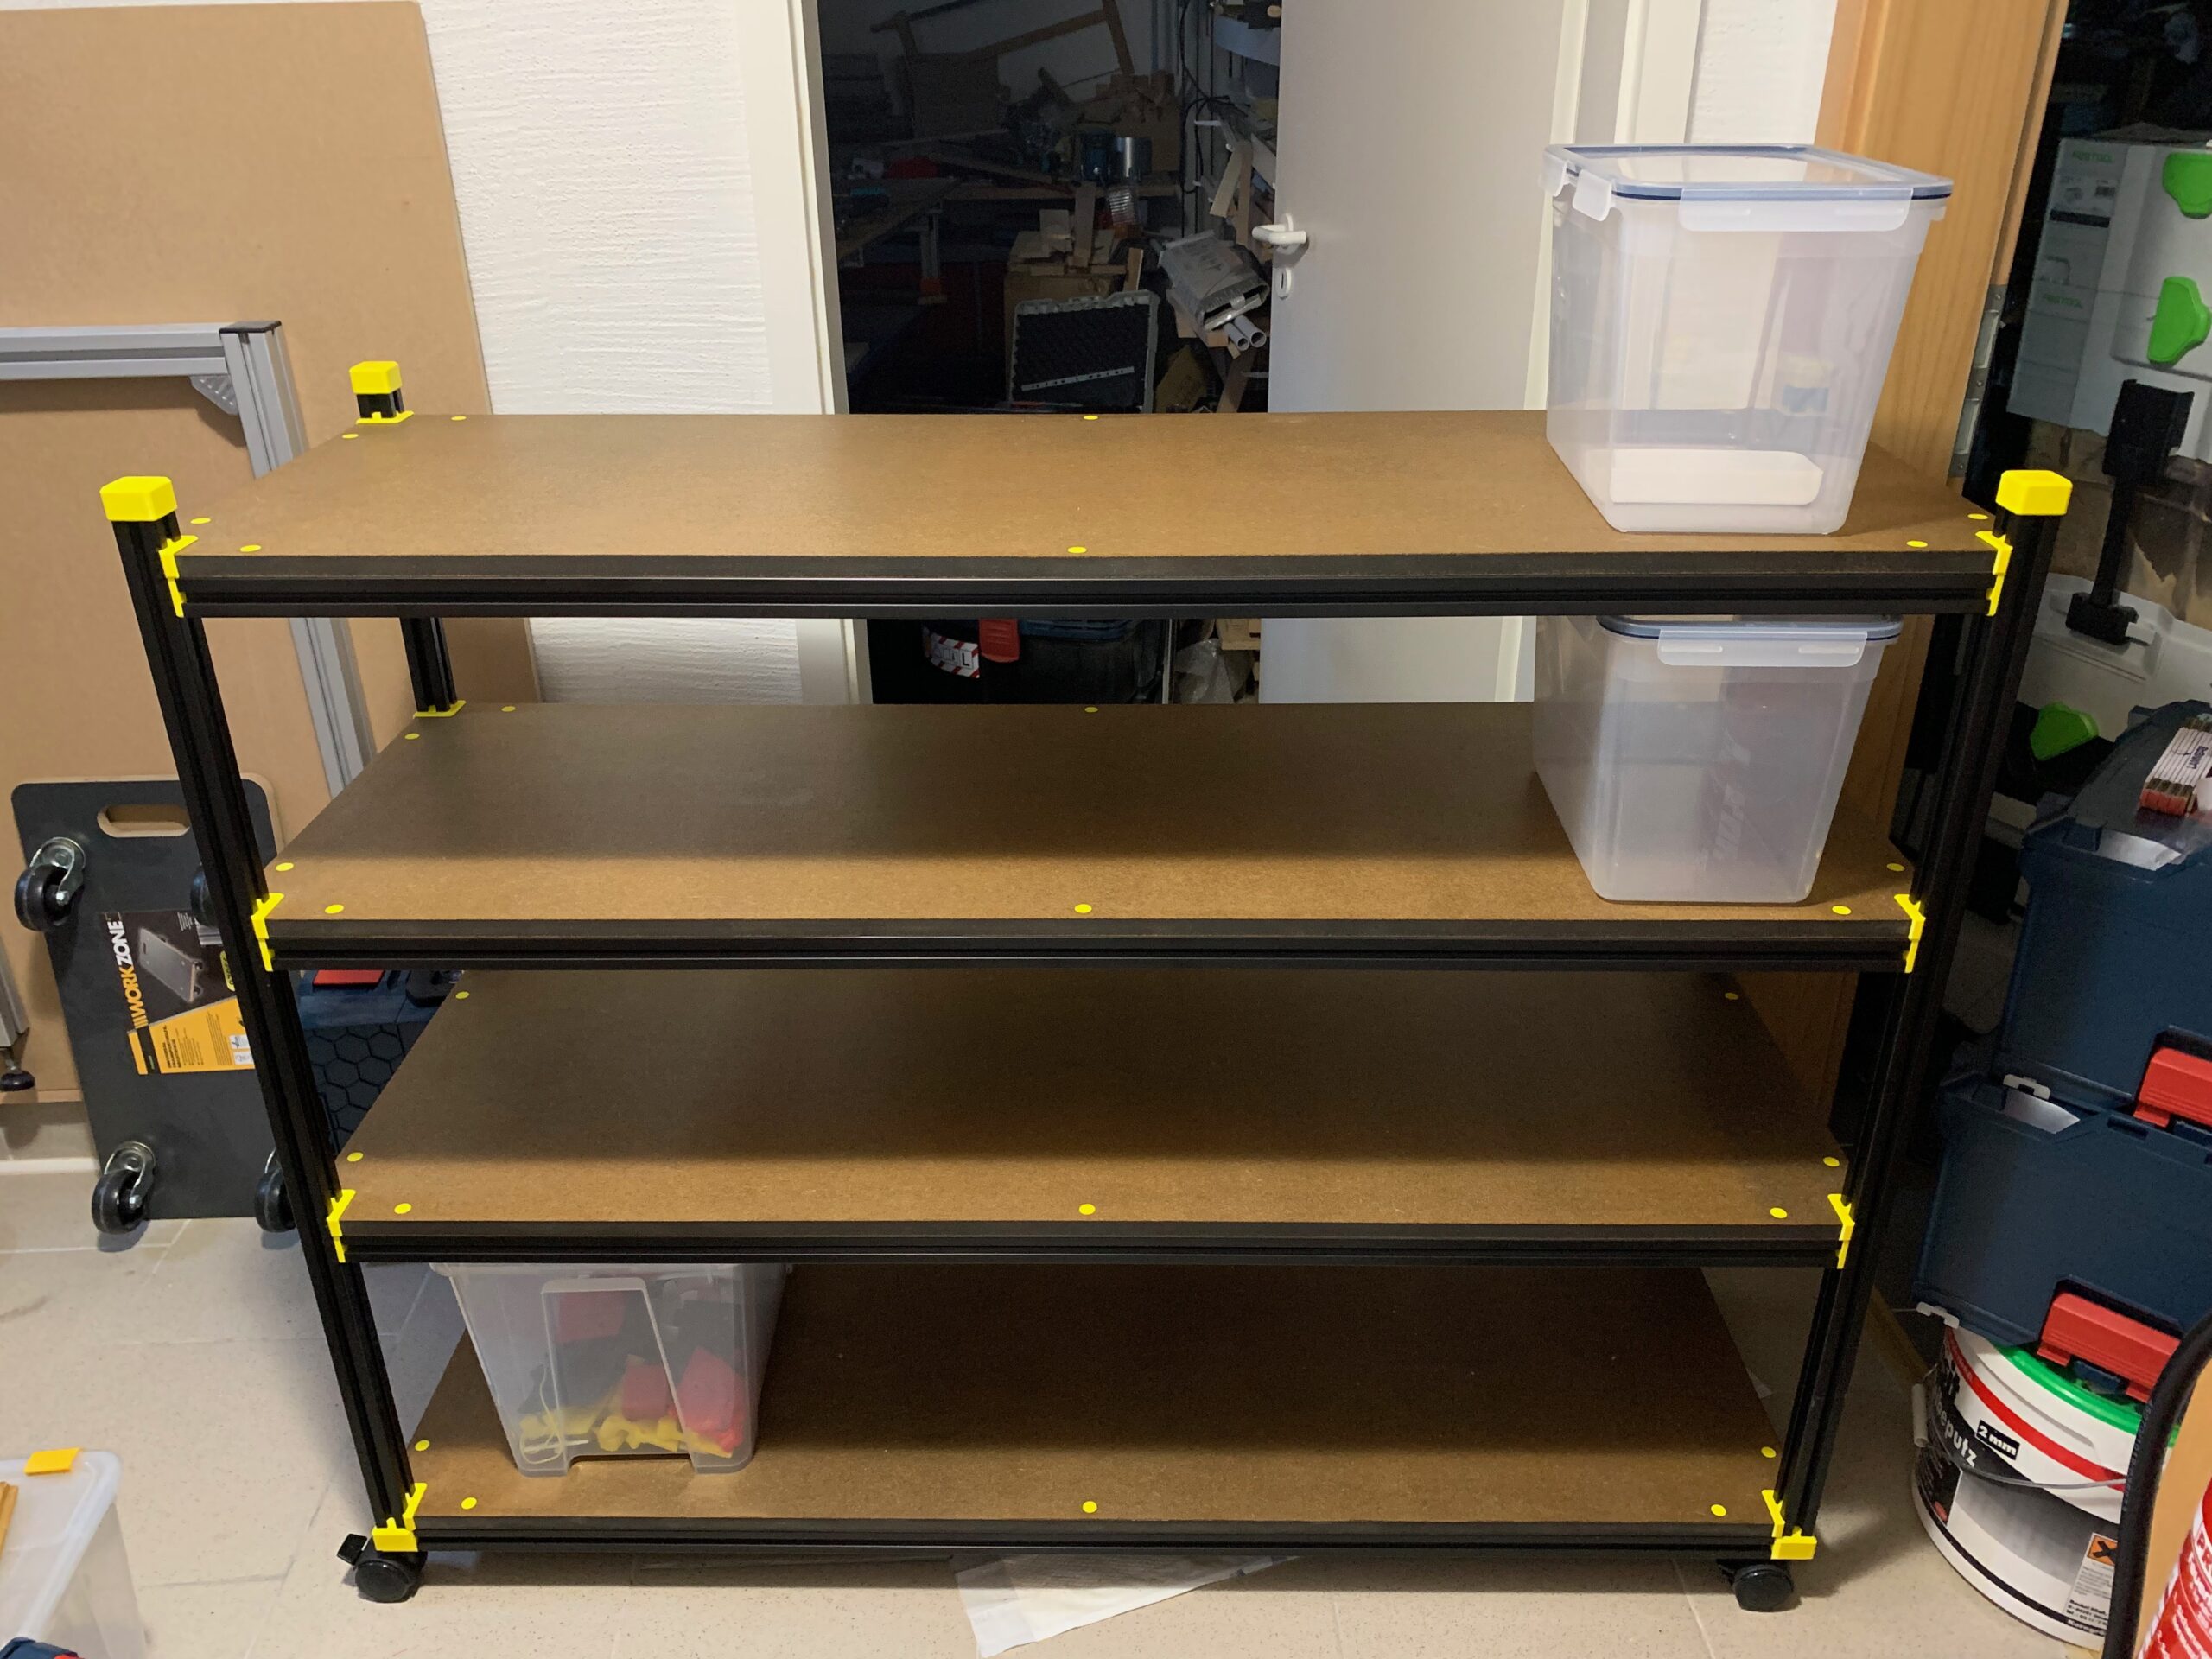
IKEA 😀
Pure Metal construction, cheap and plenty of storage.
RE: Where are you putting yours?
@acht I like it.
--------------------
Chuck H
3D Printer Review Blog
RE: Where are you putting yours?
I am going to build a rack in this design:
3030 black aluminium extrusion, MDF board (painted black) and 3D printed parts.
Place for Ikea 365+ and/or Samla boxes.
RE:
My XL currently stands on the office table but I am debating where to "finally" put it:
- IKEA LACK table
- + Cheap
- + About the size it needs
- - Height is lower than office table
- - I think it will not be stable enough
- IKEA Trotten
- + Seems table
- + Multiple options e.g. having a shelf above the printer
- - Is 80 cm wide, which would be great, but no space for that unfortunately in my case
- IKEA PLASTA
- + 60 cm wide, which fits for me (but only enough for XL + spools on one side, other side would hang over the edge)
- + With feet same height as office table
- - Only 57cm deep, meaning display and back part would overhang
- --> solution: Remove normal top cover plate and put on a custom wooden plate which is deeper (like 65 to 70cm) but will hang over at the back and front
- IKEA kitchen part
- +60 x 60 cm size which seems quite fitting
- - I don't actually think it is stable enough
- - Needs a customer wooden plate
- - Is higher than office table (about 85cm high)
RE: Where are you putting yours?
For Ikea Trotten, I see the possibility to easily attach an enclosure. I was thinking about polycarbonat sheets with magnets, that could be attached to the steel frame of Trotten. For the back of the XL, you will need some kind of extension, as Trotten is not deep enough. It offers only enough depth for placing the feet of the XL.
Although the Lack table only consists out of painted cardboard, it is quite stable and rigid. I use several Lack tables for quite heavy and big laser printers. Be aware, that the Lack table will only "survive" a long time in dry locations. It sucks humidity like a sponge.
RE: Where are you putting yours?
I can only say that the Lack table can become really great with the right modifications. I outlined what I did in this post: https://forum.prusa3d.com/forum/user-mods-enclosures-nozzles/my-lack-table-optimized-for-the-prusa-enclosure/
It's really incredible how sturdy that piece of cardboard becomes with a few brackets and rubber feet.
RE: Where are you putting yours?
What stand is that?
IKEA 😀
Pure Metal construction, cheap and plenty of storage.
Mini+MK3S+XL 5 Tool
RE: Where are you putting yours?
I can confirm Ikea Lack can survive Průša XL with single extruder + 1 spool of filament. Having it on top of it like roughly a week, performed like 5 prints and so far it's holding. That said, I think it can work for some time, but it does not feel as a good final solution (stability concerns...) and I am searching something better what would fit my flat ...
My XL currently stands on the office table but I am debating where to "finally" put it:
- IKEA LACK table
- + Cheap
- + About the size it needs
- - Height is lower than office table
- - I think it will not be stable enough
- IKEA Trotten
- + Seems table
- + Multiple options e.g. having a shelf above the printer
- - Is 80 cm wide, which would be great, but no space for that unfortunately in my case
- IKEA PLASTA
- + 60 cm wide, which fits for me (but only enough for XL + spools on one side, other side would hang over the edge)
- + With feet same height as office table
- - Only 57cm deep, meaning display and back part would overhang
- --> solution: Remove normal top cover plate and put on a custom wooden plate which is deeper (like 65 to 70cm) but will hang over at the back and front
- IKEA kitchen part
- +60 x 60 cm size which seems quite fitting
- - I don't actually think it is stable enough
- - Needs a customer wooden plate
- - Is higher than office table (about 85cm high)