Print in place Broom Holder - no separation
Hi folks
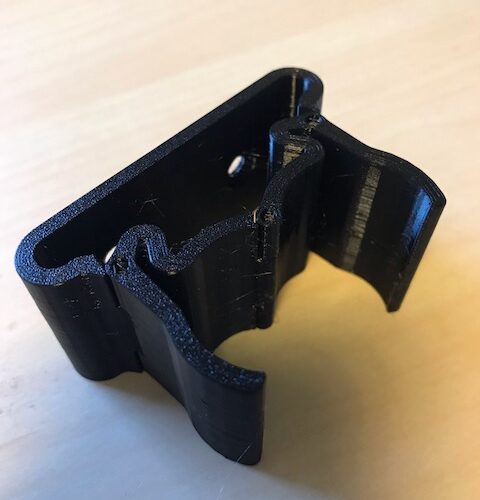
I'm trying to print this neat Broom Holder - https://www.prusaprinters.org/prints/64117-broom-holder-wall-mount-clamp/files. I've printed it standing upright, as the notes on the file advise, but the parts don't separate as they should so I end up with a solid print. (I'm using Prusament PETG)
Is there anything I can do to decrease the "stickiness" between the parts?
Temperature
You might need to lower the temperature. Did you use supports? You should not need them.
--------------------
Chuck H
3D Printer Review Blog
Print-in-place models are always tricky because the tolerances that worked for the designer may not work for your printer. Try to scale it to say 103 or 104%. This increases the size of the gaps. Scaling works in most cases of non-separating print-in-place models. Also, maybe increase elephant foot compensation a bit if you see the gaps are closed on the first layer.
Formerly known on this forum as @fuchsr -- https://foxrun3d.com/
Although it is described as print-in-place I can see no need to do so.
Try exploding the file to objects, arrange them apart on the plate and assemble afterwards. You will need some supports even when printing on end.
Cheerio,
Thank you!
Thanks you, all! I think I'll give all of these suggestions a go and see what works best - I didn't know you could explode the objects in a model!
fuchsr - 'scuse my ignorance, but what is your screen shot showing and why does it mean the model is broken?
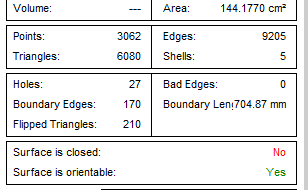
It sure doesn't help that the model contrary to its descriptions is still broken:
The designer included gcode so presumably it's fixable at slice time, I didn't check.
Cheerio,
Andrew, you finally gave me an excuse to print one of these gadgets... I used the standard Prusament PETG profile, 15% gyroid infill, 3 perimeters, 0.2 mm layer height. Came out great on a Mk3S. I didn't even bother fixing the model before loading it, I just let Prusaslicer do its repair magic.
The parts required a bit of force to break free but came off quite easily. As @diem said, this is a pretty awful example of print-in-place. You might as well print it as three separate pieces as they are only connected by the nail or filament or whatever you're going to use as a hinge.
Here's my project file. If it glued together for you, you may have some overextrusion and perhaps need to calibrate your filament. See @bobstro's notebook pages. Or do as I suggested earlier, scale by 104% or so.
Formerly known on this forum as @fuchsr -- https://foxrun3d.com/
The designer included gcode so presumably it's fixable at slice time, I didn't check.
Sort of. I didn't bother repairing it in Netfabb, just loaded the original STL and printed it. Worked fine. However, if you want to split it into objects in Prusaslicer, you end up with 4, not 3 objects, one of which is kaput. Didn't bother trying to print the parts.
Formerly known on this forum as @fuchsr -- https://foxrun3d.com/
Beat me to it
I am printing one also. I think it will come out right. I am using orange PLA + from overture.
--------------------
Chuck H
3D Printer Review Blog
Of course it turned out way too small for any of the brooms in our closet...
Formerly known on this forum as @fuchsr -- https://foxrun3d.com/
Success!
I tried both approaches... Exploding the model parts printed fine, but I can't seem to tidy up all of the residual support material so the joints don't fit very well.
I also tried the combined effects of reducing the temperature, adjusting the elephant's foot compensation and increasing the scale.
(For the scaling, I went to 115%, based on the figures in this comment from the original model https://www.thingiverse.com/thing:2031690/comments#comment-5405962)
And, ta-daaaa:
It fits my broom perfectly; I just need to get some hinge pins, and I'll be all set!
Thank you for the advice and guidance!
Customizable one
Hi
I printed several ones for different broomstick diameters from that model -> https://www.thingiverse.com/thing:2034340
Diameter can be easily adjusted in OpenSCAD. Sliced with PrusaSlicer standard parameters and printed with Prusament PLA. No issue at all
JC
Prusa MINI+ at home / Prusa MK3S+ in the Fab Lab / You can have a look at my designs here printables.com
Great! Thanks for the link. Might as well print the original, when the remix still has errors.
Formerly known on this forum as @fuchsr -- https://foxrun3d.com/


