Pinch part
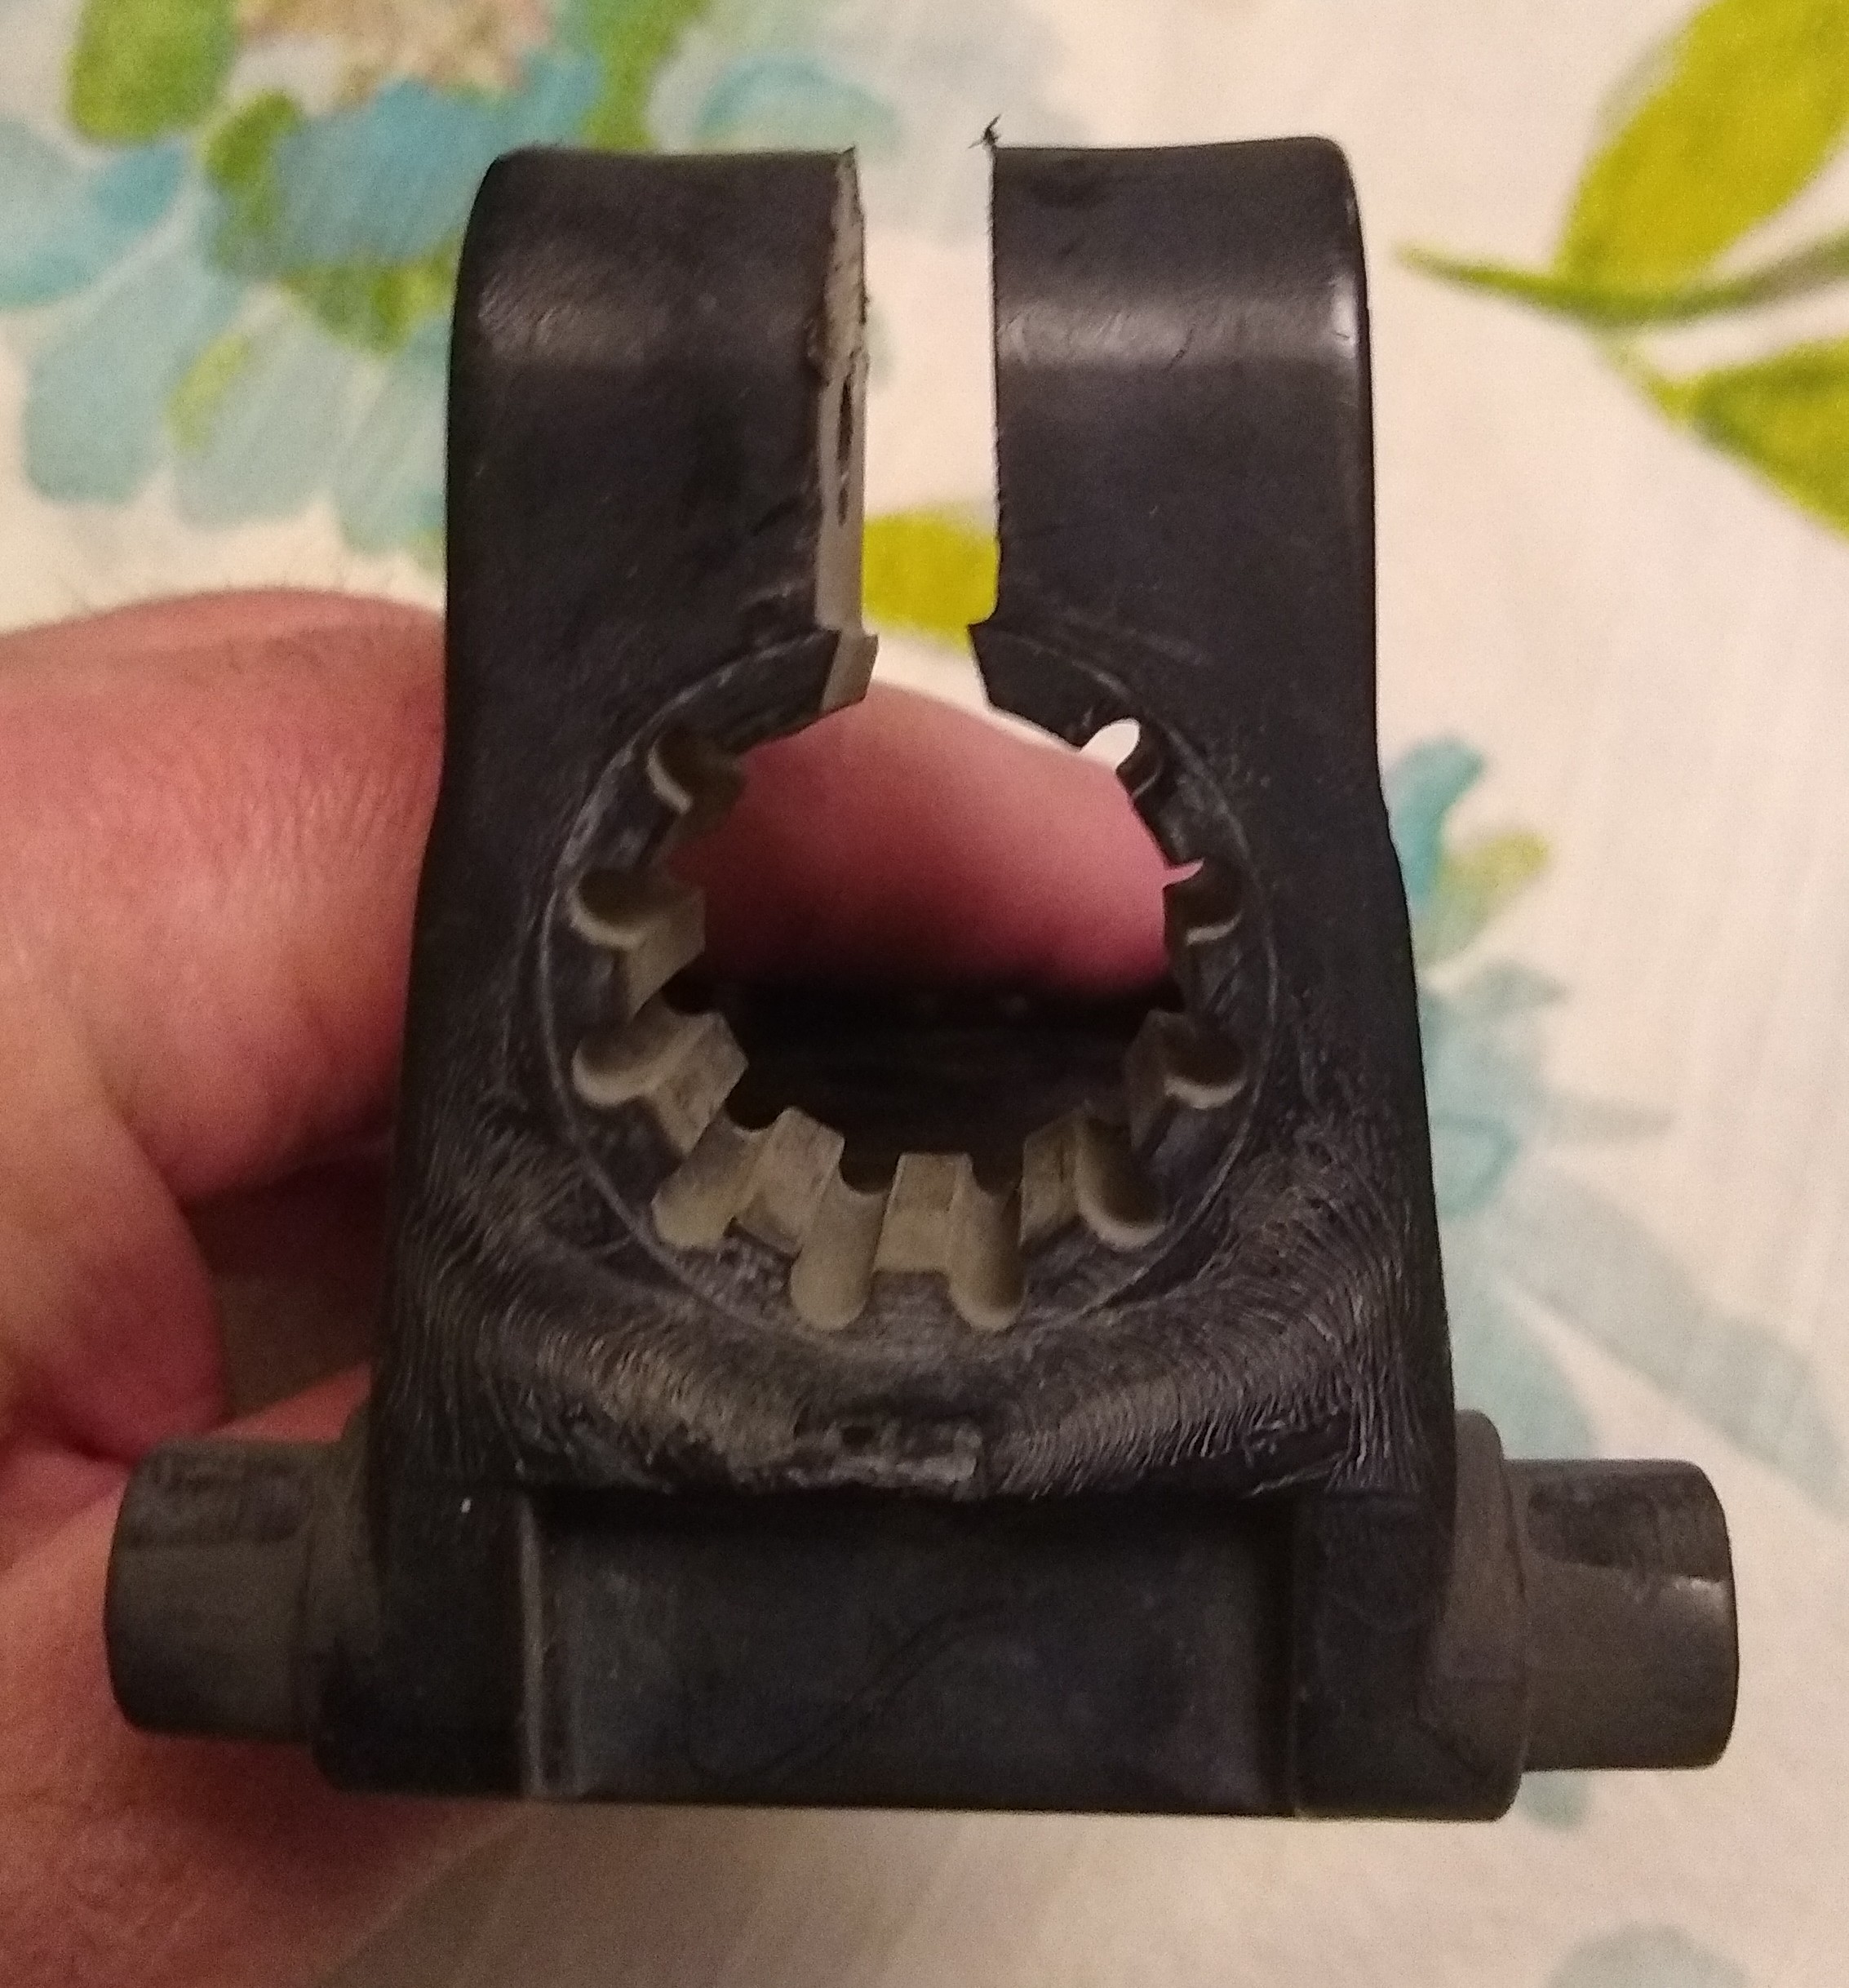
I am going to print a part that clamps onto a metal tube and was wondering if PLA will work for something that has a pinch joint on it. Here is what I am talking about.
RE: Pinch part
we can't see the rest of the part.
layer line orientation is going to be important
I expect layers parallel to the picture surface, would be best
regards Joan
I try to make safe suggestions,You should understand the context and ensure you are happy that they are safe before attempting to apply my suggestions, what you do, is YOUR responsibility.Location Halifax UK
RE: Pinch part
@joantabb
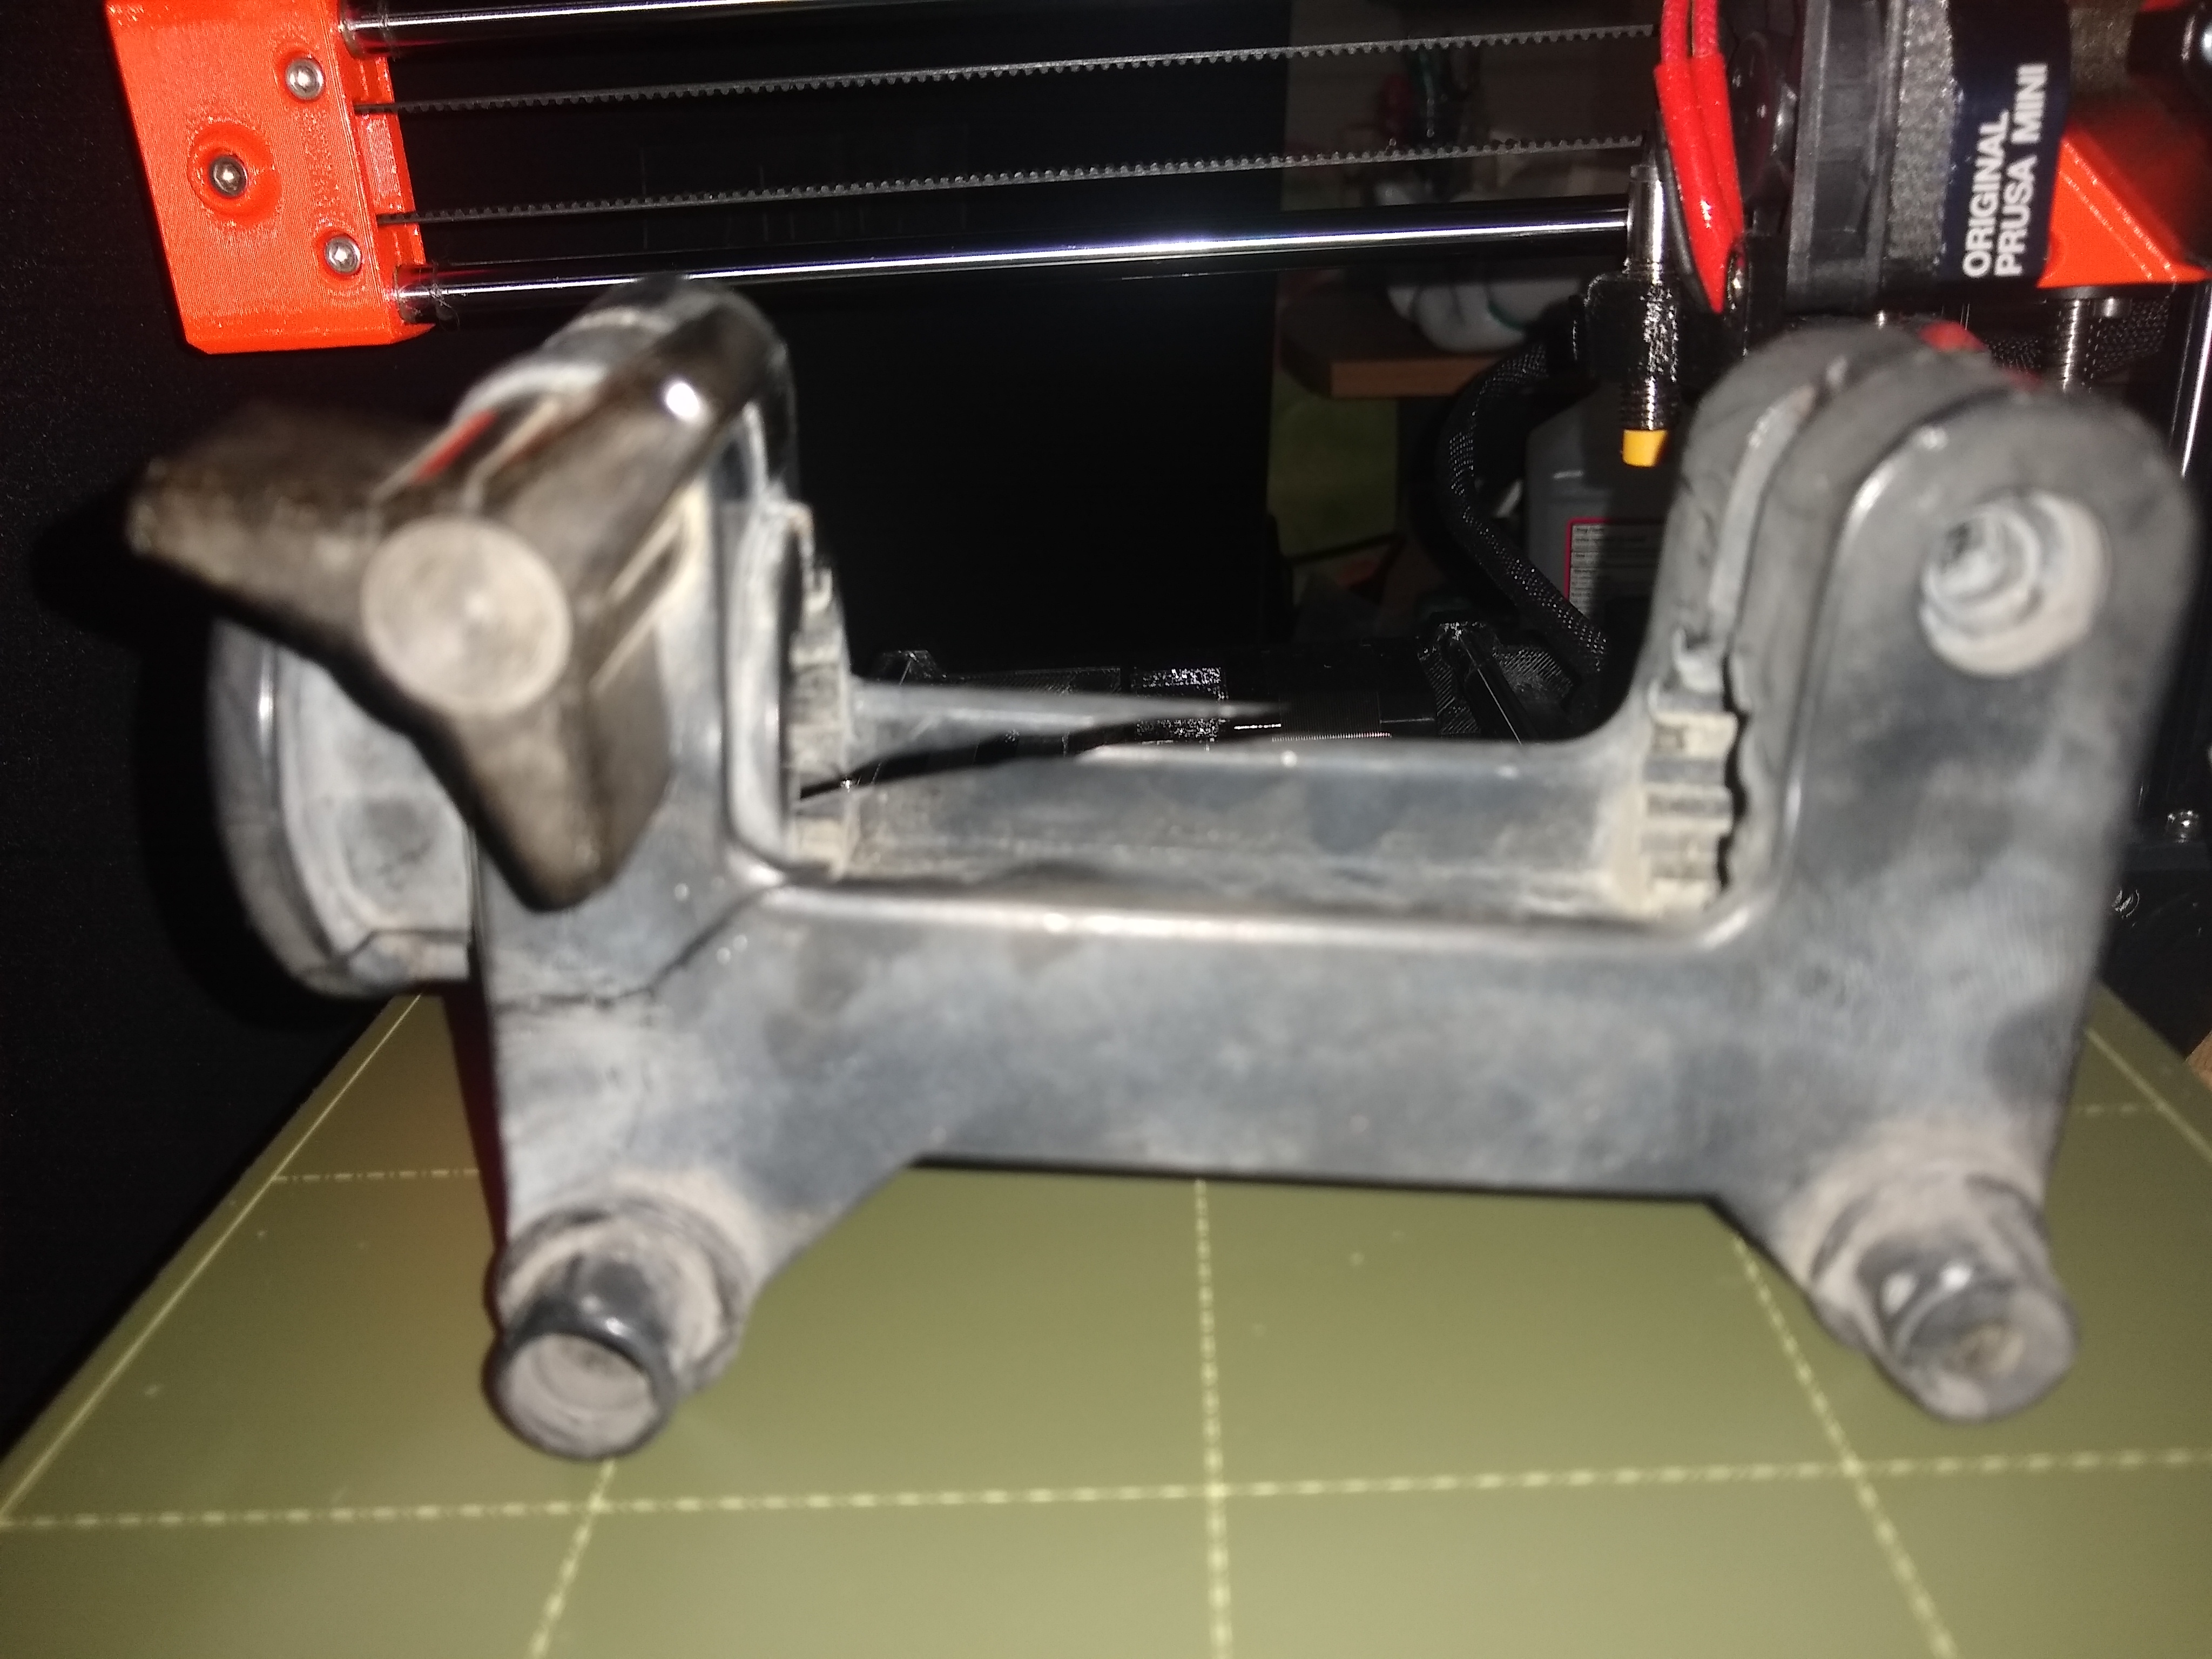
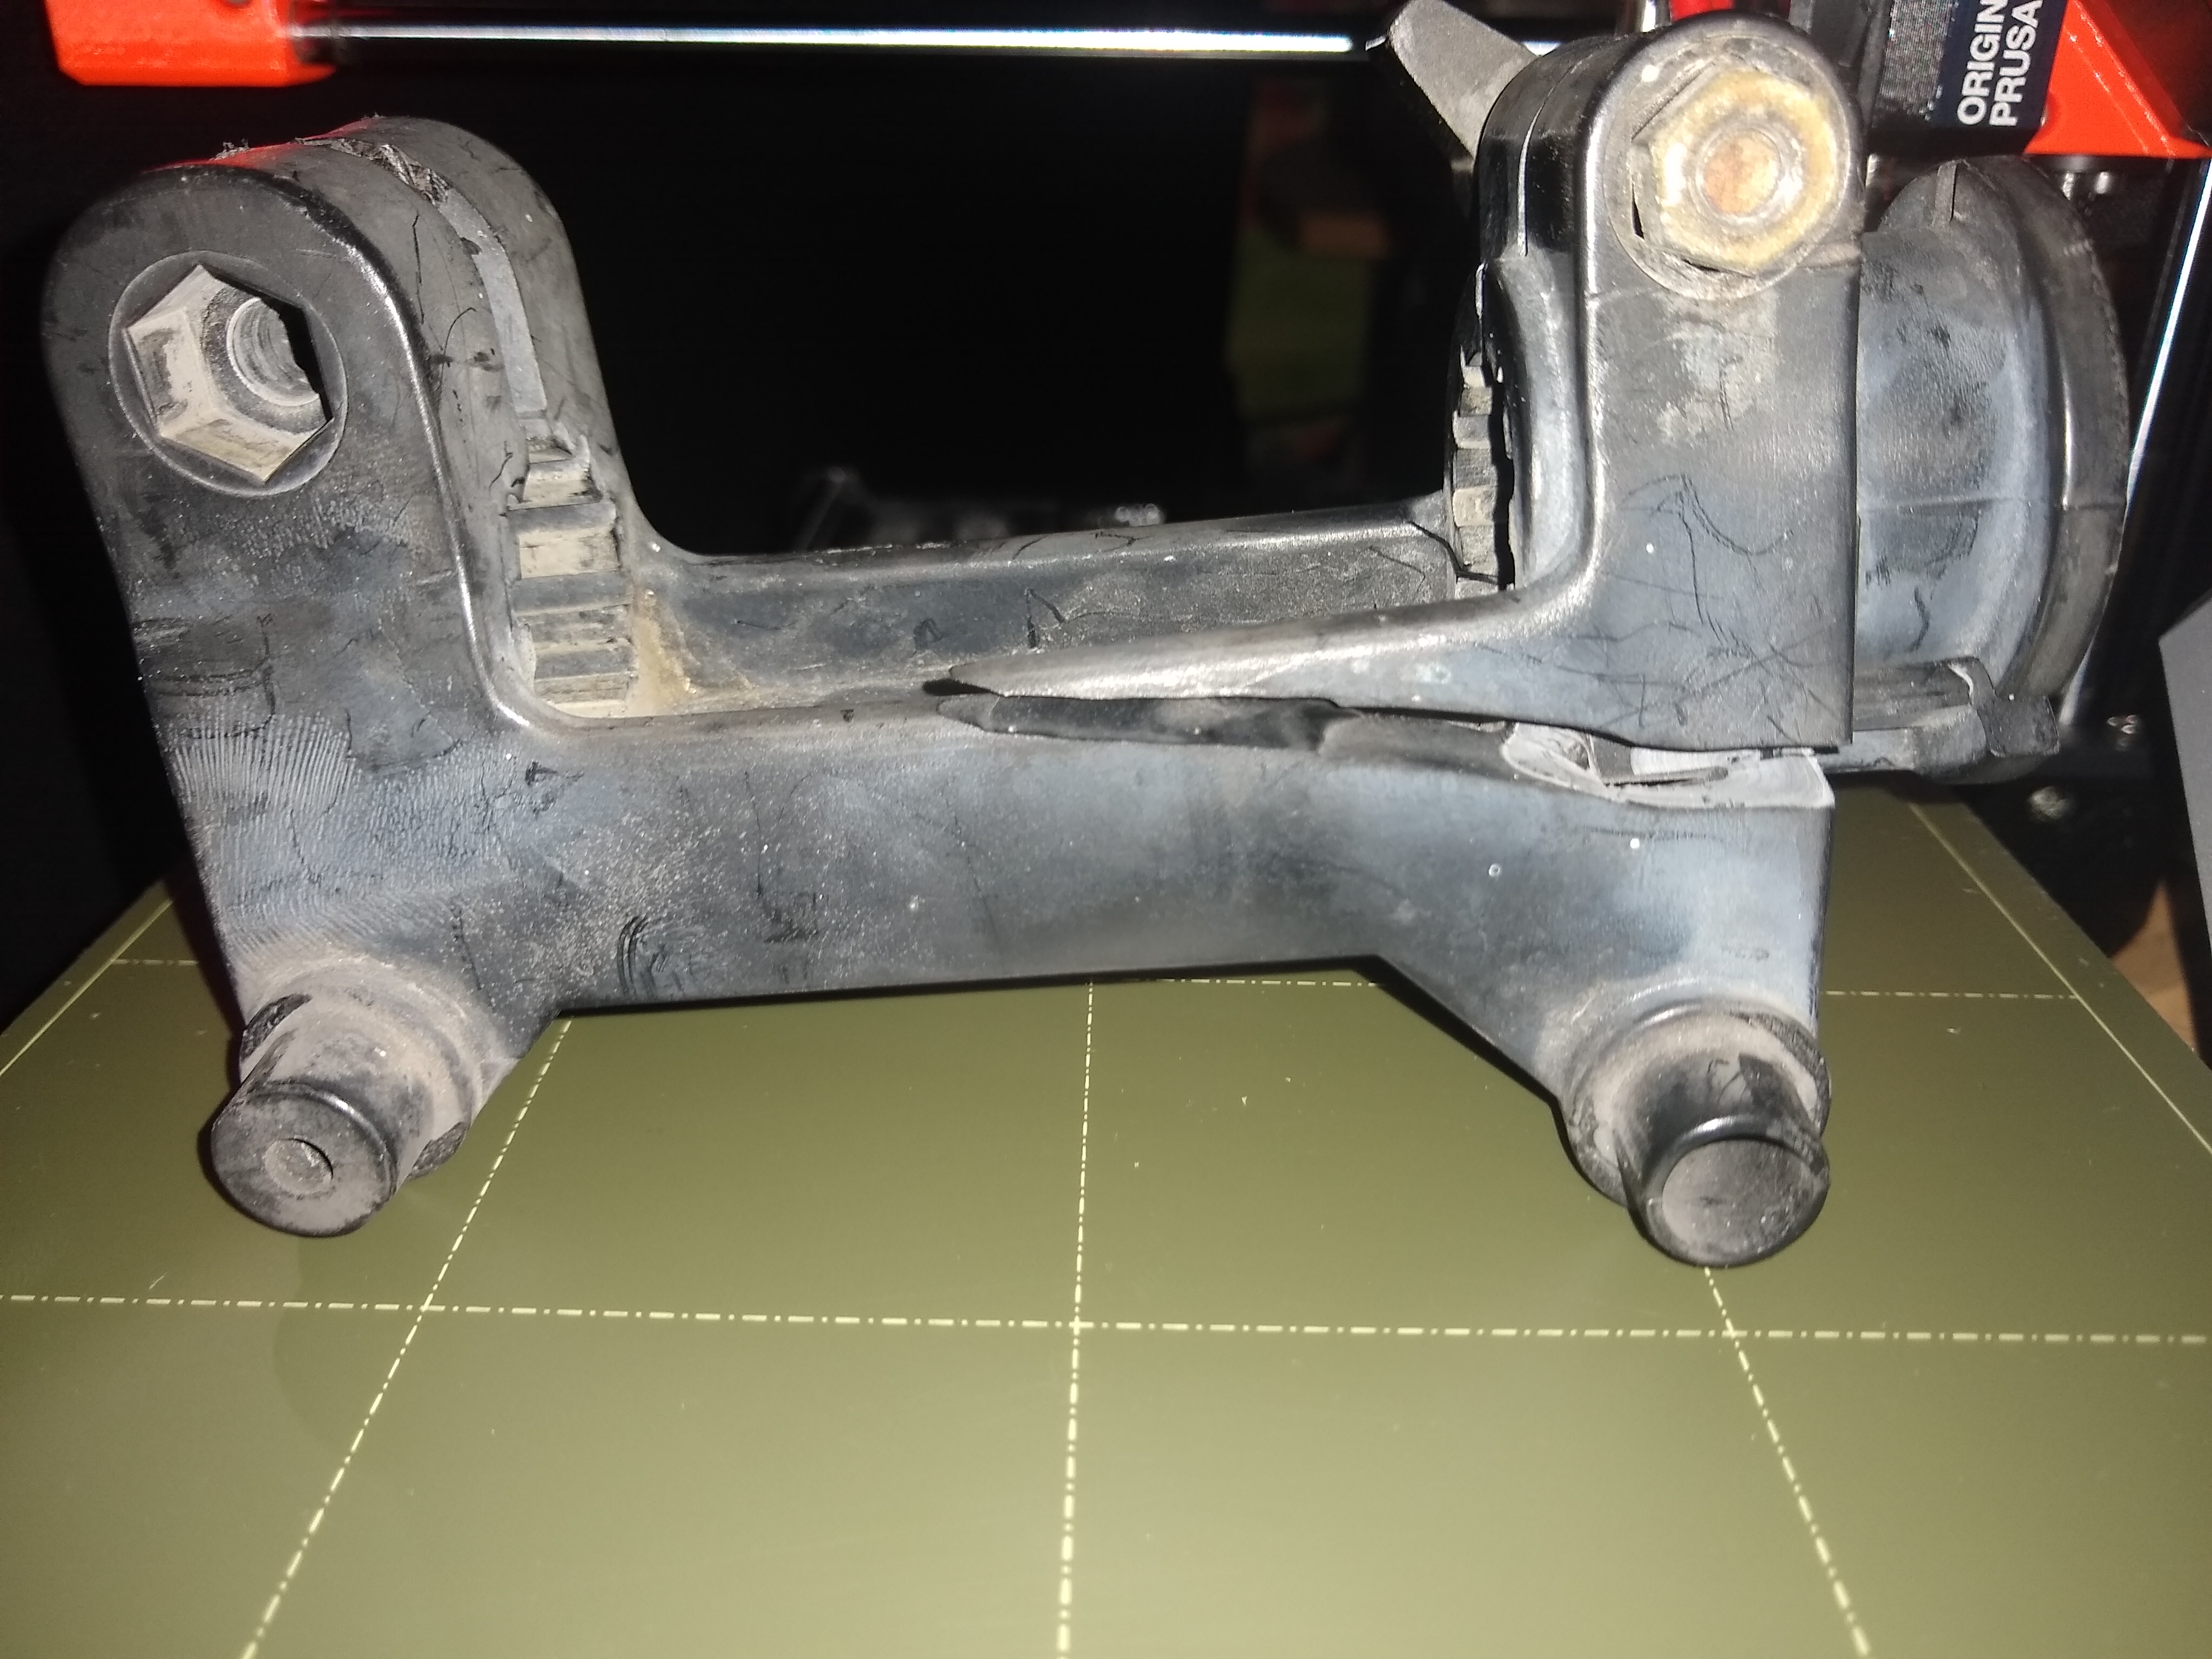
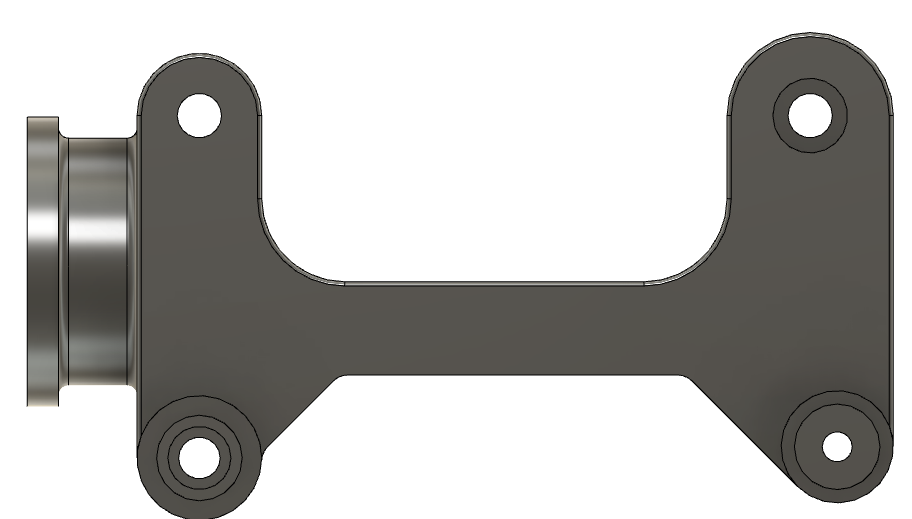
Here are pictures of the whole part. It's about 130mm long 45mm wide 72mm tall.

RE: Pinch part
That is a complex part, it might need a re design to add extra strength.
for clamping strength, layer lines perpendicular to the axis if the shafts you intend to pinch onto but that will make the waist area relatively weak.
are the teeth located in slots in the mating part?
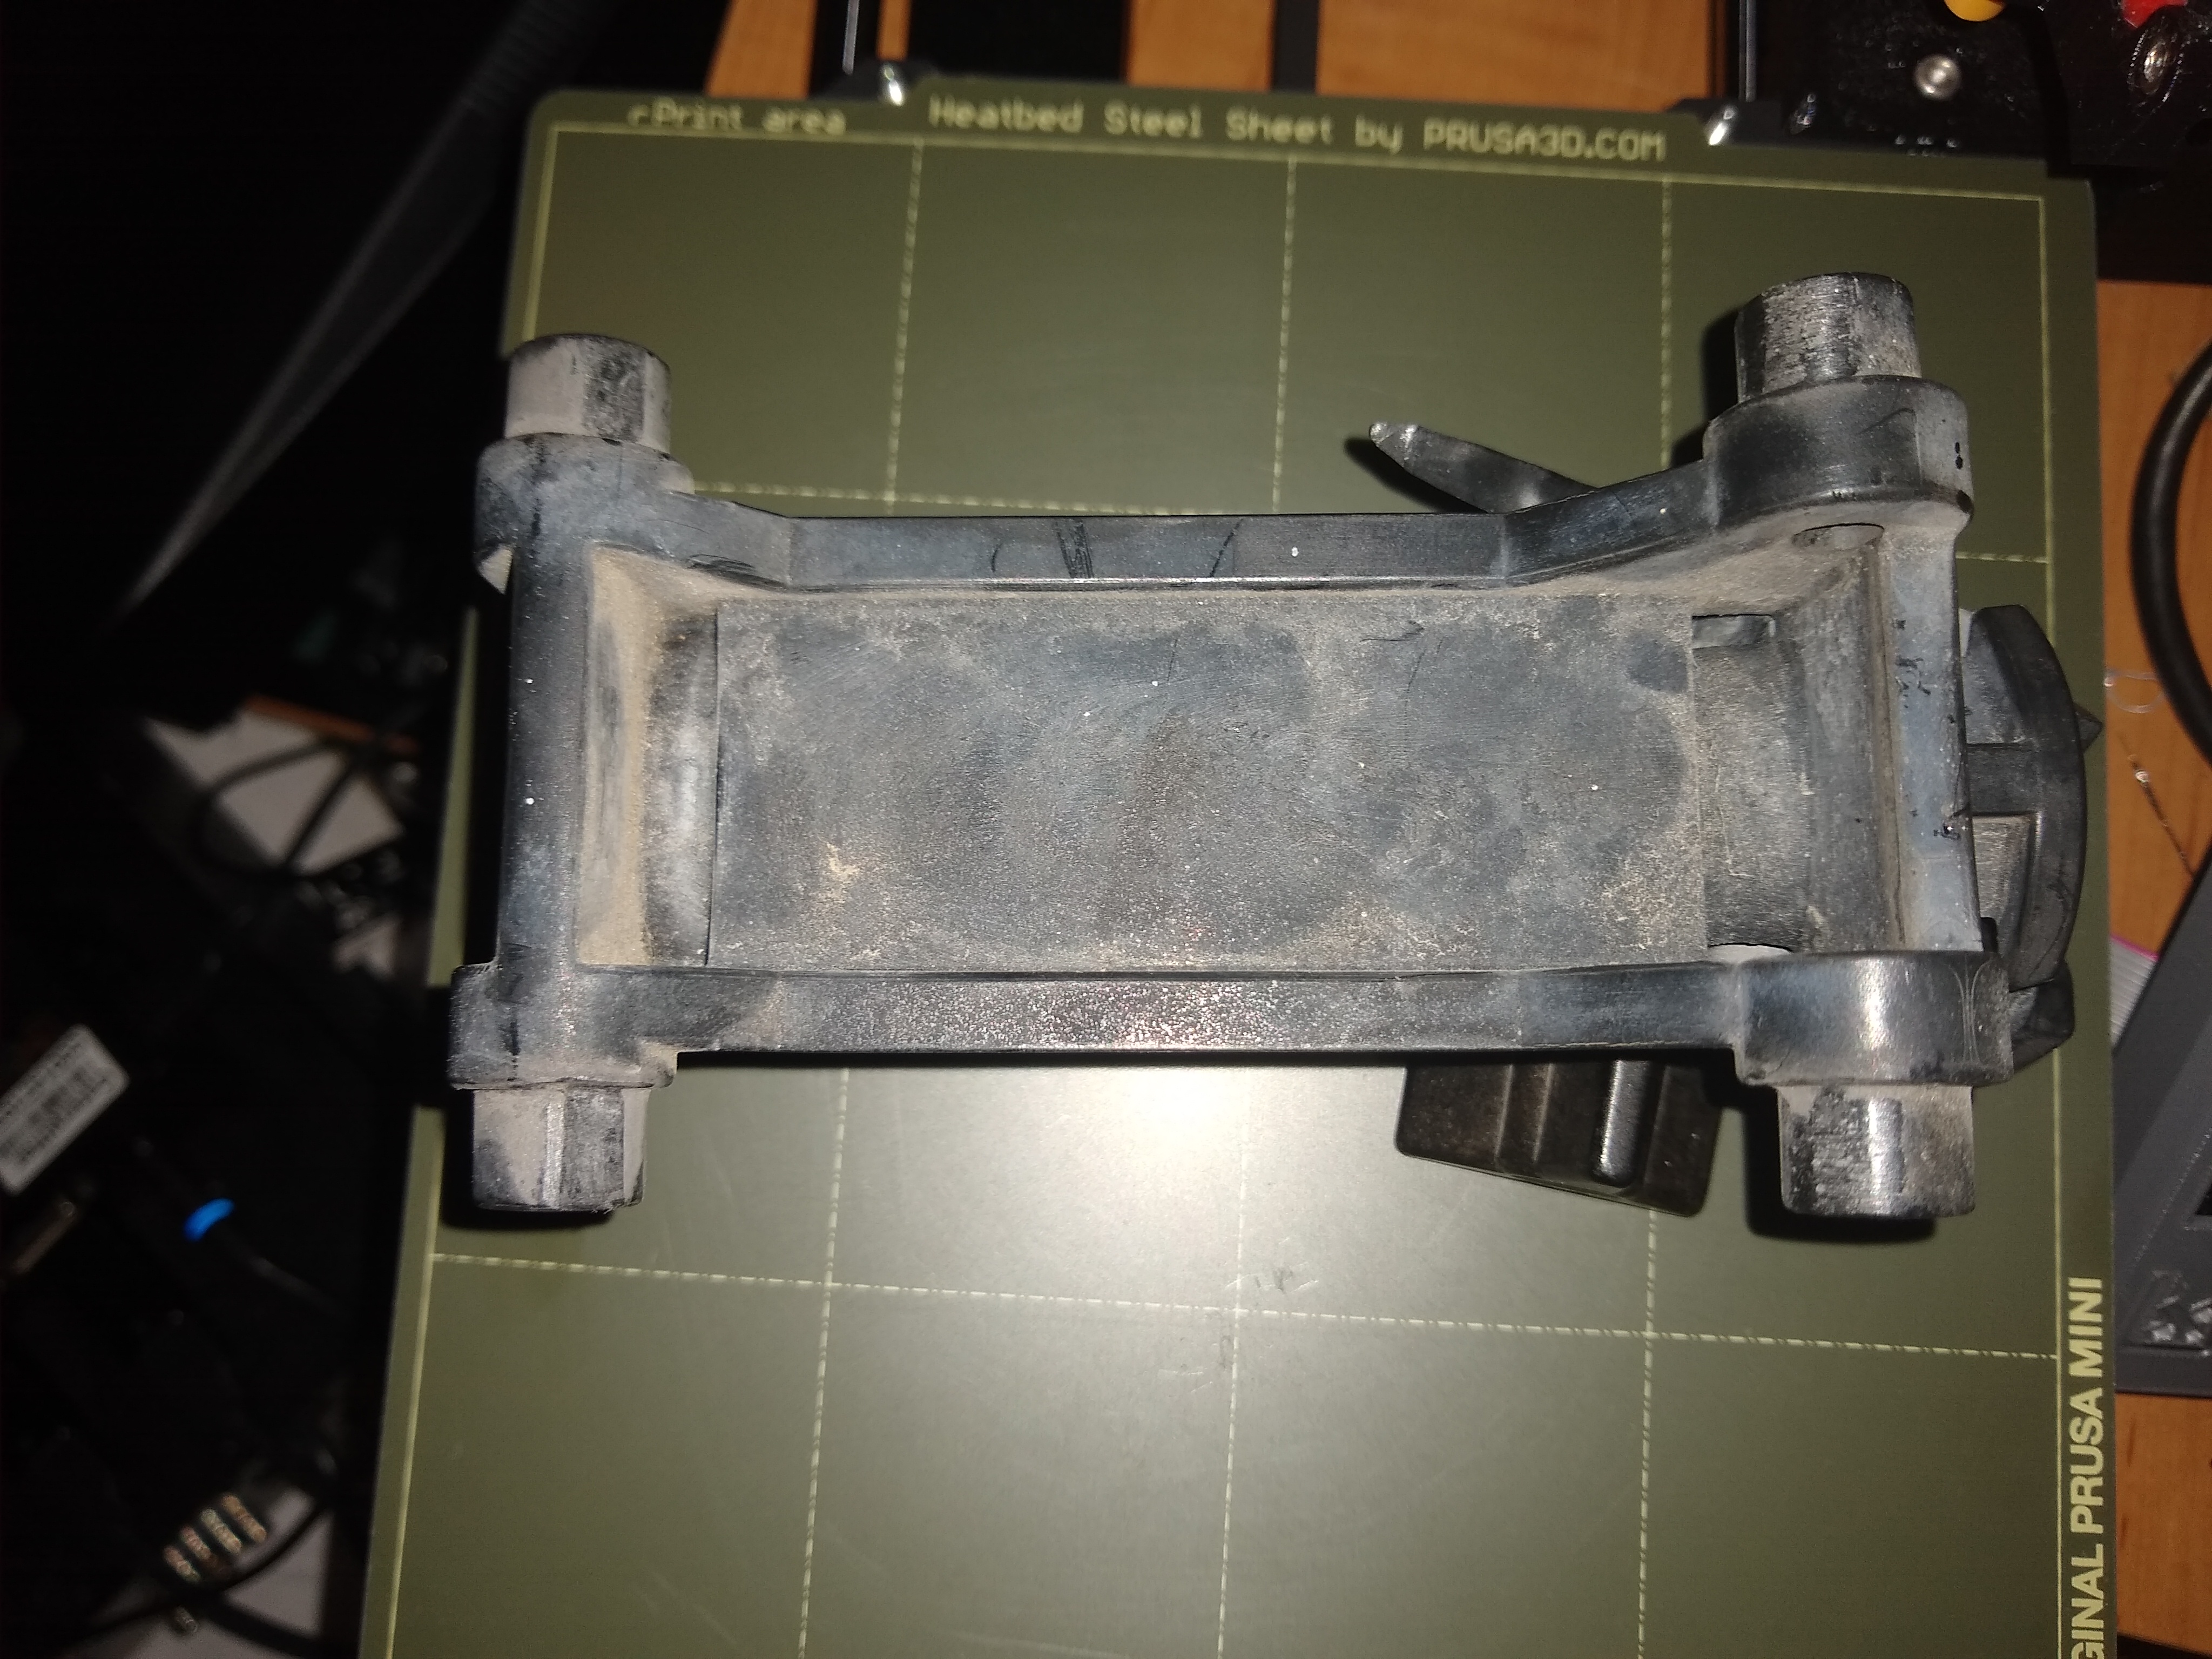
Is there scope to 'Box off' the centre part with additional rails?
regards Joan
I try to make safe suggestions,You should understand the context and ensure you are happy that they are safe before attempting to apply my suggestions, what you do, is YOUR responsibility.Location Halifax UK
RE: Pinch part
@joantabb
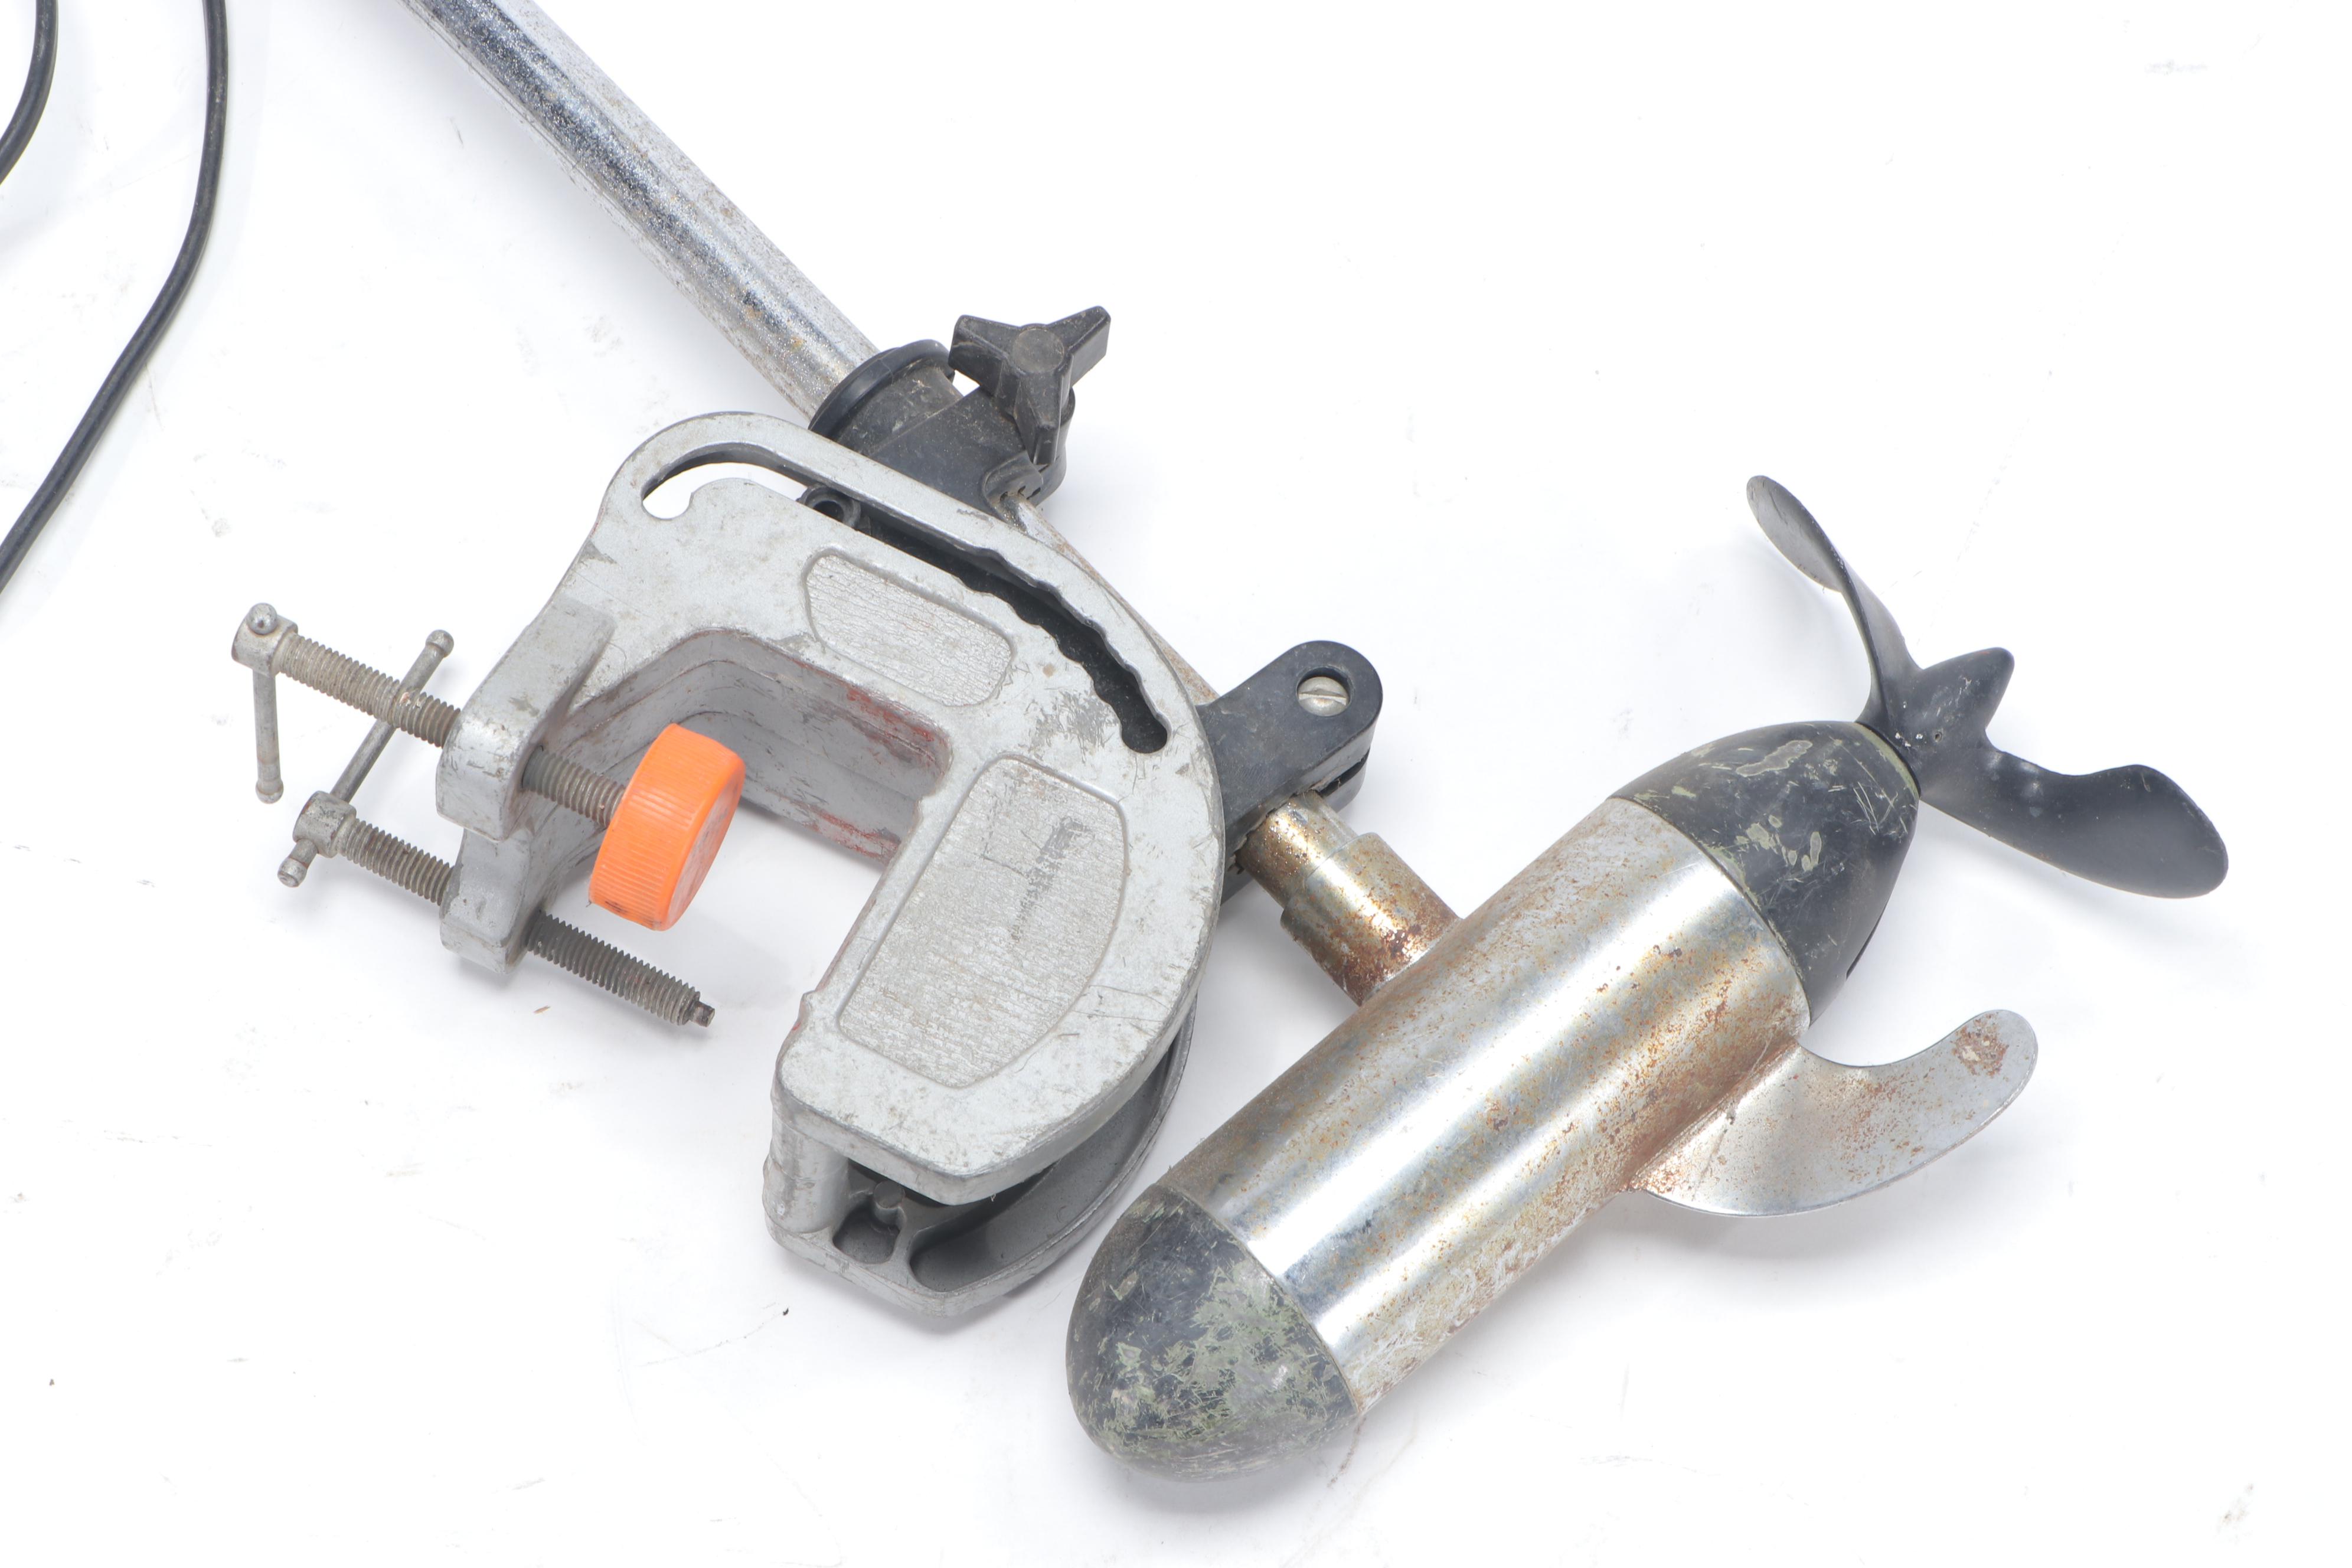
It is pretty complicated. I am trying to model it right now. The splines are not in the tube, it is just a chrome tube. I think they are just there to add flexibility to the part to easily wrap? In the second pic I would definitely add filets to strengthen those corners but could only raise the floor some as this would interfere with the tube spinning. Here is a picture of what this part actually does. It's my dad's old trolling motor that I just want to fix to use once in awhile.
RE: Pinch part
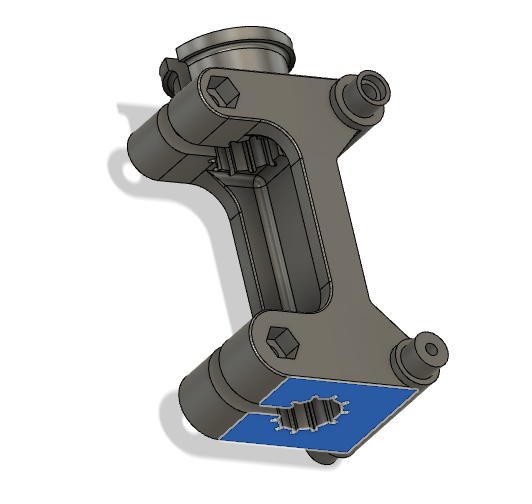
Well here is what I came up with. I plan to print it as you stated with the layers perpendicular to the centerline of the pinch area starting with the blue face in pic one on the plate. I'm thinking .25 layer with pretty factory horizontal layering but not very sure about infill. Any suggestions? Hatchbox pla 1.75 with .4 nozzle.

RE: Pinch part
I would at least print with PETG. PLA is biodegradable and creeps under pressure. Looks like a trolling motor mount bracket, so it'll be subject to UV, water, and stress, all bad for PLA. For the most part the model looks good, but for the center section, I'd add a raised X for support, at least as high as the tube-mount structure, since it's a 3d printed part, just for extra strength. As far as print settings, print it hotter than usual, for better layer adhesion, and bump it up to say, 4 perimeters, maybe 40-50% infill. The extra perimeters are better for strength than just higher infill.
I think I know, I don’t think I know. I don’t think I think I know, I don’t think I think.
RE: Pinch part
@skreelink
Thanks for your advice! After what I have read in the past 2 days, PLA is a bad choice like you said. I will take a look at adding the x brace in there. Thanks for that idea. I will look at opposite side too. I did add web thickness to the ribs so that should help too. I have also read that PETG doesn't bridge or do overhangs very well. If I print it the way I said with the blue face down would I need supports? not alot of overhang really but this is all new to me. I've never printed petg. I was going to order some Overture or Hatchbox to do the job. I actually read that something called PC was great but I don't think it will print on the pei bed and I think it requires a hardened nozzle. Thanks
RE: Pinch part
Supports would be a good idea, better to waste a little more plastic and a bit of trouble on supports, vs wasting the entire print if it fails near the end. I've had good print quality with Overture PETG printed at Prusament PETG settings (it prints a bit hotter than "generic" at 250C). PETG prints about as well as PLA does, maybe a little more stringing, overhangs can be a little fiddly, but you're not looking for pretty on a functional part. :p
PC is an entirely different beast, it would be one of the best for the application, but it also basically requires an enclosure and vent system, else it warps and ruins the part, doesn't stick, etc. You could look at ASA, it also requires being printed hot, an enclosure, and potential vent (unless you have the printer in a garage or something) because all the higher temp plastics give off fumes.
You could likely get a successful ASA print by putting a large cardboard box over the entire printer so the hotend/heatbed keeps the air temp toasty warm inside so it doesn't deform and cools evenly so no warping. ASA also only requires cleaning the smooth PEI with IPA according to the Prusa ASA info found Here.
Personally, I'd say start with PETG and move up to a stronger plastic if you find the need to.
I think I know, I don’t think I know. I don’t think I think I know, I don’t think I think.
RE: Pinch part
@skreelink
I will stick with PETG then. I will put some supports in there and see what I get. I appreciate the help! I'll post back with the results when I get some filament!
RE: Pinch part
@skreelink
I will stick with PETG then. I will put some supports in there and see what I get. I appreciate the help! I'll post back with the results when I get some filament!
If cost isn't too big an issue, once you've proven the parts works with PETG, you can get it printed with stronger material by using company like Shapeways and use one of their high strength material.
RE: Pinch part
@alex-hung
I never thought about having someone else print it. As much as I plan on using it I "think" PETG will be fine. I will just put a safety chain on the motor so if it fails it won't go in the drink. LOL PETG on order so hopefully by Wednesday I will have a printed part to show. Black wasn't available and I have wanted white for another print so white it is. I will just paint it. Daughter wants some things printed and painted so 2 birds as they say.
RE: Pinch part
@shags72
Funfact, while talking about it, I kinda been wanting to try ASA so I myself am waiting on a roll of filament... Ordered a roll of Polymaker Polylite ASA. I want to print a fan duct mod for my MINI out of it, I did it out of PETG and it worked rather well, but since it's right at the heater cartridge, it decided to start sagging a bit, so I figured ASA would be a better fit for that.
I think I know, I don’t think I know. I don’t think I think I know, I don’t think I think.
RE: Pinch part
@skreelink
Awesome! So does it need ventilation too or just covering to keep the heat in? Also the overture came with a print bed. How does that work?
RE: Pinch part
@shags72
For PETG, you do not need any sort of covering or ventilation, just make sure to print it on a clean textured sheet. Do NOT print on the smooth PEI unless you have some form of release agent like gluestick, blue painters tape, or the print bed they include. I think the included print bed is basically a textured sticker you stick to your current surface. I have the textured sheet, so I've never used one.
Also, sad day... My ASA got delivered, but the spool is shattered, so I can't use it with the roller spool holder. I've contacted polymaker about it. I plan to try it without any covering or anything first, but, I can't until this broken spool gets resolved. 🙁

I think I know, I don’t think I know. I don’t think I think I know, I don’t think I think.
RE: Pinch part
@skreelink
Aw man! Bummer! Hopefully you get it quick!
Well I am going to use my smooth plate with windex on it like the Prusa knowledge base states. But I am going to try some small prints first just to tune in the stuff in.
RE: Pinch part
@skreelink
Aw man! Bummer! Hopefully you get it quick!
Well I am going to use my smooth plate with windex on it like the Prusa knowledge base states. But I am going to try some small prints first just to tune in the stuff in.
I found that using the pre-made profiles there wasn't much to dial in, they work fairly well! If I want nicer/less stringing, I use the "Generic PETG" profile since it runs a little cooler. Functional parts, however, I use the "Prusament PETG" profile as the extra heat helps with layer adhesion to make a stronger part. Though, even with the hotter profile, Overture prints very well and pretty. Keep us all updated on your PETG adventure.
I think I know, I don’t think I know. I don’t think I think I know, I don’t think I think.
RE: Pinch part
@skreelink
Well with never printing PETG before I decided to do a few small prints. Prusa plate and now a Baby Yoda which is around 3 hours before pushing it into overdrive! Plate looks good and Yoda is looking good at about 40%. Probably start the print tomorrow early so I can keep an eye on it every once in awhile. 16 hour print with 40% infill .2 layering with 5 perimeters. We will see how it goes.
RE: Pinch part
@skreelink
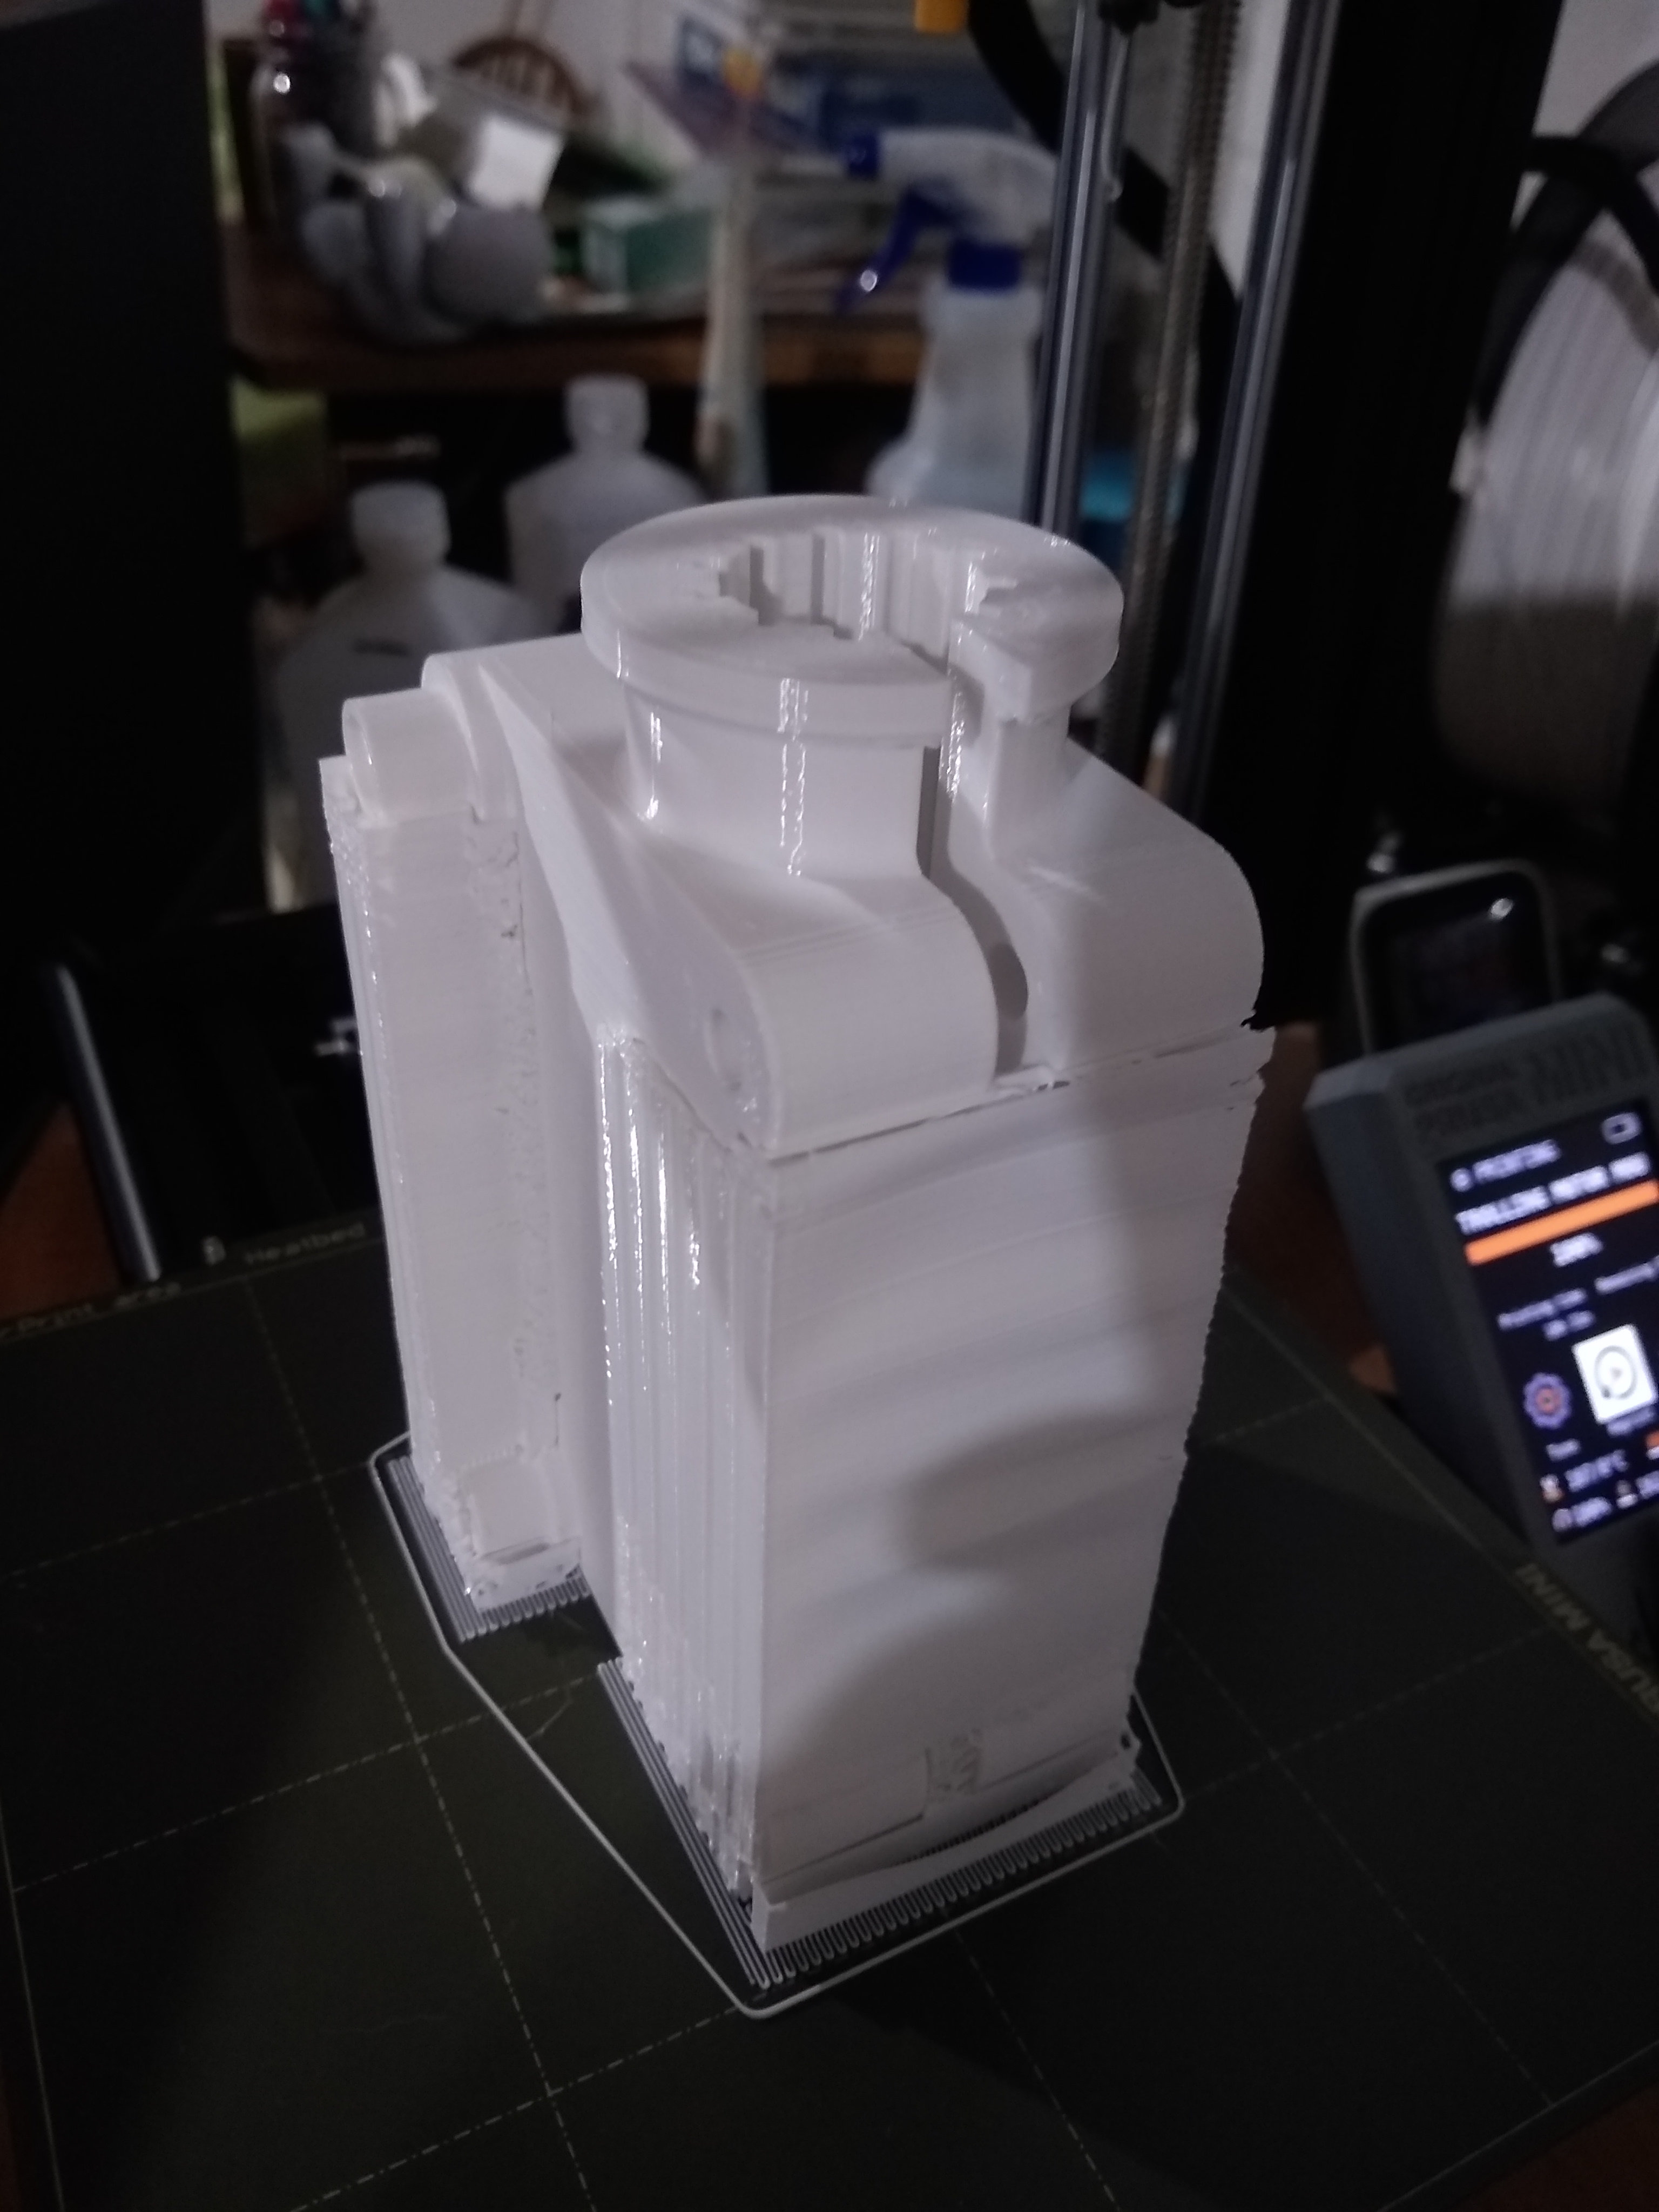
Hey here's the finished product! Not too bad using prusament profile with some oozing tweaking. Mainly 0 z lift and longer retract. 18.5 hour print. Thanks for the help!

RE: Pinch part
@shags72
That looks great! Hopefully it works out. I got a reply from Polymaker, they've shipped out a replacement spool and didn't ask for this one back... So I printed me a side-mount spool holder, vacuumed out all the broken bits from the filament, and went ahead and printed the fan shroud I wanted it for anyway. Hottest thing I've printed on my Mini so far, 260/100... Hot enough it raised the temp in the room it was in. I had a draft shield up and the part came out flawless (except for a line on the side where I was bumping the Z axis installing a tool holder). Holding up the PETG version so you know what it looks like, forgot to take pictures before mounting it.

I think I know, I don’t think I know. I don’t think I think I know, I don’t think I think.