Issues with PETG on brand-new mini+ (preassembled)
Hi!
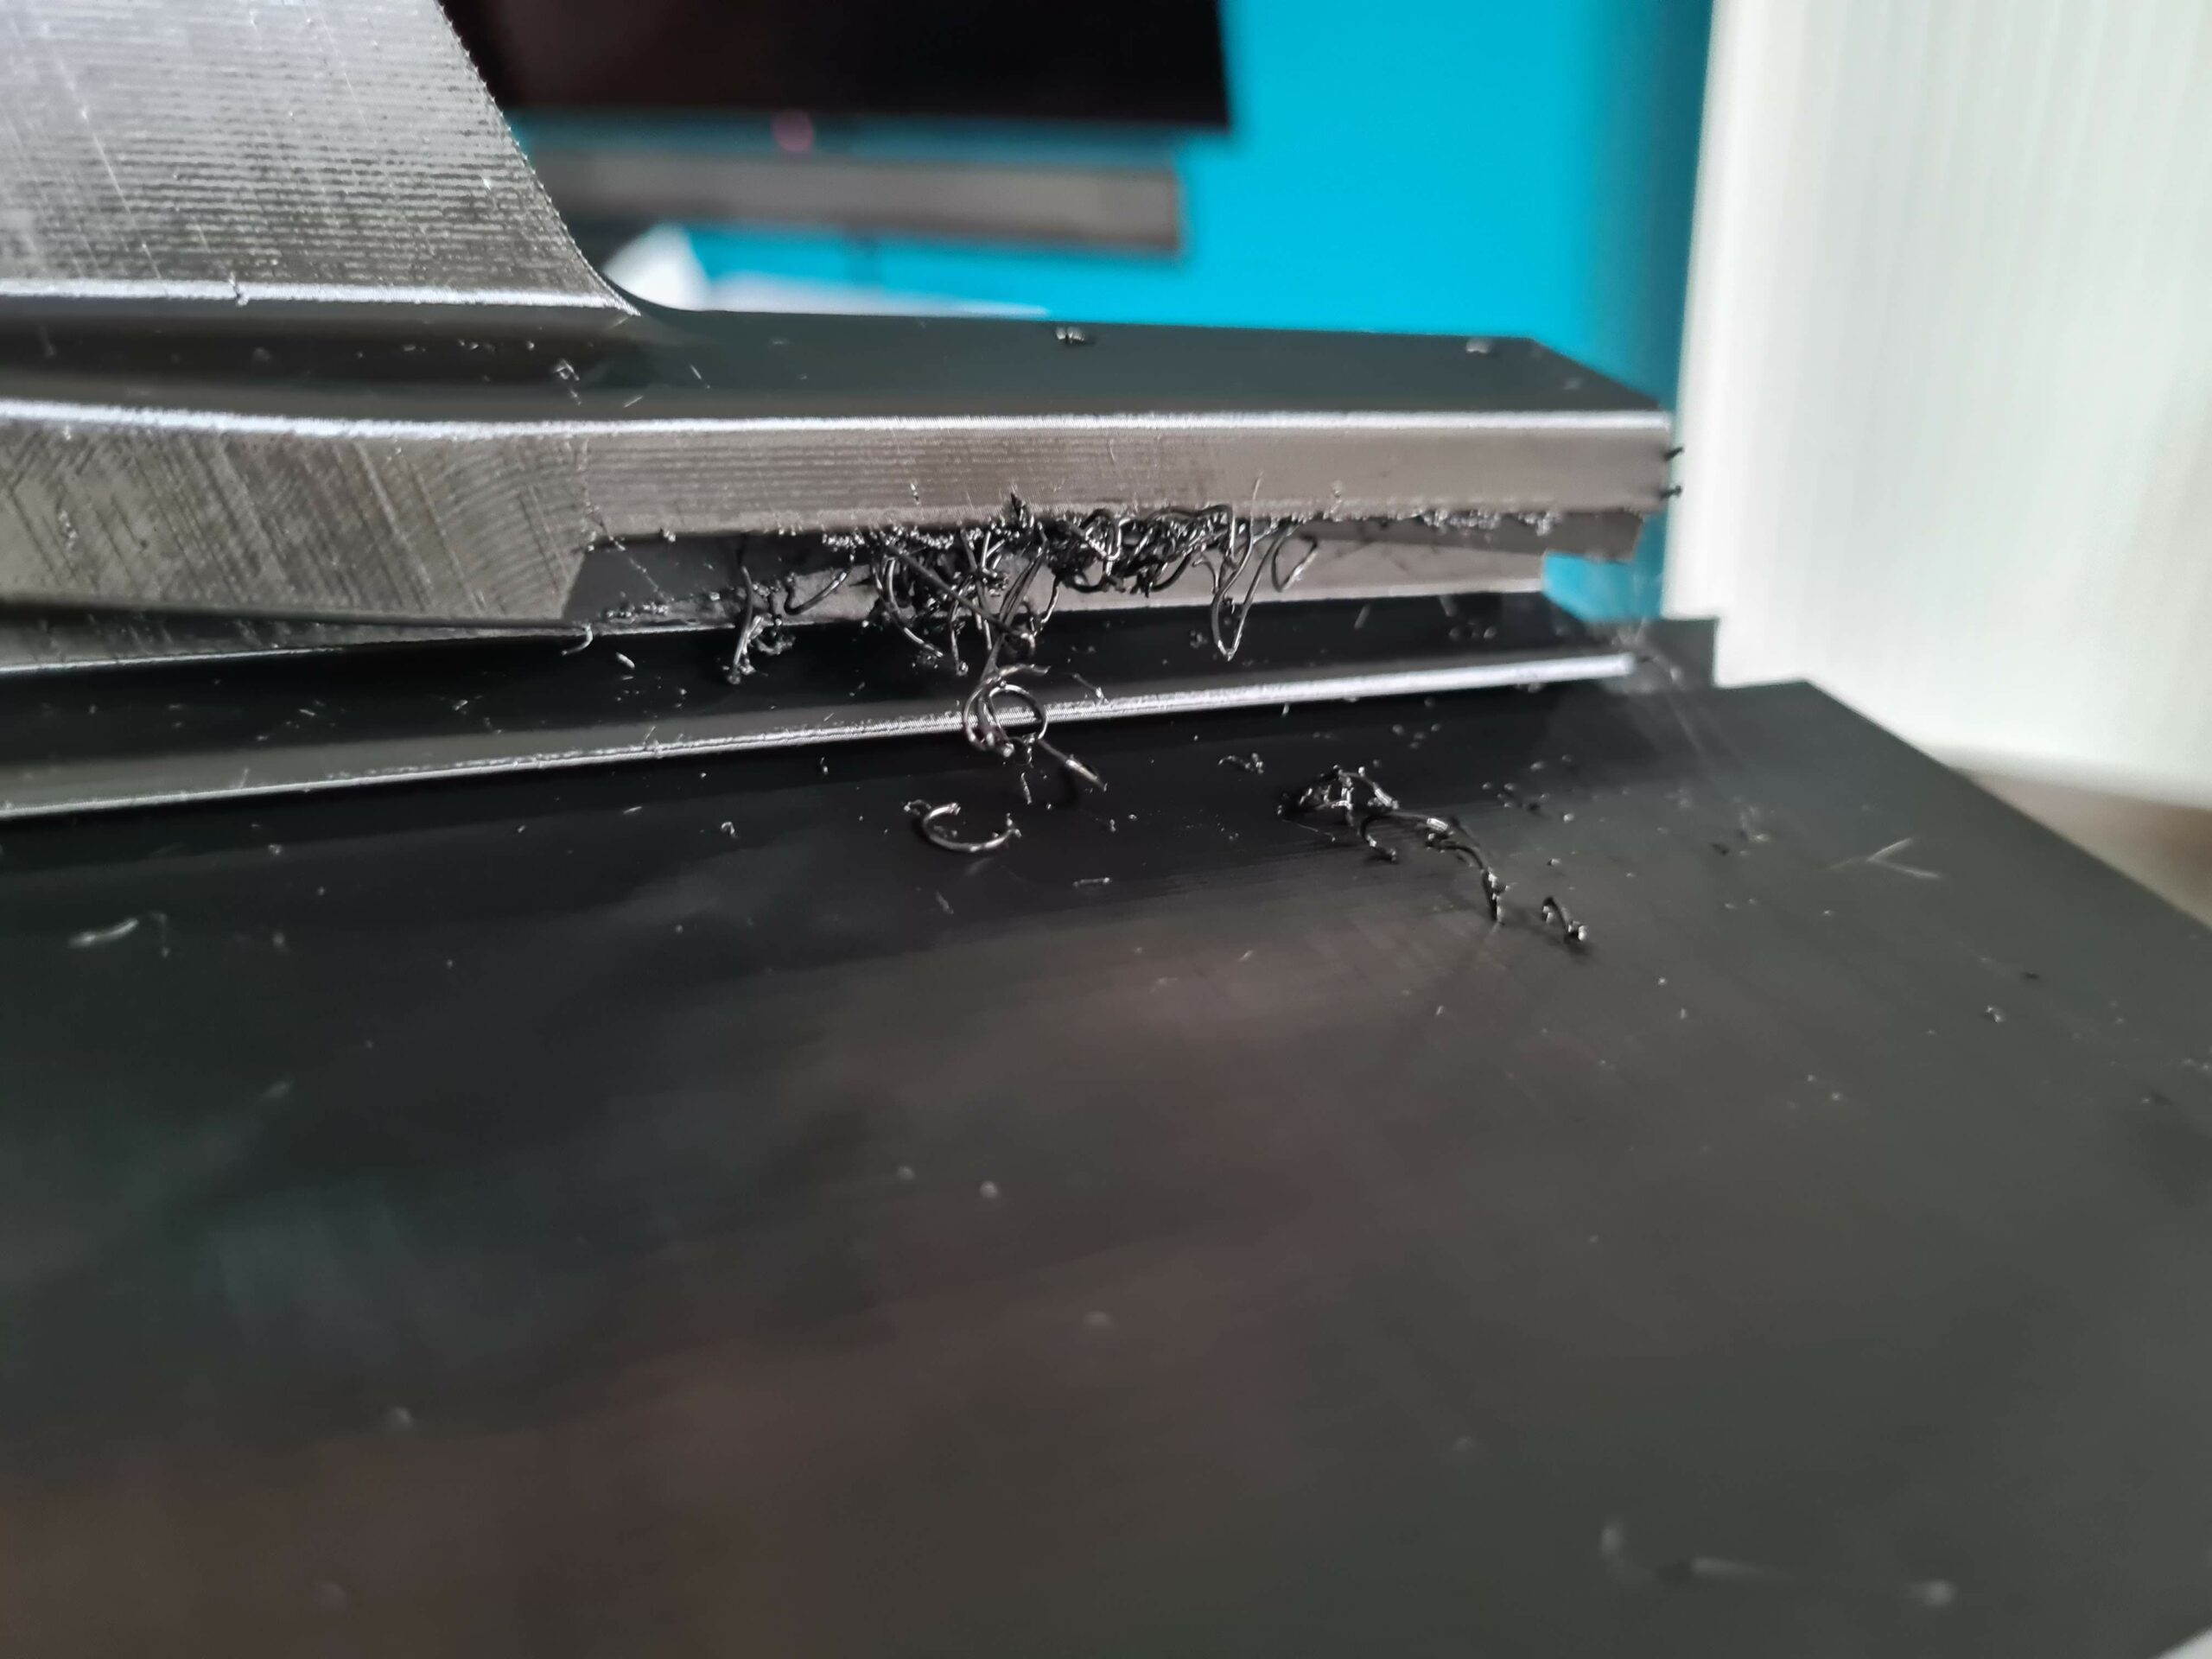
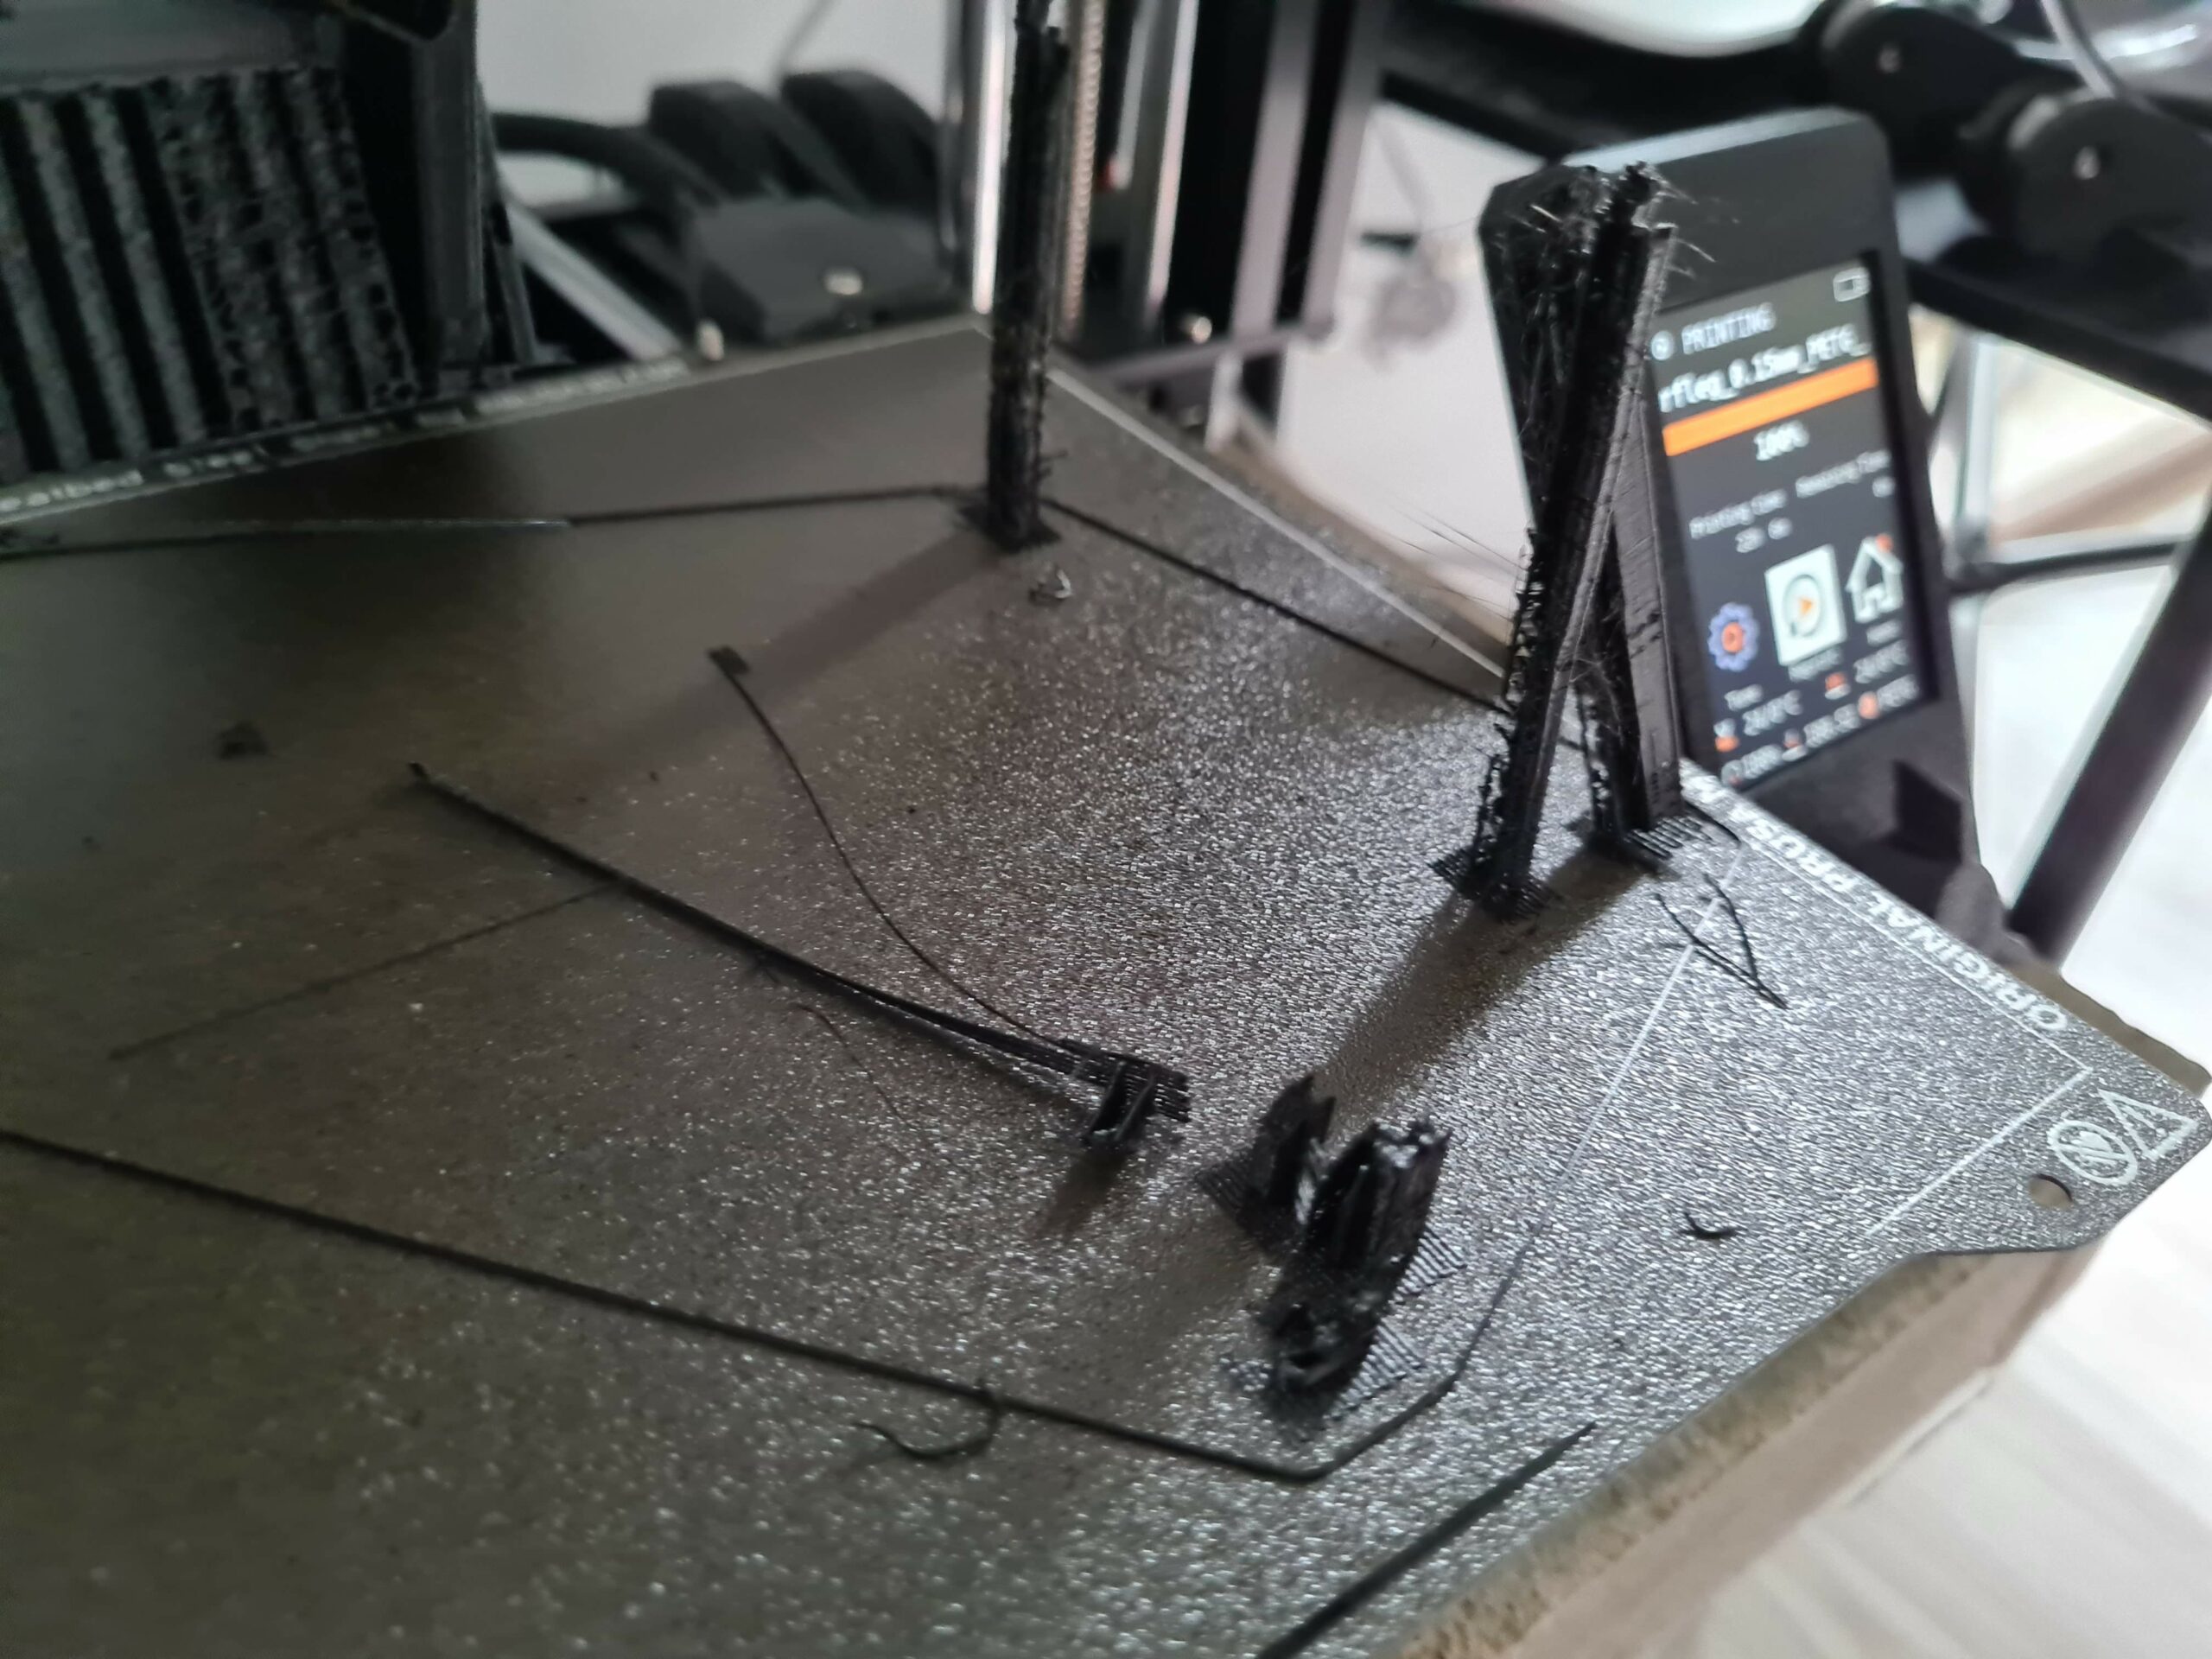
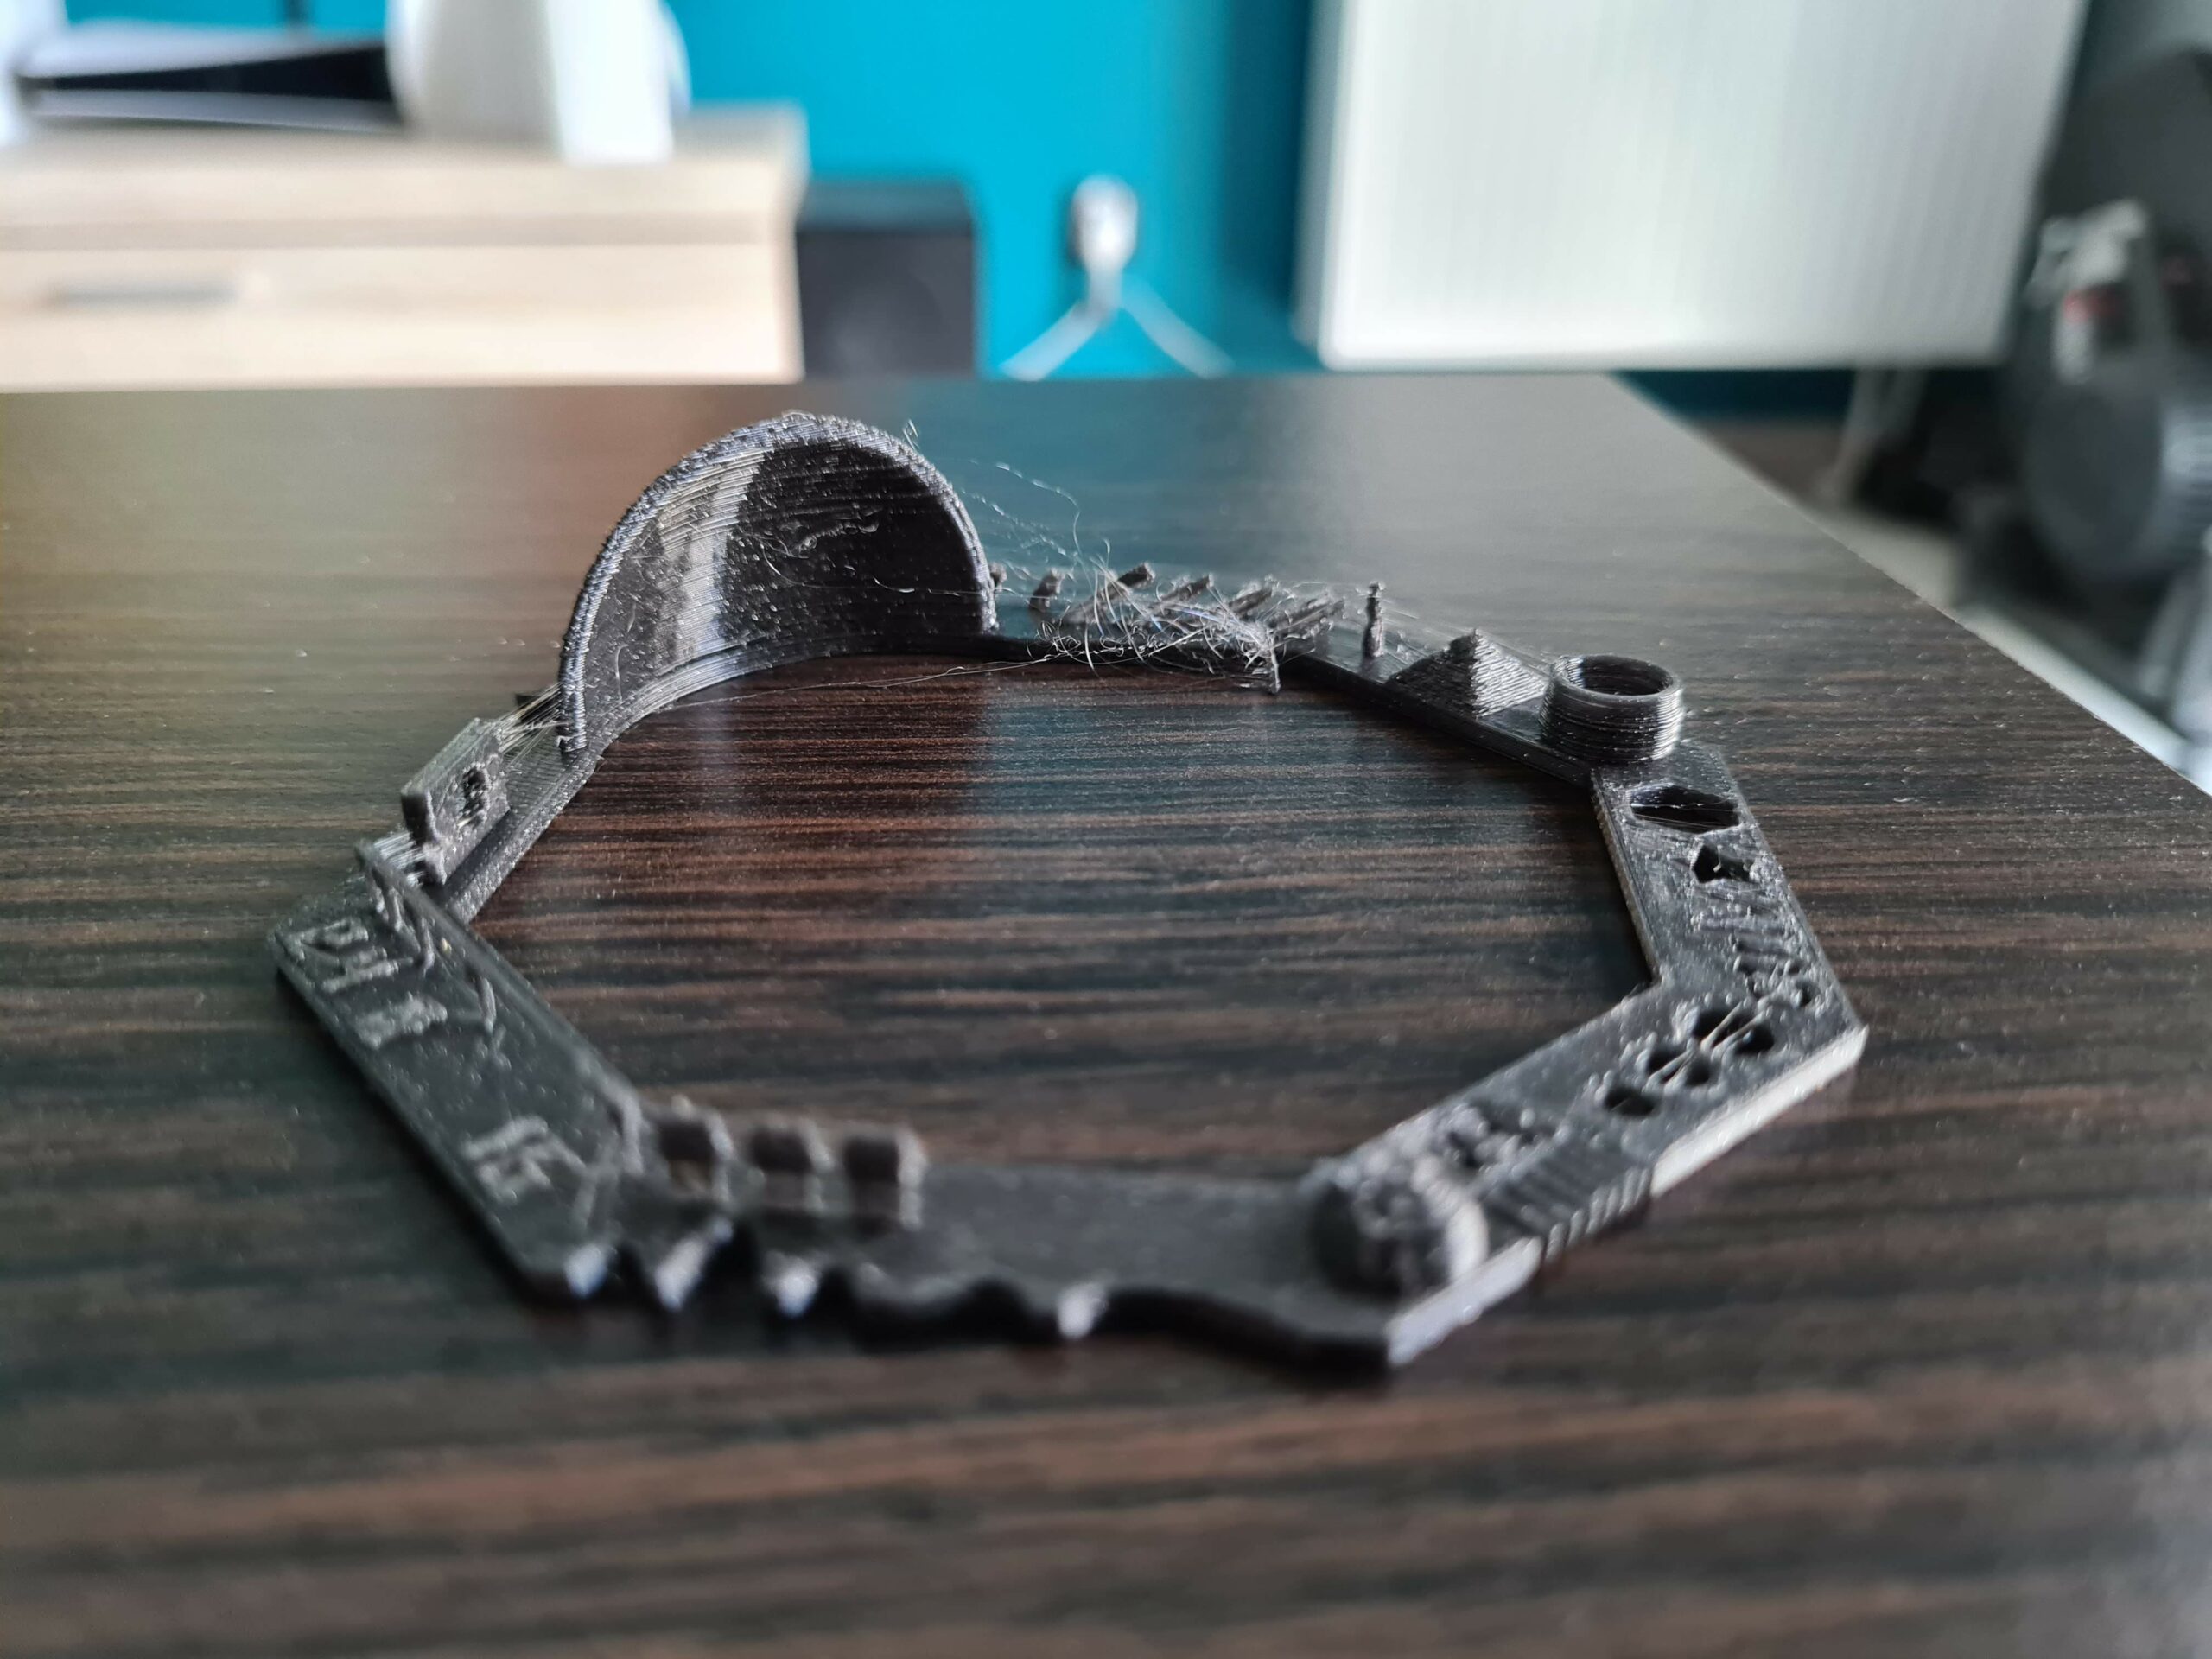
I got my Mini+ a week ago together with Prusa Galaxy Black PLA. Default settings, everything printed great. I wanted to print prusa mini+ base, so I bought PETG - Devil Design Black PETG to be exact. I saw that PrusaSlicer has profile ready for this PETG so I was thrilled to see great prints. Well, it didn't work as I expected. I get a lot of stringing, to the point where it makes print unusable (sliders for filament spool are so bad that it won't even go in, let alone turn smoothly. From 4 legs, 2 came out like this. I printed it with supports, but I noticed that it sometimes 'pulls' filament from layer before. I print it on textured PEI, first layer is mostly good, with exception of some supports being 'pulled' when another layer was put. I tried lowering temps to as low as 215 (230 on prusa profile for this filament).
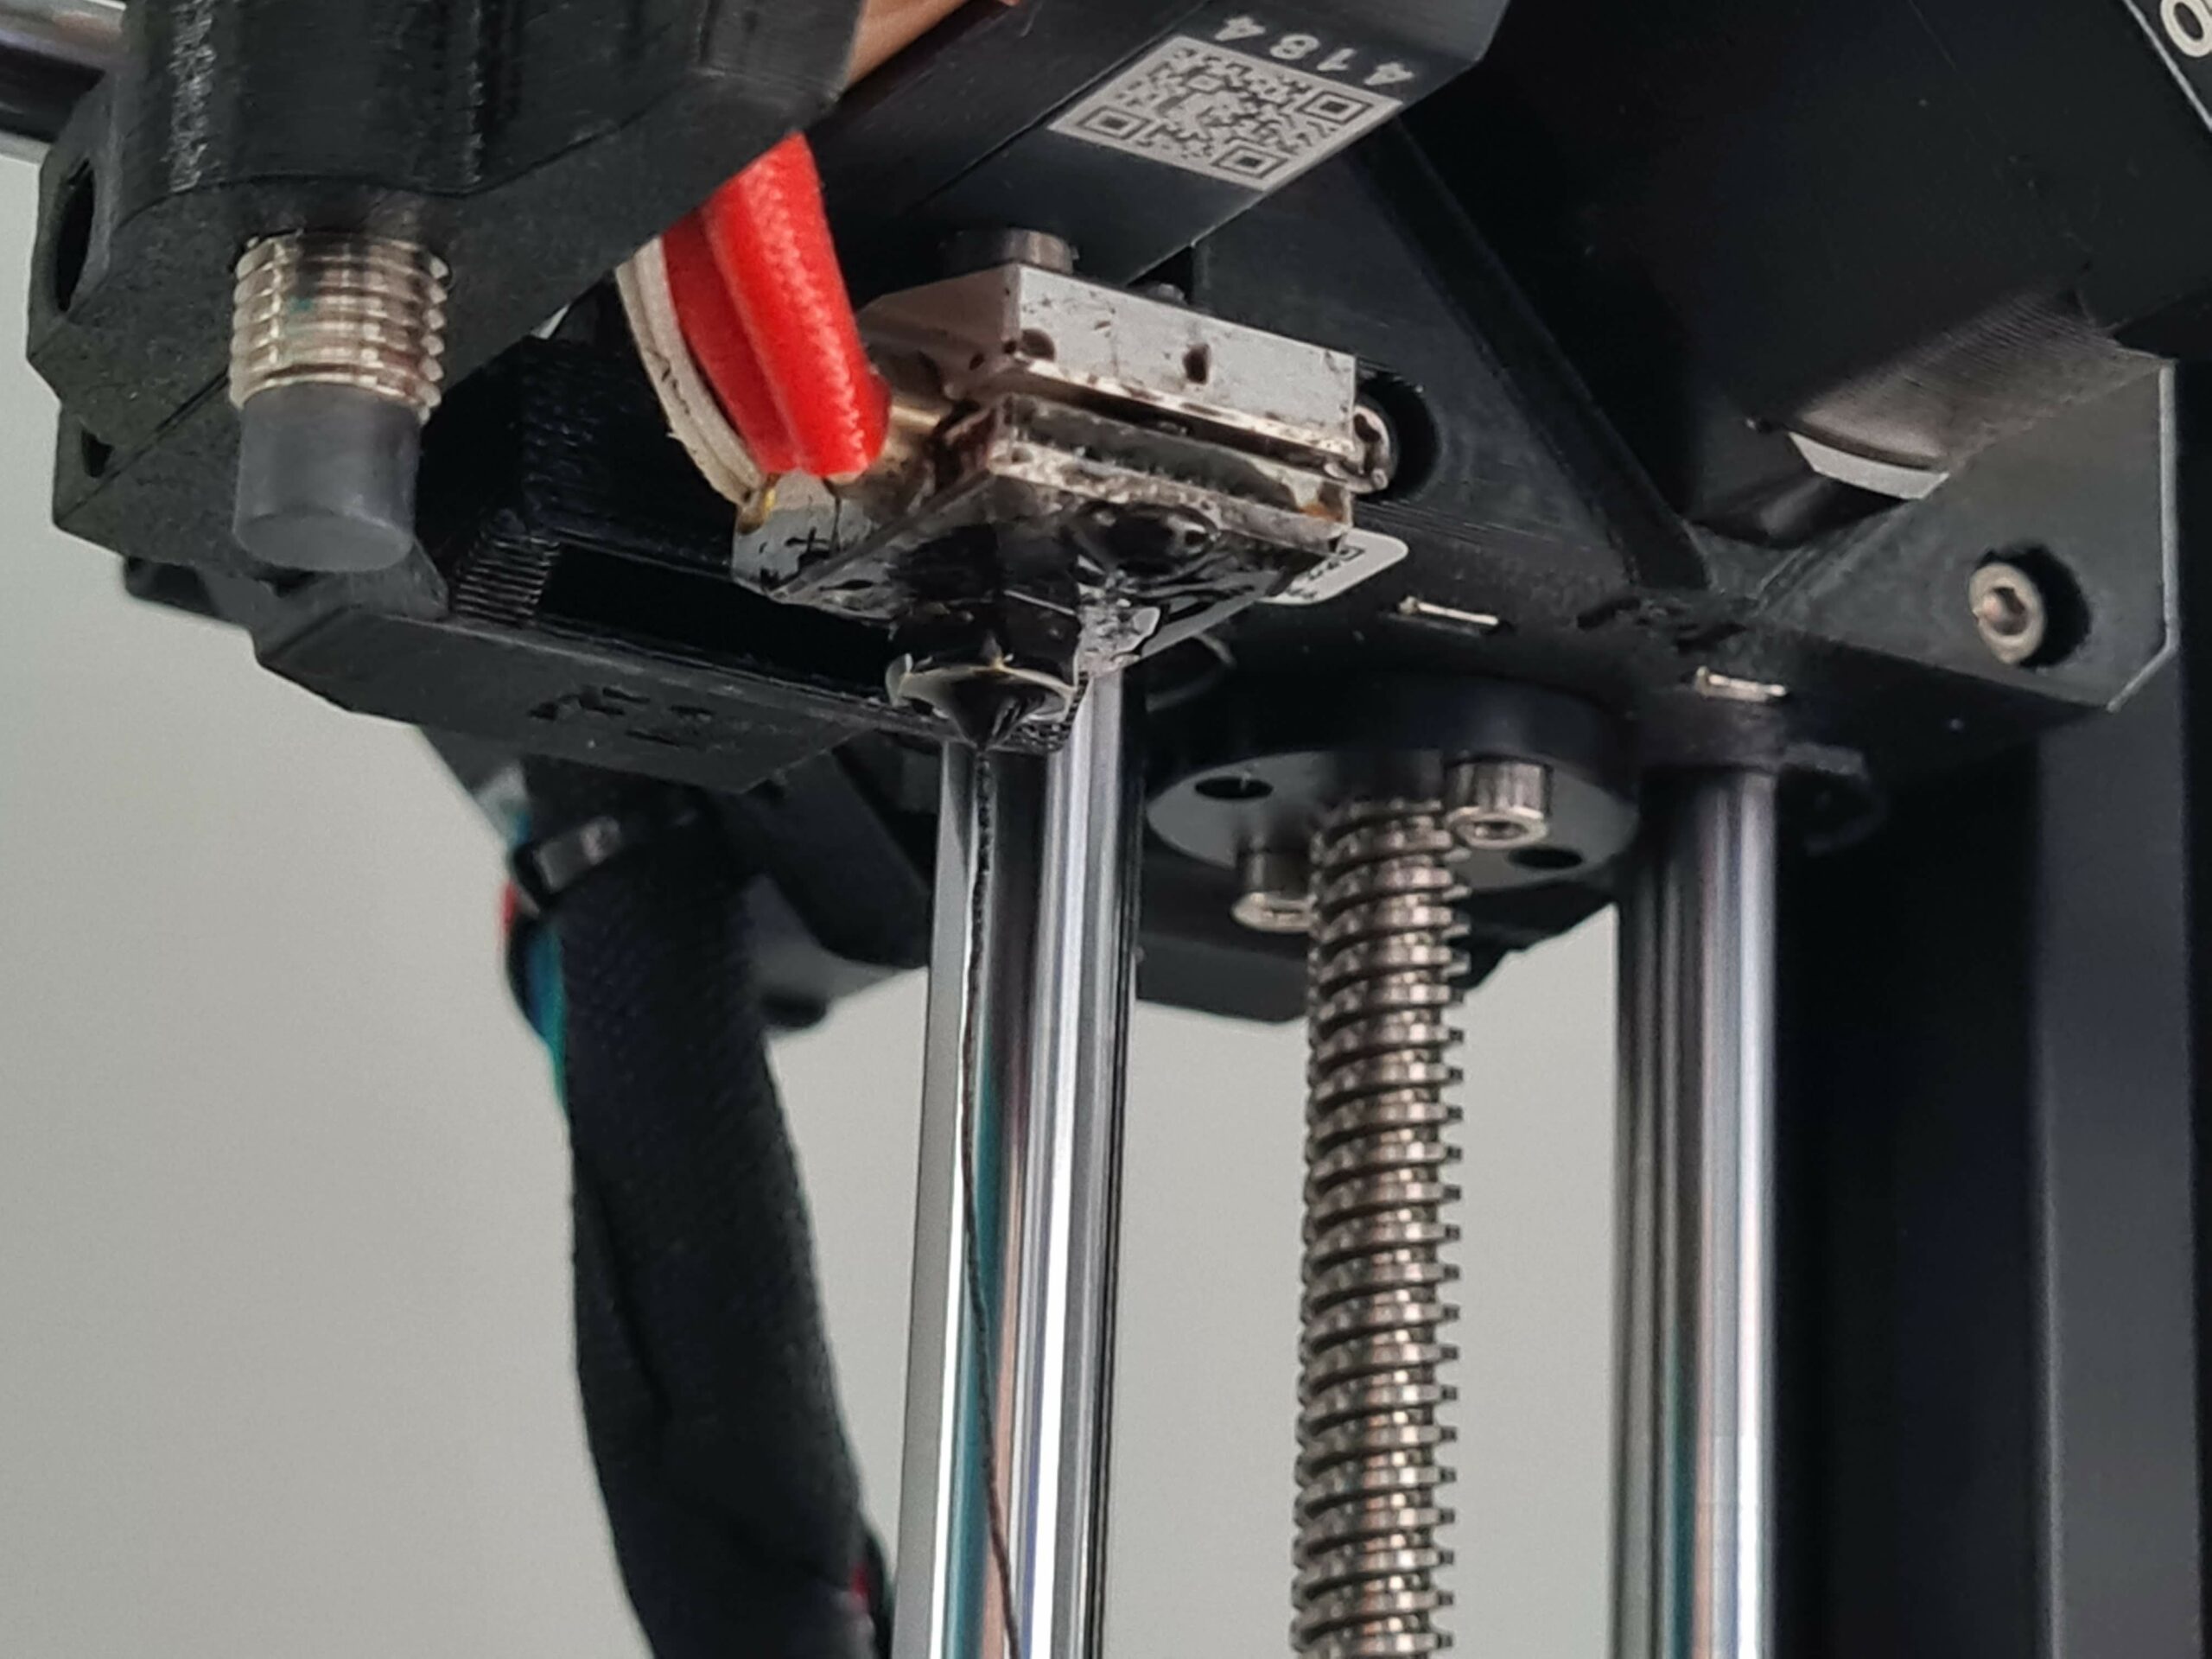
Also, nozzle gets super dirty, I cleaned it after every print and it still gets like in pictures.
With PLA I had none of those issues and nozzle was super clean after prints.
Any idea what can be a problem? I also tried underextruding to as low as 0.93, didn't seem to affect prints.
I also noticed that filament starts to flow from nozzle at around 200c already (very slowly), with me just pre-heating nozzle.
I don't really know what to do, I tried sanding one of those legs but some holes are so tiny that I can't get it to work.
Link to gcode of print from images.
I am afraid to print more PETG as I just waisted almost 40 hours of print with this :/
I would gladly buy prusa PETG if it solves problem but something tells me it would still be an issue..

About Prusament PETG
I have 3-4 months old Mini+, preassembled as well, and I have same problem with nozzle getting dirty, but prints are very successful otherwise. For small pieces on textured sheet I have to put brim to have the stick to the bed, but no other problems
Dry Your Filament
The biggest improvement I have seen is to dry PETG before using.
That said, the Mini is pretty picky about filament. Prusament and Azurefilm PETG work well for me. Some other brands (Sunlu) work poorly for me.
Regards,
Mark
As Mark mentioned (above), make sure filament is dry (is "new from sealed bag" is not enough).
In general, PETG should be printed between 230C (don't go lower than that) and up to 250C max. Bed temperature should be between 80C and 90C. These temperatures are valid for all "normal" PETG filaments, regardless of brand. Depending on filament brand (and the object we print), we fine tune temperature to get the best looking result -but we usually stay inside mentioned temperature range.
It is normal for PETG to start oozing at about 200C. And yeah, sometimes ooze curls upwards and so nozzle & heatblock start to look ugly over the time.
Needless to say.. hotend must be assembled by the book -perfectly!
Now.. at least in my opinion, Mini isn't that PETG friendly. To be more precise, it doesn't "like" high printing temperatures over longer printing period of time. The thing is, PTFE tube inside heatbreak tends to shrink on higher temperatures, which increases chances for underextrusion (partial or full clog inside heatbreak). If not before, you will notice troubles when you go back to PLA. When that happens (and it will happen), the only solution is to take hotend apart, clean it and eventually replace PTFE tube.
If you plan to print PETG often, then I recommend upgrade to Bondtech heatbreak (is about 16€ and worth every cent).
@Mark
Glad to hear you have good experience with Azurefilm. I have two Azure PETG rolls here, but haven't tried it yet 😏
[Mini+] [MK3S+BEAR]
Hot End and Azurefilm
I put a silicone sock on the hot end. Otherwise I put it together as you said, by the book, and it worked first time.
Azurefilm PETG uses a little lower temperature. That may help.
I print mostly with PETG and have generally good results.
Regards,
Mark
Thank you guys so much for inputs!
I ordered bondtech heatbreak as well as silicone sock for hotend. Once current PLA print finishes, I will re-assemble whole hotend (with cleaning). Current PETG is almost done, so I will be ordering new one - if you say it's that picky I'll probably stick to prusament - PLA version prints flawlessly.
Those prints look fine from start so I am really hoping above upgrades solve issue for those longer prints.
I am worried about humidity. I have this printer in a room where humidity is around 50-60% (a lot of plants and humidifier in same room).
I will eventually enclose it (I planned to do so right after printing legs which failed), so that should help.
Still, filament was brand new, packed in sealed bag with silicone bags. Straight from pack it printed for 20 hours and that print came out awful in middle of height (similar as the other leg from photos).
Is PETG overall that sensitive to water?
... - if you say it's that picky I'll probably stick to prusament - PLA version prints flawlessly.
We can read quite often about Mini owners having bad experience after printing PETG for a while (especially when they went back to PLA). From my experience, Bondtech heat break is a good long term solution for all (high temperature) filaments.
Is PETG overall that sensitive to water?
Well.. yes. When dealing with PLA, we usually don't think about moisture/humidity at all. PLA can be exposed freely for months and will still print well (assuming you don't store filament in sauna).
PETG does indeed absorb moisture faster (than PLA, for example). But even it's not sealed, that doesn't mean you need to dry it each day before printing! Depending on environment humidity, after a while you will notice that print finish is not as nice & smooth as it used to be. Can be after a week, or after 3 weeks -it really depends. That is, if you print with PETG, think about filament drying solution.
[Mini+] [MK3S+BEAR]
I found my Minis print PETG nicely, even without any heat break upgrade, but there's a few things to keep in mind
As said before, petg absorbs humidity much faster than PLA, so a room with a humifier may not be the most appropriate environment
PETG also doesn't like to be squished as much as PLA. You didn't post a picture of your first layer but I usually find that for PETG my first layer needs to be "more perfect" than for PLA. Too low, and you end up with filament sticking to the nozzle that can cause the kinds of problems you're seeing.
Clean nozzle and heater block are a prerequisite to success with PETG, which likes to stick to itself. I use nickel-coated copper nozzles, which seem to be a bit more effective with PETG, but standard brass works too. I've changed my startup gcode to park the hotend a bit higher than default for warmup after the mesh bed leveling so I can clean the nozzle and heater block with a brush before the print begins and use needle nosed pliers to remove any filament oozing during warmup
Formerly known on this forum as @fuchsr -- https://foxrun3d.com/
Drying, Cleaning and Support
... - if you say it's that picky I'll probably stick to prusament - PLA version prints flawlessly.
We can read quite often about Mini owners having bad experience after printing PETG for a while (especially when they went back to PLA). From my experience, Bondtech heat break is a good long term solution for all (high temperature) filaments.
Is PETG overall that sensitive to water?
Well.. yes. When dealing with PLA, we usually don't think about moisture/humidity at all. PLA can be exposed freely for months and will still print well (assuming you don't store filament in sauna).
PETG does indeed absorb moisture faster (than PLA, for example). But even it's not sealed, that doesn't mean you need to dry it each day before printing! Depending on environment humidity, after a while you will notice that print finish is not as nice & smooth as it used to be. Can be after a week, or after 3 weeks -it really depends. That is, if you print with PETG, think about filament drying solution.
I found my Minis print PETG nicely, even without any heat break upgrade, but there's a few things to keep in mind
As said before, petg absorbs humidity much faster than PLA, so a room with a humifier may not be the most appropriate environment
PETG also doesn't like to be squished as much as PLA. You didn't post a picture of your first layer but I usually find that for PETG my first layer needs to be "more perfect" than for PLA. Too low, and you end up with filament sticking to the nozzle that can cause the kinds of problems you're seeing.
Clean nozzle and heater block are a prerequisite to success with PETG, which likes to stick to itself. I use nickel-coated copper nozzles, which seem to be a bit more effective with PETG, but standard brass works too. I've changed my startup gcode to park the hotend a bit higher than default for warmup after the mesh bed leveling so I can clean the nozzle and heater block with a brush before the print begins and use needle nosed pliers to remove any filament oozing during warmup
I can see a difference in PETG stringing in about a day out of the dryer, sometimes less. I generally dry for 8+ hours and then print for no more than a day and put it back in the dryer.
I have a silicone sock and also heat things up and clean off the nozzle and sock with a brush before each print.
Using these techniques, results have been very good, just a little hair stringing that comes off easily.
If I use support, I increased the contact Z distance so the support comes off more easily.
Regards,
Mark
I can see a difference in PETG stringing in about a day out of the dryer, sometimes less.
I usually notice difference after PETG is exposed to "fresh air" for 3-4 days.. Ok, if I print some object which needs to have "perfect" finish, then I just dry it before printing.
I think many new 3D printer owners underestimate the importance of filament drying. But it's the first thing one should do, if print doesn't look as expected.
[Mini+] [MK3S+BEAR]
Upgrade arrived..
I'm coming back with some news and new struggles :/
I got Bondtech heatbreak, as well as silicone socks.
Installed it without issues, first layer calib done. I went back to Prusament PLA as it was flawless and I wanted to make sure I limit variables.
I spent last two days working on printer, splitting into two groups - extruder and hotend.
Extruder
Just before new heatbreak, I printed PETG which broke off filament during night, grinding away rest of filament between its gears. I cleaned it as much as I could, result is spacing between gear teeth, which generated clicking noise. There was a bit of orange dust inside, I presume both gears would need replacing..
Hotend
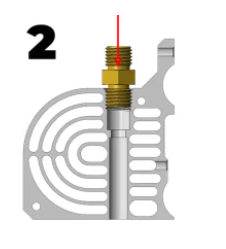
After repeated failed smaller print, between each trying to re-screw all components by the book, I read that original ptfe tube in older minis was too short. I had different one for Bondtech heatbreak, however I measured how much space was between golden screw and heatbreak (should be compressed, right?). Turns out it was shorter than space there, so I cut longer tube with 0,2mm extra for compression.
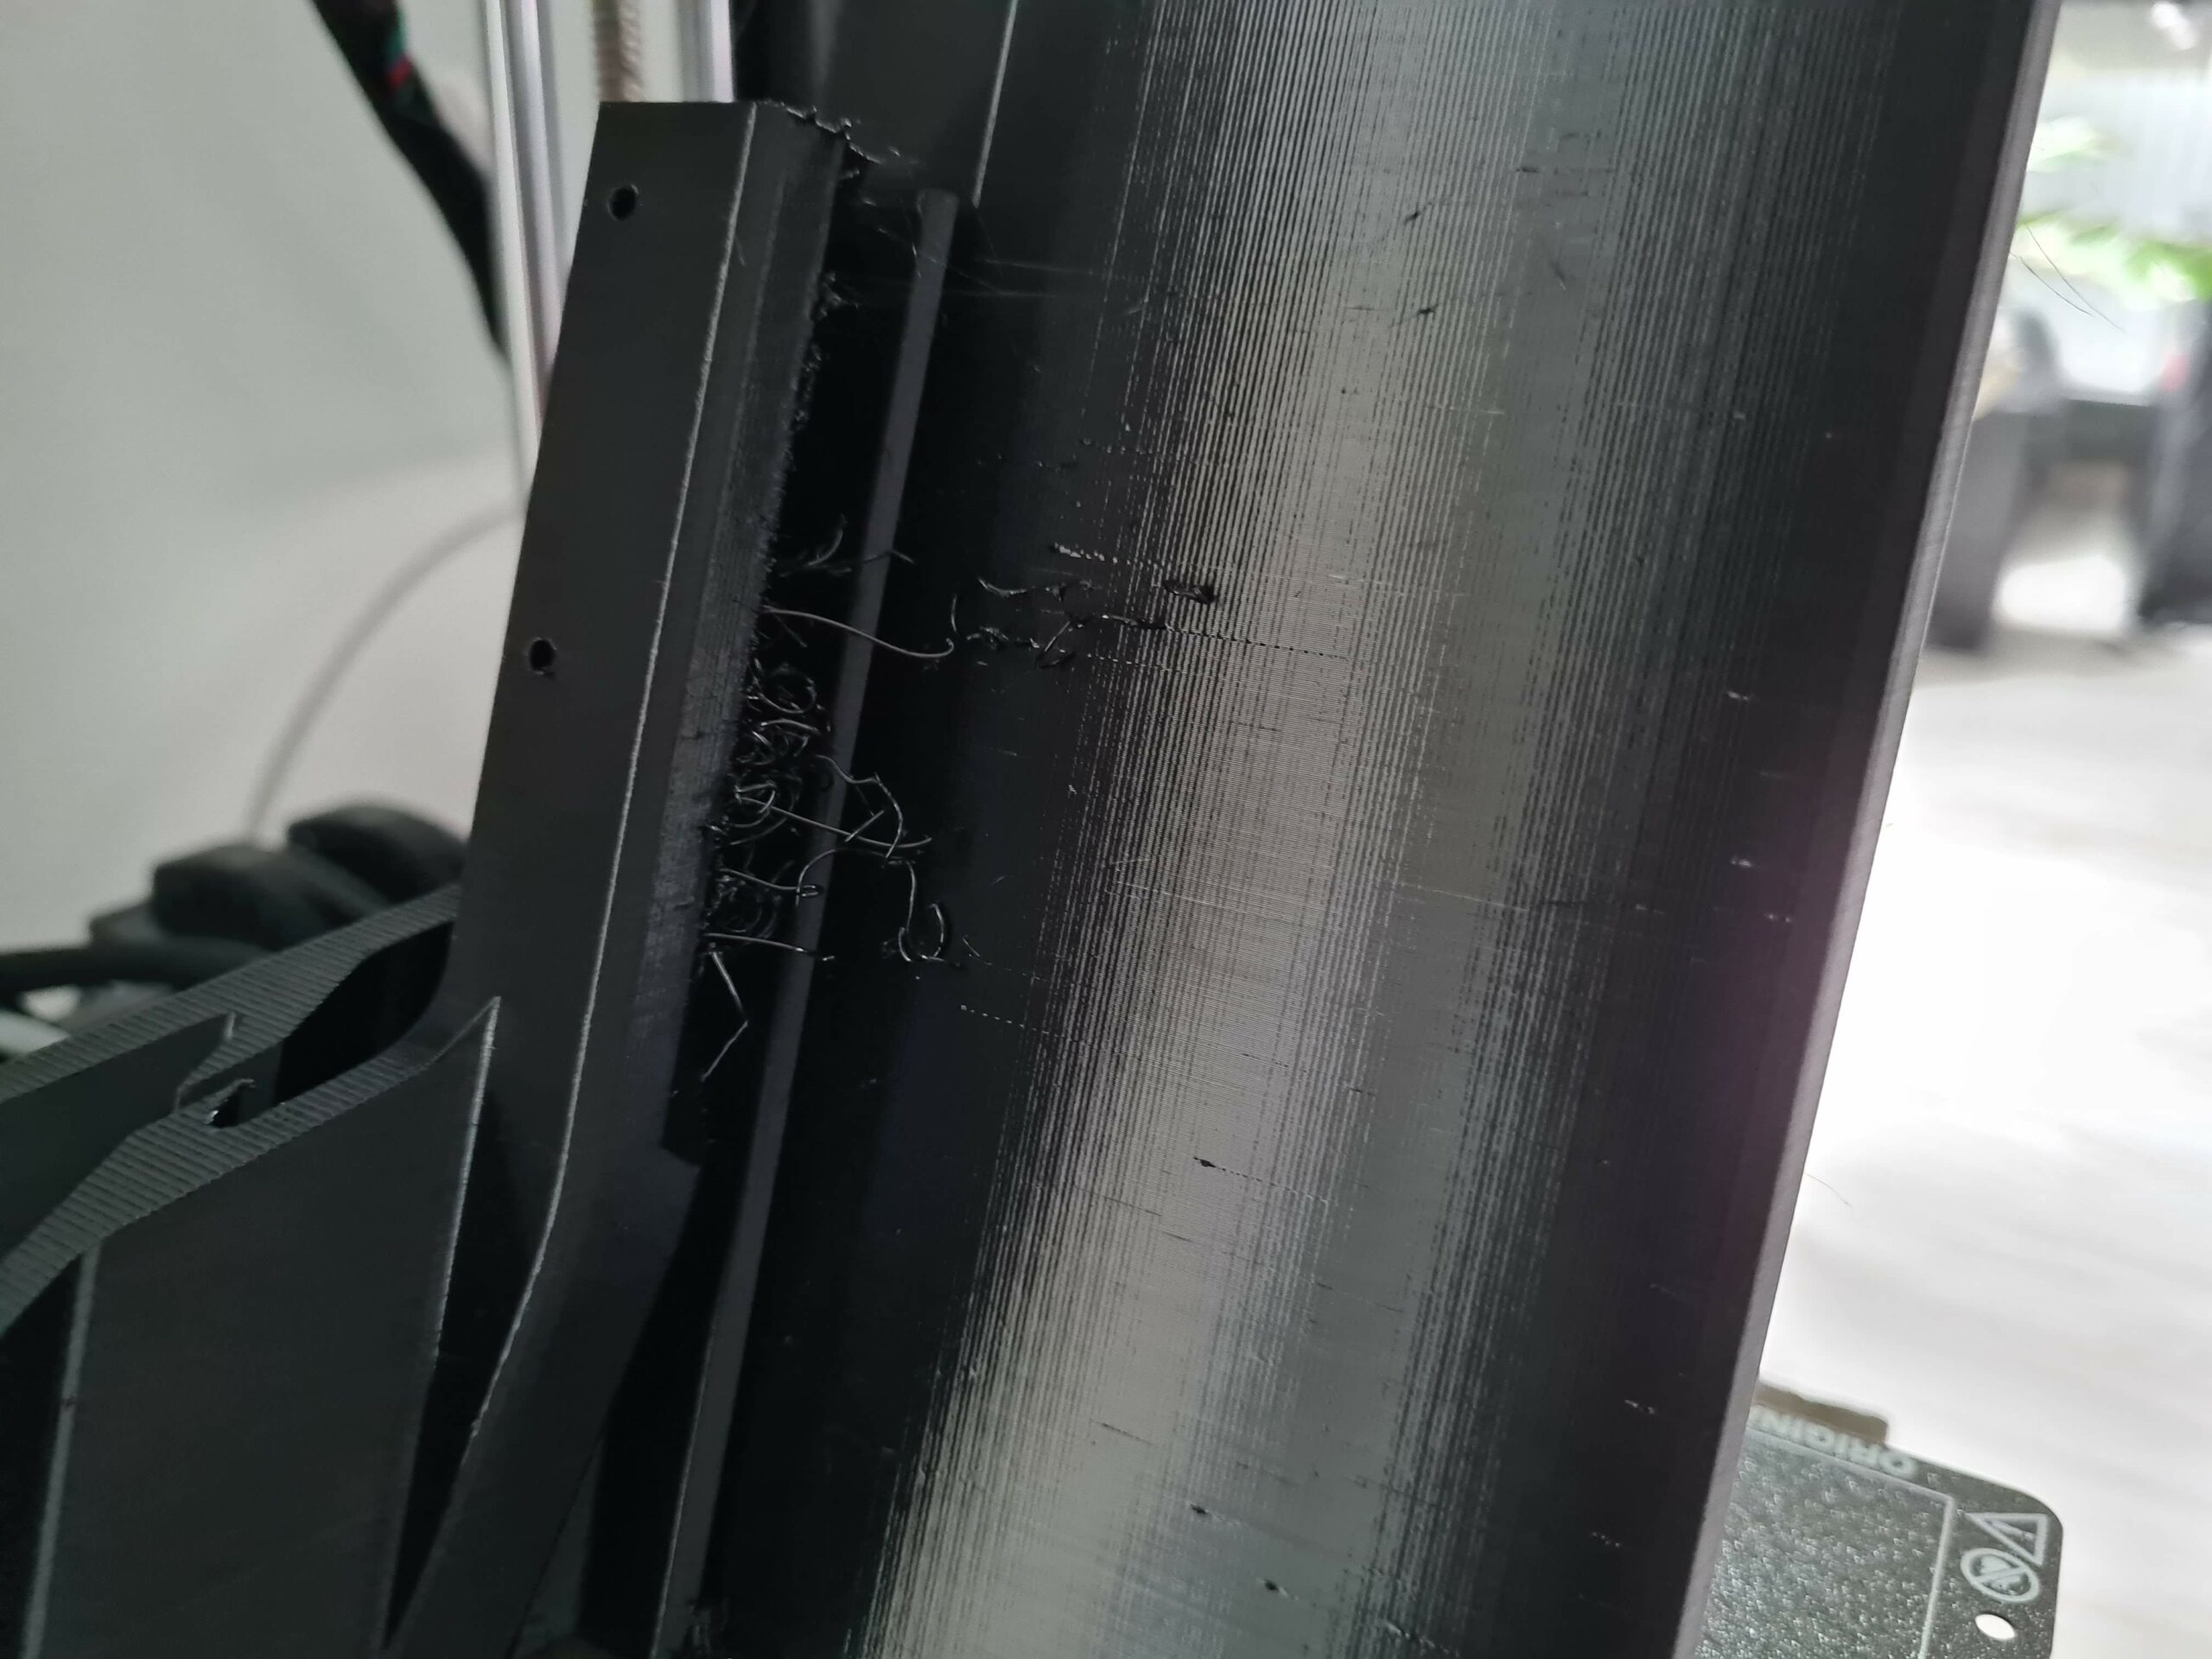
Below image is on previously flawless Prusament PLA, with Bondtech heatbreak, with ptfe tube squeezed in hotend like it should, with clicking but clean(ish) extruder gears, and I'm about to loose a fight to machine..

What is even happening here?
It starts perfectly (label on bottom of ship is flawless), then it starts overextruding? Then it goes back to normal?
What I checked extra:
- both belts tension (I used belt tension meter found for prusa printers)
- cleaned and added a bit of machine oil on all rods
- adjusted extruder driven gear bearings (that hold it from sides), pushing them inwards to hold gear and eliminate lateral wiggle
- I played around with extruder tension screw, current one is by book - screw flush with side when no filament
- multiple times checked for clogs, the only one being one from PETG right before switching to Bondtech heatbreak
The Same
I have had good luck printing on my Mini+ too with PETG. With careful calibrations, I have printed for several 24 hr periods with no problems.
I found my Minis print PETG nicely, even without any heat break upgrade, but there's a few things to keep in mind
As said before, petg absorbs humidity much faster than PLA, so a room with a humifier may not be the most appropriate environment
PETG also doesn't like to be squished as much as PLA. You didn't post a picture of your first layer but I usually find that for PETG my first layer needs to be "more perfect" than for PLA. Too low, and you end up with filament sticking to the nozzle that can cause the kinds of problems you're seeing.
Clean nozzle and heater block are a prerequisite to success with PETG, which likes to stick to itself. I use nickel-coated copper nozzles, which seem to be a bit more effective with PETG, but standard brass works too. I've changed my startup gcode to park the hotend a bit higher than default for warmup after the mesh bed leveling so I can clean the nozzle and heater block with a brush before the print begins and use needle nosed pliers to remove any filament oozing during warmup
I reverted to original settings for prusa mini+ and Prusament PLA in PrusaSlicer.


Can this be a result of slippage in extruder gears? Any ideas?
on arch it's also quite visible that few layers are 'thicker'..
I reverted to original settings for prusa mini+ and Prusament PLA in PrusaSlicer.
Reverted from what settings and what filament? Mini printed ok before reverting? (sorry, empty battery in my crystal ball)
[Mini+] [MK3S+BEAR]
I tried lowering speeds as those stepper motors on infill are quite loud (pretty much like normal paper printer).
I reverted to see if it made difference. It didn't. I'm currently drying a bit of PETG (60C in oven for 5 hours), I'll run same test in the evening to see if moisture was a problem. Even though I just have this printer for maybe two weeks? And this filament is barely week old.
It didn't print fine with either of settings, I also try to minimize amount of changes.
Above photos are from print made on printer with such setup:
- slicer - prusaslicer 2.3.3 (I also tried 2.4.0 alpha, they changes supports parameters but it didn't affect given test
- settings

- settings
- filament - prusament PLA galaxy black (leftovers, I will need to continue debugging on small amount of PETG I have, before I get new spools)
- printer itself (changes):
- prusa mini base installed
- bondtech heatbreak installed
- on that note - as I wrote earlier, I had to cut new ptfe tube as the one with kit was too short to be compressed inside heatbreak - I was getting clogs inside hotend
- I have torque wrench and nozzle is screwed in properly
- silicone sock added (checked if it was a problem, no changes with/without)
There are 3 leads that I can think of, but I'm too new into this stuff to be certain which one:
- extruder gears have so much spacing between teeth that it affects extruding (they got worn out when I had petg clog in middle of a night)
- Bondtech heatbreak and ptfe tube to be precise is incorrect length and whole setup is not sealed
- Moisture in filament
I will know more about point 3 later today.
Do you know what should be correct length of ptfe tube for bondtech heatbreak? Original 35.3mm seems way too short (about 3mm too short).
I will most likely buy new set of gears even if it's not causing problems, as clicking noise on changing extruding directions is infuriating.
What worries me is that I had no problems with prints on PLA right till I got to PETG and then started tinkering. There might be something wrong with me re-assembling it, but I need some guidance on what it can be based on images. I performed extruder surgery and heatbreak change as it's written in Knowledge base at least 5 times over this weekend, getting close to what I got on brand-new printer, but not quite close.
The only thing I didn't do yet is to install original heatbreak and see if it helps, but that would be dumb as I got assured before that this new heatbreak only solves problems, shouldn't be problematic...
https://help.prusa3d.com/en/guide/how-to-replace-a-heaterblock-heatbreak-mini-mini_122769
https://help.prusa3d.com/en/guide/how-to-access-and-clean-the-extruder-pulley-mini-mini_126457
About Bondtech heatbreak PTFE tube.. Yes, on Bondtech's website is said that length of supplied PTFE tube is 35.3mm. But in Bondtech's video, there is said the length should be 36.0mm (with chamfer on both sides!).
Anyway, if you study placement of the PTFE tube inside print head and the way how you (properly!) assemble hotend, you will realize that one mm more or less doesn't play any role. The thing is, by pushing up hotend while tightening those three grub screws, PTFE tube will always sit very tight inside print head. Means, if PTFE tube is 1mm shorter, then whole hotend will simply go 1mm deeper upwards, as you push it up against heatsink.
By looking at your photos, by assuming hotend is properly assembled and default settings are used in slicer, then my guess would be filament is not dry.
I noticed something.. if printing Prusament PLA at default settings (215C) and after print finishes, there's very little filament oozing out of nozzle (10-15mm). But if filament is not dry, then ooze gets quite longer.. about 30mm or even more. Ok, maybe that also depends on filament color being used... but I can imagine that moisture in filament would cause higher pressure inside hotend.
[Mini+] [MK3S+BEAR]
Thanks, I think that mine was around 37mm but I didn't chamfer it from both sides. I might change that later on next maintenance. New filament came in and it's currently printing 6th hour Prusament PETG with ocasional strings - which I call a win!
So, in meantime when I was playing around with bondtech heatbreak, my filament (over span of few days) apparently got enough moisture. I noticed yesterday that little pops were gone after baking PETG in oven for few hours.
I thought moisture is a problem when you have filament stored for weeks/months, but maybe this just sped up because I was printing all the time (so I had no time to dry filament in between), and there are quite a lot of plants in room (can't move printer - lack enclosure parts are printing right now :))
It could also be PID updates that I overlooked, unfortunately I was tired and frustrated so I was adjusting few things at a time, so can't tell for sure if this made difference.
If next few prints go great then I guess I need to invest in filament dryer 😪
Anyway, if you study placement of the PTFE tube inside print head and the way how you (properly!) assemble hotend, you will realize that one mm more or less doesn't play any role. The thing is, by pushing up hotend while tightening those three grub screws, PTFE tube will always sit very tight inside print head. Means, if PTFE tube is 1mm shorter, then whole hotend will simply go 1mm deeper upwards, as you push it up against heatsink.
I disagree. I did study how it works and the idea is that ptfe tube needs to have no space between heatbreak and itself, from side close to hotend. However, it needs to be right size, because you can't just push heatbreak up forever - there is a ledge, blocking it's path. It needs to be long enough for both heatbreak and top screw to not reach their ends. Only then you can ensure there is no gap inside heatbreak so that clog won't be able to form. That's why in prusa guide you unscrew top screw by 3/4turn to push heatbreak and ptfe tube as much as you can, and screw top screw back in to compress it.
because you can't just push heatbreak up forever - there is a ledge, blocking it's path. It needs to be long enough for both heatbreak and top screw to not reach their ends.
You're right on this (I forgot about the ledge) -thank you for pointing on that.
[Mini+] [MK3S+BEAR]
RE: Other option
I have one mini in which I fed PTFE tuding from the top all the way to the heatbreak. I do not use a small piece of PTFE in it at all. It works, but I do not use the standard fixtures.
--------------------
Chuck H
3D Printer Review Blog