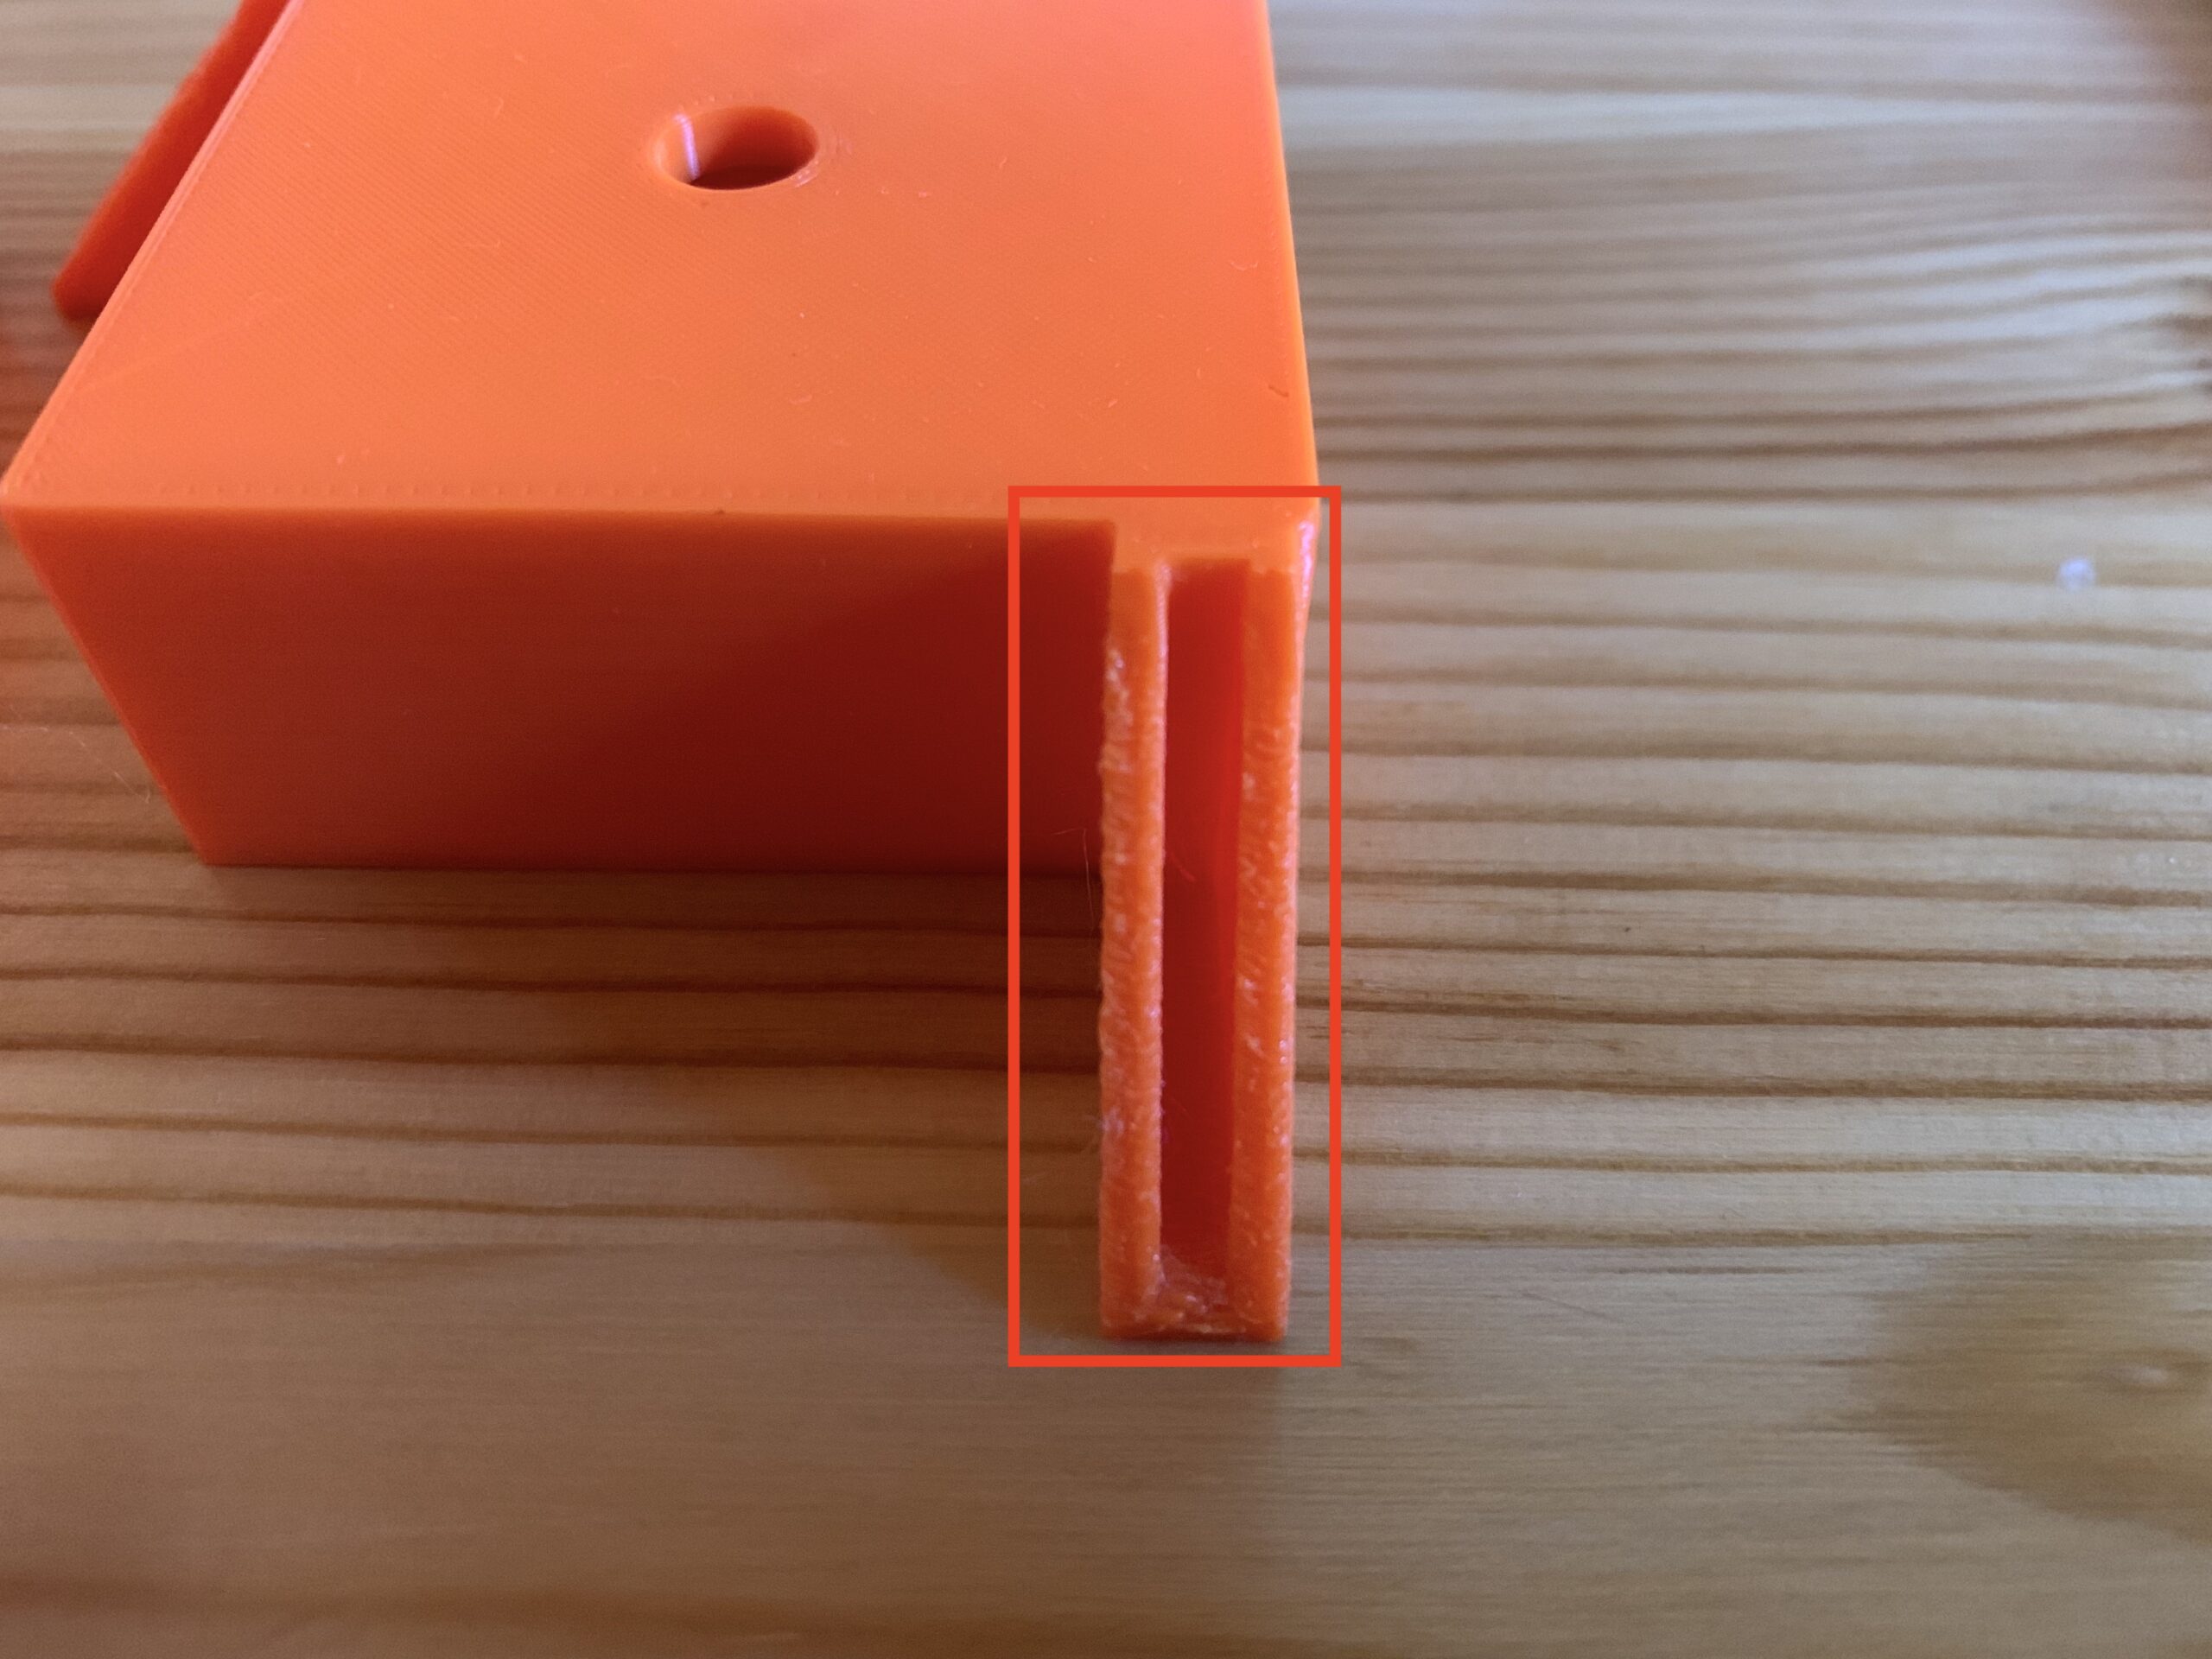
Beginner: Frayed / knobby overhang?
Dear Prusa-Community,
I am now a couple of weeks into printing stuff with my Mini+ which I've assembled myself. I am using the Prusa Slicer, Prusament PLA and Prusament PETG. As for the slicer settings, I trust on Prusa's default values. In general I am very happy with the results so far.
Currently I am printing parts for the Prusa (IKEA) Lack enclosure from Prusament PLA, layer height 0,15 mm and 20 % infill. Nozzle temperature is 215 °C and the bed temperature is 60 °C. The bottom corners have the mounts for the acrylic glas attached, which are printed as an overhang. In the pictures attached you will see two parts of the same print. Some overhangs have been printed smoothly, some have "frayed" / knobby edges. (Parts are printed upside down, other than shown in the pictures)
Does anyone have experiences the same results and is willing to a) tell me how this behavoíour is usally called by the experts and b) how to take measures to improve the print quality? That would be much appreciated.
Thank you, best regards
Michael
Best Answer by Neophyl:
Simple answer is cooling. Depending on part orientation/rotation there's always a side that faces away from the part cooling fan shroud (at least with the normal fan shrouds). That side gets less cooling. So overhangs can look worse.
Without flipping the part you can often rotate to get the maximum cooling on overhangs. Depends on the model though and how many and of what type of overhangs there are.
Rotation
I have found that there are not too many prints that I cannot print successfully by creatively rotating the prints and changing the side down to reduce or change the overhang.
--------------------
Chuck H
3D Printer Review Blog
Thanks, I will consider that.
Hello cwbullet, thank you for the hint. Not visible in the pictures are the large cones within the parts, so when I rotate the part, there is even more overhang to print.
My questions above are driven also by curiosity - why is one overhang printed very nicely and the other one not. I am still learning with every print. Best regards, Michael
Simple answer is cooling. Depending on part orientation/rotation there's always a side that faces away from the part cooling fan shroud (at least with the normal fan shrouds). That side gets less cooling. So overhangs can look worse.
Without flipping the part you can often rotate to get the maximum cooling on overhangs. Depends on the model though and how many and of what type of overhangs there are.
Thanks - now I got it ;o)
Hello Neophyl,
your explaination together, with cwbullet's initial replay, now make things clearer for me. I got your point. I have mixed up flipping and rotating the part - English is not my native language ;o)This was my first print job with multiple parts and I did not consider that the cooling air may be obstructed and may not reach the area currently in print. I will consider this in the future.
Thank you, best regards
Michael
Also seam position
You can also verify (and use paint-seam-feature) to make sure the slicer does not place seam on the overhangs. Dont know if that is common or not, but just another tip.
Prusa Mini+ kit. BondTech extruder. FW 5.1.2
Prusa MK3S+ kit. Stock. FW 3.11.0
Prusa MK3S+, used. Stock. FW 3.13.3


