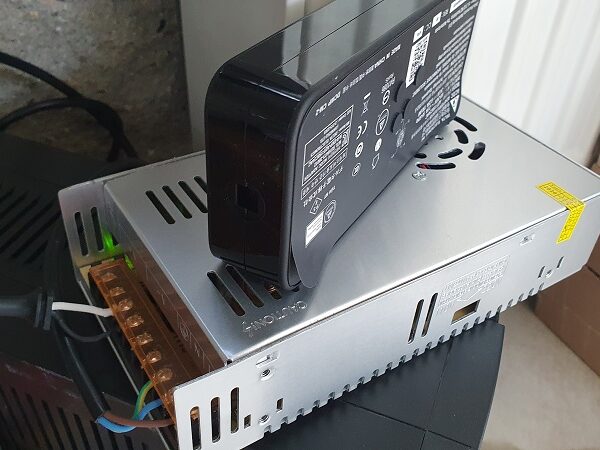
New Power Supply / Wall Adapter vs Old one
Is anyone else concerned about the change in power supplies / adapters for the Prusa Mini?
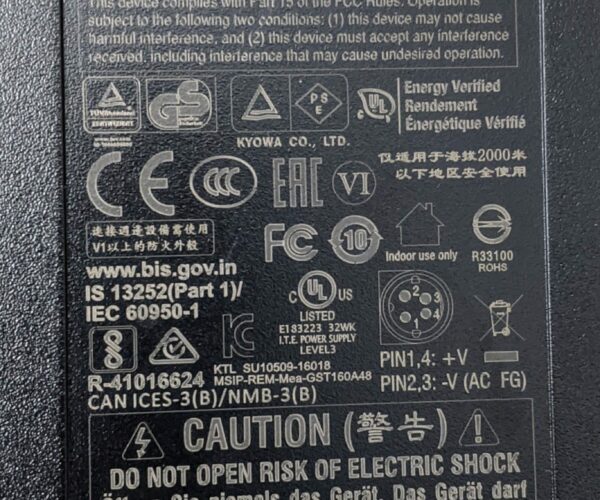
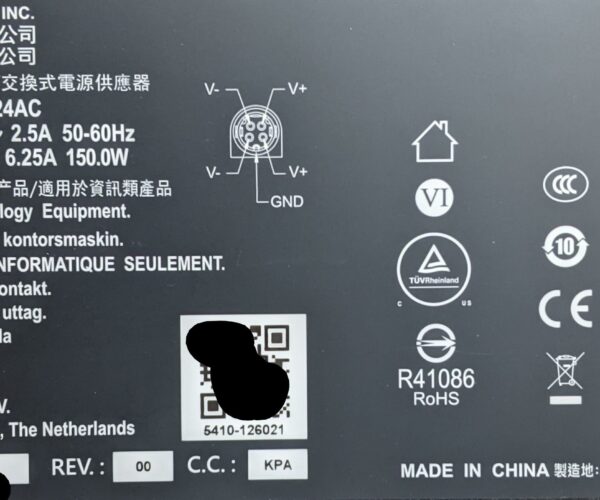
It appears the new adapter isn't UL listed or verified, it also doesn't have a FCC certification, which brings the question whether it is therefore banned in the USA?
Some other differences, it claims to be more efficient than the older power supply, ~87.5% vs ~84% efficient - I will be checking this.
I have also noticed the new one arc flashes like a "son-of-a" every time I plug it in - makes me jump every time. It gets very warm even when it's not powering anything - I'll get this data too, I have thermocouples. The new power supply also weighs ~200 grams less than the old one and has significantly smaller gauge wiring - I can actually tell a temperature difference by touching it / there are some serious losses in the wiring.
So I'd like to call shenanigans, however before everyone grabs their brooms, I would like some outside opinions on this.
Some backplate information from each:
OLD PSU: (Click to expand)
NEW PSU: (Click to expand)
RE: The Plot Thickens
I just checked the connecters and cables and boy oh boy are there developments.
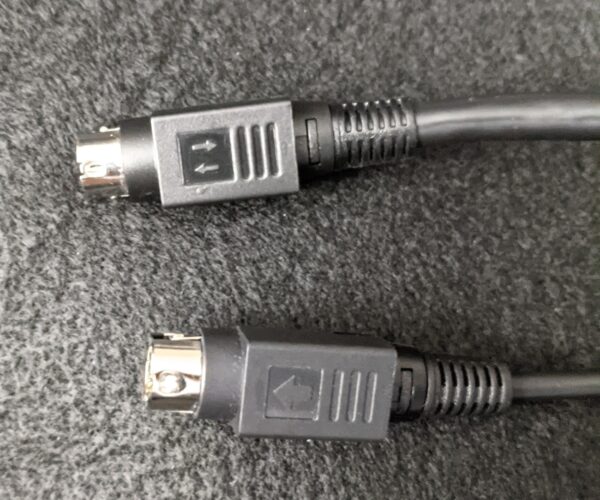
1. The connectors are different, slightly. The pin coatings are different and the old pins are 0.03mm larger (when measured with a Mitutoyo in-calibration caliper - I can do this with a Mitutoyo micrometer, but that would require destructive testing).
Also note the arc burns on the new connector, could this be because the new pins are smaller?
Old PSU Connector: (Click to enlarge)
New PSU Connector: (Click to enlarge)
2. Cable Thickness / Wiring
But I'm not finished! Check out the cable thickness difference, the old PSU cable is significantly thicker. They both claim to be 18 AWG, HOWEVER it appears the new PSU may only be running 2 wires, which depending on whether it is solid or stranded, could cause it's load rating to be less than the output power of the PSU!
Cable Ends - Old PSU on top, New PSU on bottom: (Click to enlarge)
3. Ferrite Choke / Bead
But wait, there's more! The old PSU has a ferrite choke, which reduces noise in the output, this I can and will test for with an oscilloscope.
Extra Beefy Choke - ~20mm diameter, ~30mm length: (Click to enlarge)
Am I on crazy pills or am I on to something?
RE: The results are in! - Test 1
Test Setup:
Prusa Mini+ in an enclosure, temperature was normalized to room temperature (~75 Degrees F)
Power supply was placed on top of 4 layers of a welding blanket with the supply cable running beneath it and off to the side. The temperature will be measured at the center beneath the power supply and direct contact (thermocouple taped to the cable) with the cable beneath the welding blanket. (Note: The temperature affect on the cable from the power supply is relatively low because of the insulating properties of the welding blanket.
The temperature of the ambient air and floor were taken and are reported.
Data acquisition: A Fluke 51 II thermometer was used for point temperature, a "Kill a Watt" wall meter was used for power draw and an Accurite Model 01083M Temp/Humidity sensor attached to a room exhaust vent was used for the ambient air temperature (this was checked for accuracy using the Fluke thermometer before the test)
The test was performed by printing a 1 hour 20 minute PLA print at factory/standard settings. The printer was cold-started @ ambient temperatures and the print was selected/started within ~30 seconds. The entire apparatus was blown-down using a box fan for 1 hr to bring everything back to ambient.
Test Data
Conclusion:
I can easily see from this data why there is arcing when I plug this in, it doesn't seem to have the capability to hold off it's power draw until the plug is fully inserted into the socket. The old PSU only draws about REDACTED (See test data pic) for a second or two, then pulls in the rest, this is much safer in my opinion. The power draw seems to be trading blows back and forth, however the proof in the pudding comes down to the total power draw and I will have to do some more testing to determine just how much of a difference there is.
The most alarming part of this test is just how hot the power supply became when only printing PLA and the printer was even in an enclosure, so power draw was reduced. You can obtain first degree burns by holding on to an object that is 120° F (48.9° C), so the new PSU is well within the "Danger Zone" for that. The output cable also experienced over twice the temperature increase over the old PSU, resulting in a 83.7° F (28.7° C) temperature. I'm a bit afraid of what it could be when I start printing with PETG and ASA. The cabling is by far the most suspicious part yet, it is about as flimsy as a laptop charger cable but claims to be rated for twice the amperage that most laptops would run at.
RE: Reply
I'm far from an expert on this but having heard horror stories about cheap, inappropriate chargers being sold for things like phones and laptops melting/catching fire, reading your posts does not give me a good feeling for this new power supply, especially since this is much more high-powered than a phone charger! I just checked and I have the old one (phew!)
Maybe there was a shortage of power supplies which forced them to find another distributor? Looks like they didn't do enough testing with these before considering them for sale. I certainly hope this isn't going to indefinitely be the standard power supply for future MINI shipments!
Did you contact their support directly to make them aware of this? If I were you I'd forward them this thread and follow up with them to make sure the issue reaches the right person(s) within the company. The missing FCC certification by itself seems like a good reason to discontinue shipping these.
It's not that bad
@fortinmike
I'm not trying to alarm anyone, I'm just curious if anyone thinks my concerns are valid.
I did some further digging and I'll make a full post below and oh boy does it get interesting, I don't believe Prusa3D did anything in bad faith, but something definitely points somewhere, in my opinion.
RE: Surprising results - It's probably some supplier shenanigans
So I kept digging and digging and found out some interesting things.
The Delta PSU technically passes FCC/UL requirements through the TUV Rheinland certification, but that's seriously a shady/cheapskate thing to do on behalf of Delta in my opinion.
Datasheets:
- OLD PSU: LINK
- NEW PSU: LINK
TLDR for the datasheets:
Efficiency:
- Old PSU 93% typ efficiency
- New PSU 90-01% typ efficiency
Operating Temperature:
- Old PSU -30°C to 70°C
- New PSU -10°C to 60°C
Reliability Claims:
- Old PSU 236,400 hrs MTBF - MIL-HDBK-217 (Pessimistic standard, skews left / lower)
- New PSU 300,000 hrs MTBF - Telcordia SR-332 (Optimistic standard, skews right / higher)
- New PSU 5 yr expected Capacitor Life Time
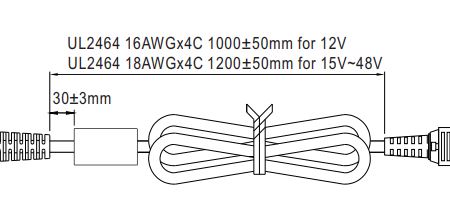
The most significant difference between the two is the drawing, the old PSU clearly states a conductor requirement (4 Conductors, see below) whereas the Delta does not.
My opinion:
From what I can see and read on the labels, it appears what happened was as follows. 1. Delta generated some rather loose specifications for a power supply that just meets requirements. This power supply is open-ended enough where they can produce it anywhere.
The primary issue with the New PSU (Delta) is the lack of specifications on the cable carrying the high current (~6+ amps), they don't specify 4 conductors, so they probably went with something less expensive. The cable claims to be "UL E323326 STYLE 1571" which appears to be a 2 conductor cable.
One Russian forum is the only place I could find some cable info, they claim the wire is 16AWG, however they also said they can't back that up. The wire itself claims to have 18AWG conductors. (LINK)
Prusa3D should seriously do a full analysis of this PSU, sure "it doesn't have an annoying light" but the new PSU is less efficient, less resistant to high temperatures, and just a bit shady. I'd recommend a long-term load test (>80%) and check the conductor/cable temperatures + housing temperatures. I'd do more tests, but it's not my job, I'm busy enough as it is.
For now since the capacitors will only last ~5 years, it'll be my main PSU and I'll just replace it with a MeanWell (Old PSU) when it dies.
Once again, this is all my opinion, please check the facts in the provided links for yourself.
Another power supply
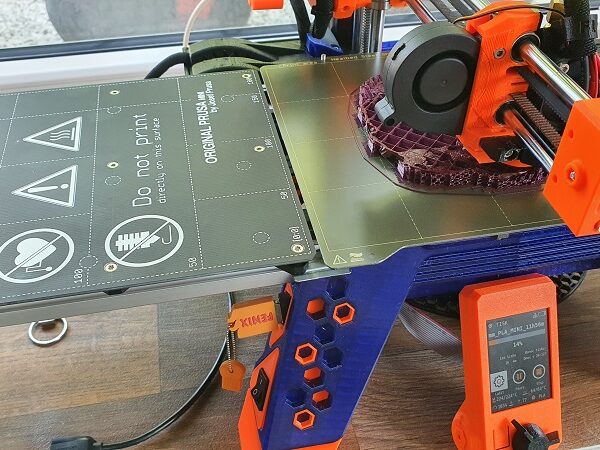
Hi. I changed the power supply bacous upgrade my MINI+ amd I was need more power for two heat bed. I was buy a power with param: 16A, 24V and that is all what you need. From old power I take a cable for connecting to printer and instal on the new power. I was buy any noname standard power for testing when it will funktion and now all is ready, but on the future I will buy a Mean Well SP-320-24 for my satisfaction.
Contacting Prusa3D
Have you contacted Prusa directly?
Not yet, I was hoping to get others to let me know their thoughts so I can finalize all my digging before I go through the support chain. As you can see through my posts, my suspicions were a bit wrong. I'd like to get my facts straight first.
I will probably contact them sometime this week.
RE: Dual heat beds? What the what-what?
@guru-von-pospi-lee
Please tell us more about that beautiful modded Mini you have. I see from the "How edit and compile firmware to MINI+" thread that you extended the Y axis and it looks like you just mounted a second bed on the same rails and connected it to the same Y belt and stepper as the first bed, so they'd always move together. Then you could print on one bed and once done, move to the other to print the next part or copy of the same part. Is that correct? How does the weight of the second bed (while printing the first part) and the first bed and part (while printing the second) affect movements, ringing, etc? For larger prints, like the Groot busts in the picture, I would guess that the completed print would be a not-insignificant weight to be pulling back an forth on the Y axis. Have you had to turn down your Y speed and accelerations or make other tweaks?
Theoretically, as long as you remove the build plate from the first bed after it switched to the second bed, you could free the part, replace the build plate, and automatically have it start printing on the first bed as soon as the second bed's print is done. Repeat like that, and you could have continuous printing as long as you're around to pop the completed parts off one bed at any time while the other bed is active. Are you doing that yet? Do you have a method to confirm that you've removed the completed print so it doesn't flip back after a second print is done and crash into the first?
Have you done any prints longer than 180mm on the Y by bridging between the two plates?
Do you have independent power control for each bed, so you're not wasting heat on an empty or completed build plate? If so, did you have to change the firmware to switch, or are you doing it by hitting an end-stop, like 3DChameleon does to change colors.
It looks like the power connector for the right bed (orange Groot side in the picture) would hit the Z axis if you move or print all the way to the right-most edge. Would it? Why not turn the bed 90 degrees clockwise so it would be coming off the right end instead?
You mentioned also needing to change the maximum Z height in firmware. How tall are you going with it?
Also, why did you create this wonderful mod? Are you looking to put this into a print farm for continuous or semi-continuous printing? Or some other reason, or just for fun?
Mike
RE: New Power Supply / Wall Adapter vs Old one
Good morning,
I'm thinking of installing a prusa mini motherboard on a mk3s so I'm very interested in modifying the firmware. Have you managed to do this on the imput shaper firmware?
