Avoiding early Prusa Mini Issues + Common Issues
Hello,
I am one of the first people to have a Prusa Mini, ordering shortly after the launch date. This is my second printer after an almost useless stripped-down Anet A8 (yes, a stripped-down A8!), and is my first actually good printer. I have been graced with great print quality from the Mini, but have also experienced almost all of the problems reported about the Mini firsthand.
First, before going into negatives for those who may be reading this, I urge everyone to consider the Pros of the Mini. The print quality is superb, with many on this forum comparing it to the full-size MK3S. The Mini is quiet, and doesn't produce a concert of sound like my A8. The build quality is also excellent. Other than a few minor flaws I will mention shortly, the Mini looks professional and looks like it will last a very long time. And, also importantly, the Mini has the best long-term roadmap of any sub-$500 printer out there. Frequent firmware updates (Josef Prusa says the first few months, he expects a new firmware release almost every week), production improvements over time, and (possibly) an upgrade kit to the Mini 2, whenever that arrives. There are other Pros about the Mini I'm not going to mention here, but the amazing prints speak for themselves.
Now for the Cons. Like any first-production run, there are going to be snags that shouldn't be present in later production (say, a month or two later). I ordered on Day 1 and my Serial Number ends with 560, indicating I have a very early Mini. Even though early adopters may experience some of the problems listed below, there are relatively simple ways to solve most of these problems, and if you did not order on Day 1, most or all of these issues will probably be fixed in production by the time your printer is made.
So, with that all in mind, here is the list:
1. Underextrusion / Filament Constantly Jamming.
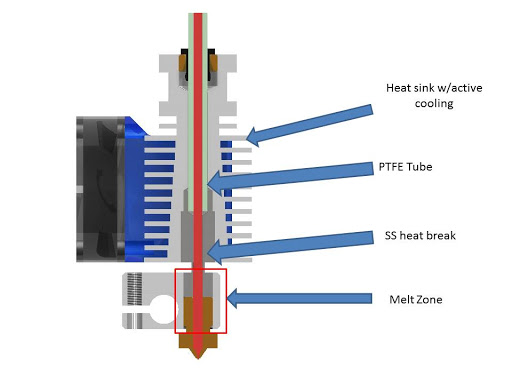
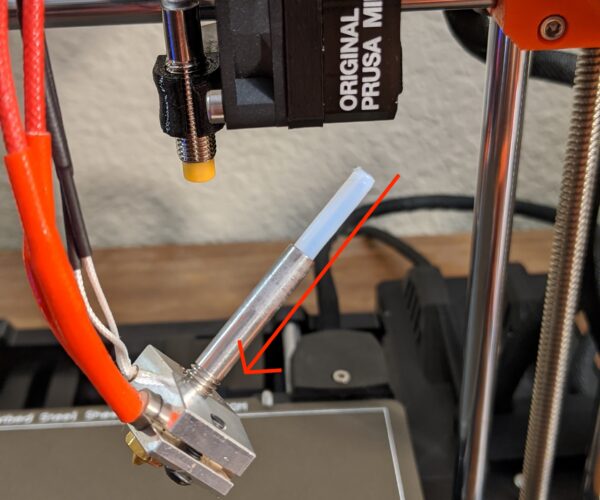
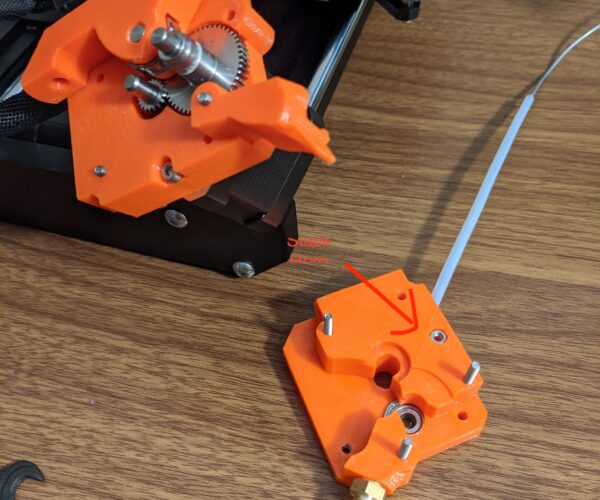
This problem is caused by the heatbreak and extruder being too low, creating a filament temperature transition from cold to hot that is too long in length. Prusament (and some other high-end PLA filaments), most likely due to its incredibly fine tolerances of +/-0.02mm, is generally immune to this problem, whereas +/-0.03mm and higher jam frequently. Because Prusament is generally not effected, this may indicate how this issue made it past QA checks.
Fix:
Relevant Forum Posts:
https://forum.prusa3d.com/forum/assembly-and-first-prints-troubleshooting/underextrusion-4/
Minor Issue Related to Issue 1: The 3 grub screws you need to loosen can be easily stripped, requiring them to be replaced. Be careful! Relevant Forum Thread:
2. MINDA probe shutting off, not lighting up when in close proximity, or causing calibration problems
Early production Minis have zip ties which are too tight, and may have caused the cable connecting the MINDA probe to be damaged. This causes problems with calibration and even may result in an inability to print. This issue tends to happen with very little print time, and may happen even if you do not fully extend the Y axis often. The break is not at the MINDA probe itself, but the break in the wire is generally close to the zip tie on the top of the Extruder.
You can either splice the cable to fix this problem, or contact Prusa Support for a free replacement MINDA probe and cable.
Relevant Forum Posts:
3. Bottom of Mini scratching desk surface
Due to inconsistent screw lengths, over tightening, or possibly a variety of other issues, the screws underneath the electronics box may be too long, resulting in them protruding slightly from the bottom of the box. These protruding screw ends will seriously scratch your working surface terribly, especially if your working surface is made of wood (like mine, unfortunately). An early reviewer has also had this problem.
Thankfully, this issue is easy enough to fix. Simply loosen the screw until it no longer protrudes. Or, for a better fix, remove the screw and snip a small amount off the bottom of the screw, then reinstall.
4. Can't unload filament
There are several issues which may cause the "Unload Filament" command to not work.
1. If you have not fixed Problem #1, Underextrusion, a side effect of that problem is that it creates a bulbous end of the filament. This end gets caught at the bottom of the PTFE tube, preventing the filament from being pulled out of the extruder. You can unscrew the top of the extruder, cut the bulbous end, and then run "Unload Filament" again. This problem is fixed when you fix the #1 Underextrusion problem. Also, be aware that if you remove the filament this way, the failure to unload may cause the Bowden system to grind the filament, creating notches in the filament. If you do not check your filament after unloading it this way, those notches may exacerbate the problem and cause a jam, or at least some damage to the finished print.
2. If you have fixed Problem #1, Underextrusion, a failing MINDA probe from #2 can also cause Unload Filament to not work.
Relevant Forum Thread: https://forum.prusa3d.com/forum/general-discussion-announcements-and-releases/problems-unloading-filament-fw-4-0-1/
5. Thermal Runaway?
1. Thermal Runaway shuts down the printer when there is a sudden swing in temperature. Unfortunately, the firmware is often too sensitive, and so taking off a warm steel sheet, then putting it back on later may cause a thermal runaway, or vice versa. This will hopefully be corrected in a future update.
Obviously, you should also check your cables, and see if any thermistor connections are loose. The main thing you should know is that it is almost certainly not the printer, but overly cautious firmware.
You can avoid this problem (and other Red Screen of Death) problems by:
1. After flipping the printer on, wait a minute or two for it to stabilize before attempting a print. I have had experiences where I've turned the printer on and immediately chose Preheat PLA, and immediately got Thermal Runaway. Waiting a minute or two after turning it on has always prevented this for me.
2. Make sure the steel plate's temperature matches the printer's expected temperature. If the printer is warming up the bed, putting on a cooler steel plate may cause a Runaway panic, and vice versa.
And... that's it for now. Overall, paper cuts, nothing massive like a recall, but still paper cuts to be aware of. I hope this is helpful to those with early printers, and let me know your further thoughts below.
RE: Avoiding early Prusa Mini Issues + Common Issues
Good summary and thanks for doing this 🙂
I had the under extrusion issue. It was very frustrating being unable to use the printer at all until the good people on here found the problem. Now I think this printer is fantastic and prints at least as good as my mk3s and probably better than it.
One thing I would add to your post though. I believe some printers are delivered with the idler screw set too tight. Mine was and it complicates problem diagnosis if you have both the under extrusion problem and a too tight idler.
RE: Avoiding early Prusa Mini Issues + Common Issues
6. I'm certain I'm having problems when I updated my printer.
You can downgrade your firmware quite easily by pressing the click wheel twice at the boot loader screen when you have the firmware of your choice on the USB.
Relevant Forum Thread:
7. I tried fixing Underextrusion, but am still having problems.
As @mark-g33 said above, you may have a tight idler screw. See the Prusa Mini Handbook, Page 41, for information.
https://cdn.prusa3d.com/downloads/manual/prusa3d_manual_mini_en_1_0.pdf
RE: Avoiding early Prusa Mini Issues + Common Issues
Oh my goodness, this post (and fine folks who pointed me to it) saved my 3d printing experience.
RE: Avoiding early Prusa Mini Issues + Common Issues
I'd like to hear vom Prusa, how they approach these issues in the production line and what we have to expect from new shippings in January.
RE: Avoiding early Prusa Mini Issues + Common Issues
Check to make sure your heated bed is properly secured (3 of mine were very loose) by loosening and retightening the 9 screws attaching it to the frame. See https://manual.prusa3d.com/Guide/7.+Heatbed++&+PSU+assembly+(Black+PSU)/1153?lang=en#s20824 for the correct tightening order. (loosen in reverse order).
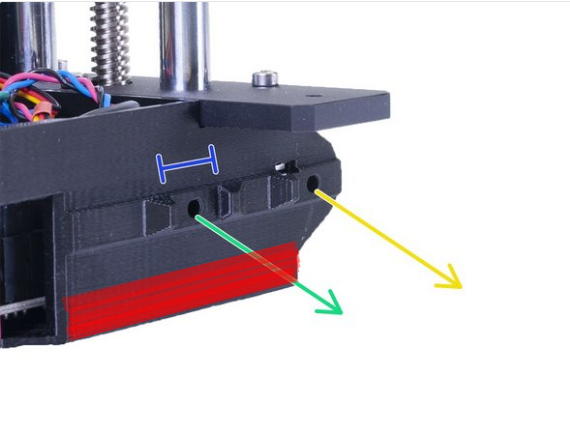
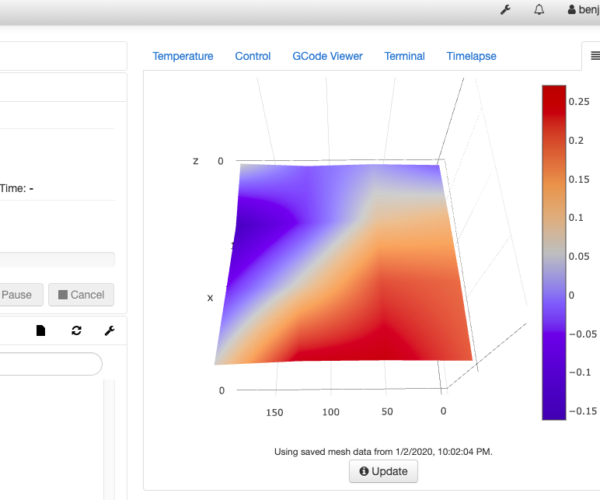
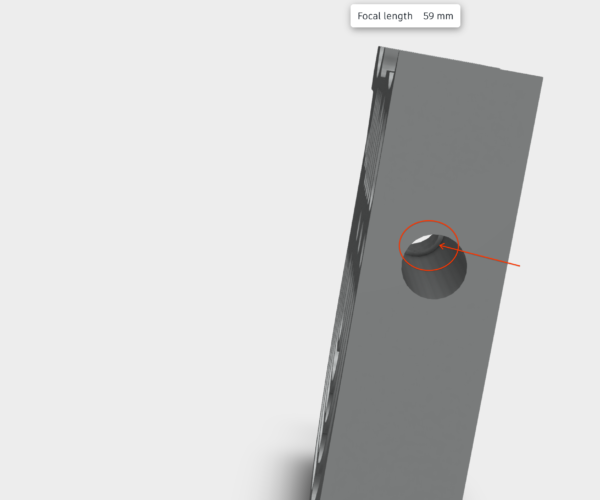
My nozzle was 2mm higher (see here) from the build plate on the extreme left vs the extreme right. To fix this I cut 5 pieces of 5x1cm strips of aluminum soda can, stacked them, and shimmed the X-Z assembly. (approx. position marked below in red).
Now this is how level my my bed and X-axis is:
Prusa Mini Silicone Bed Leveling Mod: https://bbbenji.github.io/PMSBLM/
RE: Avoiding early Prusa Mini Issues + Common Issues
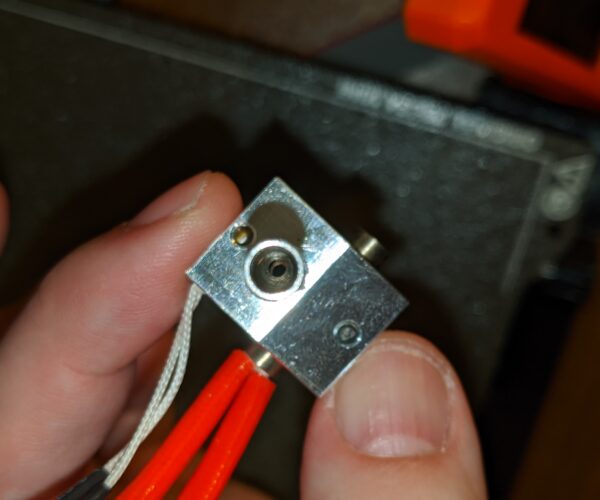
Just wanted to comment on Item 1). I agree that moving the hotend up is the correct fix, I think the root cause is less so the exact position of the hotend whether it is too high or low, but rather that there is a void between the PTFE and the heatbreak. The PTFE is supposed to be smooshed against the heatbreak. So therefore if we were to use the same PTFE tube length as provided, we have to move the hotend up.
I then reinstalled making sure to squash the ptfe between the bowden coupler at top of heatsink and inside the heatbreak. Basically same as the threads here -install bowden coupler, tighten, back off 1/4 to 1/3 turn push hotend up, tighten grub screws, tighten bowden again.
This leaves two possibilities, which I am not sure which is correct.
I had issues with filament unloading where the tip of the filament would blob to 2.1mm but be able to pass through the bowden, but get stuck in the extruder, past the gears (where the extruder printed plastic parts clamp onto the ptfte, reducing its diameter). After I snugged up the PTFE to ensure it was tight against the heatbreak, as well as bowden coupler at top of heatsink, which had the side effect of raising the hotend up my unload problems went away entirely. My tips are now 1.95mm which is just enough to pass through everything.
RE: Avoiding early Prusa Mini Issues + Common Issues
That's some really interesting observatiin, thank you for posting. Are you able to unload filament when doing it "from cold" i.e. after turning printer on and doing unload without printing or purging? If yes, then this specific issue with filament load/unload/change from cold is not a firmware one.
RE: Avoiding early Prusa Mini Issues + Common Issues
Hi Crawlerin, yes I am able to unload from cold. Its a bit stickier, I have to give it more of a tug to pull out the filament, but so far (7-8 times) since It's always come out.
RE: Avoiding early Prusa Mini Issues + Common Issues
Hi - I was just looking at the STEP files of the heatsink on the Prusa Github.
I noticed that there is a collar in the heatsink that limits how much you can shove up the heatsink tube.
This means that there is some minimum length of PTFE tube required, to have the PTFE snug between heatbreak and bowden nut. If you shove it up to max and still have a short PTFE, then your PTFE potentially will still slop back and forth on retracts, if the friction of the PTFE against heatbreak doesn't hold it in place. (well, its PTFE, its slippery by design, so its likely)
so until we know what the minimum PTFE length is, I recommend to not shorten your PTFE tube.
RE: Avoiding early Prusa Mini Issues + Common Issues
One more thing I can add to this discussion.
I had some really bad banding on my prints when printing at 0.2mm. Printing at <0.1 just resulted in a wobbly mess. See here.
It turned out the two grub screws holding on the Y-axis belt gear to the motor were completely loose. See here.
A word of advice is to just go over all the screws on the Mini and double-check they are all nice and snug. If I had done this first thing when I got my printer, I would have saved a lot of time trouble shooting different problems.
Prusa Mini Silicone Bed Leveling Mod: https://bbbenji.github.io/PMSBLM/
RE: Avoiding early Prusa Mini Issues + Common Issues
Quality control has been too bad on the first delivered Minis. No one expects to check already assembled parts for loose screws, misalignment or broken parts.
If it where a kit, that is another matter...
Have a look at my models on Printables.com 😉
RE: Avoiding early Prusa Mini Issues + Common Issues
Guides are slowly appearing on HOWTO section of manuals page, You may want to check those out: https://manual.prusa3d.com/c/English_manuals#Section_How-to
There's an article on how to replace PTFE tube which may answer few questions about the length of the tube and hotend assembly.
RE: Avoiding early Prusa Mini Issues + Common Issues
I was lucky and got my Mini a while ago (13th order), had plenty of small issues but as a 'newbie' i was expecting this and probably many were my own fault.
I am very happy with the Mini, my prints are good and getting better as i learn more and more.
However, i have noticed that the firmware is 'glitchy' and have developed the following procedure ....
I always 'purge' before any job starts and i always physically switch the Mini off between jobs, even repeat jobs.
This is working for me and takes no extra time to do, and my prints keep getting better as i learn more.
S
RE: Avoiding early Prusa Mini Issues + Common Issues
well, yesterday i took off the print plate to cool down for easy snap of PETG print.
then i scliced something else, forgot about it, started the print and went to the bathroom. a few minutes later im noticing strange noises from the mini
the nooze crashed so forcefull into the hotbed, that it got scrached very deep, bented about 3 cm and even remained a massive dent. have to try out this evening if its still usable.
so be carefull, crash recognition on the mesh bed leveling does not work!
RE: Avoiding early Prusa Mini Issues + Common Issues
I was trying to figure out source of rattling noise. It happened occasionally usually after few layers, then stopped, I was thinking bearings when printer sped up ... but no binding, when bed moved manually it was OK, so I thought that's just what it is and if it gets worse it will demonstrate itself. Then once I was organizing stuff around the printer I found the culprit: it was actually metal keyring on original USB dongle, hitting on table as printer vibrates. Lack table is kind enough to amplify the noise thanks to its hollow structure.
I feel stupid now.
RE: Avoiding early Prusa Mini Issues + Common Issues
Dont feel stupid, it fooled me the same. I took of the ring
RE: Avoiding early Prusa Mini Issues + Common Issues
Dont feel stupid, it fooled me the same. I took of the ring
