4.4.0 Firmware for Original Prusa MINI/MINI+ (Final Release) is out now!
Greetings all, just in time for the holidays 🙂 We hare please to announce the release of the final release of the Prusa MINI/MINI+ 4.4.0 firmware. All the details about the update as well as the download links are listed below.
Summary
- Support for Wi-Fi (ESP-01 & ESP-01S)
- PrusaLink updated
- Network menu updated
- Networking improvements
- GUI improvements
- Selftest improvements
- Core/Libs
- CPU reset G-code added
- Translations updated
- Known issues
- Bug fixes
This is the final release of firmware 4.4.0. This changelog is a summary of the previous releases (beta2 and RC1). The main focus is on the support of Wi-Fi and related networking features like PrusaLink.
ATTENTION: Before you rush flashing new firmware, please note that this time, there are two files needed on the USB flash drive. Both firmware and bootloader must be updated!
ATTENTION 2: In case you run into flashing issues, try to repeat the process or use another USB flash drive.
Support for Wi-Fi (ESP-01 & ESP-01S)
The MINI+ can be connected to the network using an Ethernet cable. In this release, we are adding support for Wi-Fi via ESP-01 (ESP8266). Please read the following paragraphs carefully. We have streamlined the entire process as much as possible, however, it is necessary to know which ESP hardware to use and how to set up the connection.
Brief history of development
On paper, connecting MINI+ to the Wi-Fi network seemed easy. However, in reality, the task required a complete overhaul of almost everything. First, the firmware for the ESP itself provided by the manufacturers wasn't working as expected. During the tests, we encountered random packet losses, feature limitations (max 5 sockets at once), and constant disconnects. Therefore our developers have written brand new firmware for the ESP board to ensure better stability and performance.
Second, the communication between the printer and the Wi-Fi module based on ESP8266 proved to be a source of issues and almost the entire networking (ISO-OSI stack) had to be written from scratch to achieve a smooth transfer of data across the Buddy board into the USB flash drive. Another important step was to ensure that the user can switch between the Ethernet and Wi-Fi almost seamlessly.
Third, saving data on the USB flash drive was not at the expected level. Although the data transfer rate through the Wi-Fi was reasonable, saving received parts of the G-code file onto the USB drive was affected by a bottleneck. The devs have implemented multiple performance fixes for this final release.
Fourth, all these changes mentioned above have resulted in a need to update the bootloader. It’s something the MINI platform wasn't initially designed for, so it introduced new challenges. The developers have found a solution and made the updating process fully automatic (more information below).
Overall, enabling Wi-Fi on the MINI platform proved to be a very difficult task. We learned a lot during the development and we would like to share our experience and discoveries - check our detailed technical explanation in the dev-diary on our Prusa blog.
Hardware prerequisites
The ESP8266 is quite popular among other devices, especially in IoT (internet of things), therefore there are multiple manufacturers and also two hardware revisions. We have purchased several Wi-Fi modules from different producers and our internal tests haven't shown any significant differences, however, as with any other product, not all might be equal. For this reason, we are sharing the data from our measurements in this spreadsheet and we would appreciate it if the community would join us.
Regarding hardware revisions, there are two, ESP-01 and ESP-01S. Both differ in memory size (512 kB vs 1 MB flash) and assembly of the LED. During the tests, we haven't discovered any functional differences between them. However, it is recommended to purchase the higher memory (1 MB flash).
Firmware prerequisites
As explained above in the history section, enabling Wi-Fi requires updating both the bootloader and firmware. Note that this time you need to include two separate .bbf files on the USB drive. The printer will automatically load both of them and do all the work in the background. Since this update overwrites almost the entire memory of the printer, the update might take up to 15-20 minutes.
Step-by-step guidance
The first encounter with the Wi-Fi flashing procedure might be tricky and this is why we have created a dedicated Wi-Fi guide, which will take you through the process step by step, similar to our assembly manuals.
Read the manual first before you start flashing the printer. In case you run into issues, please use our forum, where we have created a dedicated section or start a new issue here on GitHub
Transfer speeds
There are multiple factors affecting the overall performance (signal quality, USB flash drive speed, etc.). The transfer speed from your computer to the printer should be around 250-300 KB/s over the Ethernet and 45-100 KB/s over the Wi-Fi.
PrusaLink updated
MINI+ is running a PrusaLink service, which is a cornerstone for future networking capabilities. Once the printer is connected to the local network, PrusaLink is accessible via an internet browser. Look in the Menu -> Settings -> Network and rewrite the IP address.
Until now, PrusaLink was providing read-only data about the printer (temperatures, fan RPM, speed, etc.). Starting this release we are adding new features. The major change is the ability to upload G-codes and control the printing process. This can be done through a web interface (see our guide for PrusaLink) or using PrusaSlicer. To ensure that it is you, who is sending the file, you must input an API key, which can be found in Menu -> Settings -> Network -> PrusaLink -> Current API key.
Besides uploading files, the PrusaLink web interface for MINI+ is also capable of:
- Start print*
- Pause/Stop print
- Browse through G-codes, which are on the printer
- Delete G-code
*MINI+ must be on the home screen and “print-preview” screen - this is intentional for safety reasons
Note that files are currently sorted alphabetically (A-Z). Other options are planned for future releases.
Network menu updated
Due to the completely new or updated features described above, the “Network” menu was also updated. There are new menu items allowing you to set the new features based on your preferences. The list now contains these added items:
- PrusaLink
- Enabled [ON/OFF]
- Generate API key
- Current API key
- Interface
- Wi-Fi (enables the ESP module)
- Eth (switches to Ethernet)
- OFF (disables both interfaces)
- IP (displays the current IP address)
- MAC (displays MAC of the active interface)
- Ethernet
- Protocol (please note currently only IPv4 is supported)
- LAN [DHCP/Static]
- IP (assigned IP address)
- Mask (subnet mask)
- GW (gateway IP address)
- MAC (interface MAC address)
- Wi-Fi
- Setup Wi-Fi module (flashes the latest available firmware for the ESP)
- Create credentials (creates an empty config file on the USB drive)
- Load credentials (loads config file from the USB drive)
- Protocol (please note currently only IPv4 is supported)
- LAN [DHCP/Static]
- IP (assigned IP address)
- Mask (subnet mask)
- GW (gateway IP address)
- MAC (interface MAC address)
Example of the Wi-Fi prusa_printer_settings.ini:
[wifi]
 ssid=
 key_mgmt=WPA
 psk=
where:
- ssid - is the name of your Wi-Fi network
- key_mgmt - is the type of security protocol (don't change it for now)
- psk - your Wi-Fi password
Networking improvements
Tailor-made HTTP server
While working on PrusaLink and its extended network capabilities, the developers have discovered that none of the existing web servers is sufficient for our needs. Previously used lwhttpd, became more and more demanding for the hardware.
For these reasons, the developers have decided to write our own HTTP server, which is optimized for the hardware and expected capabilities. It is able to process folders with large amounts of G-codes, thumbnails in G-codes, simultaneous upload/download, and more.
Wi-Fi capabilities
The ESP is currently able to run as a client and connect to the nearest AP on a 2.4 GHz network. The data connection can be both encrypted (WEP/WPA-PSK) or unencrypted. For now, the WPA-enterprise and similar security encryptions for businesses aren't supported.
The printer is able to store login for a single Wi-Fi network, if you want to switch between wireless networks, you have to always overwrite the currently stored credentials.
The ESP is trying to automatically connect to the selected Wi-Fi network and reconnect if the connection is lost. If the printer is unable to connect to the network for over 60 seconds, the ESP module is restarted, and once fully booted up, it continues searching for the network.
Support for the SSL
Part of the firmware is now the library mbedTLS, which will be used in the future for more secure communication between the MINI+ printer and any server.
GUI improvements
Remember the position from the previous menu
Currently while returning to the previous menu, the printer doesn't remember the position of the cursor and scrolls all the way up, which can be uncomfortable for the user. Starting this release the printer will remember the position and return properly to it.
Filament actions
While performing any action with the filament (load, purge, change, unload) the user is now able to stop the procedure immediately using a dedicated button “STOP” on the screen.
Footer settings
Until now the footer was strictly set and there was no option to adjust it. Starting this release the user can change up to three positions and display the information based on their current needs. The upper row is fixed with a hotend or heatbed temperature.
The lower row is configurable and the user can pick from:
- Currently loaded filament (PLA, PETG, ASA, etc.)
- Status of filament sensor (N/A, ON, OFF, DISCONNECTED)
- Print speed in %
- X-axis, Y-axis, or Z-axis coordinate
- Z-height
- RPM of the print fan
- RPM of hotend fan
- Current Live Adjust Z value
- Currently selected print sheet
- none, the position remains unoccupied
A quick note to the Z-axis vs Z-height, where the first shows the height of the Z-axis including the Live Adjust Z value, therefore its absolute value. The second “Z-height” is showing the height of the Z-axis without the Live Adjust Z value, therefore its logical value. This can be useful for example while debugging fine prints as requested in issue #608.
Settings are stored in the EEPROM and remain persistent after the printer is rebooted.
To adjust the footer on your printer go to LCD Menu -> Settings -> Footer settings. Besides changing the three positions, the user can also tinker with advanced settings and Reset the footer to factory defaults.
Improved UI for dialogues
Sometimes the dialogue was displayed over the footer and prevented the user from reading important information about the printer. The user interface was improved to prevent this scenario.
Improved One-Click Print
Once a USB drive with G-code is inserted, the system reads the code and displays the preview. Developers have polished the code and the situation when this screen is overlaid with “Filament not detected” shouldn't occur anymore.
Switching between sheet profiles
This feature allows for switching between different steel sheet settings (value of Live Adjust Z). Previously, while fast-toggling between profiles, the system displayed all profiles, even those, which haven't been set. Now, this behavior is changed and only set-up profiles are displayed in the fast-toggle.
Selftest improvements
Detect stuck hotend temperature reading
Safety mechanisms should be an integral part of any 3D printer. MINI+ is equipped with several sensor and firmware algorithms, which are constantly checking if everything is according to the plan. Inside our labs, we are pushing the printers to their limits and trying to find conditions, for which the algorithms might not work as expected.
During one of the tests, we discovered a very rare scenario, when the thermistor might get “stuck” and reports a temperature a few degrees below the target, for example, 213 °C vs 215 °C. Because of the slight difference, the system keeps on increasing the input power to reach the target temperature, but since the thermistor is stuck at 213 °C, the only result is an overheated heater block. The “Thermal runaway” will not react as the difference must be over 6° C from the target.
For this reason, we are extending the safety algorithm with a new one, which is designed to cover the scenario described in the previous paragraph. It checks the real PWM of the heater against a mathematical model. If the real PWM is 68 (26,6 %) above the expected “modeled” PWM, the algorithm will add “1” to a fault counter. In case the value is before 68, a “1” is subtracted.
When a value of 40 is reached, the printer shuts down the heater and the print fan is activated at its highest RPM (100 %). An error message is displayed “TEMP NOT MATCHING” with further explanation: "Measured temperature is not matching expected value. Check the thermistor is in contact with the hotend. In case of damage, replace it."
Note that this safety feature is currently still in beta and might misbehave. The algorithm is expecting a stock MINI+ printer, without any hardware interventions. Should you encounter any issue, please report it to our developers using GitHub.
New checks
The printer now recognizes if the G-code was sliced using the PrusaSlicer and the correct printer type. If requirements aren't met, the printer will display the following error message:
"This G-CODE was set up for another printer type."
You can use the buttons "Ignore" and "Abort" to resolve the situation.
The printer is also able to verify whether any filament is loaded (the filament sensor must be connected and activated). In case no filament is being detected by the sensor, the following message is displayed:
"Filament not detected. Load filament now? Select NO to cancel, or IGNORE to disable the filament sensor and continue."
Please note that selecting the option "IGNORE" will disable the filament sensor in the menu, otherwise the printer will display this message in a loop. To reactivate the sensor, please enter the settings menu.
In case there is a different filament loaded than required by the selected G-code, the printer will show this message
"This G-CODE was set up for another filament type."
Use buttons "Ignore" and "Abort" to resolve the situation.
Remote print checks (experimental)
When you start a remote print, the printer now correctly checks whether the right filament is loaded. If the G-code file is sliced for a different type of filament than the one currently loaded, the printer will display a message. Please note this is an experimental feature and might sometimes misbehave.
Stuck fan check
While printing, the system now checks whether both fans are spinning or not. In case any fan stops (jammed, broken wires, …) the system activates appropriate measures.
- Hotend fan - the print is paused; the heater gets cut off to prevent possible damage to the PTFE tube inside the print head
- Print fan - print is paused; the heater remains active
Since this is a safety feature, it is turned ON by default. In case you don't want to use it, you can turn it off in Menu -> Settings -> Fan Check
Prevent “blob” after pause or M600
The communication between PrusaSlicer and firmware was improved to prevent the creation of a blob after the print was paused or the filament changed (M600). The behavior is now the same as on MK3S+ where after the filament change and proper color is confirmed by the user, a small portion of the filament is extruded.
Load filament - optimized X coordinate
MINI+ is a Bowden printer and based on the current shape of the PTFE tube, the filament either flows through with little or more resistance. While loading the filament the printer now parks its print head about ⅓ from the left end of the X-axis. This was also requested by the community, issue #1971.
Fixed behavior of safety timer
In case the safety timer was invoked in the past, the printer correctly started to cool down the printer, but the target temperature remained displayed incorrectly based on the loaded material. Now, the target is correctly set to zero.
Fixed rendering during MBL
Until now, while performing the Mesh Bed Leveling (MBL) the printer displayed incorrectly “1/16” in every measured point. This release fixes this issue and the printer correctly displays every point (1/16, 2/16, 3/16, …).
Improved logic if the X-axis selftest failed
In case the self-test of the X-axis fails, the following Y-axis test is performed, but the Z-axis test is skipped. The reason is, that the print head might be too far left and while going down, the SuperMINDA sensor might not be triggered, resulting in the nozzle crashing into the heatbed.
Waiting for the user after FLC
Once the First Layer Calibration (FLC) is performed, the printer remains heated up and awaits user confirmation. This behavior change is based on the fact that some users aren't satisfied with the result, and want to repeat the calibration process, but the heatbed is already cold at this point.
FLC after safety timer fixed
If the user started FLC and left the printer unattended on the starting screen for over 30 minutes, the printer correctly displayed the Safety timer and turned off the heating. However, upon restarting FLC, only the print head was heated up, this is now fixed.
Filament autoload
Similarly to MK3S+, once the filament sensor detects inserted filament, the printer displays a screen for filament preheating.
Safety timer on M600 fixed
The system was previously incorrectly keeping the heater on even after 30 minutes if the screen “Is color correct” displayed. Now, the safety timer is correctly activated.
Core/Libs
XFLASH and bootstrapping
This firmware introduces a new filesystem on the external FLASH (XFLASH) memory by utilizing project littlefs for its tolerance/immunity against sudden power loss.
Having the filesystem in XFLASH enabled the developers to transfer more static resources into the firmware - in this release the PrusaLink web pages and the ESP’s firmware binaries are moved into XFLASH.
This has greatly freed the FLASH memory on the CPU chip which can now be used for more code. Moreover, in the future, the plan is to use the XFLASH for other tasks (for example for community languages through standard gettext MO files).
In order to make this work, the bootloader must be updated. This is done automatically by the system. The user only has to provide both .bbf files on the USB flash drive. After the update, it will be capable of using the extended .bbf files and copying the static content into the XFLASH as an inherent part of the firmware flashing process - called bootstrapping.
EEPROM safety
The EEPROM safety features have been extended - upon startup the firmware checks the CRC (also stored in the EEPROM). If not matching, the EEPROM is loaded with defaults. This feature prevents various crashes and misbehavior caused by incorrect data being read from the EEPROM in the past (e.g. incorrect E-steps).
PNG optimization
The configuration of libPNG has been revised and several constraints tightened which resulted in shorter code and less RAM needed. Support for unused auxiliary PNG chunks has been removed and libPNG error texts have been removed as they aren't printed after all. Moreover, PNG icons have been optimized now leveraging even lower bit-depth and paletted images => less code space taken.
CPU reset G-code added
The G-code M999 R (aka CPU reset) added, now can be issued for example from Octoprint.
Translations updated
Compared to the previous stable release 4.3.4 there are new networking and web dialogues, which have been translated into all officially supported languages.
Known issues
Download G-codes from the printer disabled
Due to issues while downloading G-codes back to the computer, this feature is temporarily disabled and will return once the developers provide a fix.
Rerunning MBL
In case the mesh bed leveling (MBL) is stopped during a pre-print procedure by the user and then immediately run manually from the menu, the system might stop responding and a restart is required.
Wi-Fi (ESP) ignoring printer restart
In case the printer is restarted using the hardware button below the LCD, the ESP might remain powered on and doesn’t power cycle. In case the Wi-Fi stops responding, please turn off the printer completely and turn it on again. This behavior will be fixed in the upcoming releases.
Bug fixes
- When uploading G-codes via Wi-Fi, the One-click Print message was incorrectly displayed. This is now fixed.
- Low-RPM fan errors fixed: when the user lowered the print fan RPM to less than 40, the printer displayed an error message because the system saw the fan as completely stopped. This is now fixed.
- The filament sensor is no longer enabled by default. This caused an error on printers without a filament sensor - a message was displayed warning the user that the filament is not loaded. This is now fixed. When no filament sensor is detected, it is automatically disabled.
- Fixed filament unload for the first layer calibration. When the user wanted to change filament before the first layer calibration, the unload was successful, but the printer did not follow up with the filament loading procedure. This is now fixed
- Safety timer at the end of the first layer calibration: if the user kept the printer running after the first layer calibration procedure with the “Do you want to repeat…” message on the screen, the printer continued to heat up the nozzle and the bed. This is now fixed. Once the procedure ends, the heating is disabled and is only re-enabled after the user’s interaction.
- First layer calibration ignored Mesh Bed Leveling errors and no warning message was displayed. This is now fixed.
- Incorrect filament displayed after a filament runout. If the user loaded a PETG filament, restarted the printer, and started a print during which a filament runout occurred, the printer then shows PLA as the loaded filament. This is now fixed.
- Extruder location for filament change fixed. The parking position of the extruder was taken over from the homing of the X-axis. - - This could cause a situation where the extruder would be directly over a print during a filament change. To prevent possible damage to the printed model, the parking position was reverted to the original state - to the end of the X-axis.
- Flashing ESP (Wi-Fi) during printing is no longer possible. Previously, it was possible to navigate through the Tune menu during the printing process to the ESP flashing option which would cause the print process to jam. These menu options are no longer interactive during a print job.
- Configuration saving in the experimental menu fixed. Previously, if the user set E-Steps in the experimental menu and then adjusted the Footer, the E-Step value was not saved. This was fixed by removing the Footer from the experimental menu.
- Unload filament double-click bug fixed. Previously, if the user chose Unload in the Filament menu and proceeded to select Load or Unload, the menu item had to be clicked twice.
- Flashing texts fixed by adjusting the way how texts are rendered.
- Assist sound mode issues in the Print menu are now fixed.
- OctoPrint logo is now correctly displayed after the connection is established
- OctoPrint connection wasn’t working correctly in the RC1 release, but now works as expected (#2558)
- Flashing screen during filament change is now fixed
- PrusaLink G-code upload sometimes caused One-click-print to display the wrong G-code. In this release, the system compares correctly selects the latest G-code (#2331)
- For fan RPMs set below 40 the printer incorrectly displayed fan error. The controlling algorithm was adjusted to fix this behavior (#2314)
- The filament sensor turned on by default was causing issues for printers without this hardware part. Now, the printer checks for the sensor and turns the check off if the hardware is not present.
- If the user-initiated filament change just before the First Layer Calibration, the printer didn’t allow to load new filament and continued calibration without it. This is now fixed.
- In case the user finished calibration, but left the printer on the last confirmation screen, the system initiated a “Safety timer”. Now, once the calibration is done, the printer stops heating and waits for the user.
- The previous release didn’t include a message of failed MBL while doing the First Layer Calibration. This missing text is now added to the firmware.
- In case of filament runout, the printer sometimes incorrectly displayed that PLA is loaded regardless of the currently loaded filament. This bug was fixed for the final release (#1400).
- Filament change via M600 in certain scenarios caused the print head to remain above the printed object. Starting this release, the print head correctly moves to the end of the X-axis, outside the printed object (#2323).
- Setting the E-steps in the experimental menu wasn’t correctly saved if the user also made changes to the Footer, this is now resolved (#2310).
- While changing the filament, the user had to click twice in case he wanted to immediately load a new filament. This UI error was caused by a missing dialogue and is now fixed (#2329)
- Scrolling texts on the LCD screen were sometimes flashing. This issue is now resolved.
- Assist sound mode wasn’t beeping in the print menu, this feature now behaves as expected (#2300)
- After unloading the currently loaded filament the screen started to flash for some users. Now, the content is displayed correctly (#2299)
Supported printer:
Original Prusa MINI
Original Prusa MINI+
Download Link:
https://github.com/prusa3d/Prusa-Firmware-Buddy/releases/tag/v4.4.0
How to flash the firmware on MINI:
Copy the firmware file (.bbf) onto the USB drive with FAT32 formatting Insert the flash drive in the MINI's USB port Turn the printer ON (or reboot it) A new screen will appear Confirm you want to flash the firmware
Please report any bug here:
github.com/prusa3d/Prusa-Firmware-Buddy/issues
As always, we wish you happy printing and look forward to your feedback!
Shane (AKA FromPrusa)
RE: 4.4.0 Firmware for Original Prusa MINI/MINI+ (Final Release) is out now!
I flashed my Mini - entire process (don't forget to put both files on your USB) went smoothly no issues at all
Run few prints - no issues as well
RE: 4.4.0 Firmware for Original Prusa MINI/MINI+ (Final Release) is out now!
Thanks for the update. I was able to update with no issues.
I was looking forward to have the ability to assign a static IP address for the WiFi connection. This is not yet possible?
RE:
Thanks for the update. I was able to update with no issues.
I was looking forward to have the ability to assign a static IP address for the WiFi connection. This is not yet possible?
You can do that on the router and provide slightly more security. Assign IP addresses on the router per MAC address and only valid MAC addresses get an IP. Many routers allow you to control how the DHCP server assigns addresses.
Regards,
Mark
RE: 4.4.0 Firmware for Original Prusa MINI/MINI+ (Final Release) is out now!
Thanks for the reply Mark 🙂
I know I can assign static IP addresses on the router. In this case I wanted to do that on the printer itself since it has the option for it, it just doesn't seem to work (or I'm missing something).
I believe you can make a settings file to USB on the WIFI menu, then edit the file on your PC. Once edited, you can then load the settings on the printer.
Do you know what is the setting for setting the static IP?
Thanks.
RE: 4.4.0 Firmware for Original Prusa MINI/MINI+ (Final Release) is out now!
https://help.prusa3d.com/article/prusa-connect-local-mini_133279#save-load-settings
Thanks for the reply Mark 🙂
I know I can assign static IP addresses on the router. In this case I wanted to do that on the printer itself since it has the option for it, it just doesn't seem to work (or I'm missing something).
I believe you can make a settings file to USB on the WIFI menu, then edit the file on your PC. Once edited, you can then load the settings on the printer.
Do you know what is the setting for setting the static IP?
Thanks.
[lan_ip4]
type=DHCP //or "STATIC" (UPPERCASE!), if a static IP is set up in your router's config.
hostname=PrusaMINI // Optional.
address=0.0.0.0 // From your router's config.
mask=0.0.0.0 // From your router's config.
gateway=0.0.0.0// From your router's config.
RE: 4.4.0 Firmware for Original Prusa MINI/MINI+ (Final Release) is out now!
Thanks for the info.
But this is for when you assign the IP in the router as @mark-3 suggested, right?
I was asking if there was a way to assign a static IP address straight in the printer, as you can do with a computer, smartphone, etc.
RE: 4.4.0 Firmware for Original Prusa MINI/MINI+ (Final Release) is out now!
Well, that was interesting. I got a persistent #12608 corruption error ("Firmware in the internal flash corrupt! Please reflash firmware.") after the first flashing attempt, and had to use the Alternative method to re-flash the exact same firmware image a second time, which worked fine.
RE: 4.4.0 Firmware for Original Prusa MINI/MINI+ (Final Release) is out now!
Thanks for the info.
But this is for when you assign the IP in the router as @mark-3 suggested, right?
I was asking if there was a way to assign a static IP address straight in the printer, as you can do with a computer, smartphone, etc.
🙄Please read. At your printer, go to the network settings and select "Save settings". Pull the USB stick and put it into a computer. Open the ini file and change "type=DHCP" to "type=STATIC". Then adjust the address (IP), mask (in a home net usually 255.255.255.0) and gateway (the address of your router).
Back at your printer plug the stick in and select "Load settings" in the network settings.
RE: 4.4.0 Firmware for Original Prusa MINI/MINI+ (Final Release) is out now!
Thanks for the info.
But this is for when you assign the IP in the router as @mark-3 suggested, right?
I was asking if there was a way to assign a static IP address straight in the printer, as you can do with a computer, smartphone, etc.🙄Please read. At your printer, go to the network settings and select "Save settings". Pull the USB stick and put it into a computer. Open the ini file and change "type=DHCP" to "type=STATIC". Then adjust the address (IP), mask (in a home net usually 255.255.255.0) and gateway (the address of your router).
Back at your printer plug the stick in and select "Load settings" in the network settings.
Thanks again.
I actually read what you posted. In the comments it always says: //or "STATIC" (UPPERCASE!), if a static IP is set up in your router's config. and // From your router's config.
I understood you had to configure it on the router and THEN bring this config to the printer, that is why I asked if that config was for configuring it on the router. Sorry if I misunderstood, those comments were confusing me.
So, I did that, this is my config file:
[wifi]
ssid=MYNETWORK
key_mgmt=WPA
psk=MYPASSWORD

[lan_ip4]
type=STATIC
hostname=PrusaMINI
address=192.168.1.20
mask=255.255.255.0
gateway=192.168.1.1
Also, on my printer it doesn't exactly says "Save Settings" and "Load Settings":
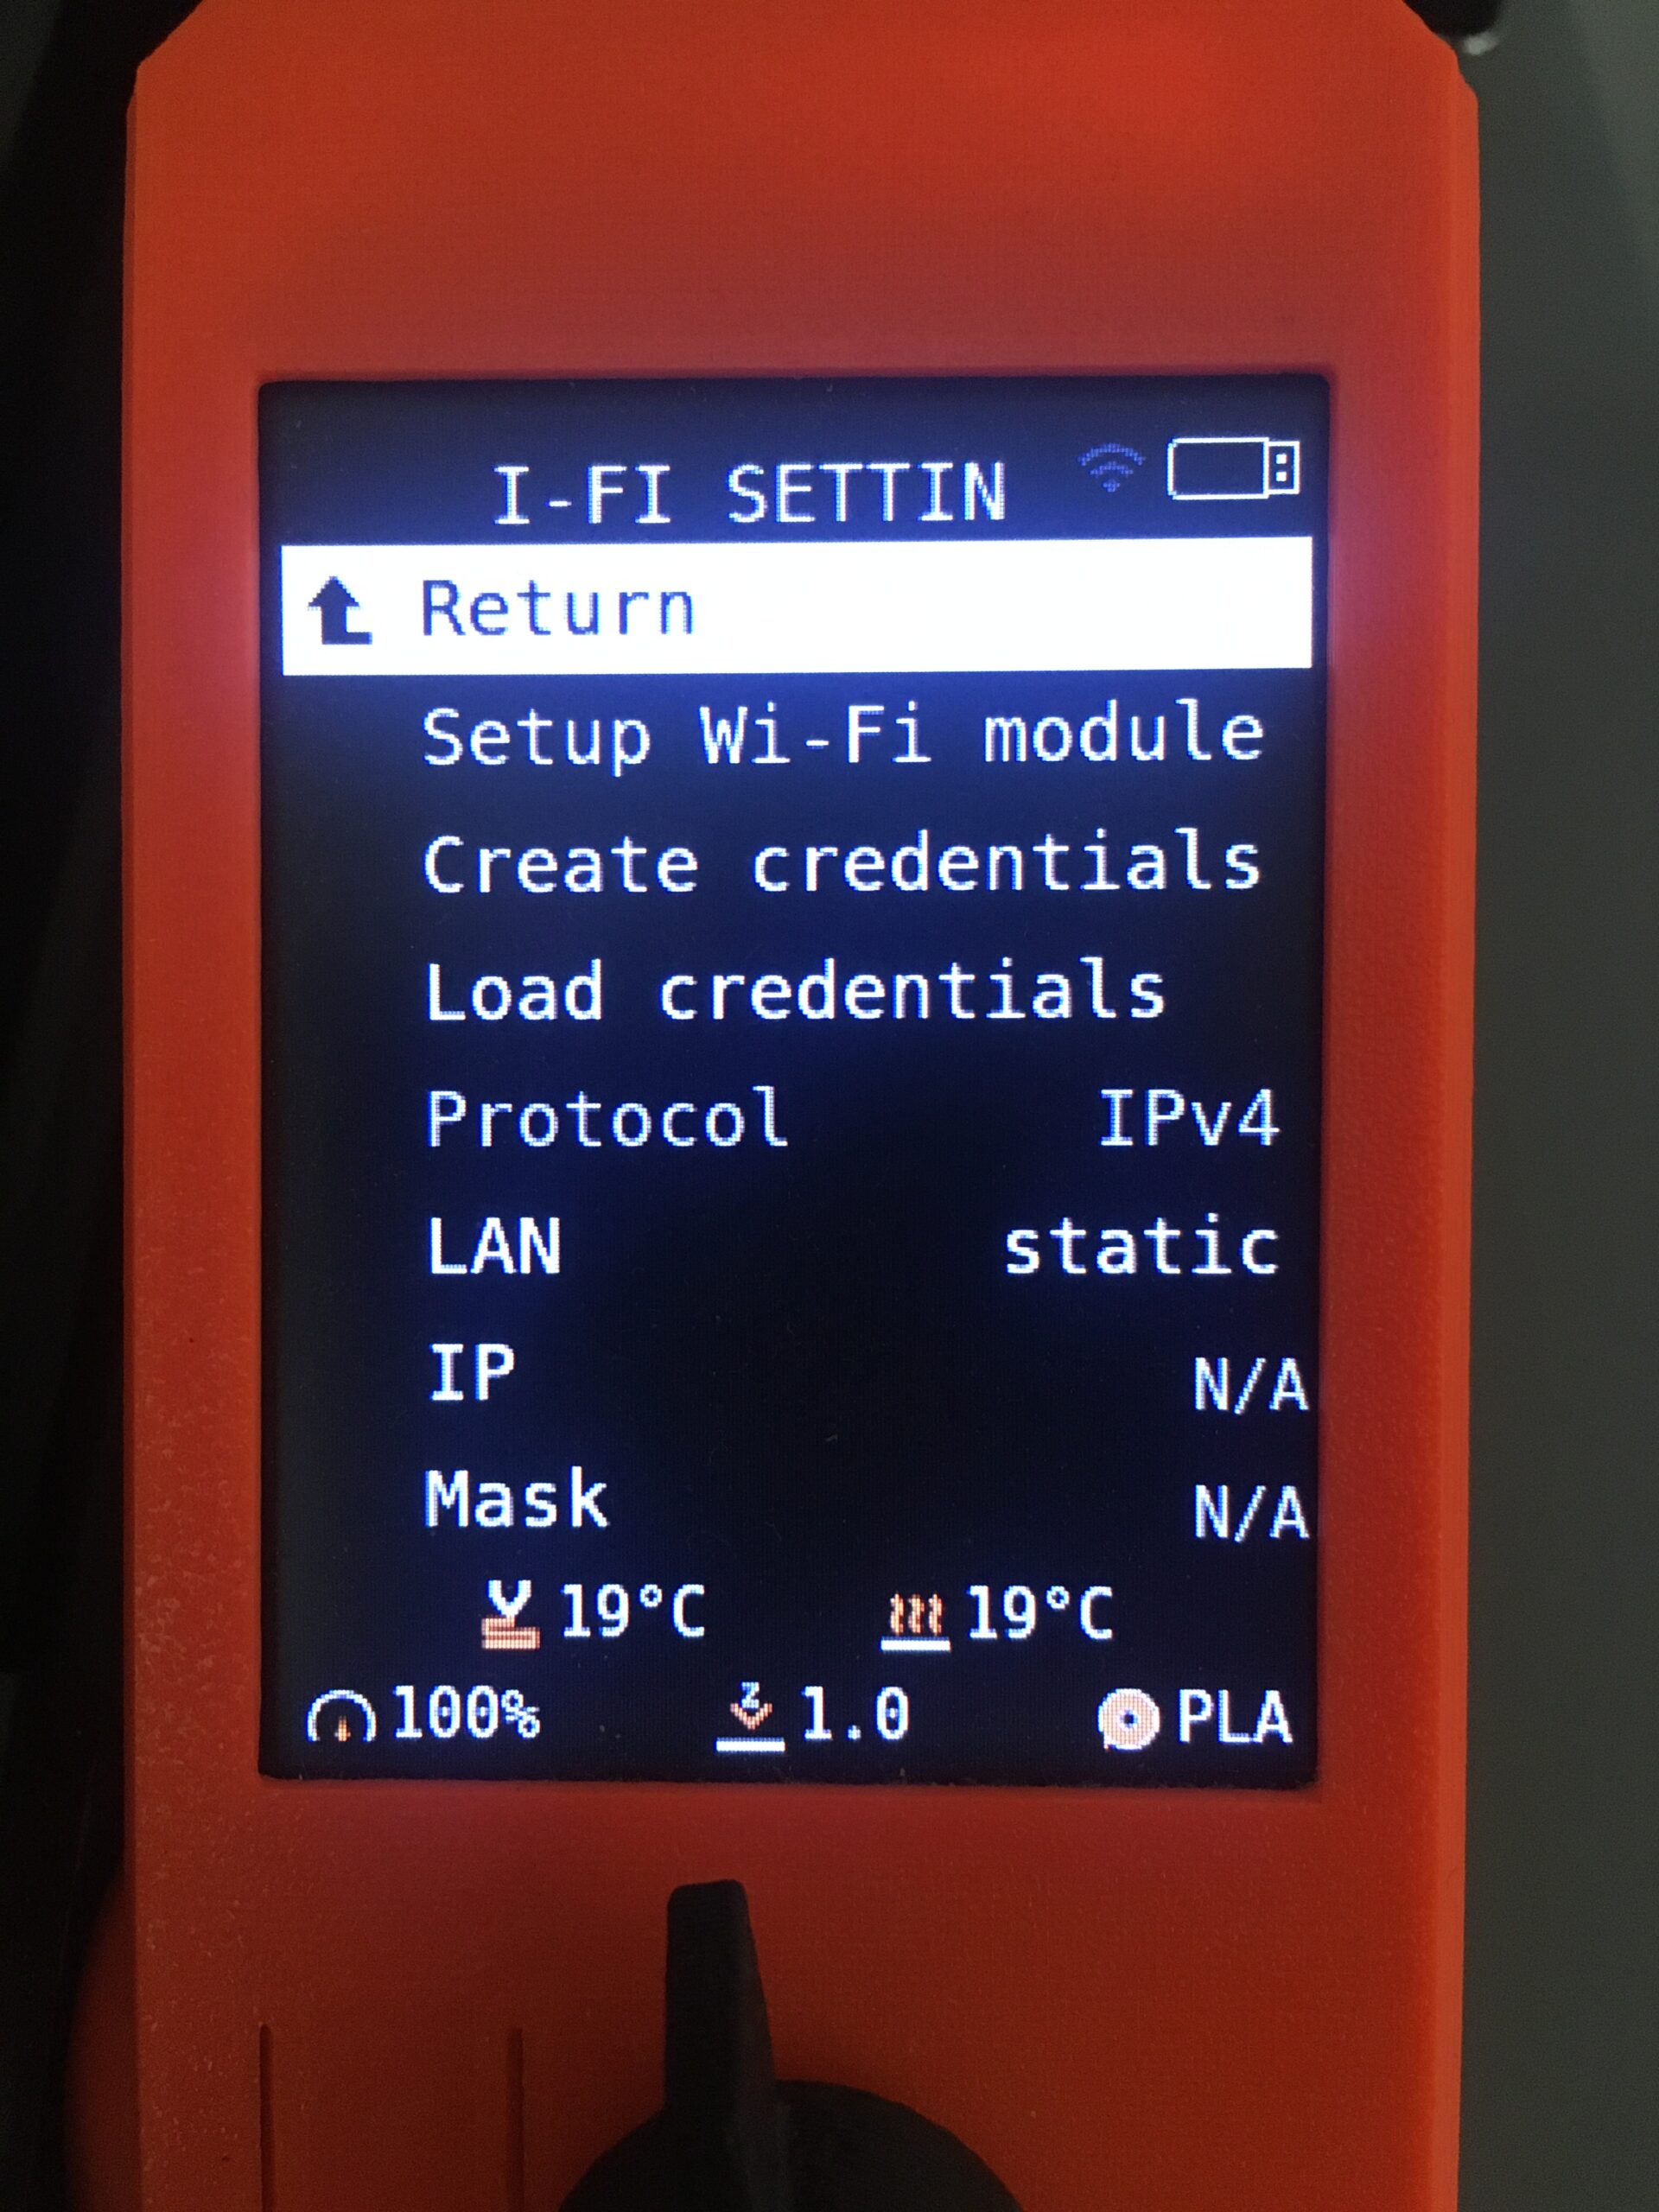
I did everything but it doesn't seem to be working.
Thanks for your help.
RE:
Hi, I am trying to update my Prusa Mini, I downloaded the bbl files, decompressed and uploaded them on a USB stick. The names are:
mini_release_boot_4.4.0+4180.bbf
mini_release_boot_update_pre_4.4_4.4.0+4180.bbf
After tuning on the printer it detected the new firmware and it went into updating it. Then reseted itself and now it is stuck on a screen saying: "Looking for BBF..." and it is not doing anything after 20-25min. Is it safe to reset the printer to try again or is there a risk of bricking the printer?
Are the files the correct ones? I downloaded them from the official Prusa web page...
Thanks!
Edit: Ok, I just rebooted the printer by pressing the button below the display and it seems to be working now...
RE: 4.4.0 Firmware for Original Prusa MINI/MINI+ (Final Release) is out now!
Prusa Link
folders do not appear , only root 🙁
RE: 4.4.0 Firmware for Original Prusa MINI/MINI+ (Final Release) is out now!
Is it correct that every time I open the prusalink url (in an new browser session) I have to insert the API key again? That seems like a lot of unnecessary 'work' to me.
I now edited my bookmark of the prusalink url and added the API key as an url parameter so I can copy pasted it from the URL more quickly.
But! Now I can send files directly to the printer from Prusa Slicer which is really awesome. So thanks for all the hard work and cool new features and fixes!
RE: 4.4.0 Firmware for Original Prusa MINI/MINI+ (Final Release) is out now!
Posted by: @pidra
Prusa Link
folders do not appear , only root 🙁
This issue has been discussed in github:
https://github.com/prusa3d/Prusa-Firmware-Buddy/issues/2506
Is it correct that every time I open the prusalink url (in an new browser session) I have to insert the API key again? That seems like a lot of unnecessary 'work' to me.
I now edited my bookmark of the prusalink url and added the API key as an url parameter so I can copy pasted it from the URL more quickly.
But! Now I can send files directly to the printer from Prusa Slicer which is really awesome. So thanks for all the hard work and cool new features and fixes!
So has this issue:
https://github.com/prusa3d/Prusa-Link-Web/issues/222
The developers pay more attention to github. You should search for issues there and post new ones if not already found.
Regards,
Mark
RE: 4.4.0 Firmware for Original Prusa MINI/MINI+ (Final Release) is out now!
Prusa Link
folders do not appear , only root 🙁
Yah, there's a bug tracking adding that feature:
RE:
Posted by: @pidra
Prusa Link
folders do not appear , only root 🙁
This issue has been discussed in github:
https://github.com/prusa3d/Prusa-Firmware-Buddy/issues/2506
Is it correct that every time I open the prusalink url (in an new browser session) I have to insert the API key again? That seems like a lot of unnecessary 'work' to me.
I now edited my bookmark of the prusalink url and added the API key as an url parameter so I can copy pasted it from the URL more quickly.
But! Now I can send files directly to the printer from Prusa Slicer which is really awesome. So thanks for all the hard work and cool new features and fixes!
So has this issue:
https://github.com/prusa3d/Prusa-Link-Web/issues/222
The developers pay more attention to github. You should search for issues there and post new ones if not already found.
Regards,
Mark
I did actually saw this issue at github and figured it should have been fixed (as someone also pointed out there). But since I do not have a (private) github acccount I post it here :). I figured perhaps I missed something in the final release which does not need me to enter the api key every single time.
edit; you know what, I'm gonna make me a private account there now.
RE: 4.4.0 Firmware for Original Prusa MINI/MINI+ (Final Release) is out now!
Does the WiFi module have to be an ESP-01, or would an ESP-12 also work, if I solder the connections on?
Just curious, since I have an endless amount of ESP-12e lying around, but no ESP-01.
Prusa Mini FW6.2.4
RE: 4.4.0 Firmware for Original Prusa MINI/MINI+ (Final Release) is out now!
I now edited my bookmark of the prusalink url and added the API key as an url parameter so I can copy pasted it from the URL more quickly.
Hi,
(1) can you give me an example how to add the API key to the url?
(2) is there a link how to setup the Wi-Fi Mini to Prusa Slicer?