Print warping - large(?) flat surface - PLA & PETG
I've tried printing 2 items that have large(?) flat surfaces in both PLA and PETG. The first one is custom part for a Polaris Ranger that has a base of 14cm x 9cm (no pics) and the other is a plate holder I found on Maker World. Both of these prints warp, where the plate holder warps significantly more than the custom part. My printer is a stock MK4S that I purchased this past December.
Any hints on what I can do get these prints to lay flat? I've read quite a few posts in this forum and as well querying Perplexity. From reading the posts, it seems like this is just the nature of the beast. Is that correct or should a person be able to print large base objects without the warping?
Thanks.
brian
- Experience
- Novice
- 3mf file - Prusa Slicer
- Print Setting: .20mm Structural
- Filament
- Prusament PLA - smooth plate cleaned with IPA
- Prusament PETG - satin plate cleaned with Dawn and hot water (also tried Windex)
- Printer: Original Prusa MK4S HF0.4 nozzle
- Original+MK4.3mf
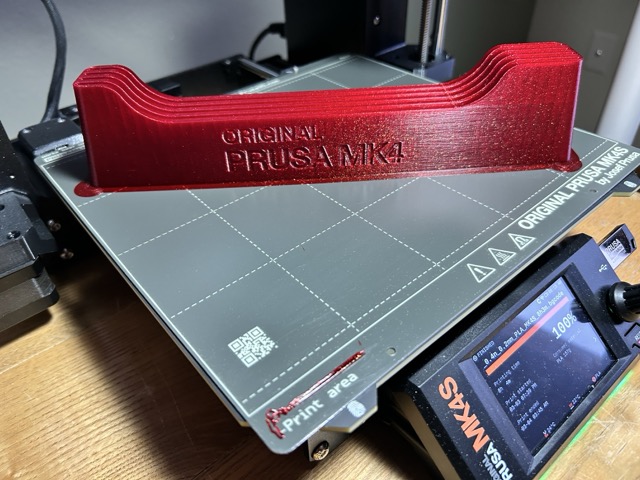
 ends curled up, center section still attached to the plate
Best Answer by FoxRun3D:
From reading the posts, it seems like this is just the nature of the beast.
And an ugly beast it is. Long models like this are a bane for FDM printing, still today.
Assuming that your sheet is clean (washed with soap and hot water, plus 90+% isopropyl) and your live Z is fine (and I'm not sure from the pictures; in my hands the MK4S is nowhere near "always perfect" in its bed leveling, and for PETG for example I would manually add -0.03), the usual ideas are:
- Slow down print speed (5-10 mm/s) for first layer(s).
- Add Mickey Mouse ears to the corners. There's a "helper disk" in PrusaSlicer's Add Part library but I prefer to simply add a cylindrical, maybe 10mm diameter, change height to single layer height, then place the part at the corner. Repeat for each corner.
- Add a brim around the model, 5 mm or more. Wider or 2-layer high brims may be needed but may not work with the size of the model or may require being added in your CAD software.
- Use Layerneer Bed Weld ( https://www.amazon.com/Printer-Adhesive-Layerneer-Original-Filament/dp/B079984GV5/ ), Magigoo, etc. You only need a thin layer.
- If you have design control over your part and it's possible considering the intended use, you can try to round the edges and/or add holes to the base of the model.
- Combination of above.
Usually, brim/ears does the job for me, or some Layerneer if needed, but large, rectangular objects can be a challenge. Also, drafts can encourage warping, so printing in an enclosure (with doors open for PLA) may help.
If you searched the web and used Perplexity, you must have seen these suggestions before but from your post it's not clear which ones you've tried. I would start with a large brim for that particular model.
A pretty good article:
https://the3dprinterbee.com/warping-3d-printing-causes-solutions/
RE: Print warping - large(?) flat surface - PLA & PETG
In the original post I added images through the "Add Media">"Insert into Post" and for some reason they don't show up in the post.
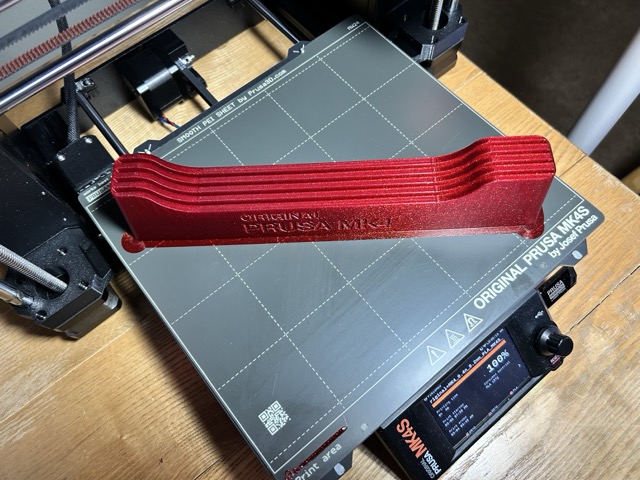
PLA print on smooth sheet. The center section was securely attached to the plate.
The warping on the other side was about 1/5 as much.

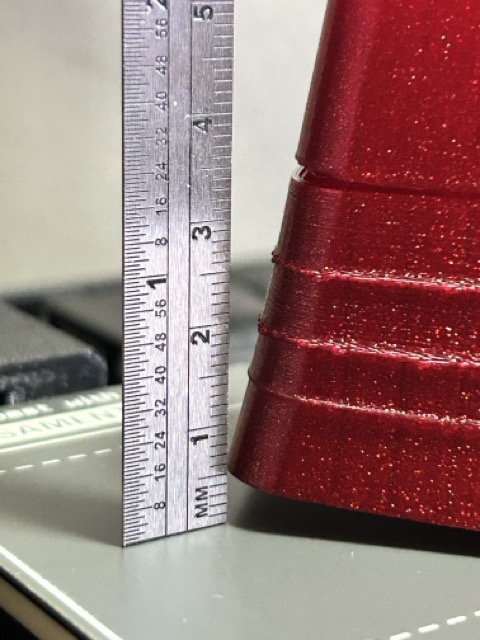
It looks like these lines are stress fractures from the warping. On PETG print one of the tops of the end just fell off.

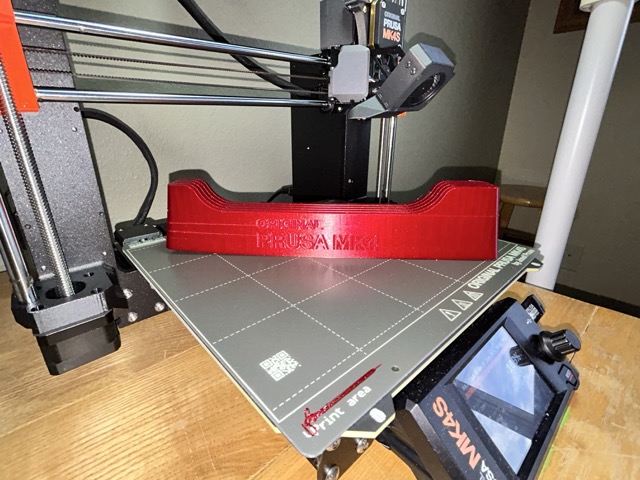
This is the underside of the PETG print. The ends were lifting off the sheet. When it cooled it was fully detached from the sheet.
RE: Print warping - large(?) flat surface - PLA & PETG
The pictures are in your first post. But you managed to get some formatting information around the links. Which stops the forum from displaying the pictures. I don't know what causes this. And you seemed to do it differently the second time.
Regards Joan
I try to make safe suggestions,You should understand the context and ensure you are happy that they are safe before attempting to apply my suggestions, what you do, is YOUR responsibility.Location Halifax UK
RE: Print warping - large(?) flat surface - PLA & PETG
From reading the posts, it seems like this is just the nature of the beast.
And an ugly beast it is. Long models like this are a bane for FDM printing, still today.
Assuming that your sheet is clean (washed with soap and hot water, plus 90+% isopropyl) and your live Z is fine (and I'm not sure from the pictures; in my hands the MK4S is nowhere near "always perfect" in its bed leveling, and for PETG for example I would manually add -0.03), the usual ideas are:
- Slow down print speed (5-10 mm/s) for first layer(s).
- Add Mickey Mouse ears to the corners. There's a "helper disk" in PrusaSlicer's Add Part library but I prefer to simply add a cylindrical, maybe 10mm diameter, change height to single layer height, then place the part at the corner. Repeat for each corner.
- Add a brim around the model, 5 mm or more. Wider or 2-layer high brims may be needed but may not work with the size of the model or may require being added in your CAD software.
- Use Layerneer Bed Weld ( https://www.amazon.com/Printer-Adhesive-Layerneer-Original-Filament/dp/B079984GV5/ ), Magigoo, etc. You only need a thin layer.
- If you have design control over your part and it's possible considering the intended use, you can try to round the edges and/or add holes to the base of the model.
- Combination of above.
Usually, brim/ears does the job for me, or some Layerneer if needed, but large, rectangular objects can be a challenge. Also, drafts can encourage warping, so printing in an enclosure (with doors open for PLA) may help.
If you searched the web and used Perplexity, you must have seen these suggestions before but from your post it's not clear which ones you've tried. I would start with a large brim for that particular model.
A pretty good article:
https://the3dprinterbee.com/warping-3d-printing-causes-solutions/
Formerly known on this forum as @fuchsr -- https://foxrun3d.com/
RE:
Thanks for the response. I've tried the brim with moderate success. I didn't try ears but your explanation showed me the light on how to add them in Slicer, although it took me a bit to figure out that you have to add them to the original object and not as individual cylinders. I've probably have changed too much at once but if it gets me further down the road at least one thing has worked for me today.... 😬 .
- slowed the initial layer to 5mm/s <- Slow down print speed (5-10 mm/s) for first layer(s).
- added the ears <- Add Mickey Mouse ears to the corners. There's a "helper disk" in PrusaSlicer's Add Part library but I prefer to simply add a cylindrical, maybe 10mm diameter, change height to single layer height, then place the part at the corner. Repeat for each corner.
- added the 5mm brim <- Add a brim around the model, 5 mm or more. Wider or 2-layer high brims may be needed but may not work with the size of the model or may require being added in your CAD software.
- ordered the bed weld <- Use Layerneer Bed Weld ( https://www.amazon.com/Printer-Adhesive-Layerneer-Original-Filament/dp/B079984GV5/ ), Magigoo, etc. You only need a thin layer.
- Disabled the fan for the first 3 layers
- Full fan speed at layer 6
- Moved the printer away from the wall (it was against the wall that separates my office from the garage)
Read the article, thanks.
I will research the "live Z" part.
RE: Print warping - large(?) flat surface - PLA & PETG
The print turned out much better after the tweaks. I did notice a slight warp after cleaning up the brim though. It something I can live with as I am learning which levers to pull and buttons to push. Thanks again @foxrun3d.
brian