Trying to print a weird shape and need the top and bottom to be as smooth as possible
Hi
I'm printing a headless bass guitar, I've already printed an electric six string, a headed bass guitar and a headless bass, so I'm slowly getting the hang of it. The key things about the bass is that the string tension is about 4x that of a six string so you need an aluminium backbone. That's the easy bit 🙂

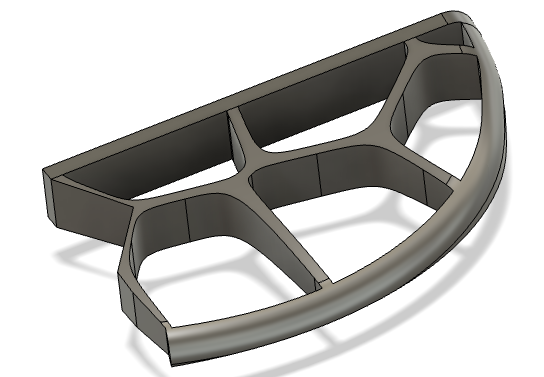
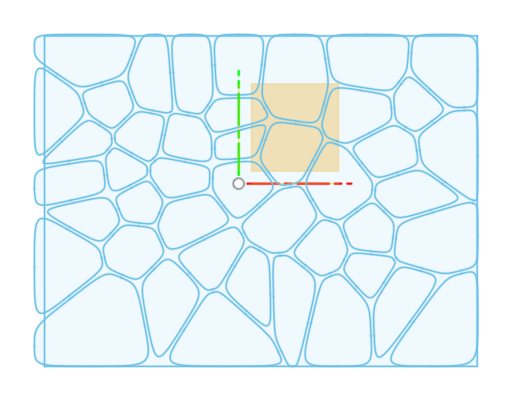
The design of the body of the bass is open, ignore the gap between the top and bottom parts of the bass, the open here is the space in the top and bottom parts. It uses a Ventori design which is very organic and very strong. I print at 5% infill and it's strong. I have to print six sections and glue them together as the Mk4 isn't big enough.
The quality of the MK4 is very high, certainly higher than the two Mk3s+ I have as well, but I'm struggling to get the top, curved surface as good as possible without sanding it. As the whole of the top surface is gently curved when then leads to a fillet curve. ironing doesn't work.
The bottom is flat with a fillet at the end, so I normally print on the bottom face with support for the bottom curved edge. These supports break away with virtually no impact on the bottom surface.
I can't print on the flat edge (on the left below) as that requires supports on the inside and they leave damage no matter how fine I make them.
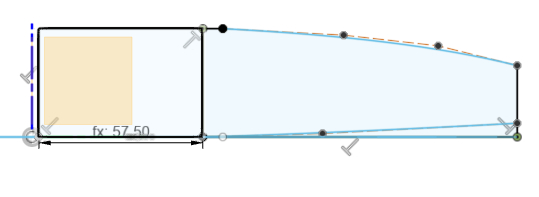
Here's the sketch for the top of the bass, you can see the gentle curve. Ignore the very gentle curve at the bottom in the sketch, thats not used.
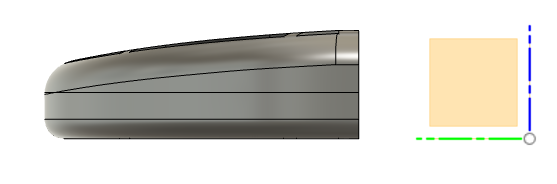
Here's a piece in side profile, you can see the bottom is flat and the top has this gentle curve.
Any advice how to get the top as smooth as possible welcomed. It always has little tiny ridges as the curve is probably too gentle and even at 0.1mm layers, its not possible to get it smooth.
Next steps are sanding and filling, but then I need to spray the body to get the colour back and thats yet another step.
Thanks
Rob
RE: Trying to print a weird shape and need the top and bottom to be as smooth as possible
Without your parts to experiment with its not possible to say with certainty. However you could try angling the part upwards, like this
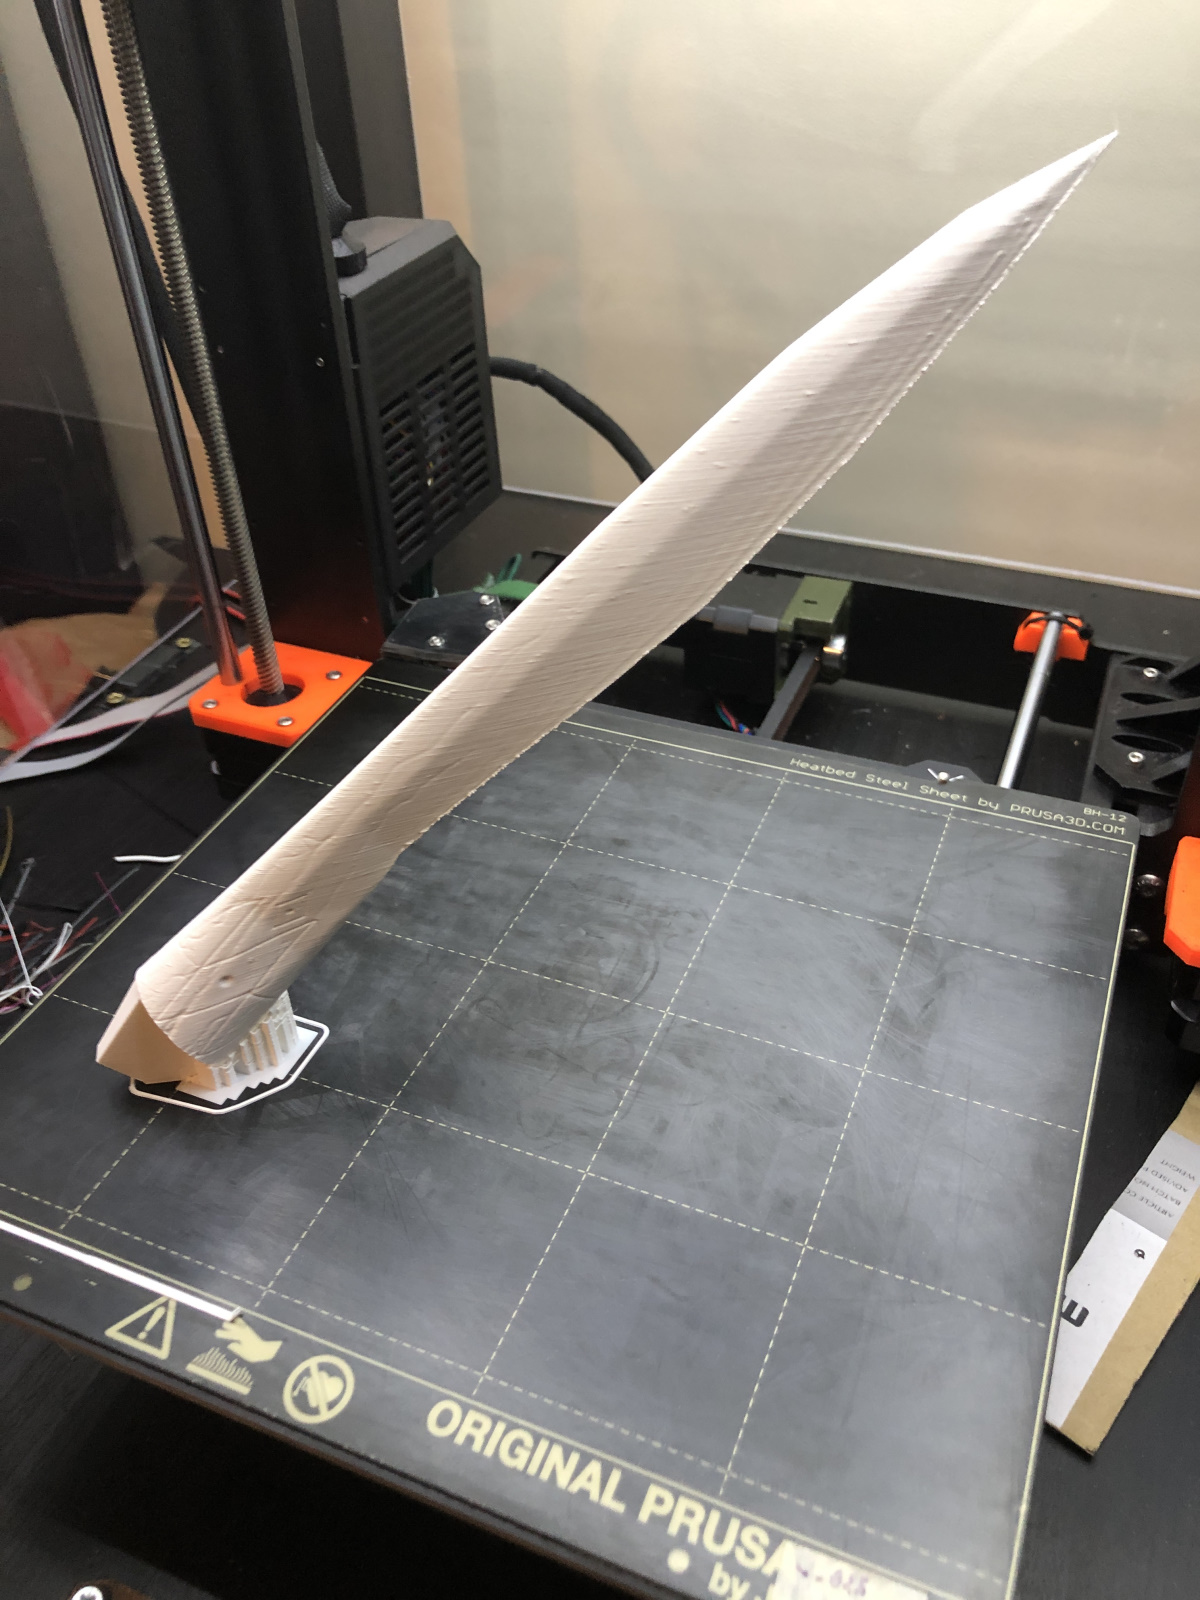
If you are printing in your original orientation then you are limited by the thinnest layer height you are willing to print at. With gentle slopes that will lead to stair stepping, theres no way around that.
RE: Trying to print a weird shape and need the top and bottom to be as smooth as possible
Wow!
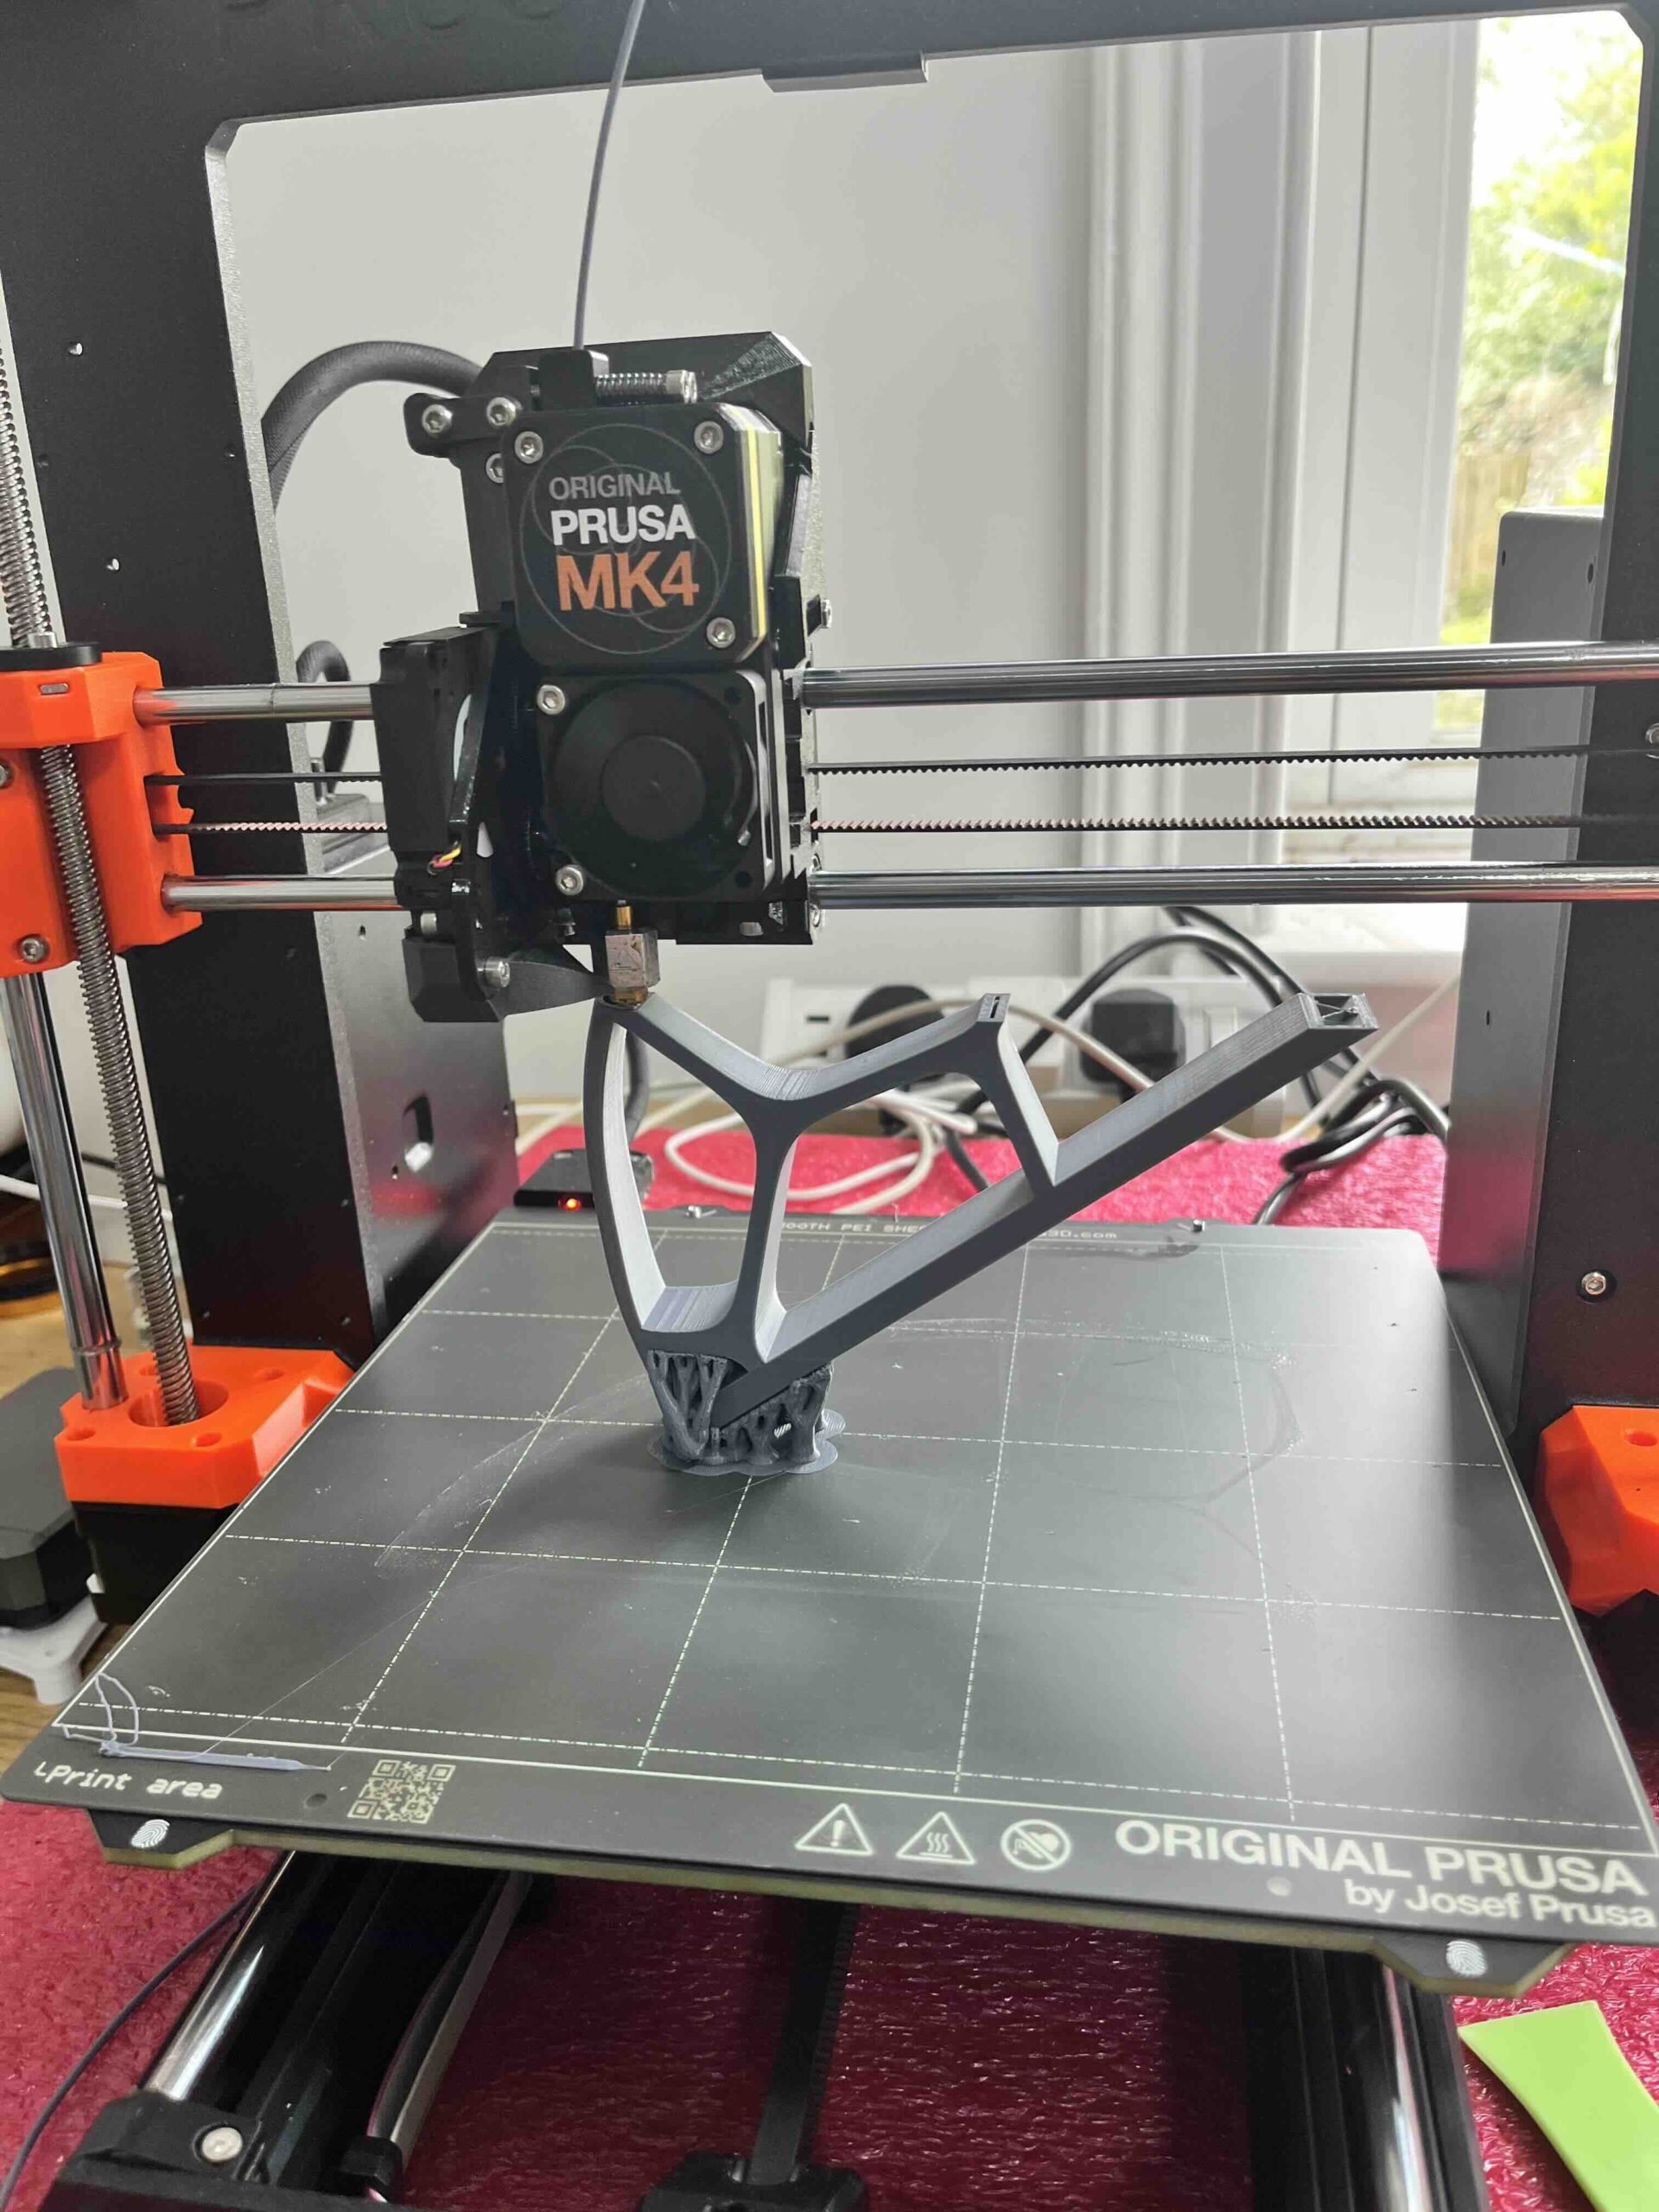
Thanks for taking the time to reply, Thats very interesting. I never thought to do that, so something like this

That might work, I'll give it a try 🙂 It just fits on the bed, 21 hours of printing on the MK3 and 10 hours on the Mk4.
or....

Still 10 hours 🙁
RE: Trying to print a weird shape and need the top and bottom to be as smooth as possible
On that top pic, if the bottom is flat at that slope there is no need for support going all the way up usually. Just a few cm at the bottom and its will be fine. Just make sure your bed adhesion is good. I's also use snug supports as it will be more efficient than tree when done right. Just use support enforcer painting to define the area(s) you want supporting.
RE: Trying to print a weird shape and need the top and bottom to be as smooth as possible
@neophyl
I'll try that idea and reduce the support tree. I'll stay with organic for the moment and will probably stop the print half way up. Lets see what it looks like 🙂
Thanks very much
Rob
RE: Trying to print a weird shape and need the top and bottom to be as smooth as possible
For information.. I'm a little surprised at how well its printing. Always good to learn something new.
RE:
If I may add my 3 cents:
1. Put your 45 degree glasses/view on, when designing and slicing in 3D (you already got the advice from @neophyl. Love it)
2. Second method: Double cutting (BEST DONE IN YOUR CAD PROGRAM:
- Add several empty cylinders in your object (these will be used to put dowels in when assembling. Be sure they are inside, and invisible after glueing.
- Cut the object (as it is place as flat and horizontal as possible) in two about equal layers as symmetric as possible). So you get two slices (like baking a cake or slicing bread). You will now see the cylinders as holes on both slices.
- Now cut these both slices in parts your printer can handle. Do not cut both slices at same spot, you want them to overlap eachother as stones in a wall.
- Slice every part as you are use too. Every part will have a large flat side (the innerside of the slice).
- You do not need brims, or supports now. Every thing will hold fine directly to the plate.
NB: Set the elephant foot so, that they are equal to the outer size or even a bit smaller.
- after printing, glue everything together. Use the dowel holes to align all parts. For this I print triangle stave, same diameter as the cylinder, they always fit, if needed force them in.
- Maybe ad the edges there is some space open (because of the elephant foot), no problem, add some baking powder to your superglue.
A little bit sanding is all what is needed later.
PS; This method will cause that you have a layer inside with multiple perimeters, giving your part a perfect inner structure.
We will do what we have always done. We will find hope in the impossible.
RE:
Double cutting
See this example of a donut:
We will do what we have always done. We will find hope in the impossible.
RE: Trying to print a weird shape and need the top and bottom to be as smooth as possible
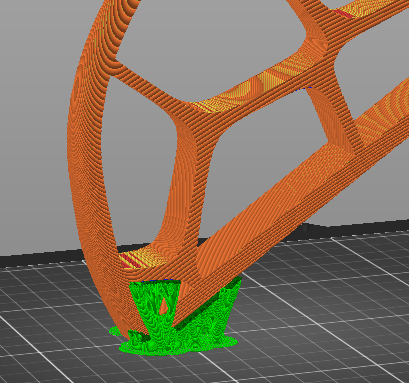
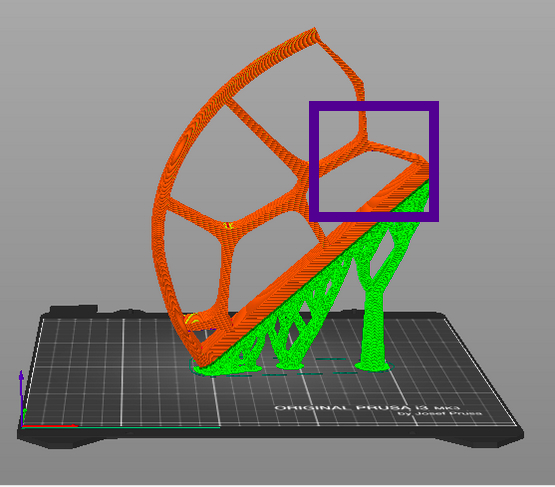
This is the output from the upright print above. Below is one unsupported corner, the lack of support clearly shows
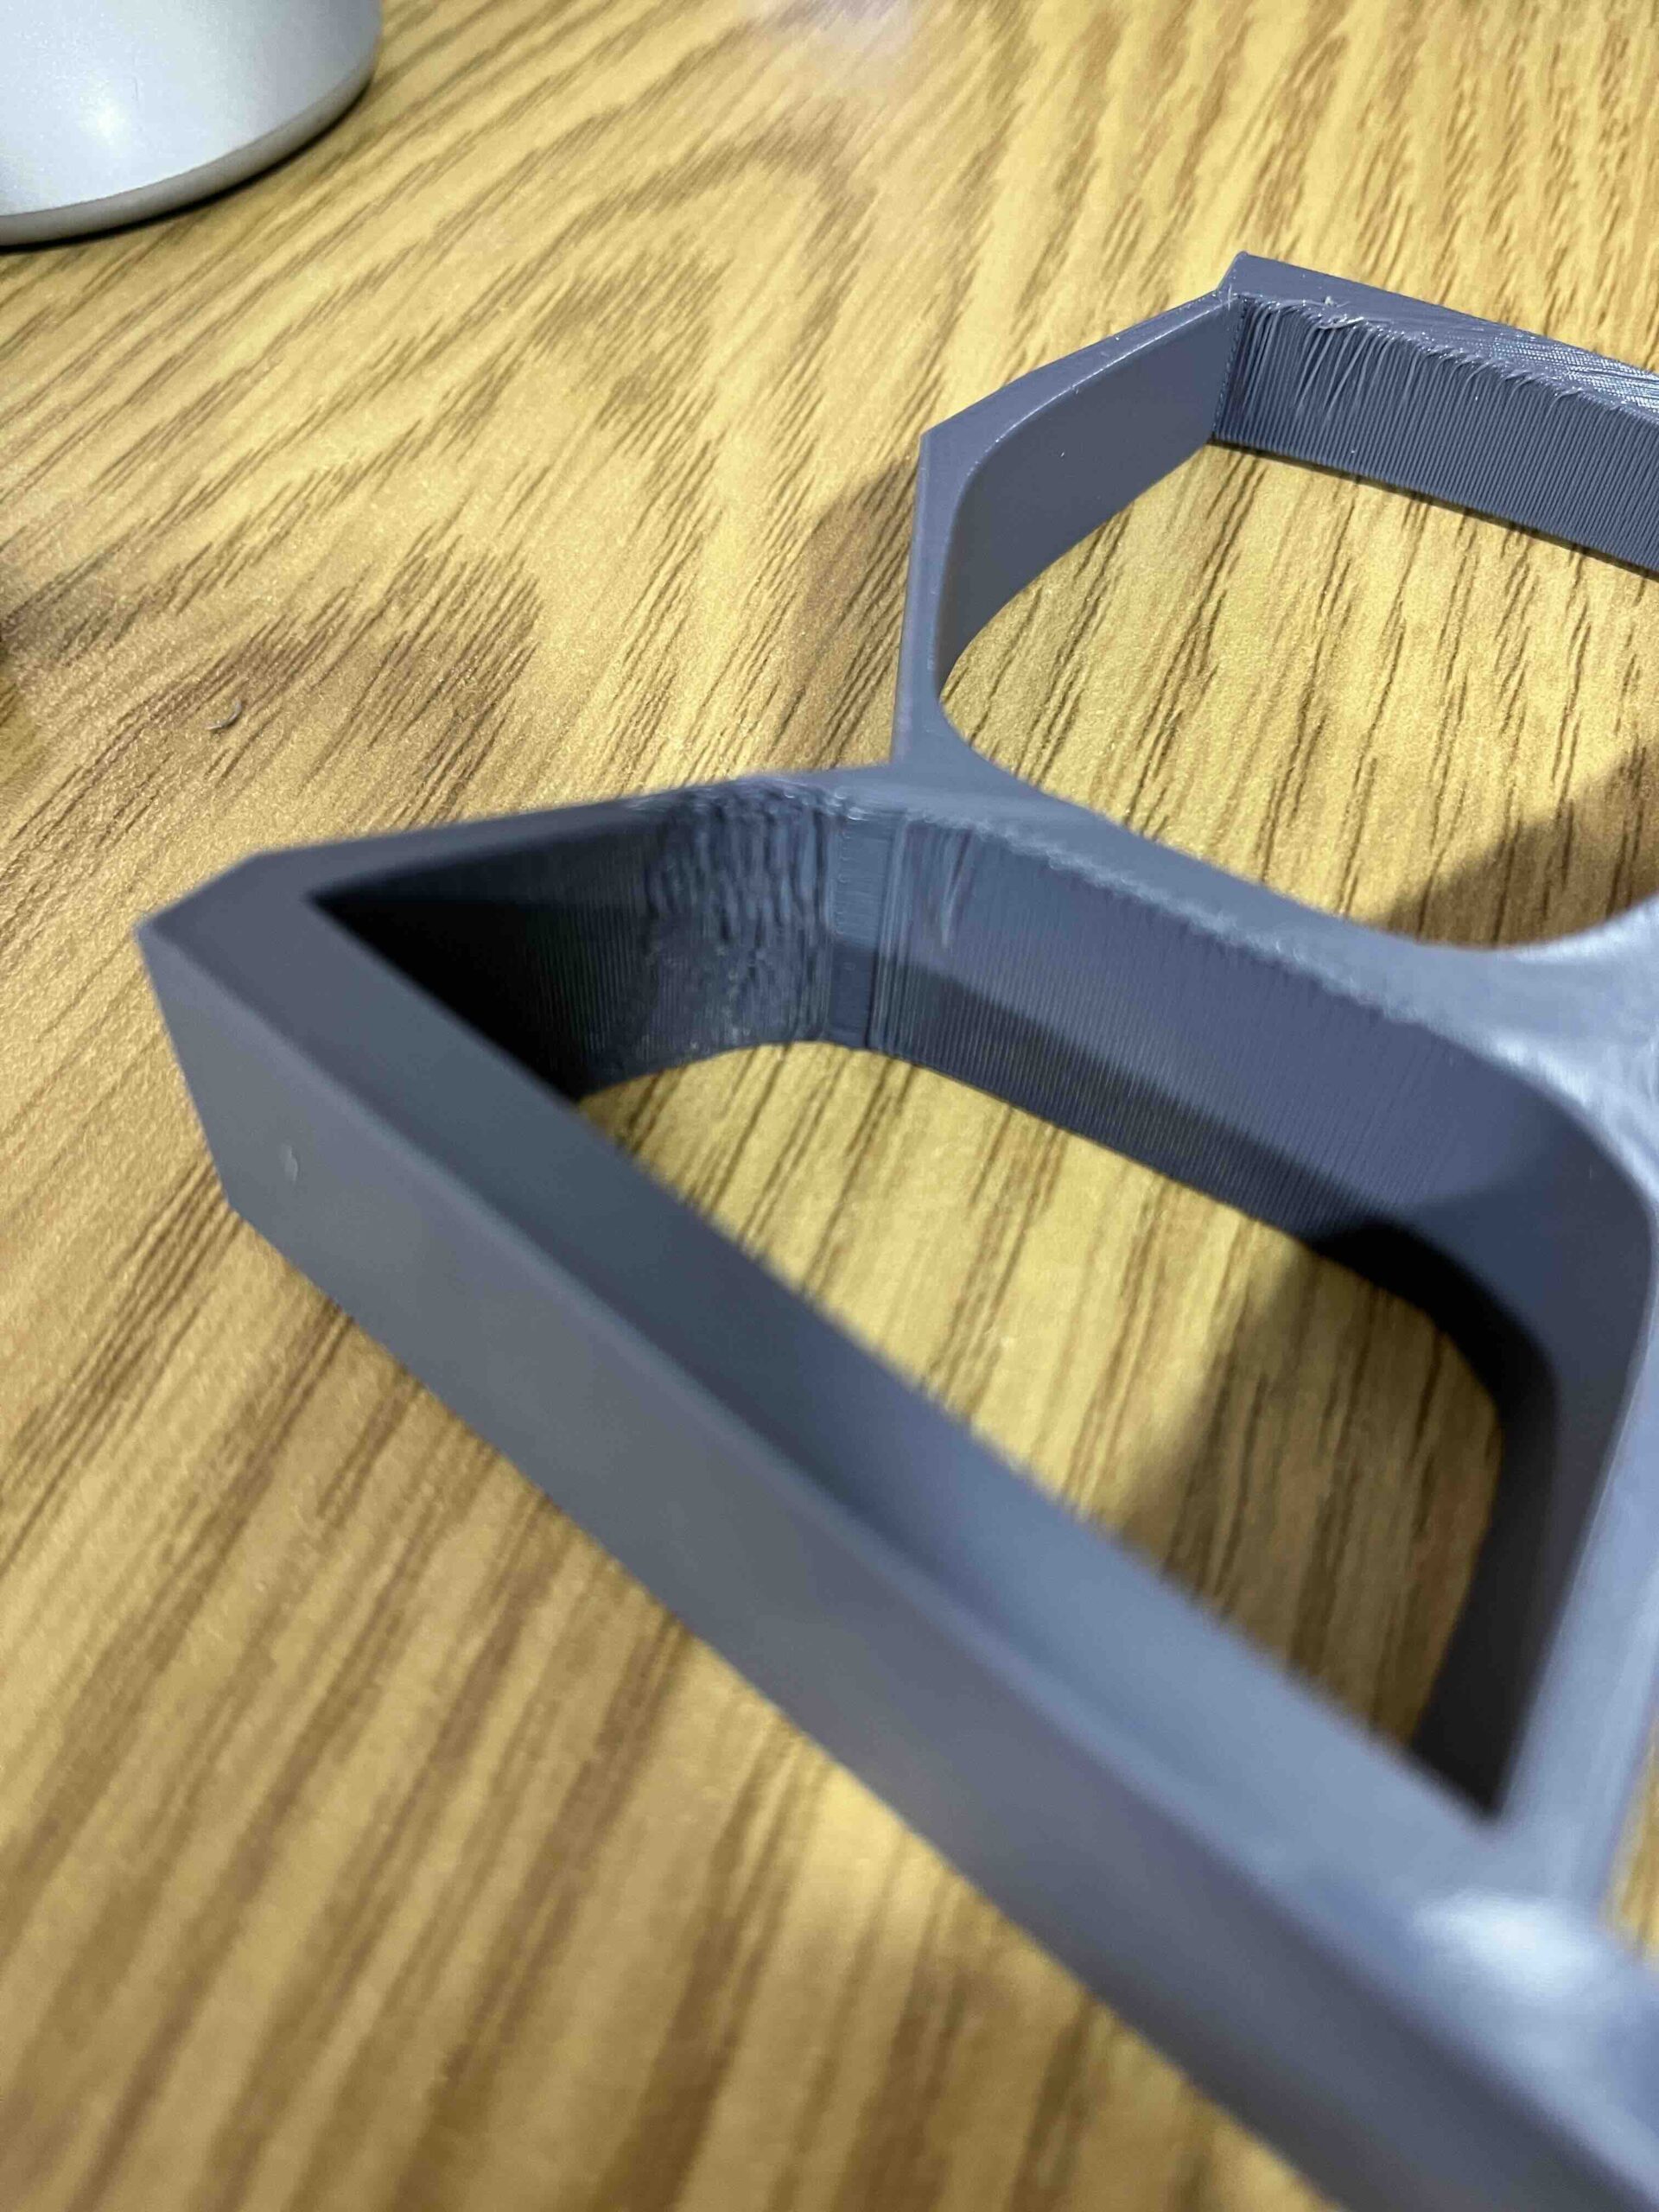 This is the part of the model in the picture above
So I'm not surprised that not every section is perfect, it wasn't designed to be printed like this and to be honest, the results are better than I expected.
If I may add my 3 cents:
1. Put your 45 degree glasses/view on, when designing and slicing in 3D (you already got the advice from @neophyl. Love it)
2. Second method: Double cutting (BEST DONE IN YOUR CAD PROGRAM:
- Add several empty cylinders in your object (these will be used to put dowels in when assembling. Be sure they are inside, and invisible after glueing.
- Cut the object (as it is place as flat and horizontal as possible) in two about equal layers as symmetric as possible). So you get two slices (like baking a cake or slicing bread). You will now see the cylinders as holes on both slices.
- Now cut these both slices in parts your printer can handle. Do not cut both slices at same spot, you want them to overlap eachother as stones in a wall.
- Slice every part as you are use too. Every part will have a large flat side (the innerside of the slice).
- You do not need brims, or supports now. Every thing will hold fine directly to the plate.
NB: Set the elephant foot so, that they are equal to the outer size or even a bit smaller.
- after printing, glue everything together. Use the dowel holes to align all parts. For this I print triangle stave, same diameter as the cylinder, they always fit, if needed force them in.
- Maybe ad the edges there is some space open (because of the elephant foot), no problem, add some baking powder to your superglue.
A little bit sanding is all what is needed later.PS; This method will cause that you have a layer inside with multiple perimeters, giving your part a perfect inner structure.
@eef Thanks for the considered response.
1. Already looking at the Voroni diagram to turn it for the best orientation for printing. I may have to generate a few until one "works".
I have already looked at the split and assemble method, though not the housebrick assembly method, thats a new idea so thanks. I'll remember that for the future.. The issue here is that I can get it to work BUT the top gentle curve still has ridges. I also have more split lines to fill as well. I'm trying to avoid too much filling and sanding and painting as thats my final and least favourite option (but it is an option).
I think there are two options here,
1. I do the print the model at 45 degrees or so and design the Vorono inside to be for printing at 45 degrees. I have to make sure that all six pieces are at corect, but thats just time and hitting the generator time and time again.
2. I change the model to have straight lines rather than curves and keep the rounded fillet on the edges. I just did a quick print on a Mk3 and that looks quite good. The MK4 is busy tonight with the upright model, so thats a test for tomorrow.
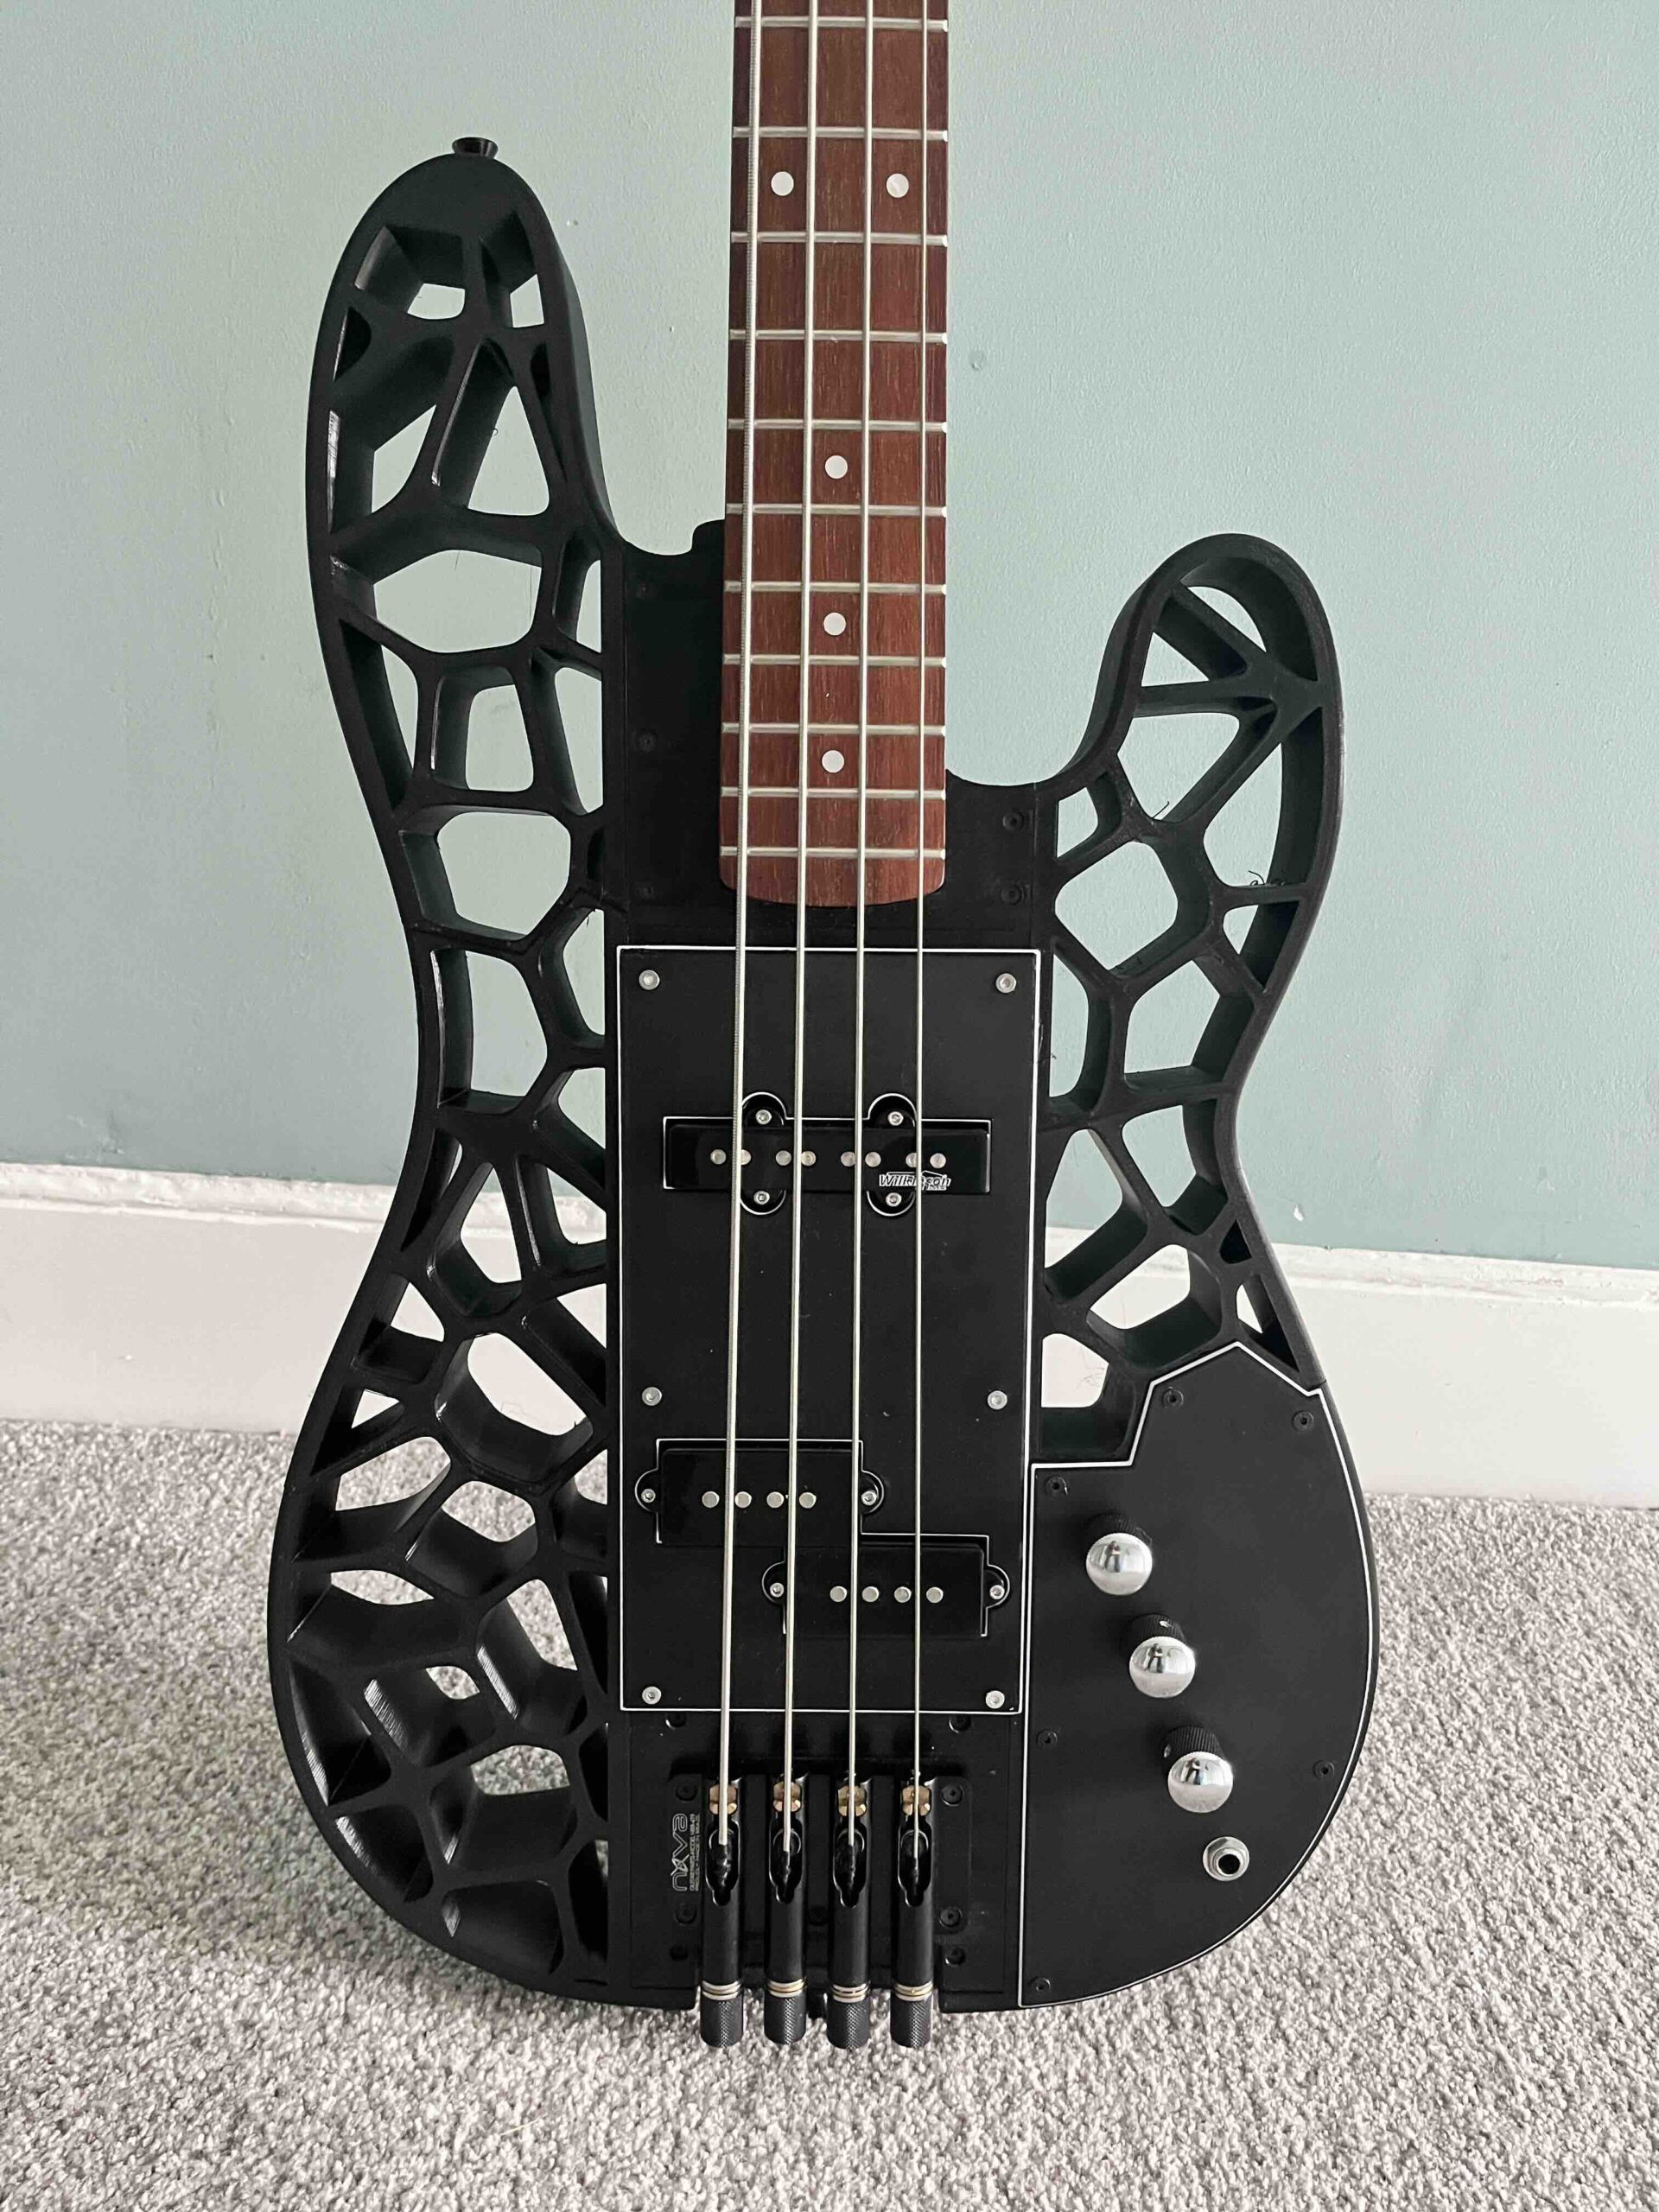
And this is what the previous version headless bass guitar looks like...This design had smaller Voroni cells, the new design has far large ones.
I would put some other pics up, but they get made square and a guitar ain't square, It plays well, not quite as nice as my Fender Jazz, but not bad.
RE: Trying to print a weird shape and need the top and bottom to be as smooth as possible
And trying to get a Vornoi diagram to line up for 40 degrees (or any angle) is hard work. There's always one or two lines that need support 🙁

Might need to rethink this....
RE:
Just an idea:
Why not combine both methods:
- First slice in two parts (bottom + top) as I suggested. (ad the dowel holes for aligning)
- then cut the both with 45 degree angle, as big as your printer can handle
- with the flat side looking at the plate, so all your nice curves etc are on the topside.
this gives opportunity to print as much supports as you like, later they will be inside the model, so you van sand them away before glueing.
We will do what we have always done. We will find hope in the impossible.
RE: Trying to print a weird shape and need the top and bottom to be as smooth as possible
@eef
Already tried that approach and it mostly works, but there's a glueing and joining and more chances for things to go wrong.
After a lot of printing yesterday, I had three Prusa's going flat out, I eventually came up with what I think is the right solution. Its a slight change in the design.
From here

to here (apologies for the space, for some reason the system wants squarish images.

Ive removed the two very sightly curved lines and replaced them with straight lines. This means I can print the bottom flush against the plate and the top is actually neat, with no ridges, as it's not a gentle curve, its a straight line. There is a tiny amount of support at the bottom left for the 6.8mm fillet, but that comes away very well.

I don't need any supports at all for this. I need to change other features of the design, especially how I embed square nuts as its printing about 2 degrees off centre, which is easy enough to handle.
I printed one version with the curved top and one with the straight top and bottom and I can't feel the difference against my hand. I know its straight and I really a very gentle curved top, but all design is compromise. This is one I'm happy to take as it solves so many other problems.
I'll put up pictures of the finished bass once it's done, which is probably 3-4 weeks away.
Thank you very much for all the helpful suggestions. I'm 100% certain I would not have got to this place without your help. I really appreciate the time you have taken here to carefully think through what you'd do. I've learnt some new stuff as well and thats always good.
Hopefully I can contribute back in the future, I suspect I'm better at Fusion 360 than PrusaSlicer.
best wishes
Rob
RE: Trying to print a weird shape and need the top and bottom to be as smooth as possible
Anybody want any used PLA? The joys of testing...
