The Movement of the Filament from the Dry Box to the Nextruder itself
Hello colleagues! 🙂
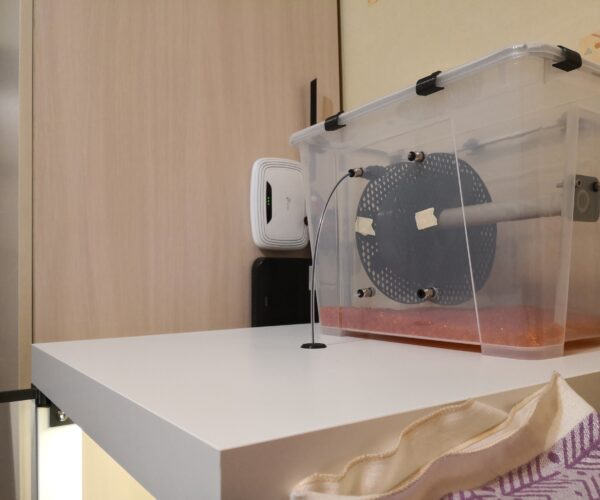
My whole setup is done! In addition to the Ikea enclosure also made a dry box for the filaments and printing directly from it. The same as from the lesson of the "CNC Kitchen" tutorial
Filament Dry Box || How to properly store and 3D print Nylon, PC, TPU, PVA... .
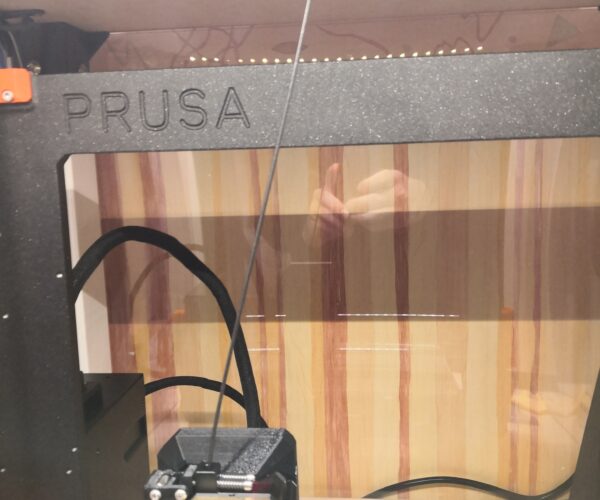
So I noticed that the filament develops quite hard. The thread stays taut like a string while the printer prints. At the start of printing, if the filament is fully stretched, the printer cannot start the procedure at the beginning with which it descends along the "Z". He starts and stops until I manually pull him a bit of advance thread. Is this bad for the printer? I haven't noticed any degradation in print quality.
How can I solve my problem? The "PVC" tube, which serves as the axis of the roller with filament, rotates freely, but the roller does not drive it when unwinding. It rubs against the "PVC" pipe without rotating it.
Best Answer by Justin:
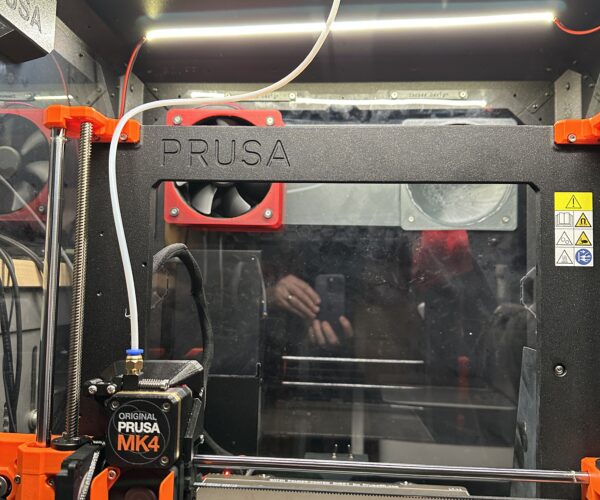
You want a PC4-M5 connector (4mm tube OD x M5 thread). However, you don't absolutely need a connector. When the extruder is pulling filament, the tubing will also be pulled into the Nextruder (not all the way in, just a few mm in from the top). It's only really during retraction that the reverse direction of the filament would push the tubing out of the top of the Nextruder. However, that doesn't matter much since retractions are only a few millimeters and the deretraction will just pull the tubing right back in. Worst case scenario, a super long retraction may push the tubing all the way out of the Nextruder. If that happens, when the deretraction pulls filament back in, the tubing may get caught on the top of the Nextruder a few mm short of bottoming out. In that case, the reverse bowden is still accomplishing its purpose of constraining the filament path from start to end.
As for the length, just find a length that allows free movement of the Nextruder from left to right, top to bottom. For mine, I ran Auto Home to put the extruder near the bed then just slide it side to side with my hand. Then I added a little extra length to ensure it had room to move without being pulled taut. You don't want to add so much extra length that the tubing can get caught on something or that it adds so much friction to the filament that the Nextruder has trouble pulling it in. That's also a reason I went with 4mm OD 3mm ID tubing rather than actual bowden tubing which has much tighter inside tolerances (2mm or even less). I'm not trying to push filament through the tube, just guiding it's path from the spool to the extruder.
RE: The Movement of the Filament from the Dry Box to the Nextruder itself
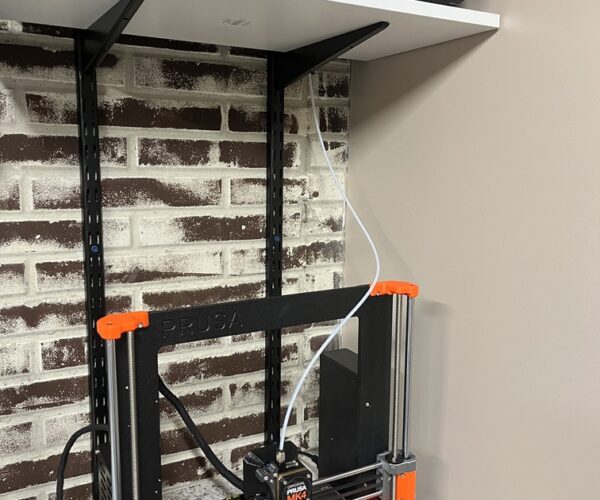
That tubing you have running from the box down to just inside the enclosure? Extend that tube all the way to the extruder (with a little extra room to allow for movement of the extruder up/down left/right). What you almost have is a reverse bowden. By extending the tube all the way to the printer and attaching it at both ends (doesn't technically need to be attached to the extruder) you've completely constrained the filament path.
While you may not notice a degradation in print quality, it may very well be there since as the extruder needs to pull more filament in it's also pulling itself up (think of equal and opposite forces here). Either the filament comes to the printer or the printer goes to the filament. The printer is too heavy to be lifted off the table but until the forces balance out that extruder is definitely being pulled up by at least a little bit.
RE: The Movement of the Filament from the Dry Box to the Nextruder itself
I don't think lengthening the teflon tube will reduce the strain. It will also restrict my access to the thread. I won't be able to pull it off just before the print starts. Mainly the problem is at the beginning of the print. I'm considering putting bearings in the box soon!
RE: The Movement of the Filament from the Dry Box to the Nextruder itself
Read this: Should you use a Reverse Bowden?
RE: The Movement of the Filament from the Dry Box to the Nextruder itself
I'm not sure what else to tell you. The link you provided from Tom even ends with "So even though the reverse Bowden didn’t manage to directly improve print quality, it’s still a super useful tool to have at your disposal when you need it and it’s going to make your machine more reliable in those situations." The "when you need it" can be found a couple paragraphs earlier when he gives an example as "printing out of a drybox."
His post didn't find it helped quality and you said you haven't noticed a degradation in quality (but do you have a comparison?) so perhaps in your case quality isn't an issue. But, you will absolutely notice a problem when the hotend carriage is trying to move side to side and it skips steps because the filament is pulled too taut and is literally holding the carriage back. Tom's article again mentions this exact issue and how a reverse bowden solves it.
The focus of your post was how taut the filament is and that you even have to pull some slack so that the hotend carriage can move downward in Z to calibrate. With a reverse bowden you are 100% constraining the filament path between two fixed points. Rather than filament being pulled directly, filament is being pulled through the tube which takes the strain off the filament itself.
Not trying to sound condescending but extending that tube all the way to your hot end with some extra slack will absolutely solve the taut filament issue you are seeing. I have used a reverse bowden setup on every direct drive printer I have ever owned for these exact reasons.
RE: The Movement of the Filament from the Dry Box to the Nextruder itself
I can confirm that this works really well with the MK4 - I'm using it for the exact same reasons that Justin described and it solved the problems he mentions perfectly.
RE: The Movement of the Filament from the Dry Box to the Nextruder itself
Thanks for the clarifications. I appreciate that! I will trust you and give it a try. How did you attach this connector to the next extruder? Is it a coiled thread or? And how to determine the correct length of the tube?
RE: The Movement of the Filament from the Dry Box to the Nextruder itself
You want a PC4-M5 connector (4mm tube OD x M5 thread). However, you don't absolutely need a connector. When the extruder is pulling filament, the tubing will also be pulled into the Nextruder (not all the way in, just a few mm in from the top). It's only really during retraction that the reverse direction of the filament would push the tubing out of the top of the Nextruder. However, that doesn't matter much since retractions are only a few millimeters and the deretraction will just pull the tubing right back in. Worst case scenario, a super long retraction may push the tubing all the way out of the Nextruder. If that happens, when the deretraction pulls filament back in, the tubing may get caught on the top of the Nextruder a few mm short of bottoming out. In that case, the reverse bowden is still accomplishing its purpose of constraining the filament path from start to end.
As for the length, just find a length that allows free movement of the Nextruder from left to right, top to bottom. For mine, I ran Auto Home to put the extruder near the bed then just slide it side to side with my hand. Then I added a little extra length to ensure it had room to move without being pulled taut. You don't want to add so much extra length that the tubing can get caught on something or that it adds so much friction to the filament that the Nextruder has trouble pulling it in. That's also a reason I went with 4mm OD 3mm ID tubing rather than actual bowden tubing which has much tighter inside tolerances (2mm or even less). I'm not trying to push filament through the tube, just guiding it's path from the spool to the extruder.
RE: The Movement of the Filament from the Dry Box to the Nextruder itself
Thanks for the reply. It is very thorough and helpful for newbies to the 3D printing world like myself. I think I'm done with the setup! On the next print, I will observe what happens.
A thousand thanks and a merry welcome to the Christmas holidays
RE: The Movement of the Filament from the Dry Box to the Nextruder itself
Today I also added a new gadget that helps even more with easy thread pulling without metal bearings:
Prusament Spool Inside Bearing for Dry Box with Tube for Axis 1/4 (25mm) 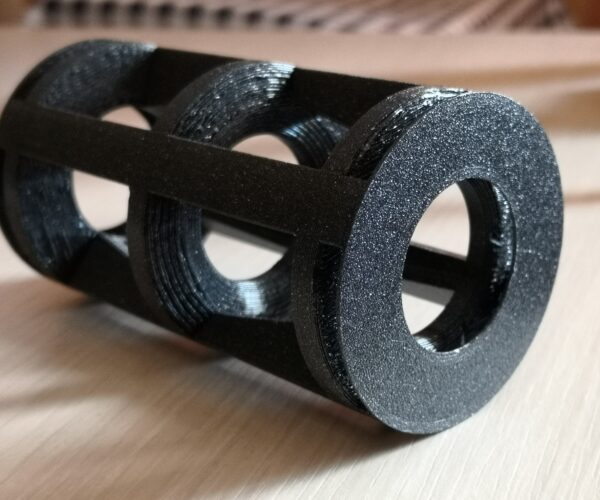
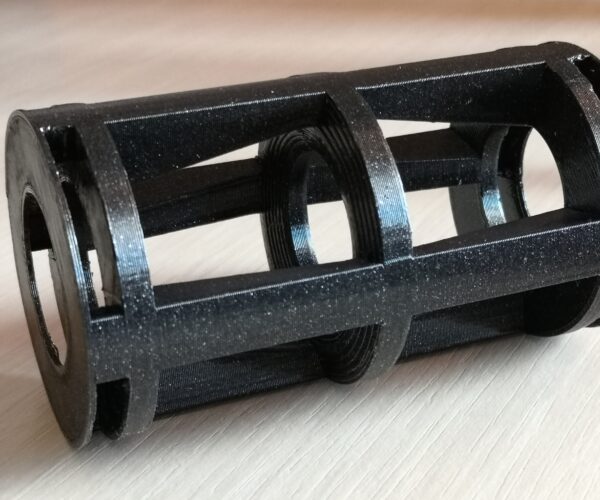
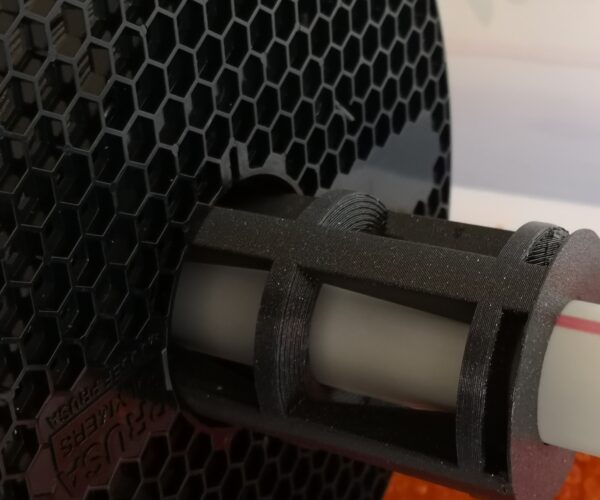
RE: The Movement of the Filament from the Dry Box to the Nextruder itself
You are very welcome! While the reduced strain on the filament may not have some huge, immediately noticeable impact, it will reduce overall stresses on the system which can only be a good thing.
Those little inserts looks to be a simple and effective solution. You can even try modeling something similar with even less contact area with the dry box pipe. Less contact area = less friction. Though too little contact area and the part would wear faster. So many options!
Happy printing and welcome to the club!
