Poor adhesion on textured plate
First let me say I've been printing for over 10 years and on a MK3 with all updates since it was introduced, and all printers built and modified by me.
I mainly use PETG and XT-CF20 for engineering projects, so the MK4 choice was to ensure that the reliability of printing would be maintained. Whilst the PLA performance appears perfect on the smooth plate, PETG adhesion is too unreliable for unattended printing, even with Z-height adjustment via PrusaSlicer and with no dynamic Z-live adjustment on the machine to run, I can't get consistent results. Please don't tell me to clean the plate, as this is the one that I use on the MK3, and I use all the recommended methods; the MK3 performs faultlessly on this plate, one print after the other, with no preparation or profile settings for different colours. All PETG filaments, usually transparent or black, are from the same source. Obviously, all settings were automatically ported from the MK3 into the MK4 profiles via the 3mf files to try and resolve the issue, but there are no significant differences. When printing on the edge of the plate, the adhesion is different from printing in the centre, seeming to indicate that the auto-levelling is not as effective. The MK3 prints all the same models without issue!
I notice that actual bed temperatures when set to 80C are worse on the MK4, with edges between 10-16C low around the edges and 8-12C on the centre sections, about 4C worse than the MK3, but compensating for this has no effect.
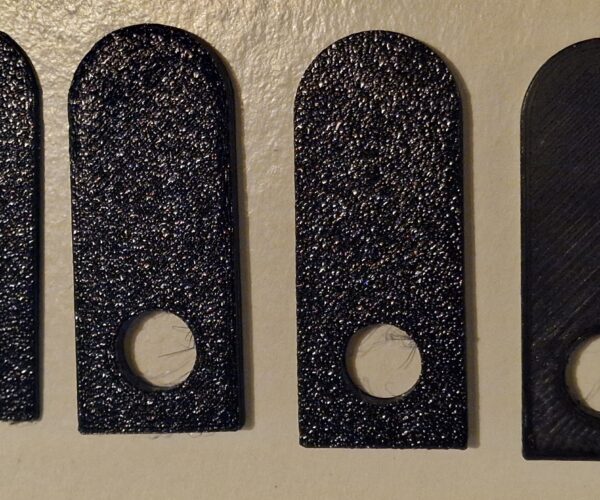
The image of four test prints shows results achieved, the left hand being the first failure with default Z height, the next when printed with Z adjust on the front left corner, the third being with the same Z-adjust in the centre and the last being with no Z adjust on the smooth plate. The overall size of each part is 50mm x 20mm. The finish of the completed models is very good and size accuracy is as good as the MK3 with slightly better vertical definition.
As others have noted, on completing the build the random screen failures occurred, but I updated the firmware and, apart from one initial failure, the machine has performed OK, and the PLA spatula on the thumb drive is excellent on the smooth plate.
Any help will be appreciated.
Best Answer by Chris:
Ok, after talking to Prusa customer service either via chat, we seem to have found the problem. This was a mk3.5S upgraded to a Mk4. I forgot this is more an art than a science, and I had similar problems setting up the mk3.5S. I had to heat the heatbed to 90°C for PETG. I suppose to be honest there are variations in each printer Cleaning with washing up liquid (soapy water, not direct to plate) also helped a little, and Prusa said every few weeks is helpful. (I normally just use IPA) Prusa also said changing the speed of the 1st Layer to 20mm/S (was 40mm/S) would help.
So big thanks to Prusa for talking it through with me. Fingers crossed...
The following may also help anyone else getting problems. (From Prusa)
++++++++++++++++++++++++++++++++++++++++++++++++++++++
Consider the following aspects:
- At the start of every print, there should always be some slack for the filament between the extruder and the Filament guide. Otherwise, the filament slightly pulls the extruder up, which will affect the Loadcell readings during the mesh bed levelling.
- Ensure the trapezoidal nuts screws are not over-tighten. As it will create excessive dragging resistance during Z-axis movements.
- Calibrate the Z axis to ensure it is perfectly levelled. (Control- Calibrations & tests- Z alignment calibration )
- Ensure the Nextruder hotend is fully pushed up and secured into the heatsink.
For the underlying issue contact Prusa Support:
Log into your Eshop account, navigate to Company, click Contact Us and 24/7 live Chat is one of the options.
Cheerio,
RE: Poor adhesion on textured plate
Kit or pre -assembled model?Have you ever checked the bed on a flatness?
With the MK4, the bed is so attached that it should have less default due to warmth.Maybe dismantle the heating bed and check everything. You can use the KIT instructions.
I have the problem on the satin bed. I printed a flight model where the wings are only printed with one layer.Not even the perimeters held together.With the smooth sheet without any problems.With the rough side of the kitchen sponge dish soap and lukewarm water cleaned and have not been any problems for since.
But you will have tried that.
I would make a part in Prusa Slicer that goes over the entire printing surface and is 0.2 mm high.You may see more.
RE: Poor adhesion on textured plate
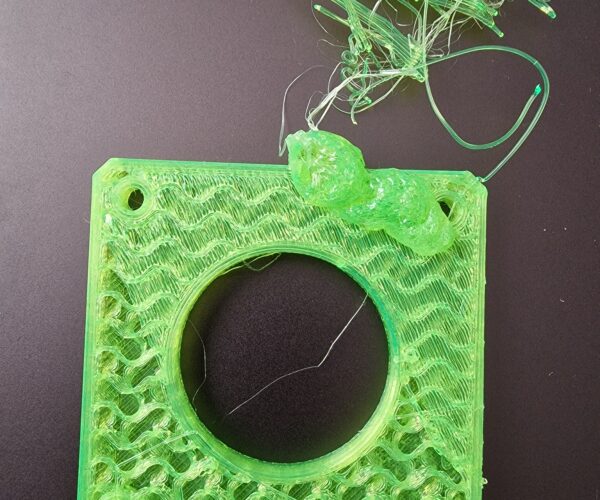
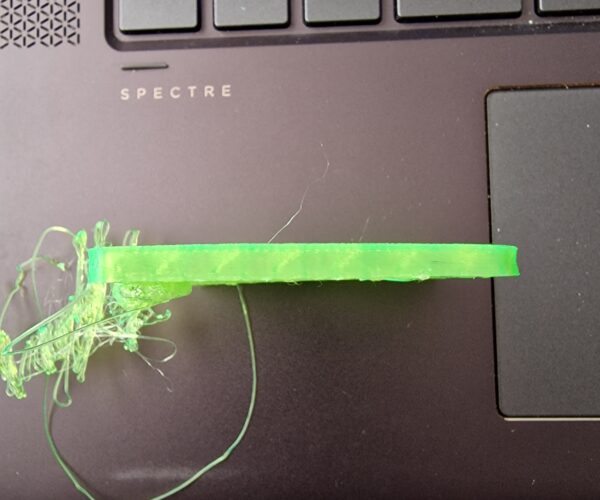
It's a kit and the bed is perfectly flat in both X, Y and diagonal planes. I thought I'd sorted the problem with careful Z-height adjustment, but today a print near the centre-left edge of the bed displayed hedging in one corner of the first layer. This was not a concern as that indicates a well squished first layer and the next layer hid this issue; 20 minutes later I found a mess. The part, 50mm square, had warped, so it was clear that bed adhesion issues had not been sorted out. It is interesting to note that the corners of the part that warped were those where the hedging had not occurred, which indicates a levelling error, but worse than this the temperature at the spot on the bed was 18C below the set temperature. My MK3 has nowhere near this error. I reprinted the part in the centre of the bed, and it is perfect!
Don't tell Joe, but I degreased, lightly, with acetone after washing! Well, it is my old MK3 plate I'm using, and it has been treated to that abuse before with no ill effects. I've been around a long time in engineering since starting work in 1958, so taking liberties is based on qualification, experience, . . . and stupidity, mostly the latter. 😜
RE: Poor adhesion on textured plate
Sadly, I went to Live Chat today with the issue and all I got was "wash the plate", which I have done, frequently, despite explaining observations of the levelling process with textured sheets, using their methodology compared with Pinder. Saying the same plate works fine on the MK3 was meaningless to the guys Nikolai and Jerry and they said I have to get out the soft brush with soap and water! I was waiting for the suggestion to rub it over with very fine flour paper!!! It was Joe Prusa who said a couple of years ago that using water on the PEI textured plate would cause rusting, how life changes!
OK, try the drastic clean - no acetone but rub neat washing up detergent (Dawn/Fairy) into the surface and leave it ten minutes, then wash it clean with VERY HOT water.
If the plate is left damp it will rust so dry it on the heated bed and try printing straight away.
If you still have problems go back to support and suggest they read this thread or at least show them the pictures.
Cheerio,
RE: Poor adhesion on textured plate
Have you tried it now just one layer high over the entire surface. You could immediately see whether the printing was really unevenly deep or high. A photo, maybe also against the light, will also convince the support. Also post it here in the forum.
RE: Poor adhesion on textured plate
I wanted not to have to resort to that, but I'll do it. At least it'll give me peace of mind, even if it's a failure!😜
RE: Poor adhesion on textured plate
Recently, I have noticed this intermittently. I cleaned my nozzle before leveling, and it seems to have helped. It was such a small amount of plastic, but it made a difference.
--------------------
Chuck H
3D Printer Review Blog
RE:
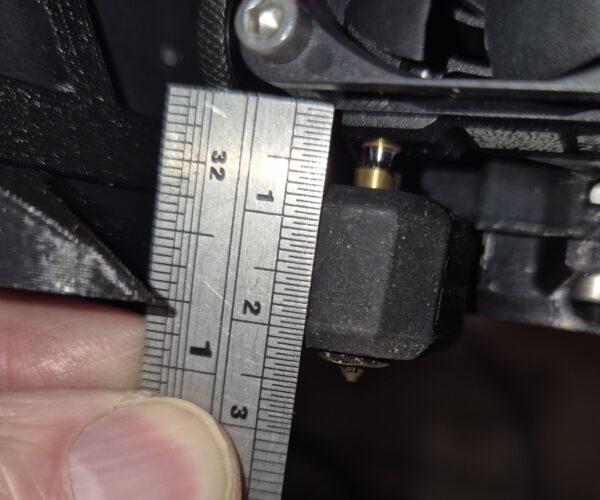
Did you guys solve your problems? I seem to be having problems with 1st layer on my mk4 (upgrade from Mk3S with MMU3). Single filament prints. There is only so many cleans you can do. It happened once before and I reinstalled the nozzle to fix it. Slightly worried about ooze of filament at the top of heat block, and also does anyone have any comments as to the height between the heatsink and the brass part of the nozzle. (it looks like about 2mm).
RE: Poor adhesion on textured plate
I have had zero issues since I started cleaning the nozzle with tweezers prior to leveling with PETG and ABS.
Did you guys solve your problems? I seem to be having problems with 1st layer on my mk4 (upgrade from Mk3S with MMU3). Single filament prints. There is only so many cleans you can do. It happened once before and I reinstalled the nozzle to fix it. Slightly worried about ooze of filament at the top of heat block, and also does anyone have any comments as to the height between the heatsink and the brass part of the nozzle. (it looks like about 2mm).
--------------------
Chuck H
3D Printer Review Blog
RE: Poor adhesion on textured plate
Ok, after talking to Prusa customer service either via chat, we seem to have found the problem. This was a mk3.5S upgraded to a Mk4. I forgot this is more an art than a science, and I had similar problems setting up the mk3.5S. I had to heat the heatbed to 90°C for PETG. I suppose to be honest there are variations in each printer Cleaning with washing up liquid (soapy water, not direct to plate) also helped a little, and Prusa said every few weeks is helpful. (I normally just use IPA) Prusa also said changing the speed of the 1st Layer to 20mm/S (was 40mm/S) would help.
So big thanks to Prusa for talking it through with me. Fingers crossed...
The following may also help anyone else getting problems. (From Prusa)
++++++++++++++++++++++++++++++++++++++++++++++++++++++
Consider the following aspects:
- At the start of every print, there should always be some slack for the filament between the extruder and the Filament guide. Otherwise, the filament slightly pulls the extruder up, which will affect the Loadcell readings during the mesh bed levelling.
- Ensure the trapezoidal nuts screws are not over-tighten. As it will create excessive dragging resistance during Z-axis movements.
- Calibrate the Z axis to ensure it is perfectly levelled. (Control- Calibrations & tests- Z alignment calibration )
- Ensure the Nextruder hotend is fully pushed up and secured into the heatsink.
RE: Poor adhesion on textured plate
I can say that this is absolutely critical on MK4:
At the start of every print, there should always be some slack for the filament between the extruder and the Filament guide. Otherwise, the filament slightly pulls the extruder up, which will affect the Loadcell readings during the mesh bed levelling.
I always pull the filament from the spool and create a loop of filament just above the Nextruder. This avoid any error on the load cell because when the Nextruder moves there is plenty of floating filament and no negative pressure tension is applied to the Nextruder. I have done this since day zero so automatically that I even forgot to mention. 😀
RE: Poor adhesion manual Z ?
Hallo
I just swapped from MK3S (self assembled) to MK4S after 3 years alsmost nonstop printing and over 10 000 hours happiness.
No I start with the same satin bed and at least every 2nd print has too little adhesion which means at the middle of print or later the parts are pushed of the plate.
I ptin for start my PETG parts at same temperatures as on MK3s. What I ca nsay is that I used to go for a bit deeper first z layer on the MK3 to achieve a perfect face / 1st layer bottom view. I alsmost NEVER had adhesion problems. Printing thousands of PETG and ASA parts in my IKEA housing.
I miss the possibility to set Z constant and not manual a bit deeper. Of course I will try all above but it seems to be a paint and no serial printing possible at the moment on MK4 while the Mk3 was running "blind".
My question: Is there any chance to set first layer / Z constantly a bit lower or manual ?
best greetings a bit desperated and strongly dissappointed from Bavaria
Benno
PS the MK4S was bought as complete machine due to time pressure so no fails on assembly by me possible.
RE: Poor adhesion on textured plate
Hi Benno,
Du hast zwei Möglichkeiten oder kannst beide kombinieren.
Den Flow für die erste Schicht erhöhen oder im Prusa Slicer ein Z Offset angeben um mit der Düse immer etwas näher ans Bett zu Leveln.
Ersteres geht nur über den Gcode. Den müstest du im PS auf den alten Standard umstellen.
Im Gcode dann beim ersten Layer M221 S105 , am zweiten M221 S100.
Den z Offset kannst du auch im PS einstellen.
Must du in den Einstellungen suchen. Bin gerade im Urlaub und kann nicht nachschauen.
Oder wenn er anfängt zu drücken den Knopf länger drücken, loslassen und im Menü den Offset einstellen.
Zum ausprobieren würde es ja mal reichen.
Gruß aus dem Schwarzwald
Rainer
RE: Poor adhesion on textured plate
Hallo Rainer
printer back "at home" in its housing. Cleaned and PC Windows polished so they are transparent again 🙂
mit dem Knopf je Druck etwas tiefer klappt bis dato sehr gut, muss man aber jedesmal erledigen und den Start abwarten.
Wenn es im PS ein Setting gibt wäre das fein irgendwo in den Exp Einstellungen. Solltest Du nach dem Urlaub dazu Zeit finden wäre mir SEHR geholfen.
Besten Dank bis hierhin
Benno
PS im Deutschen Forum ist es so still daher hatte ich hier platziert. Swap back to english no problem..
RE: Poor adhesion on textured plate
Müste unter Druckereinstellungen zu finden sein. Ziemlich oben "Z Offset".Must aber den Slicer auf min. Expert mode haben.
RE:
Hallo Rainer
ich hatte zur gesucht, auch per "Hilfe" , finde aber nichts..
English for all: Anyone knows where to set a Z offset as standard in PS ?
I use 2.8.0
I use now new bed, Dimafix pen on the petg test. I get some sticking to the plate but too litte. At MK3S I ripped the top layer of the plate sometimes when it became old so strong adhesion i got with ASA or PETG.. Very Strange..
Danke für jede Hilfe
Thanks for ongoing support
Benno
PS: Gerade mal einen Power off mit PETG getestet. Danach gab es Krümel .. ?? MK3 ging auch über minutenweisen Stromausfall hinweg, hier waren es Sekunden und :(.. Druckeregebnis MK3s klar überlegen, WENN sie mal gelingen...
RE: Poor adhesion on textured plate
Hallo Benno
The setting is found under "Printers/General/Size and coordinates/Z offset", in normal or expert mode. I use a value of -0.05 mm for a little extra grip on the textured plate.
RE: Poor adhesion on textured plate
Hallo
thanks a lot found it 🙂
and this overrideds / adds to the mesured Z, right ?
So if I add -0.05 it would always press 0.05mm deeper than the bed mesurement / automatic Z setting by MK4 does it ?
Thanks for ongoing support
Benno
PS speed, qualitity and ASA Strenght is impressing better than at my 10K hours MK3s, only adhesion to solve


