Printer Head Material Removal
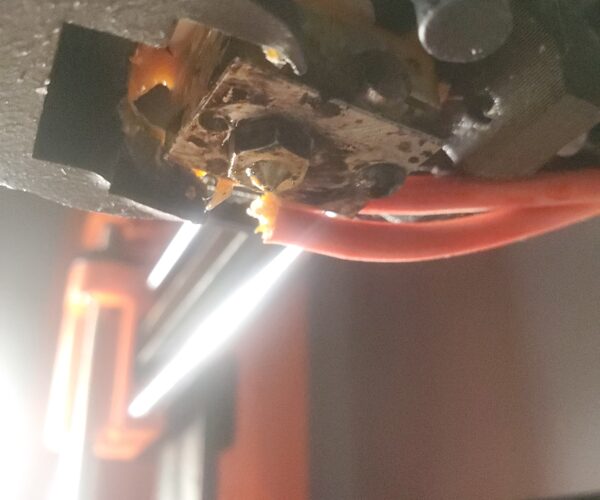
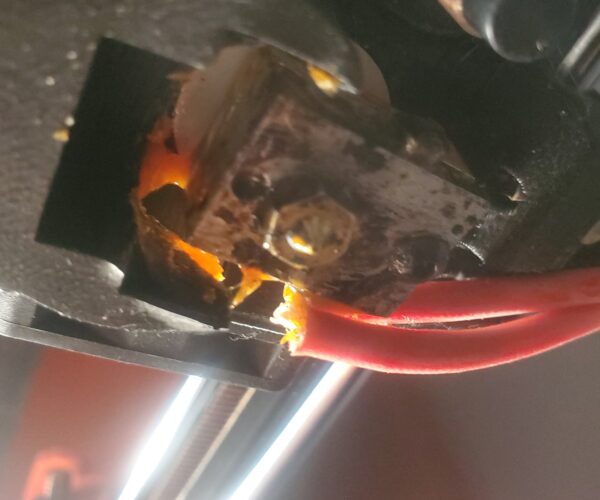
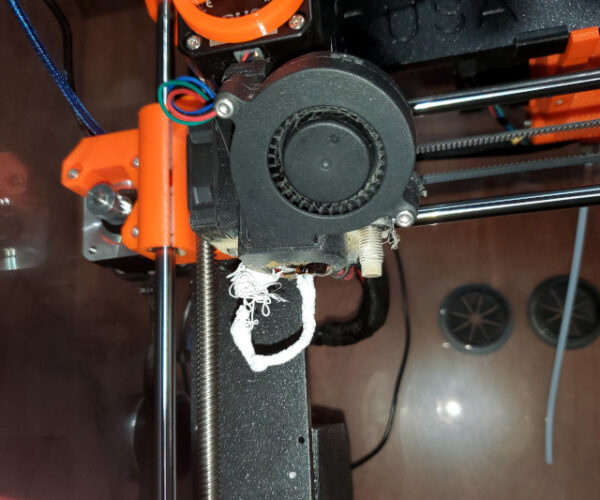
Any suggestions on the best way to remove this mess from my printer head?
Its about 6 hours worth of printed PTEG material stuck to the bottom. Not double checking, I used the wrong material setting in PursaSlicer (used PLA material setting). Honestly not sure why it didn't come out stringy instead i got this ball of rock hard PTEG. Thinking of using my Dremel cutting disk to remove.
As you can see in the photo the PTEG molded around the wires......
Any suggestions would be greatly appreciated.
RE: Printer Head Material Removal
Frankly, for big blobs of death around the wires I'm almost resigned to just replacing the hotend. You can try to heat up the hotend to 260 or so and use needle nosed pliers to pull off as much as you can. Probably have to disassemble the hotend and take a heat gun to the heater block to melt the gunk. Don't use the heat gun with it still mounted or you'll melt the plastic pieces of the hotend.
Formerly known on this forum as @fuchsr -- https://foxrun3d.com/
RE: Printer Head Material Removal
Thank @fuchsr for your help here. Ill give it a try and post my results.
Before doing anything, look at pictures of a clean extruder and note the position of the rather delicate wires that are currently hidden, if you damage them you will have to buy replacement parts as broken wires can't be rejoined.
You have probably damaged your fan shroud and will need a replacement.
[Newcomers reading this: You should monitor your first few prints until you have made certain of your first layer calibration, in a week or so all will be working smoothly and leaving the printer running will be OK.]
To remove it:
Raise the nozzle temperature to the printing temperature for the filament in question and allow it to heat for several minutes.
If you are lucky you will be able to prise the blob open - more likely you will need to add heat from outside with a heat gun to aid the softening, sometimes it's worth using a soldering iron to carve chunks off the mass.
Use needle nosed pliers to prise this away; remove it in parts if it won't release the wires.
Once you have the worst removed you decide whether you need to disassemble the extruder to get at all the blob or perhaps you can clean up in situ.
After the cleanup there will be overcooked filament inside the nozzle so at least a purge and probably a cold-pull will be necessary.
Cheerio,
RE:
Update: heated the head up to 275 degrees for 5 minutes, grabbed onto it with plyers and it peeled right off, took some extra time to get all the little bits. Thanks for the suggestions. Problem solved.
RE: Printer Head Material Removal
Congrats. I know some folks will bark at this, but the original E3D silicon sock would have gone a long way in preventing this, if this is an MK3s or +. The most current ventilation duct actually even is made to provide room for the sock.
Btw, since it´s usually not mentioned - before manipulating the heated blob, it makes sense to shut off the electricity to avoid shorting the wires with the tools used.
Cheers
Chris
I try to give answers to the best of my ability, but I am not a 3D printing pro by any means, and anything you do you do at your own risk. BTW: I have no food for…
the original E3D silicon sock would have gone a long way in preventing this,
'though if you are getting enough blobs to justify fitting a sock there is something underlying that needs fixing. Once you have a little experience blobs are incredibly rare.
Cheerio,
RE: Printer Head Material Removal
I'm with diem. I feel the socks are more trouble than worth but i don't think there's a right or wrong answer here.
Formerly known on this forum as @fuchsr -- https://foxrun3d.com/
RE: Printer Head Material Removal
Good job on the first half of the repair. Now you need to remove the hotend and finish the job. You should be able to return that to pristine condition with a bit of work. I can see from your pictures there is still material to be removed and cleaned up.
I've been in the same situation, and it doesn't take much more than time to make it perfect again. That will also let you do a better inspection of all the parts to make sure that the printer is going to work perfectly when you're done.
RE: Printer Head Material Removal
The eternal ( and so far harmless ) war between pro and anti-sock people is an endless source of entertaining chat for this forum. 😋
RE:
I'm with diem. I feel the socks are more trouble than worth but i don't think there's a right or wrong answer here.
Some time ago I got some plastic-resistant coating that is supposed to help prevent the sticking of filament to the heatblock.
The brand is Slice Engineering, but I forget if I ordered it directly or from Amazon or what.
I applied it the last time I had the machine down for some maintenance and, if anything, it appears to help.
In recent months I've had two minor blob conditions, both which came off cleanly by simply heating the hot end to ABS temperature, letting it warm thoroughly, and gently and carefully pulling things off. I did clean things up with a soft wire brush both times.
(And yes, yes, I do realize that the machine is overdue for a good PM and blow-out.)
war between pro and anti-sock
Socks are OK, even useful in some cases, mostly when needing extra air cooling for the print (eg. bridging) without chilling the hotend...
What I am against is misusing them to cover up unrelated issues.
Cheerio,
RE: Printer Head Material Removal
Sock or no sock is kind of a moot point of discussion for this issue. The blob went way above the sock level and was wrapped around the heater and thermistor wires. A sock wouldn't have helped in this case I don't think.
I think the best way to evaluate if a sock could be an aid to your printing is to watch the hotend temp and if you see wide swings of your temps a sock might be of value to keep a more consistent temp. I've tried sock and no sock and have never seen a significant hotend delta-t that would make a difference one way or the other in print quality. Absent fixing an issue you have verified with excessive temp swings; I can't see better prints as a result of using a sock. This is only looking at a sock from a completed print quality perspective.
As far as reducing cleanup when things go wrong... if you catch the issue early enough then it could be of benefit. If you aren't watching your 14hr print closely you will still wind up with a mess when things go sideways with your print. I watch a long print for about the first 15 minutes to verify good bed adhesion, but honestly, I do not actively monitor a print during the entire 14hr print. I do check-in occasionally through Octoprint, but I don't watch it like a television program. I rely on the failsafes built into the MK3s to stop the print when something goes really wrong and then deal with the aftermath and investigate the cause... which is usually poor bed adhesion that caused the issue. If the bed adhesion is really good, as it should be, a crash detection will shut down the print operation. If the bed adhesion is not good the printer will happily push the printed part around and air print a ton of filament until something causes enough resistance to trigger crash detection.
Unless you have a verified reason to use a sock, it's just personal preference to use one or not. I have had problems with socks coming off at one corner or another during prints and ruining the job, so my socks are in my parts inventory because I don't have a good reason to use one on the printer and I have a good reason not to use one. But that's just my experience and personal opinion.
RE: Printer Head Material Removal
it's just personal preference to use one or not.
For me, that sums it up nicely.
Formerly known on this forum as @fuchsr -- https://foxrun3d.com/
RISPONDI: Printer Head Material Removal BEST ADVICE EVER
I wish I had read this a few days ago! Thank you all on the forum for your excellent advice and insights.
[Newcomers reading this: You should monitor your first few prints until you have made certain of your first layer calibration, in a week or so all will be working smoothly and leaving the printer running will be OK.]


