New to this and frustrated
I am bitterly disappointed. I purchased a partially assembled MINI+ for my daughter's only birthday present. I assembled the parts carefully according to the instructions and calibrated the first layer. Using Prusament PLA vanilla we printed a perfect Prusa logo, whistle, and several frogs. We then downloaded a large complex articulated dragon, sliced it and it printed perfectly. At first we were so impressed. Since then it has been a disaster. I tried to make another downloaded model but seemed to get a lot of stringing and oozing. The first layer stuck to the bed, but then the nozzle knocked the printed parts off the bed when they are were a few layers thick. I thought the print head might be clogged (no idea why) and did a "cold pull" twice. The filament looked clean. Then I went back to the preloaded models and the performance is still the same. The prints start out OK and then fail when the nozzle knocks them off the print bed when a few layers thick. I have cleaned the bed with alcohol repeatedly but it does not help. Can anyone help? Thanks
RE: New to this and frustrated
It's a pity that you have such problems with the Mini. Maybe some tips on this website will help you.
good luck,
Karl
Statt zu klagen, dass wir nicht alles haben, was wir wollen, sollten wir lieber dankbar sein, dass wir nicht alles bekommen, was wir verdienen.
RE:
Hello,
A few things you can do :
1 - If you have both, make sure to use the smooth build plate rather than the textured one for PLA.
2 - For thin, intricate parts, print with a brim.
3 - Don't think of a FDM 3D printer as a regular printer. The varying physical properties of 3d models mean that every print job is different.
4 - Perhaps try the Galaxy Black PLA Prusament. I haven't tried any other Prusaments (yet) hence I can't compare it to the white you've used, but I can definitely say that this specific one has some qualities that differ from any other filament I've used, perhaps because of it being matte. It is by far the easiest filament to print out of all the others I've tried so far.
5 - Your filament might have gotten moist, so you might want to look up instructions on how to make it dry again.
RE: New to this and frustrated
Thanks. Looked there already but will go over it all again.
RE: New to this and frustrated
Are the first layers no longer sticking to the bed? Try to degrease the bed with dishwashing detergent.
Please run a first layer Z calibration and show us the resulting print *on the print sheet*.
Cheerio,
RE:
Calibration is important and should often be performed especially after setting up a new printer and periodically over time when having print issues. These machines have a lot of moving parts and alignment and parts like the steel sheets can change and wear over time.
I just built a kit this week and was getting inconsistent first layer at different spots across the bed so I spent time today following the procedure at the link below to make sure the machine is square.
https://help.prusa3d.com/article/squaring-your-mini_158518
In my case I needed to slightly adjust the YZ and XZ axes. There was noticeable improvement in print quality and consistency, less print defects, and a consistent first layer across the bed. If you follow the article and need to make any adjustments, you will have to redo the first layer calibration. After that I like to run a bed level test to make sure the first layer is even across the bed.
RE: New to this and frustrated
My initial prints were the Prusa logo, frogs and whistle (from the included USB). The first layer Z was -1.100 or -1.200 (not sure which one) and the prints were great. We then downloaded and sliced an articulated dragon from Printables and it printed great. We have only used PLA Vanilla white. Since then everything has failed.
I have included photos of the first layer calibration for a range of Z values, and would appreciate feedback on which one is optimal. Thank you for your help.
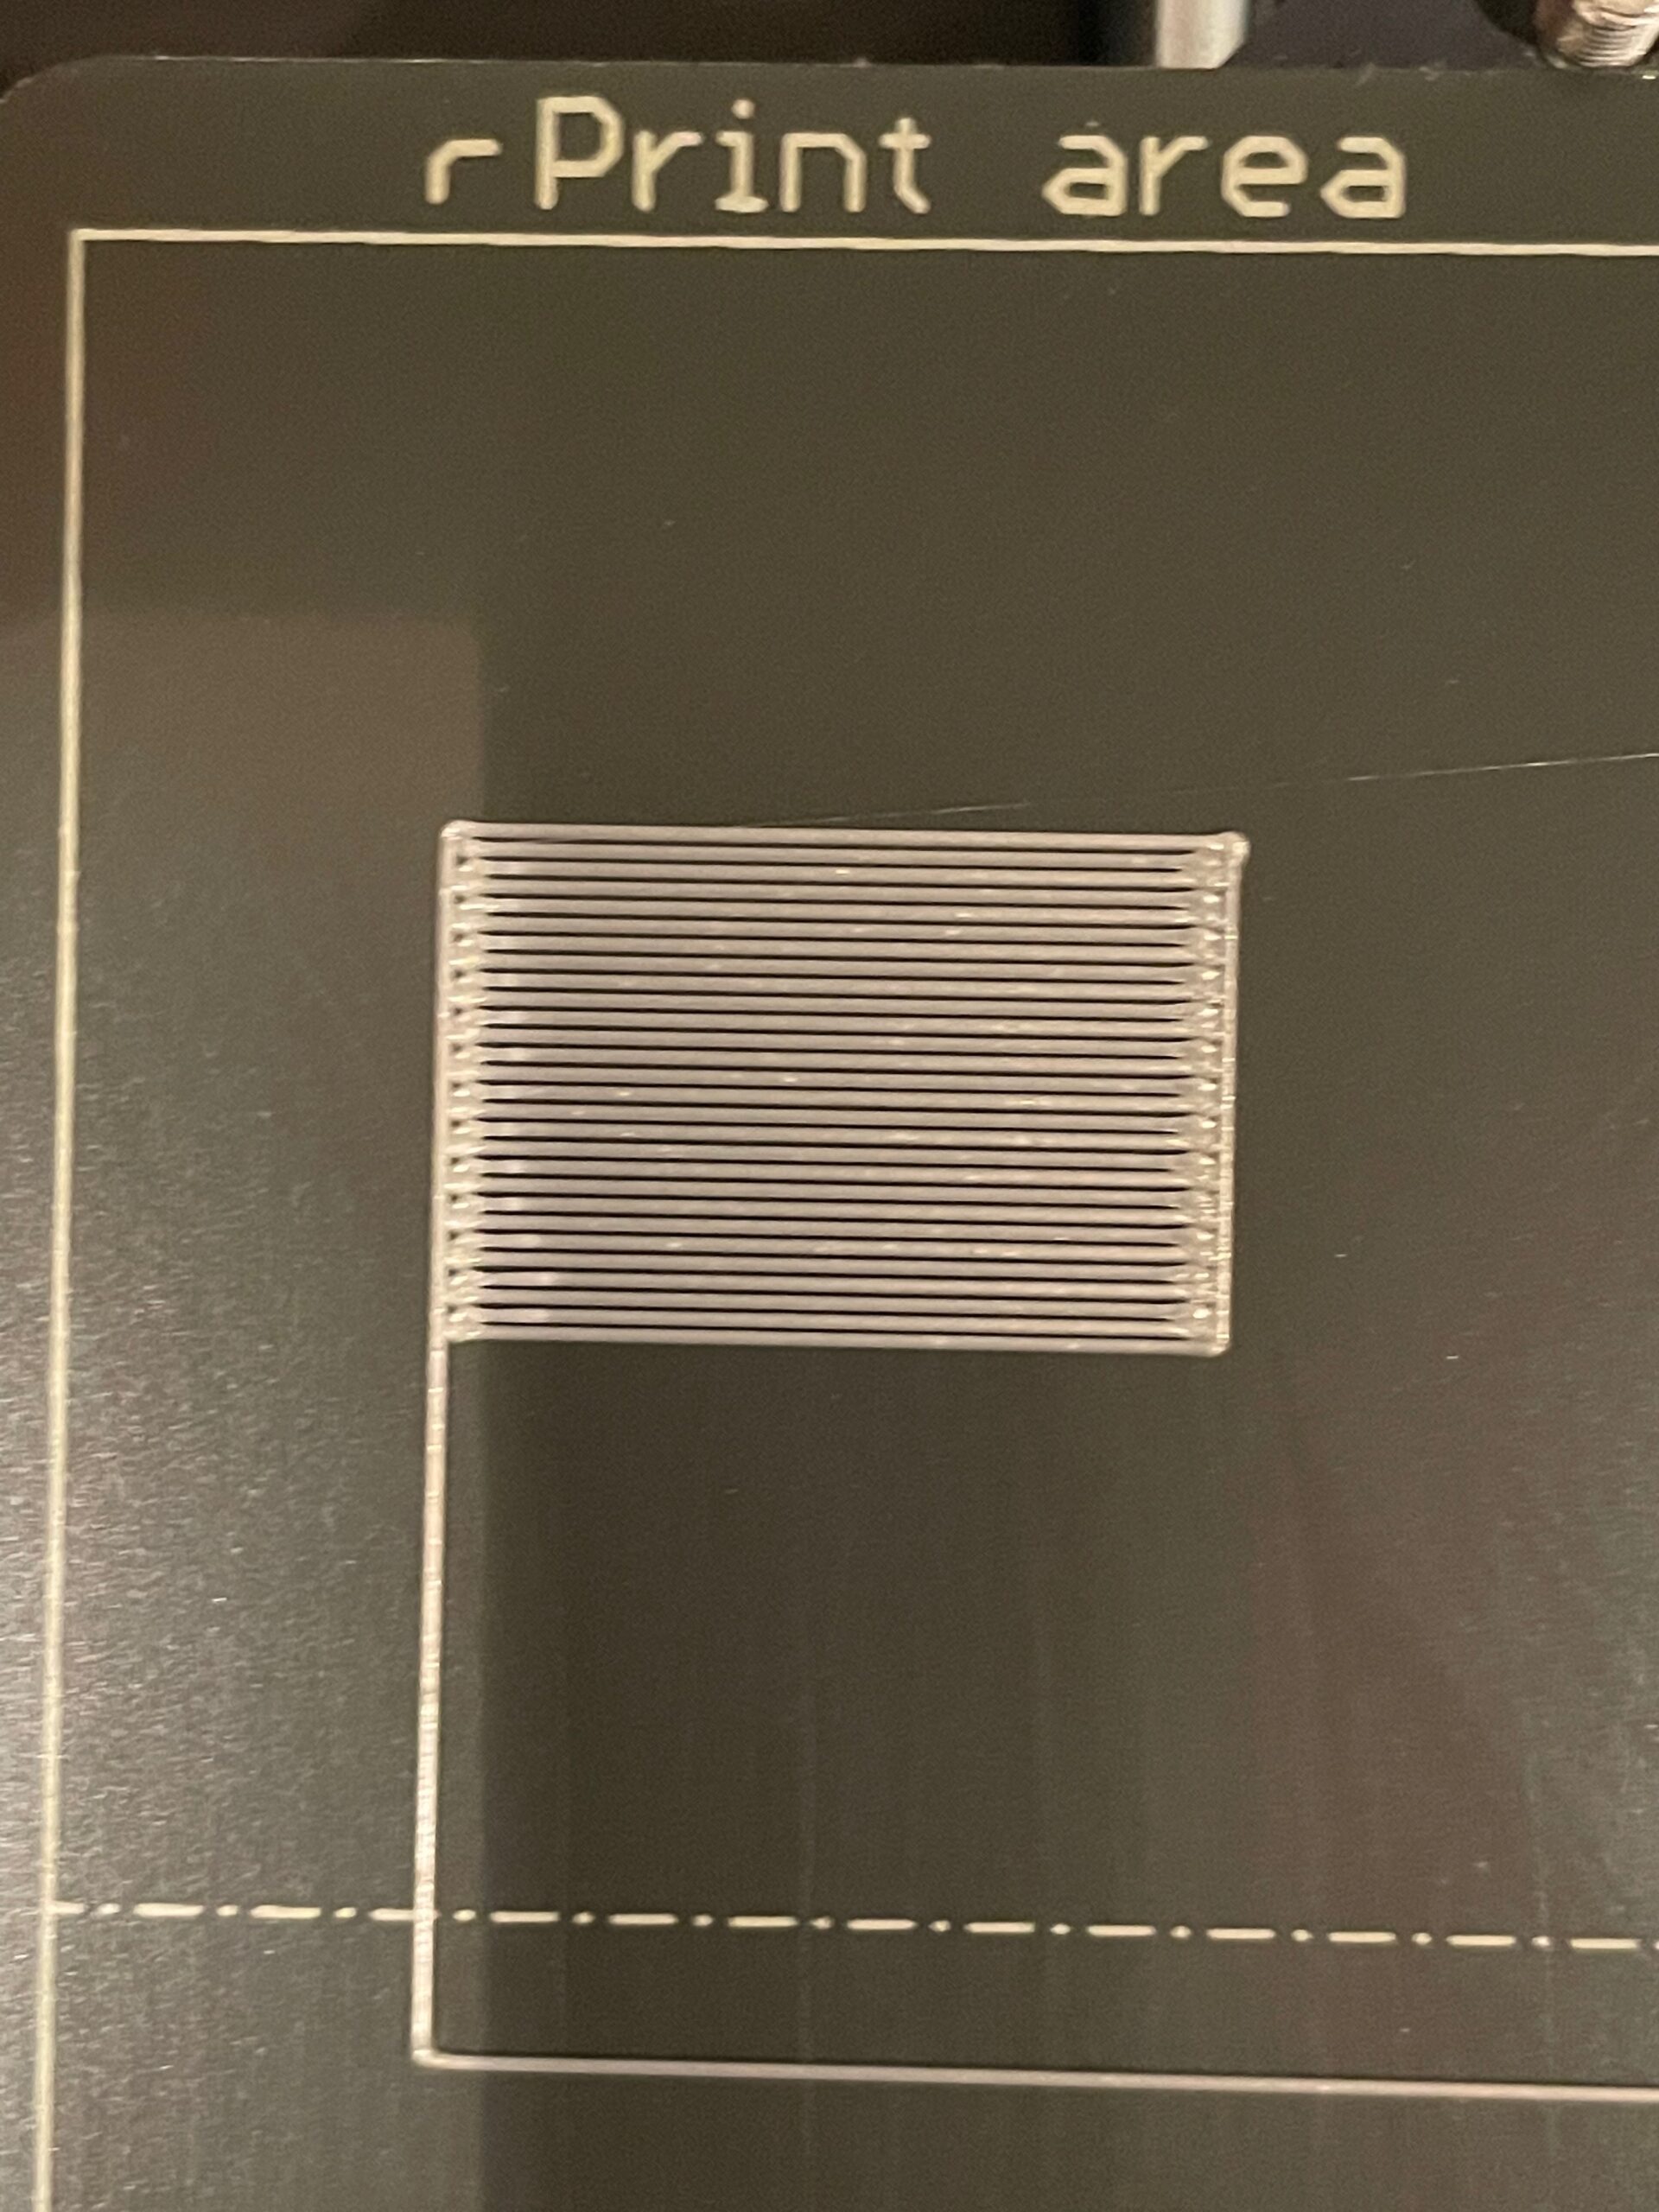 Z -1.200 closeup
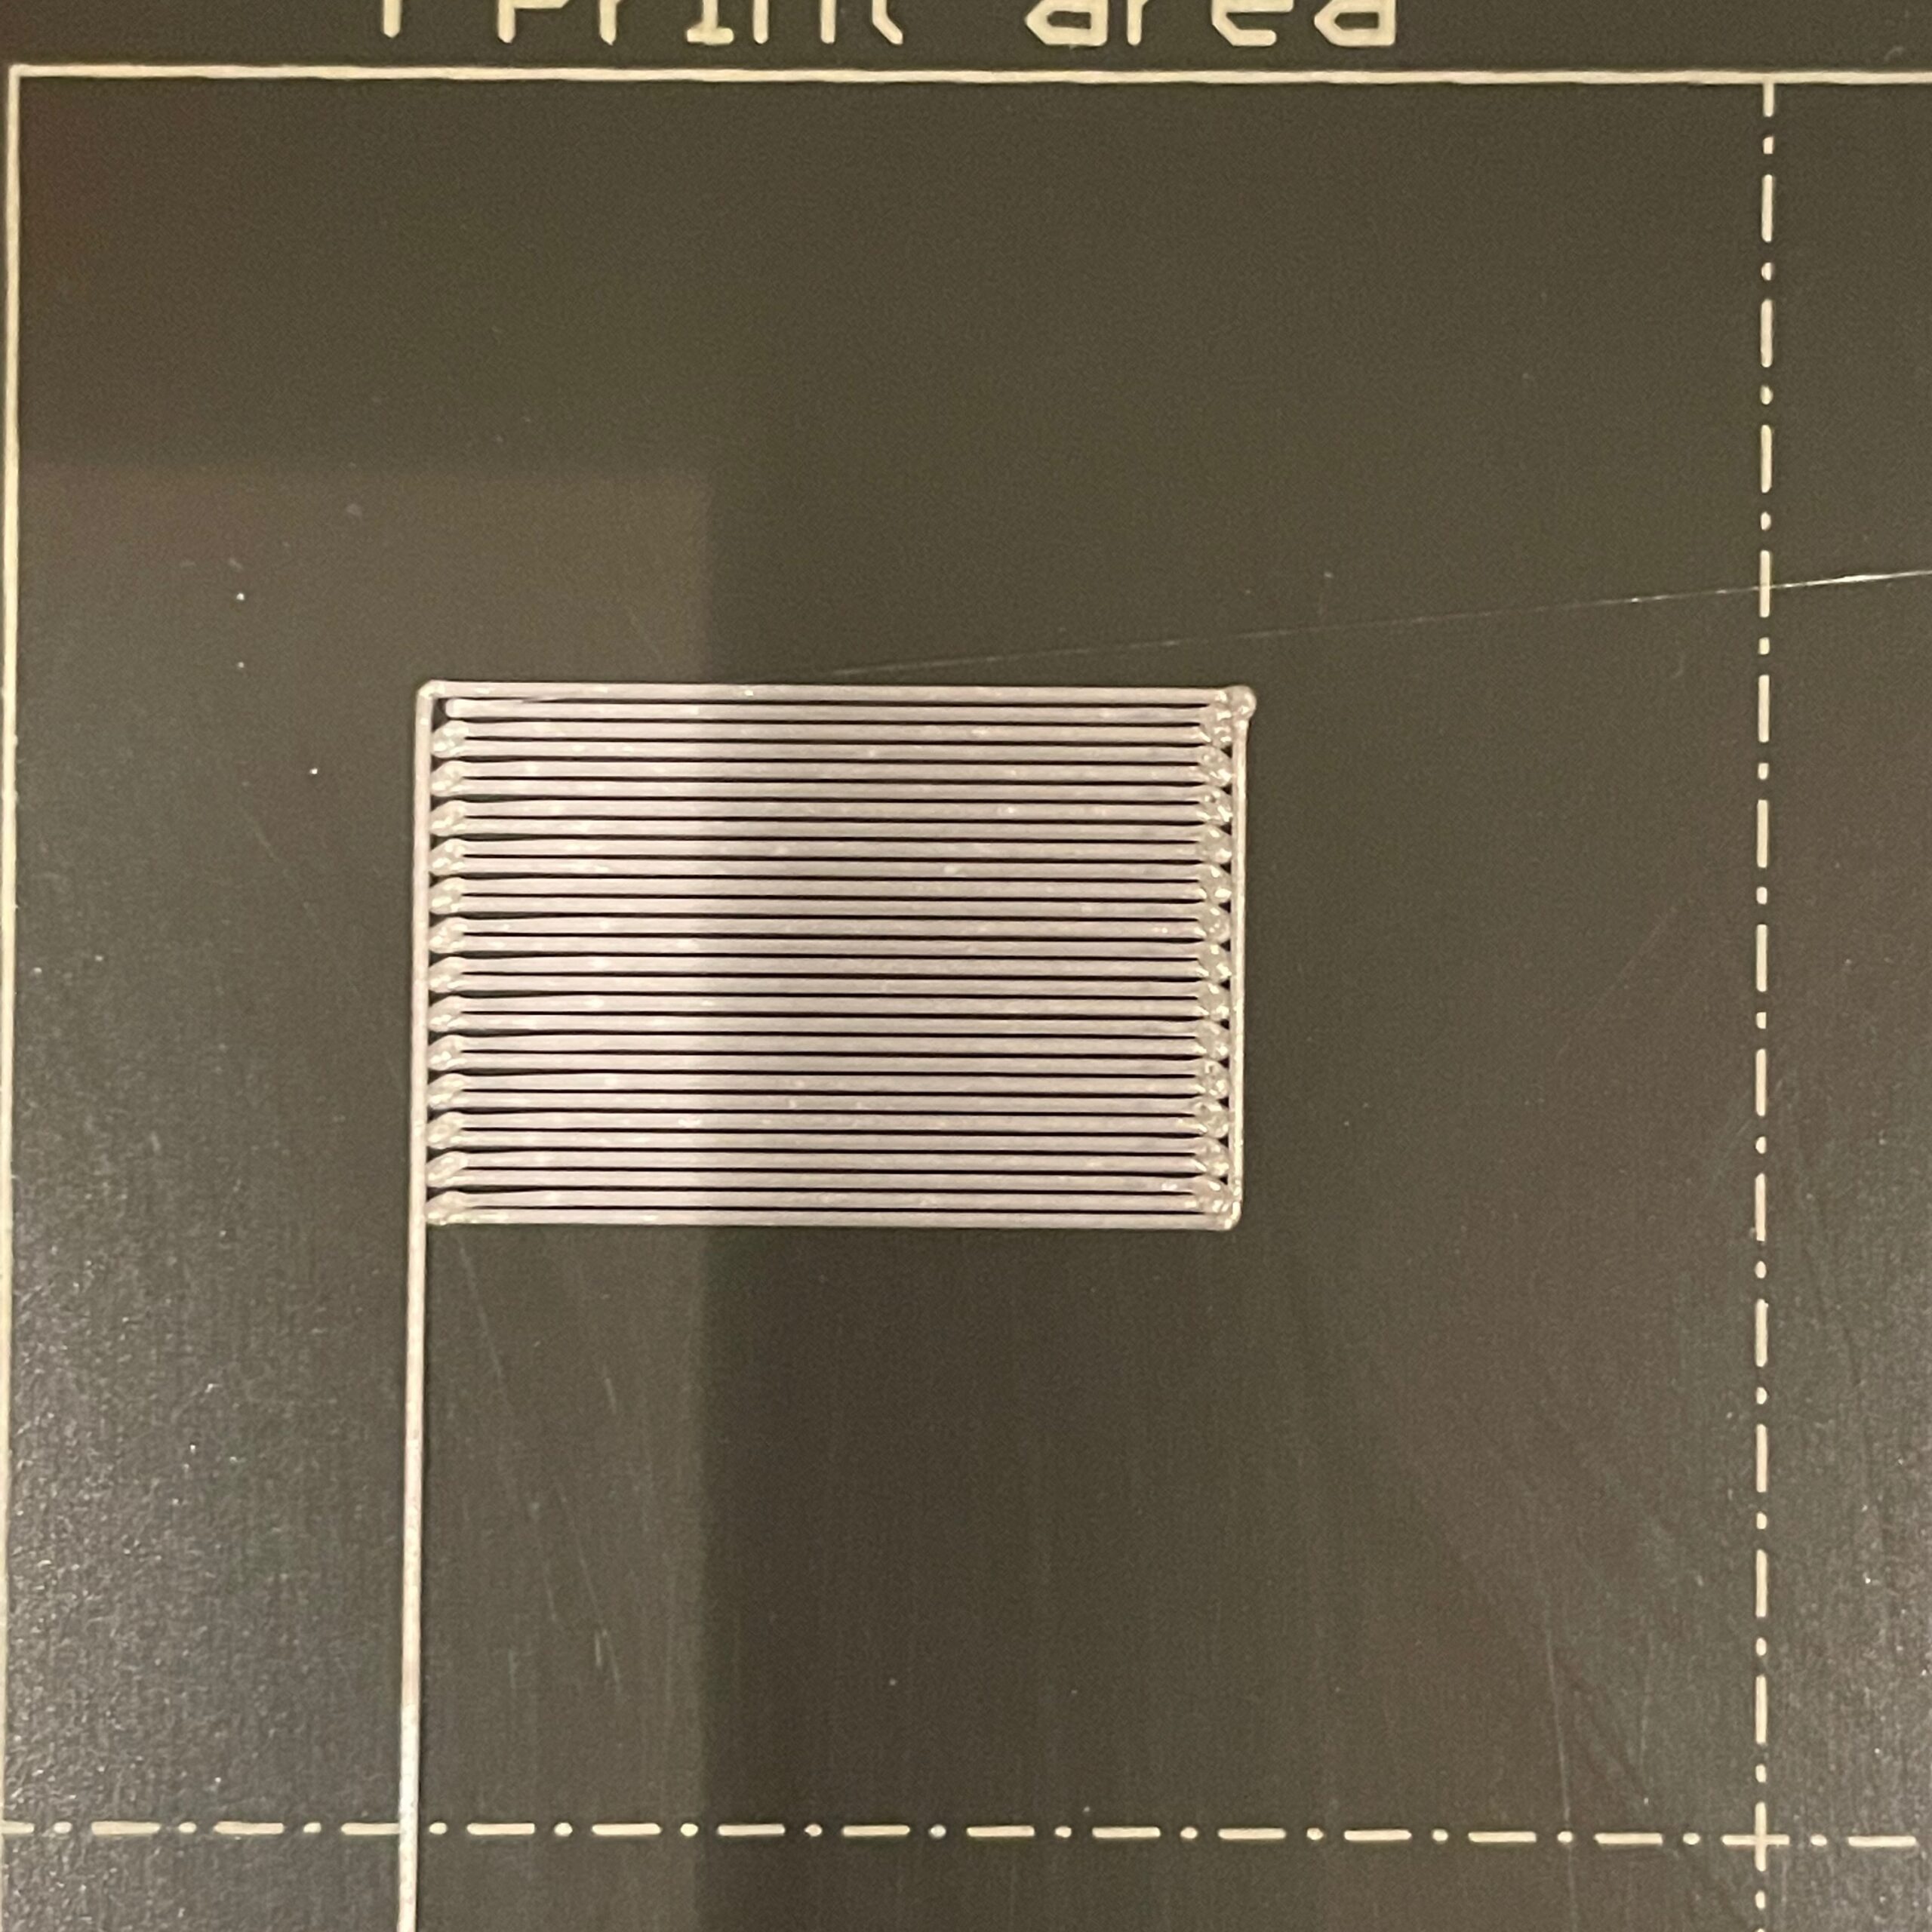 Z -1.100 closeup
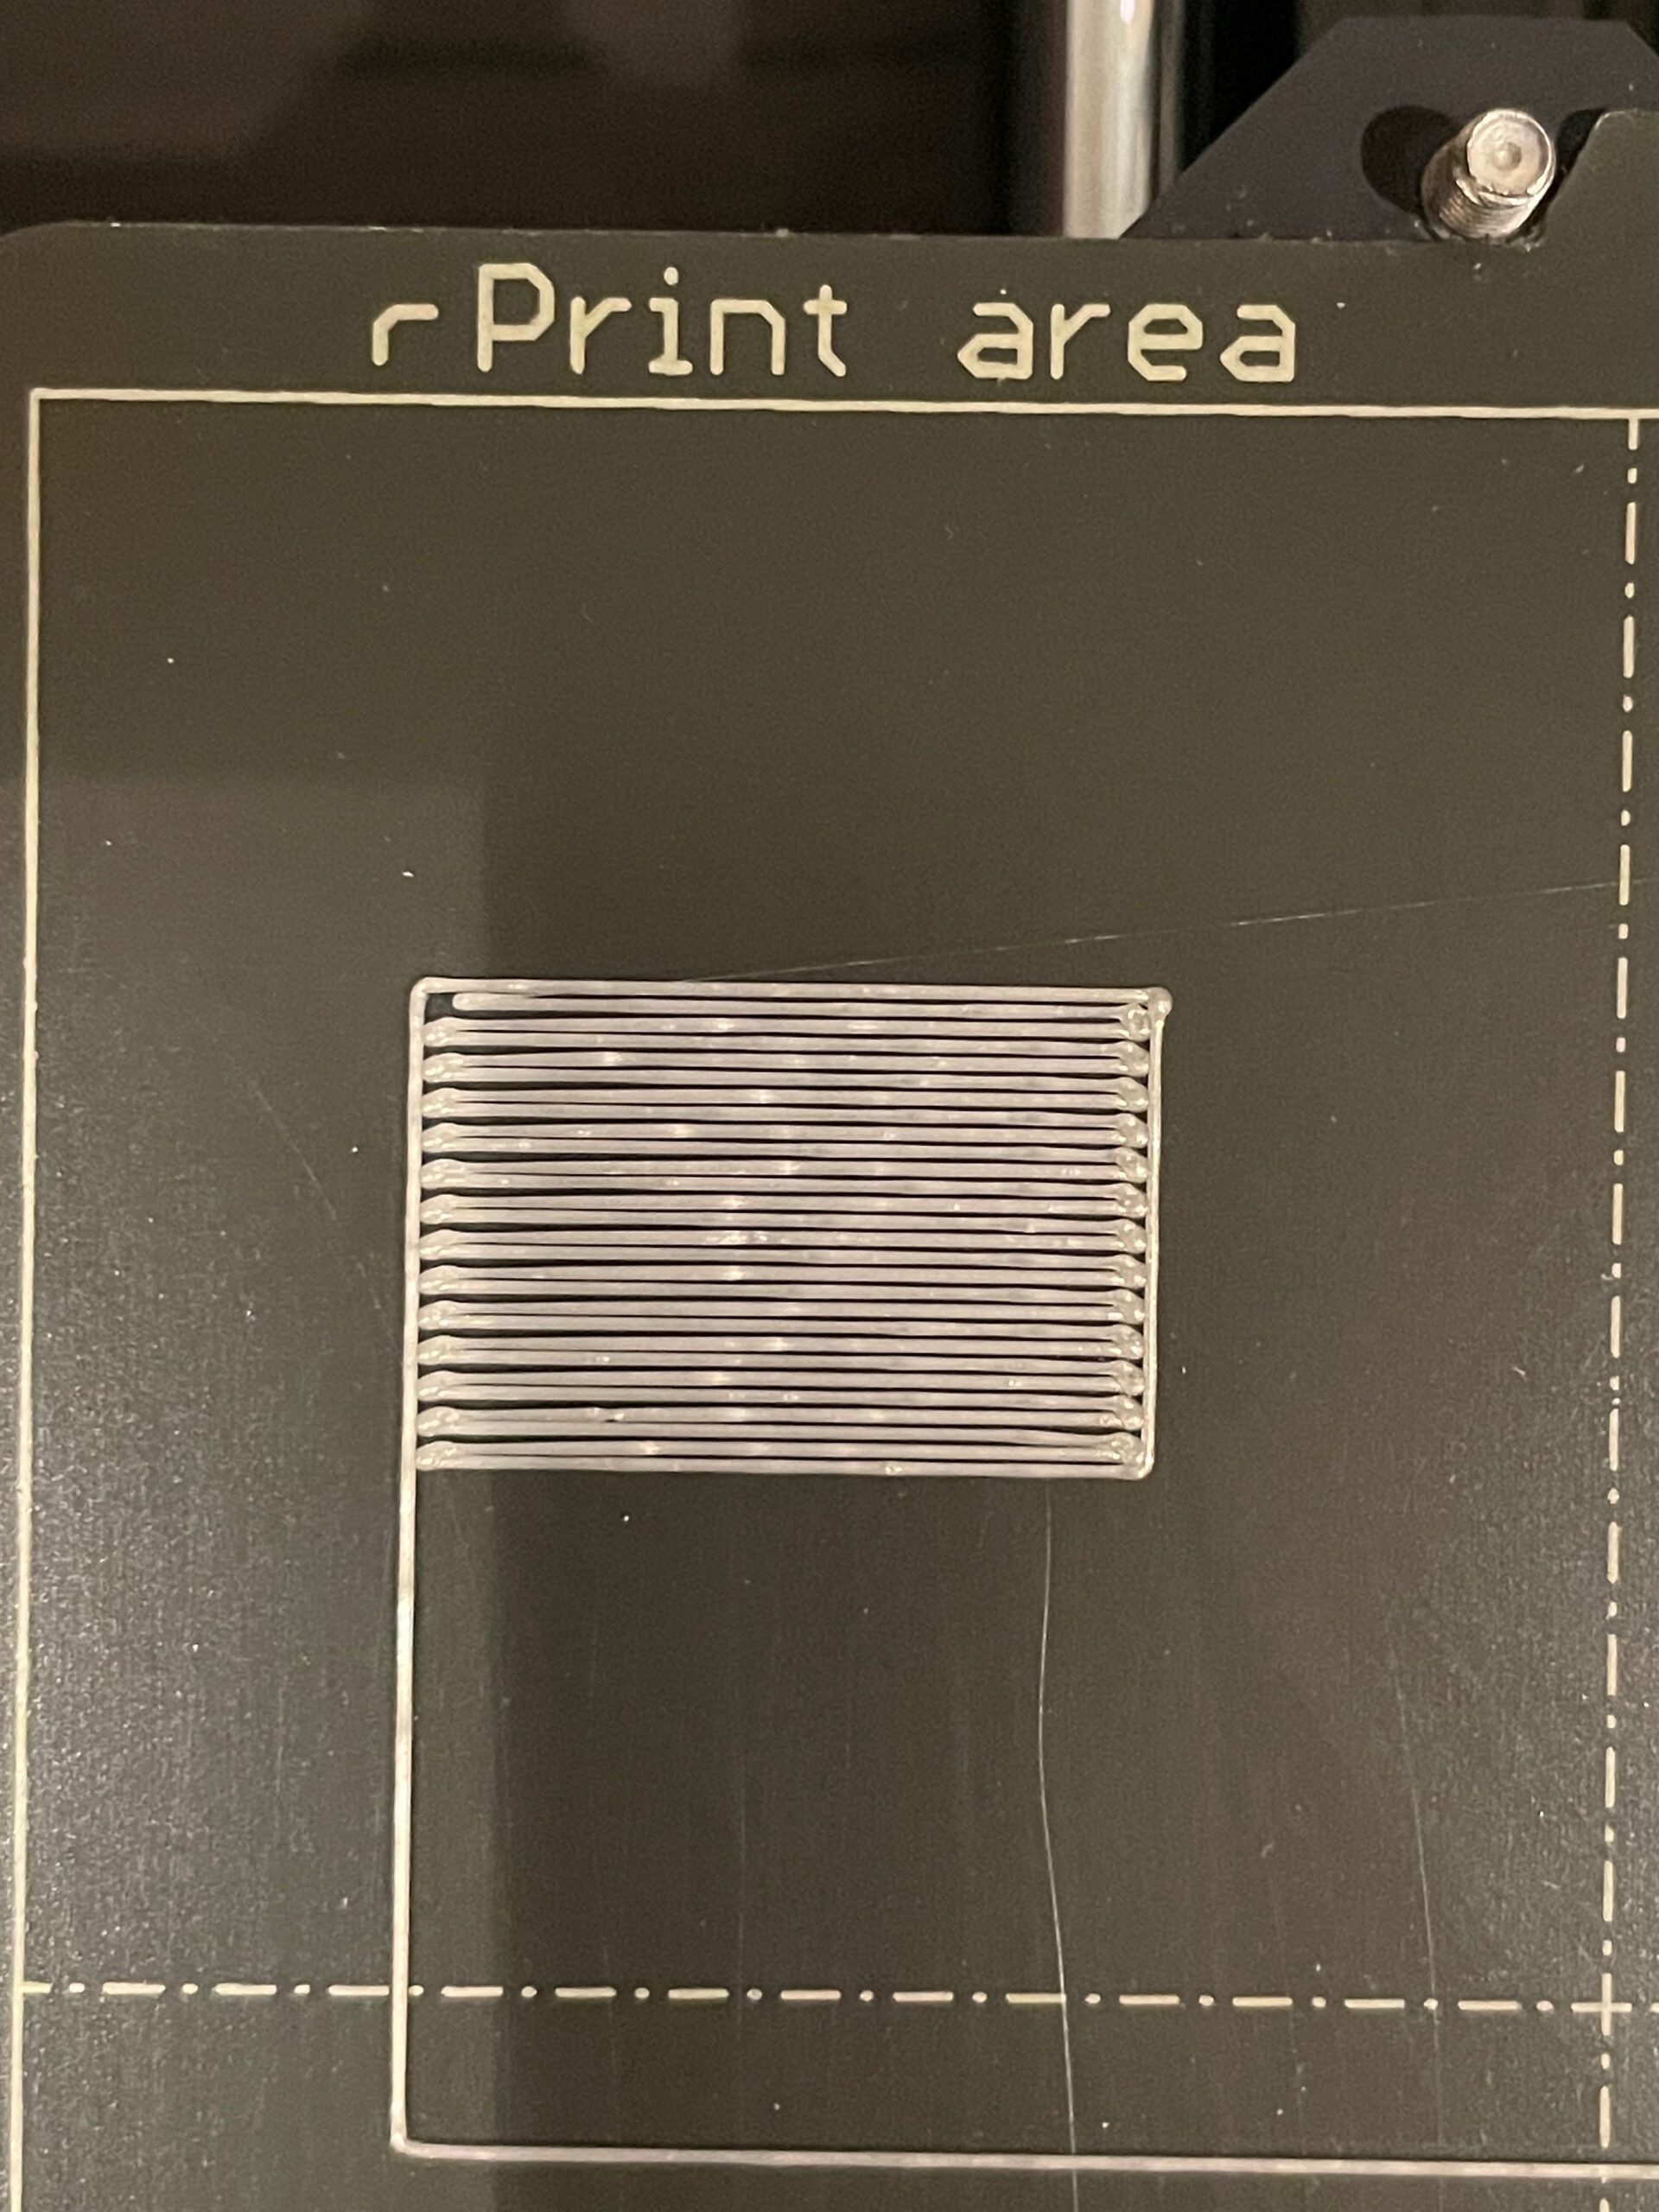 Z -1.000 closeup
RE:
Hello again,
These all look like awful first layers and definitely not a healthy base for a print to sit on, as the parallel lines should touch to form a continuous surface. So even before worrying about the other issues you are facing, this first layer issue is certainly the first thing to address. For reference you can refer to pages 20 to 22 of the user manual :
https://cdn.prusa3d.com/downloads/manual/prusa3d_manual_mini_en.pdf
The logical thing to try here would be to keep lowering the Z value quite a bit so that these lines finally connect. But of course this would also mean that the probe would sit lower and lower, and dangerously close to the prints. Perhaps it has been mounted way to low in the first place.
I think we are back in business - thank you so much everyone !!
Thank you so much for your help. I was worried about the nozzle striking the plate if I lowered it too far, and did not appreciate the fact that I need to get a continuous layer. I moved the Z to -1.500, cleaned the plated again with detergent, and made a few minor mechanical adjustments and we seem to back in business.
Thanks again everyone.
It sounds like you're getting there but for future reference:
At the end of the calibration you are aiming to print a single layer *sheet*. It should be possible to peel it off in one and fold it without the threads seperating. If it breaks into lines it is too high, not squished enough. If it is a single sheet but with wavy lines or drag marks on it you are too low.
Cheerio,