Layer shift—please help
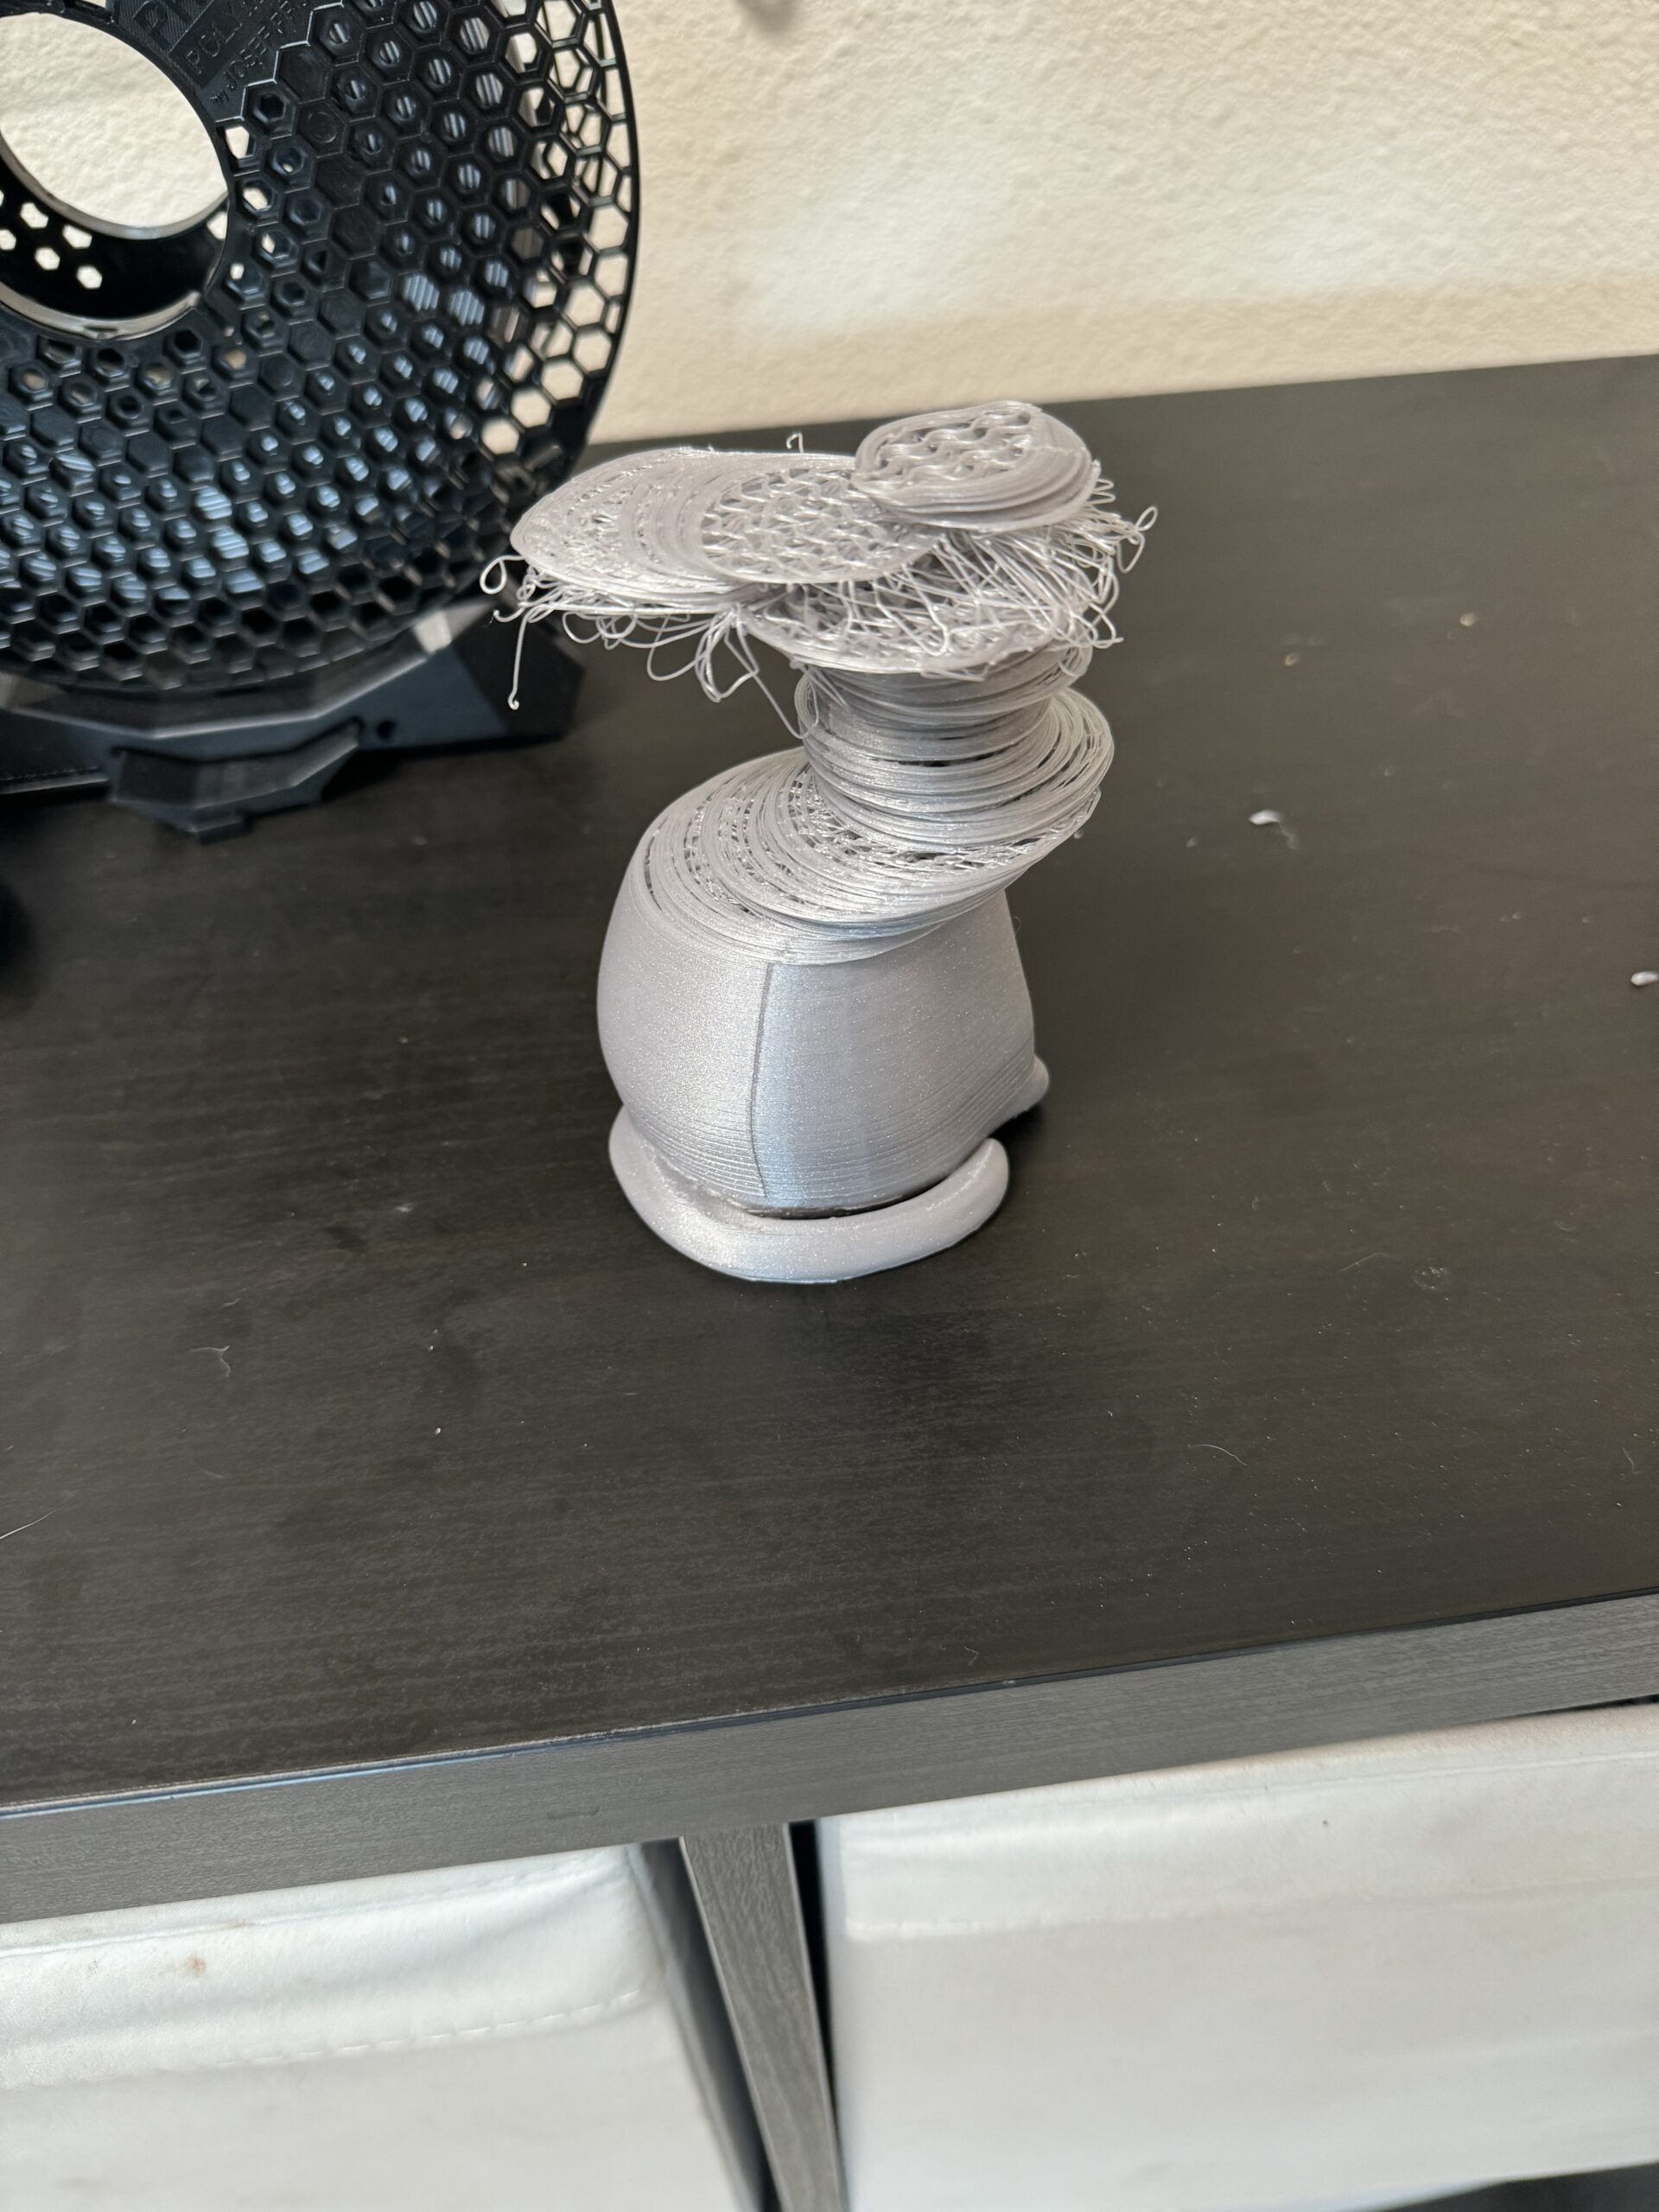
I purchased a Mini+ for my son and the first few prints went well. Then things went off the rails. We’ve been able to troubleshoot most issues, but I’ve been unable to overcome this layer shift. Picture attached.
I read that I should tighten certain screws along the x and y axis, but I don’t know which ones. The belts seem tight enough and move unrestricted.
Where are the screws that I should tighten? What other troubleshooting can I try?
Thank you for any help you can provide!
RE: Layer shift—please help
The screws in the aluminium belt pulleys on x and y axis.
Aluminium belt pulley is between the belt and the rod on the motor.
After tightening those screws readjust the belt tension.
See my GitHub and printables.com for some 3d stuff that you may like.
RE: Layer shift—please help
Thank you for the response. I feel incredibly dumb on this because I am still confused somewhat. There are two things that could be the motor—the orange box through which the filament runs and the black piece that “floats” over the bed.
I’m also not sure what the rod could be—there are two horizontal rods hanging over the bed.
I don’t really see any screws between those rods and the belt on either item that could be the motor.
And so I just tightened ever screw I could find.
That of course was just the x axis. I didn’t see any rod or motor for the y axis (underneath the bed).
We are going to try and print again and I’ll let you know if it worked! Thank you again!
RE:
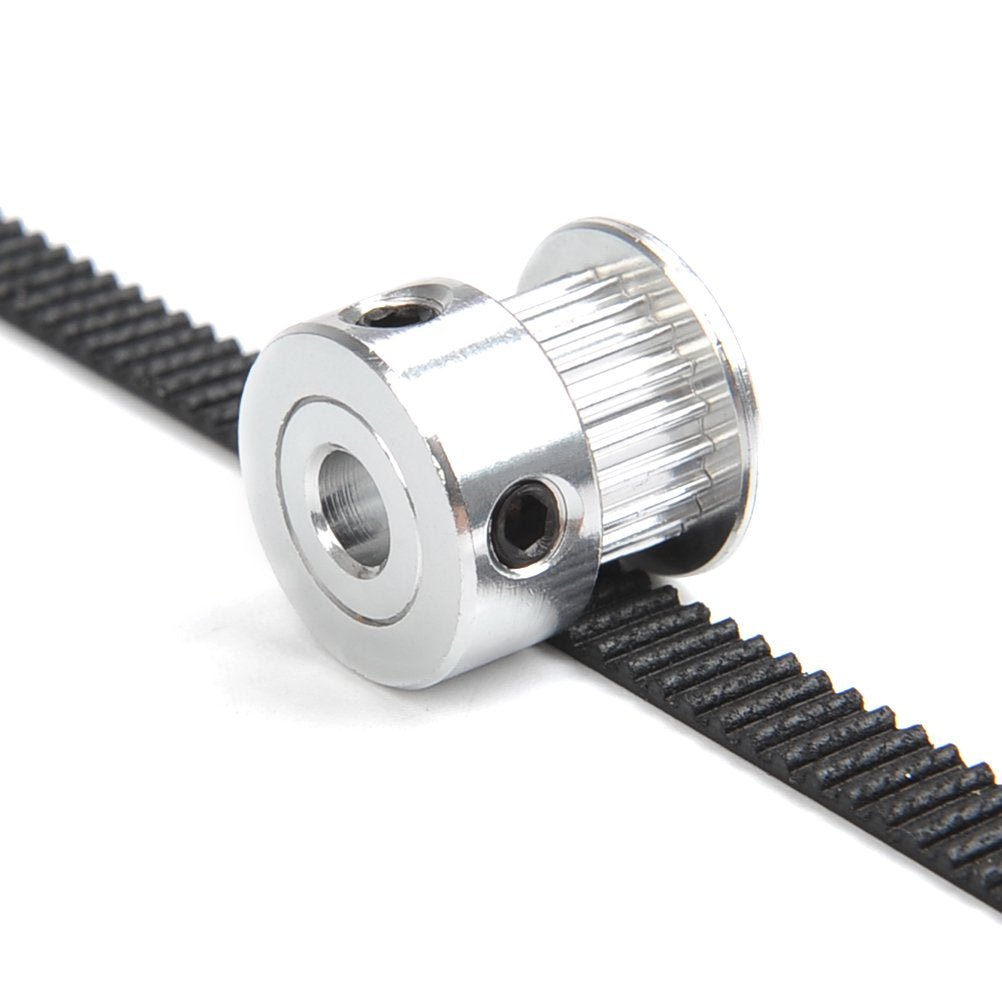
in the picture above:
Black belt on the bottom.
On the belt we can see aluminium belt pulley, it has two black screws in it (on the top and on the side front to us when looking at the image) - you need to adjust those two screws.
Also aluminium belt pulley has a round hole that goes all across the pulley, in that hole you put a motor rod - also that rod is called a shaft.
When you screw in the screws you are stopping ability of the pulley to rotate smoothly. So if the screws are loose then sometimes the shaft turns but the pulley does not or does not rotate unless there is enough friction between the shaft and the screw that it starts to rotate as well.
Now, depending on how the model was placed on the bed you can distinguish which screws were loose, but generally this looks like the X or Y axis.
For Prusa Mini the X axis is the arm moving above the bed, and Y axis is the bed itself.
For Y this is easy, just move slowly bed to the front (on the photo the front is on the right edge) and then you should see the Y motor with a belt.
Green arrows show the screws I was talking about.

The X axis will be more problematic, because it is hidden within the area in the green circle - you have to disassemble the X axis (maybe not everything, not sure, never done this). (Notice that in the picture below in the green circle I have a special white plastic printed band around the motor and there is a button glued to it - you can just ignore that, you probably do not have that at all and you do not need it.)

Hope that helps.
One more thing, you could disassemble the parts - remove the pulley from the motor shaft and clean the parts with isopropyl alcohol and assemble them back.
Do NOT lubricate it, there should be no lubrication between the pulley and motor shaft.
See my GitHub and printables.com for some 3d stuff that you may like.