brand new mini+ - a few issues and questions
Totally new to 3d printing, but I thought I had the calibration right and our first test print of the 'PRUSA' went pretty well, however the next two test prints I tried seem really really badly.
Our calibration looks pretty good to me (image gallery attached)
When we printed the PRUSA logo, that also seems pretty good - we had a few issues on the first layers but adjusted the live adjustment and then it turned out pretty OK looking.
I then got a bit adventurous and ran a print of a spool holder, and it went REALLY badly. The circle print seemed like it didn't want to stick to the heatbed at all - even the prints of the hex shapes of the holder seemed to go really badly.
I decided maybe that was too much for a first print, so I grabbed the PRUSA included nut gcode file and that did the same thing. Just seems like the print doesn't want to stick at all - even after cleaning the heatbed multiple times with isopropyl.
Attaching some images if anyone has any feedback, not really sure where the issue is
Our live adjust is at -0.900
RE: brand new mini+ - a few issues and questions
attachments didn't show - here's a google doc with the images and examples of what i'm seeing - https://docs.google.com/document/d/1j3fhjCl6soClbluof08QDrCz1C-NAUXBOnyE_ekjDTk/edit?usp=sharing
RE: brand new mini+ - a few issues and questions
@prolix21
Hi, Unfortunately the picture is password protected. in the google site
If you drag the picture file into the bottom of the text entry box, the box should turn blue, drop the file there and the picture should appear in an add media 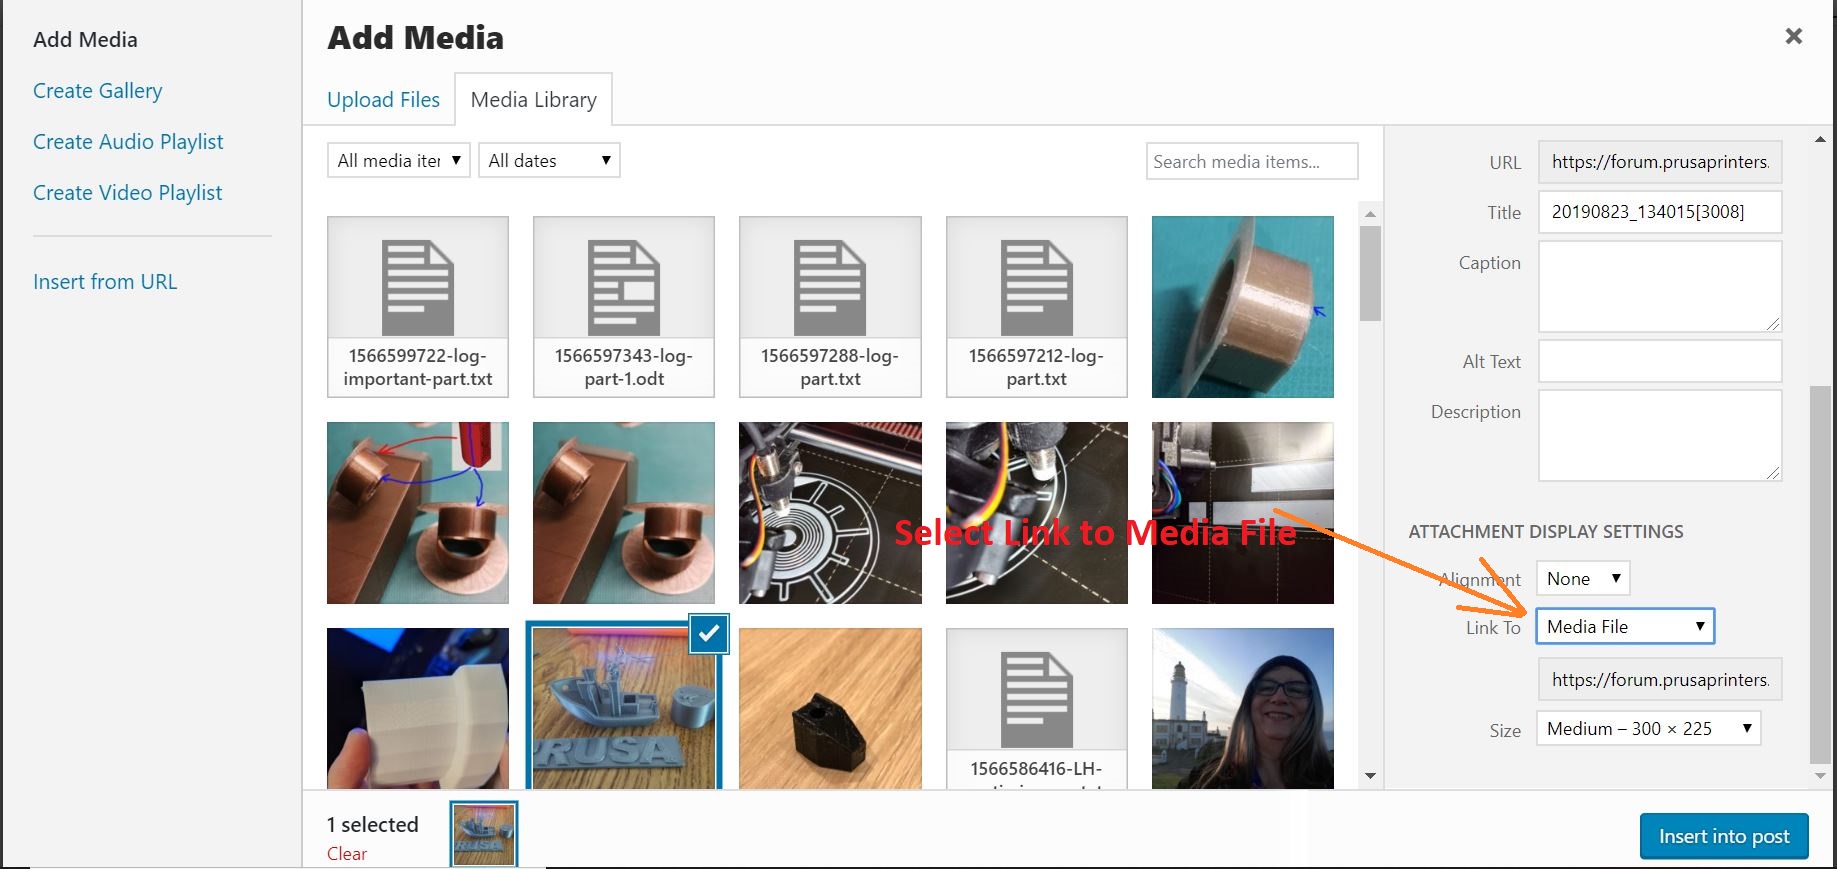 Like this
and if you tick, Link to: Media file, the picture will open in a larger format. 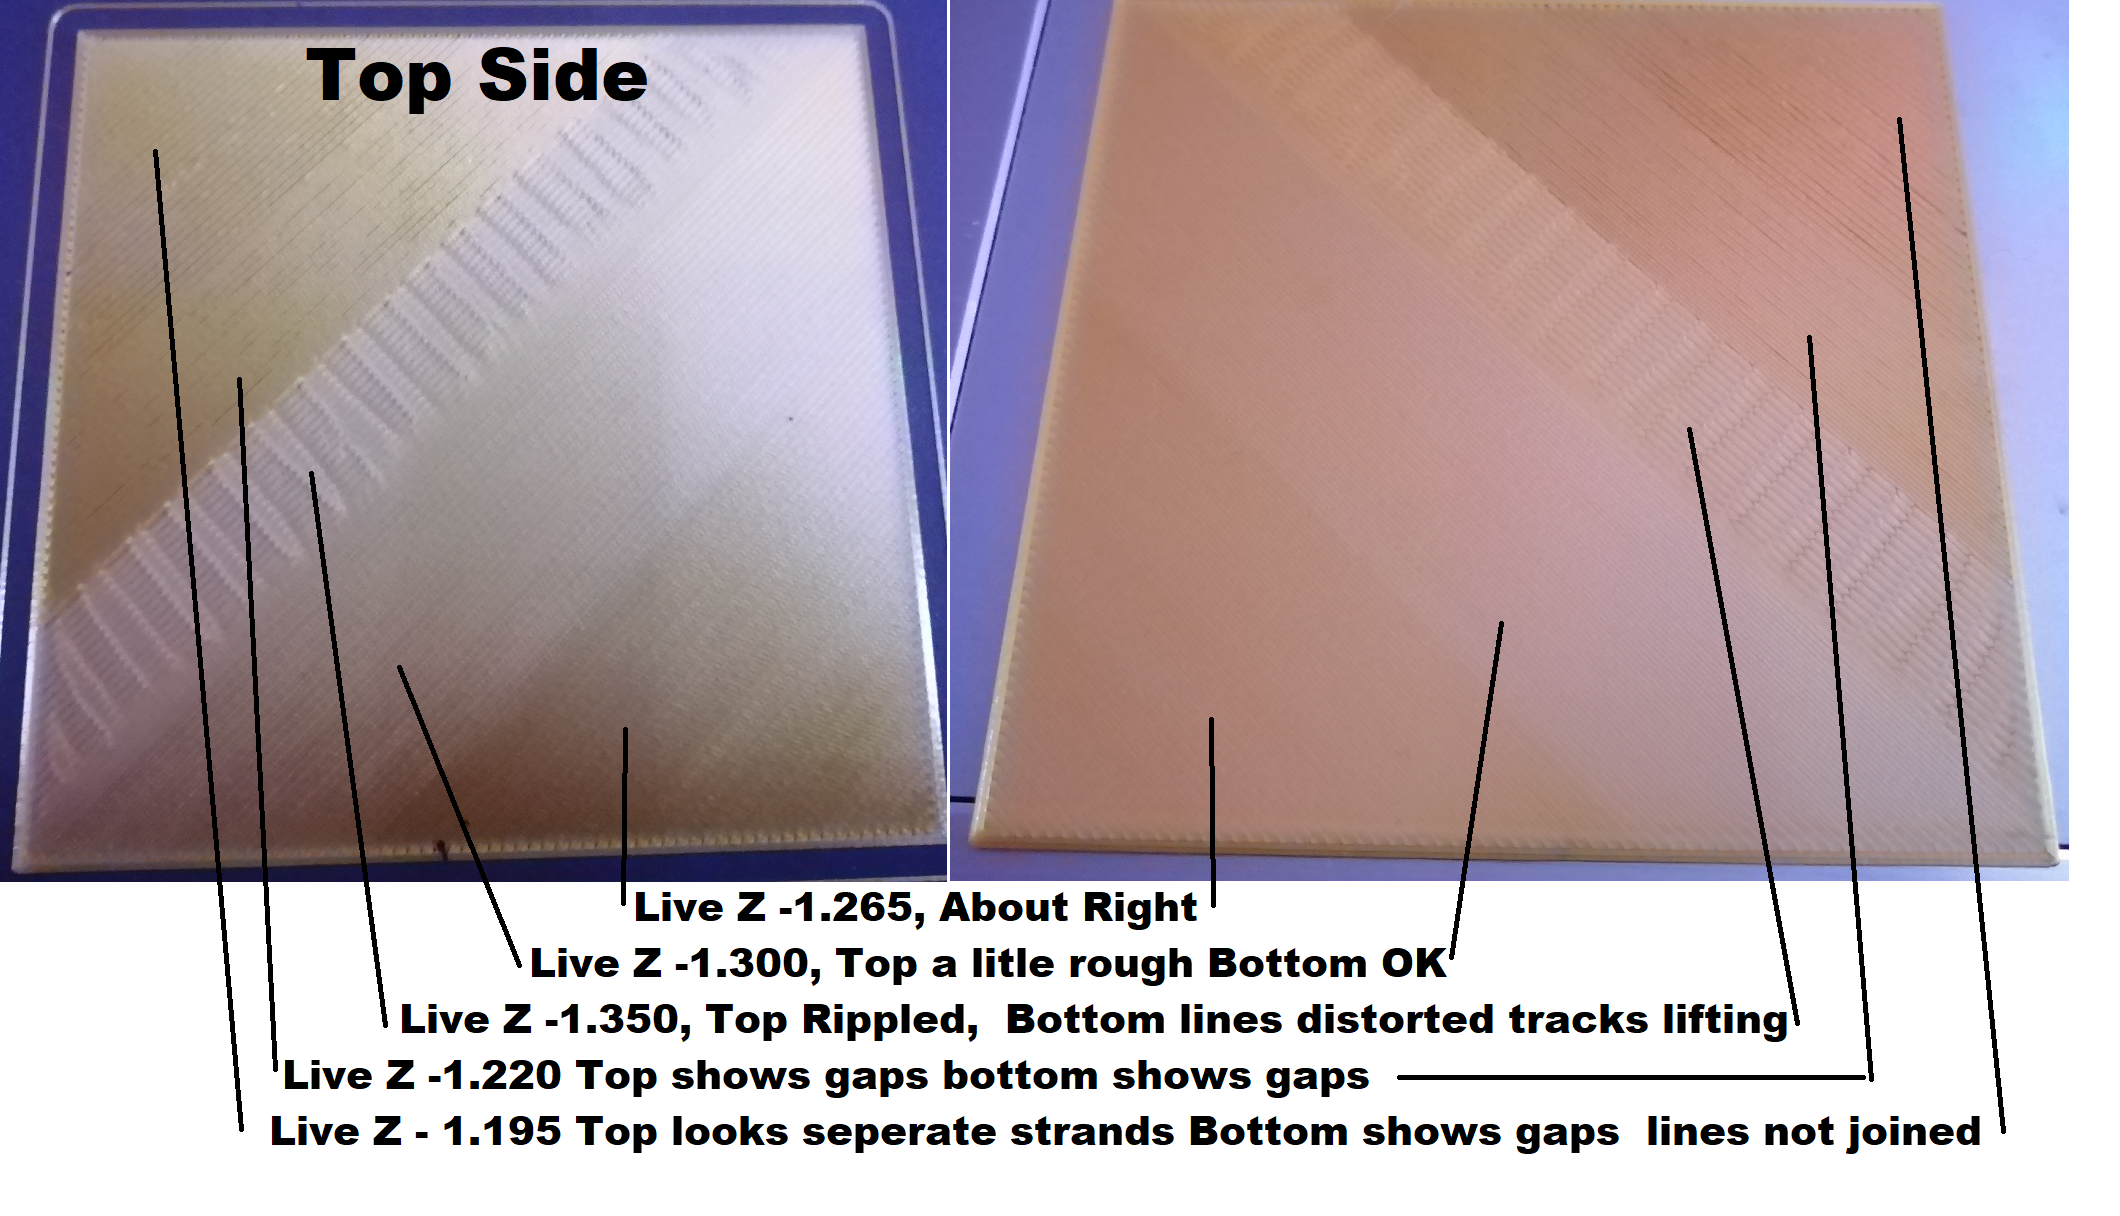
In the picture above you can see some different appearances for the first layer of a model,
the range of Live Z values is unique to every printer,
But the relationship. is common to all printers, if live z is too small a negative number the lines will not stick, and the first layer will be poor, as the live Z number begins to get closer to a good value, the appearance of the lines will begin to improve, then they will look like separate paralell lines, then the lines will merge and become smooth, then as you increase the size of Live Z, negative number, the tops of the lines will become rough (You have just passed the optimum Live Z value, ) if you continue increasing Live Z the lines will begin to buckle and bend as the space for filament between the nozzle and the build plate becomes too small. and the filament gets pushed to the side...
I hope this makes sense,
regards Joan
I try to make safe suggestions,You should understand the context and ensure you are happy that they are safe before attempting to apply my suggestions, what you do, is YOUR responsibility.Location Halifax UK
RE: brand new mini+ - a few issues and questions
@joantabb
Sorry, fixed the doc - that example you posted is helpful - seems like the Live Z at 0.9 may be too little - so I may need to keep testing and increase that value.
Here's an example of what I've seen on test prints that involve anything more than a straight line. This one is for the 'nut' example PRUSA includes, which should just be a hex, but none of the corner points stick and it gets out of control really fast.
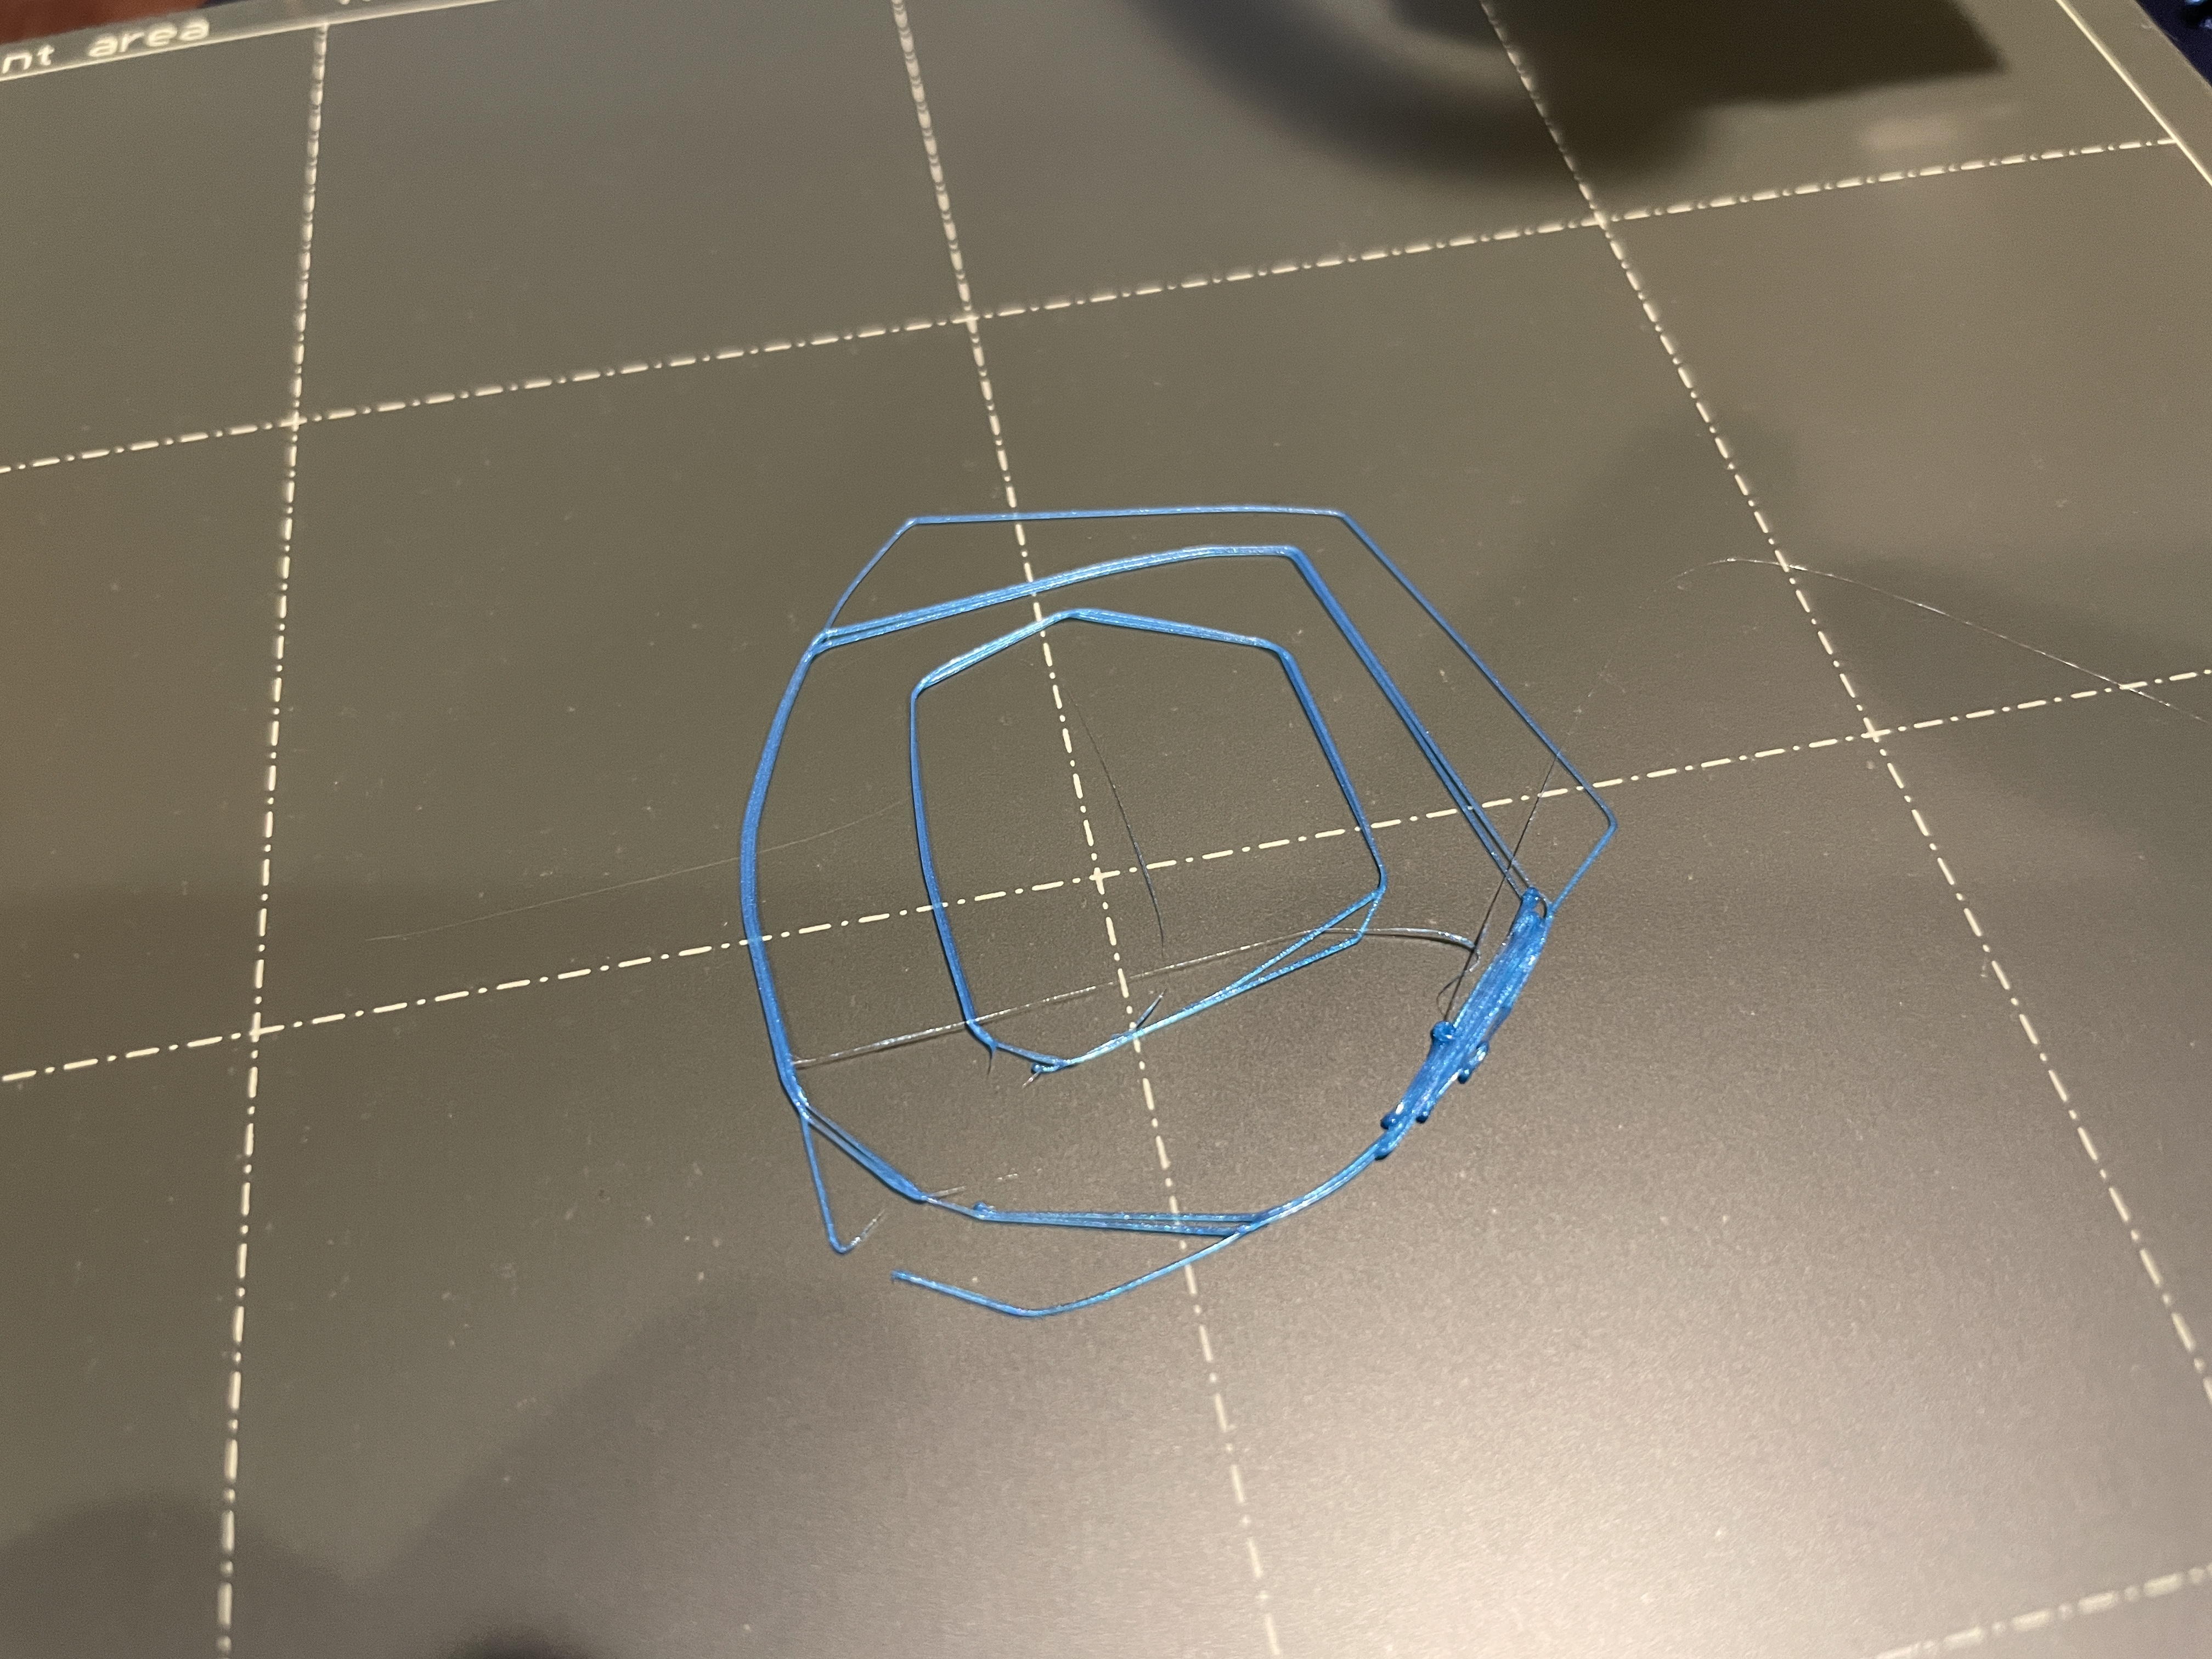
The issue is definitely the first layer, so I'll keep plugging away at the live Z calibration
RE: brand new mini+ - a few issues and questions
@prolix21
As a guide, the nozzle should be close to the plate but not touching it. The gap should be pretty small such that the filament is lay down, not drop from a distance, onto the plate. If the gap is too close, you'll see excess material between lines in the small square. You will probably need to go through the Live Z calibration a few times to home in the value.
RE: brand new mini+ - a few issues and questions
@prolix21
As you guessed, the way to improve adhesion is to go lower
regards Joan
I try to make safe suggestions,You should understand the context and ensure you are happy that they are safe before attempting to apply my suggestions, what you do, is YOUR responsibility.Location Halifax UK
RE: brand new mini+ - a few issues and questions
Thanks for the responses, the fix was definitely to go lower. .90 is where I thought the test print looked ok, but after a lot of rounds of tests I ended up at -1.3 and things looked a LOT different and then more advanced testing looked much much better. Circles are actually circles - and the 1st layer is definitely sticking now. Thanks for giving me the push to go lower - was nervous to keep cranking it lower
