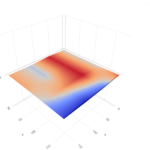
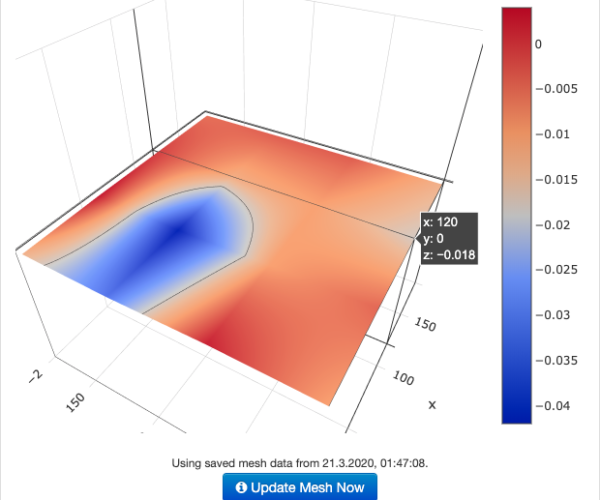
Prusa Mini Silicone Bed Leveling Mod
Introducing the world's most level Prusa Mini bed.
(idea from Paul_GD, prusa3d Discord)
(Click to enlarge)
What you need:
- Length of 3mm ID 7-8mm OD high-temperature silicone tubing (can be found in car parts shops)
- 8 M3 low-profile nylon locknuts
- 8 M3x16 flat head countersunk Torx screws (hex will not work)
- 3mm combination wrench
- Computer with Pronterface or OctoPrint
- Micro USB cable
- Torx wrench or driver (recommend key for precision in later steps)
- Tube cutting jig ( https://github.com/PaulGameDev/PrusaMK3_Silicone_Leveling )
- Razorblade or sharp knife
Directions:
- Make sure your X-Z assembly is square with the Y assembly. If you can't get it right, try shimming.
- Power off the printer.
- Cut 8 pieces of silicone tubing using the jig linked above. Or if you have a steady hand, cut 8 x 10mm pieces without the jig.
- Remove printbed
- Remove heatbed (Follow the reverse order as stated here: https://manual.prusa3d.com/Guide/7.+Heatbed++&+PSU+assembly+(textile+sleeve)/589#s9738 )
- Remove the 8 3mm screws and spacers along the outside of the Y carriage (leave the center screw & spacer)
- Replace the heatbed while placing the cut silicone tubing between the carriage and the bed. Place the 8 Torx screws through the heatbed, silicone tube and carriage to hold it all together.
- Carefully apply pressure to a corner Torx screw to compress the silicone tube and loosely attach a low-profile 3mm nut.
- Go to the opposite corner and do the same. Now the other two corners and then the remaining screws. Be very careful here, you can break the heatbed if it bends too much.
- Start tightening the screws back into place until approximately 6mm between the Y carriage and the heatbed. ONE TURN EACH! This takes a while but ensures you get it back on level and without unnecessarily stressing the bed. (Follow the order as stated here: https://manual.prusa3d.com/Guide/7.+Heatbed++&+PSU+assembly+(textile+sleeve)/589#s9738 )
- Now screw in the center screw until tight.
- Power on the printer
- Plug in USB-B from computer to the printer
- Fire up Pronterface or OctoPrint and hit the connect to printer button
- In the bottom right text box, enter the following GCode followed by the enter key. `M104 S170` set extruder temp for bed leveling
M140 S60 ; set bed temp

M109 R170 ; wait for bed leveling temp

M190 S60 ; wait for bed temp - Once the temperature has reached the target, input the following GCode
G28 ; home all without mesh bed level

G29 ; mesh bed leveling - Now, wait for the mesh leveling to complete.
- Copy results and paste them into the spreadsheet (B3:E6) here: https://docs.google.com/spreadsheets/d/1iDbB3aLflnnJze0St2_mDPMZZynlTgUOanb5mXP_Qng/edit?usp=sharing (make a copy first)
You might need to remove any `+` signs - Copy results (A12:H18) and paste them into the website here: https://pcboy.github.io/g81_relative/
- Follow the instructions for which screws to turn and how far
- Repeat steps 18-21 until the numbers from the results section on the website are no more than .02 difference between your biggest and smallest numbers.
- Run Z calibration again resetting the current value. You've just changed the height of your print surface and you don't want to crash the nozzle into it.
- Spend loads of quality time printing the bottom 2mm of Benchy and getting that live-z value perfect.
Notes:
- Why not the Nylock Mod? It's not that simple on the Mini. The Silicone Mod is superior in my opinion anyway.
- Why Torx screws? Because the Mini's heatbed screw holes are not as deep as the Mk3's. Hex screws will sit proud of the bed.
- Why low-profile locknuts? Actually the only area the low-profile locknut is required on is the top center mount point. This allows clearing the Y-axis motor mount.
- If you cannot find low-profile locknuts, you can use regular ones, but you will need 18mm 3m Torx screws. However, the top center point REQUIRES a 16mm Torx screw and low-profile locknut. If you cannot find a single low-profile locknut, you can sand one down to at least 3mm height.
I take no responsibility or liability, for any damages including, but not limited to indirect or consequential and/or loss of life.
More pictures coming soon.
Best Answer by Benji:
Please read the up-to-date guide here: https://github.com/bbbenji/PMSBLM
and use the PMSBLM specific converter and plotter here: https://bbbenji.github.io/PMSBLM/
Issues and bugs with the convert can be posted here: https://github.com/bbbenji/PMSBLM/issues
The original instructions are outdated and the Google Sheets converter depreciated. This is a friendly reminder as I am still regularly getting requests from people to edit the spreadsheet and am unabled to edit the original post.
Prusa Mini Silicone Bed Leveling Mod: https://bbbenji.github.io/PMSBLM/
RE: Prusa Mini Silicone Bed Leveling Mod
@oliver
We got a new record holder here! 🙂 Did you also do the silicone or nylock mod?
Prusa Mini Silicone Bed Leveling Mod: https://bbbenji.github.io/PMSBLM/
RE: Prusa Mini Silicone Bed Leveling Mod
@benji
Thanks 😊... the silicone mod 👍🏻
RE: Prusa Mini Silicone Bed Leveling Mod
Looks really interesting and simple material wise. I still dont have my Mini so can I ask what material do they have under the heatbed in the original design? Just metal spacers or springs?
One more question that comes to mind is since this mod can straighten the heatbed cant it be performed with the original design?
Again I must say that I dont have my Mini yet so I cannot see the hardware myself at the moment.
Original Prusa Mini + Smooth PEI
Prusa Slicer 2.6.0
RE: Prusa Mini Silicone Bed Leveling Mod
@geoper2
The original design uses 6mm metal spacers. It doesn't allow for adjustment.
Prusa Mini Silicone Bed Leveling Mod: https://bbbenji.github.io/PMSBLM/
RE: Prusa Mini Silicone Bed Leveling Mod
Hello, Nice idea. I'm just getting the parts together but cant find the low profile nylon nuts? Could you share a link please ?
RE: Prusa Mini Silicone Bed Leveling Mod
@theste1234
If you cannot find a single low-profile locknut, you can sand a regular one down to <= 3mm height.
If anyone finds them available at a reasonable price, let me know.
Prusa Mini Silicone Bed Leveling Mod: https://bbbenji.github.io/PMSBLM/
RE: Prusa Mini Silicone Bed Leveling Mod
Do you know of a source for the screw you used?
RE: Prusa Mini Silicone Bed Leveling Mod
@bryan-b7
I ordered them here: https://inoxprostal.pl/din-965-tx-a2-wkrety-metryczne-nierdzewne-plasko-stozkowe-na-torx/3312-din-965-tx-a2-m3x16-mm-wkret-metr-plasko-stozkowy-torx.html
Prusa Mini Silicone Bed Leveling Mod: https://bbbenji.github.io/PMSBLM/
RE: Prusa Mini Silicone Bed Leveling Mod
Amazing mod! However it took me way too long to understand the instructions, some images would be helpful. What's the advantage of silicone over steel springs?
RE: Prusa Mini Silicone Bed Leveling Mod
@wouterv
If I ever take apart my bed again I will take pictures and rewrite this guide. I have noticed some small mistakes already, however, I am unable to edit this post anymore.
Metal springs expand & contract, shift and distort. The high temp silicone which is under constant pressure in this mod should mitigate these problems.
Prusa Mini Silicone Bed Leveling Mod: https://bbbenji.github.io/PMSBLM/
RE: Prusa Mini Silicone Bed Leveling Mod
Well I'm just got all the parts together (in the post) and I will try and take some photo and videos when doing the mod.
The nyloc nuts are called AXA1052 and they are about 3mm and less
RE: Prusa Mini Silicone Bed Leveling Mod
@theste1234
That would be great! Thanks. Looking forward to your results.
Prusa Mini Silicone Bed Leveling Mod: https://bbbenji.github.io/PMSBLM/
RE: Prusa Mini Silicone Bed Leveling Mod
Just wanted to thank you for the tutorial. I have just finished performing this mod and went from a 0.95mm shift to a 0.08mm shift in bed.
Prusa Mini with Bondtech heat-break
RE: Prusa Mini Silicone Bed Leveling Mod
Well said, 👍🏻 from me too
RE: Prusa Mini Silicone Bed Leveling Mod
So glad I could help:) However, the real MVP here is Paul_GD from prusa3d Discord.
I have found this mod as well as the Bondtech heatbreak both essential to my Prusa Mini.
Also, I'd love to see more pictures, if anyone has taken any worth sharing, so others can get a better idea of how this mod works.
Prusa Mini Silicone Bed Leveling Mod: https://bbbenji.github.io/PMSBLM/
RE: Prusa Mini Silicone Bed Leveling Mod
@benji
I too have the Bondtech heat break. I have some interesting shapes on my silicone tube, your ones seem to all deflect the same way 🙂
Also, the blue pad underneath my printer - I have "borrowed" a tile from a kids foam "hopscotch" game and it has almost eliminated the vibration heard around the house.
I did not have a 3mm wrench so I had to improvise and drilled a hole (4mm) into some plastic then heated a sacrificial M3 nut with a blow torch and pressed into the plastic. worked well enough to do the job.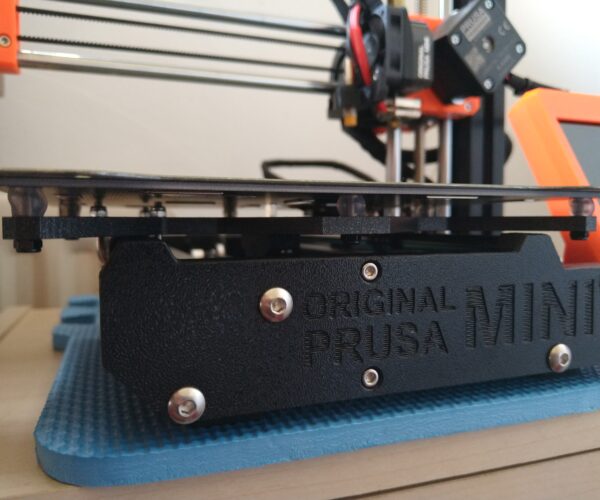
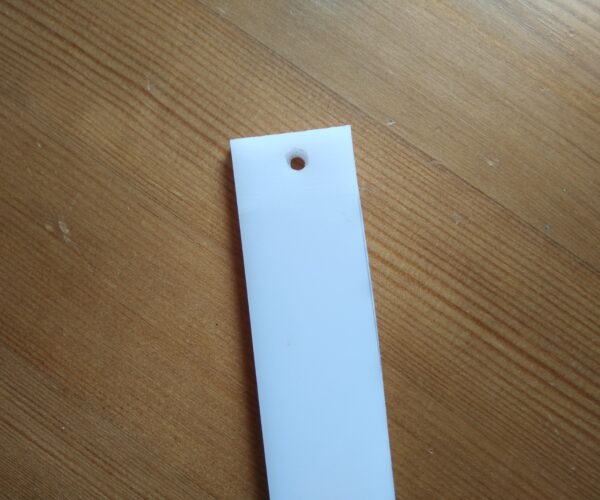
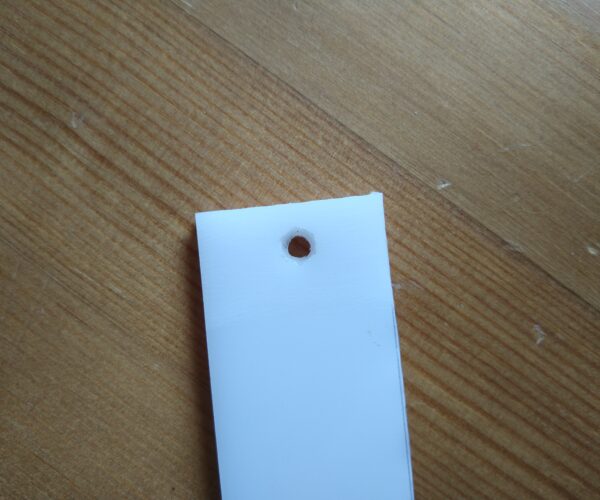
Prusa Mini with Bondtech heat-break
RE: Prusa Mini Silicone Bed Leveling Mod
@briancotton4
That definitely is some interesting shape to those spacers 😀 What is the inner and outer diameter on those?
As for the DIY wrench, great idea 😀 I myself just used needle nose pliers to hold the lock nuts in place. We should probably just print a wrench 🙂
Thanks for sharing!
Prusa Mini Silicone Bed Leveling Mod: https://bbbenji.github.io/PMSBLM/
RE: Prusa Mini Silicone Bed Leveling Mod
We have a 3D printer, right? That's what I've used M3 Wrench 😜
