RE: Different Hotends
@4nthonylin
I've only printed 1 thing that used the whole build plate and that was this morning! 5 'ear savers' for covid masks. The build plate was full to the brim and one mask was cut off by the Y restriction.
RE: Different Hotends
@4nthonylin
Also, what sock did you make (or buy)? The one I plan on making looks like it will be a tight fit with the RHD shroud.
RE: Different Hotends
@malcmcm
That's great to hear, I've only attempted to print 4 at the same time without a brim.
I'm using these socks: https://www.amazon.com/gp/product/B082YGGJ7W/ref=ppx_yo_dt_b_asin_title_o02_s00?ie=UTF8&psc=1 which has enough space for a sock but the sock does contact the shroud. I've been printing several hours like this including ASA and the shroud is still fine. I'm not concerned about the shroud melting since silicone is a good thermal insulator as well.
RE: Different Hotends
Just ordered my Mosquito. I plan to use @malcmcm's mount. Does the mosquito come with a nozzle ? I forgot to check, no biggie as I have a spare. Also once I have gotten this machine working, I'll probaby add @4nthonlin's shroud. Noob quesiton, Should I get the sock as well ? Is just for stabilizing the temperature ? What is the exact purpose of the sock?
Thanks,
RE: Different Hotends
@kevman
The mosquito does not but you can use your existing nozzle! The mosquito is compatible with the E3Dv6 nozzles, just remember to heat up the original nozzle to ~280 and then remove it, you can follow the directions here: https://www.help.prusa3d.com/en/article/changing-or-replacing-the-nozzle_2069
I got a sock since I print a lot of PETG and wanted to prevent the build up of burnt plastic on my heater block. I also find it useful to help insulate the heaterblock and the plastic pieces around.
Thank oyu! I'll order the sock.
RE: Different Hotends
@4nthonylin
I downloaded your mount, but didn't find the PTFE Jig in the Zip file. Is it available ? At What angle do I need to chamfer the tube ?
RE: Different Hotends
Another questoin I forgot to ask, can I use the stock thermistor and heater cartridge from the Mini on the mosquito ?
RE: Different Hotends
@kevman
I would recommend using @malcmcm mount since it uses the M2.5 screws that comes with the Mosquito.
https://www.prusaprinters.org/prints/36643-prusa-mini-mosquito-mount/files there should be a 15-5mm-ptfe-jig-m8.stl, you can look for any of the chamfer tools on thingiverse, 45 degrees should be fine and you only need to externally chamfer the face on the top and then use a 4mm drill to internally chamfer both sides.
You can also reuse the stock thermistor and heat cartridge.
RE: Different Hotends
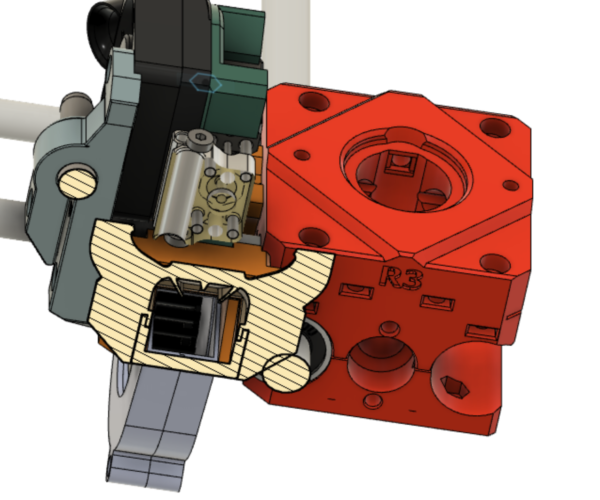
Got around to installing the RHD shroud and new x-carriage. Andddd I ran into another problem xD.
The new x carriage and shroud prematurely hit the smooth Z axis rod, much truncates the build volume by about 3mm. I know it's another minor issue but it does bother me when I cant use the entire build volume!
I didn't want to change your x-carriage for the RHD but there's no way around it. I'll have to modify it.
RE: Different Hotends
Ahhh that's very fair, I noticed it too but my nozzle was still aligned within the full build volume so I thought it was fine. If you can keep the screw and shroud insert in the same location that would be great though 🙂
Thanks for testing these parts too, hopefully can continue to iterate and solve all problems and deliver more functionality.
RE: Different Hotends
If you can wait, I'll post an updated version in a day or so where the carriage does not hit the z-smooth rod first.
RE: Different Hotends
@4nthonylin
That would be great, at least we can stay on the same page. I think unfortunately you will have to move the fastener location.
RE: Different Hotends
@malcmcm
Unfortunately you are right, will have to move the fastener. I should have something by end of today or early tomorrow morning. Testing another iteration now.
RE: Different Hotends
If anyone is interested in making their own Mosquito sock. I can recommend the one designed for Voron found here: https://github.com/VoronDesign/Voron-2/tree/103c52f0db0c7cf4b602e8ffb998c625c26cb52a/STLs/Gantry/X%20Carriage/Toolhead/Mosquito%20Hotend%20Sock
Just make sure to mirror it along the X-axis. (I didn't.) The Voron has wires coming out the opposite side to the way all the Mosquito Mini mounts do.
Here is a .pdf on how to put it together: https://github.com/VoronDesign/Voron-2/blob/d1bbd4735ba14efd4a69f84108ccb0fa921abd6b/STLs/Gantry/X%20Carriage/Toolhead/Mosquito%20Hotend%20Sock/mosquito_sock_mold_assembly_drawing.pdf
Note that the files I linked above have been removed from the Voron repository for unknown, to me, reasons. I have linked to the original commits which contain the files still.
They suggest RTV silicone, but I used a two-part silicone from Troll Factory and it came out great.
Prusa Mini Silicone Bed Leveling Mod: https://bbbenji.github.io/PMSBLM/
RE: Different Hotends
I have posted Revision B for the X-Carriage cooling duct! This version has better optimized airflow and no longer interferes with the z-smooth axis rod.
RE: Different Hotends
@4nthonylin
I just printed and installed your original cooling duct... Now I have to print the new one... At least it will come out better this time since I already have better cooling 🙂
Thanks for the revision! Are you planning on working on it more or would you consider it final, at least for now?
Prusa Mini Silicone Bed Leveling Mod: https://bbbenji.github.io/PMSBLM/
RE: Different Hotends
I have posted Revision B for the X-Carriage cooling duct! This version has better optimized airflow and no longer interferes with the z-smooth axis rod.
Do we still need the low profile heat bed cover with this ?
RE: Different Hotends
Y carriage is made of aluminum, not printed AFAICT.
RE: Different Hotends
I have posted Revision B for the X-Carriage cooling duct! This version has better optimized airflow and no longer interferes with the z-smooth axis rod.
Do we still need the low profile heat bed cover with this ?
Yes, you will still need the low profile heatbed cover.
@benji The next thing I would like to fix is to move the mosquito mount close towards the original position with a cooling duct optimized for that. Since the only reason I had that y-offset was for the original cooling duct, I see no reason not to move it to the original location now. And great! How have you been liking the new fan duct?

