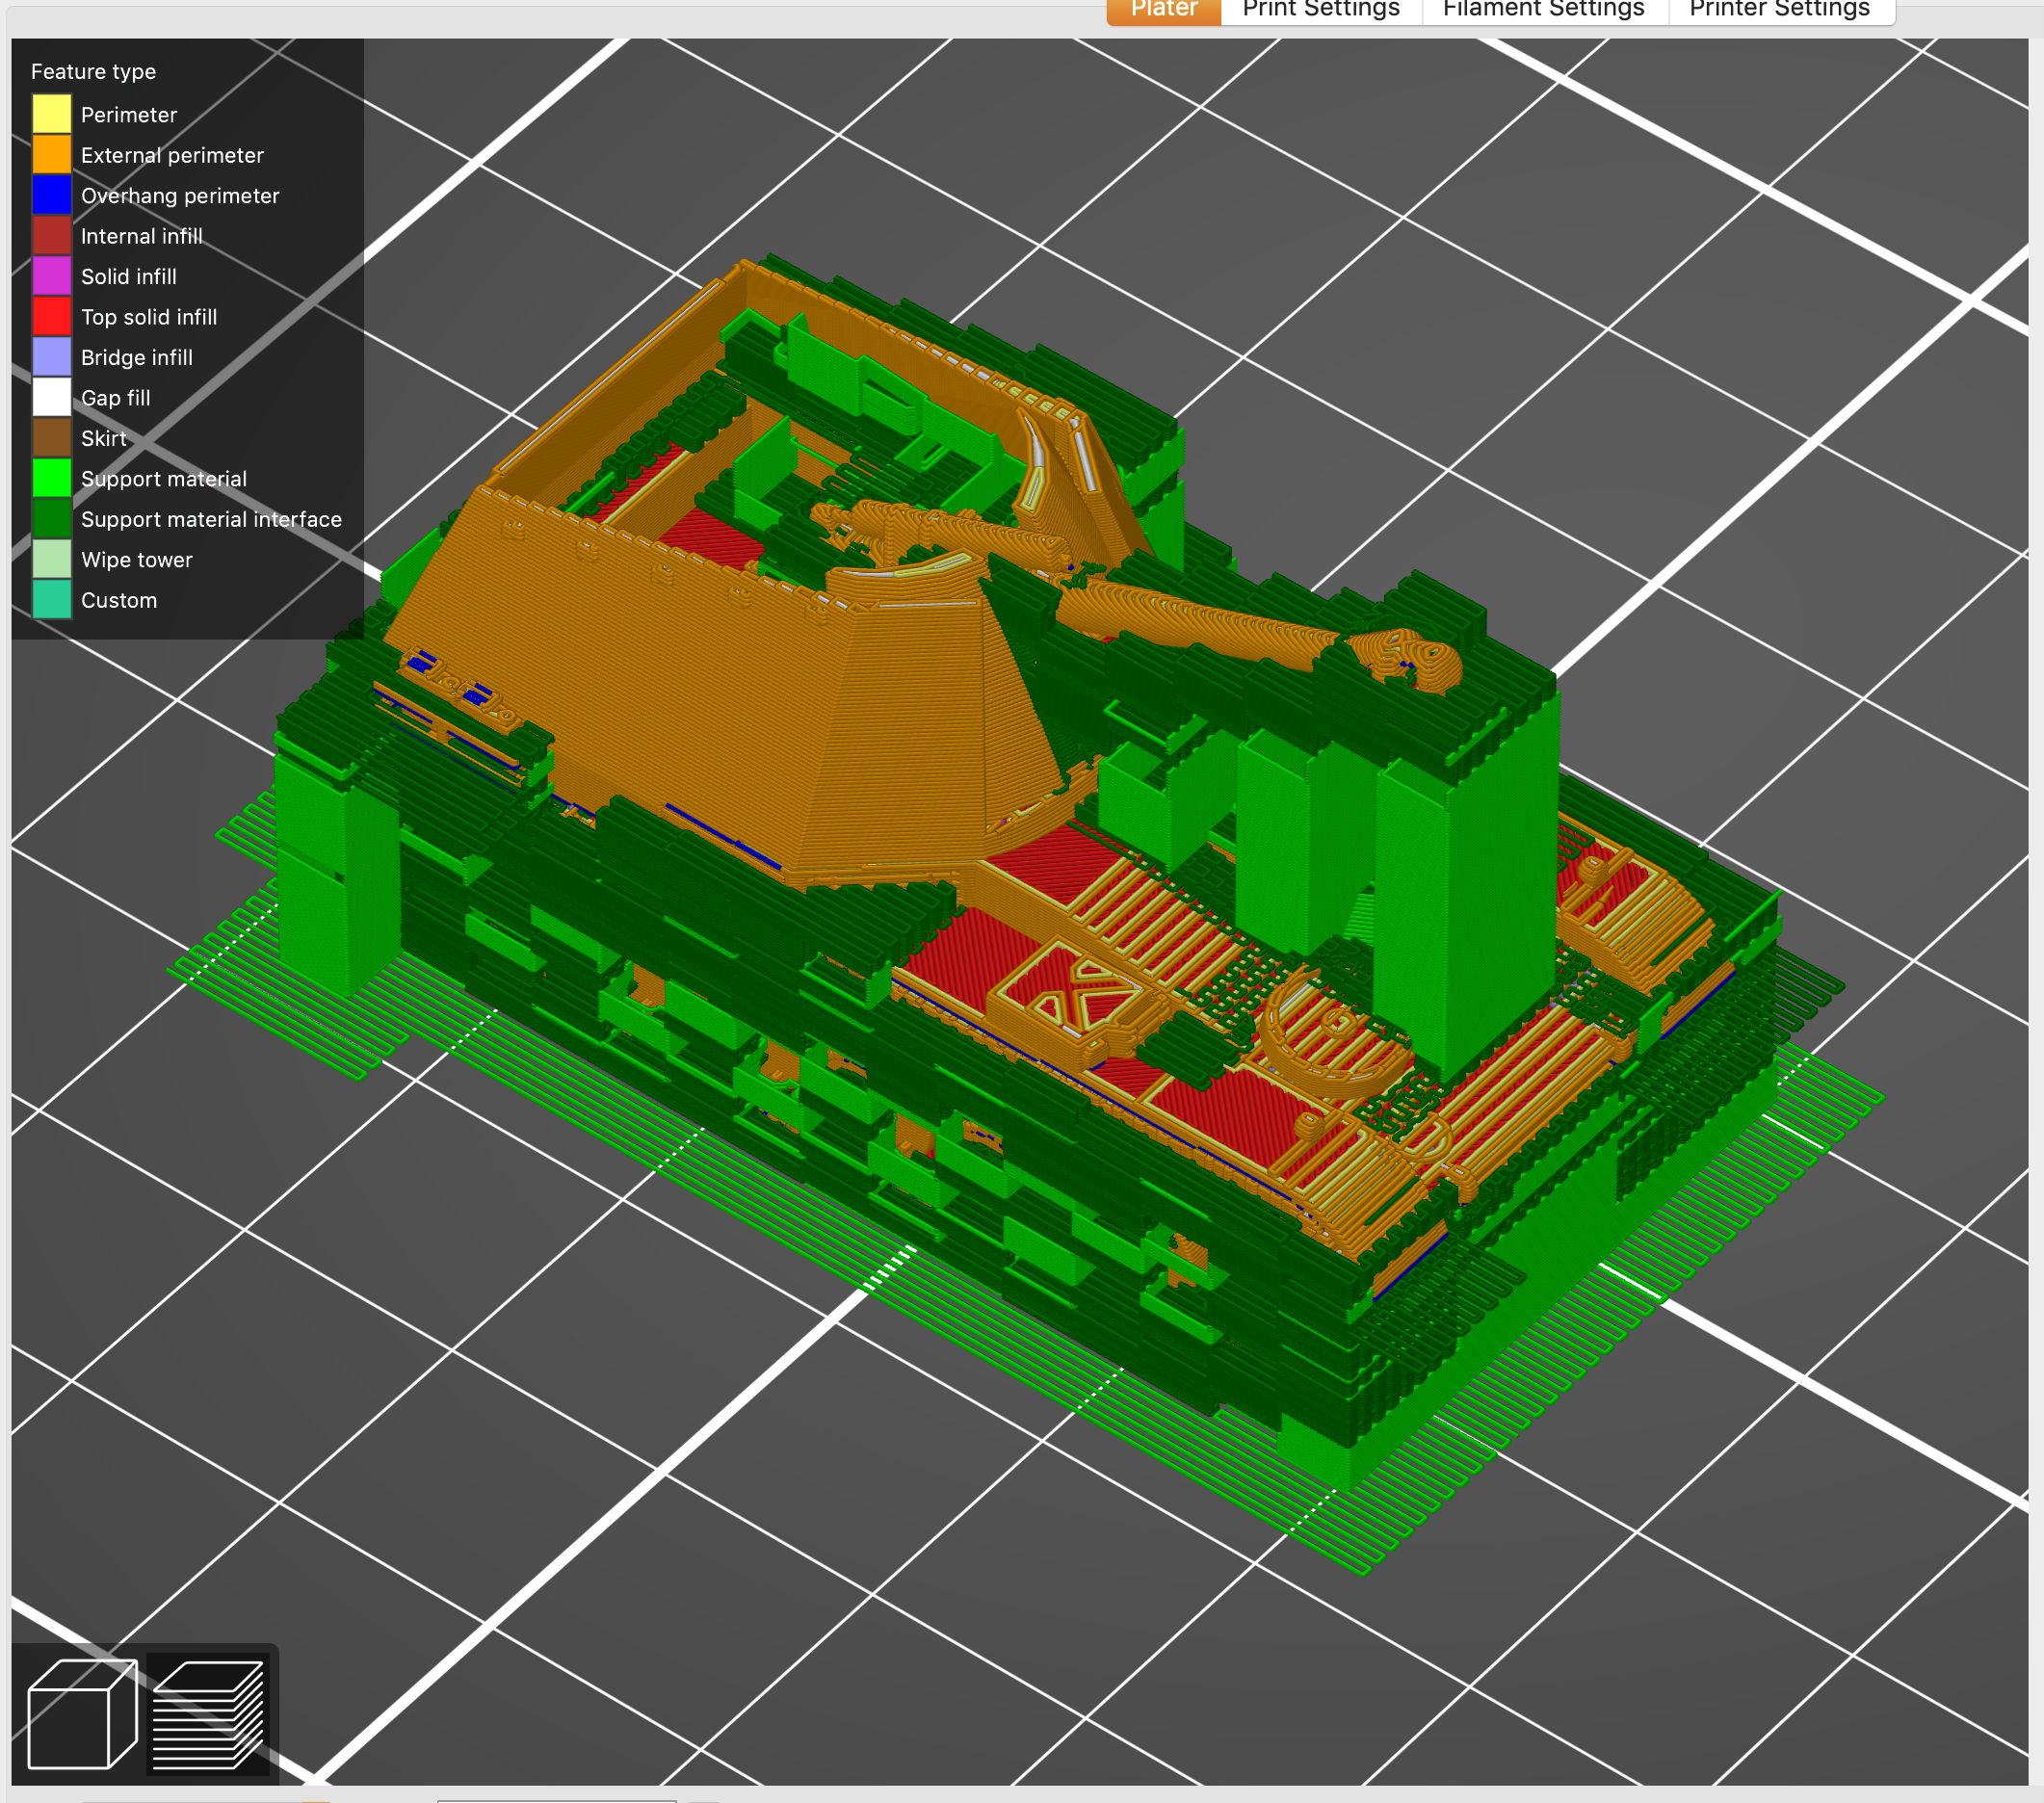
What is this part and how i can reduce it ?
Hi all,
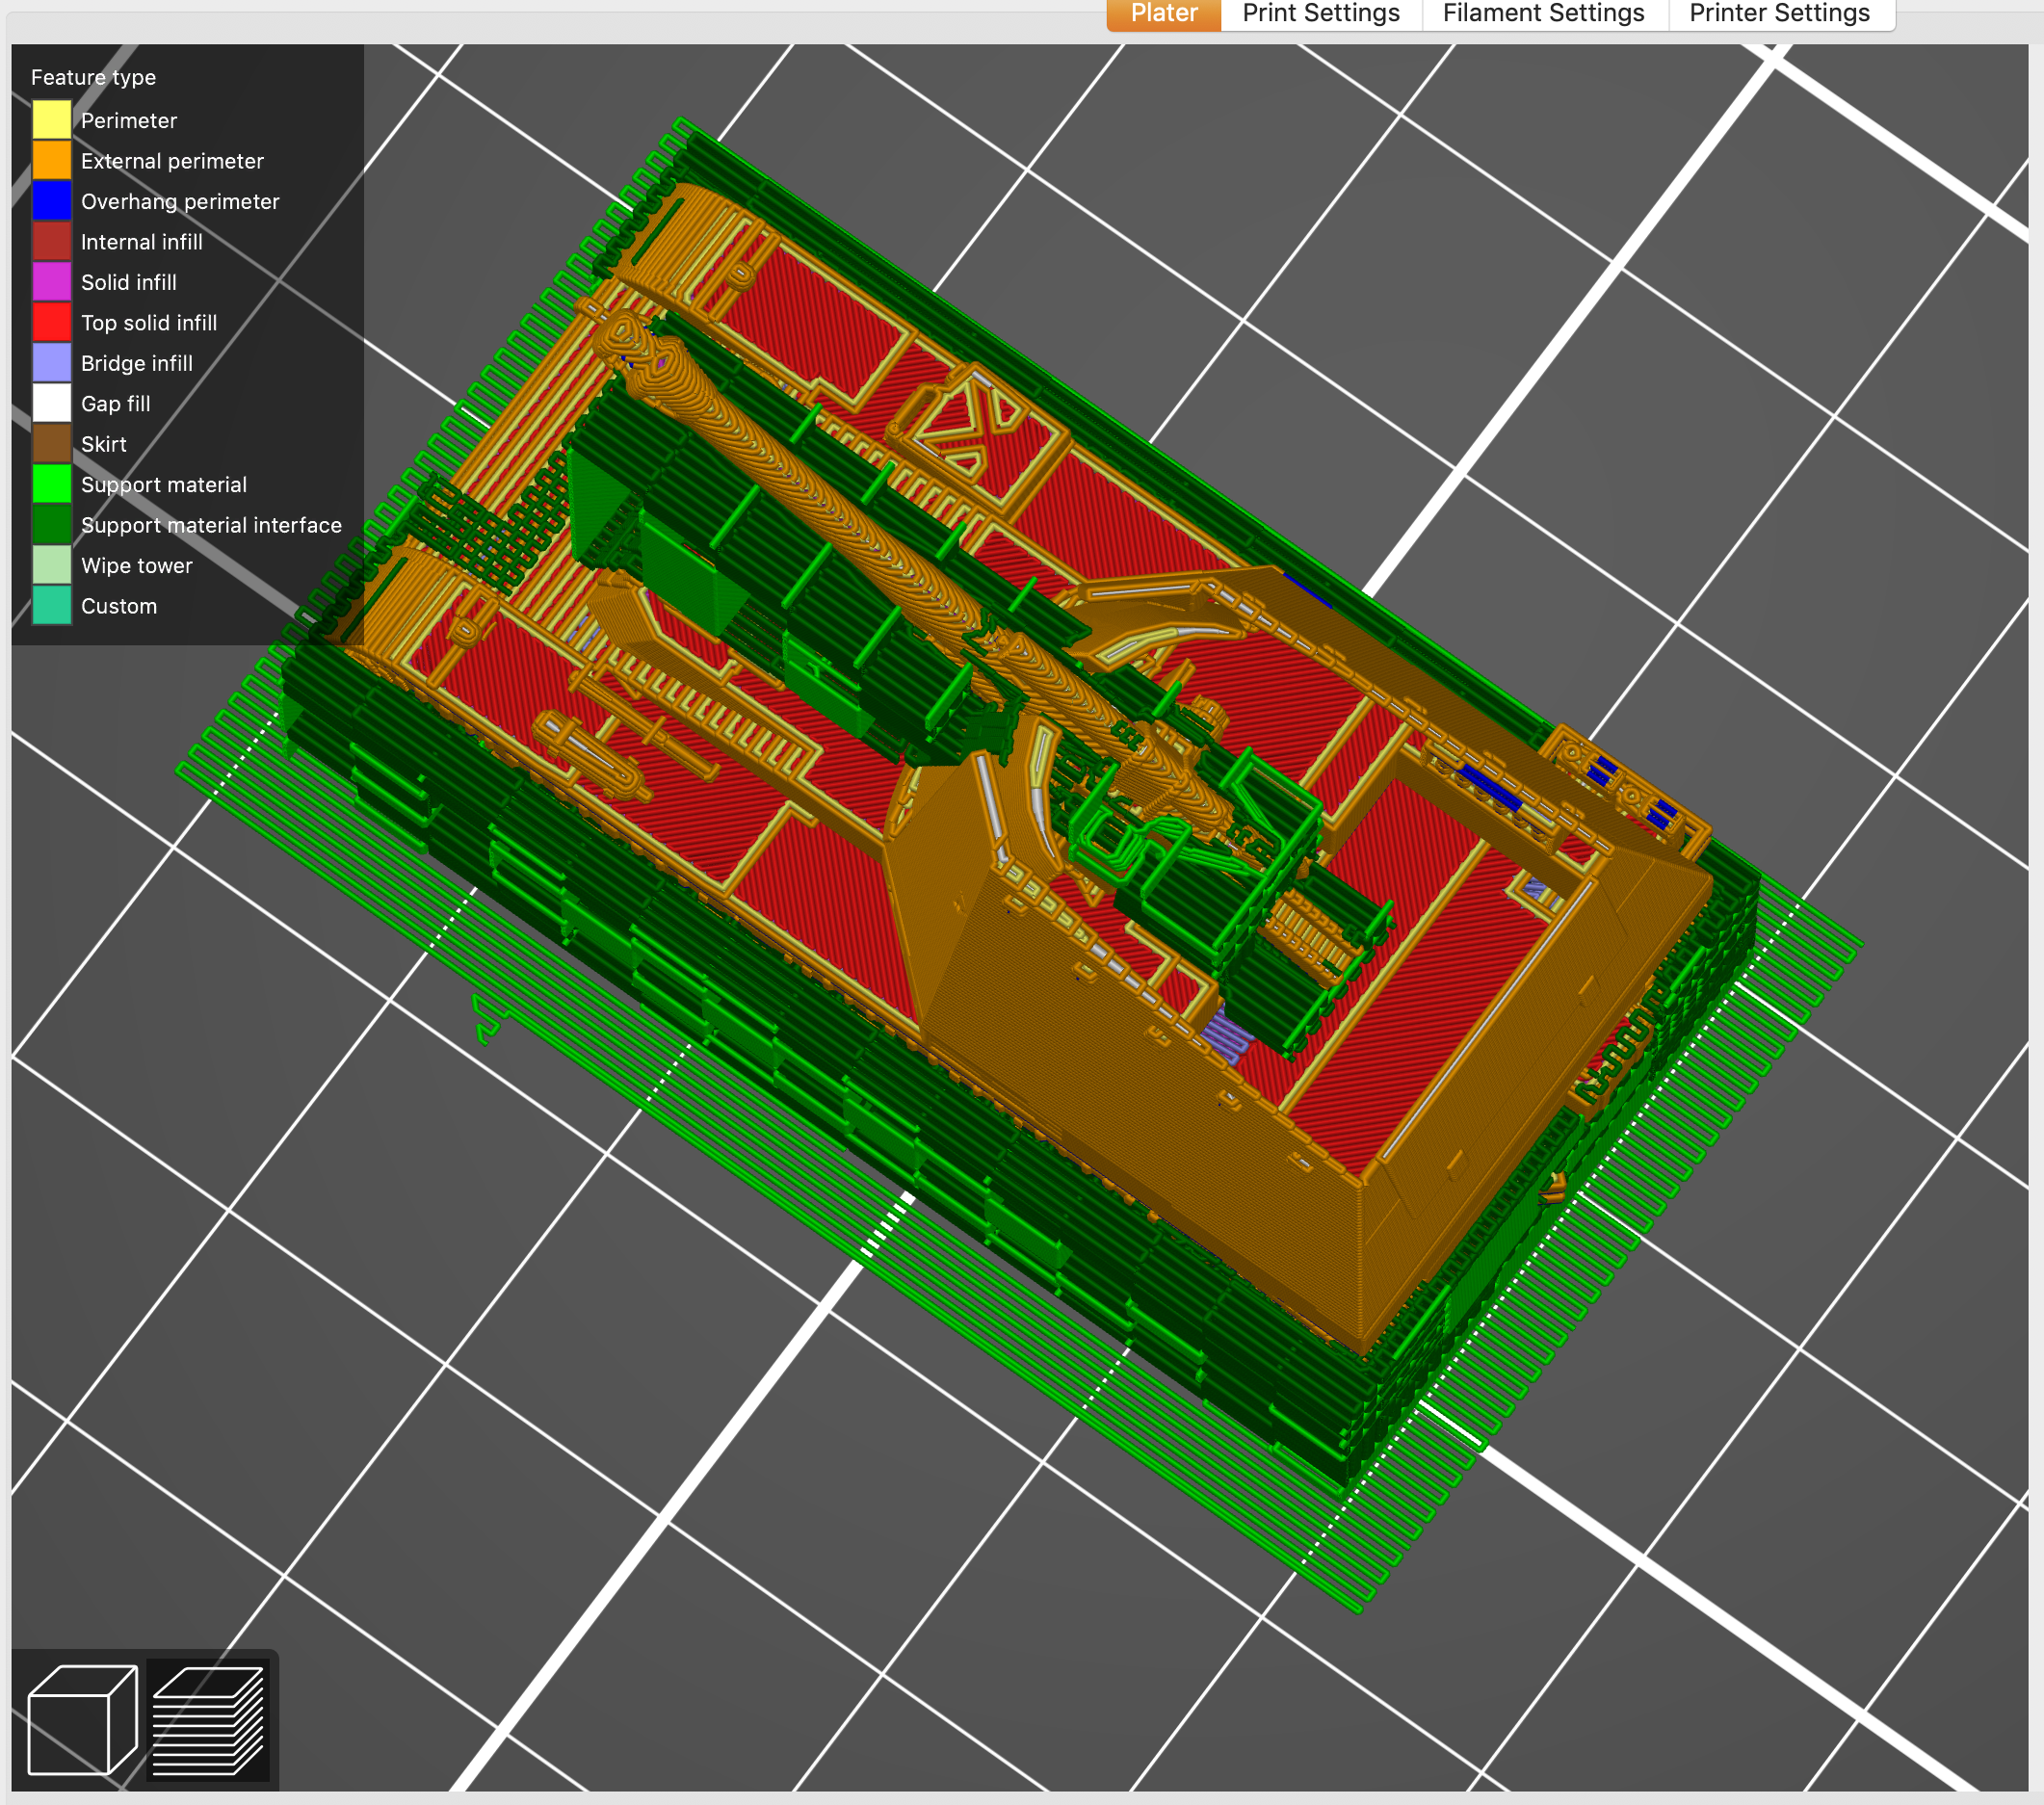
someone can tell what is the red and yellow part in the image and how i can reduce it ?
I know is support, but is really bigger than necessary.
The yellow is really useless because that side of part is vertical but cannot find the parameter to reduce it .
prusaslicer 2.1.0
Thanks
marco
RE: What is this part and how i can reduce it ?
My first guess (without knowing much about the part or it's intended use) is to change the print orientation. Try setting the part with the face near the yellow-indicated supports down against the bed. The side effect is your curves and holes will be truer to round. But if the part is printed in that orientation to move the layer lines away from parallel to stresses, this suggestion might not be suitable.
See my (limited) designs on:
Printables - https://www.printables.com/@Sembazuru
Thingiverse - https://www.thingiverse.com/Sembazuru/designs
RE: What is this part and how i can reduce it ?
Overhang degree of 89 is a little bit too high. Try something reasonable around 45
Often linked posts:
Going small with MMU2
Real Multi Material
My prints on Instagram
RE: What is this part and how i can reduce it ?
hi all,
@nikolai-r thanks , but was during test time, so i not really use 89%, only for understand how to remove excessive support (spoiler: not solved...).
@sembazuru, thanks for your answer but. yes was printed in this way to better force to mechanical force.
I wanna only reduce X/Y dispersion of support material.
RE: What is this part and how i can reduce it ?
With the setting of 89° for the overhang threshold, you will have (nearly) the maximum amount of supports as you are telling Plicer to support near vertical surfaces. You want to lower that threshold to 45° or lower. (Less will be supported the lower you go, potentially leading to print quality issues if you go too low.)
You will have to have some supports because you can't print over air. So at minimum you will need those wings and the bottom side of the two radiuses that are smaller than your largest radius supported.
See my (limited) designs on:
Printables - https://www.printables.com/@Sembazuru
Thingiverse - https://www.thingiverse.com/Sembazuru/designs
RE: What is this part and how i can reduce it ?
sorry. maybe i dont write correctly. I know very well what is support and (as i wrote previous) image with 89° was during some test.
I search know how to reduce X/Y dispersion of support, for example 89° or 45° or 5° are the same for the vertical (VERTICAL=90°) wall on the rear (yellow mark) but still a lot of x/y dispersion in than area for nothing to support.
RE: What is this part and how i can reduce it ?
sorry. maybe i dont write correctly. I know very well what is support and (as i wrote previous) image with 89° was during some test.
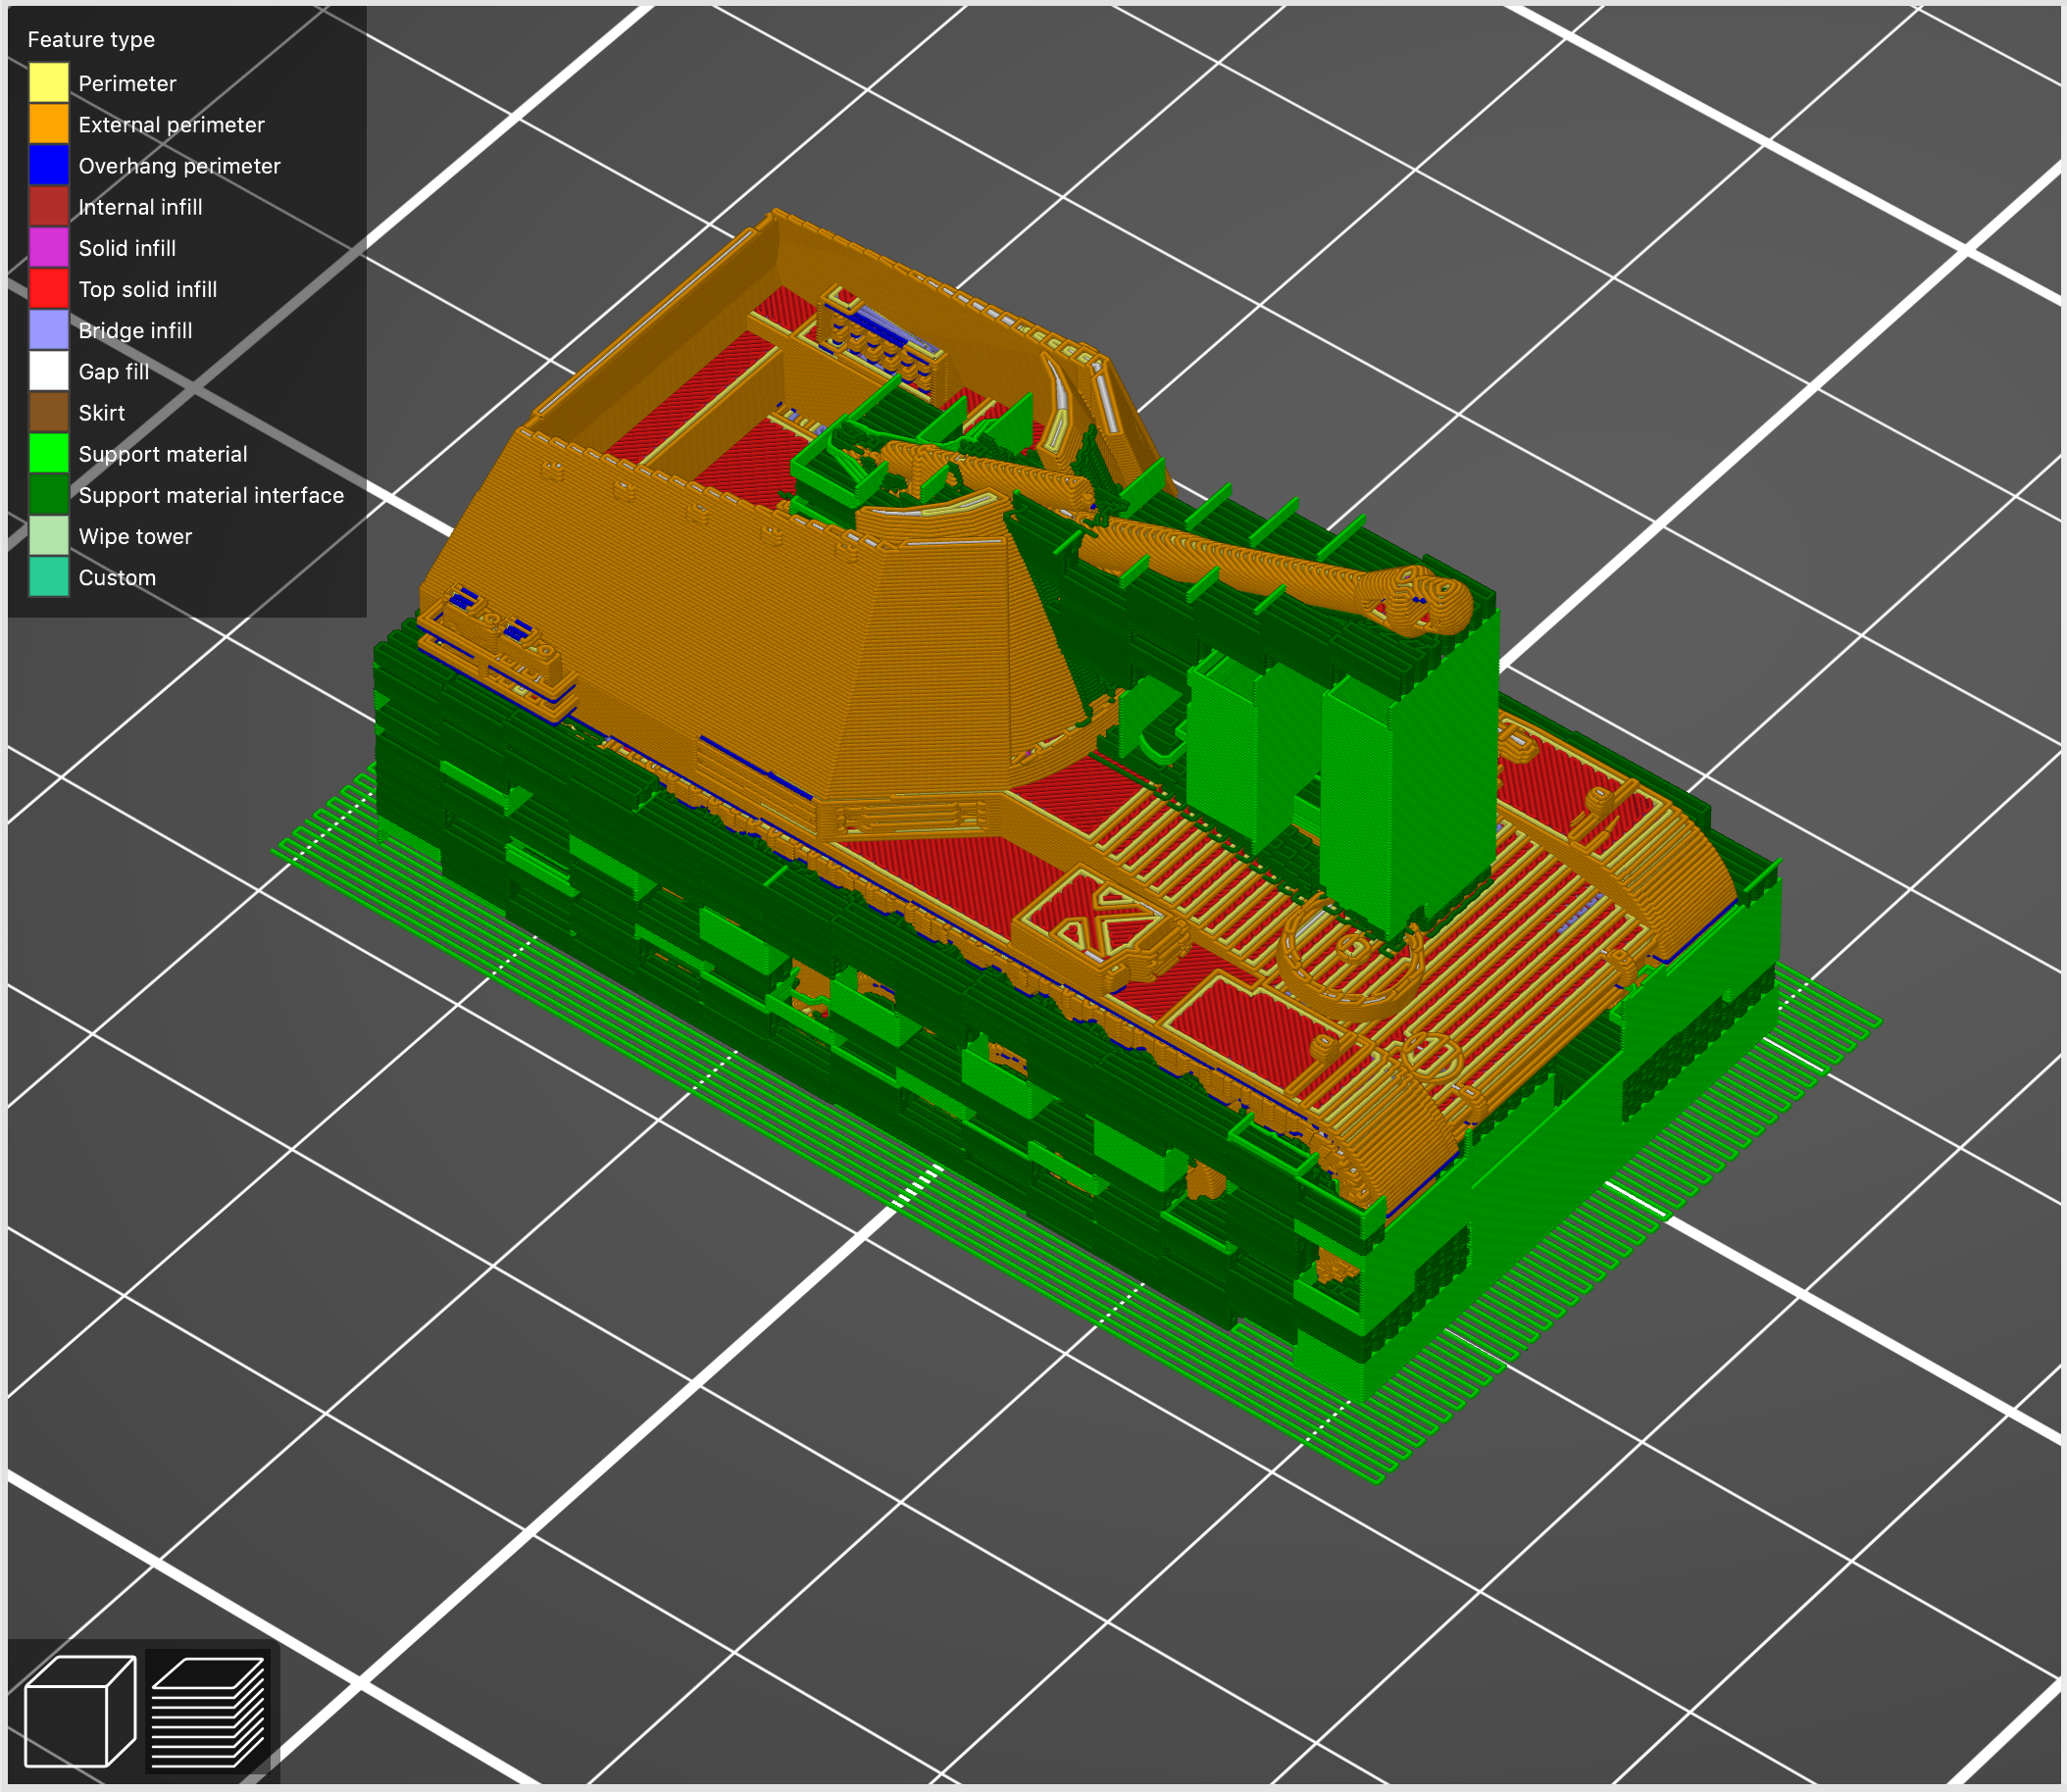
It sounds like you want to reduce the amount of spurious support in areas where you don't need or want it. Have you tried creating a support modifier to limit where support is printed? Here's an example using PrusaSlicer default support everywhere:
Here's the same part restricting support to support enforcer modifiers only:
and miscellaneous other tech projects
He is intelligent, but not experienced. His pattern indicates two dimensional thinking. -- Spock in Star Trek: The Wrath of Khan Unfortunately,…
RE: What is this part and how i can reduce it ?
Hi @bobstro , not tried.
did you mean insert a modifier block and put "no support" as modifier function ? i think it work, but is a lot of effort already for a simple part.... i dont wann think for a real complex part.
i hope there is a simpler way... your image is a perfect description... on the front there is some "support" in the air and a lot of support useless on side and on back.... why none see it ? i'm wrong ?
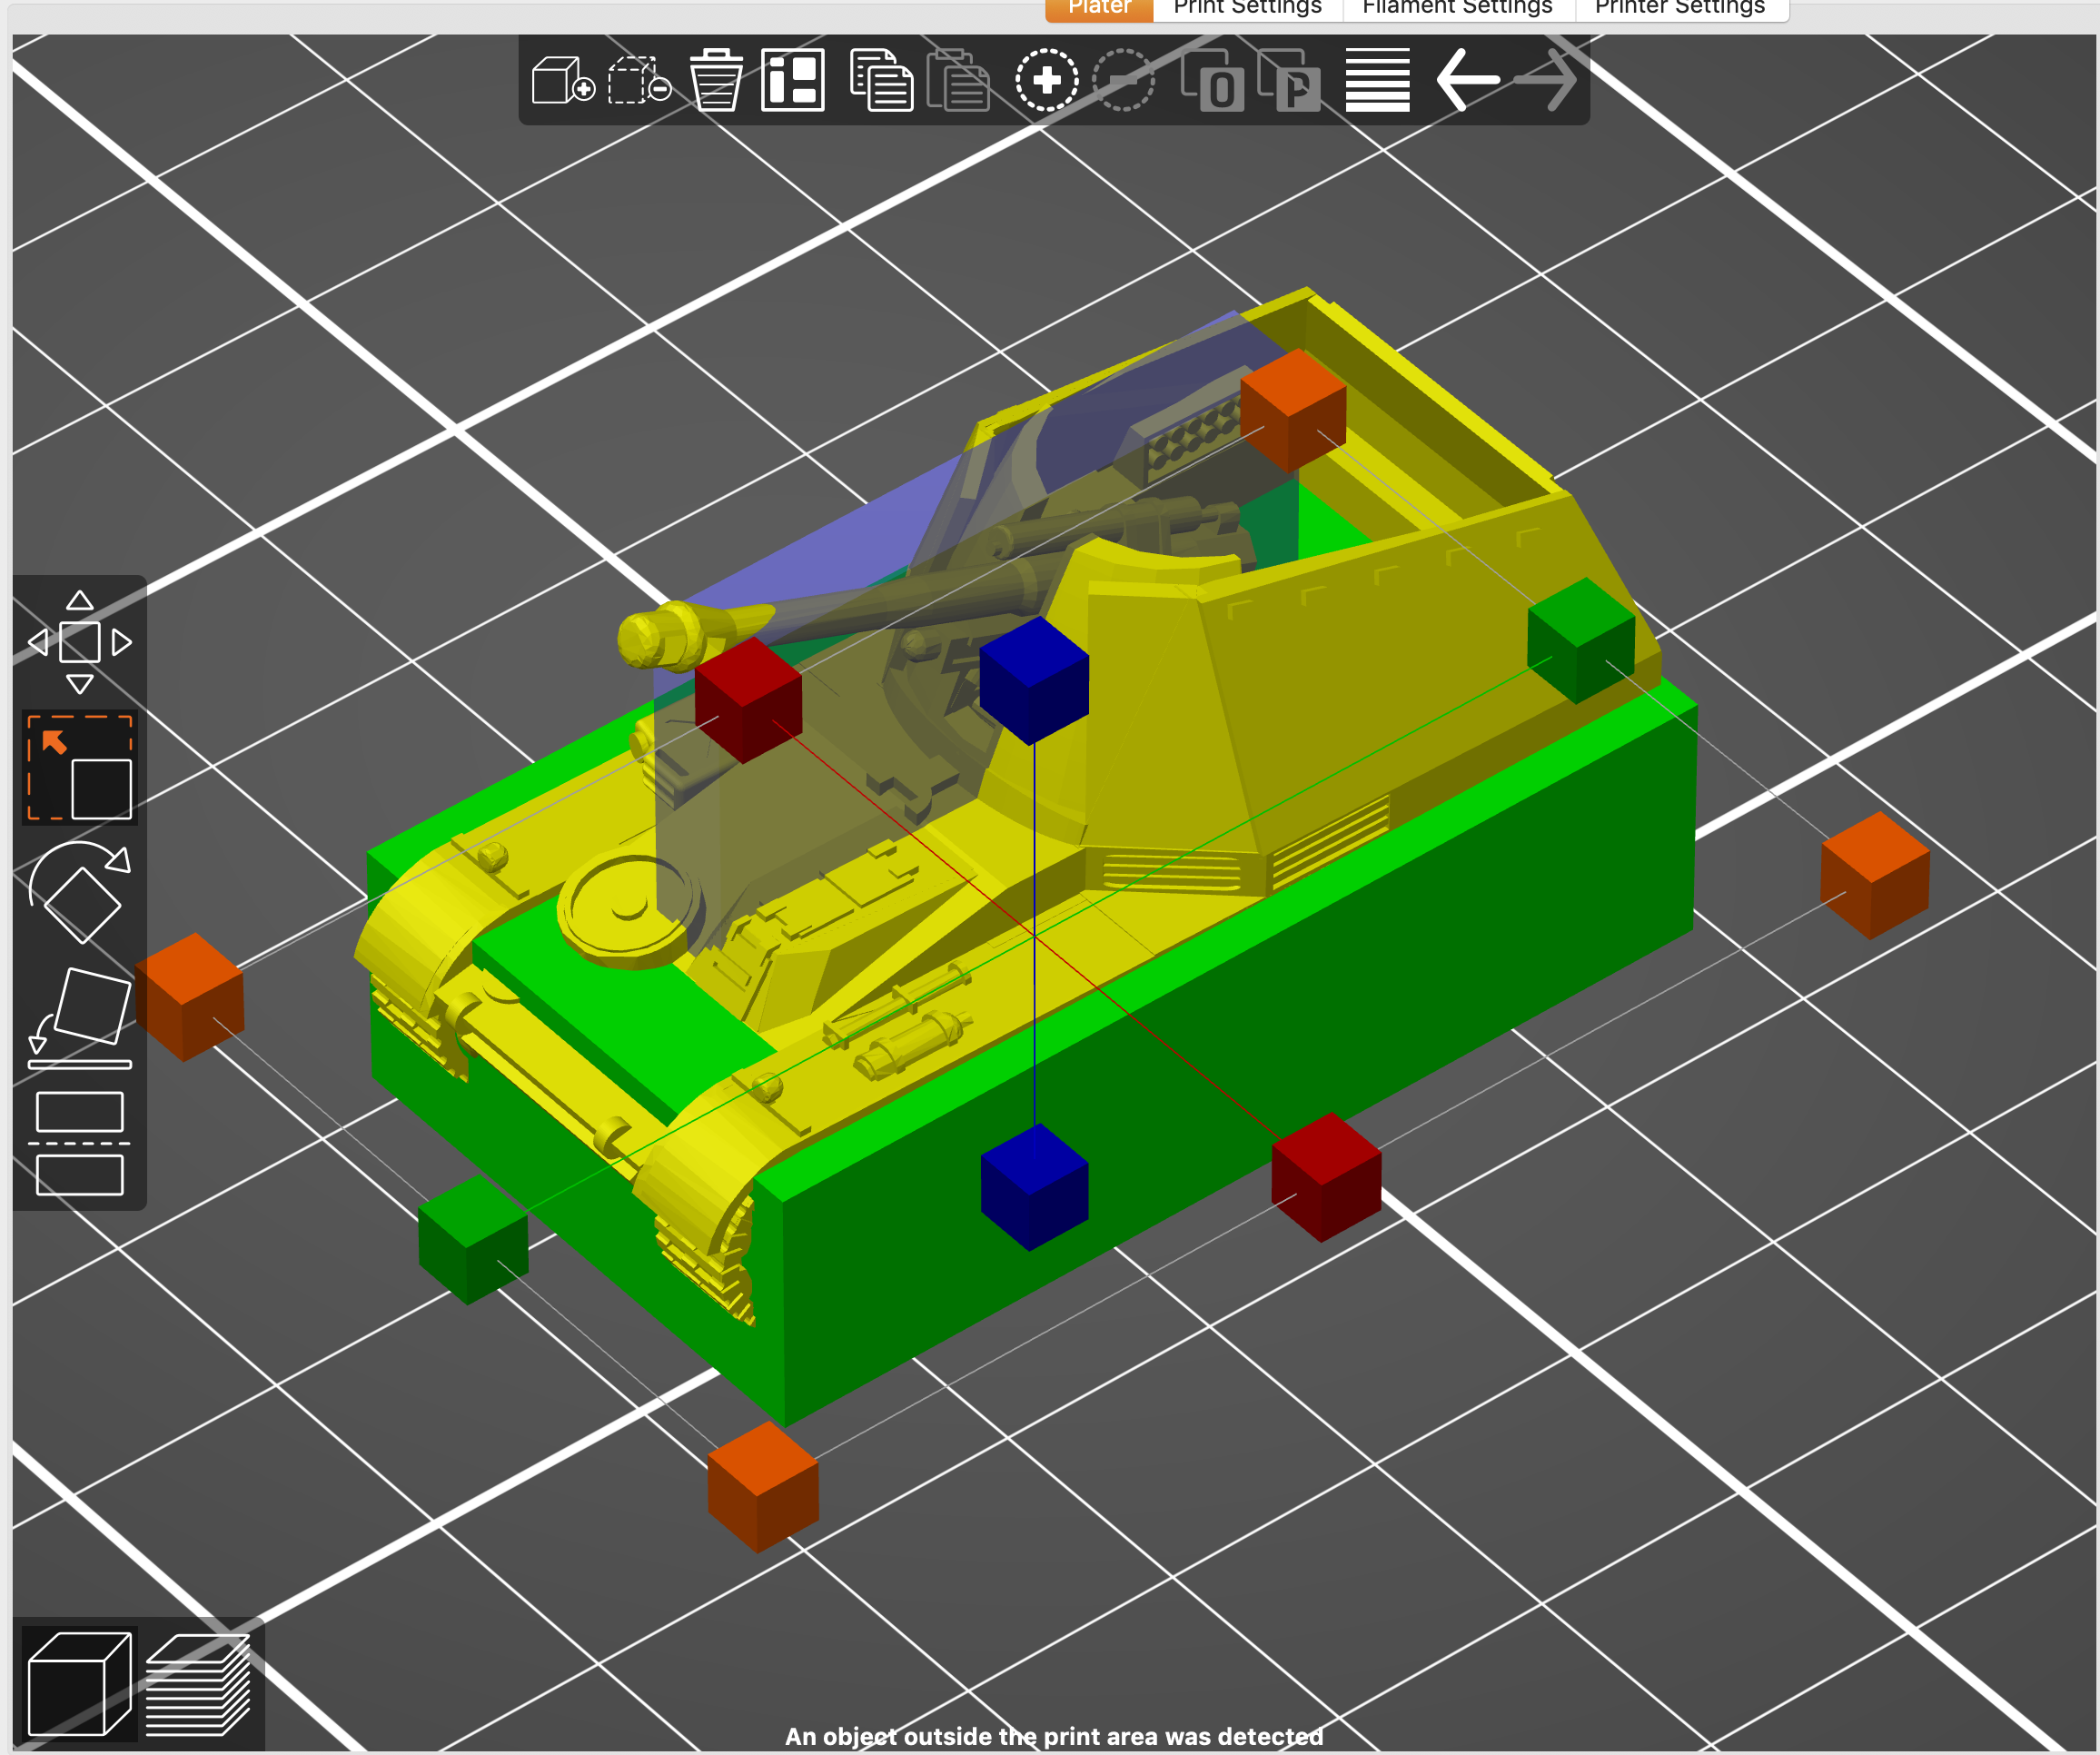
Attached ( i cannot paste image... i don't know why..) your image with my annotation.
RE: What is this part and how i can reduce it ?
[...] did you mean insert a modifier block and put "no support" as modifier function ? i think it work, but is a lot of effort already for a simple part.... i dont wann think for a real complex part.
No, I meant turn supports off and use support enforcers to limit where it is used.
i hope there is a simpler way... your image is a perfect description... on the front there is some "support" in the air and a lot of support useless on side and on back.... why none see it ? i'm wrong ?
A lot will depend on how much time you're willing to put into placing your support modifiers. For this part, I've used 2 modifiers (blocks):
You can see a bit of the modifier creeping onto the front. When sliced, there is a bit of extra filament visible:
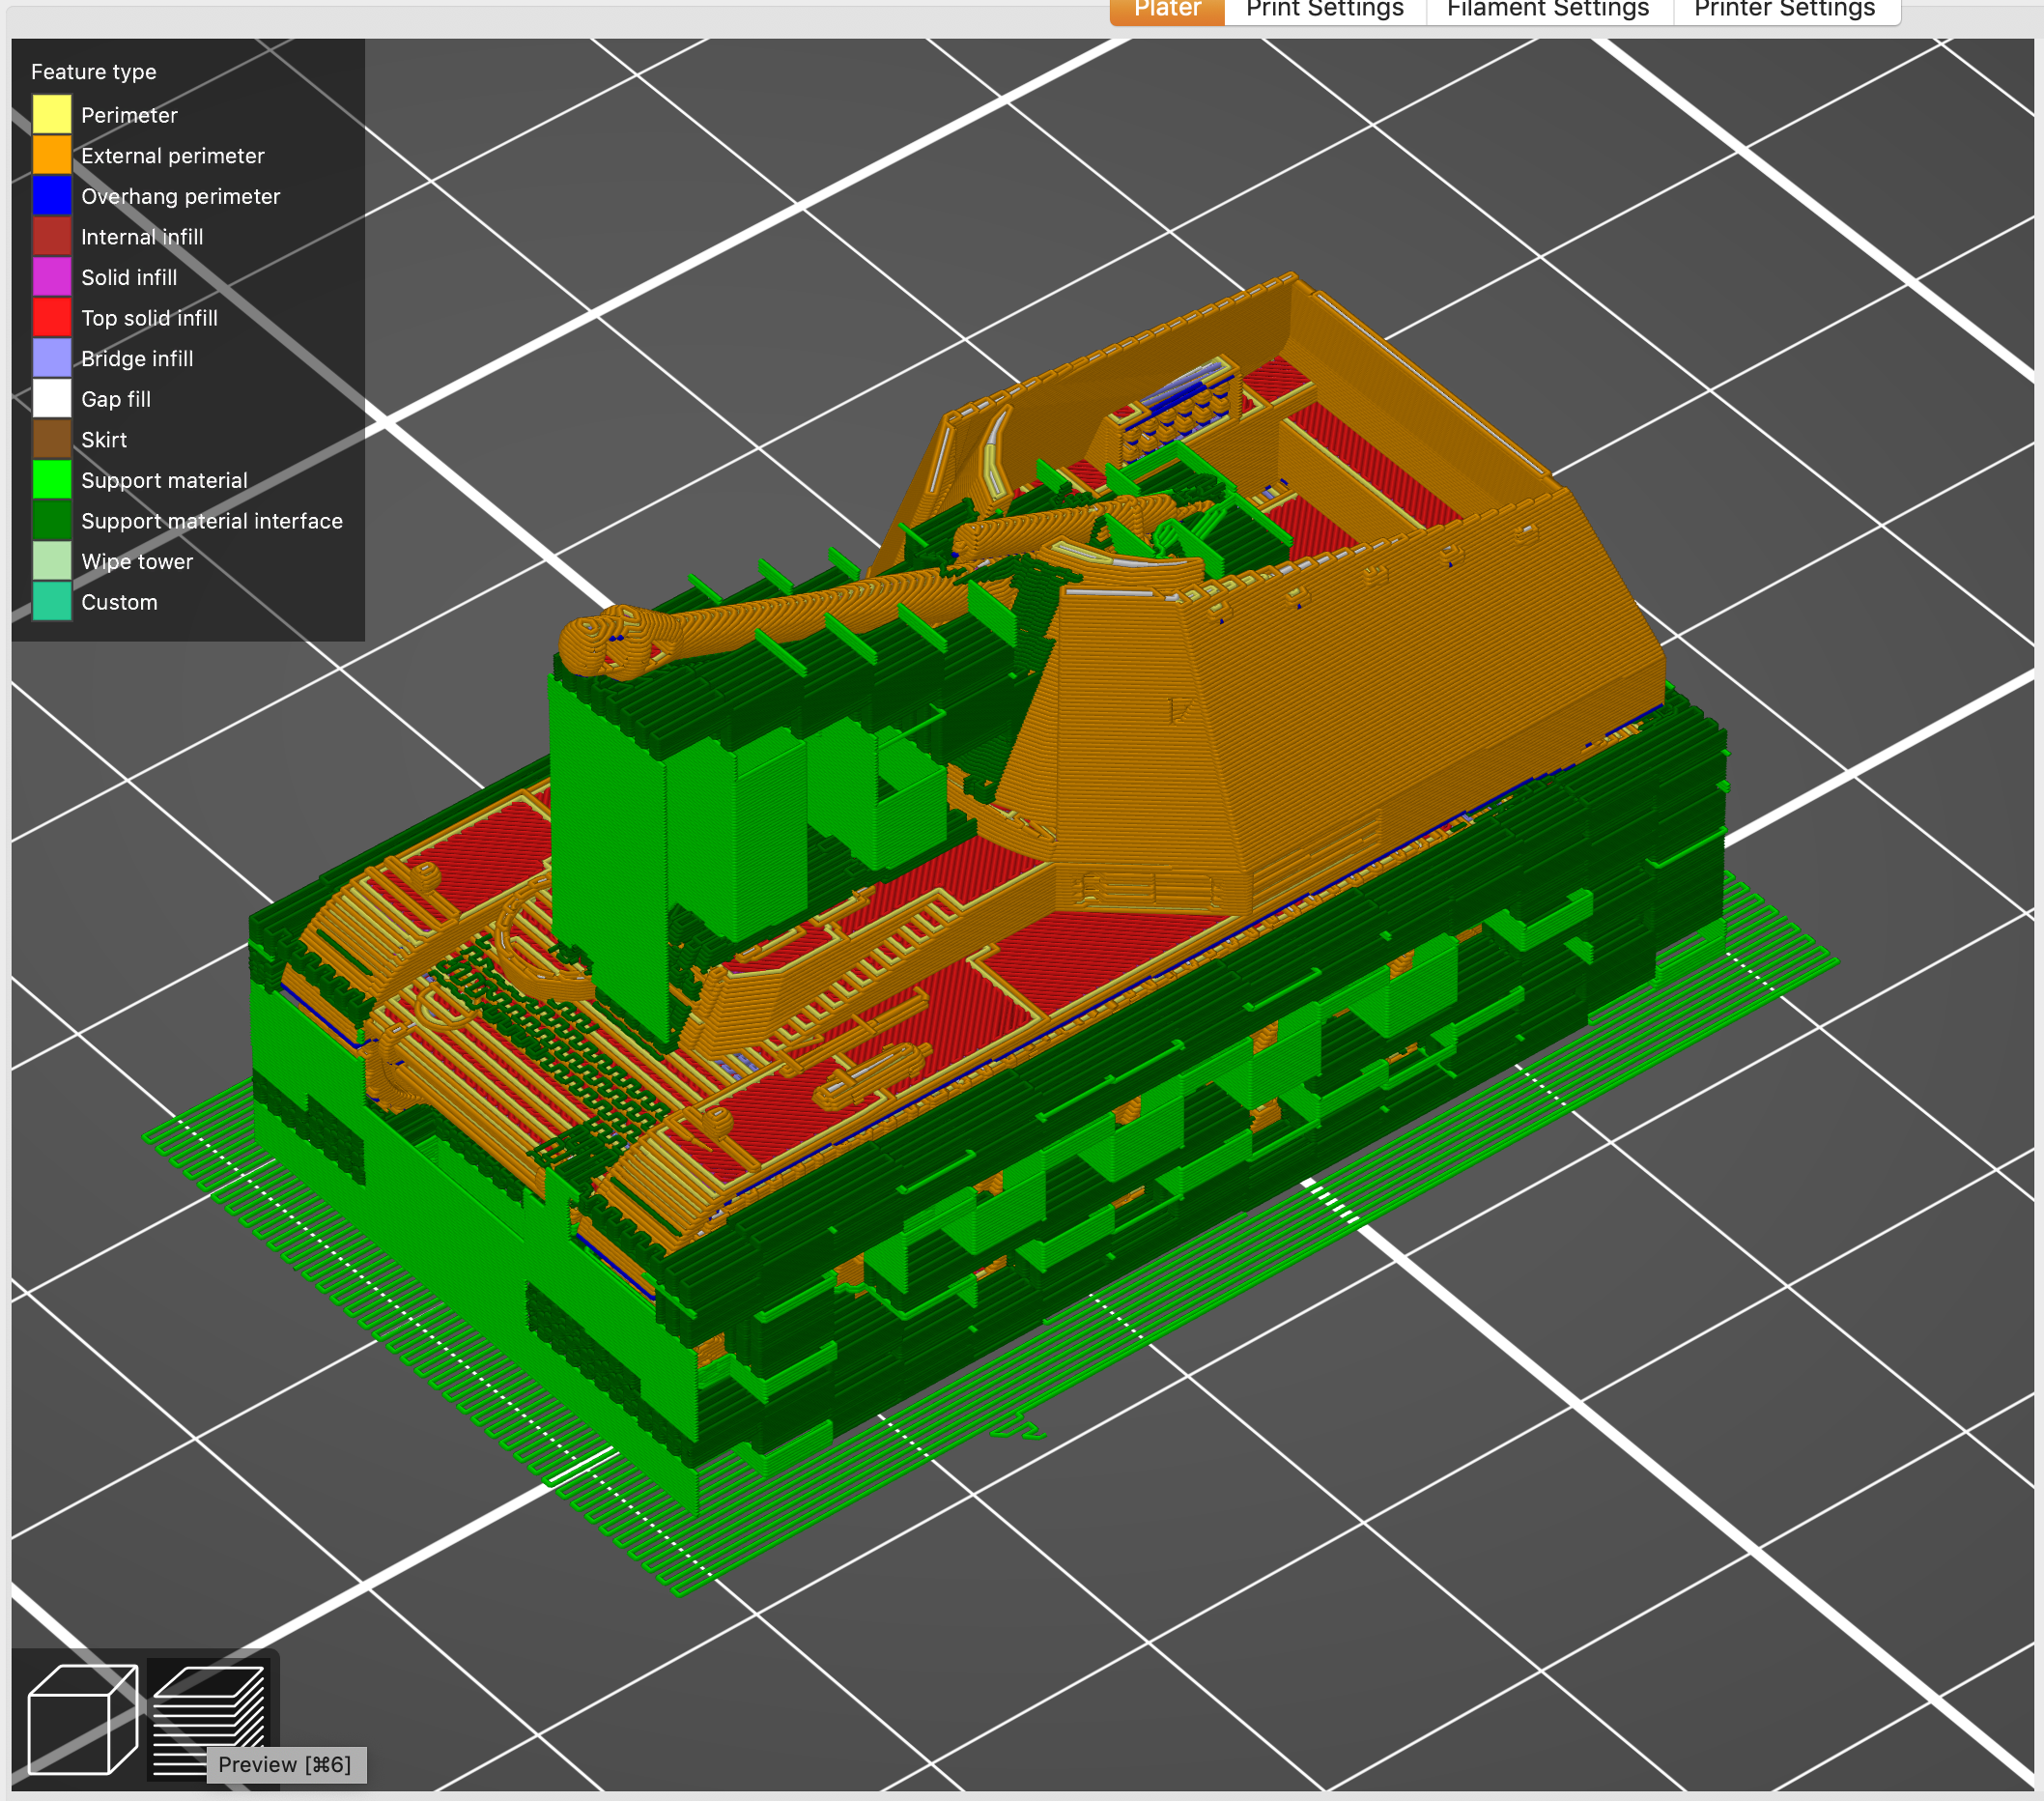
In reality, those extra bits of support don't really cause any problems on the print. If it weren't for the barrel that I need to support from the hull, I could enable Support on build plate only. I could also spend more time carefully placing supports, but I'm in mass-production mode and the extra bits of support pop off with a poke with a file. The main thing is that the amount of support appearing inside the cabin where it's hard to reach is minimized:
Attached ( i cannot paste image... i don't know why..) your image with my annotation.
and miscellaneous other tech projects
He is intelligent, but not experienced. His pattern indicates two dimensional thinking. -- Spock in Star Trek: The Wrath of Khan Unfortunately,…
RE: What is this part and how i can reduce it ?
thank i'll try. but i think support management maybe better.