Tricking slicer to make 100% fill in certain areas?
I have been using small voids (0.03mm) to trick cura to make 100% fill to critical areas, for example, cylindrical voids around screw holes. With cura, this works with mostly default options. However, I have been trying prusaslicer and ankermake slicer (based on prusaslicer), and I only get partial success.
With prusaslicer, default options do not work at all, prusaslicer figures out that those voids are too small, and completely removes them, and uses normal fill.
I did find option "Detect thin walls" which seems to do the trick, but generates different infill, apparently trying to create the thin voids as they are in the model. This is a bit less optimal as the adhesion direction is to direction of voids. Is there a better way to do this? I do not want to use the stuff in the slicer, as that would require doing additional manual steps when printing, while using voids for strengthening can be included in the model.
PS. Using large number of small voids make openscad very slow, but is not need to be enabled for editing, just of printing, so I just turn on model parameter in the makefile which generates the parts.


RE: Tricking slicer to make 100% fill in certain areas?
You haven’t included a PRUSA slicer project with an example for us to diagnose but if PS is removing he voids as they are too small you might be running into the slice gap closing radius setting. That merges areas below. Certain size. Which causes issues for things like tolerance testers for example.
RE: Tricking slicer to make 100% fill in certain areas?
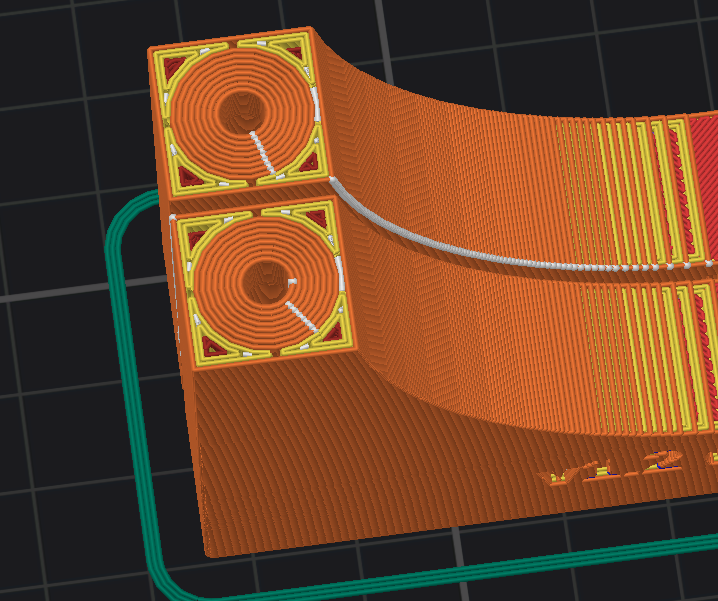
gap closing radius has an effect, if I set it to zero it generates the structure visible in picture, without it, nothing (other than normal fill) is generated.
 Slice gap closing radius as default, 0.049
With Slice gap closing radius set to 0, the result is this:
How do I attach stl or scad files to these messages? scad file is
https://github.com/hsuonsivu/hsupublic/blob/main/3d-models/stevensonshield.scad
Command line of openscad to compile it
openscad -D print=9 -D printstrong=1 -o stevensonshield-62mmpipeattach.stl stevensonshield.scad
(if using GUI, set print=9 and printstrong=1 in the file)
RE: Tricking slicer to make 100% fill in certain areas?
Sorry don't do Scad. The most useful file to debug prusa slicer issues is the Prusa Slicer project file. File>Save project as. That will save a 3mf. The 3mf from PS will contain your parts, placement, all the settings from all 3 profiles as well as any modifiers etc you might be using. Its basically a snapshot and the single best way to debug issues. We can slice, examine the previews, generate gcode etc all like you would.
To attach files to the forum you must ZIP them up. The forum will just silently not attach anything it doesn't like. And it doesn't like most formats lol.
RE: Tricking slicer to make 100% fill in certain areas?
Run this sample OpenSCAD script. Import the resulting .STL in slicer and render. In the preview window slide to about half height to see the reinforcing voids - now try changing the Slice gap closing radius and you can see how the effect works.
// Voidtest

number=20;

difference(){
  cube([105,20,20]);
  voidset();
}

module voidset(){
  for(count=[1:number]){
    translate([count*5,5,5]){
      cube([count*0.01,10,10]);
    }
  }
}
Yes, you can use the technique, just pick dimensions to suit. Be aware that curves are approximated so need to be wider for completion.
Cheerio,
RE:
Create another object or objects such as cylinders in the places where the screws should be and expand them outwards to add additional space around the screw threads etc - generally just make a models of the volume you want to be different.
Merge them all into one object and export as STL.
Then use exported model.as infill modifier in expert mode. Use infill params to adjust it for example by forcing 100% infill.
It's called modifier meshes in expert mode.
https://help.prusa3d.com/article/modifiers_1767
See my GitHub and printables.com for some 3d stuff that you may like.
RE: Tricking slicer to make 100% fill in certain areas?
I know you are trying to get PrusaSlicer to automagically increase fill in certain areas of your model with modelling tricks. But, have you considered using mesh modifiers directly in PruasSlicer to increase the perimeters?
I have a model that I'm printing at work where I want more perimeters around screw holes to give more meat for the threads of the screws to bite into. I put a cylindrical mesh modifier of larger diameter than the hole overlapping the hole. Apply more perimeters with the mesh modifier. This gives me more perimeters around the hole. If I sink the mesh modifier to just below the surface of the model, I don't get extra perimeters on the top outer layer.
I haven't tried on non-vertical holes yet, might need to use the mesh modifier to increase the infill to 100% instead of using perimeters for horizontal (or close to horizontal) holes.
See my (limited) designs on:
Printables - https://www.printables.com/@Sembazuru
Thingiverse - https://www.thingiverse.com/Sembazuru/designs